
Kotlin Configuration Scripts: An Introduction

This is a five part series on working with Kotlin to create Configuration Scripts for TeamCity.
- An Introduction to Configuration Scripts
- Working with Configuration Scripts
- Creating Configuration Scripts dynamically
- Extending the TeamCity DSL
- Testing Configuration Scripts
With TeamCity 10, we brought the ability to define configurations using Kotlin as opposed to using XML or the User Interface.
This provides several benefits amongst which are
- A human-readable and editable configuration script, not relying on the user interface
- Ability to do diffs on changes to a configuration script
- Ability to check in your configuration scripts alongside your source code1
- Ability to dynamically create configuration scripts, as well as test them
Why Kotlin?
You might ask why Kotlin and not some other language? For those not familiar with Kotlin, it is a statically-typed language developed by us at JetBrains and open sourced under the Apache 2 license. It targets the JVM, JavaScript (and we also have native in the works). It’s designed to be a pragmatic language that cuts down boilerplate code, remains expressive, and facilitates tooling. Kotlin provides a series of features that allow the creation of DSL’s (Domain Specific Languages) and TeamCity is a perfect fit for this purpose. Kotlin enables the benefits we’ve outlined and we’ll see.
Why not something more common such as YAML? Based on our experience, we believe that while YAML is great for the simpler setups, at some point it does fall short, and can lose clarity when it comes to defining more complex configuration scripts. We wanted to provide a solution that works for the simplest to the most demanding of scenarios, and that’s why we’ve gone with Kotlin. It’s important to understand though that we’re not providing just a DSL for creating configuration scripts. Kotlin is a programming language and as such we have the ability to write any kind of code in our configuration scripts (which, of course, like anything can be also abused). This enables many scenarios such as those we’ll see when creating dynamic configurations.
What is needed
Given Kotlin is a proper language, you might be wondering what tooling is required to edit configuration scripts. In principle any editor will do. Kotlin is built so that it can be used with any editor or IDE. In fact we ship support for not only IntelliJ IDEA (both Ultimate and the free OSS community editions), but also Eclipse and NetBeans. If Vim or another editor is your thing, you can also use that along with a command line compiler.
For the purpose of this blog post series, we’ll be using IntelliJ IDEA.
Creating a first script
While we can start with a completely blank script, the easiest way to create a Kotlin build script is to take an existing TeamCity project and either
- Download it as a Kotlin Script
- Enable Versioned Settings
The first is a great way to start playing with Kotlin configuration scripts and get a feel for them. The second option not only provides us with the configuration scripts checked in to source control, but it’s actually a required step for us to use Kotlin build scripts in production.
The recommended approach is to use the second option once we’re ready to enable Kotlin scripting in our projects. The first option, as mentioned, is great for discovering how things work and getting familiar with Kotlin configuration scripts.
Download Settings as a Kotlin Script
In order to see what a build configuration looks like in Kotlin, simply Edit Project Settings on the selected project and click on the Actions menu, picking the entry Download Configuration Script in Kotlin format

This downloads a zip file that contains a Maven project which can be obtained in IntelliJ IDEA. Note that the folder it contains is prefixed with a dot, which indicates it’s hidden under MacOS. The idea is that this folder can essentially be placed in version control at some point (TeamCity marks its configuration files as hidden).
Enable Versioned Settings
The second option, which is required for us to actually use Kotlin configuration scripts, is to enable Versioned Settings. This is done under Versioned Settings and selecting Enable, and Kotlin as the file format.
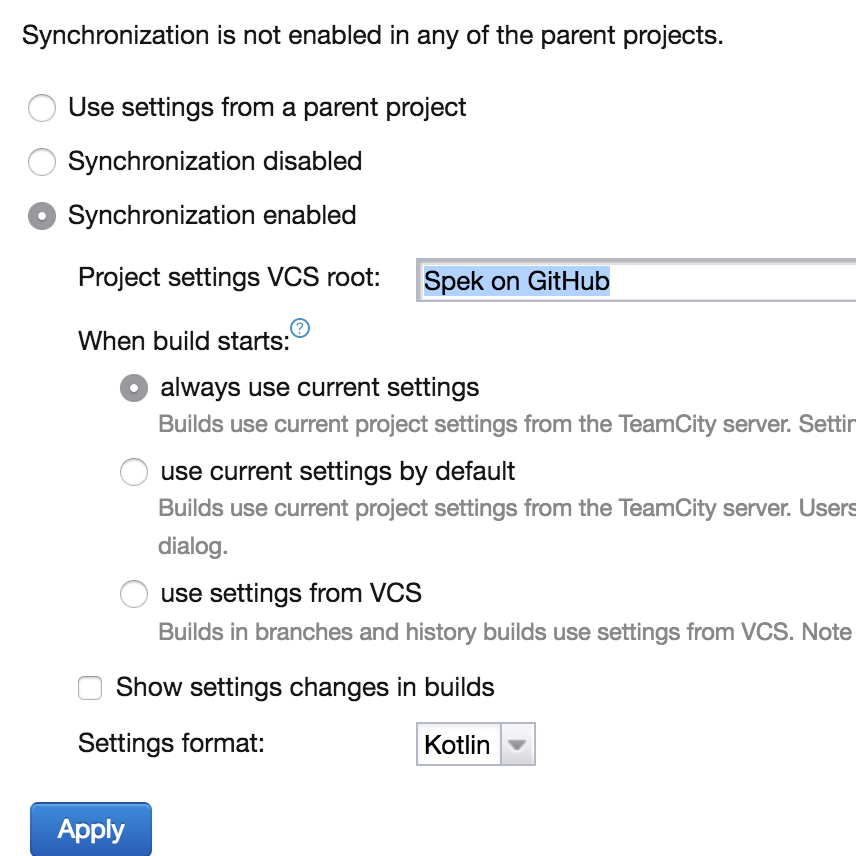
As soon as we activate this, the TeamCity UI will no longer allow any changes and all the configuration will be stored in version control and modifications have to take place via the build script.
These script files will have the same folder layout as that of the downloaded zip file (first option). For instance, the following are the files checked in to version control for the Joda-Time project. We can see that once again it’s a Maven project containing a series of Kotlin files (.kt).
Opening the script in IntelliJ IDEA
Once we have the configuration script (be it as a zip file or checked in to version control on enabled versioned settings), we can open it in IntelliJ IDEA, and Maven will pull down the correct dependencies. Our project layout should look like the one below
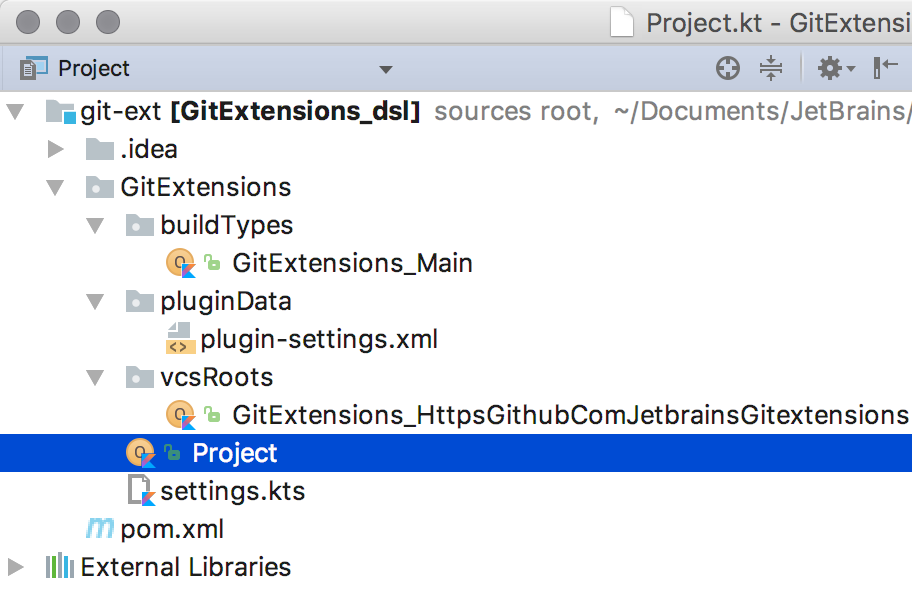
Don’t feel overwhelmed by the number of files in there. In fact, TeamCity really only needs one file, which is settings.kts. Let’s examine each file in more detail.
settings.kts
kts is a Kotlin Script file, different from a Kotlin file (.kt) in that it can be run as a script. As mentioned above, all the code relevant to the TeamCity configuration could be stored in this single file, but it is divided into several files to provide a better separation of concerns.
This file contains usually two lines
![]()
version indicates the TeamCity version, and project() is the main entry point to the configuration script. It represents a function call, which takes as parameter a Project, representing the entire TeamCity project.
The parameter GitExtensions.Project is an object in Kotlin. Think of objects in Kotlin as you would in JavaScript. Or to compare it to Java, they’d be a Singleton, a single instance of a Kotlin class. While Kotlin script could work with singletons, having a first-class support for objects, makes things much easier.
In this case, Project is the name of the actual object, and GitExtensions is the package name.
Project.kt
This file contains the GitExtensions.Project object, and is where all the magic happens. If you look at the script layout, it’s basically a code representation of the build steps we’re accustomed to seeing the TeamCity user interface
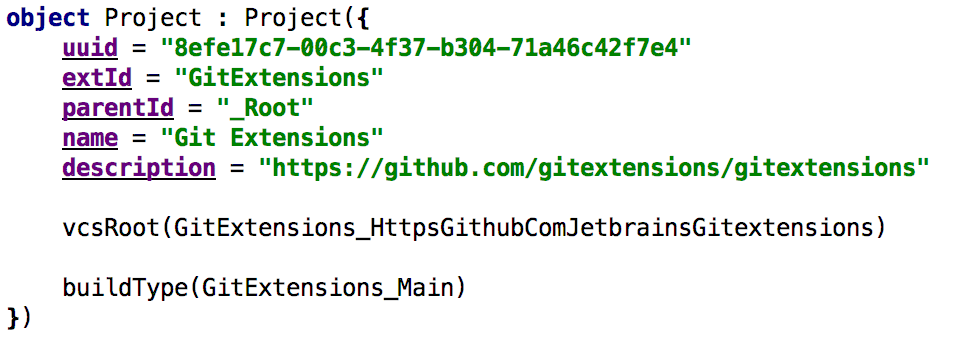
which would correspond to the following entries in the UI, in addition to VCS roots and Build Types.
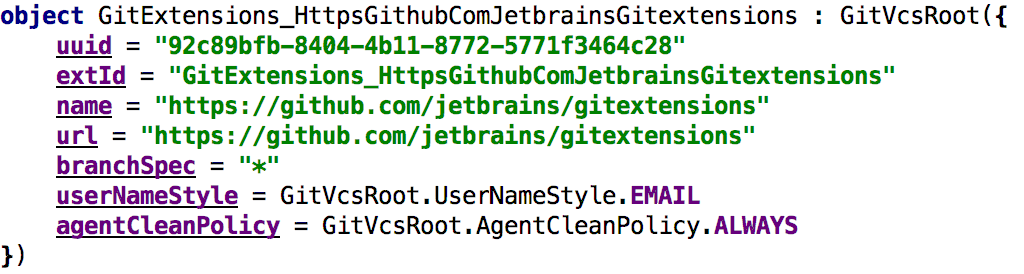
GitExtensions_HttpsGithubComJetbrainsGitextensions.kt
This object defines the VCS root configuration. It’s important to note that we could have just placed all this information directly in the code above, as opposed to making the call vcsRoot(GitExtensions_…). However, the advantage to doing this, as we’ll see, is not only to make the code cleaner and separate concerns, but also to provide reusability.
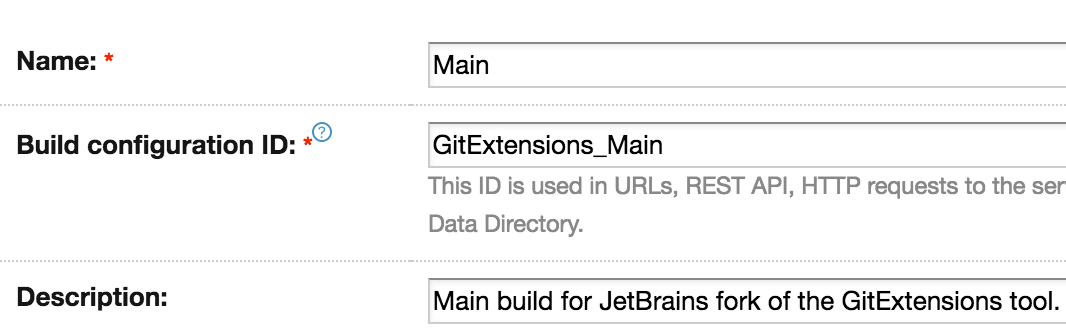
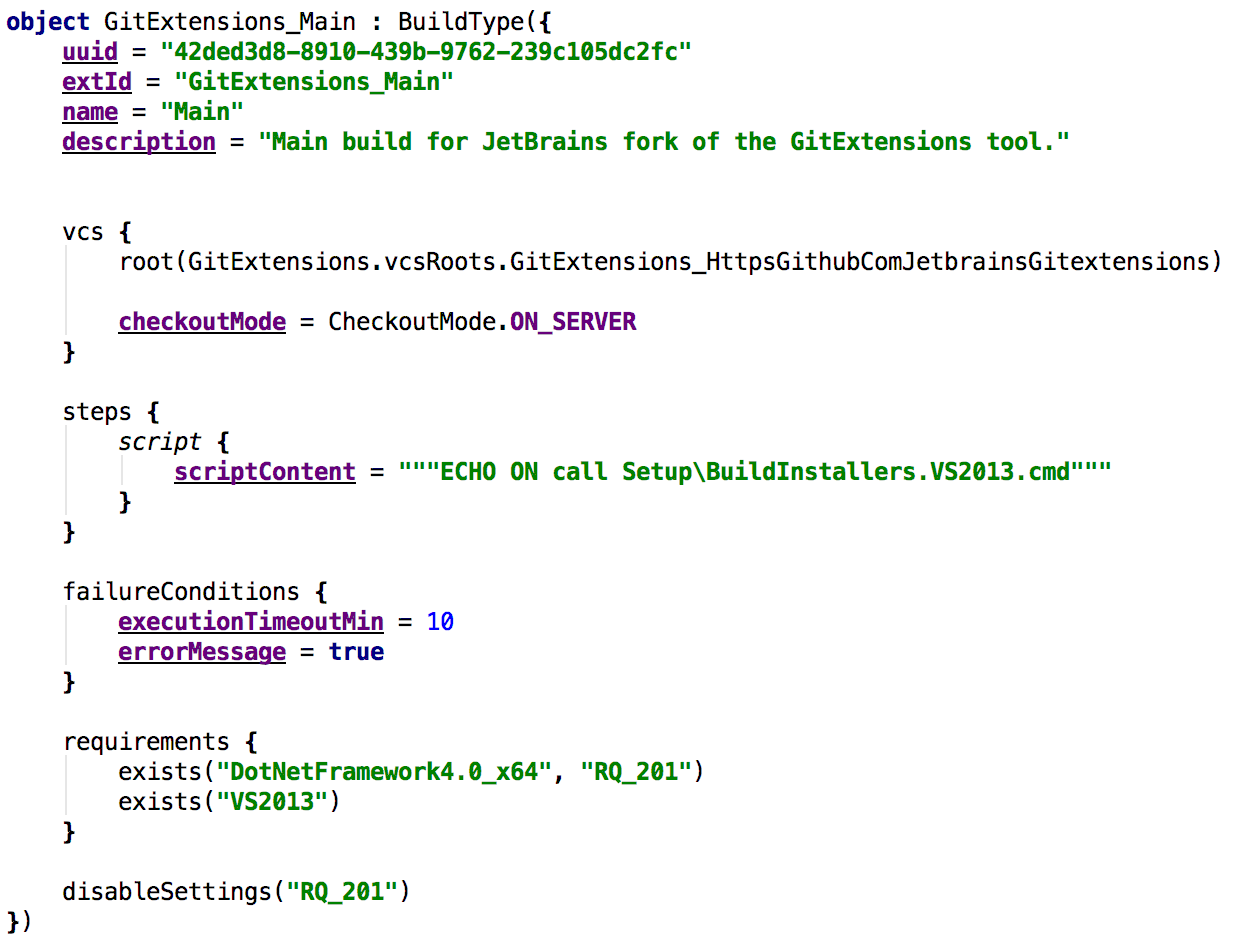
GitExtensions_Main.kt
Finally, we have the actual meat of where the build happens. This object defines the build steps, failure conditions, and everything else you’d come to expect for a build configuration in TeamCity
Summary
In this first part we’ve seen the components of a TeamCity configuration script. In the next part we’ll dive a little deeper into the DSL, modify the script, and see some of the benefits that Kotlin and IntelliJ IDEA already start providing us in terms of guidance via code assistants.
[1] While enabling version control storage for settings has been available since version 9, it was only available in XML format. TeamCity 10 brings Kotlin to this.

Subscribe to TeamCity Blog updates


