DataGrip and GitHub: Step-by-step Integration

All IDEs based on the IntelliJ Platform have Version Control System integration. DataGrip is no exception! But because database developers usually do things a little differently from other developers and because DataGrip’s project model has its own specific workflow, the integration between the IDE and VCS support isn’t quite as straightforward as with other JetBrains IDEs.

We’ll cover two general use cases:
— Cloning an existing GitHub repository with SQL scripts and other files
— Sharing a user scripts directory on GitHub
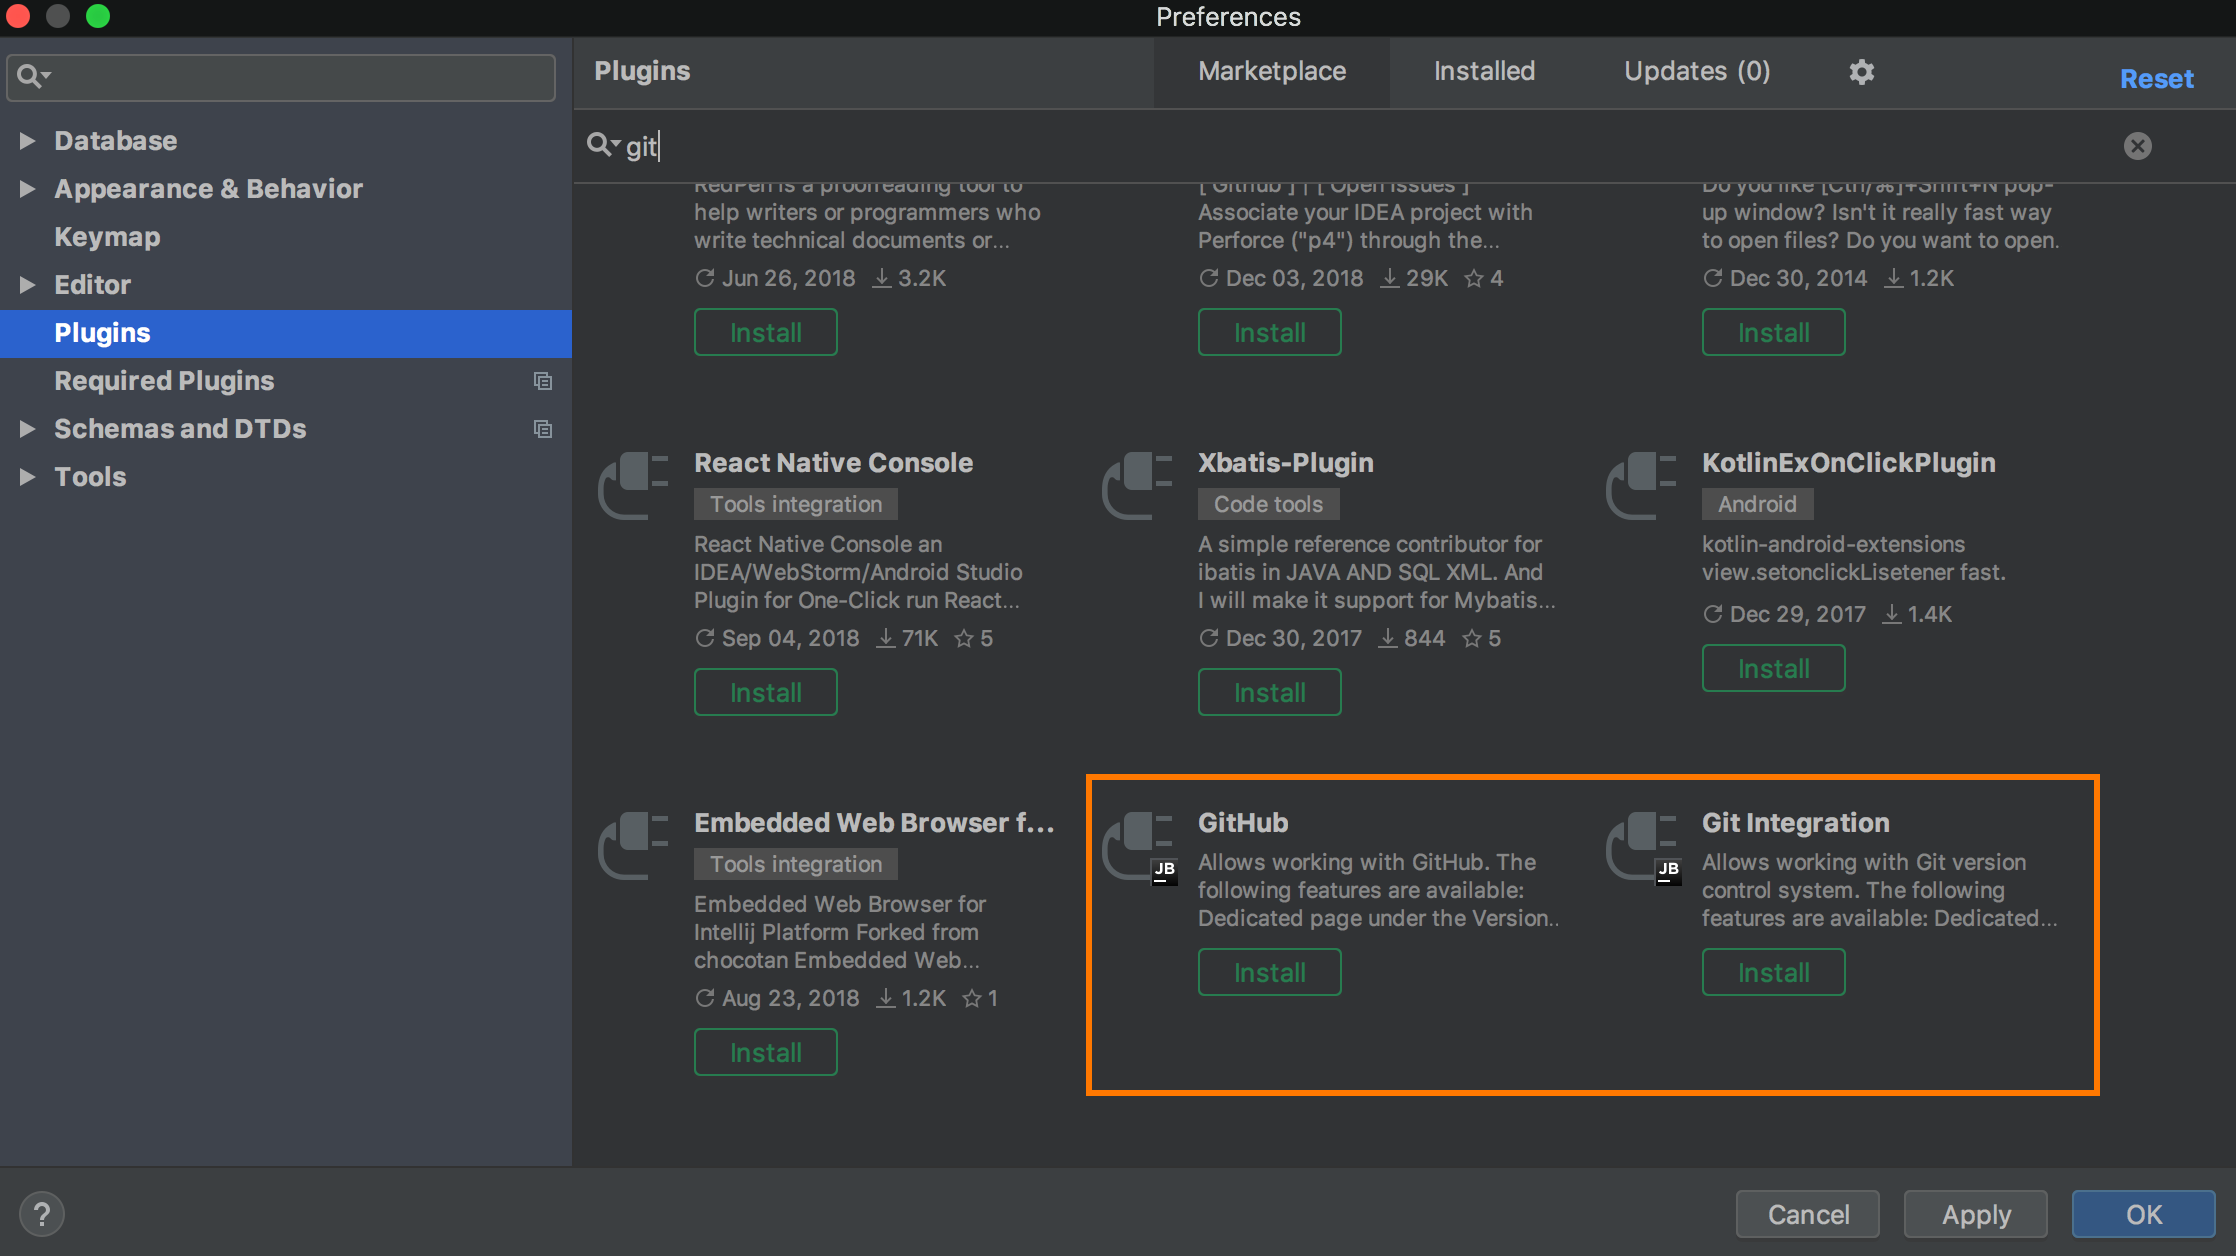
In DataGrip, VCS support doesn’t come out of the box. To have support for a particular version control system, please install the corresponding JetBrains plugin from Settings → Plugins. Since we’re going to work with GitHub, we’ll need the Git Integration plugin and the GitHub plugin.
They’re both provided by JetBrains, which is indicated by the small JB icon on them. Note that they can appear at the end of the list. This happens because we use a special plugin repository in DataGrip.
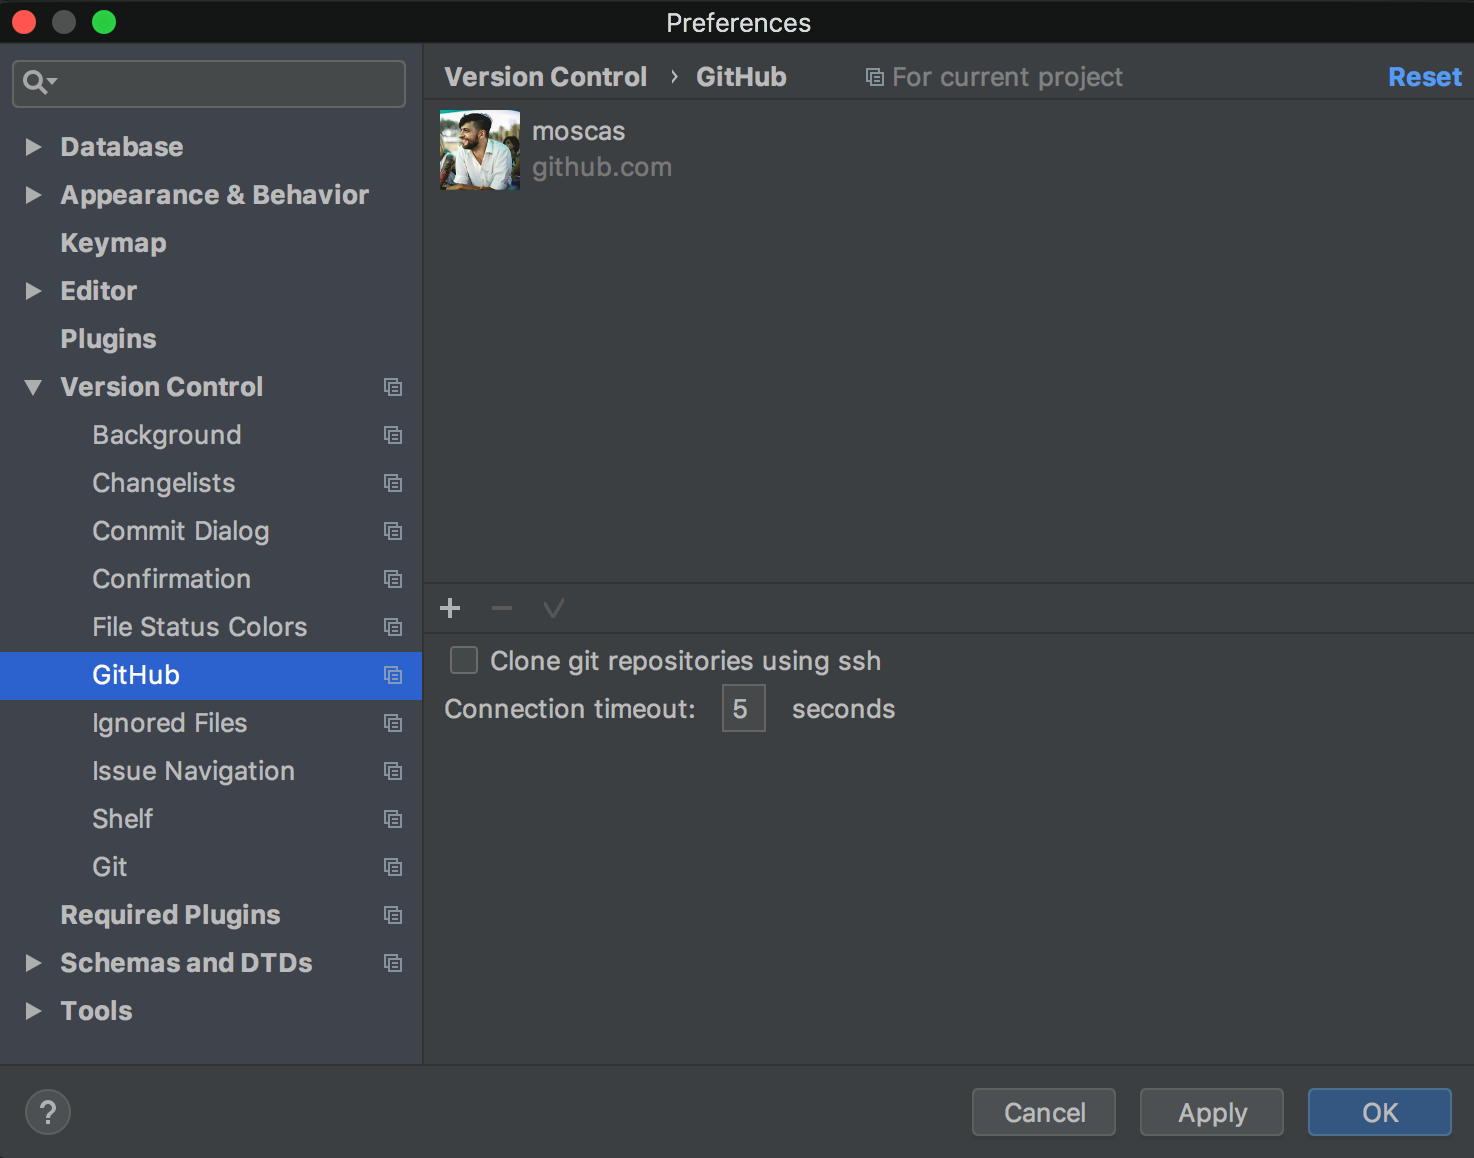
Once you’ve installed these two plugins and restarted DataGrip, please go to Settings | Version Control | GitHub. Add your GitHub account there so the IDE is able to connect and use it during interactions with GitHub.
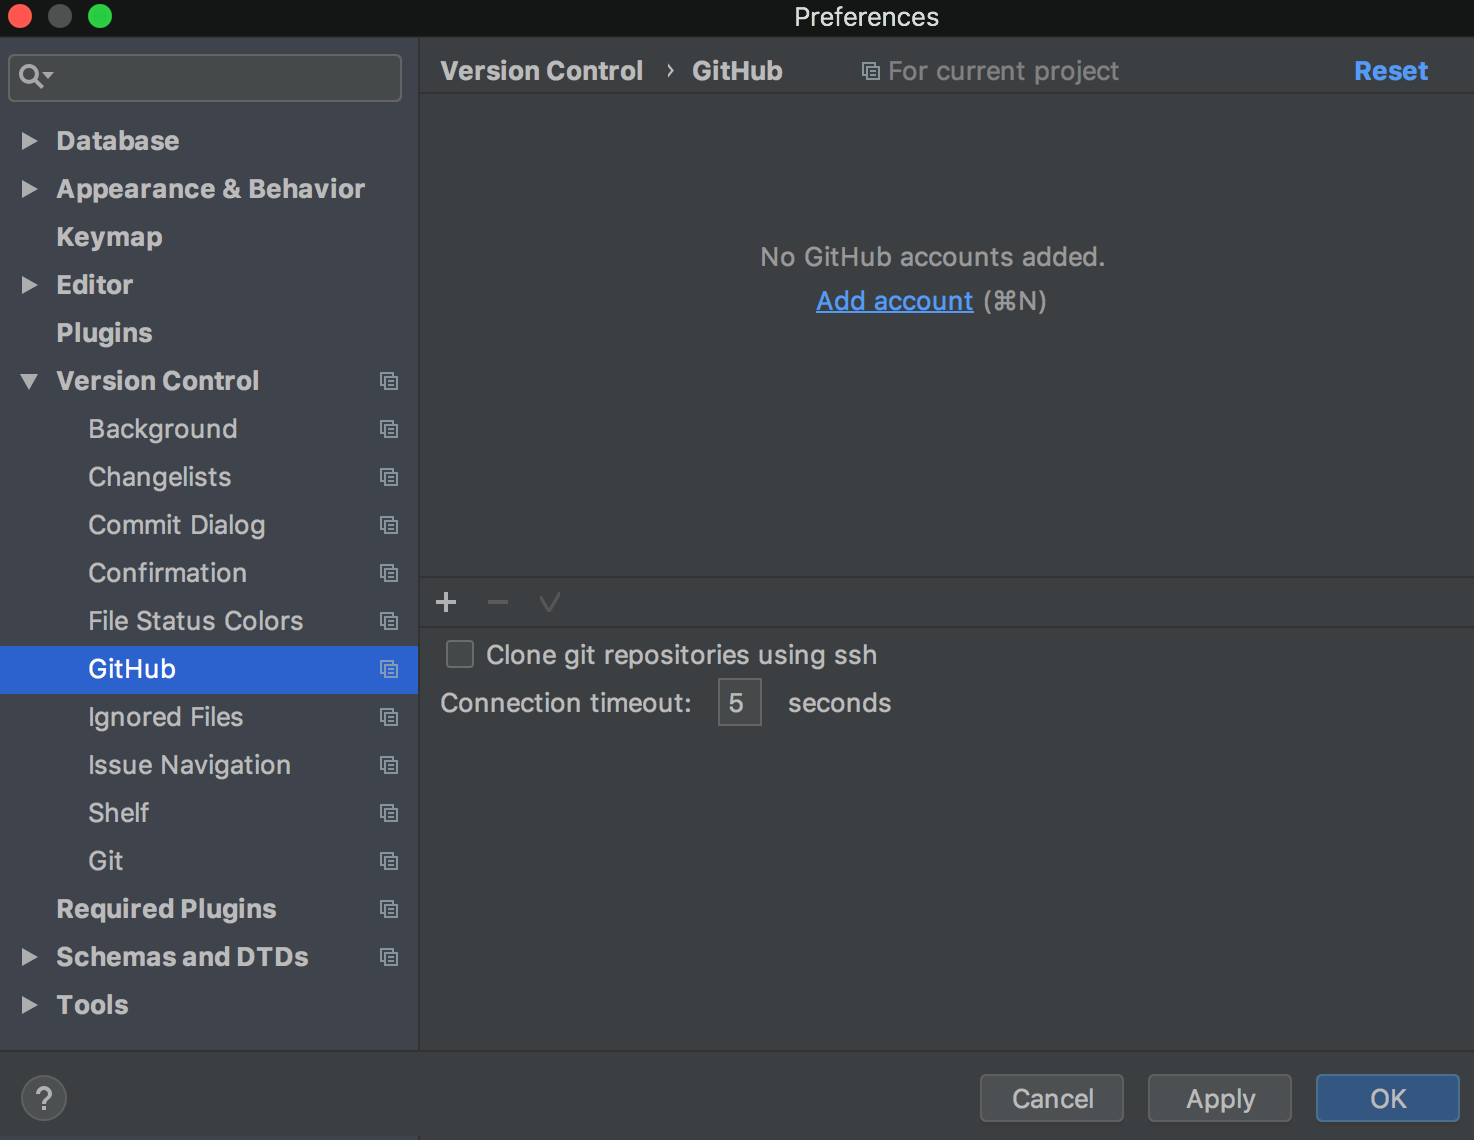
The GitHub plugin is a must if you use two-factor authentication. If everything is OK, you’ll see that your account is linked.
Your IDE is ready to work with GitHub. Let’s go through the use cases we mentioned above.
Cloning an existing GitHub repository with SQL-scripts and other files
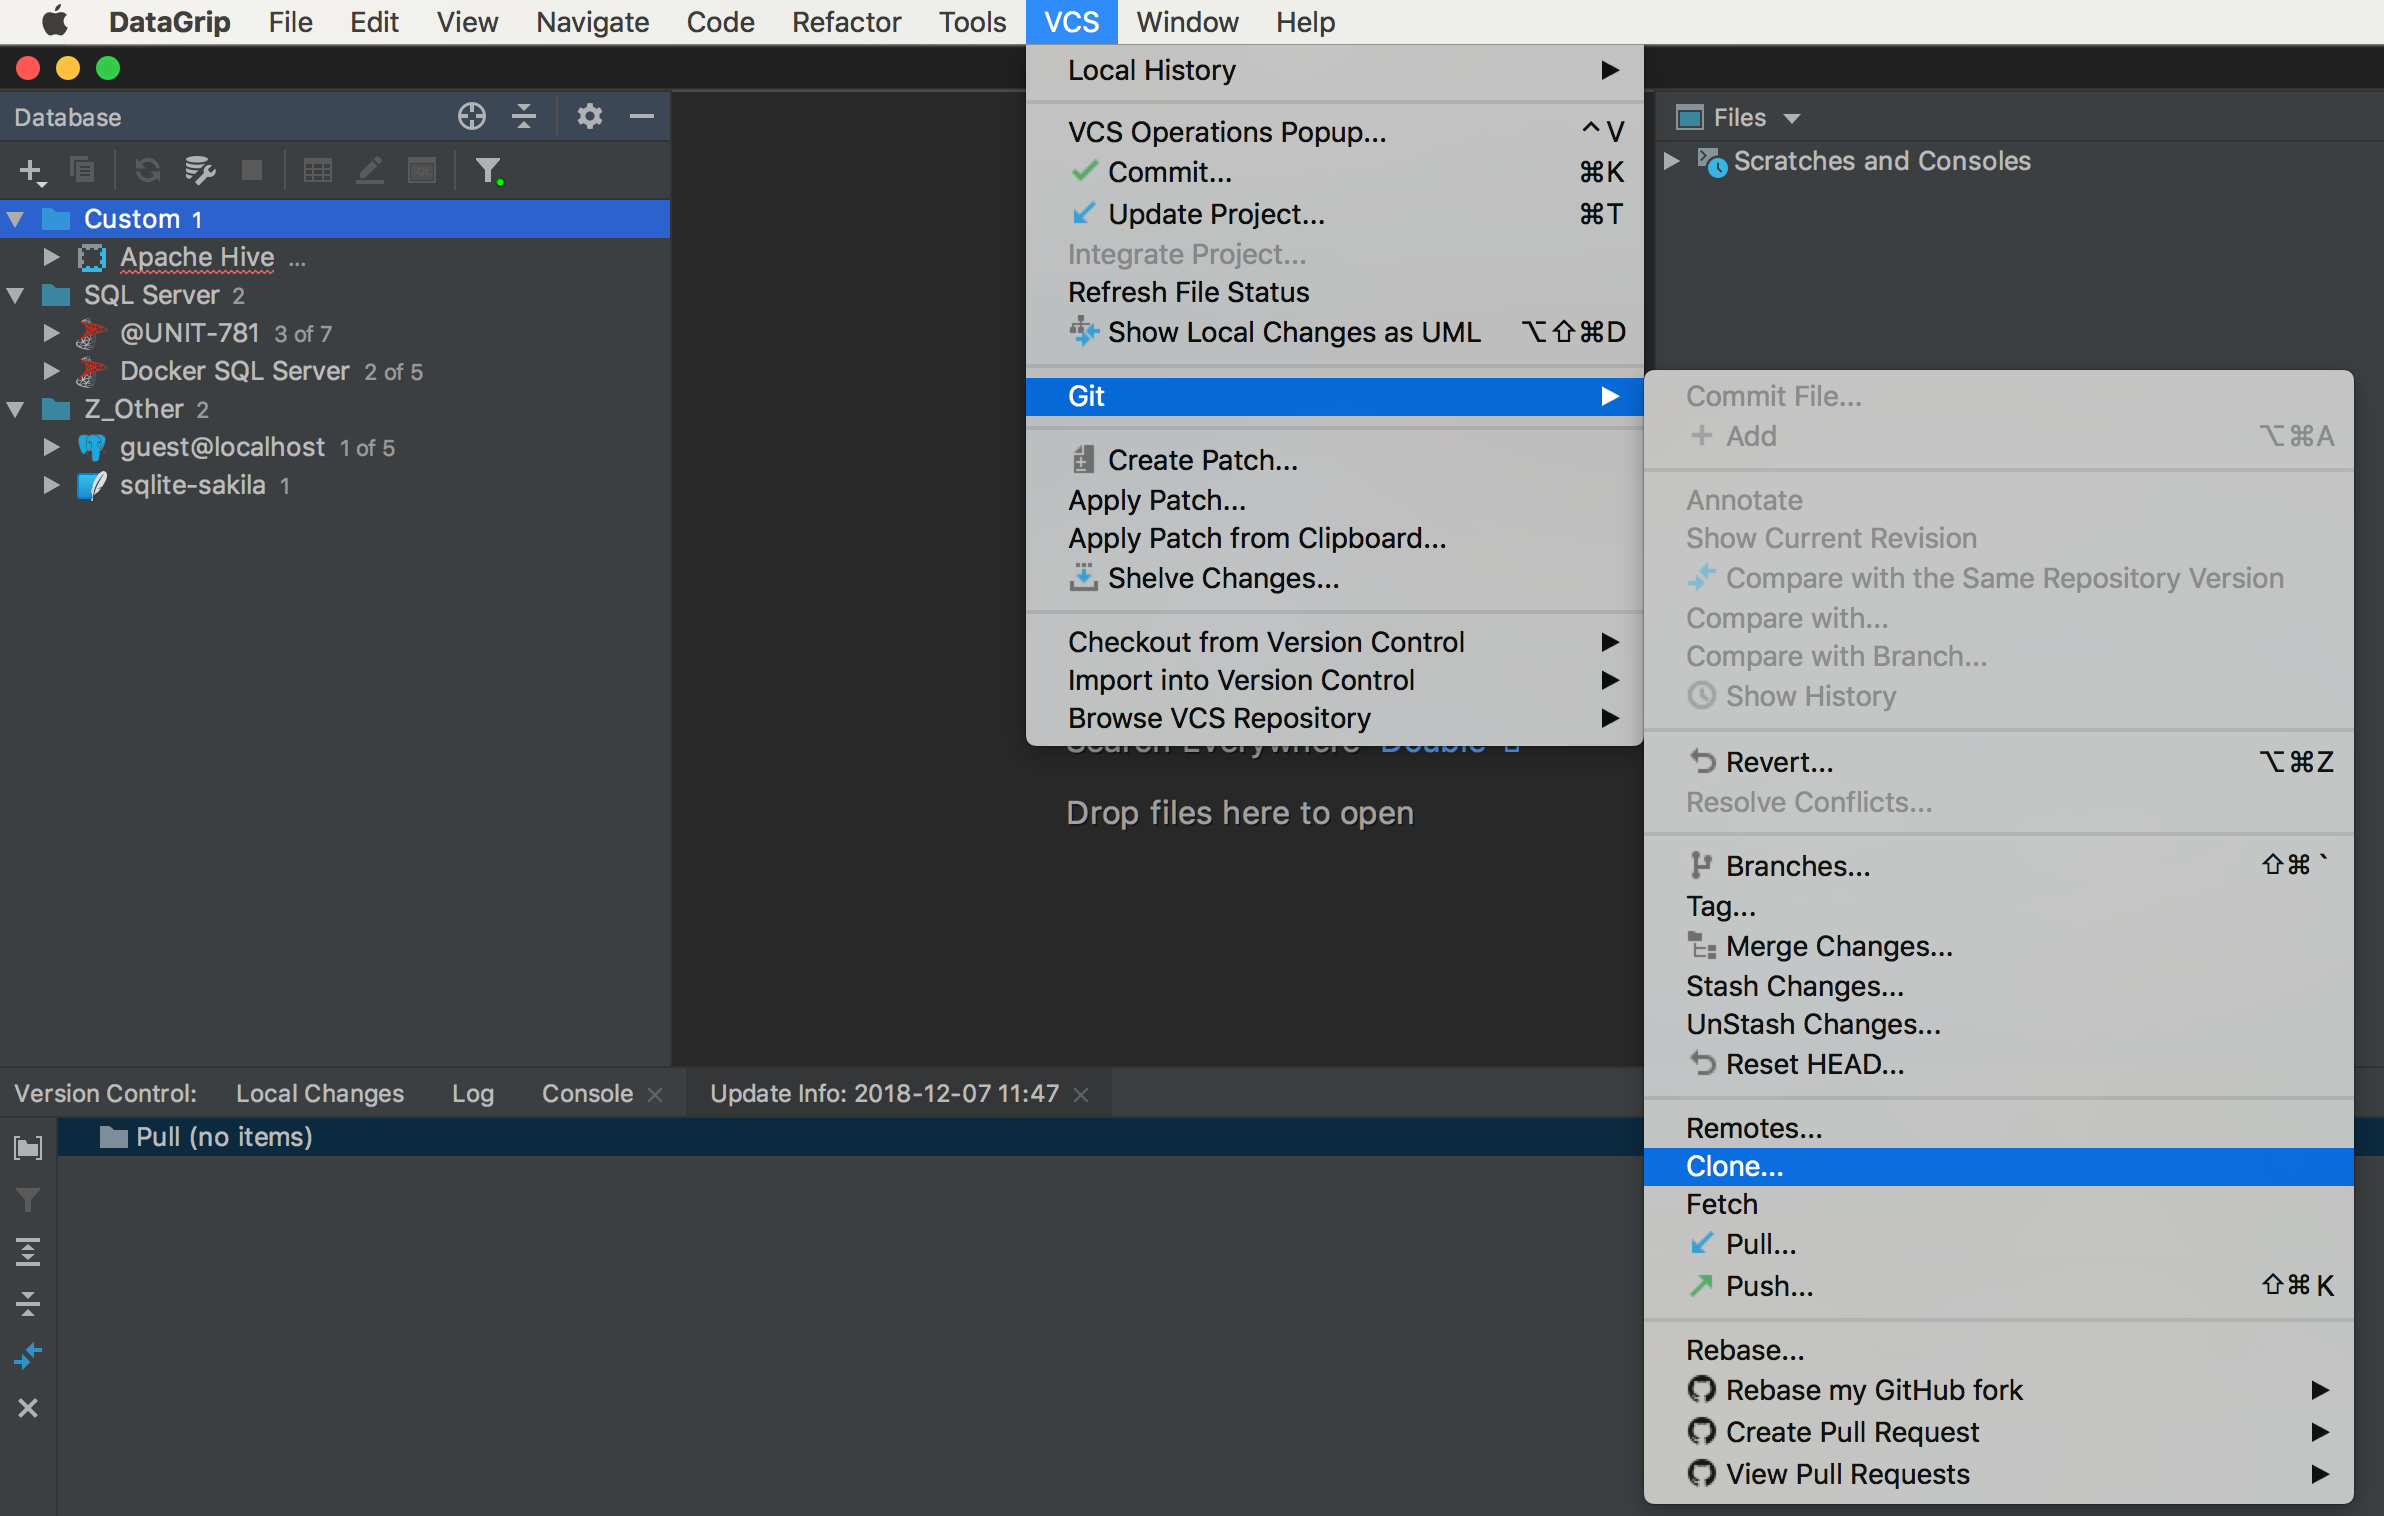
Suppose you want to work with an existing GitHub repository. To clone it go to VCS | Git | Clone…
We should mention that all the actions, including this one, can be performed from any place in the IDE via Find Action (Ctrl/Cmd + Shift + A). Anyway, there is a way to do this through the menu too – see our screenshot.
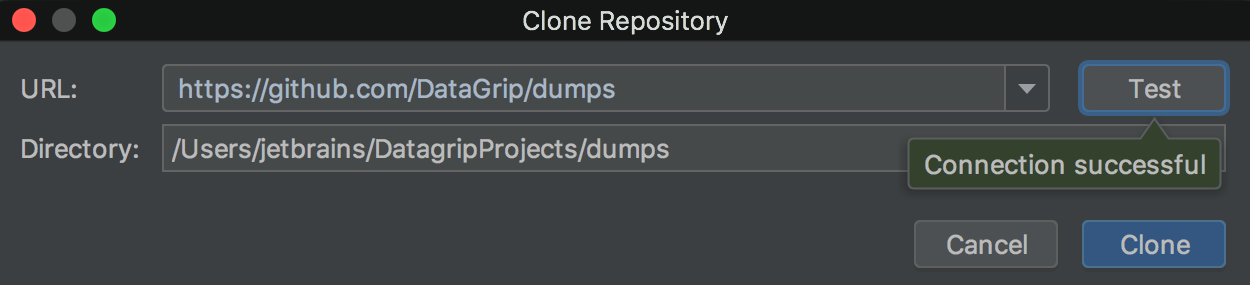
Paste the link to the GitHub repository in the URL field and click Test. Hopefully, everything goes smoothly. In our example, we will clone the public DataGrip repository with various database dumps: https://github.com/DataGrip/dumps
DataGrip will ask you a question:
— Would you like to open this directory?
— No
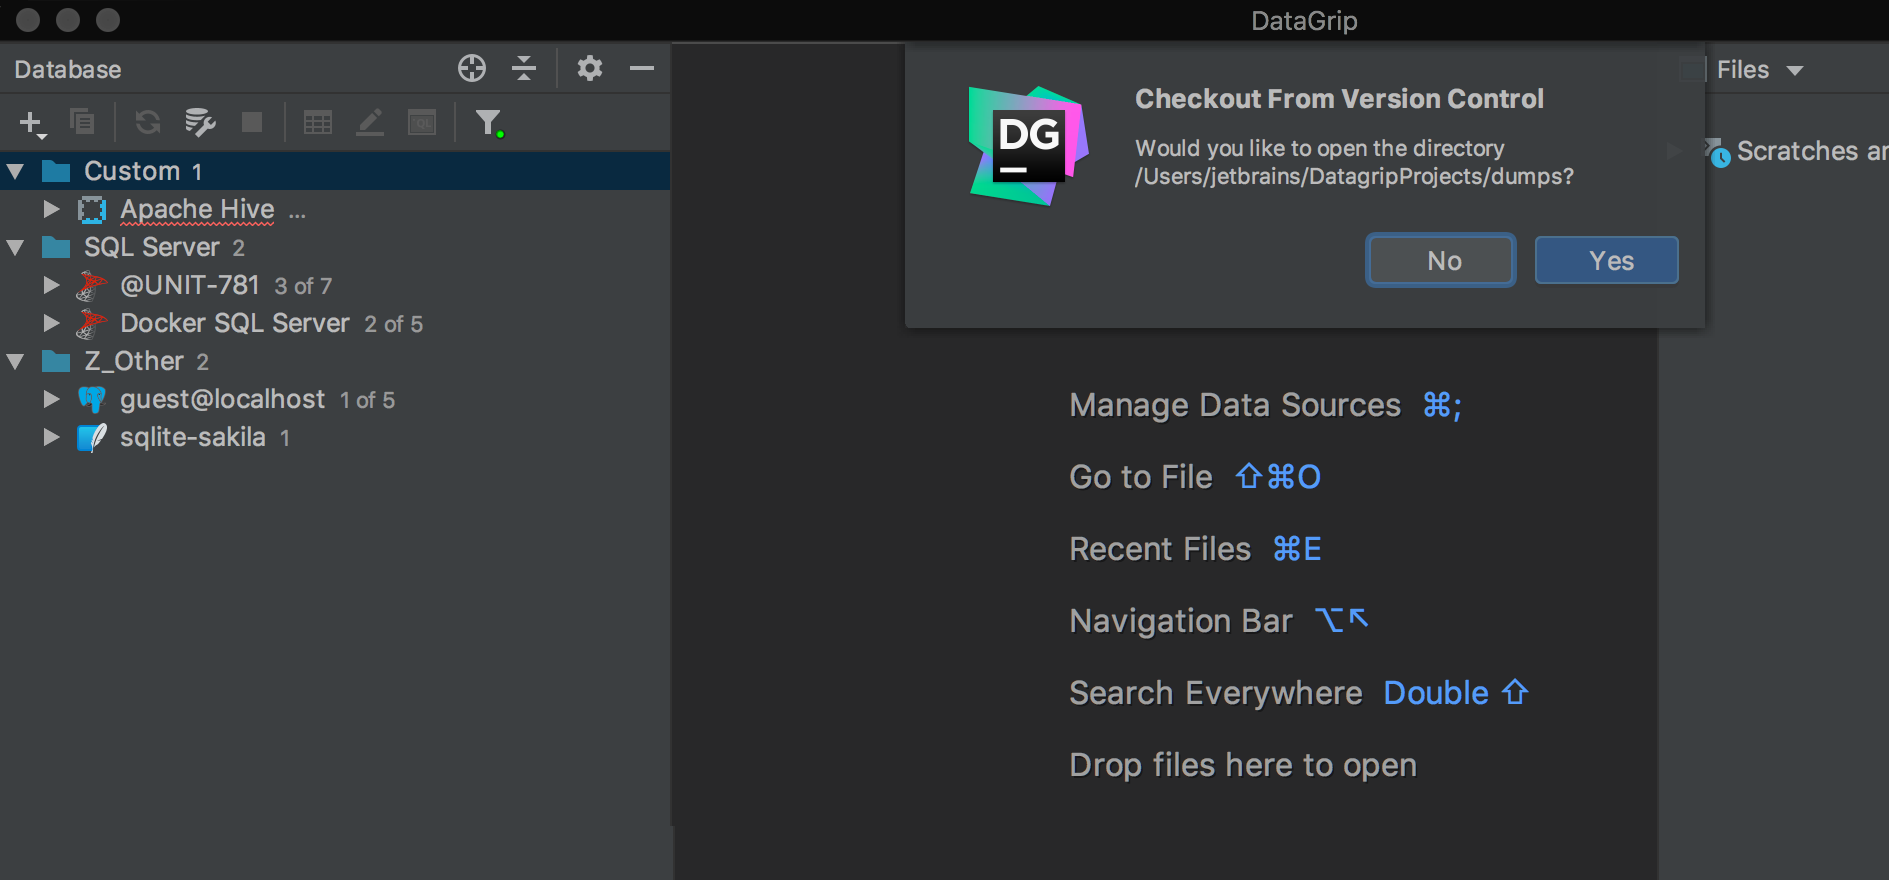
By clicking No, you indicate that you want to work with the repository from an existing project where you have already attached directories and have connections.
If you click Yes, it will suggest that you create a new project.
So, now you’re still in your project. The connections are in the left part, but the directory mapped to the GitHub repository isn’t attached and you don’t see it in the Files tool window. So, you need to attach it!
— Open the Files tool window (Alt/Cmd+2).
— Invoke the context menu.
— Click Attach directory.

Voila!

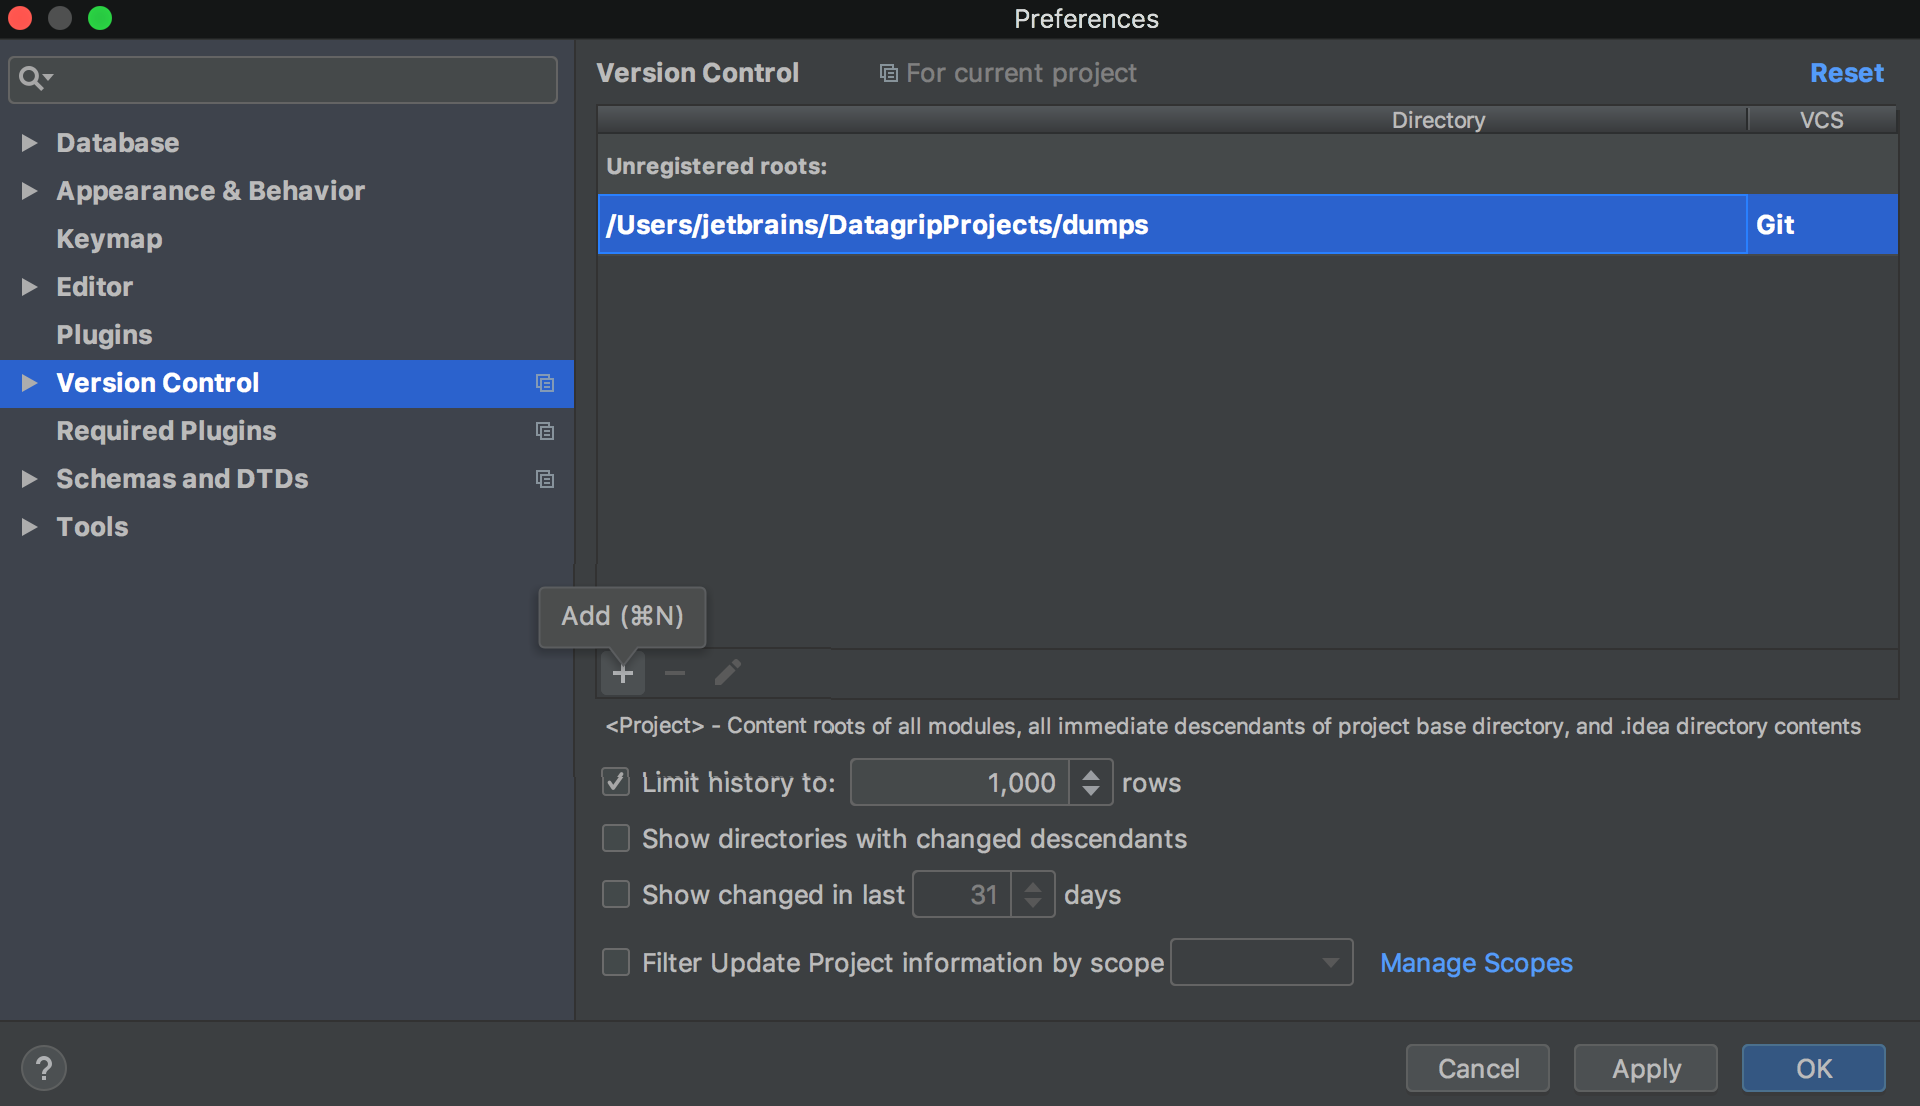
The only thing left to do is to register root. To do that, go to Settings | Version Control, locate the folder that is needed, and click +.
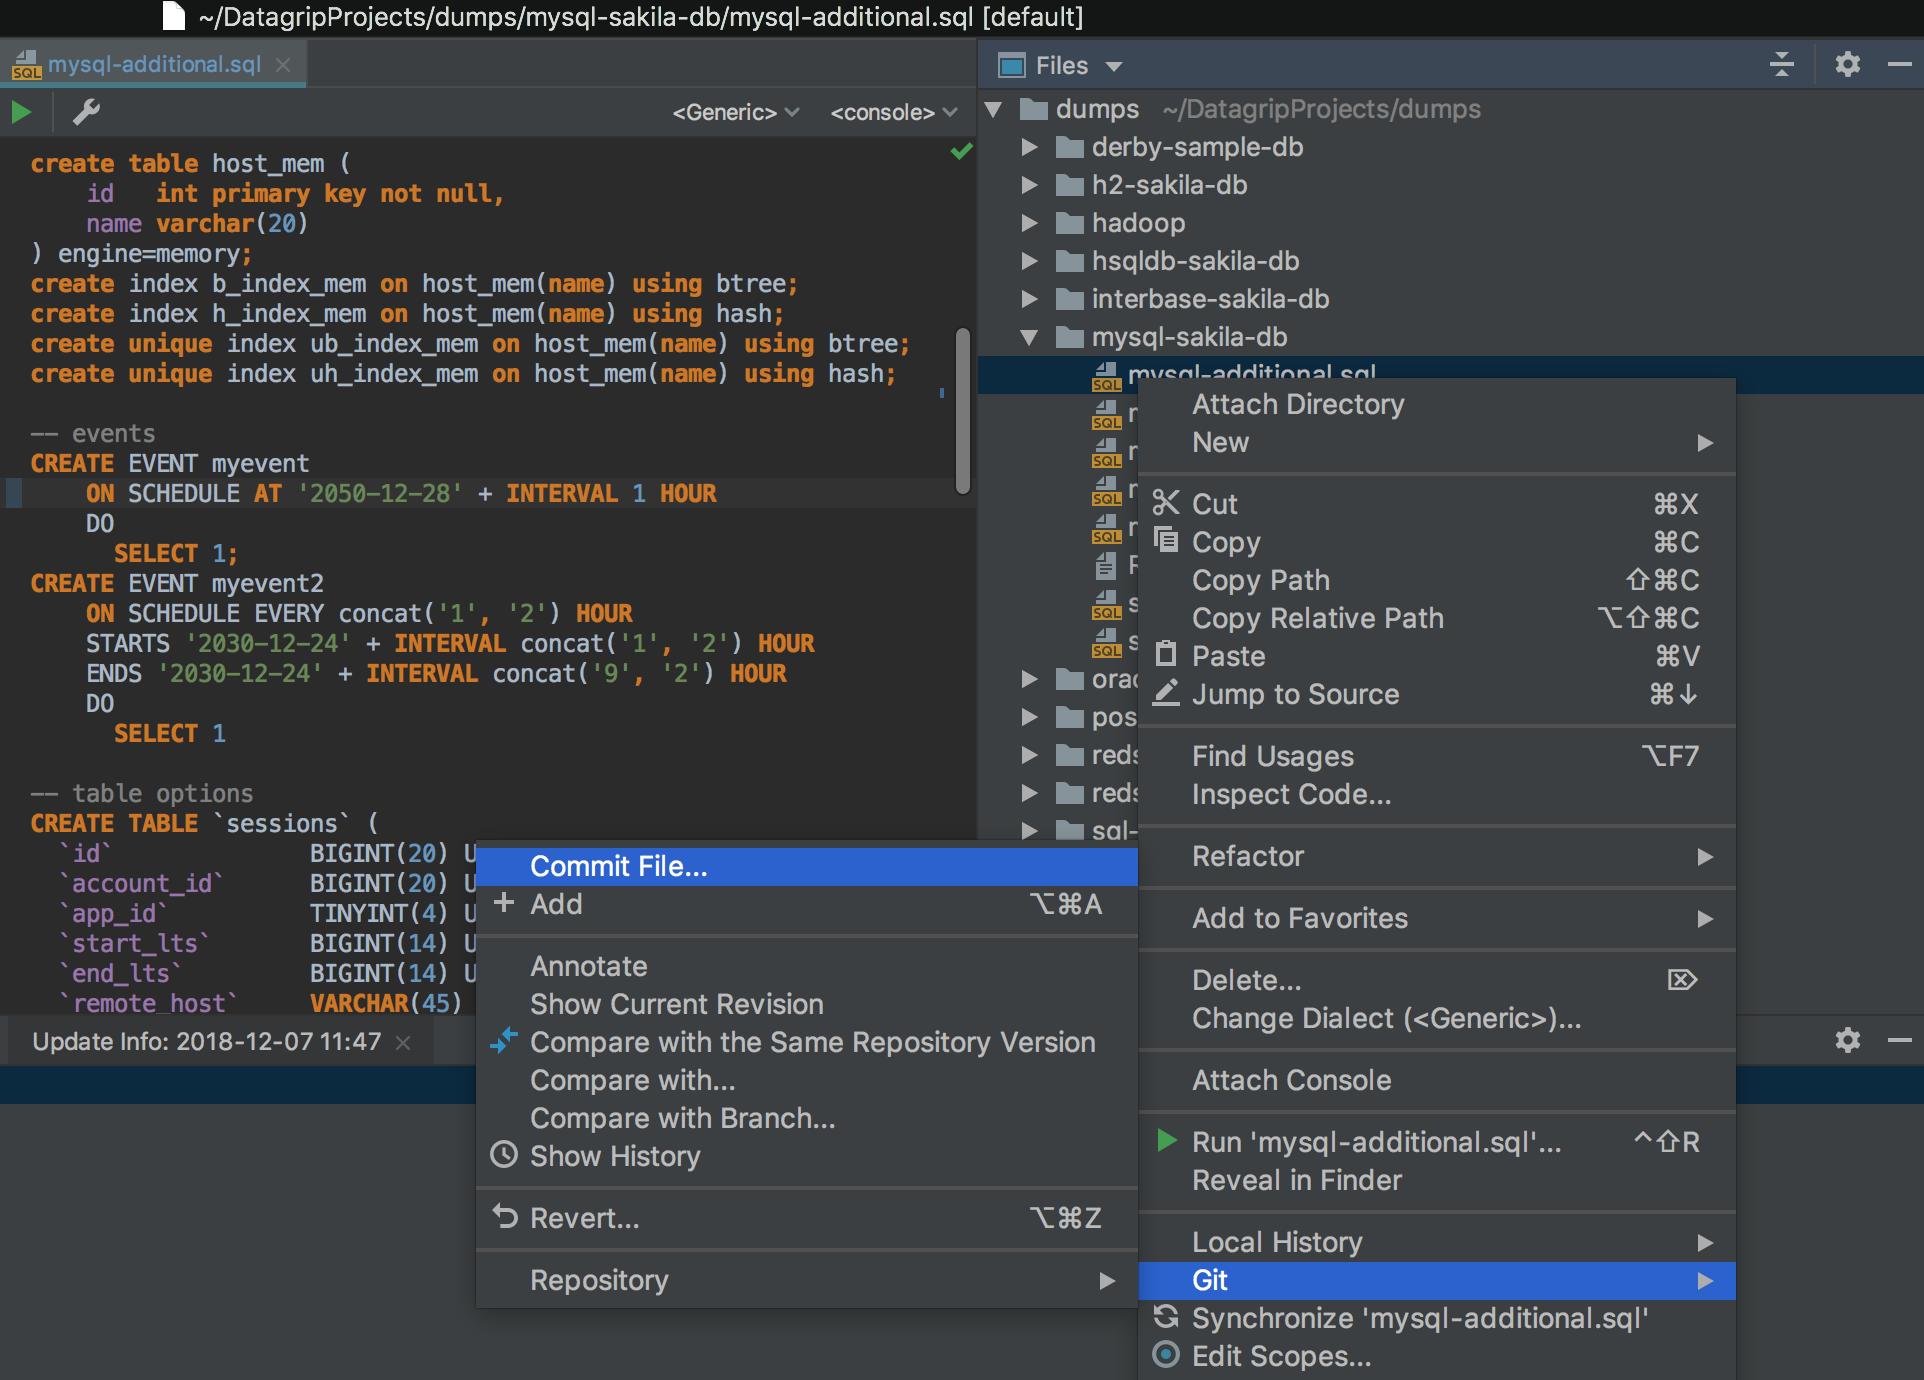
Now you’re ready to change your files, commit, and push your changes!
Sharing the user scripts directory on GitHub
Perhaps you’ve realized that you can’t track changes on your SQL files and you cannot revert to previous versions of your scripts. In some cases, the Local History is the only thing you need, but sharing scripts on GitHub can also be a good idea.
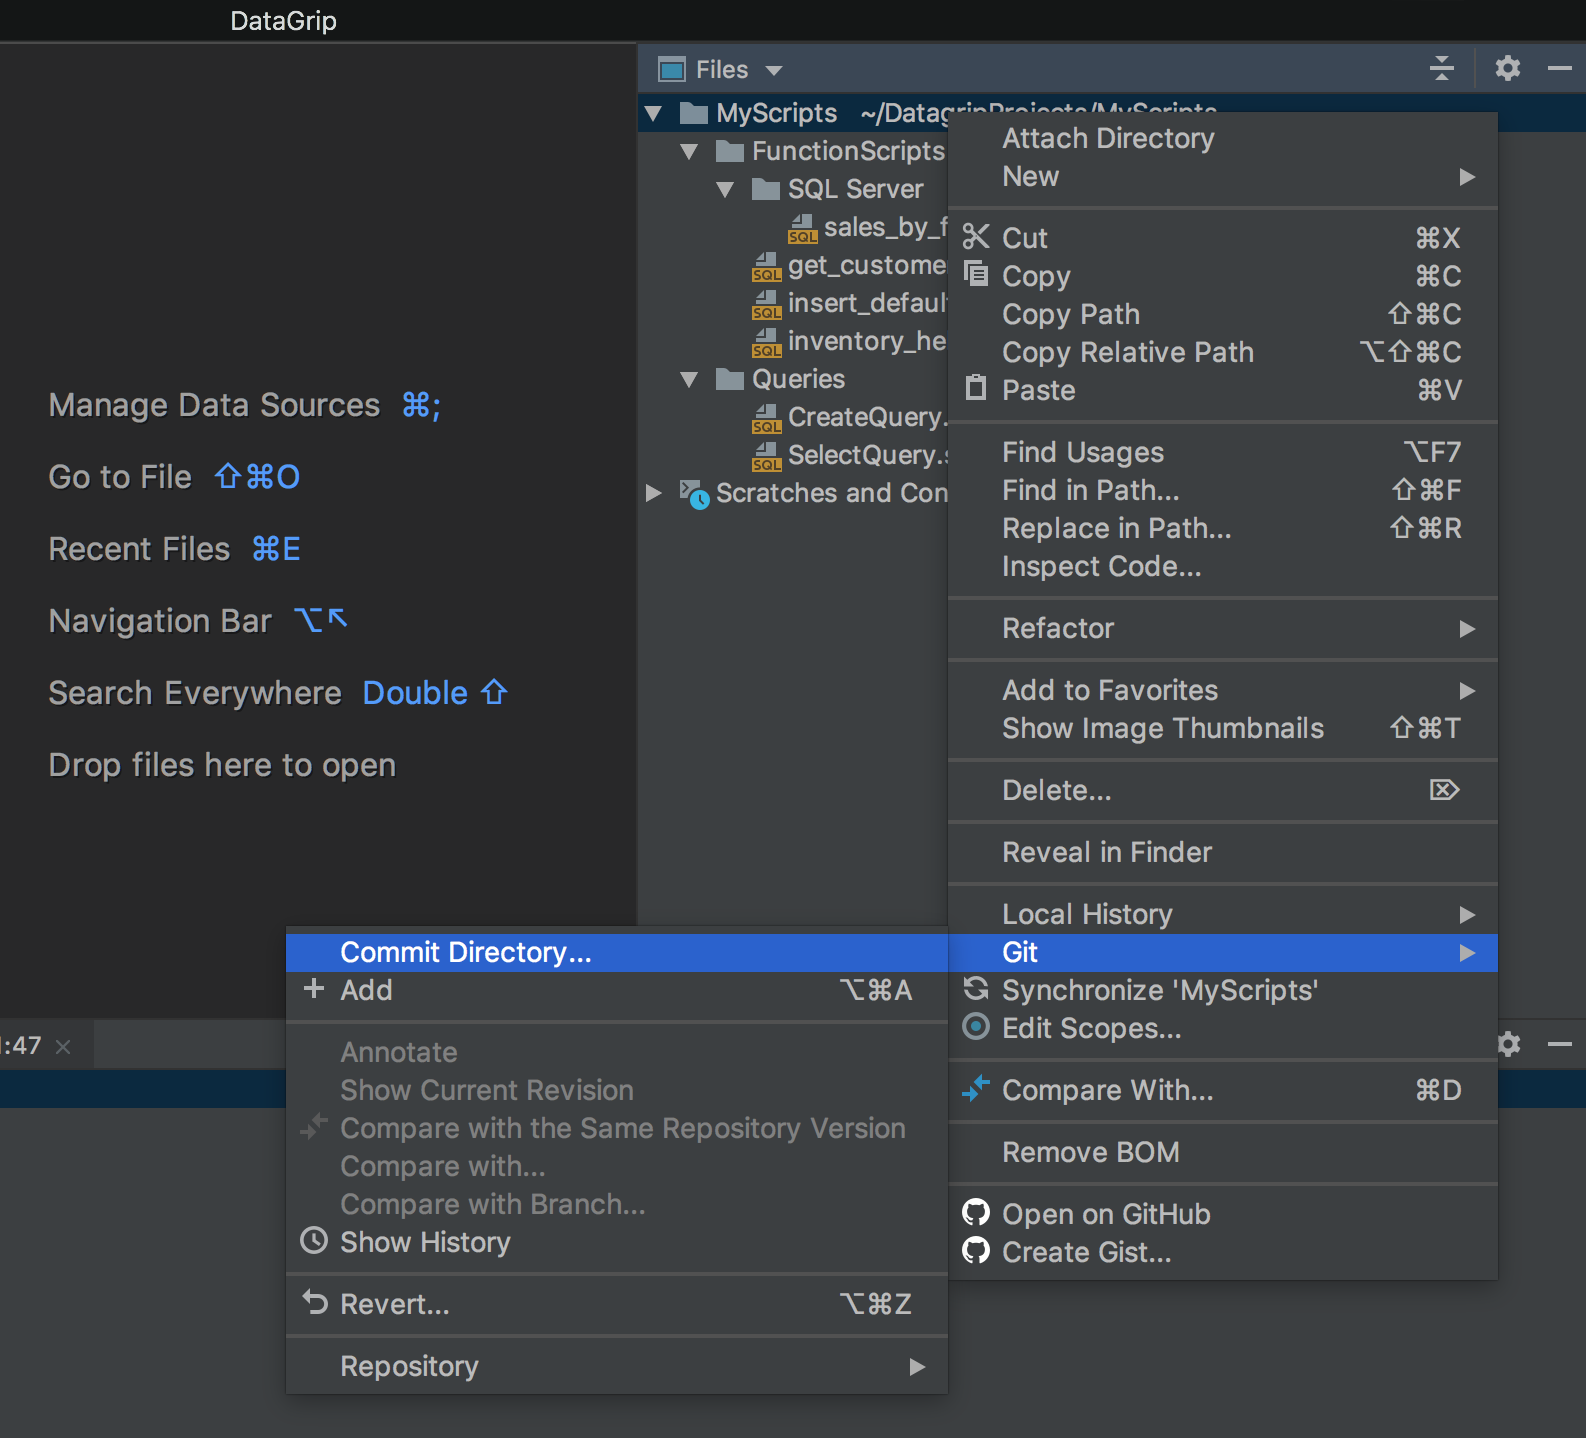
When you work with files in DataGrip, you need to attach the directory from your computer to the Files tool window. If you have no folders attached yet, you can do it from the context menu.
If you have already and worked with it – great! Suppose we have a MyScripts folder which we want to share on GitHub. First, we need to create a Git repository on our machine which will then will be linked with the remote one on GitHub.
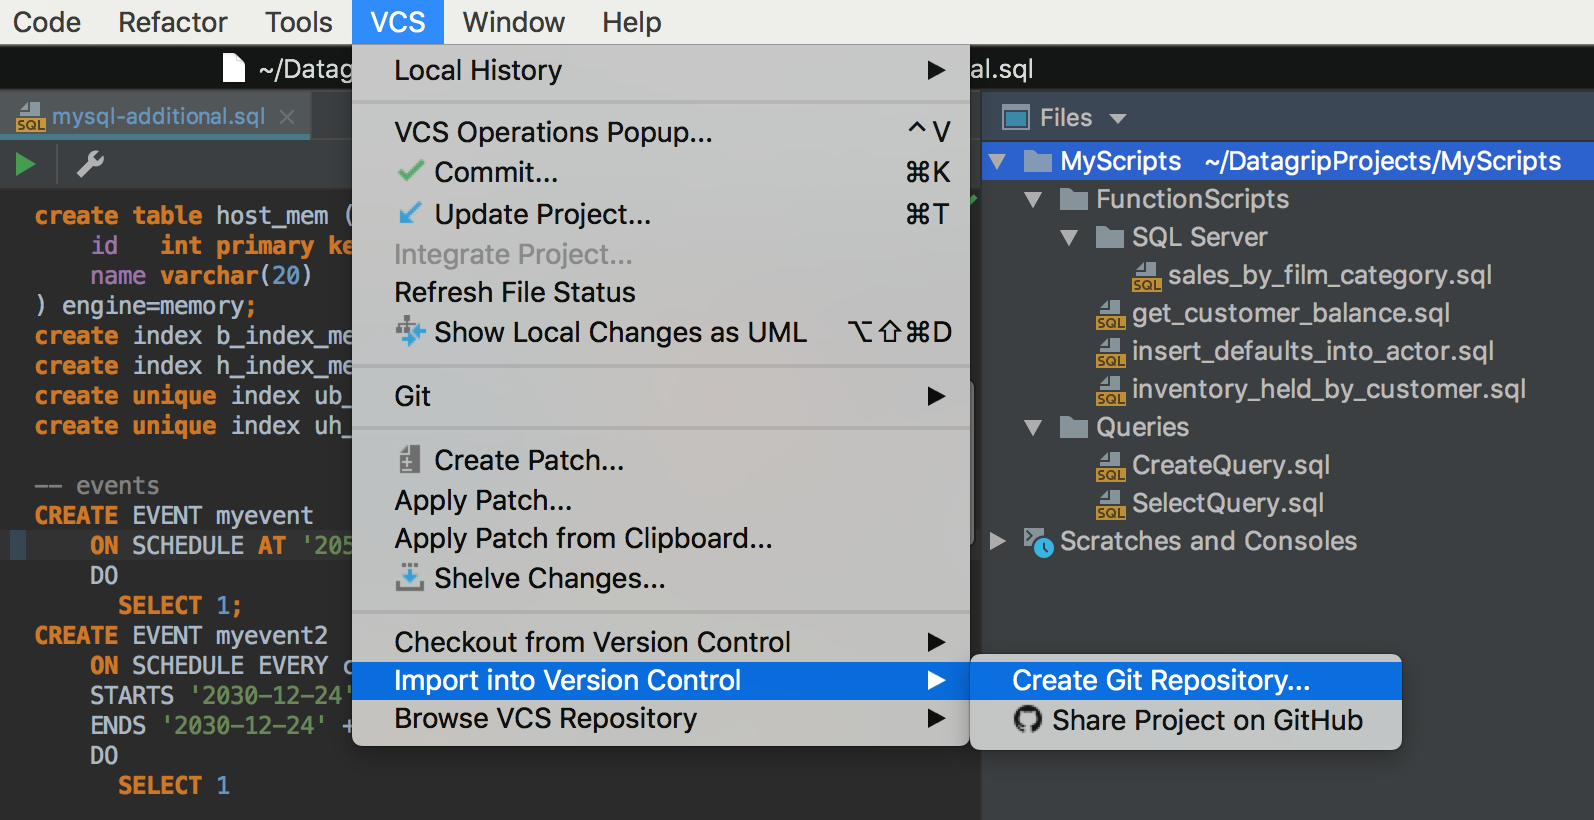
Go to VCS | Import into Version Control | Create Git repository.
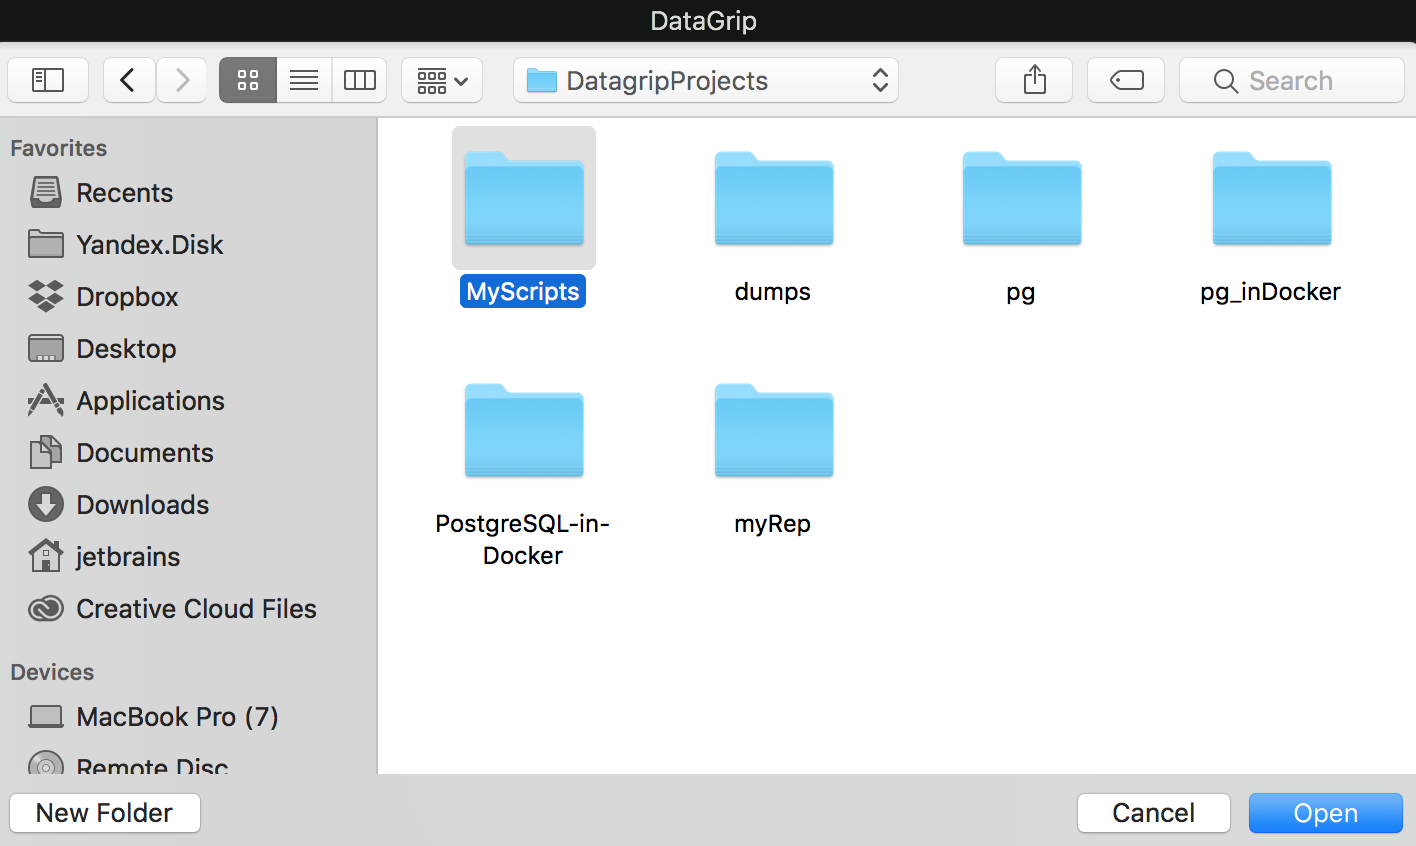
Choose the folder. In my case, it is the folder MyScripts.
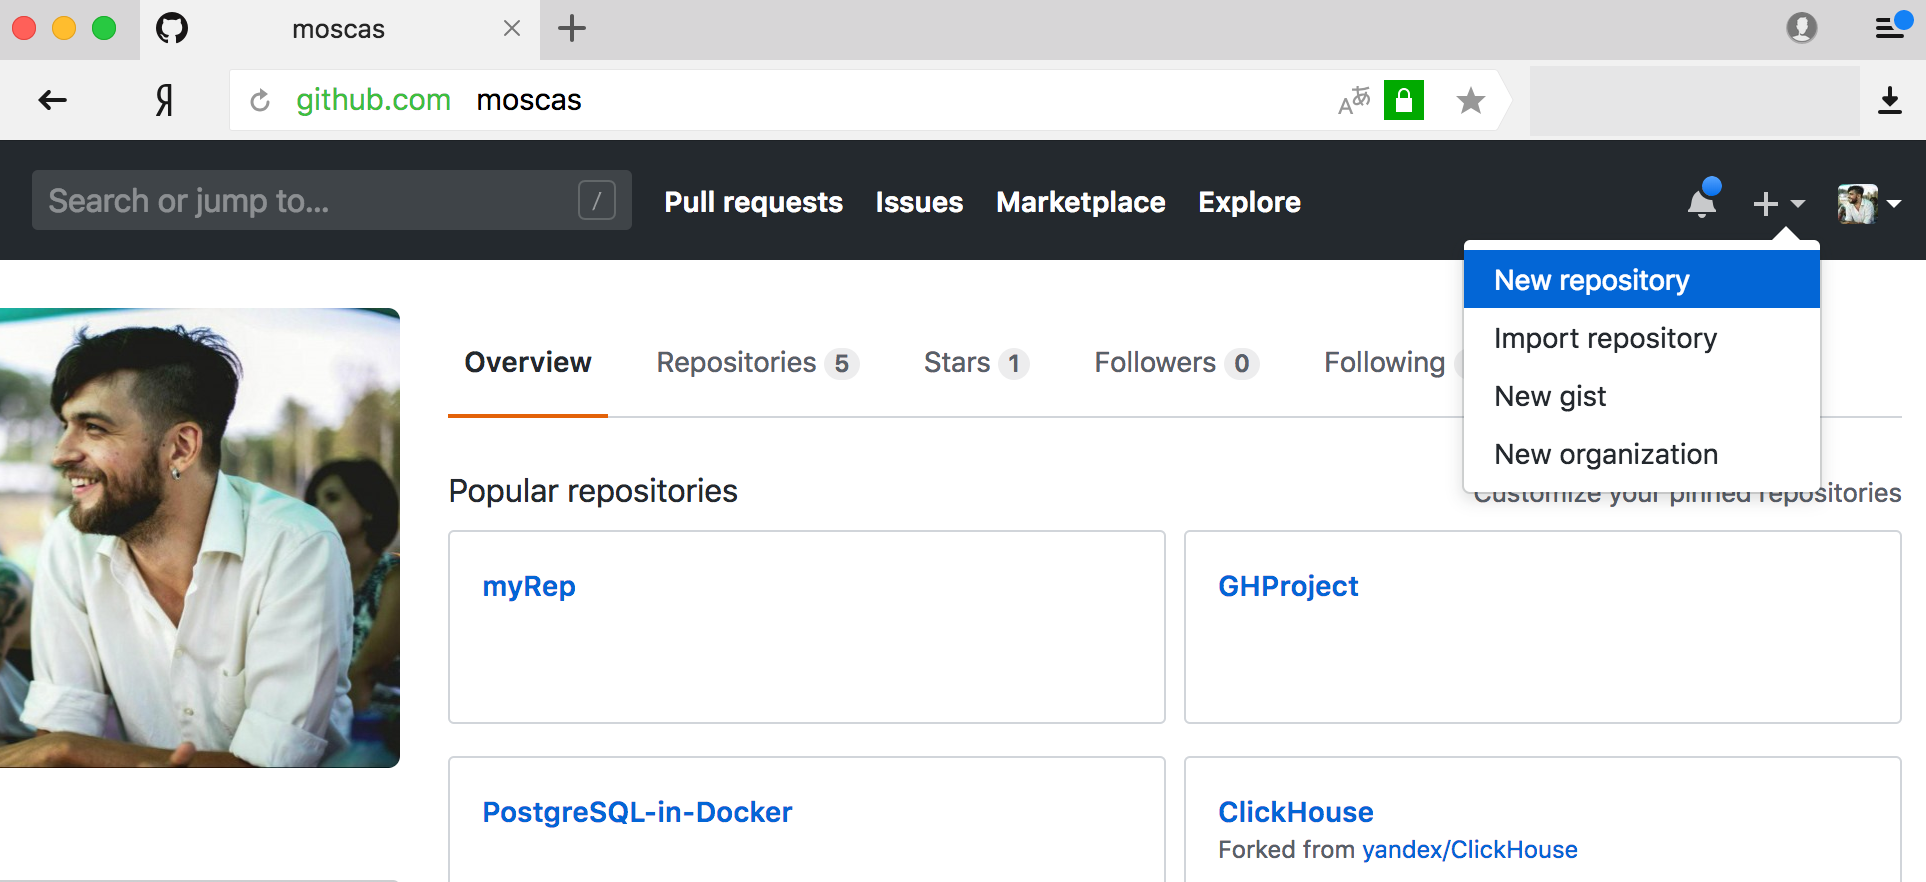
The local repository is created. Now let’s create an empty remote repository on GitHub. Log in to your account and click + | New repository.
Define all the fields you need and click Create repository. That’s it! Done!
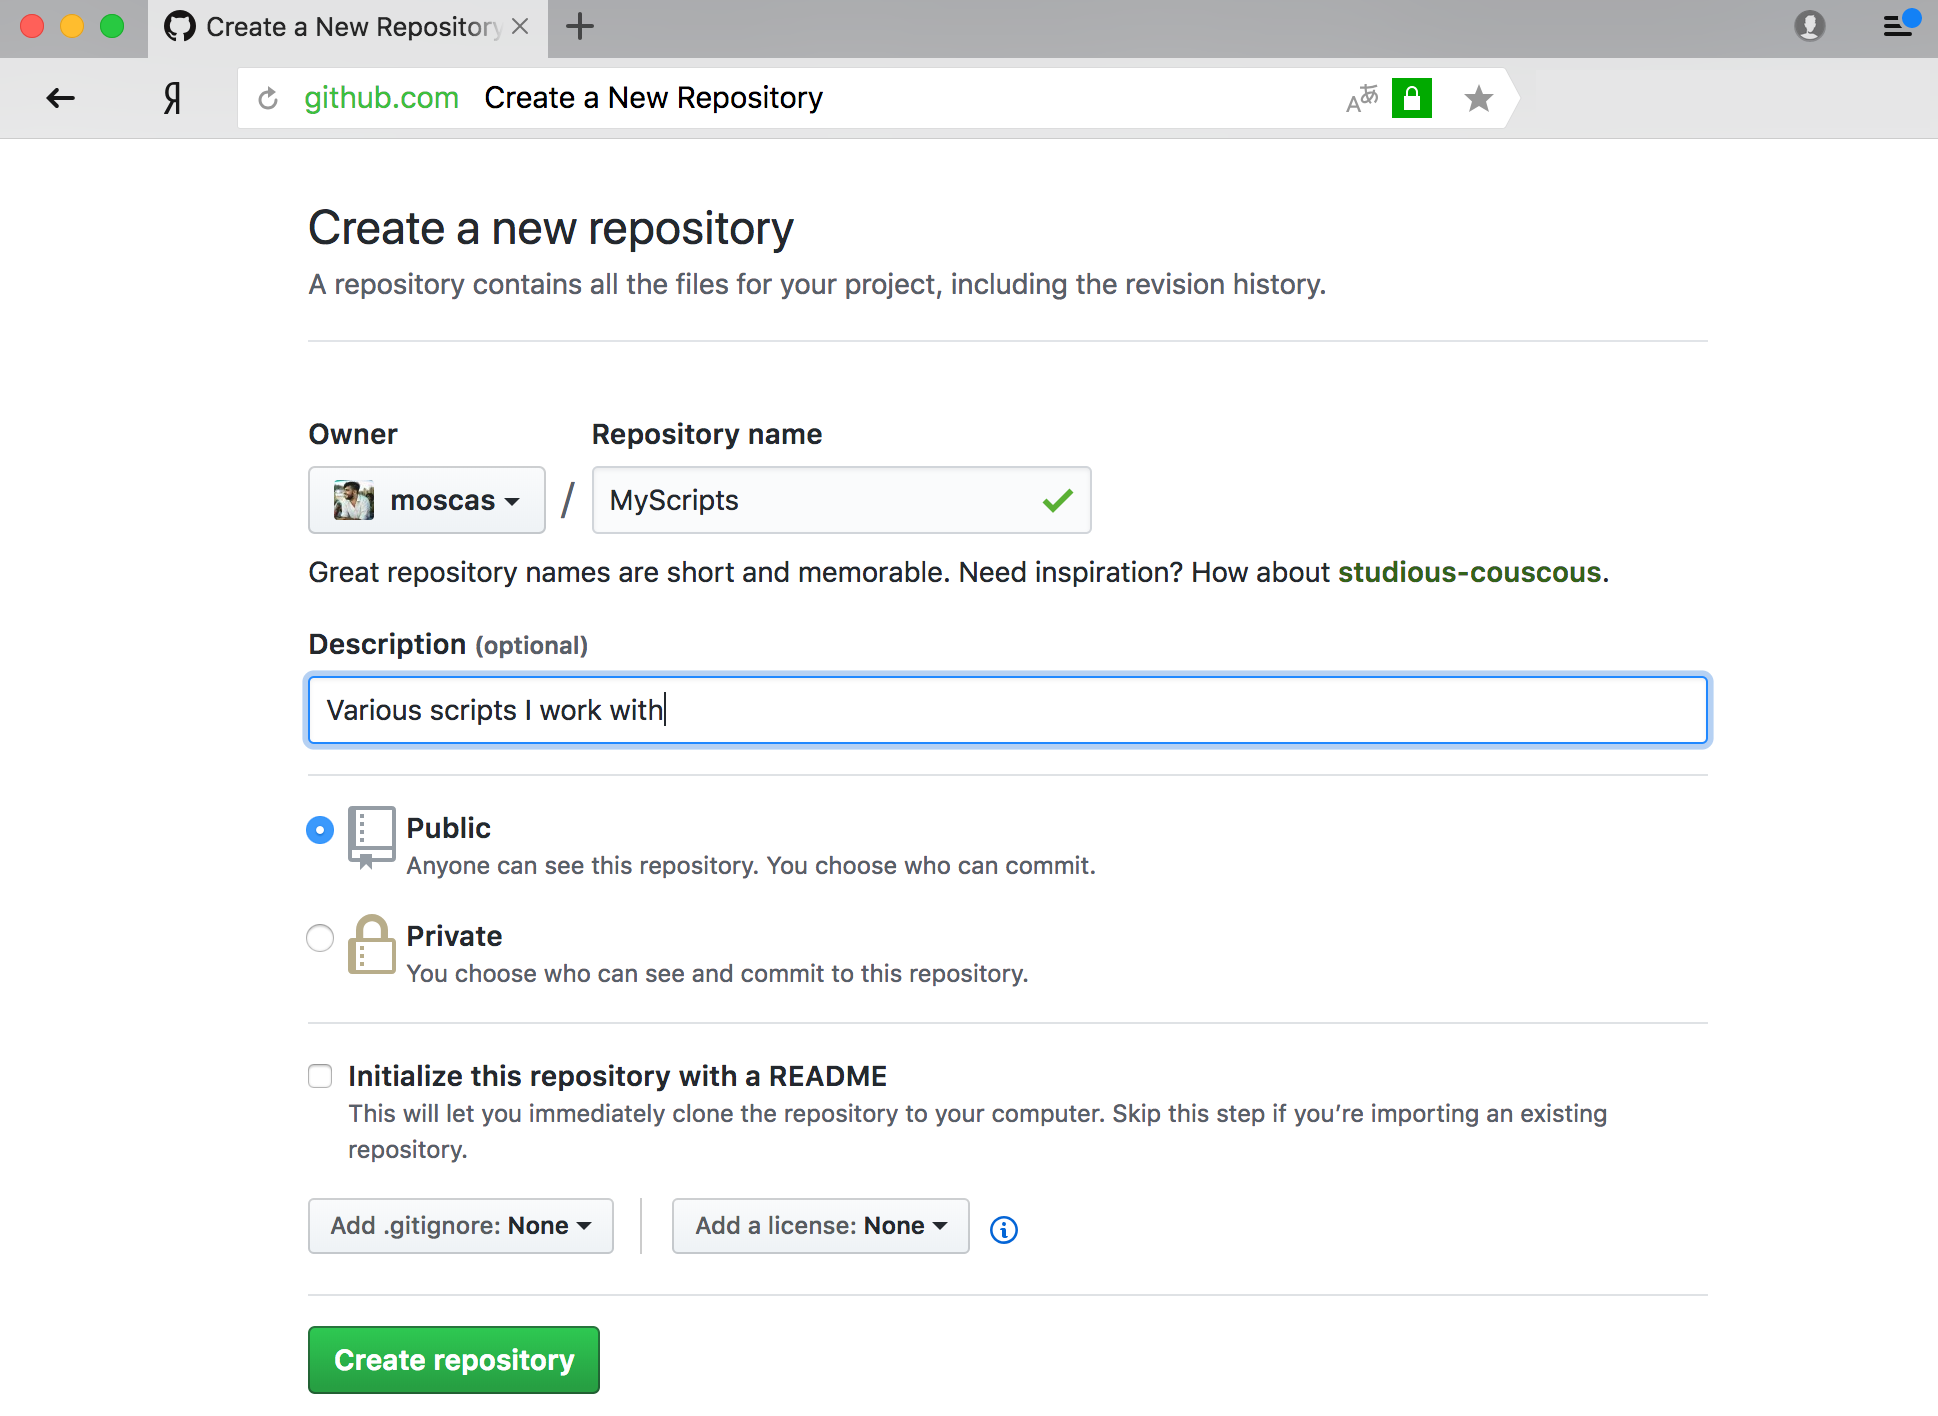
If you used the option Initialize this repository with a README, don’t forget to pull your repository before pushing commits.
The final thing we need to do is to add this remote repository to our local one. Go to Git | Remotes…

Choose the repository you need and click +.

Paste the repository address in the URL field and click OK.

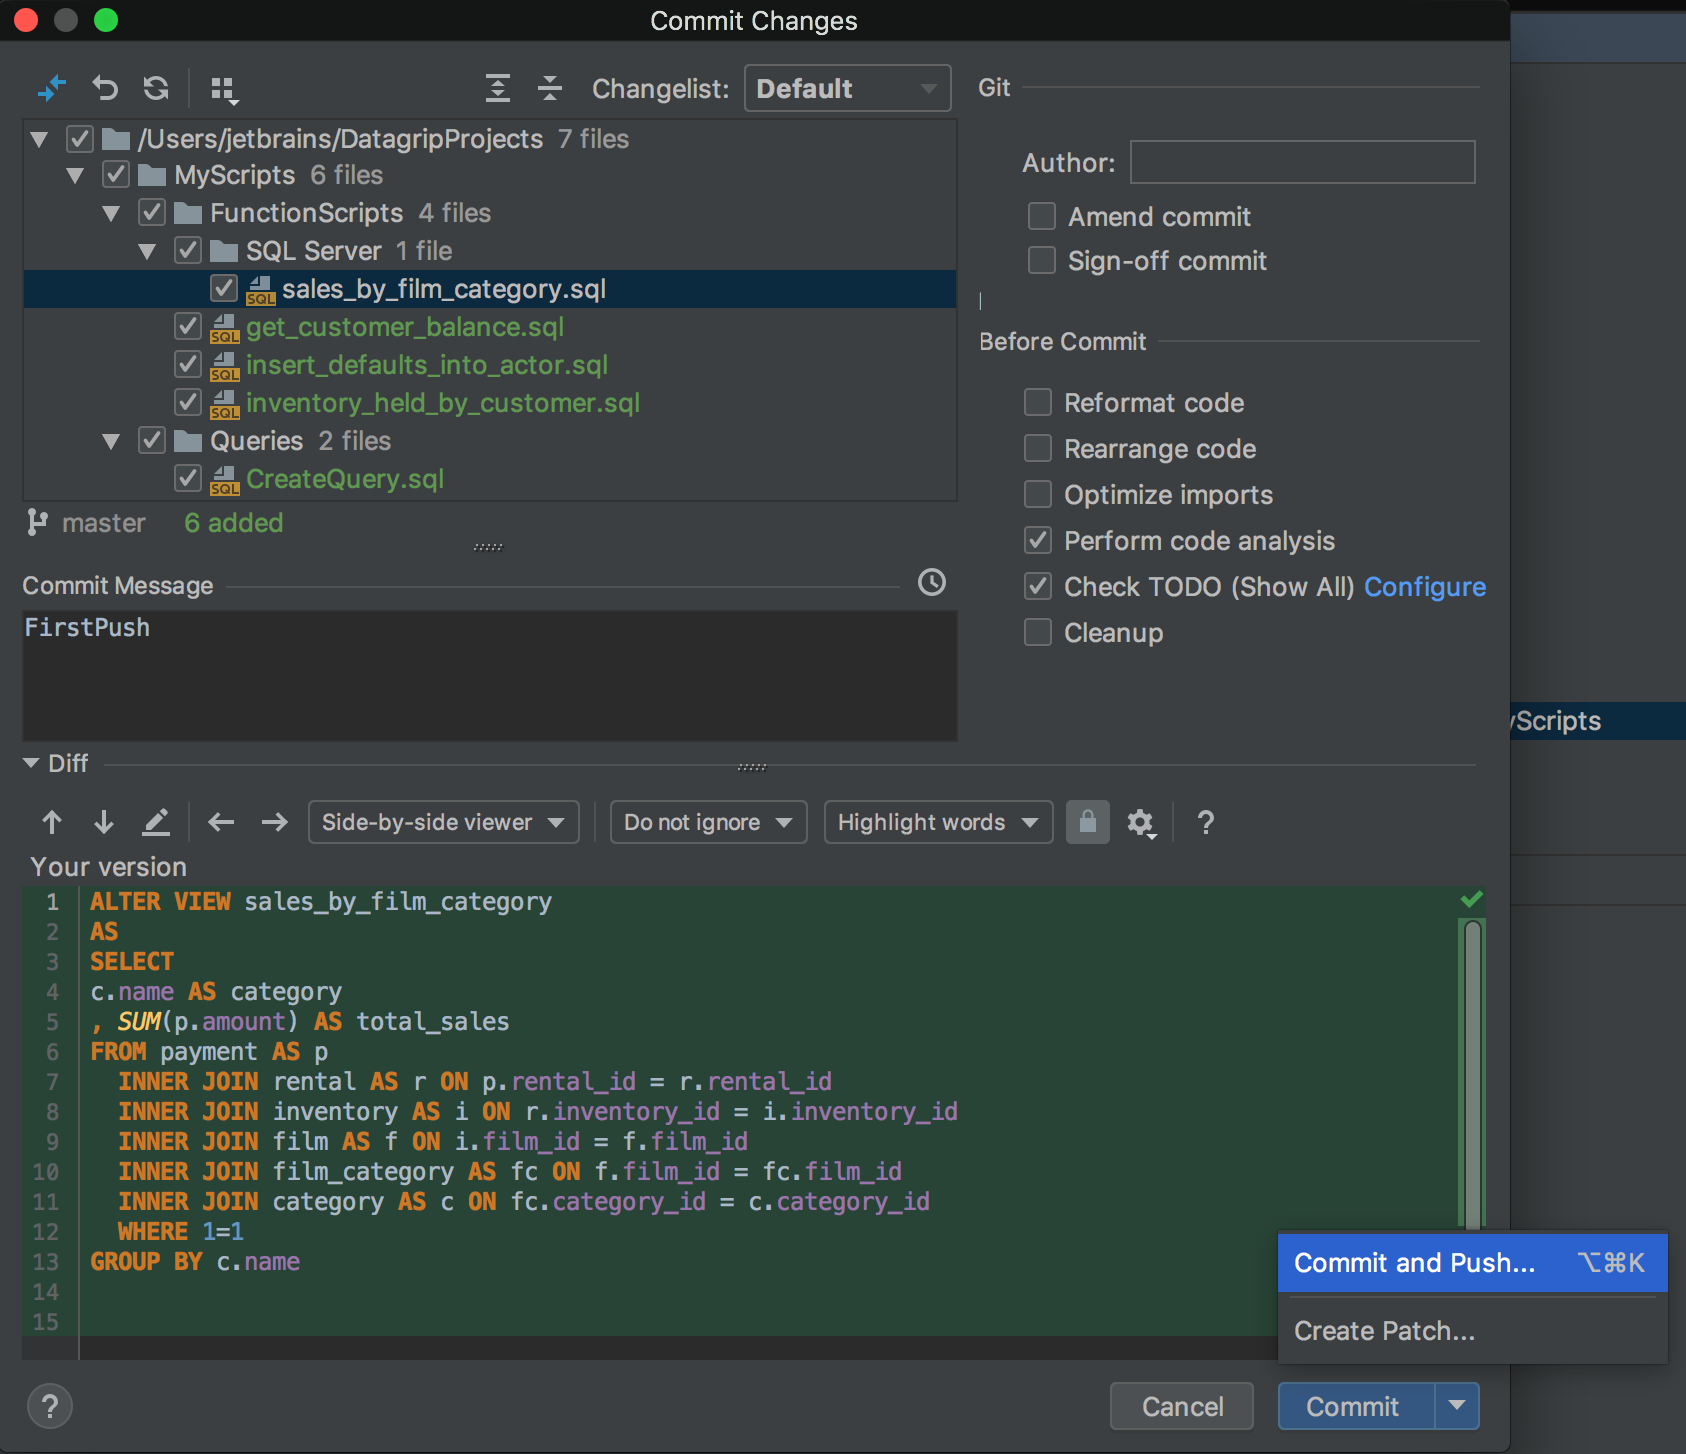
Now you can commit and push your files.
The first push will actually create all the files that you need in the remote repository.
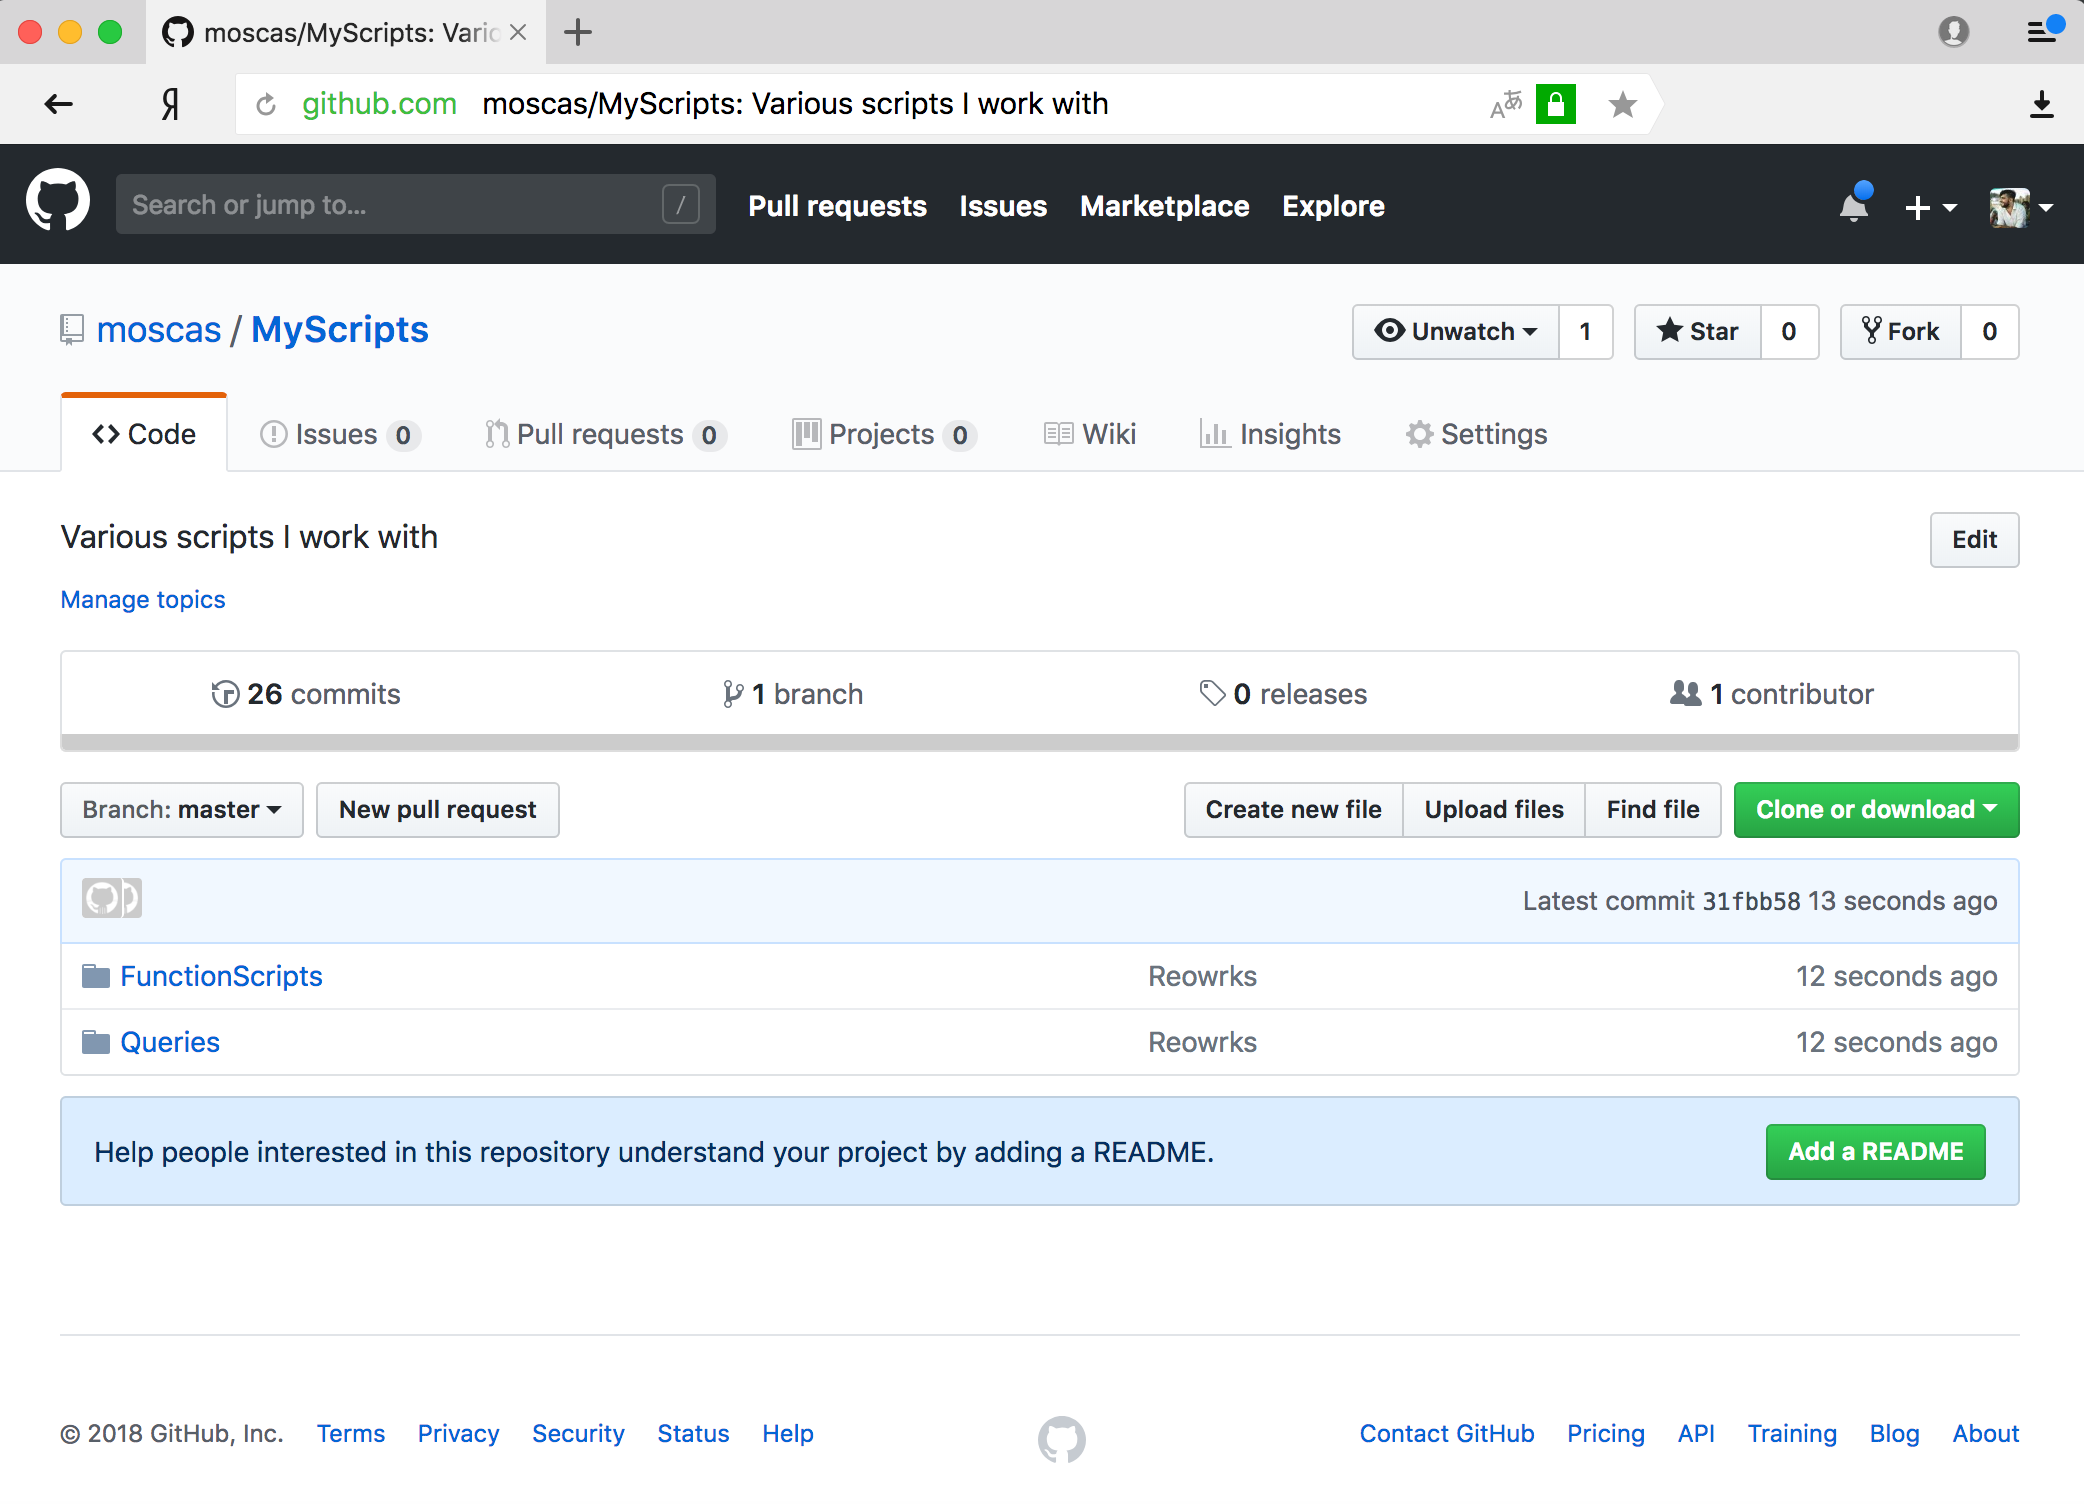
After performing Push, we have all the files we need on GitHub!
That’s it! One last thing to mention:
You can tell DataGrip which SQL dialect is used in the work directories so that the IDE can analyze your code correctly. To define dialects for the directories, go to Settings | SQL Dialects.

If you want to learn more about how to work with Git in DataGrip, and how to commit, push, and work with branches, check out our tutorial named How to work with Git in DataGrip.
Download the latest DataGrip and try it out! We’d love to hear your thoughts and feedback.
To learn more about Git with all the JetBrains IDEs, watch the YouTube series covering Git Questions.
Please report issues and problems to our tracker. Thanks!
The DataGrip team
Subscribe to DataGrip Blog updates