Memory Testing on a CI Server. dotMemory Unit Standalone Launcher

After we announced the dotMemory Unit framework, the most frequently asked question was, “When will the standalone launcher for CI be available?” Finally, the time has come! Along with dotMemory 4.4, we have also released dotMemory Unit 2.0 which contains not only a lot of improvements but also the dotMemoryUnit.exe tool.
The tool (distributed as a zip archive*) works as a mediator: it runs a particular standalone unit test runner under a profiler and provides support for dotMemory Unit calls in the running tests.
*Important! If your domain policy is to treat files from the Internet as unsafe, don’t forget to unblock the zip file by clicking the Unblock button in file properties.
For example, this is how you can run NUnit tests from some MainTests.dll file:
dotMemoryUnit.exe

-targetExecutable="C:\NUnit 2.6.4\bin\nunit-console.exe"

-returnTargetExitCode --"E:\MyProject\bin\Release\MainTests.dll"
Here:
-targetExecutableis the path to the unit test runner that will run tests.-returnTargetExitCodemakes the launcher return the unit test runner’s exit code. This is important for CI as the build step must fail if any memory tests fail (test runners return a nonzero exit code in this case).- The parameters passed after the double dash (
--) are unit test runner arguments (in our case it’s a path to the dll with tests).
Now, it’s easier than ever to make memory tests a part of your continuous integration builds. Simply add the command shown above as a build step on your CI server, and it will run your tests with the dotMemory Unit support.
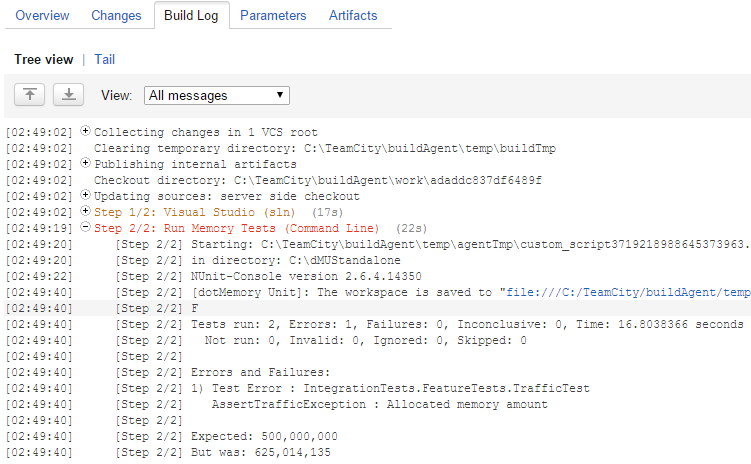
For example, this is how the build log of a failed step looks like in TeamCity:
However, if you’re a TeamCity user, we can offer a much more convenient solution.
Integration with TeamCity
Along with dotMemory Unit 2.0, we release the plugin for TeamCity that adds support for dotMemory Unit to all .NET test runner types. Let’s take a more detailed look at how this works.
TIP! If you want to take a look at a working example, here is a sample build project on our public TeamCity server. Project build configuration is available at this link.
- On your TeamCity server, copy dotMemoryUnit.zip (get the latest version from Artifacts on JetBrains build server) to the plugins directory located in your TeamCity data directory.
- Restart the TeamCity Server service.
Now, all .NET test runners in TeamCity provide support for dotMemory Unit. - As the dotMemory Unit standalone launcher is required for the plugin to work, you should provide it to your build agent. There are two ways to do this:
- Download and unzip the launcher to any directory on a TeamCity build agent. Don’t forget to Unblock the zip!
- [Recommended] Use the launcher from the dotMemory Unit NuGet package referenced by your project.
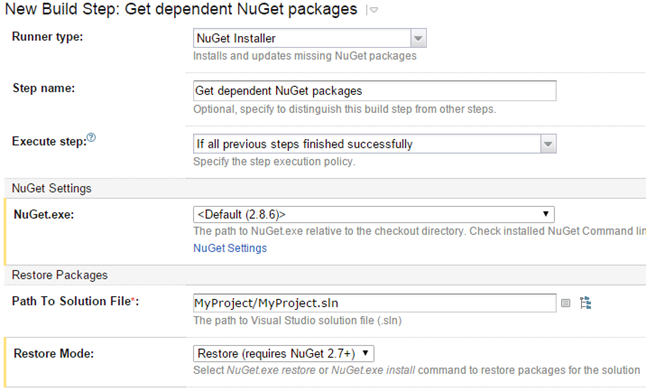
Note that if you omit binaries from the source control repository, you can use TeamCity’s NuGet Installer runner type. It will perform NuGet Package Restore before the build. All you need is to add the NuGet Installer “build step” and specify the path to your solution.
- Now, update the step used to run tests in your build configuration. Open the corresponding build step in your build configuration:
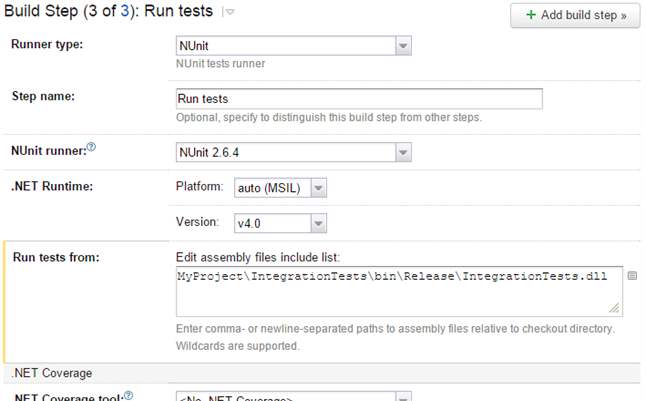
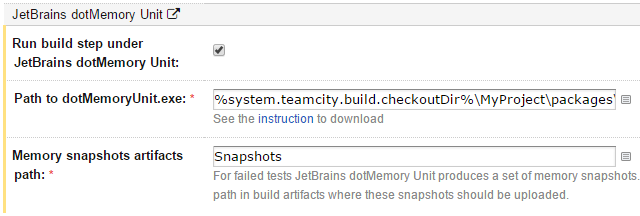
- Note that after we installed the dotMemoryUnit plugin, this build step now additionally contains the JetBrains dotMemory Unit section. Here you should:
- Turn on Run build step under JetBrains dotMemory Unit.
- Specify the path to the dotMemory Unit standalone launcher directory in Path to dotMemory Unit. Note that as we decided to use the launcher from the NuGet referenced by our project (see step 3), we specify the path relative to the project checkout directory.
- In Memory snapshots artifacts path, specify a path to the directory (relative to the build artifacts directory) where dotMemory Unit will store snapshots in case memory test(s) fail.
- Save the configuration.
Done! Now, this build step supports tests that use dotMemory Unit.
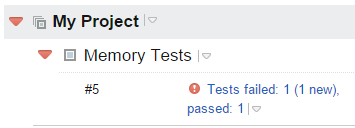
From the point of the end-user, nothing has changed. If you run the configuration and any of the memory tests fails, the results will be shown in the overview:
The Tests tab will show you the exact tests that have failed. For example, here the reason had to do with the amount of memory traffic: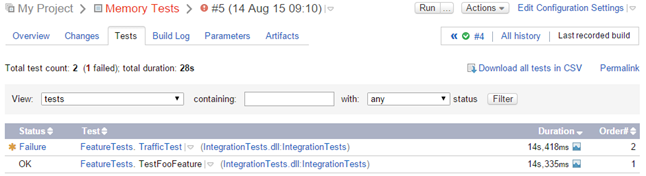
Click on a failed test to see exactly was has gone wrong:

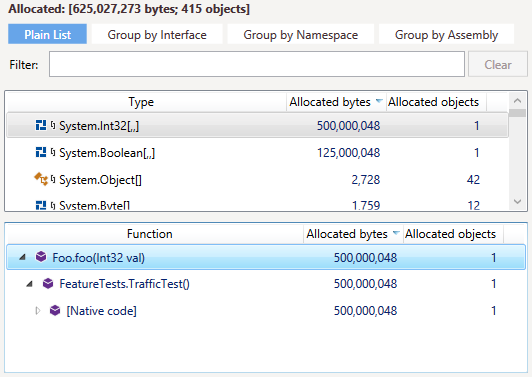
Now, you can investigate the issue more thoroughly by analyzing a memory snapshot that is saved in build artifacts:
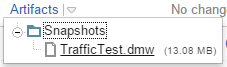
Note that to open memory snapshots, you will need a standalone dotMemory (or ReSharper Ultimate) installation.
Additional Benefits
If you’ve used dotMemory Unit before, you probably know that it required ReSharper unit test runner to work. Since v2.0, you can also run tests via dotMemory Unit’s standalone launcher and the list of supported unit testing frameworks has expanded to include:
- MSTest*
- NUnit*
- XUnit
- MBUnit
- csUnit
*Can also be run from Visual Studio with ReSharper
Nevertheless, if your unit testing framework is missing from this list (e.g., MSpec), you can still use it with dotMemory Unit.
All you need to do is tell dotMemory Unit where your test method starts and where it ends. This is done with two methods: DotMemoryUnitController.TestStart() and DotMemoryUnitController.TestEnd().
We recommend that you create an IDisposable class that uses these methods, and then wrap the code in your tests with the using statement that creates an instance of this class:
class DotMemoryUnit: IDisposable
{
   public static IDisposable Support{get{return new DotMemoryUnit();}}
   private DotMemoryUnit()
   {
       DotMemoryUnitController.TestStart();
    }

   public void Dispose()
   {
      DotMemoryUnitController.TestEnd();
   }
}

public class Tests
{
   [Test]
   public void TestMethod1()
   {
      using (DotMemoryUnit.Support)
      {
         ... // your code goes here
      }
   }
}
That’s it! Now you can run tests wrapped in this way using dotMemory Unit standalone launcher or Visual Studio with ReSharper (in case it has the extension for the unit testing framework you use). Simply copy & paste the code above and reuse it in your project. You can also find this code on github.
With this new feature, dotMemory Unit becomes very flexible: you can use it not only to add support for a unit testing framework, but also to extend and adapt dotMemory Unit to your specific needs. For example, see how we added support for MSpec.
Thanks for reading! As always we recommend that you try dotMemory Unit on your own. If you’re already using it, then probably automating your tests on a CI server is the next logical step.
Subscribe to a monthly digest curated from the .NET Tools blog:


