Working with to-do items in ReSharper

Have you ever had the need to place a TODO comment in code? Most of us will have. TODO comments are often a temporary reminder to ourselves, a pointer that tells us to continue work on something after finishing something else.
A TODO can be a bug, a code smell, an optimization or even a feature. That last category should probably be logged in an issue tracker like YouTrack, JIRA, GitHub issues or Visual Studio Team Services, but the others can usually found in about any code base:
// TODO: This needs cleaning up

// REMARK: Do not change this code - it comes from my brilliant mind and is Turing-complete

// REVIEW: Should we log this Exception?
ReSharper (and Rider, too) makes it easy to navigate and manage this type of comments, recognizing various patterns of TODO comments. With ReSharper 2017.3, we’re adding a couple of additional features to navigate from code to our To-do Explorer, or to an external URL such as an issue tracker.
This post is part of a series around working with to-do items in ReSharper:
- Working with to-do items in ReSharper
- Defining to-do patterns in ReSharper
- Linking to external resources in ReSharper 2017.3 to-do items
First things first, though! How can we navigate these TODO comments in a code base? How do we group and filter them?
Working with to-do items
The To-do Explorer tool window (Ctrl+Alt+D or ReSharper | Tools | To-do Explorer) provides an overview of all TODO comments in our codebase. By default, these are all grouped by project structure, similar to what our solution looks like in Solution Explorer.
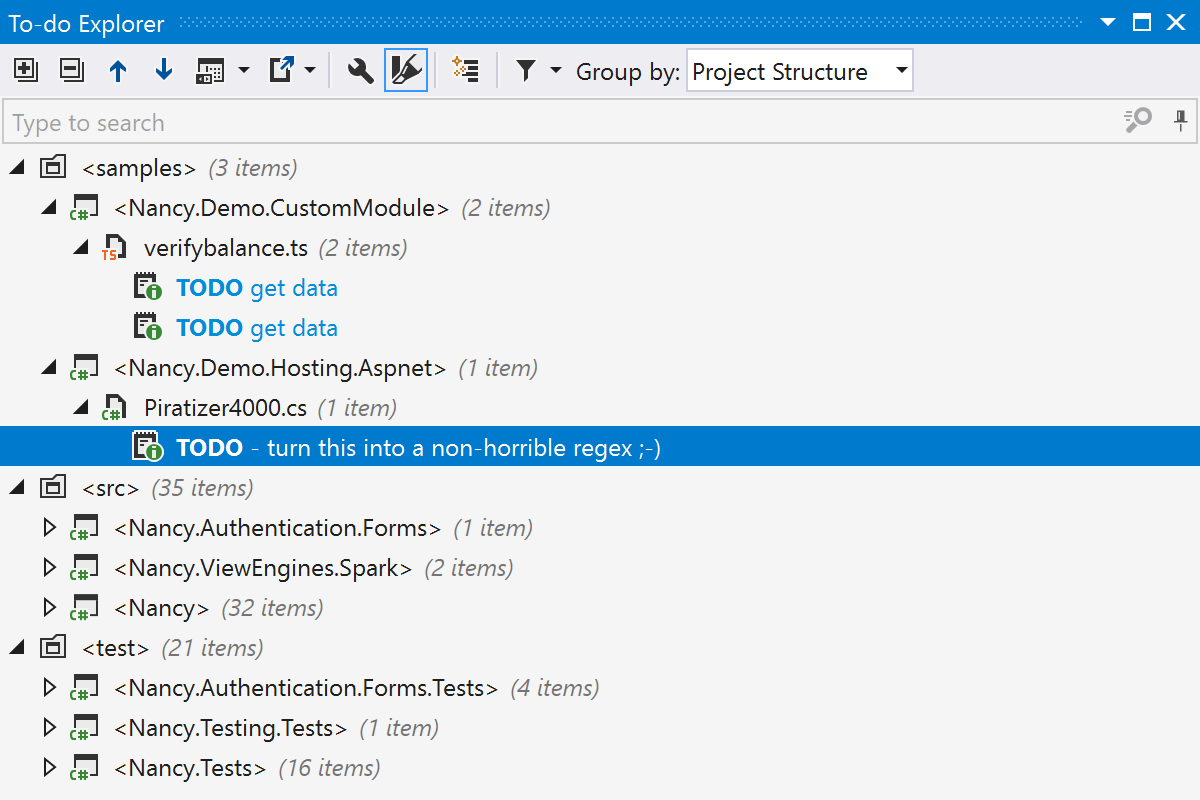
ReSharper not only searches for to-do items in C# code, but also in other languages like VB.NET, JavaScript, TypeScript, CSS, ASP.NET Razor syntax etc. As long as we write a comment that starts with the word “todo”, ReSharper will display it in the To-Do Explorer.
The toolbar provides a couple of options. For example, we can export the list of items to a text file, HTML or XML, we can show/hide to-do items in generated code, or select to Show Preview (Ctrl+P) of the code where our to-do item is located:
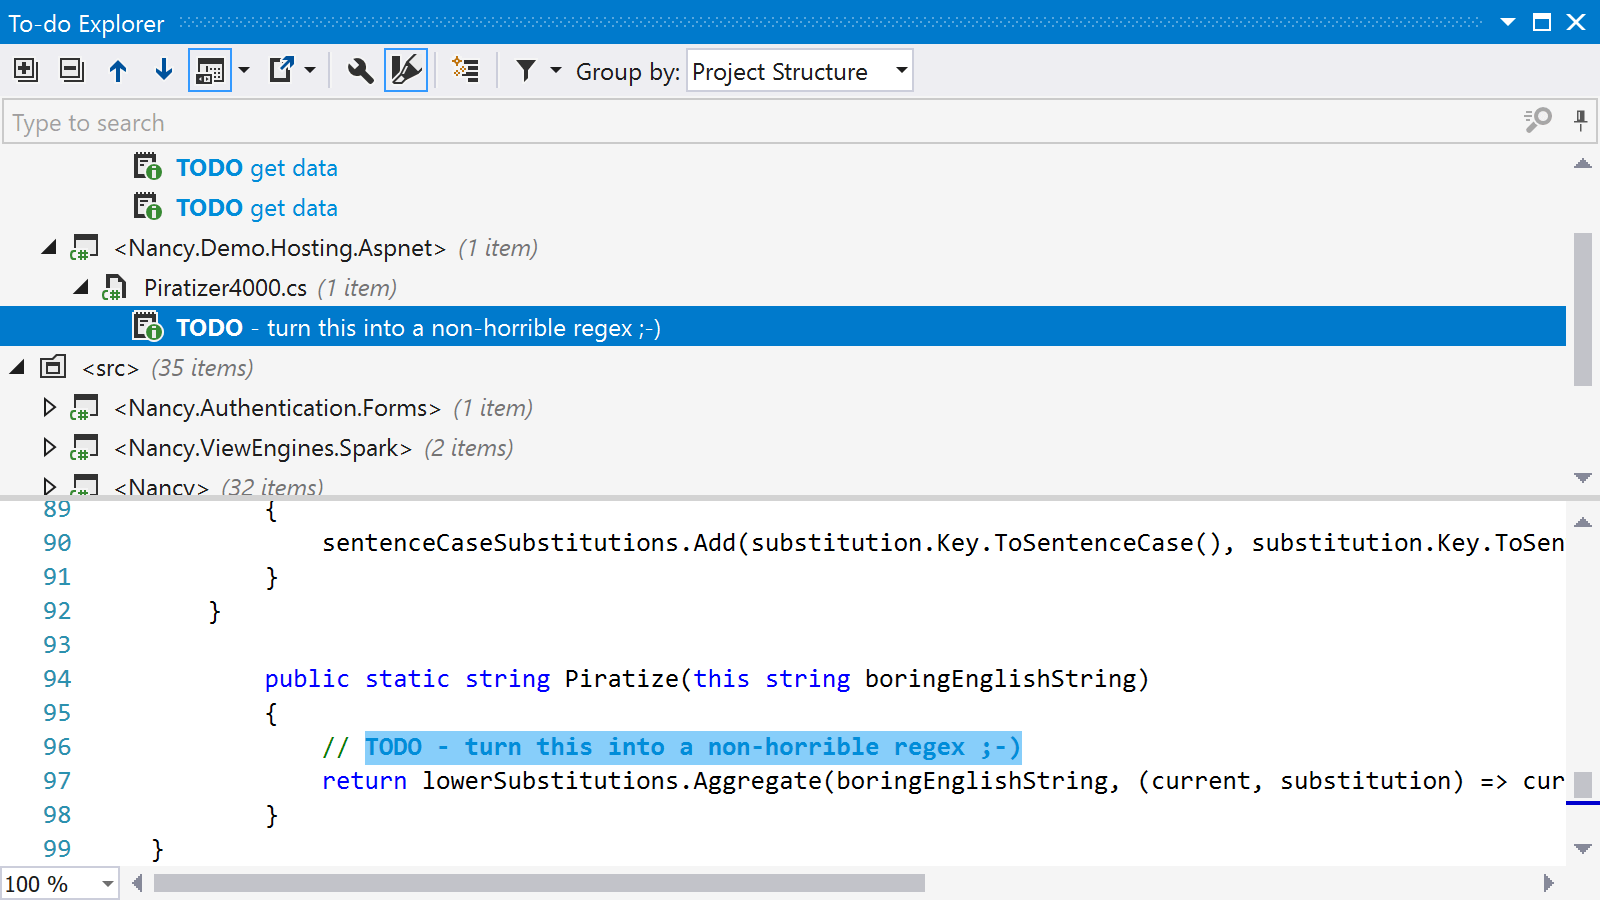
We can browse the list of to-do items using our mouse or the keyboard up/down arrows, or use the search bar to find a specific item we’re after. To jump to the source code where the comment is located, we can double-click the item in the list or simply press Enter when selected.
Grouping and filtering to-do items
By default, the To-Do Explorer lists our to-do items based on project structure. There are many other options to group our to-do items. We can disable grouping, group by tags, types, namespaces, directories, projects, …
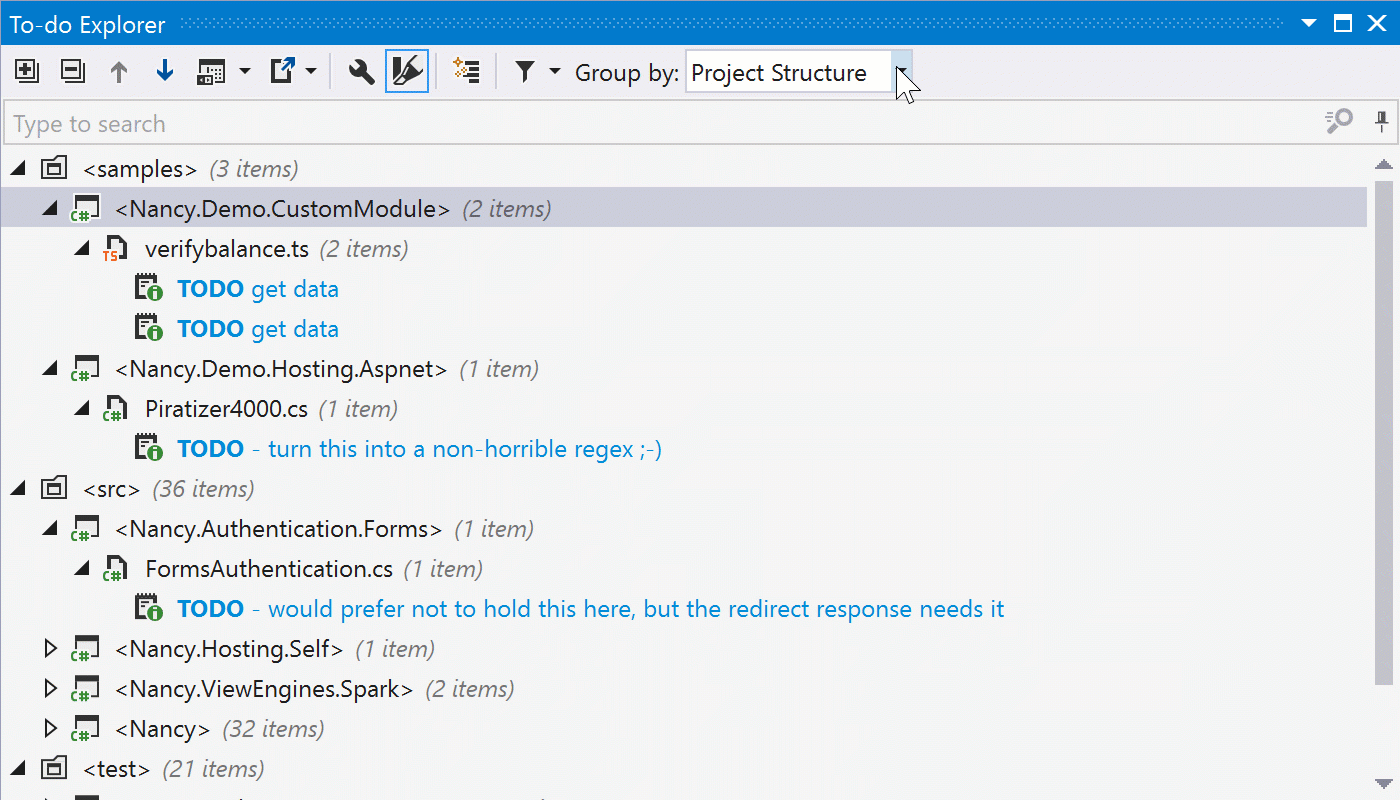
We can also filter out list of to-do items, based on the type of to-do item we want to see. We can show all to-do items, only those marked todo, bug, or all places where we throw NotImplementedException. One or multiple to-do patterns can be selected.
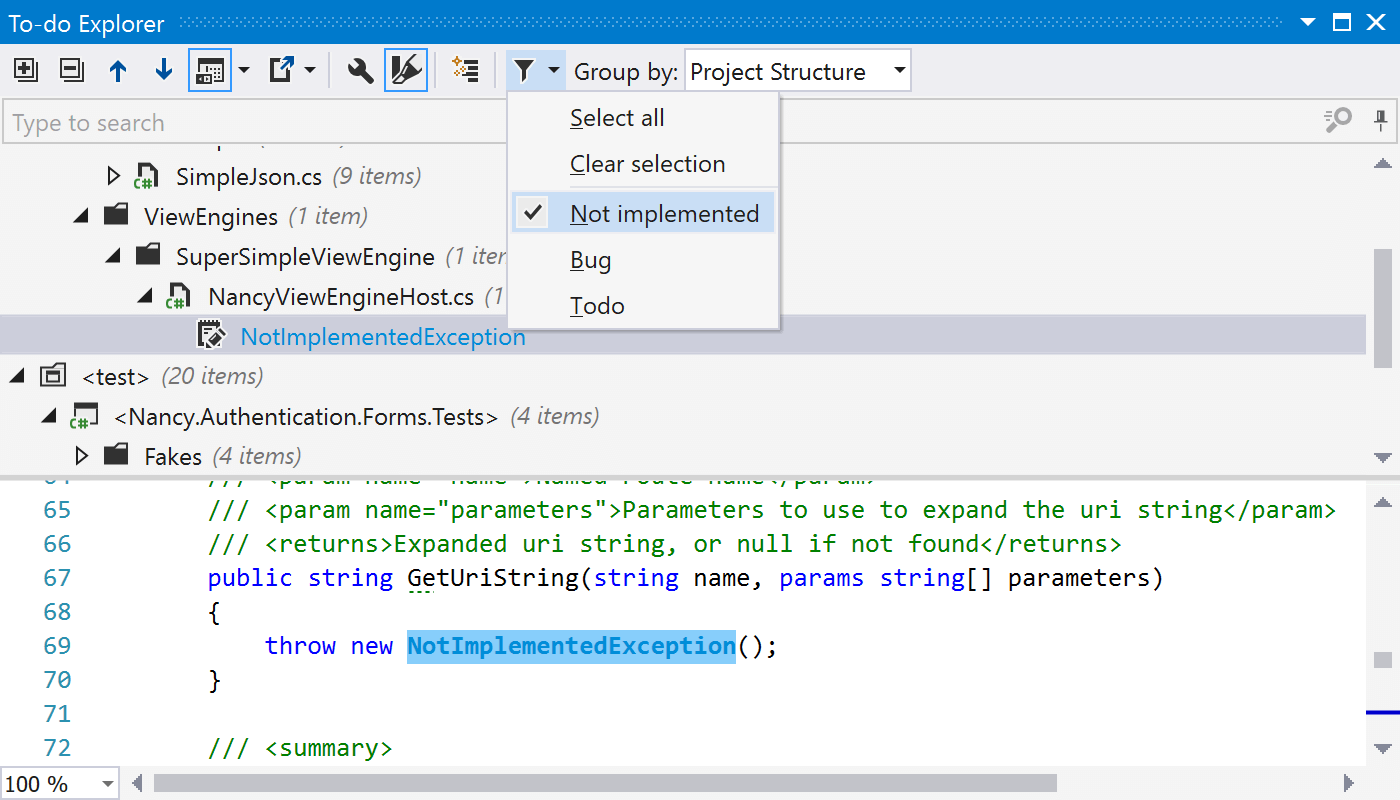
These types originate from the to-do item patterns. The todo, bug and NotImplementedException types are pre-defined, but we can add our own – a topic for our next post.
ReSharper makes working with to-do items more efficient than when using Visual Studio’s built-in to-do functionality. We’ve already mentioned it is possible to export to-do items to a text file (or HTML or XML). This is very helpful as it allows creating items in an issue tracker based on the export from To-do Explorer. And keep in mind: we can also use Rider to work with to-do items!
There are more benefits: to-do patterns, linking to external resources (new in ReSharper 2017.3) and better filtering and grouping of to-do items. We will keep those for a next post!
Download ReSharper 2017.3 and give it a try! We’d love to hear your feedback!
Subscribe to a monthly digest curated from the .NET Tools blog:


