Working with Data in Rider

In previous blog posts in this series, we looked at connecting to a Microsoft SQL Server and getting familiar with the features in Rider 2017.3 to work with SQL databases. In this final post in our series, we will look at how to query and work with the data in the tables in our database.
This post is part of a series around working with databases and data in Rider:
- Configuring SQL Server 2017 for Rider
- Getting started with database support in Rider
- Working with Tables and Indexes in Rider
- Working with Data in Rider
(Note: we’ll use the Visual Studio keymap on Windows throughout this post – check the web help for Mac OS X and other keyboard schemes)
Querying Data
To work with the tables in your database, you will need to open the View | Tools Windows | Database menu selection to view the details of your database or use Ctrl/Cmd+T or a double Shift and then type “database” to get the window.
Expand the tables view in the Database window and use the context menu to create a new table:

Note – I have moved the Database window to the left of the IDE for demonstration purposes. Learn more about docking tool windows within Rider in our web help.
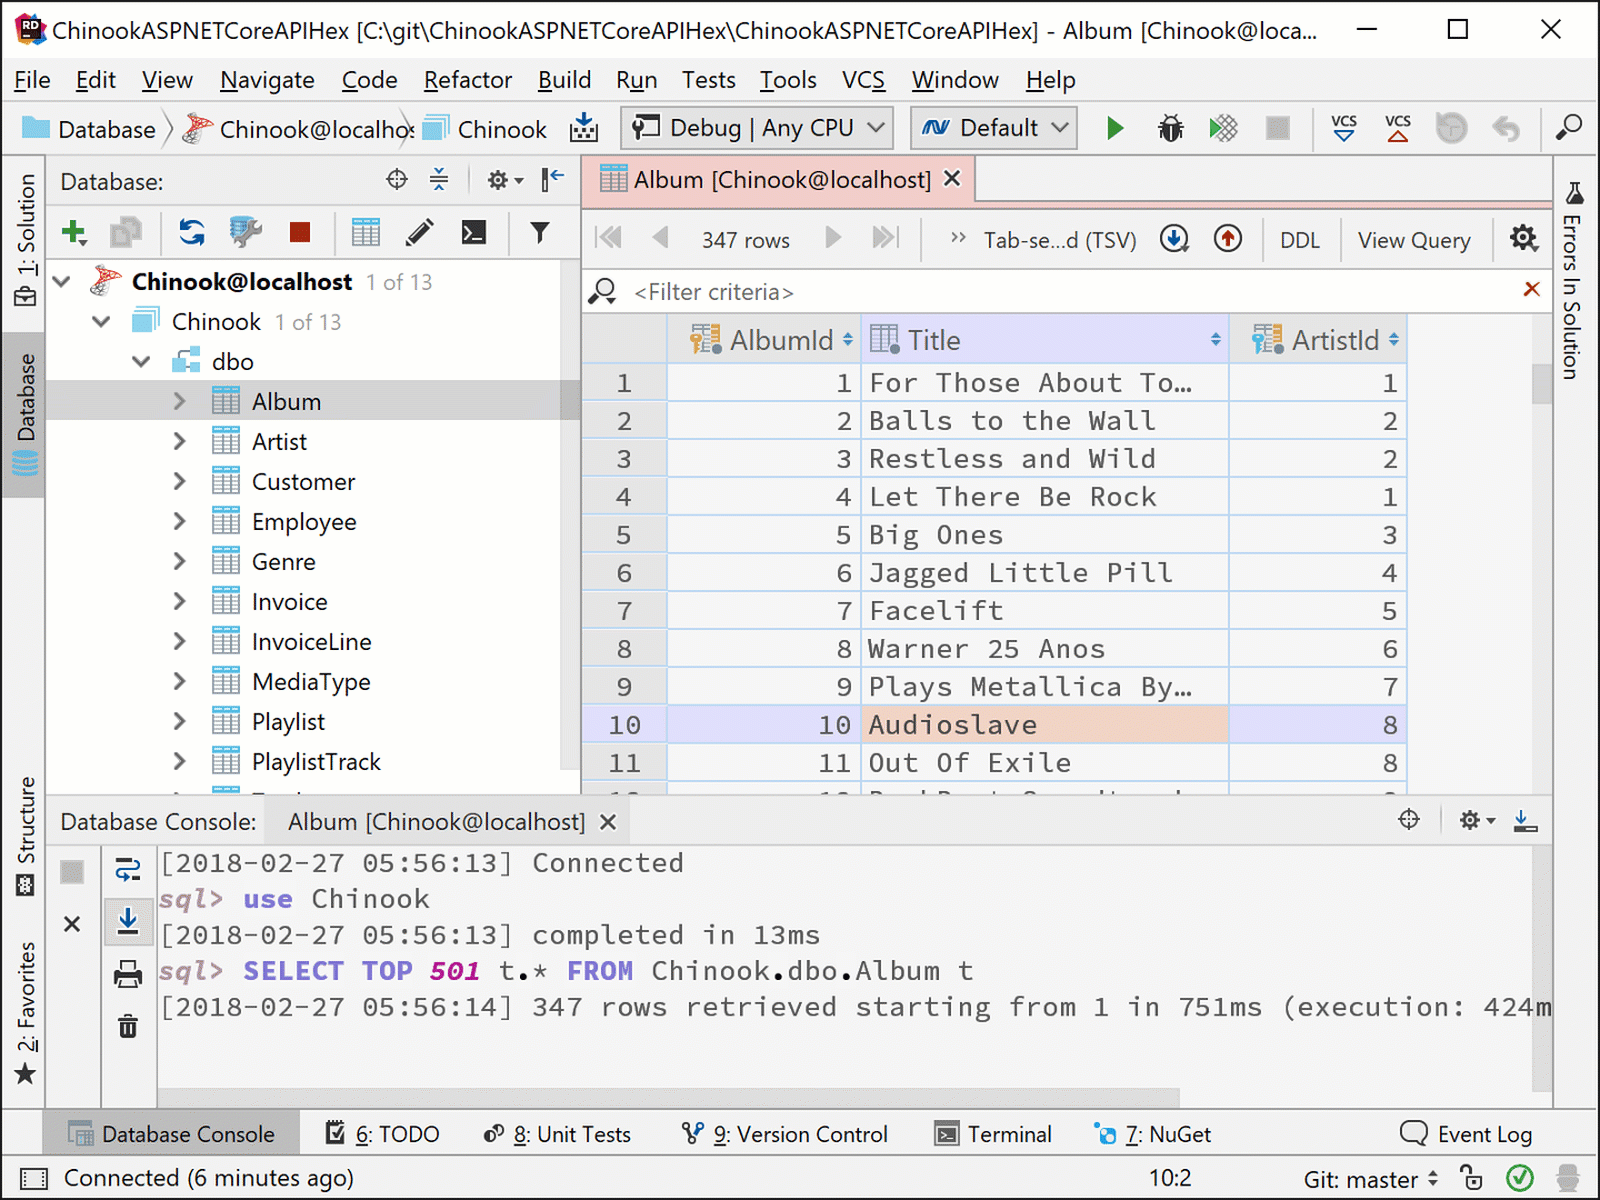
Data Editor
To view the data in a table, open the Data Editor or double-click the table.
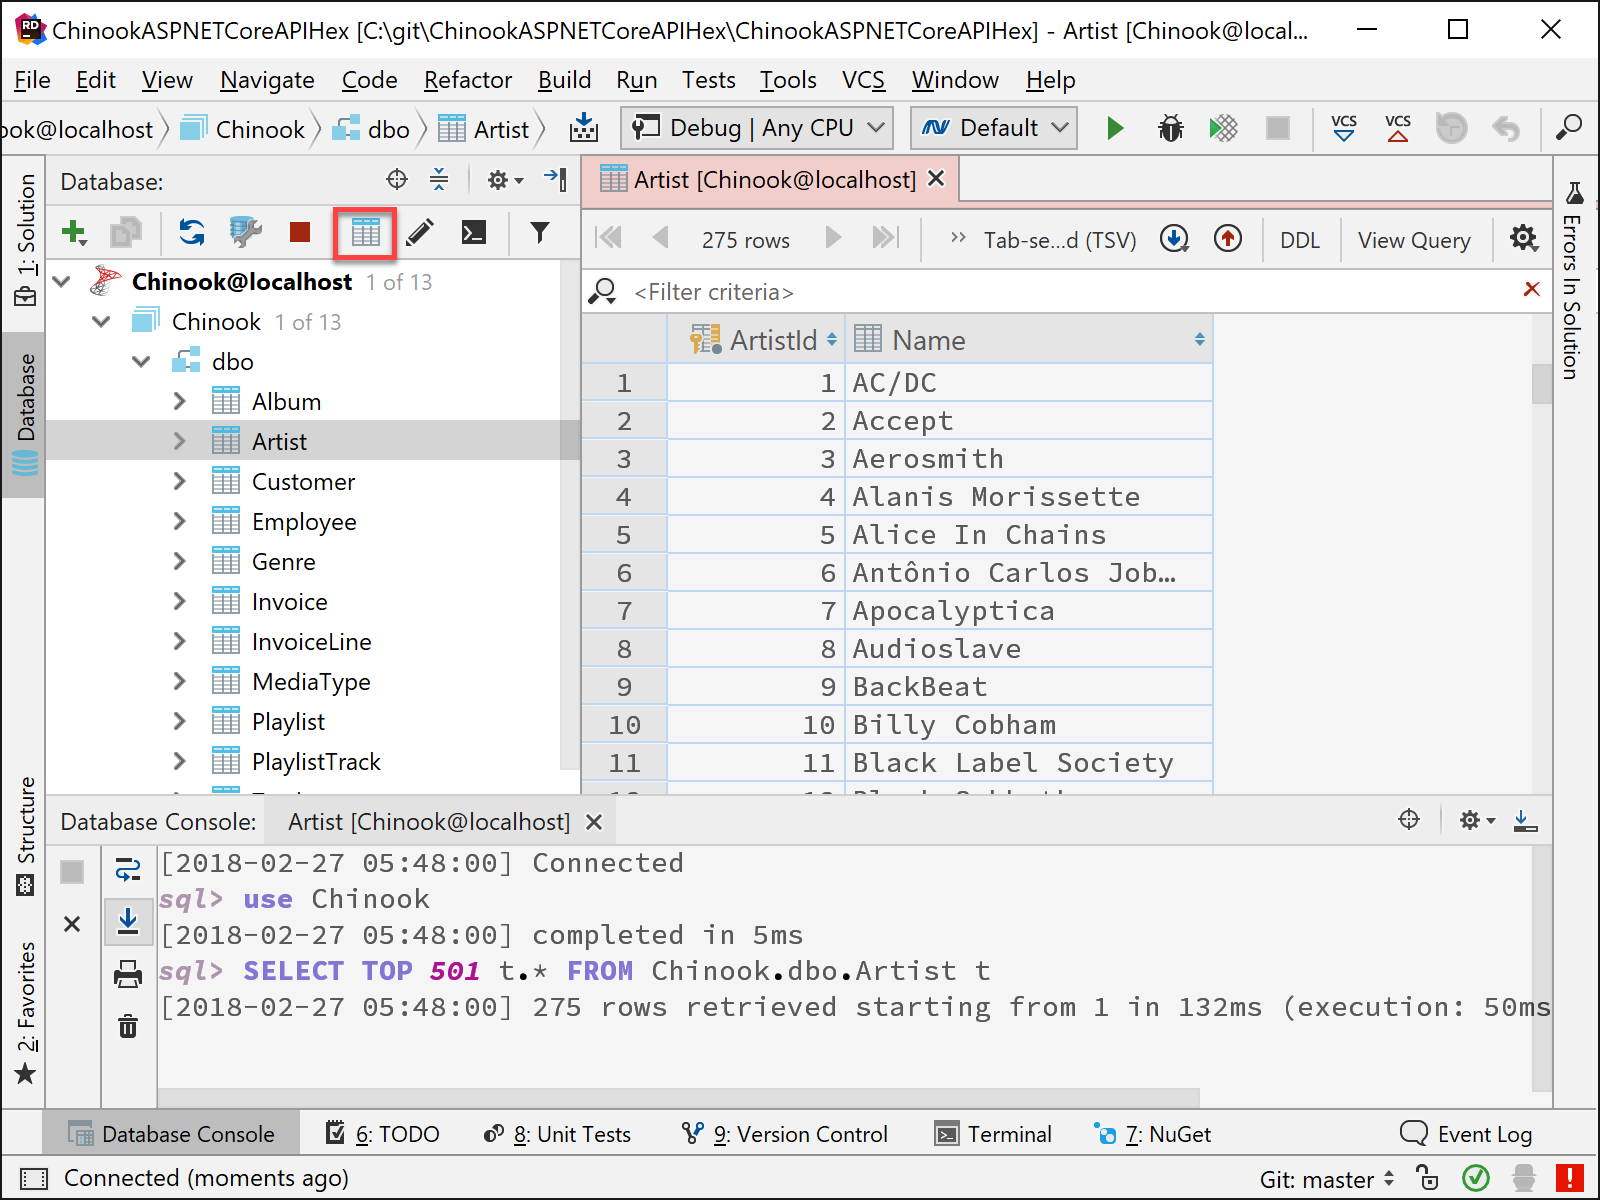
Within the Data Editor, you can perform many function beyond just viewing the data.
Modifying data
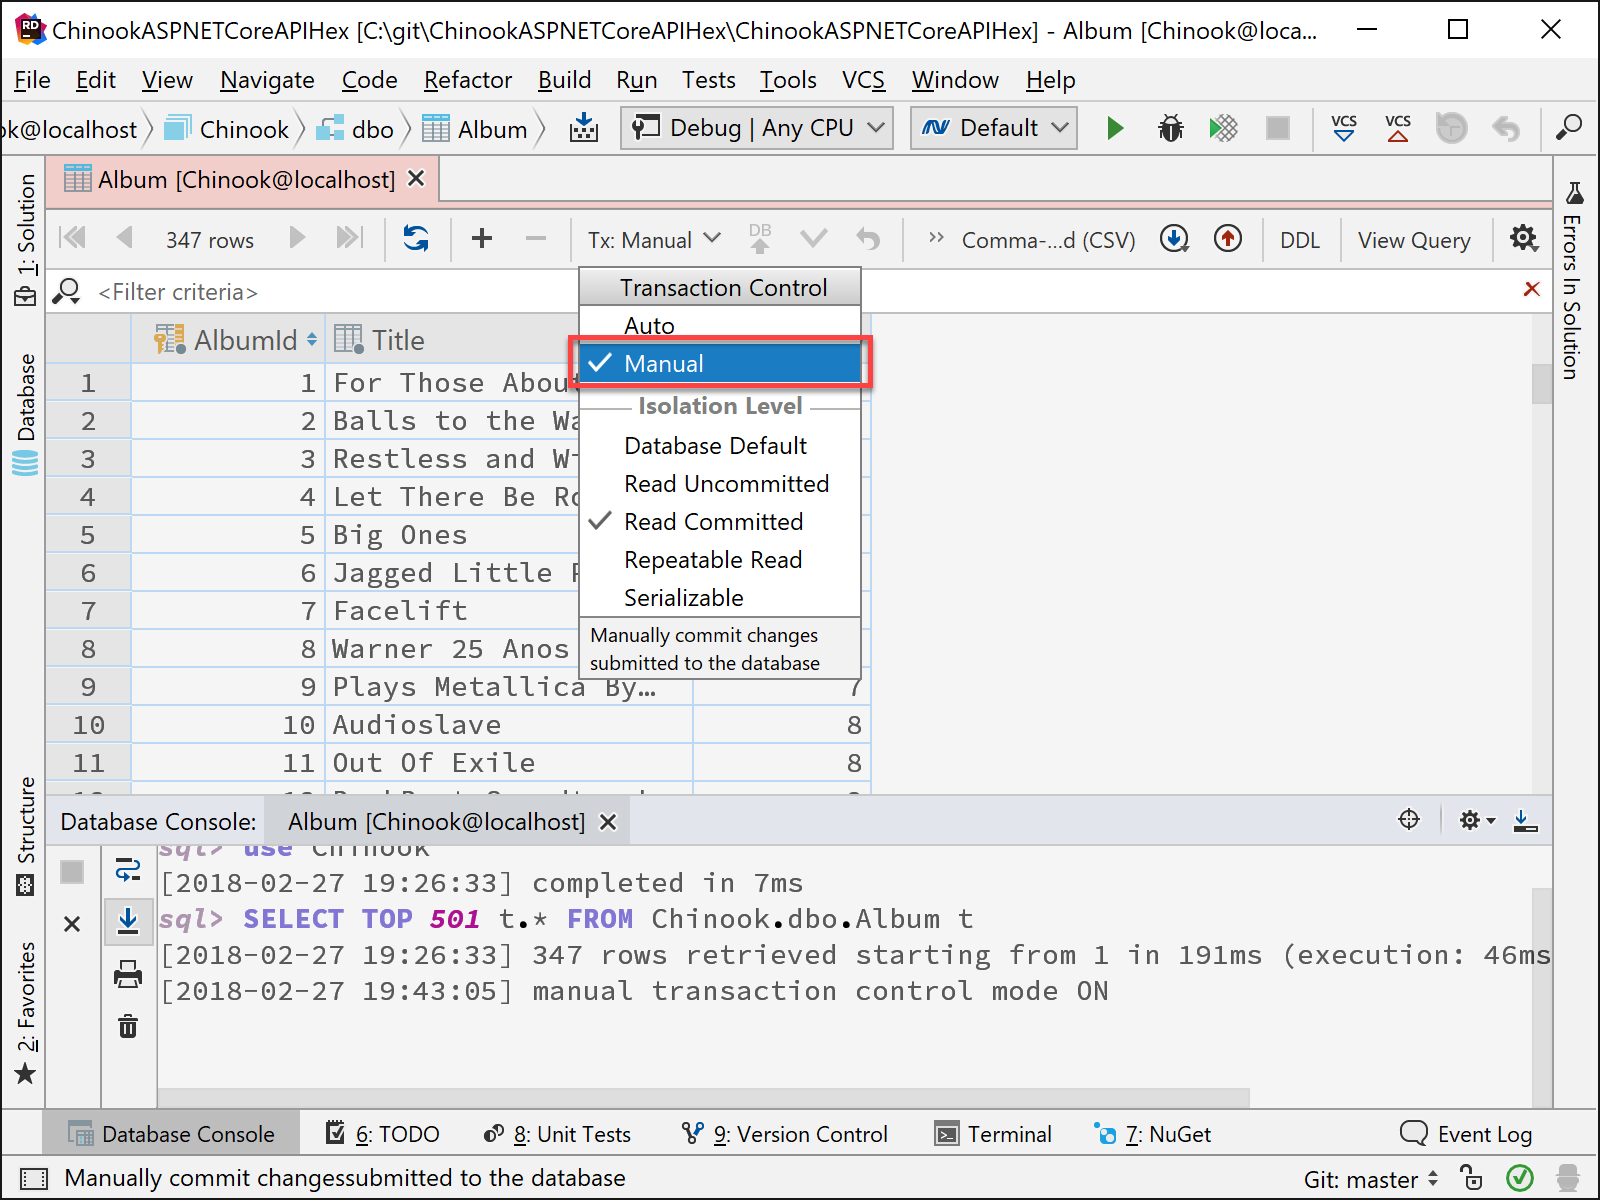
You can modify data in your table without leaving the window. All your changes in the data editor are stored locally and can be submitted all at once. Local changes are colored, so you can see which changes you are going to save, be it updating, inserting, or deleting rows. Submit with Ctrl/Cmd+Enter. Ctrl/Cmd+Alt+Z is for canceling but works in a tricky way — only the selected changes are canceled. If you wish to cancel all of them, select all the cells with Ctrl+A before reverting. This type of modification is Auto transaction commit level. All changes will be implicitly committed and cannot be rolled back in auto transaction commit level.
if you wish to have more control over your data, you can change to Manual transaction commit level. With Manual transaction commits, the changes you have submitted can be explicitly committed or rolled back.
Searching for data
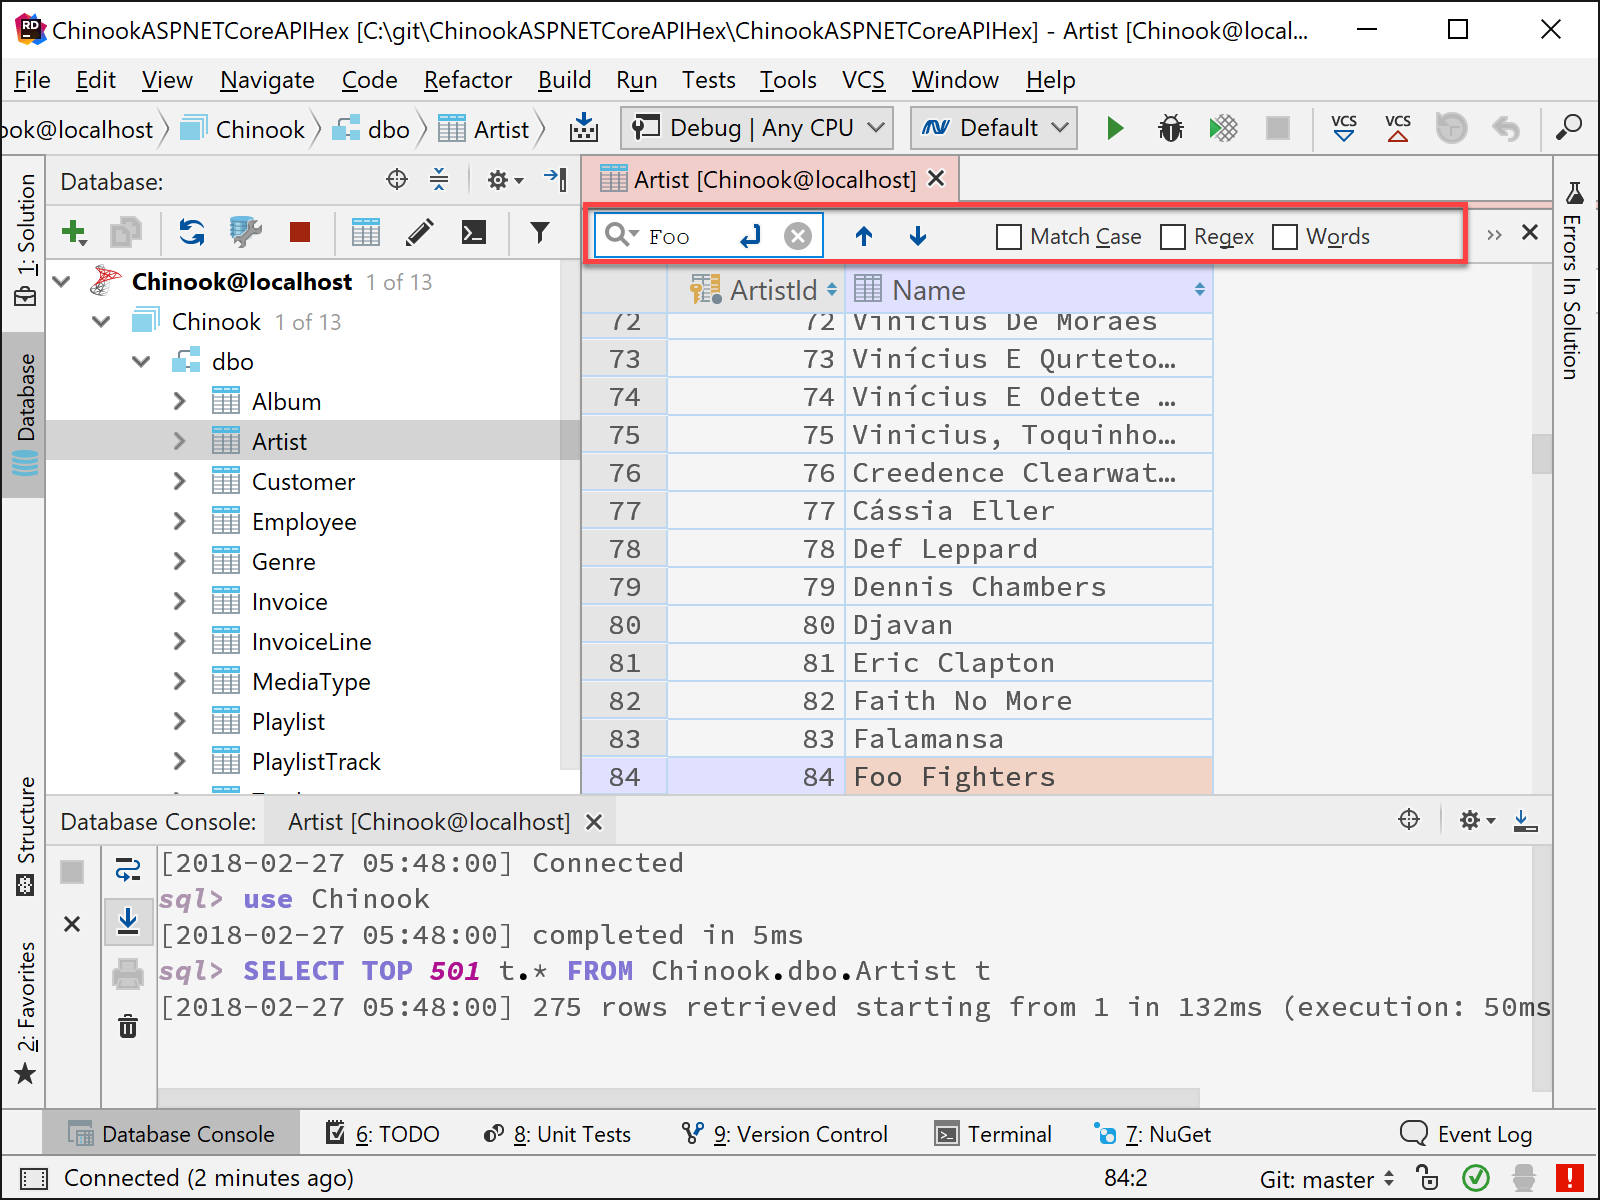
You can find data inside a table quickly without writing a statement thanks to text search, available in the Table Editor via Ctrl+F. It’s especially helpful if you don’t know which exact column contains the data you’re looking for. You can easily hide irrelevant rows, and regular expressions are available as well. One thing to note about searching is that search only works on the client side in the current page in the IDE. If you want to do a full search of the entire table, you need to perform a filter.
Filtering data
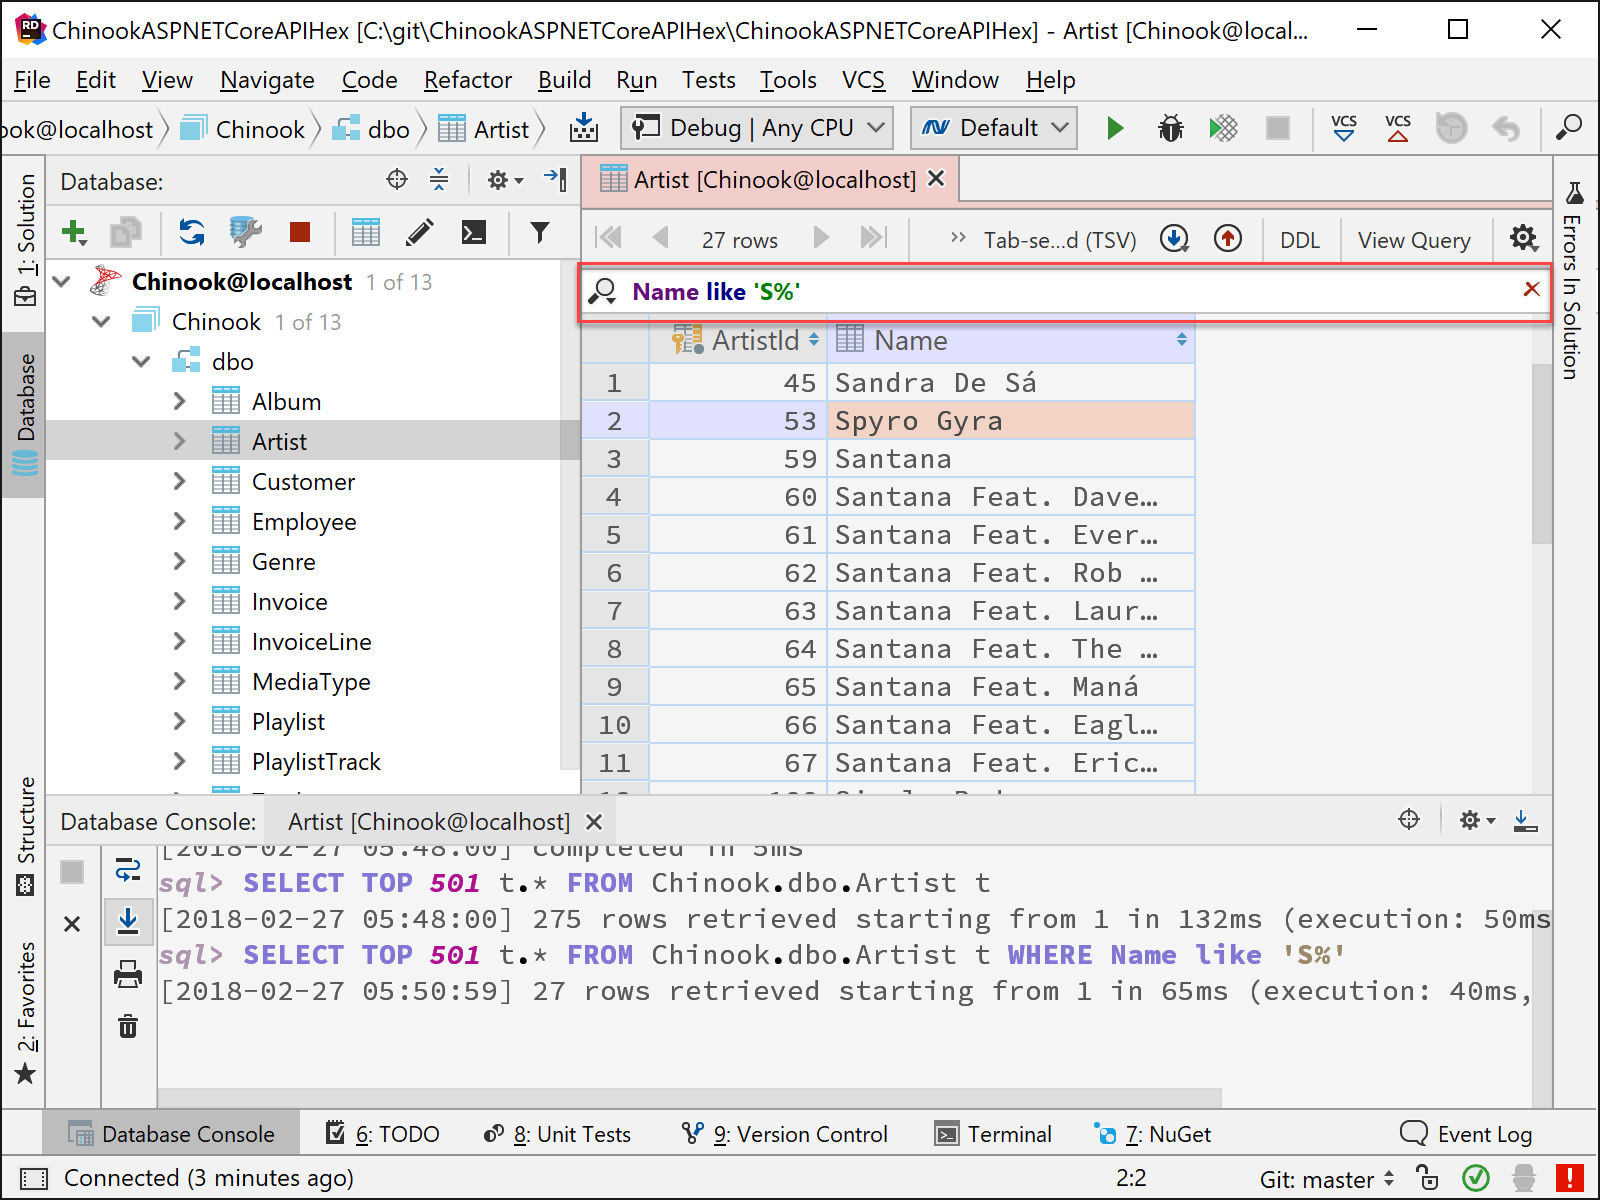
Use the filter text field to only see the data you need, without writing any WHERE clauses. Just put the condition in this field in the appropriate SQL dialect.
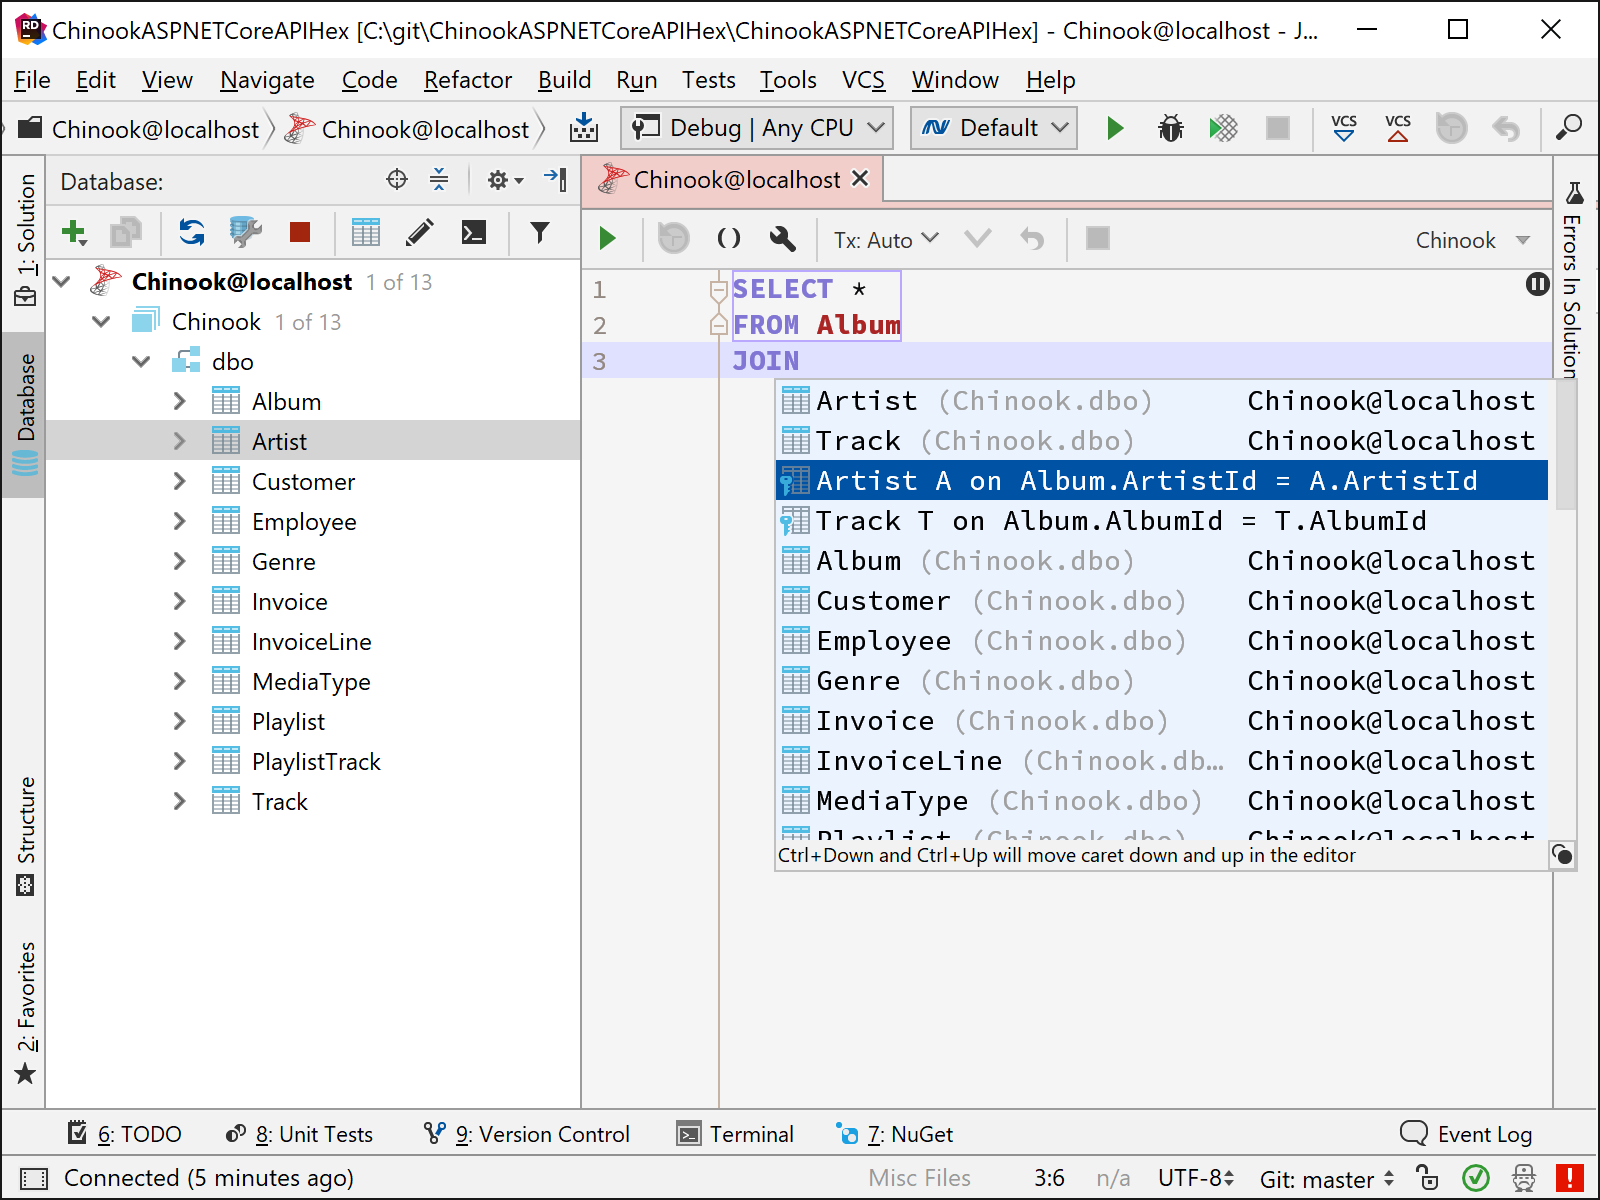
Smart Completion on SQL Joins
DataGrip provides code completion based on the context and schema constraints, helping you write SQL code faster. You can complete the JOIN statements if the tables in your query are connected with a foreign key. The details will appear during the creation of the JOIN in your SQL statement or you can invoke it using the Ctrl+Enter shortcut.
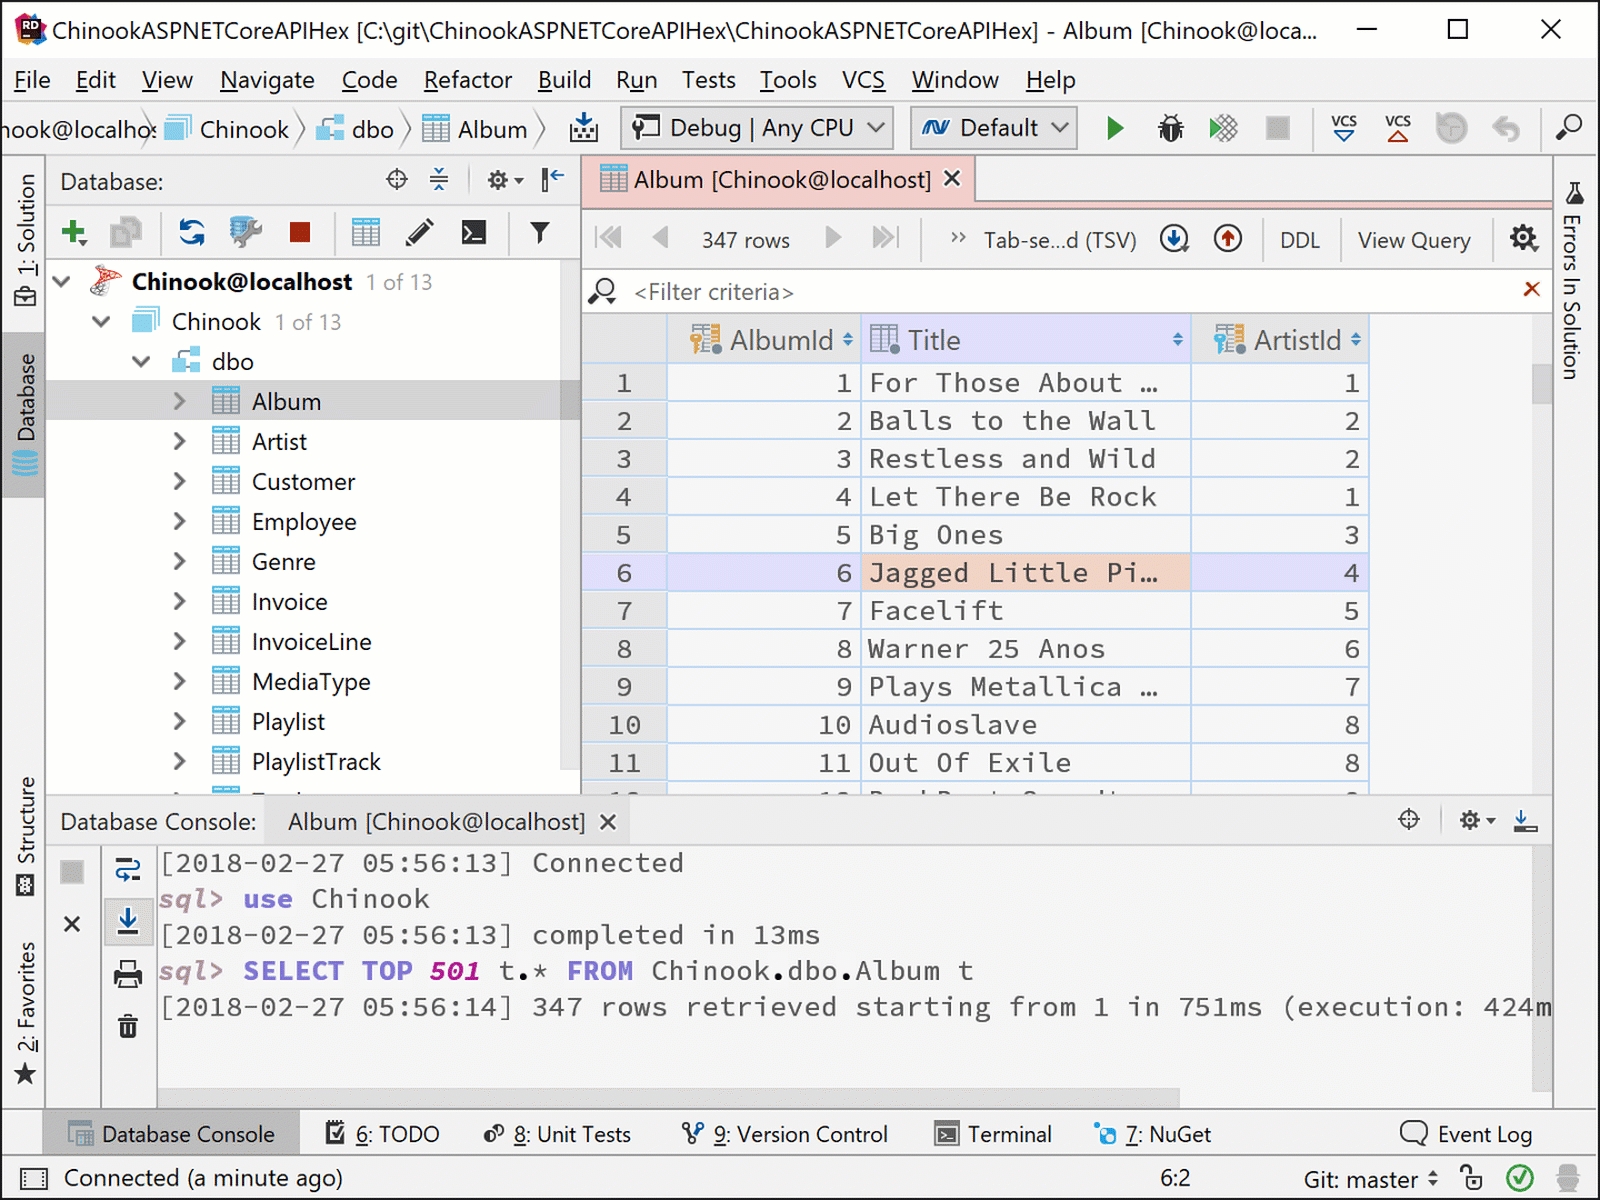
Navigation by Foreign Keys
You can also navigate through your database using the foreign keys in your tables. If a column in the table you are viewing contains a foreign key, you can navigate to the related data for a particular value or view it in the pop-up. In many situations, this saves you from having to write a query. Use the F4 key to show the dialog to choose the foreign key target.
On the opposite side, you can find usages of foreign keys in other tables. You will be navigated to the data referencing your row and column.
Importing and Exporting Data
You can import and export data using different data sources and formats. Let’s look at a few scenarios how we can use the data in our databases.
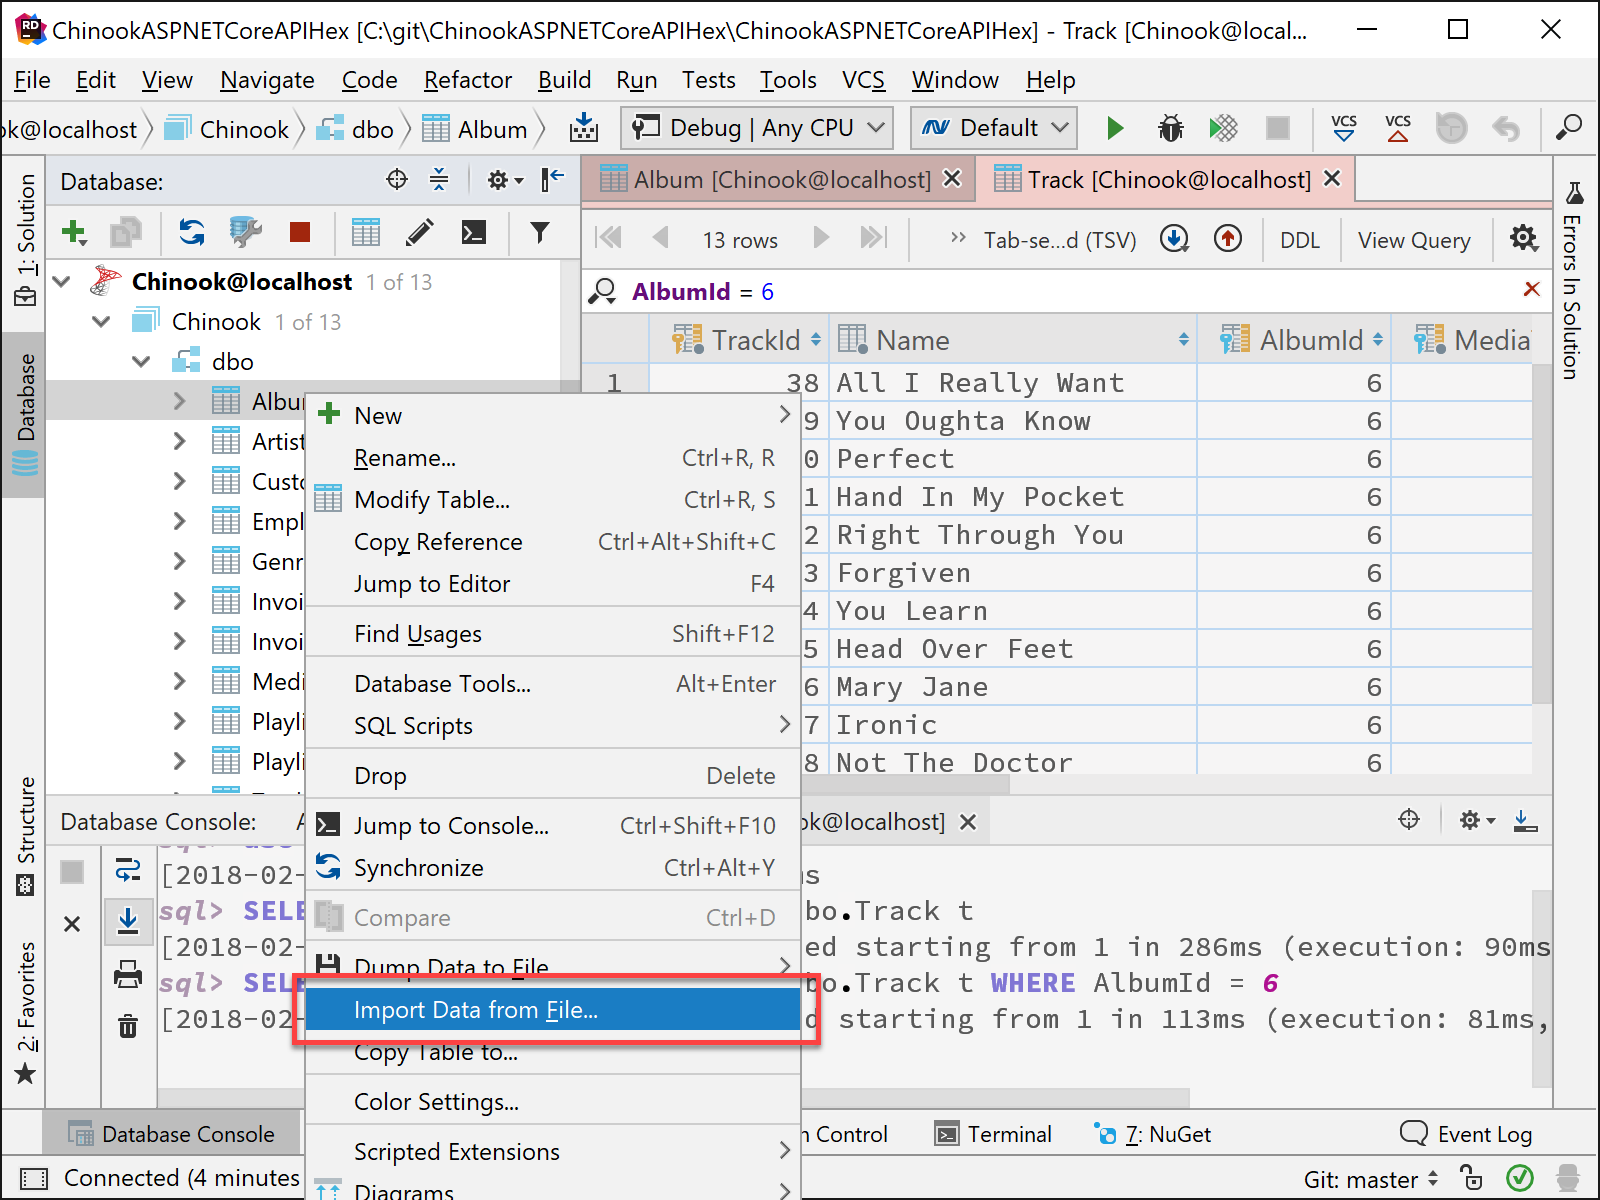
Import data from file
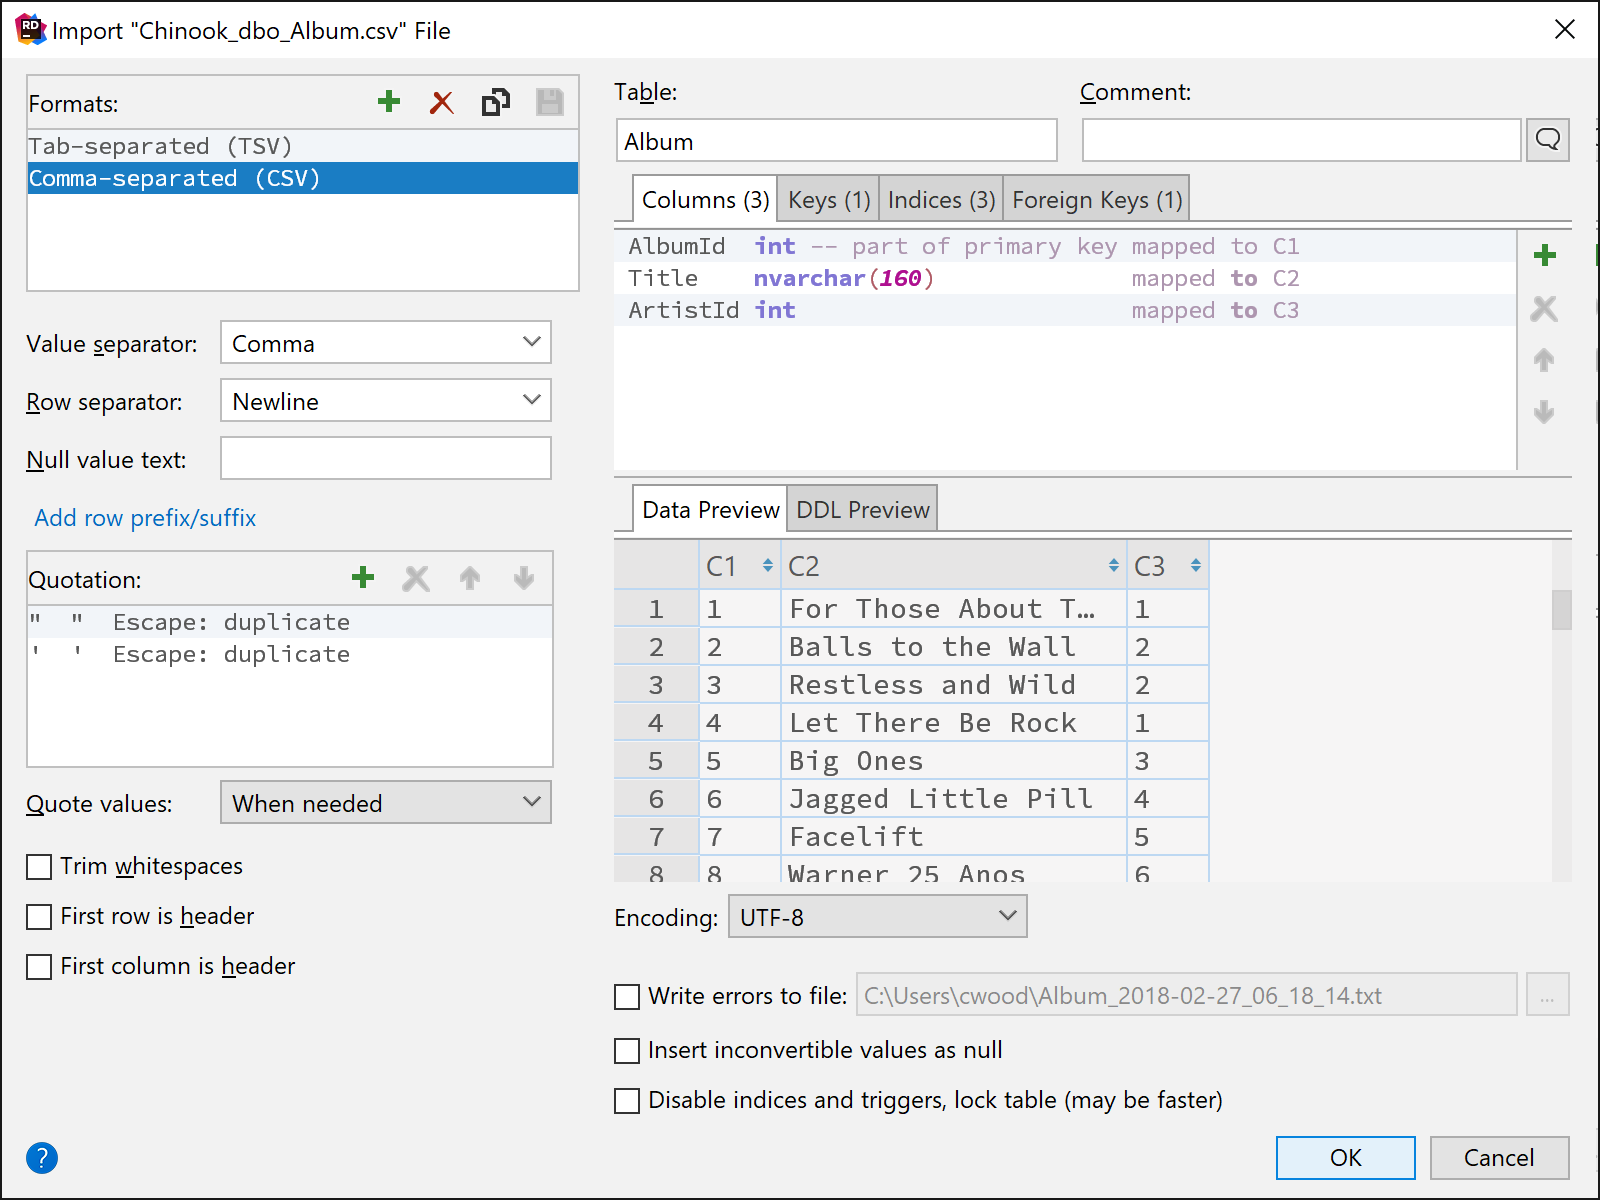
There is a dedicated UI for importing CSV files to the database. Click the table you wish to import data to, right-click and choose Import From File.
You will be presented with the Import File dialog to have full control on how your data will be imported in the table.
Exporting Data
Any table or result-set can be exported in a variety of formats including CSV, JSON, XML, and HTML. I nice format that is most other tools do not allow for export is exporting selected rows as SQL INSERT statements. You can find that selection in the drop-down menu for the formats supported by Rider.
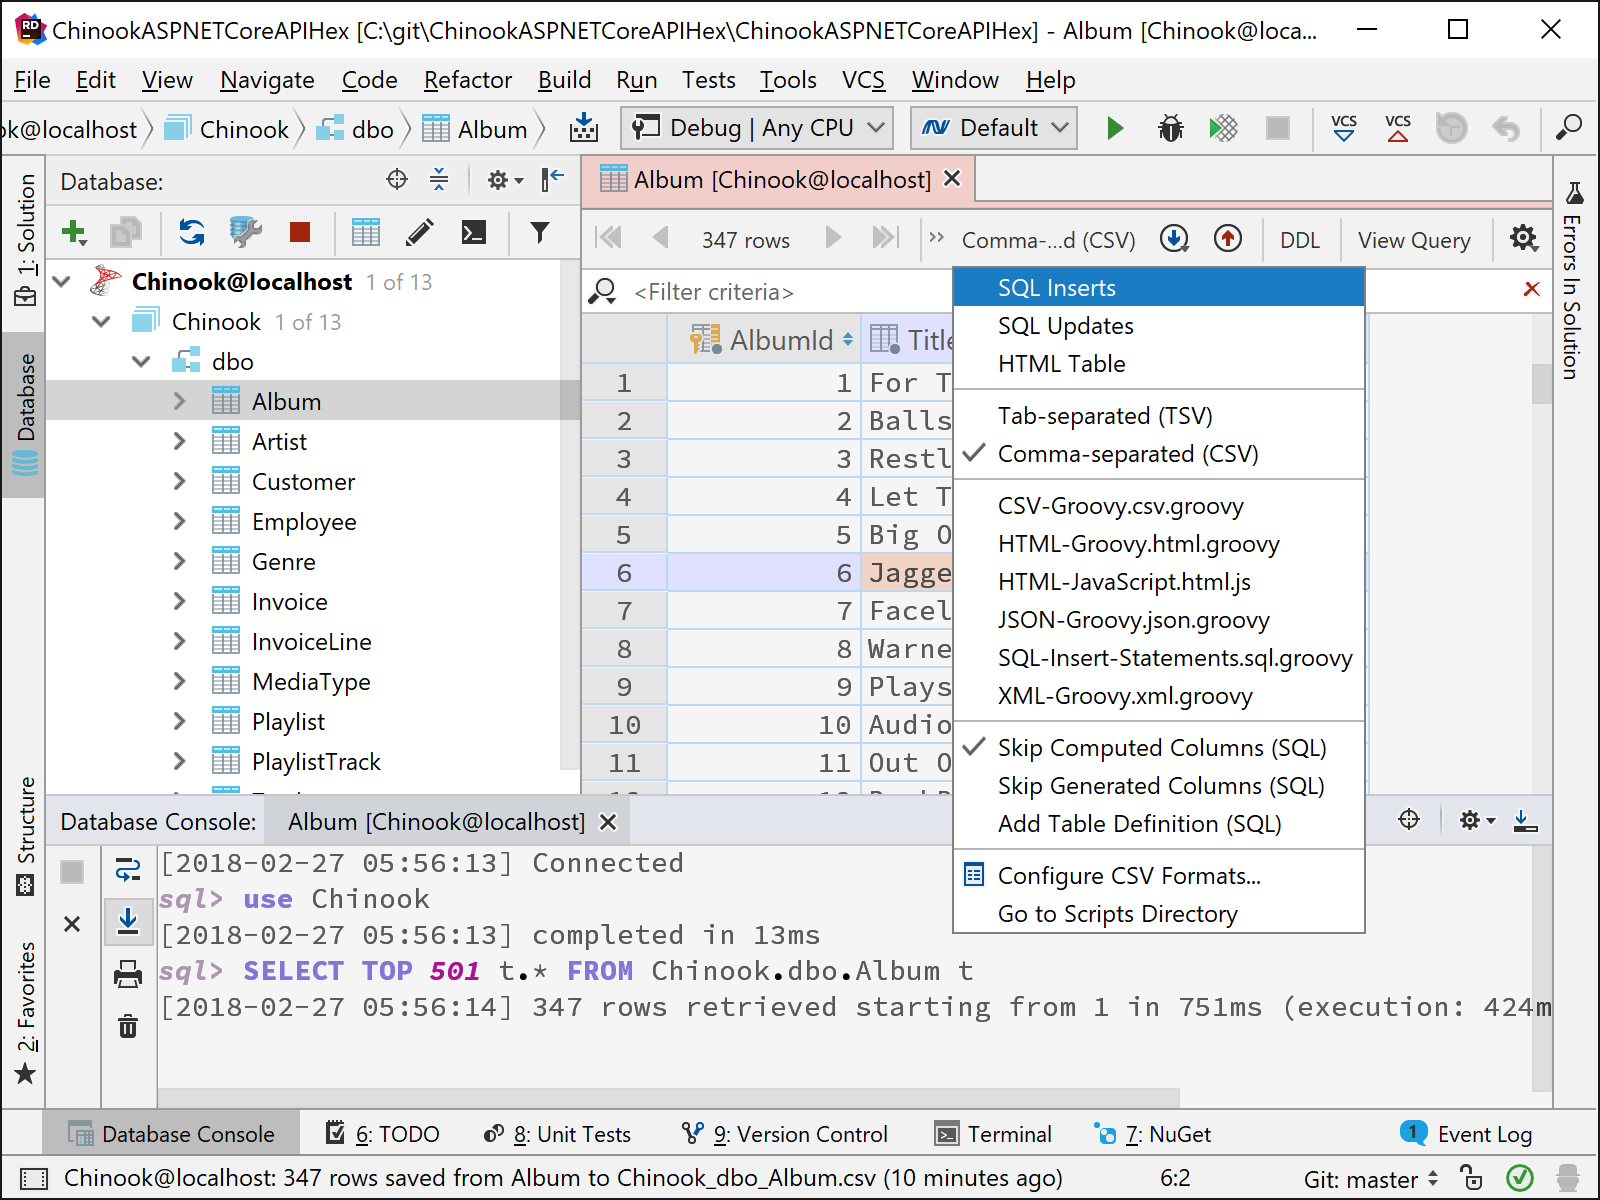
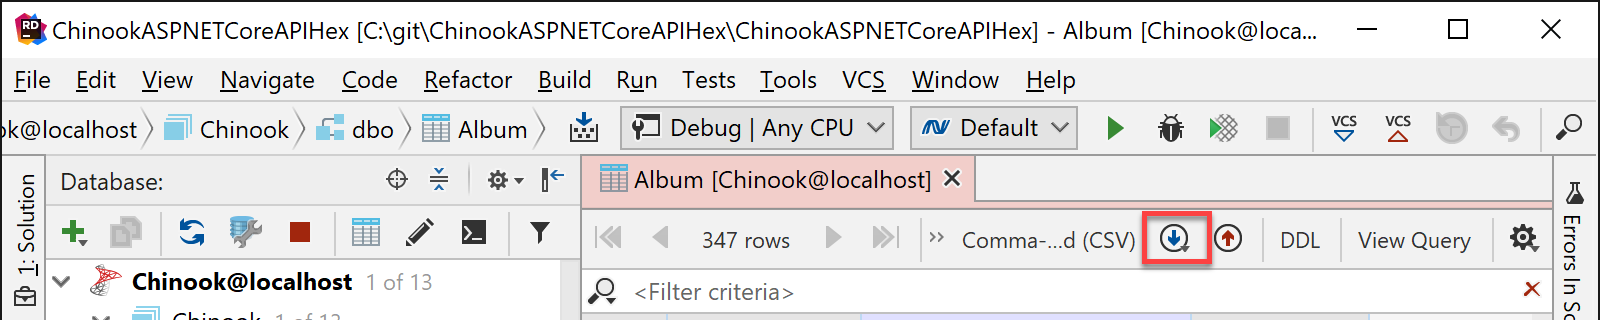
When you have selected the format, you wish to export, perform the Data Dump command which is located next the format drop-down list.
You can learn more about exporting data with all IntelliJ-based including rider here.
Protecting Data or Working with Read-Only Data Sources
You may work with data that is either read-only or needs to be protected from accidental editing. This can be determined or set through toggling the read-only attribute by clicking the padlock icon in the lower-right corner of Rider’s IDE.

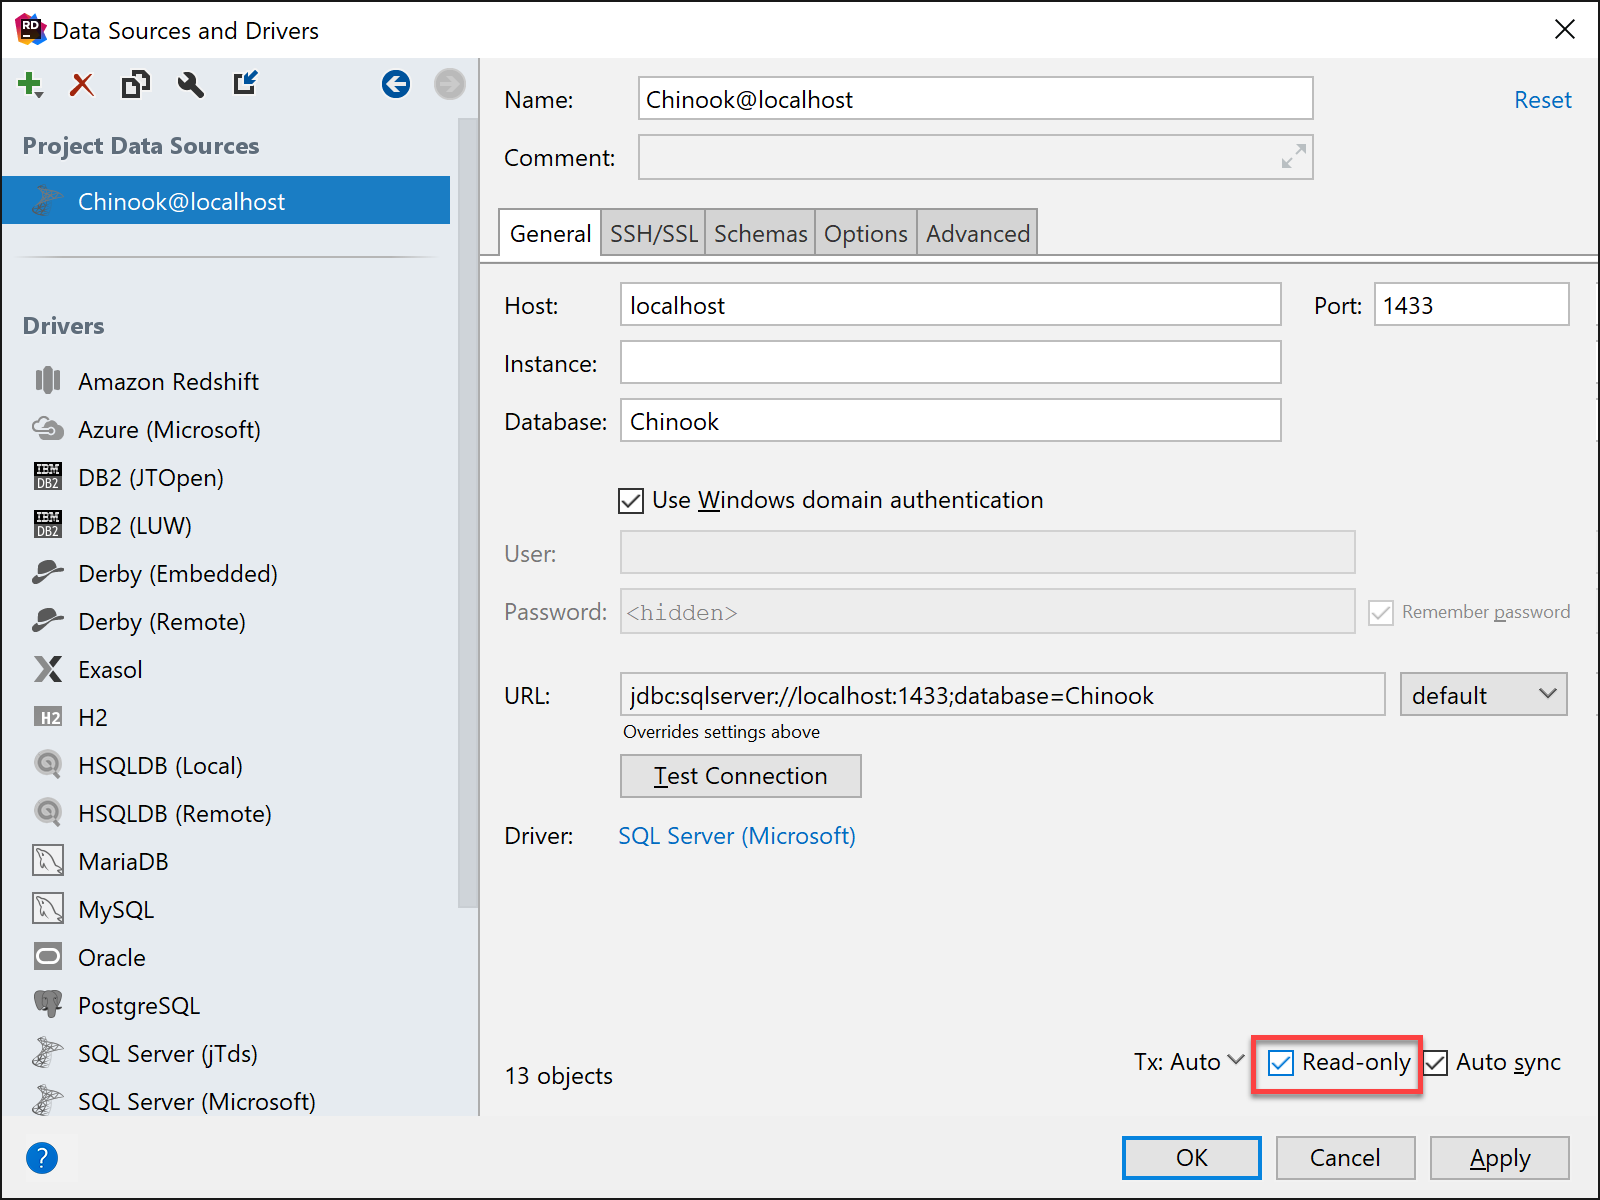
In addition, you can also turn on read-only protection at the jdbc-driver level. With this data protection, you will get warnings if you attempt to execute a SQL statement that will change the underlying data. You can still execute the SQL statements if you are confident in what you are doing.
This concludes our series about working with the Database tools in Rider.
Download Rider 2017.3 and give it a go! We’d love to hear your feedback!
Subscribe to a monthly digest curated from the .NET Tools blog:


