Working with Go Modules – Dependency management

In this second article from our series on Go Modules, we’ll cover how to manage project dependencies:.
This series of articles is broken down into the following sections:
- Starting with a new Go Module from scratch
- Dependencies and how to use them
- Versioning and migrating to a new major version
We looked at how to get started with a simple application that has an external dependency in the previous article. Now let’s check out how we can change the version of that dependency, remove it from our source code, and, finally, use the vendoring mode to move our dependencies to the vendor folder.
Changing the version of a dependency
Changing the version of a dependency is a fairly straightforward task.
Navigate to the go.mod file of the project, locate your dependency and replace the version that’s present in the file with the one that you need to upgrade or downgrade to.
The caveat here is that if you want to upgrade to a major version, then you’ll have to change the import path as well, e.g., to migrate from github.com/dlsniper/demo at v1.6.5 to v2.3.4, you’ll need to change the file from require github.com/dlsniper/demo v1.6.5 to require github.com/dlsniper/demo/v2 v2.3.4. We’ll cover this in more detail in a separate article about versioning and migrating to a new major version.
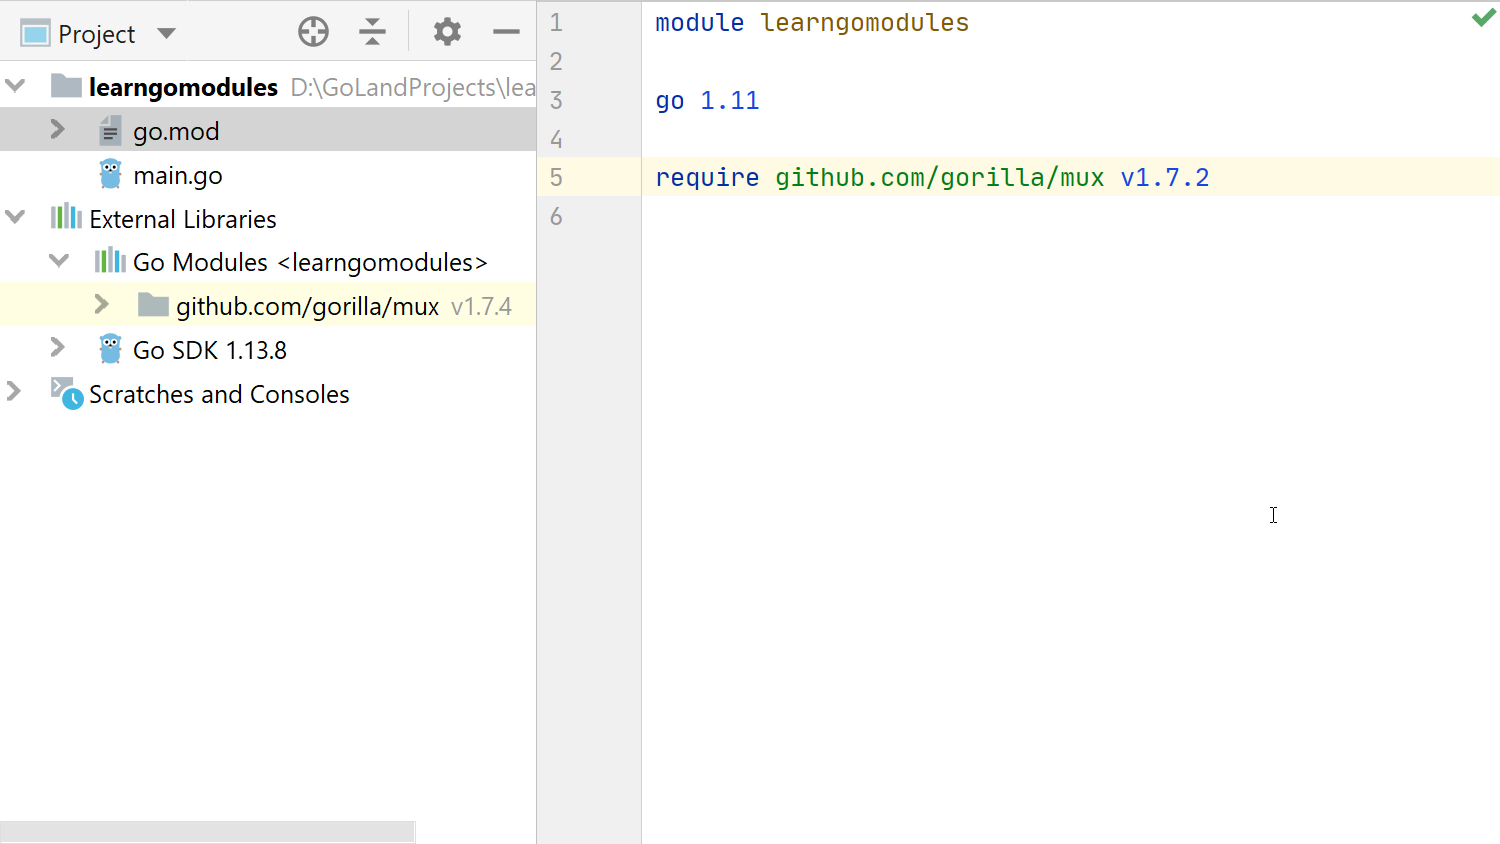
For our example code, let’s migrate from github.com/gorilla/mux v1.7.4, which was the one that was fetched automatically when we originally wrote it, to v1.7.2. To finish the migration, switch to the main file and use the Sync packages of project to download the new version. If the version of the dependency is already in the Go Modules cache, the Sync… operation won’t be needed.
After this, you should now see that the new version is reflected in the list of dependencies for the project.
Using the vendoring mode
The vendor folder appeared in Go 1.5 and is a popular way to ship the code along with all the dependencies needed to compile it.
Using the vendor mode with Go Modules is straightforward, even if the project was not initially created with it in mind.
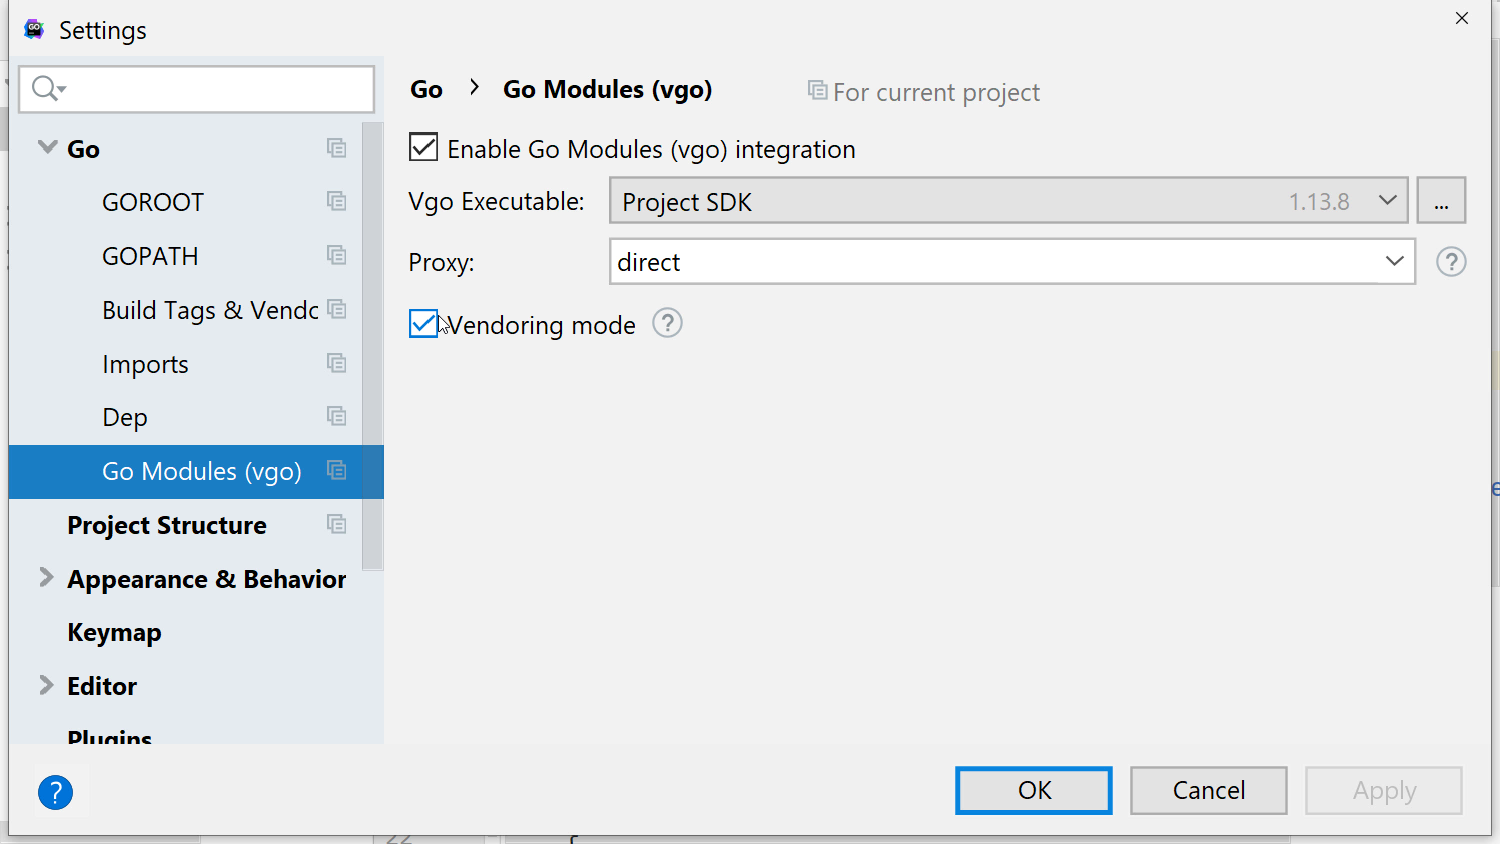
We’ll need to enable this manually by going to Settings/Preferences | Go | Go Modules (vgo) and tick the vendoring mode checkbox.
This will result in a vendor folder being created and all our current dependencies being placed there.
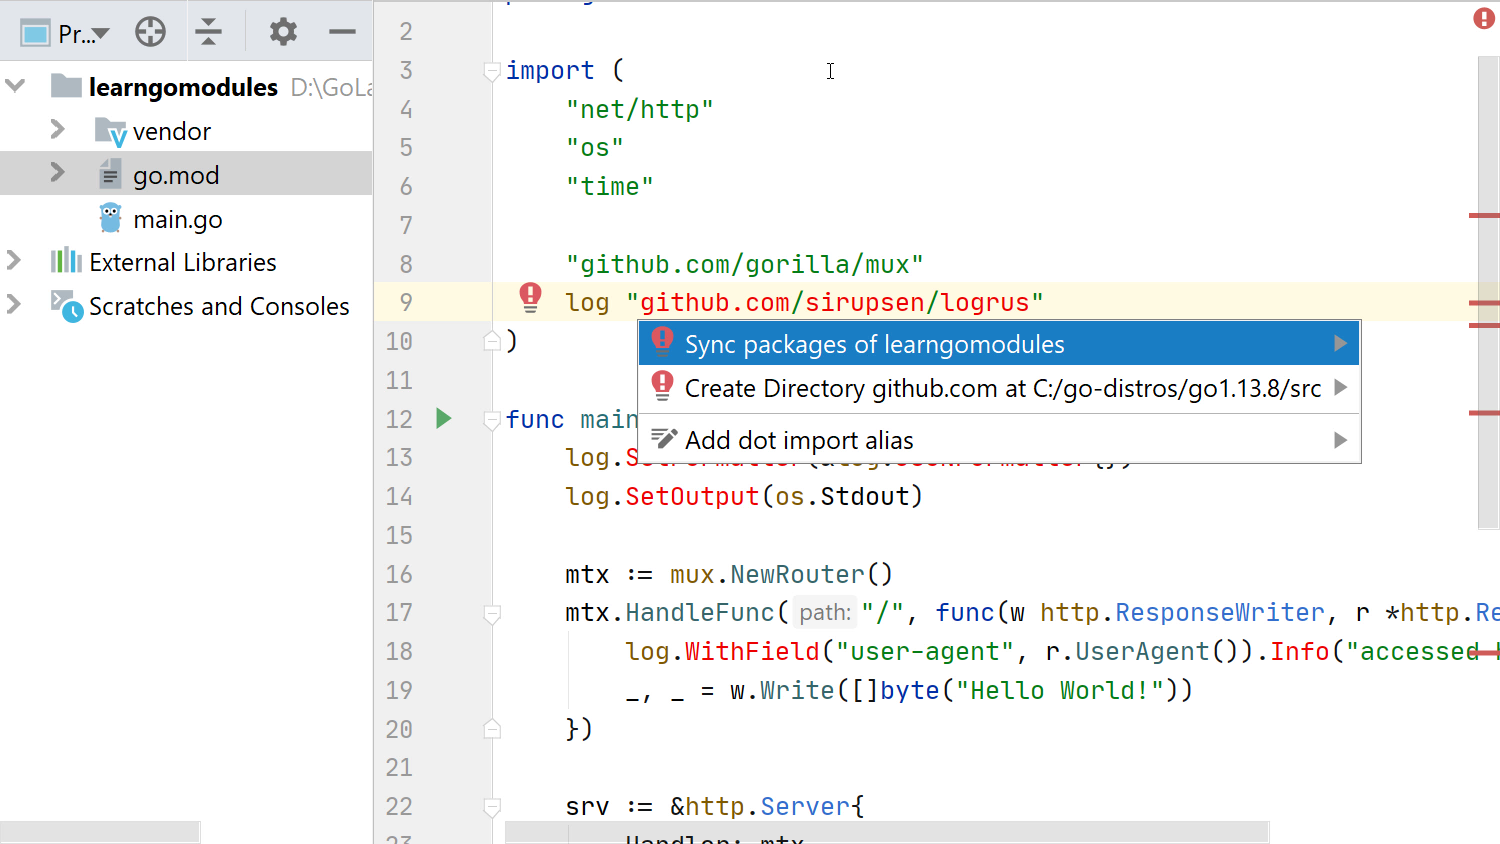
If we want to add a new dependency, like the popular logging library https://github.com/sirupsen/logrus, then the steps are still the same.
Using the code below, we need to run the Sync packages of project action again and see how the new dependencies are added to our vendor folder.
package main

import (
	"net/http"
	"os"
	"time"

	"github.com/gorilla/mux"
	log "github.com/sirupsen/logrus"
)

func main() {
	log.SetFormatter(&log.JSONFormatter{})
	log.SetOutput(os.Stdout)

	mtx := mux.NewRouter()
	mtx.HandleFunc("/", func(w http.ResponseWriter, r *http.Request) {
		log.WithField("user-agent", r.UserAgent()).Info("accessed home page")
		_, _ = w.Write([]byte("Hello World!"))
	})

	srv := &http.Server{
		Handler:      mtx,
		Addr:         "127.0.0.1:8000",
		WriteTimeout: 10 * time.Second,
		ReadTimeout:  10 * time.Second,
	}

	log.Fatal(srv.ListenAndServe())
}
Tip: Using vendoring mode on new projects is straightforward as well. We just need to tick the vendoring mode checkbox when the project is created, and that’s it.
Tidying up the modules in a project
During the normal usage of modules, some modules that you don’t need may show up in the dependencies list, or you may need to add missing parts of the libraries you import.
So, how do you tidy up the environment? Go offers the go mod tidy command, which will take care of this. It will ensure that the missing modules are added to go.sum and the ones that are no longer used are removed.
It will also clean up the go.sum file so that it refers only to the versions currently being used.

Visualizing the dependencies of a Go project
As projects become more complex, one way to keep track of this complexity is to visualize the dependencies used.
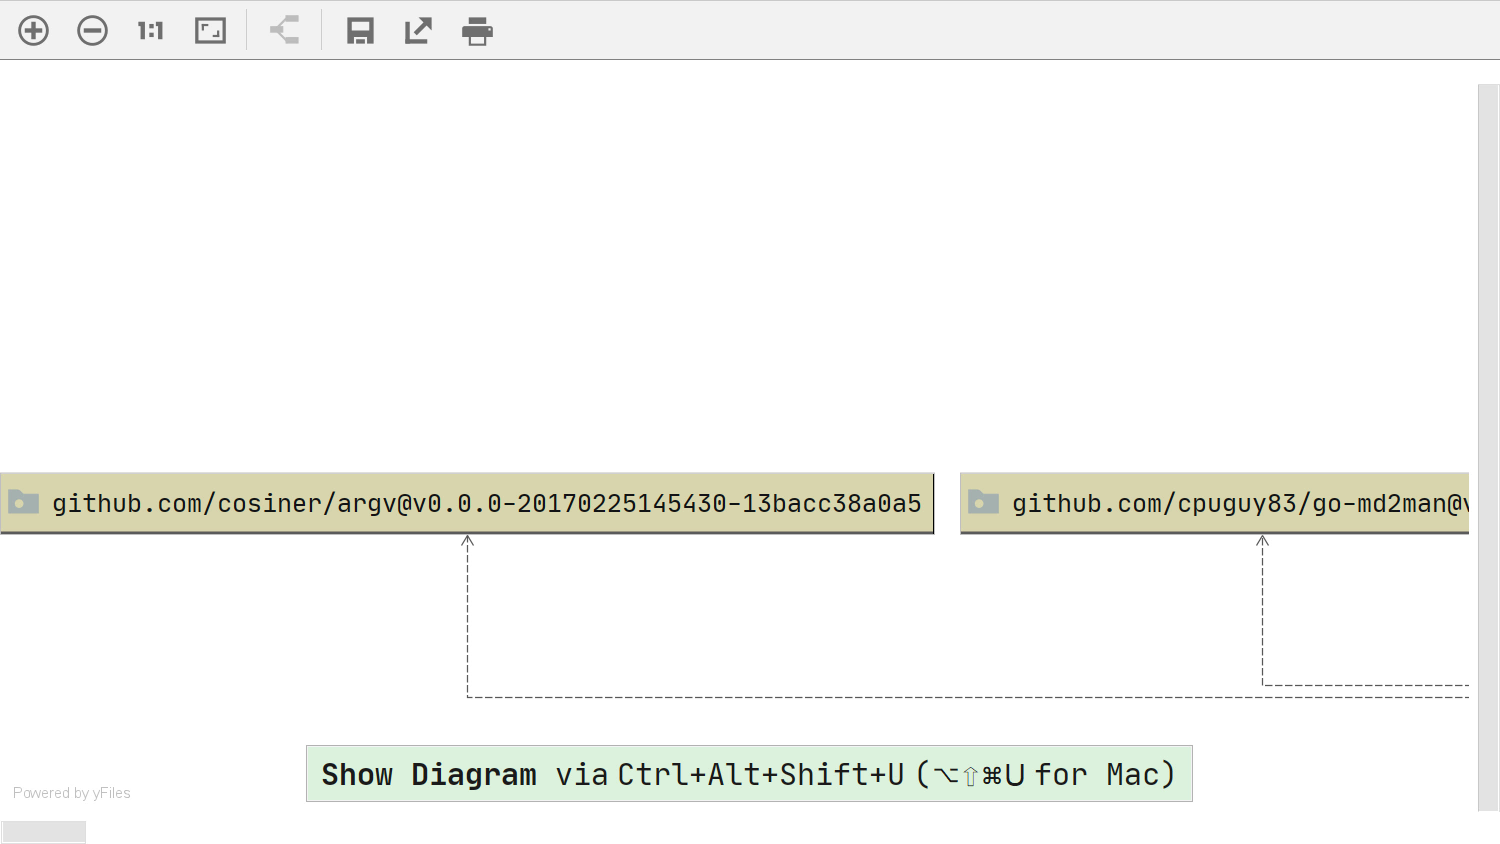
In GoLand you can do this by using the Show Diagram feature, Ctrl+Alt+Shift+U on Windows/Linux or Cmd+Opt+Shift+U on macOS. Navigate to any go.mod file in the project and invoke the feature via the dedicated shortcut or Find Action, Ctrl+Shift+A on Windows/Linux or Cmd+Shift+A on macOS, or Search Everywhere, Shift+Shift.
In the example below, we’ll use Delve, the Go debugger, as an example of this feature in a medium complexity project.
This concludes our second post for today. In it, we have learned how to change the version of a project dependency and how to use the vendoring mode. In the next blog post, we’ll see how we can increase our project’s major version and what needs to be done to do this correctly.
Until then, if we are looking forward to your feedback. As usual, you can write to us in the comments section below, on our issue tracker, or by tweet to our Twitter account.
Subscribe to GoLang Blog updates


