Space Packages. Get Started with npm Registry

Once again, we’re extending the list of repository types supported by Space Packages. Now it’s time for npm registries! The full list is now as follows:
- Container registries
- Maven repositories
- NuGet feeds
- npm registries
Let’s take a look at the basics: how you can create an npm registry, and how you can publish and get npm packages – all this right inside your Space instance.
Create an npm registry
Note that recently we made Packages a project-level entity. So, now every project has its own Packages storage. So, to create a registry, you should first go to Projects, select a project, and in project Packages, click New repository. In Type, choose npm Registry.
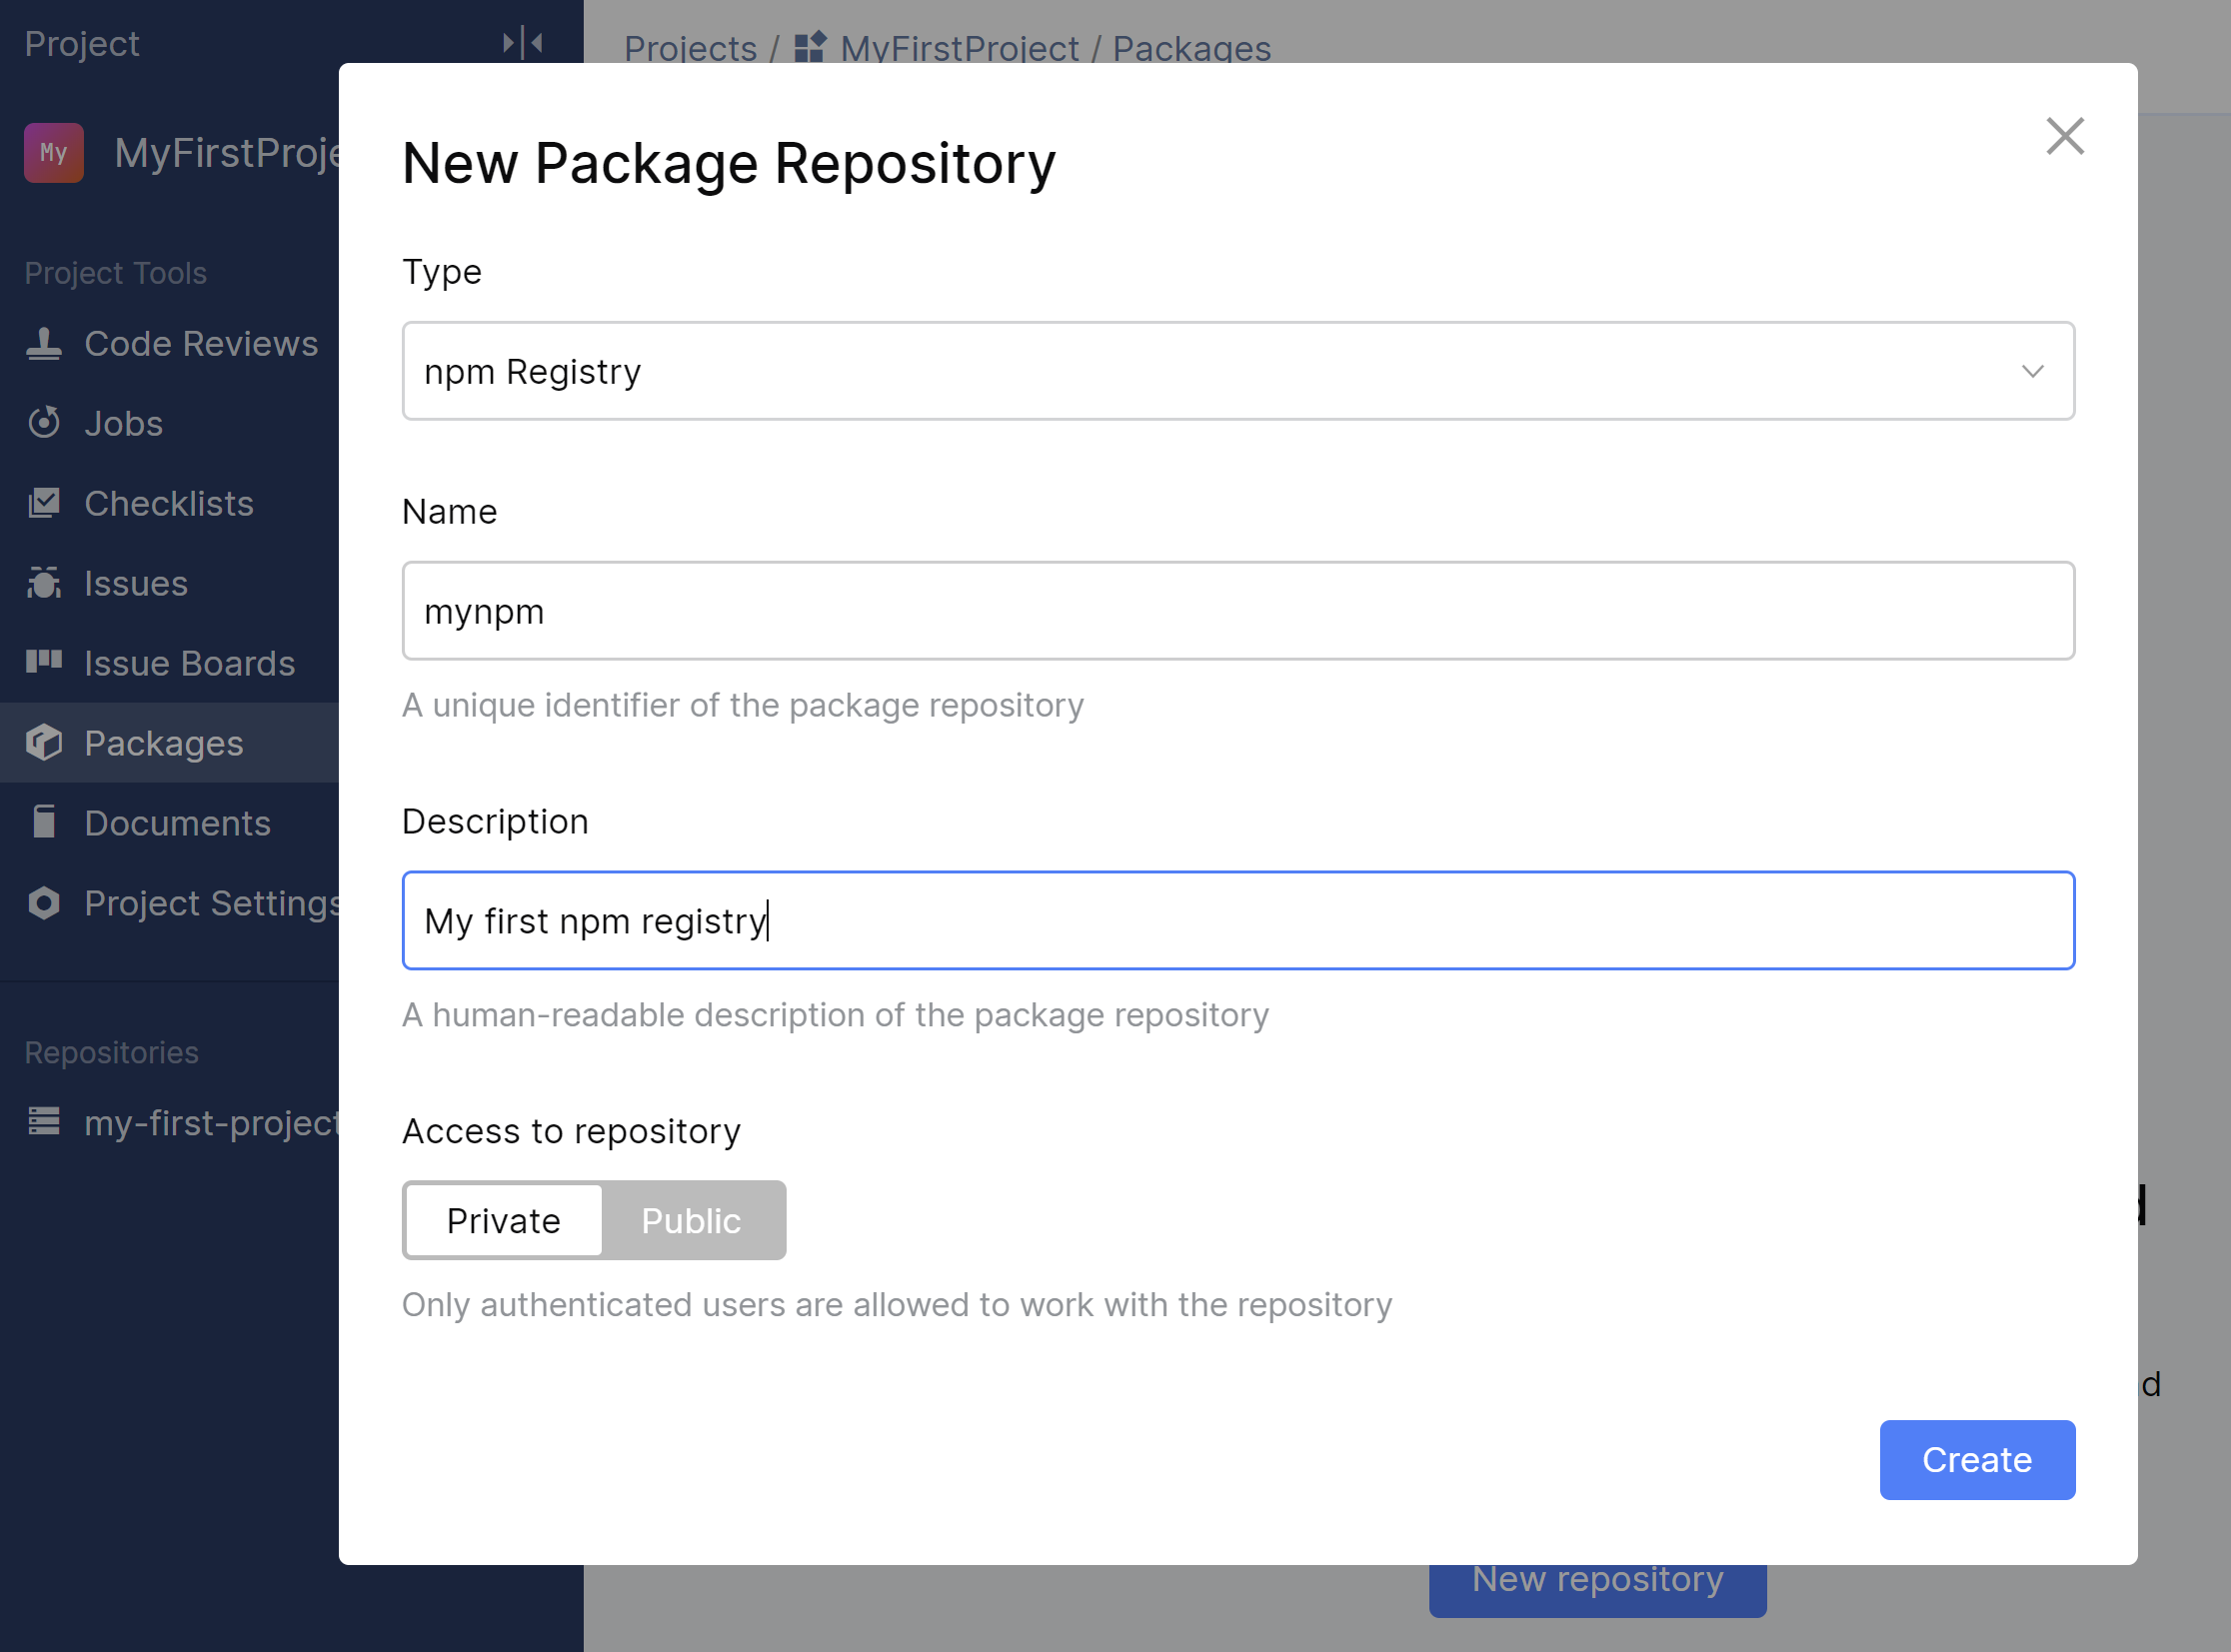
The registry URL will look something like https://npm.pkg.jetbrains.space/mycompany/p/projectkey/mynpm/
Log in to the npm registry
Before you can publish and download packages from this registry, you need to log in to it on your local machine. Follow these steps:
- Run
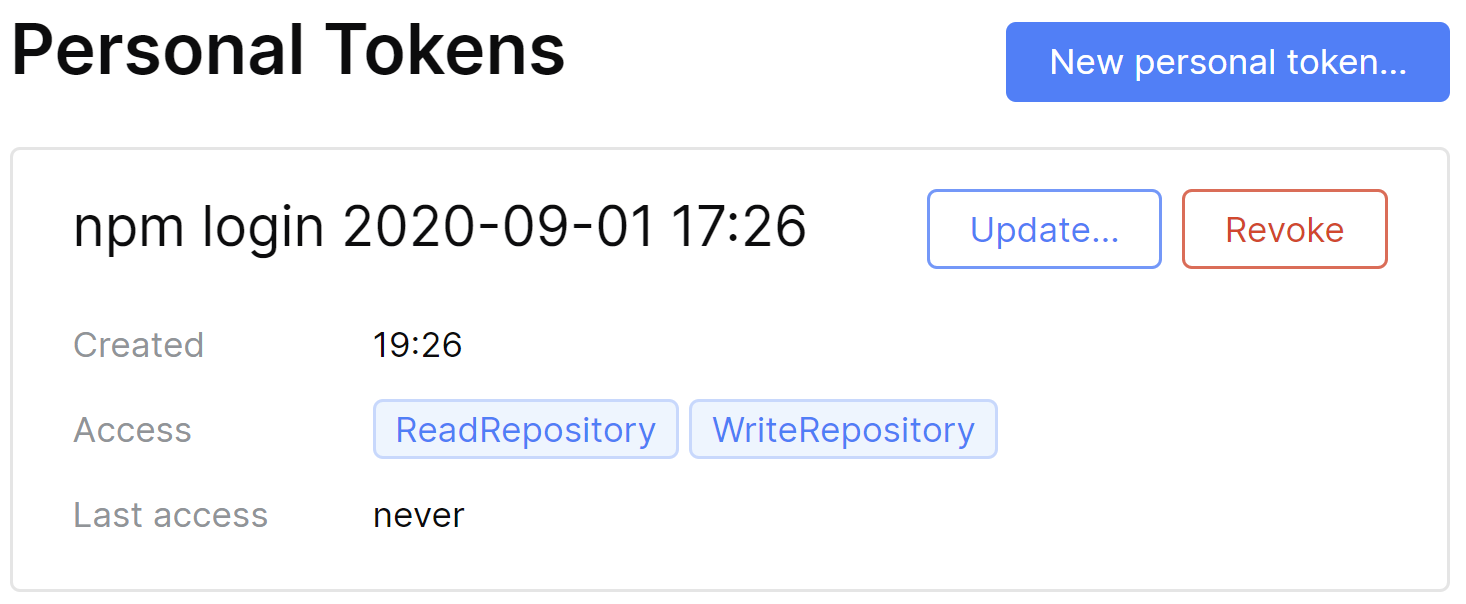
npm login --registry https://npm.pkg.jetbrains.space/mycompany/p/projectkey/mynpm/ - When asked for credentials, specify your Space username and password. npm uses permanent tokens for authentication. Once you log in to the registry, Space will automatically create a permanent token specifically for accessing the npm registry. This token will be saved in your local
.npmrcconfiguration file and will be used for all further connections to the specified registry. You can manage the created token by going to My Profile | Personal Tokens.
Note that you can create a personal permanent token manually and then specify it as a password while logging in. In this case, npm will use the provided token.
Publish packages to the npm registry
After you have successfully logged in to the repository, just open the directory containing your package and run:
npm publish --registry https://npm.pkg.jetbrains.space/mycompany/p/projectkey/mynpm/
Install packages from the npm registry
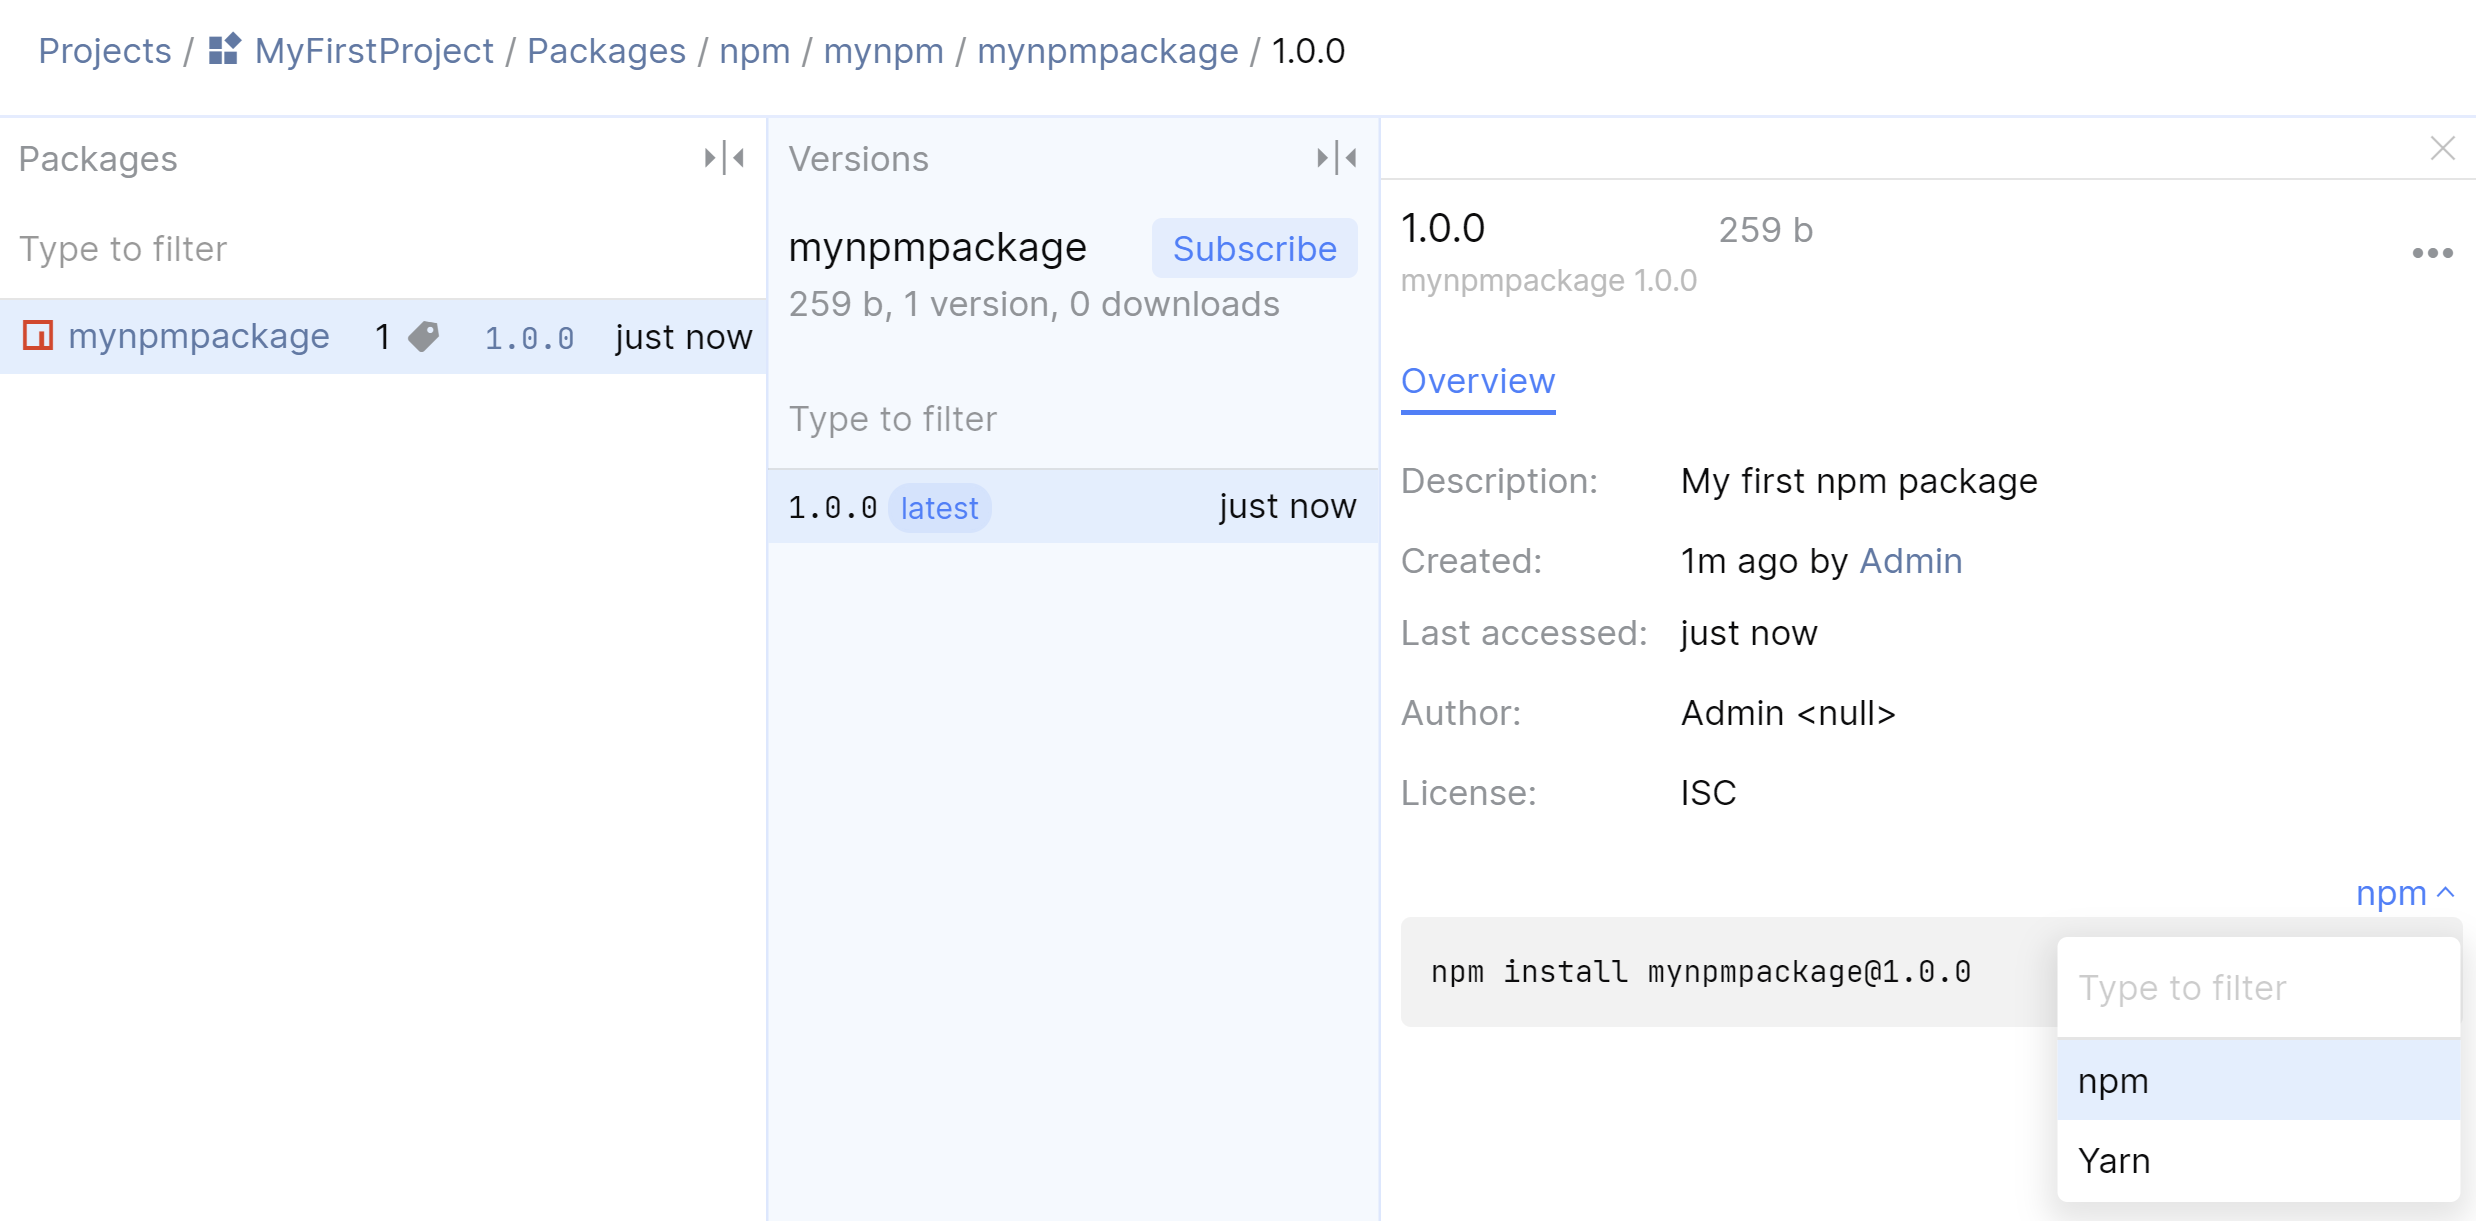
To help you install packages from the registry, Packages generates snippets for the npm and yarn tools. Follow these steps to install a package:
- Find it in project Packages and open it.
- In package properties, copy the snippet.
- Make sure you’re logged in to the registry and run the snippet.
Use scoped packages
Space npm registries support npm’s scoped packages. Basically, this feature is used to avoid conflicts on npmjs.com: after you assign @somescope to a package, the scope will be added to the package name, e.g. somescope/somepackagename. If somepackagename already exists on npmjs.com, there will be no conflict. What’s more, you can assign the same scope to your Space npm registry. In this case, all packages marked with somescope will be published to the Space registry, while others will be published to npmjs.com.
To assign a scope to a registry:
npm config set @somescope:registry https://npm.pkg.jetbrains.space/mycompany/p/projectkey/mynpm/
To assign a scope to a package, open its package.json and add the scope to the name:
"name": "@somescope/myfirstnpmpackage"
After you’ve published the package with npm publish, it will be published to your registry in Space.
That’s it for now! Please share your thoughts in the comments below.

Subscribe to Space Blog updates