.NET Tools
Essential productivity kit for .NET and game developers
Automating File Header Information with ReSharper
[Update: ReSharper 6 now support Macros in File Headers. See the following post for more information]
Many OSS projects often have some license information at the top of each file, reminding you of the evils you need to comply with. Some companies also have policies in place that require every single file to have company information. It would be quite cumbersome if one would have to constantly and manually enter this information. Fortunately though, you don’t need to. Let’s examine the various ways to do this.
Inserting File Headers during Code Cleanup
ReSharper offers the possibility of running code cleanup on your file, project or solution. As it’s name indicates, Code Cleanup can clean up certain aspects of your files, like optimizing using statements, formatting the layout of type members, removing code redundancies, changing explicit type declarations to use var, and much more.
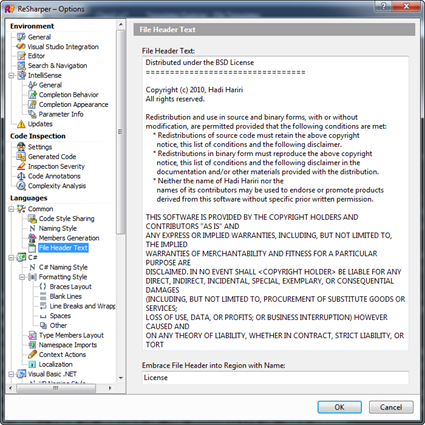
One of these options is to insert File Headers. For this, it uses the File Header values defined in ReSharper | Options | Languages | File Header. Therefore, the first step to take advantage of this feature is to define the header:
We can optionally add a region name in the Embrace File Header into Region with Name. By doing so, ReSharper will wrap the header inside a region (currently the File Header is global across solutions).
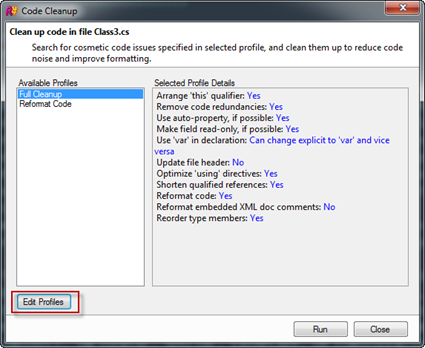
Once we have the header defined, all we need to do is activate the option in the Code Cleanup. We can either activate it in an existing profile or create a new profile specific for Header insertion. To do so, we invoke the Code Clean up (Cltr+E,C in VS Scheme) and select Edit Profiles
We then create a new Profile by clicking on Add, and giving it a name, for instance File Header Insertion.
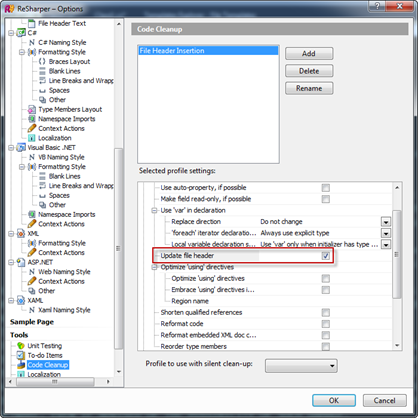
We then need to select all the cleanup operations we want to happen when we run the profile. In our case, we’re exclusively interested in the Update File Header.
Our newly created profile should now appear as an option when invoking code cleanup. To apply the cleanup to a file, we can invoke it when editing the file or having it selected in the Solution Explorer. To apply to the project, we select the Project. And as expected, selecting the entire Solution will apply the cleanup solution-wide. In our case, we want to apply the licensing to the entire solution
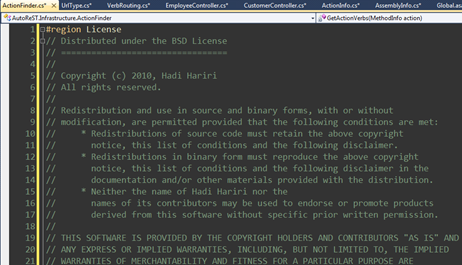
That’s it. With one action we’ve applied licensing to our entire solution.
Automating File Headers with File Templates
The previous solution works great when we want to apply licensing on a global scale. The downside is that it’s the same across different solutions. What happens if we want to customize it based on project? One other issue is that it does not support any type of macros. As such, we cannot insert values such as the filename or date the file was created.
An alternative to this approach could be create file headers when we create the actual files, for which we can use File Templates. (we’ve covered File Templates in details in an earlier post). Let’s see how we can apply this to class creation.
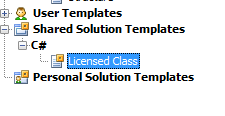
We create a new template under Shared Solution Templates in File Templates
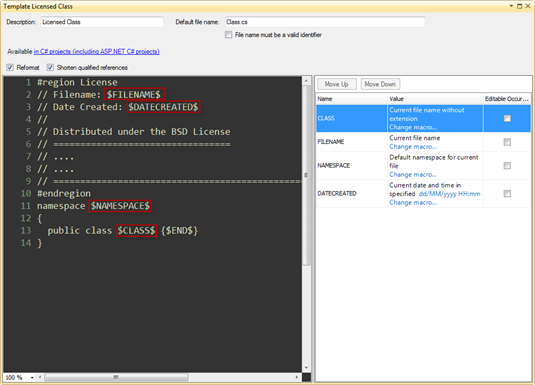
in this case called Licensed Class. The definition of the template is:
which is the default class template, to which we have added a region with the license information and two additional macros: Filename and Date Created. There are corresponding Macros in ReSharper to obtain this information so no need to extend the functionality. We do set the Editable Occurrence of each Macro to false so that ReSharper does not prompt us for values.
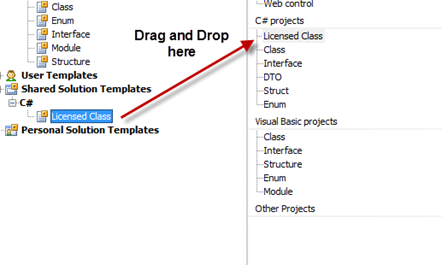
The final step is to make this template accessible when creating classes (using Cltr+Alt+Ins). To do that, we need to drag it and drop it on the Quicklist as shown
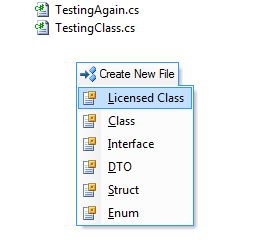
Now when creating a new file, we get Licensed Class as the first entry
When we switch to a different solution, the Licensed Class will not be available, so it will not interfere with other solutions were this type of header is not required. Obviously, we could generalize this by modifying the built-in template as well as apply it to other templates (template embedding might be a good feature here!)
Like everything, this also has it’s downsides. First of all, you cannot apply this to existing classes since it’s on creation. Secondly, if you run code cleanup with a new File Header, it will overwrite the existing one. The one advantage it does have is that you can place that template anywhere you want. So for instance if you prefer your license information to be at the bottom of the file, you can do that.
Using StyleCop for ReSharper to provide Company and Copyright Information
If you’re not familiar with StyleCop, it’s a tool for Microsoft that highlights certain coding styles. Howard van Rooijen wrote a plug-in for ReSharper that makes using StyleCop much easier and more interactive. Check it out if you’re not familiar with it.
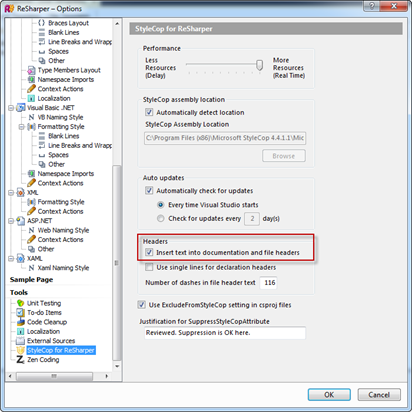
One of the rules that StyleCop recommends is for files to have headers with information about author/company, etc. When you install StyleCop for ReSharper, it creates some options under ReSharper | Options as well as entries under the Code Cleanup options.
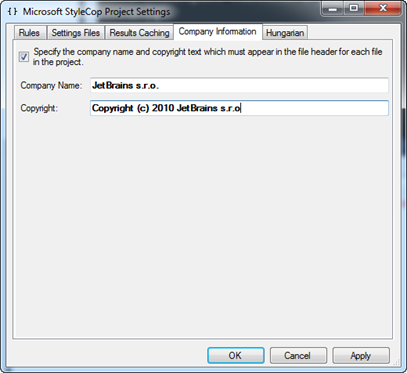
In order to define the information required, we can right-click on the Project Properties and select StyleCop Settings
and enter the information under Company Information
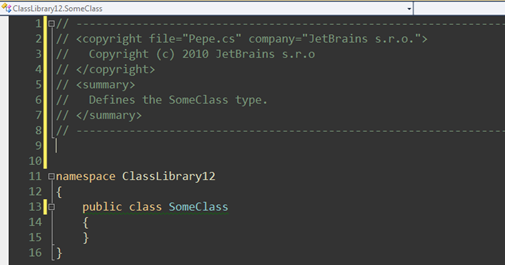
By just enable StyleCop for ReSharper, we already get quickfixes on our files to provide header information
which generates
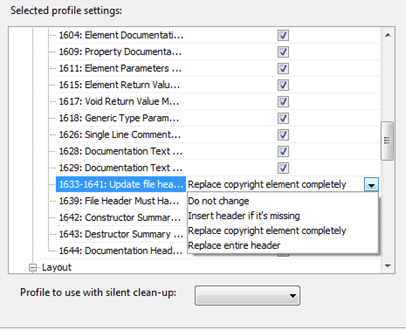
and we can apply it globally using the Code Cleanup Options that StyleCop adds
It is important to note that the license information would need to be provided independently using the File Header option of ReSharper. What StyleCop for ReSharper provides is the ability to combine this information with it’s own.
Summary
Based on the type of information we want included, as well as the scope, we can pick one of the different options presented here or combine them when appropriate. Right now the File Header option in ReSharper is slightly limited in the functionality it offers but already suggestions have been made to improve it. If there’s something you’d like, please either log it in YouTrack or leave a comment here.
Subscribe to a monthly digest curated from the .NET Tools blog:


