
Symfony Command Line Usage With Command Line Tool Support

Since PhpStorm 2.0 Symfony framework command line tool can be used inside PhpStorm by Command Line Tool Support.
Let’s pass through a simple Symfony tutorial, and then create a custom task. You’ll need having PhpStorm 2.0 and Symfony 1.1 or newer stable release installed on your computer. If you have no Symfony, tutorial describes its installation.
First we need to configure a new command line tool with Symfony commands.
Loading Symfony Commands
Choose Settings | Command Line Tool Support and press the “Add” button. Three options are offered. Choose “Symfony”:
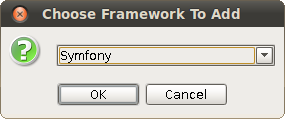
Then provide the path to its $Symfony_home$/data/bin/symfony file. For configuration from tutorial, that path is $Project_root$/lib/vendor/symfony/data/bin/symfony. The description of Symfony commands is loaded and saved in a file inside your project settings. In the Settings dialog box, the description looks as follows:

- The Tool Path field contains the common part of all framework commands. These common parts are “php $path_to_symfony$ “ in Symfony or “$Zend_Framework_Tool_home$/bin/zf.bat” in Zend Framework Tool. $PhpExecutable$ is a macro, it changes to the php configured in the project settings when a Symfony command is executed, and $ProjectFileDir$ changes to the full path to the project. Macros make sharing settings between several IDE instances much more handy.
- A common Tool Path can be annoyingly long, so we provide an Alias, which is a string to be used instead of the full Tool Path.
- By selecting or clearing the “Enable” checkbox, you can easily have framework commands included or excluded from tool’s auto completion without deleting the description file. Now the Enable checkbox is selected, so symfony commands are provided in auto completion.
Press Ctrl +Shift+X or choose Tools | Run Command… and type:
Using Symfony Command Line
Now we’ll create a simple Symfony project as it is described in Symfony’s “Getting Started” document.
Creating a Symfony Project
Press Ctrl +Shift+X and type:
![]()
The command has two parameters:
- Required “name”. We set it to macro $ProjectName$, which stands for the name of the PhpStorm project.
- Optional “author”.
Before the command execution, the $ProjectName$ macro will be exploded to the actual project name, and the framework alias “s” will be changed to the Tool Path. In our case, it is “usr/bin/php /home/sfproject/lib/vendor/symfony/data/bin/symfony”.
Project files are created:

Configuring Database
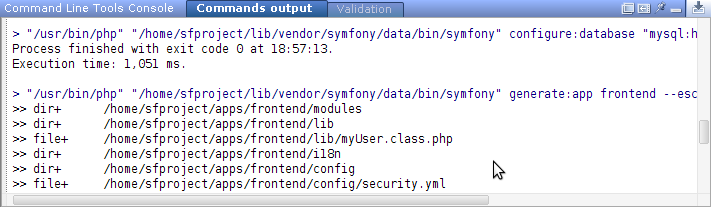
Now configure database through Doctrine with command “php symfony configure:database “mysql:host=localhost;dbname=dbname” root mYsEcret”
![]()
Creating a Frontend Application
Let’s create a frontend application without escaping output, though it makes our application less secure. Press Ctrl +Shift+X and type:
![]()
Note that options after commands are also supported. In our case the –escaping-strategy=false option defines that output is not escaped.
Check commands output:
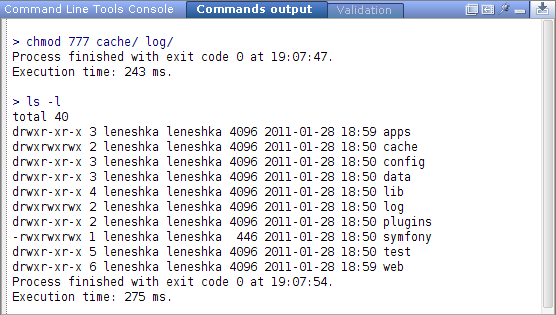
Directory Structure Rights
Next step in tutorial is setting appropriate permissions on the cache/ and log/ directories. This can also be made by Command Line Tool Support. It invokes unknown commands and even resolves macros there. But note that there might be no “chmod” command on Windows.
![]()
Check result:
Now configure your web server as described in the tutorial and run it.
Testing
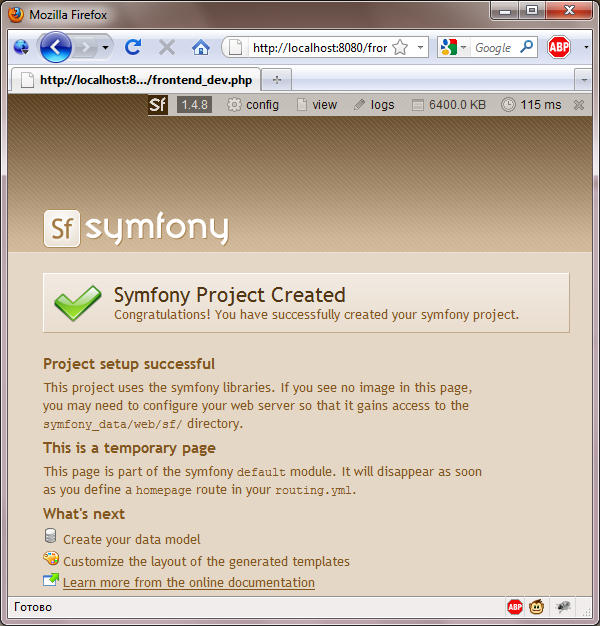
Check that you have access to the new application by opening a browser at url http://localhost:8080/index.php/, and then open currently created application in the development environment at http://localhost:8080/frontend_dev.php/
Your project is ready:
Adding custom task
Let’s create a simple “hello” task inside a Symfony project. We suppose that you have previously loaded and enabled Symfony commands and created a Symfony project.
- Press Ctrl+Shift+X and type:
 A new task class “helloTask” is created inside the lib/task directory.
 - Open the helloTask class in the editor and make the following simple changes to its “execute” function:

- Open the Symfony description file: choose Settings | Command Line Tool Support and press the “Open definition in editor” button.
- Add a new “hello” command description:

Command description :
<command>
<name>hello</name>
<help>My first task with no parameters.</help>
</command> - To test the new command, type:

The result of executing the command is shown in the Output console:
Troubleshooting
If you get any troubles while editing description file and auto completion does not offer you expected commands, open the Validation tab of Command Line Tools Console. This tab shows info about problems with parsing description files:

You can also get information about the description format from schema file at .idea/commandlinetools/schemas/frameworkDescriptionVersion1.1.xsd. Its path is provided in the generated description file, and the editor validates the file against the schema automatically.
More about Command Line Tool Support in this tutorial.
