Continuous Integration for PHP using TeamCity

 If you have multiple team members, you should be doing Continuous Integration (CI). By building the desired output artifacts on a frequent basis and analyzing their quality using unit tests and code coverage, you will find that there are fewer integration problems in working on a software project.
In this blog post, we’ll be using the open-source PHP project PHPExcel as a sample project to set up Continuous Integration using TeamCity. This project features a large amount of code, PHPUnit tests and uses Phing to create build artifacts. We’ll use TeamCity to get this process completely automated and ready for immediate feedback once the source code on GitHub changes.
Installing the TeamCity environment
TeamCity can be downloaded and installed on various platforms such as Windows, Mac OSX and Linux. The installer contains two applications: the TeamCity web interface which we will be using to set up our continuous integration process and a build agent, a small service that listens for build commands and can run the CI configuration. Every TeamCity setup can have one or more build agents on one or more machines.
Since installing TeamCity on various platforms is a bit different, we’ll not go into detail on the installation. We have an installation guide available that can be used to get TeamCity up and running.
Before setting up our CI process, we’ll assume that you already have a PHP environment with PEAR, PHPUnit and Phing installed. If not, now is the time. You can find more info on installing TeamCity on Linux and on configuring your PHP environment through this blog post.
Setting up the project
After installing TeamCity, log in via the web interface. The first thing you will see after logging in is the projects overview. This screen will show you the various projects you have configured in TeamCity and gives immediate feedback on the status of these projects.
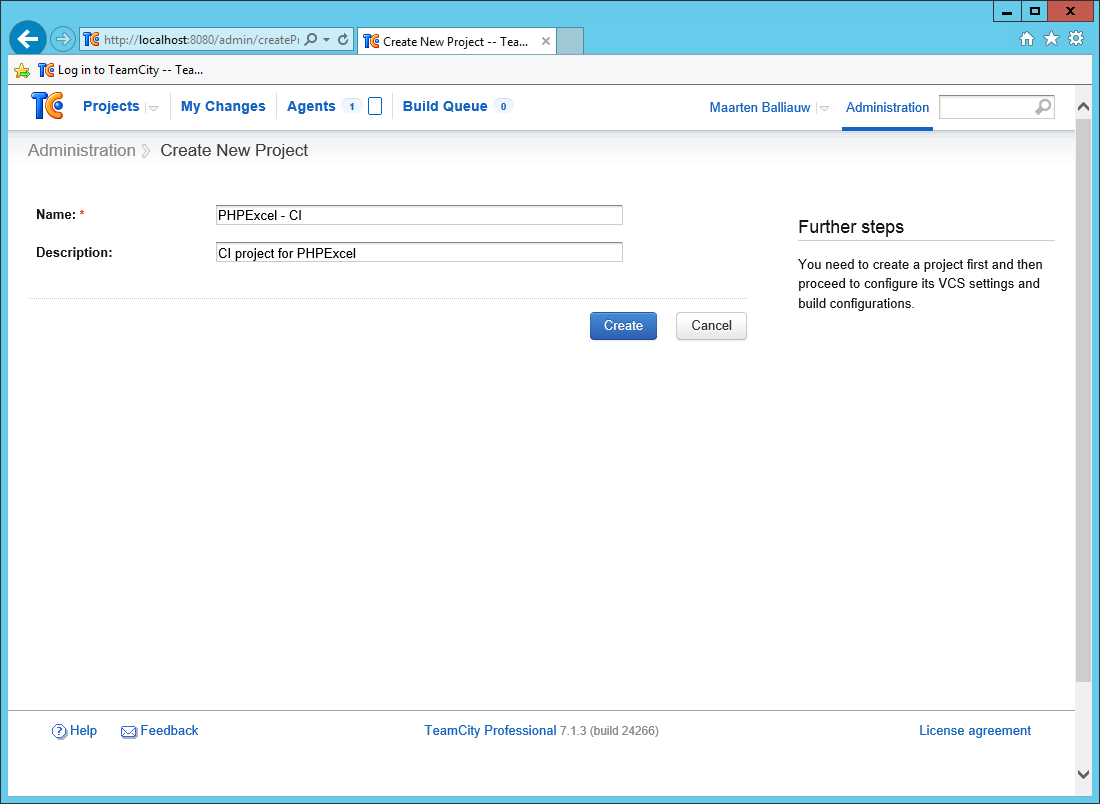
Since we’re on a clean install, let’s create a project. Under Administration | Projects, click the Create project button. The first thing we’ll have to do is give the project a name and a description.
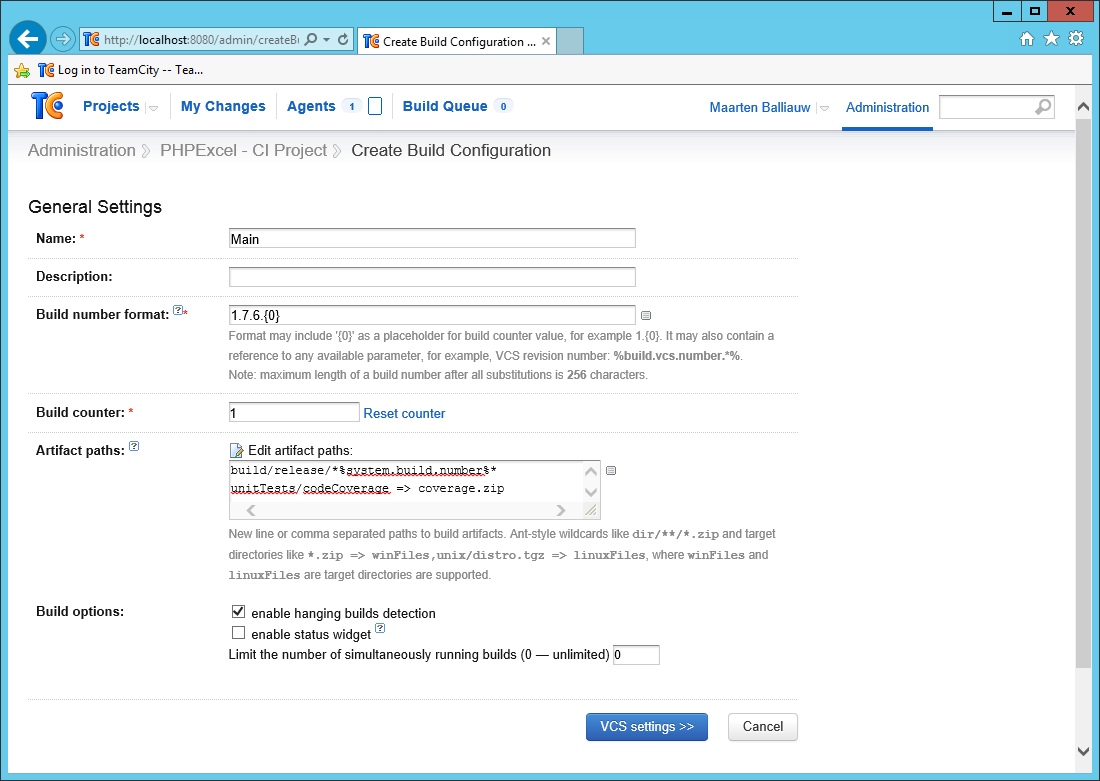
The next thing to do is creating a build configuration. This can be anything meaningful to your team: a build configuration per branch (although it’s better to use TeamCity’s feature branching), a build configuration for code and a separate one for documentation, or a build configuration per release.
We’ll create a build configuration named “Main”. Every build will be named with a number. This can be anything you want but since PHPExcel is currently in the 1.7.6.x range, let’s go with “1.7.6.{0}”. TeamCity will automatically increment the revision version for every build. The build counter starts at 1, so our first build will be versioned 1.7.6.1.
PHPExcel’s build script creates build artifacts under the ”build/release/*” folder. TeamCity can grab these from the configured artifact paths and display them in the TeamCity web interface once the build is finished. Don’t worry: we can configure artifact paths later.
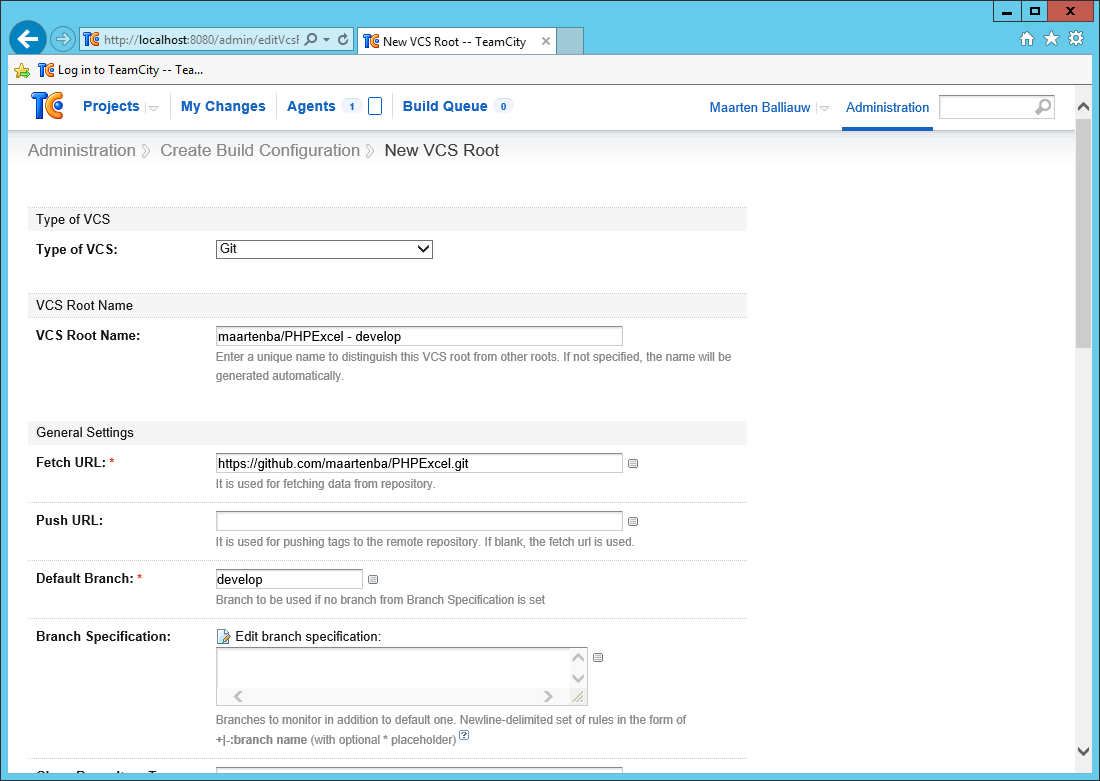
In the next step, we have to provide Version Control System (VCS) settings. TeamCity supports a variety of version control systems such as Git, Mercurial, CVS, Subversion and many more. We’ll go with Git and configure TeamCity to fetch sources from https://github.com/maartenba/PHPExcel.git. Note that if required we could add a number of options to the VCS settings: which branch to clone, whether to include submodules, at what interval TeamCity should check for changes, and so on.
After adding the version control we can start adding build steps. We’ll start with…
Unit tests
As a first step in the build process we’re creating, we want to make sure all tests are green. Whenever there is a failing unit test, we want to fail the entire build and not provide any build artifacts. TeamCity comes with a number of predefined build steps for Java and .NET, but since we’re on PHP we’ll have to select the Command Line build runner.
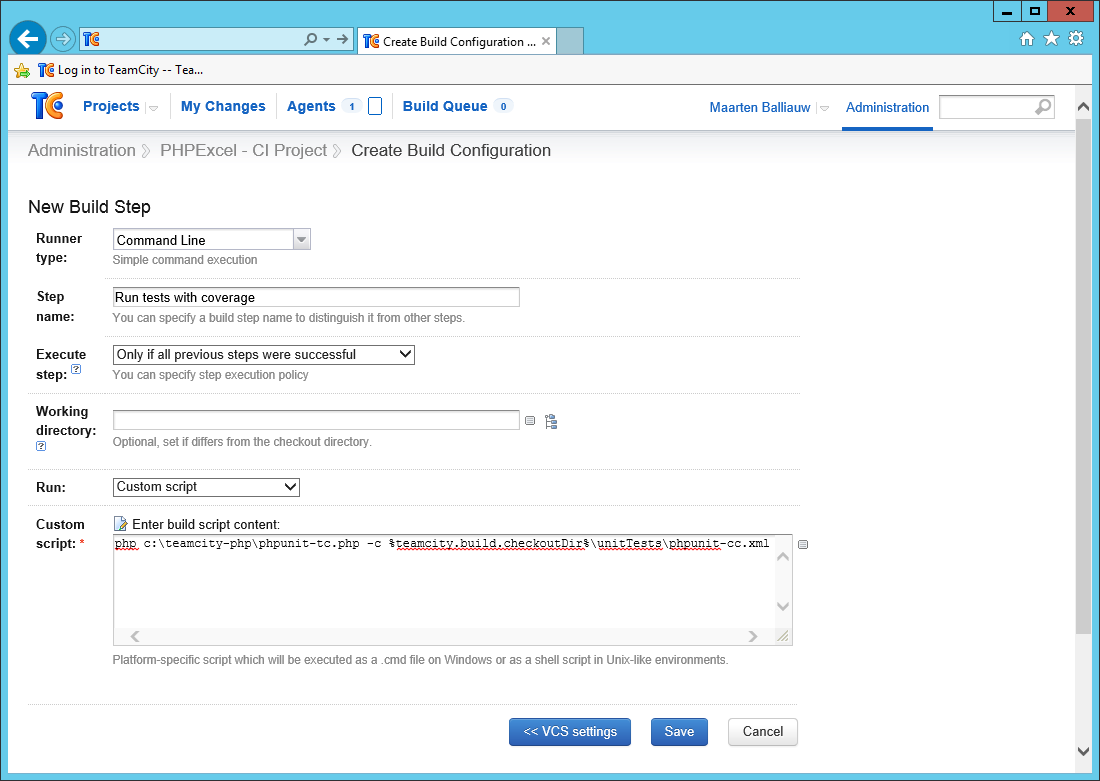
Since we want to run unit tests, the custom script could read something like phpunit -c phpunit.xml to run the PHPUnit configuration that’s in PHPExcel’s source code. Since there are a lot of unit tests to be run, why not report test results to TeamCity real-time so that our team members can see what’s happening? I’ve created a wrapper around PHPUnit which uses service messages to report build results. You can download this wrapper here and locate it somewhere on the build agent or have the build agent download it from the above GitHub repository directly using a second VCS root. If you want to use standard PHPUnit, add an XML report processing build feature which processes PHPUnit’s JUnit compatible XML report. This can be done after storing the current build step.
We can now run our build: click the Run… button to start a build, go to the project dashboard and watch in real time which unit tests are passing or failing.

Congratulations on your first build for a PHP project using TeamCity! Now let’s add some more build steps since just running unit tests is only the first step…
Build using Phing
Our next build step will be invoking Phing, a PHP project build system or build tool based on Apache Ant. PHPExcel comes with a Phing build script which we’ll invoke after all unit tests have passed. Find the Build Steps again by clicking the Edit Configuration Settings link at the top-right in this screen.
Next, add a new Command Line build step. This time we’ll invoke Phing’s command-line tool and pass some parameters to it:
phing -f buildbuild.xml -DpackageVersion=%system.build.number%
    -DreleaseDate=CIbuild -DdocumentFormat=doc release-standard
PHPExcel has four build targets defined (release-standard, release-documentation, release-pear and release-phar), all providing different build artifacts. The release-standard target which we’ve now specified at the command line is the default build for PHPExcel which generates a ZIP file containing all source code and phpDocumentor output.
We are also passing Phing the current build number from TeamCity using Phing’s -D command line switches. The build script can use these to create the correct file names. TeamCity actually provides a lot of variables you can use, including source control details like revision number and so on.

If you haven’t configured the artifact paths while creating our build project, it’s best to do so now (see “Setting up the project”). We want to make sure that the ZIP file generated in this build script is available from TeamCity’s web interface.
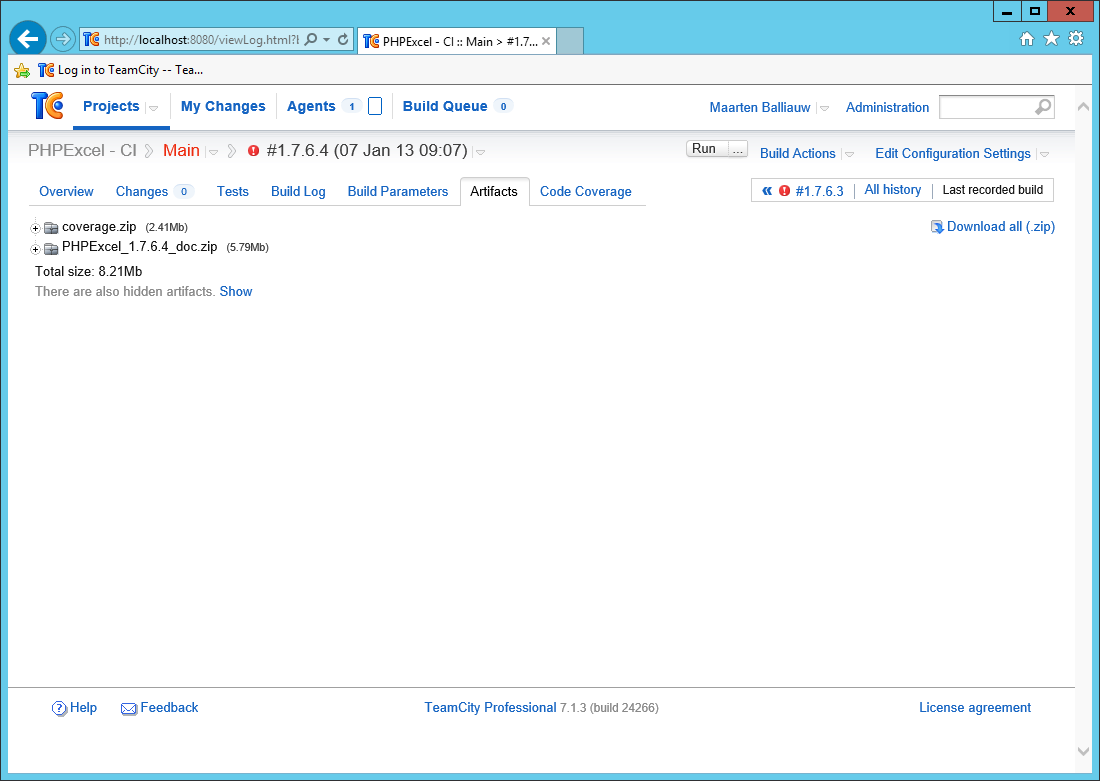
Try running another build. You’ll now see that unit tests are being run and afterwards the Phing build script is being run. From the project dashboard, navigate to the build that’s running and open the Artifacts tab. Once the entire build is completed, you will find the ZIP file generated by the Phing build script is now available for download. The best thing is that you can even configure guest access to TeamCity so the users of your project can come and download continuous integration artifacts.
Nice, isn’t it? Let’s see what else is possible. How about…
Code Coverage
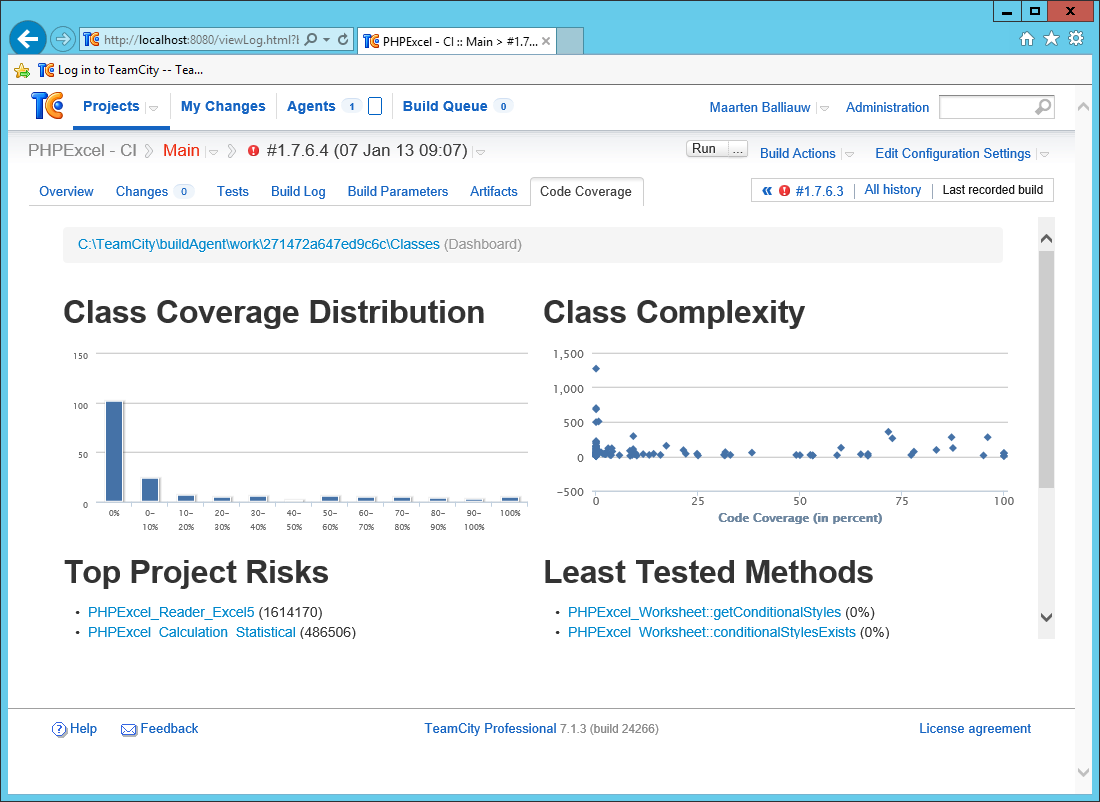
The first build step we created was running unit tests using PHPUnit. The nice thing about PHPUnit is that it can provide code coverage information as well, nicely formatted as an HTML report. What’s even nicer is that TeamCity can display HTML reports on a custom tab in the build results.
Let’s first make sure code coverage is enabled. Edit the first build step (running PHPUnit) and make sure it uses PHPExcel’s phpunit-cc.xml configuration file for configuring PHPUnit. This configuration file which is specific to PHPExcel outputs its code coverage report in the unitTests/codeCoverage folder. While it is possible to add all generated files to TeamCity as a build artifact, it’s cleaner to ZIP that entire folder and make it available as one single file. We can have TeamCity create this ZIP file for us by using a special artifact path pattern! Edit the build artifacts again and make sure the following two artifact paths are specified:
build/release/*%system.build.number%*
unitTests/codeCoverage => coverage.zip
That’s right: we can make TeamCity create a ZIP archive from the unitTests/codeCoverage path by simply using => and specifying a target artifact name.
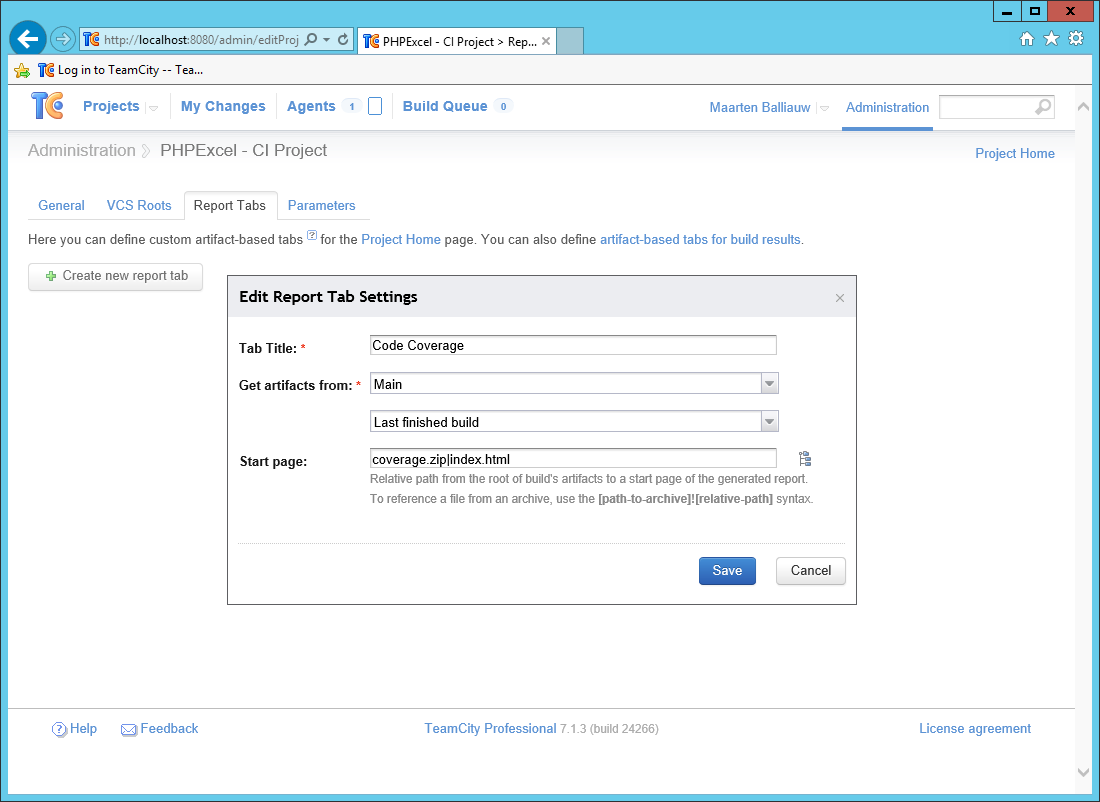
Next, navigate to Administration and edit the PHPExcel – CI project. Under Report Tabs, we can add a custom report tab and point it to a file in the ZIP file we’re creating every build.
Run the build again. Once it completes, the Artifacts tab should contain the coverage.zip file we’ve just created. Next to that, there should now be an additional tab Code Coverage available which displays code coverage results:

Using the same approach (zipping HTML files and adding a custom report tab), it’s very easy to add additional build reporting and display results from PHP mess detector, PHPLint or even have a tab available which displays phpDocumentor contents.
What else is there?
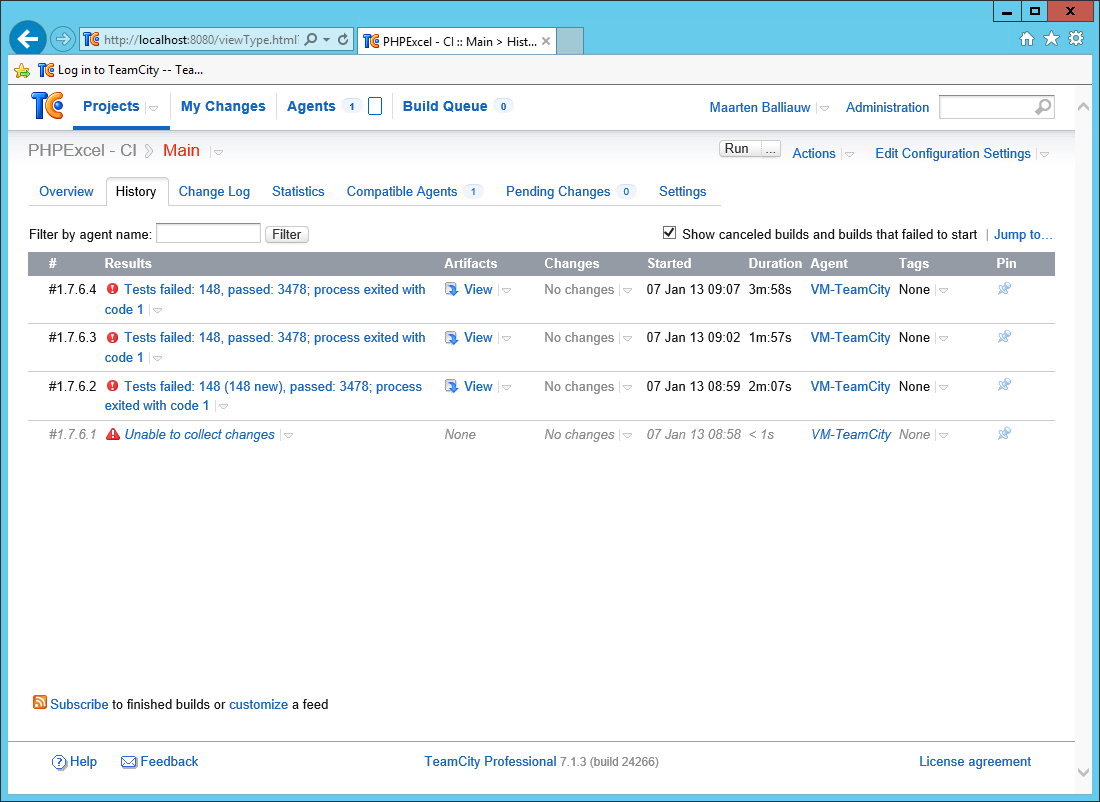
TeamCity is a very versatile product. In this post, we’ve seen that while there is no PHP support out-of-the-box, it is very easy to configure Continuous Integration for PHP with it. Next to this flexibility, a number of additional reports are available. For example, build history is tracked and you can check what happened in previous builds:
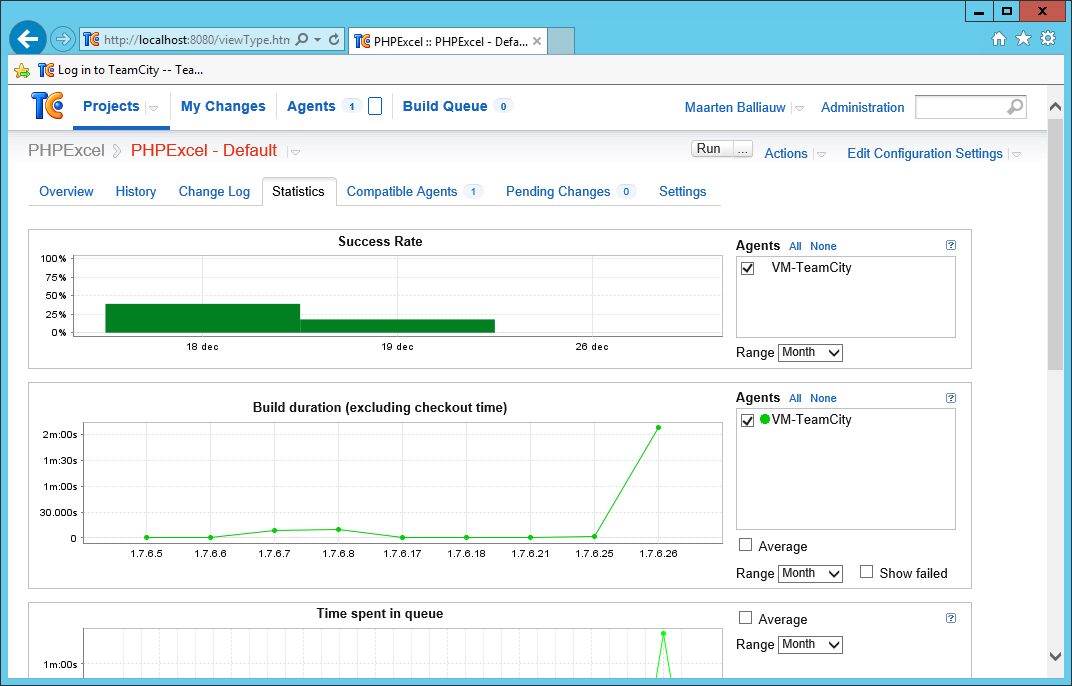
Another interesting tab is Statistics. This tab shows general build statistics such as success rate, build duration and test count in a graphical format.
Another thing I like when reviewing build results is the possibility to dive into the changes that are included in a specific build. For example, we can get a global overview of all changes:

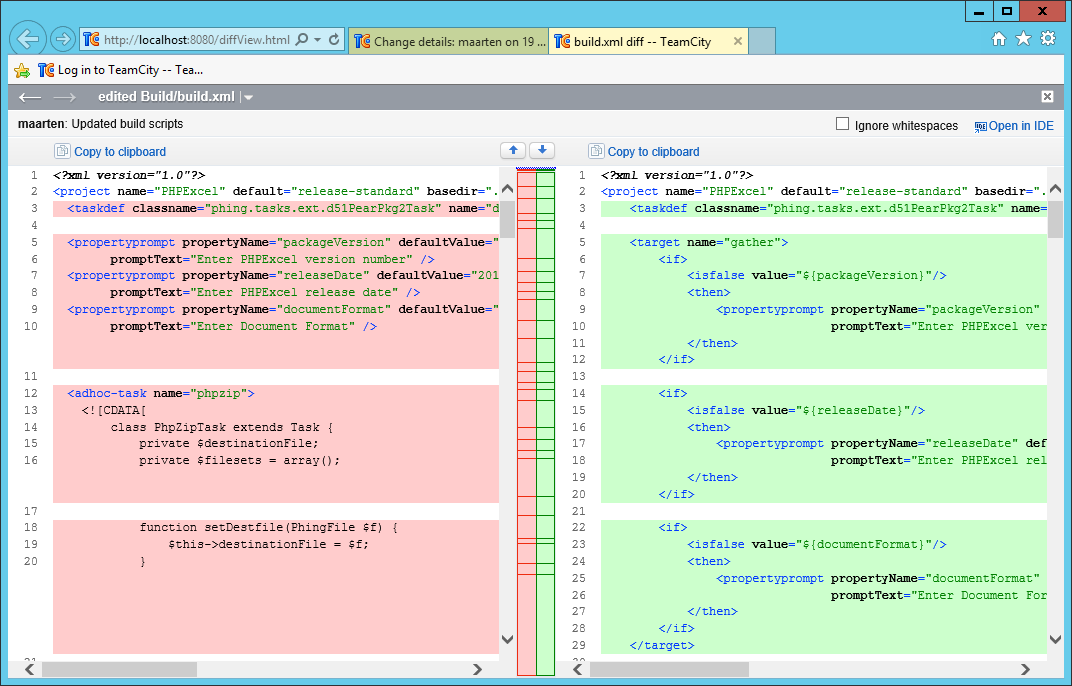
Note that we can drill down in the changes and inspect in which build a specific change was included for the first time or diff with a previous version:
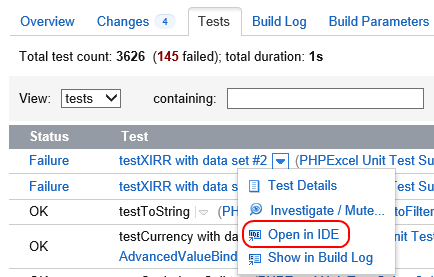
When working with an environment based on the IntelliJ Platform, like PhpStorm or WebStorm, it’s easy to link TeamCity with the IDE. After installing the TeamCity plugin into your IDE you’ll notice that there are some useful little things like opening a unit test in the IDE from within TeamCity:
Feel free to experiment with TeamCity: it’s 100% free for up to 20 build configurations!
Develop with pleasure!
– JetBrains Web IDE Team
Subscribe to PhpStorm Blog updates