Docker-Compose: Getting Flask up and running

A couple of issues were resolved in PyCharm 2017.1, and Docker for Mac should now work out of the box. In this blog post we’ll show you how to set up a project with Docker Compose on a Mac. If you’re on Linux, the process is very similar. Docker Compose is supported on Windows from PyCharm 2017.2.
In this tutorial we’ll show how to create a very simple ‘Hello World’ Flask application, and then how to run it within a Docker container. For the full code, and to follow along, see GitHub: https://github.com/ErnstHaagsman/flask-compose.
First things first
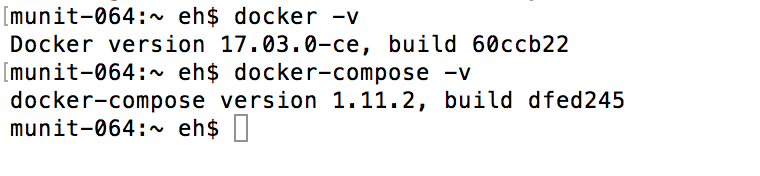
Before we get started, let’s check a couple of things: make sure you are using PyCharm 2017.1 Professional Edition or later. Docker support is not available in PyCharm Community Edition. Then, please ensure your Docker and Docker Compose are up to date. To check, open a terminal, and run `docker -v`, and `docker-compose -v`:
Then, although it is the default setting in PyCharm 2017.1, it never hurts to check that your Docker API URL (Preferences | Build, Execution, Deployment | Docker) is set to `unix:///var/run/docker.sock`.

Now we can create a new Flask project. Let’s create a virtualenv so that PyCharm can stub out our Flask project before we have Docker configured. You can create a Virtualenv by using the ‘…’ button next to the interpreter dropdown.

Dockerizing Flask
After you click create, you should see the standard “Hello World” Flask template. So let’s see if we can get Flask to show us “Hello World” from a Docker container. To do this, we’ll add four files:
- requirements.txt, just put “Flask==0.12” here to install Flask
- Dockerfile, where we will set up the Python environment for the Flask app
- docker-compose.yml to set up how to run the Dockerfile, and add a database
- docker-compose.dev.yml to make some changes for local development
In the Dockerfile, we’ll use the ‘python:3’ image, expose port 5000, install packages from requirements.txt, and afterwards copy the rest of our project into /app. See the full file on GitHub.
Then, we’ll create a Compose file where we define the Flask app as our only service (for now). Just use `build: .` to make Docker Compose build the container from the Dockerfile.
Docker will bake our code into the image, and that way the image is self-contained. If we wanted to, we could stop here and rebuild our image whenever we change the code. It makes development quite a bit faster to mount our code with a volume. So we’ll create an additional Compose file to do that while we’re developing.
In docker-compose.dev.yml, all we’re doing is adding a volume mapping for `.:/app` for the `web` service. This overlays the code in the container with a volume, making sure that code changes are applied immediately. Keep in mind that you will need to rebuild the image before pushing it anywhere.
Now that everything is configured, let’s quickly run `docker-compose up` in the Terminal to make sure that works. Open the terminal with Alt+F12 (in PyCharm) and run `docker-compose up`.

As we can see, Docker built our container, and Flask is running! Let’s go and check out our ‘Hello World’ message!
A trap for young players!
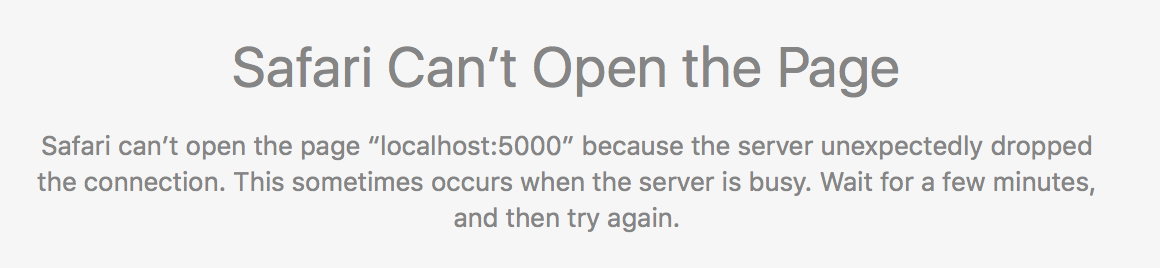
What happened here? Didn’t docker say that Flask was running?
For security reasons, many modern web frameworks actually limit incoming connections to only come from localhost. This means that our Flask app is running, but only accessible from within the Docker container, not from our Mac host. The easiest way to fix this is to add `host=’0.0.0.0’` as a keyword argument to `app.run()` in flask-compose.py:
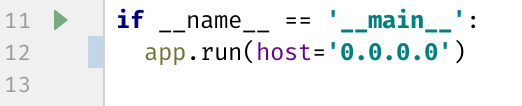
This change tells Flask to listen not only to requests from localhost (in this case the docker container), but on all network connections. In the case of our container this means we can access it from our host, and depending on configuration from other computers in our network.
If we now stop our container (Ctrl+C in the PyCharm Terminal), and rebuild it by running `docker-compose up –build`. We can see in the Docker Compose output that Flask is now listening on 0.0.0.0 instead of 127.0.0.1:

And reloading the page in Safari actually shows ‘Hello World’ now. So let’s stop the container (Ctrl+C in the Terminal), and then configure PyCharm.
Configuring PyCharm
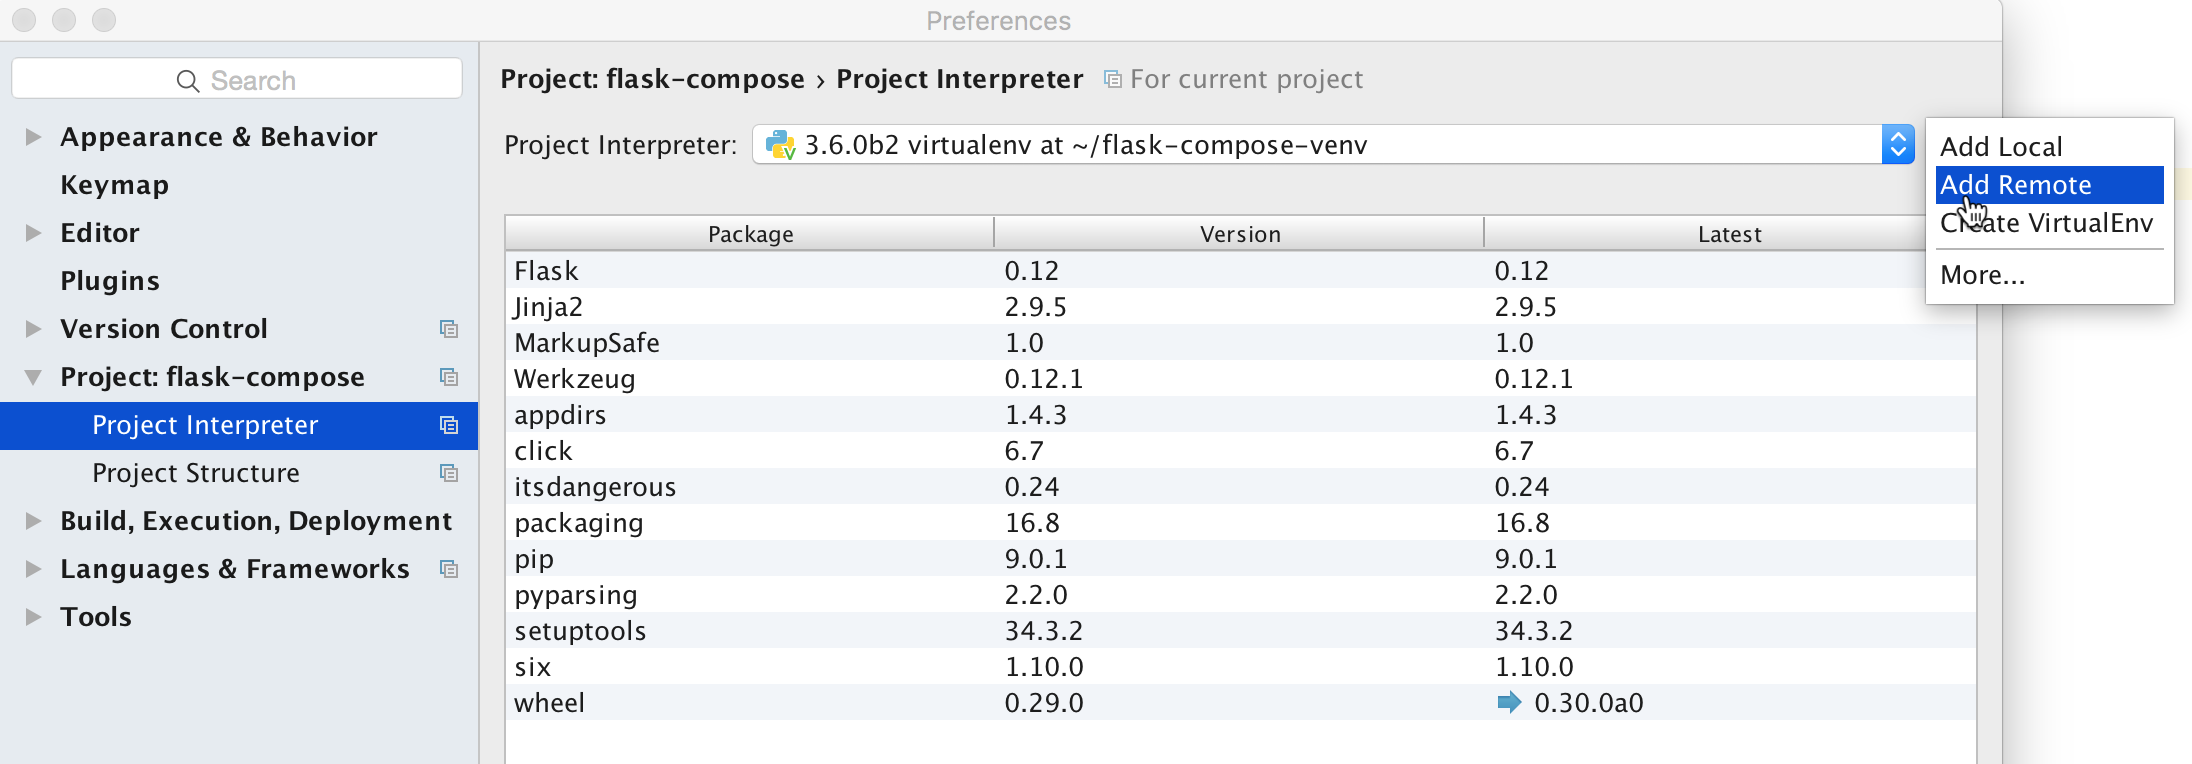
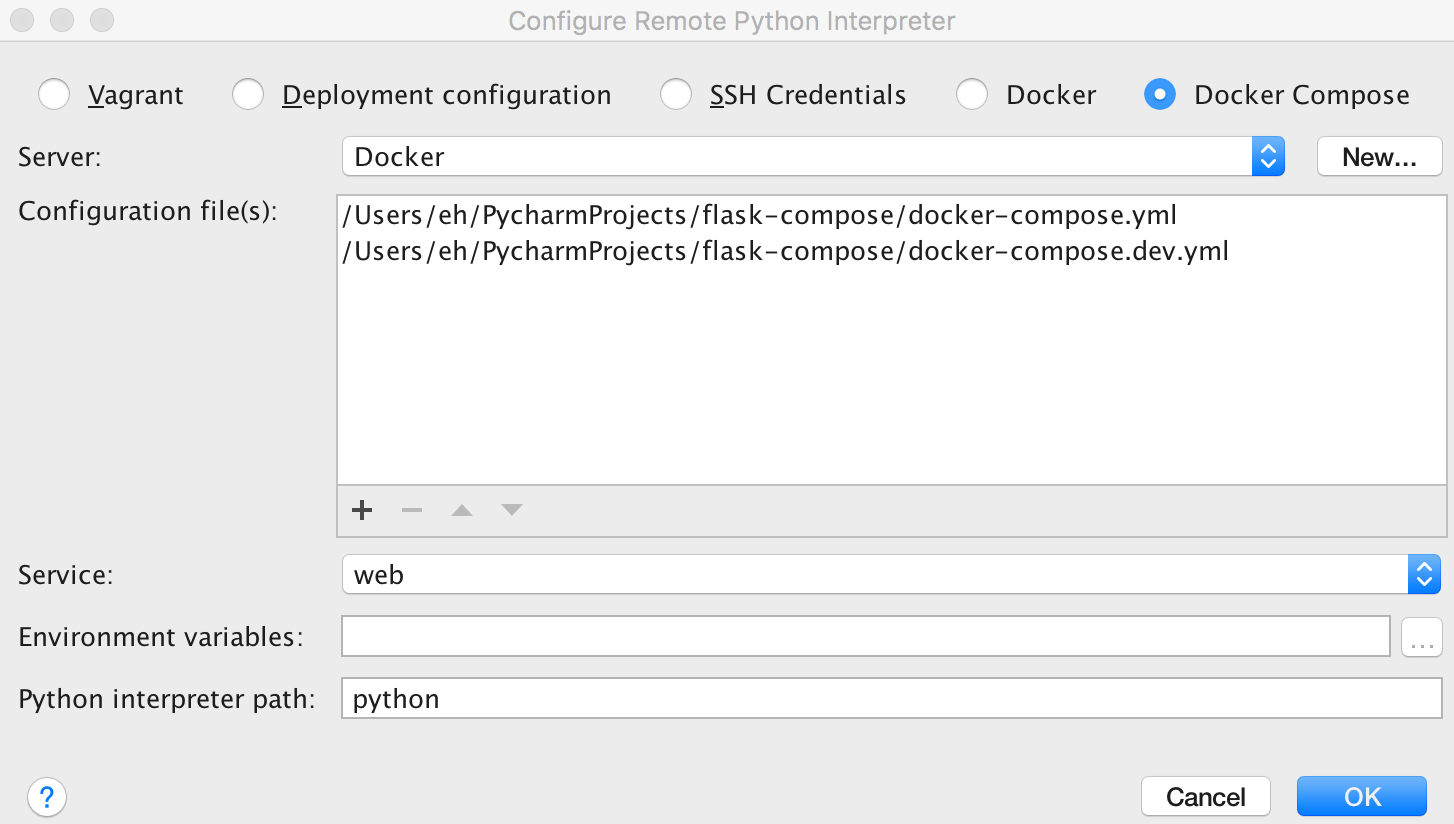
To make our project run using a PyCharm run configuration, we need to set the project interpreter to the Docker Compose service. We can do this from the Project interpreter page in preferences: Preferences | Project: <Project Name> | Project Interpreter.
Click the little button next to the interpreter dropdown (the white one, not the blue one), and choose “Add Remote”. If you don’t see “Add Remote” here, you may be using PyCharm Community Edition, which doesn’t support remote interpreters.
Now choose “docker-compose”, and almost everything will be pre-configured, I only had to add the `docker-compose.dev.yml` configuration to the list. We need to add it manually as this isn’t part of a standard docker project. You can do this with the ‘+’ button underneath the list of configuration files.
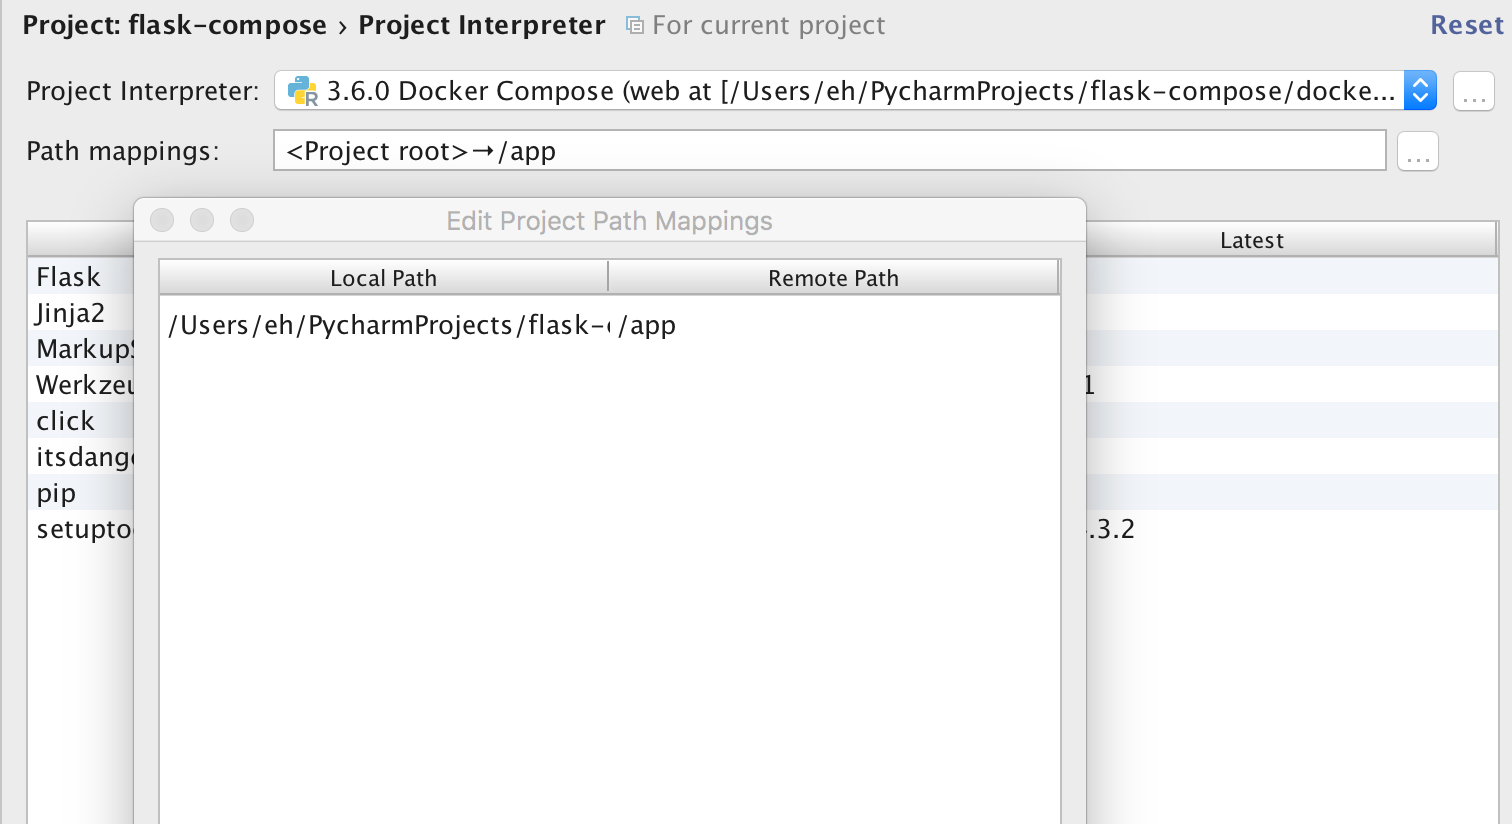
Now, we should set up the path mapping. We are inserting all our project code into the container’s “/app” directory. So let’s add this on the Project Interpreter screen, use the ‘…’ button next to the Path mappings field to change them.
After you close the preferences window, you can just use the regular Run and Debug buttons to start and debug your project:
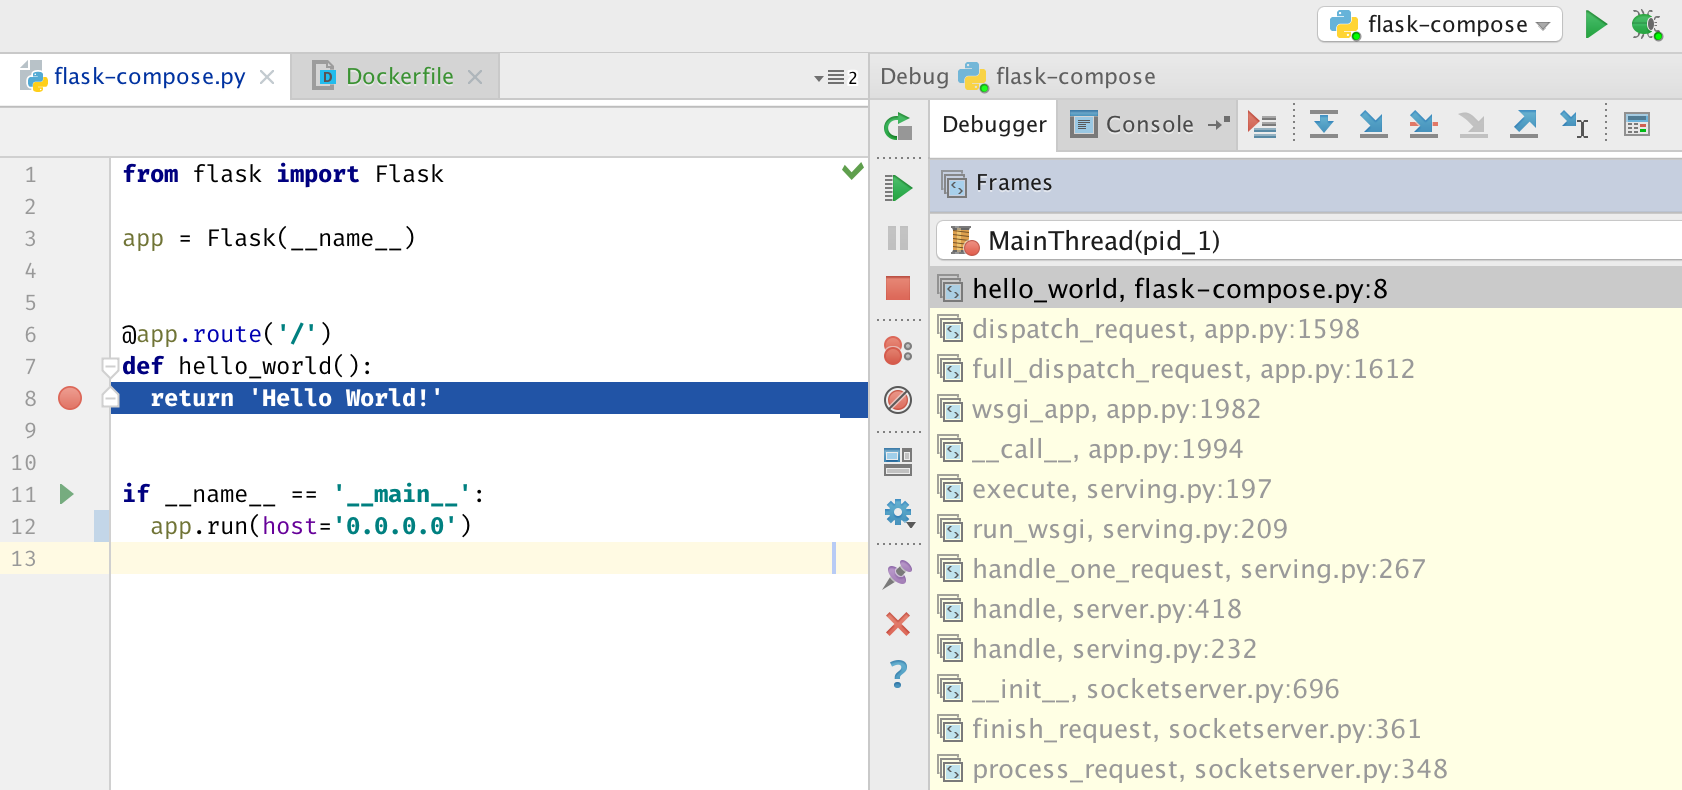
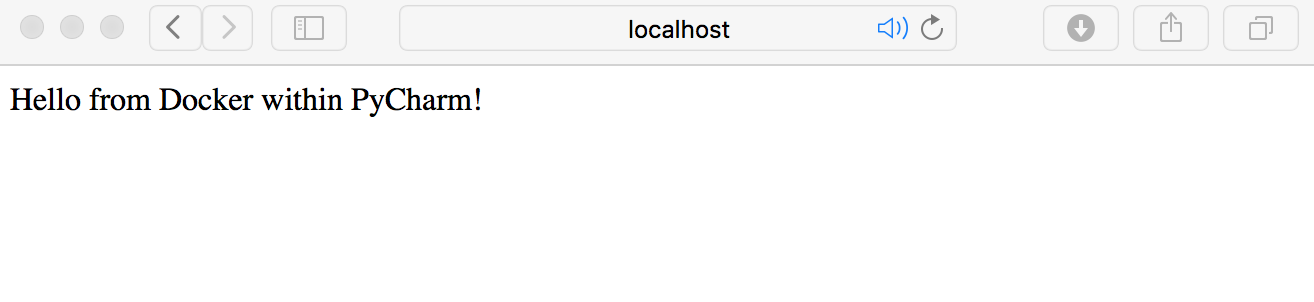
To celebrate, let’s change “Hello World!” to “Hello from Docker within PyCharm!”
And that’s all there’s to it! Have fun developing with Docker Compose! If you’d like to learn more, you can read the second part of this tutorial about adding a database service.
PyCharm Team
-The Drive to Develop