
Crafting TeamCity Pipelines: The Art of Pitch Design

Design is an integral part of any product or feature development cycle. In this blog post, we’ll tell you how we go about designing new features for TeamCity Pipelines.
We spent over a year fine-tuning our processes so that we can adopt a better design approach that puts our customers first. Here’s our story.
Disclaimer: While this workflow is comprehensive and thorough enough on its own, this is our approach for designing just one of the many features of TeamCity Pipelines.
This is not an attempt to provide guidance for design in general, but rather share our findings on how to design and develop specific user features for an overall product, one ticket at a time.
The process may vary for each designer and can change based on the scope and complexity of the task.
Feature design process: Overview
From the moment the designer starts working on a pitch, the design process can be consolidated into six main steps:
- Research
- Creating a solution
- Design verification
- Documentation
- Design review
- Getting feedback

Each stage consists of further steps that we’re going to cover in the blog post.
The process is not linear – we might go a step or two back when we receive feedback on a newly designed feature.
So instead of a nice straight line, it looks something like this:

Let’s go through every step, one by one.
Step 1: It all starts with research
When starting work on a new feature, the first step is to gather all important and relevant information, going beyond initial insights from the pitch. Understanding the user problem is paramount – who the users are, what their needs are, and why they need the feature.
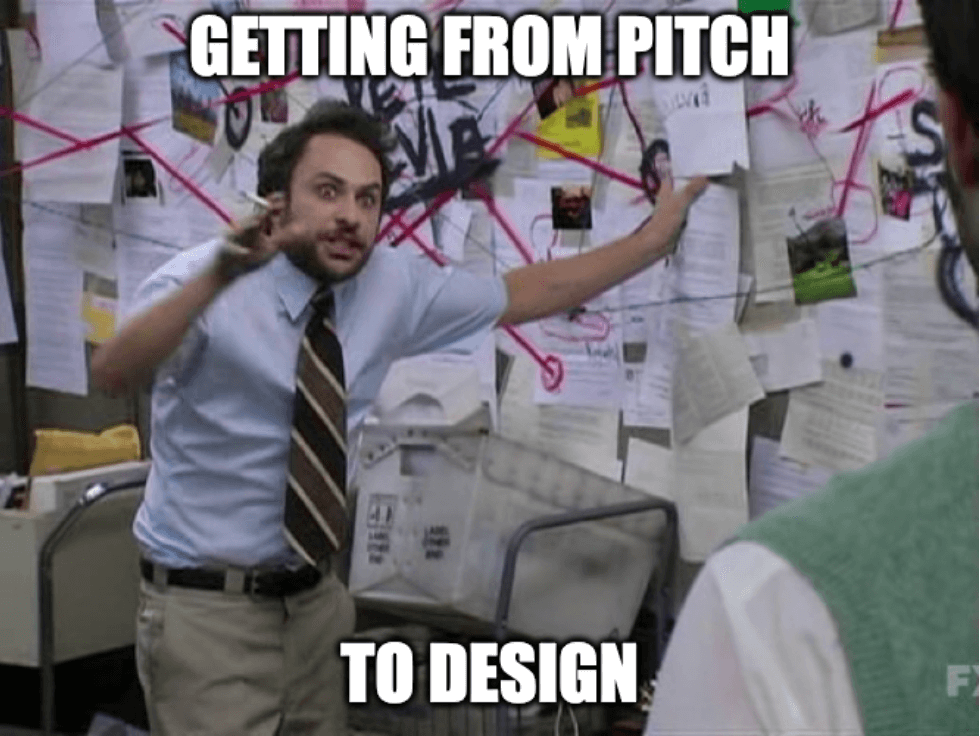
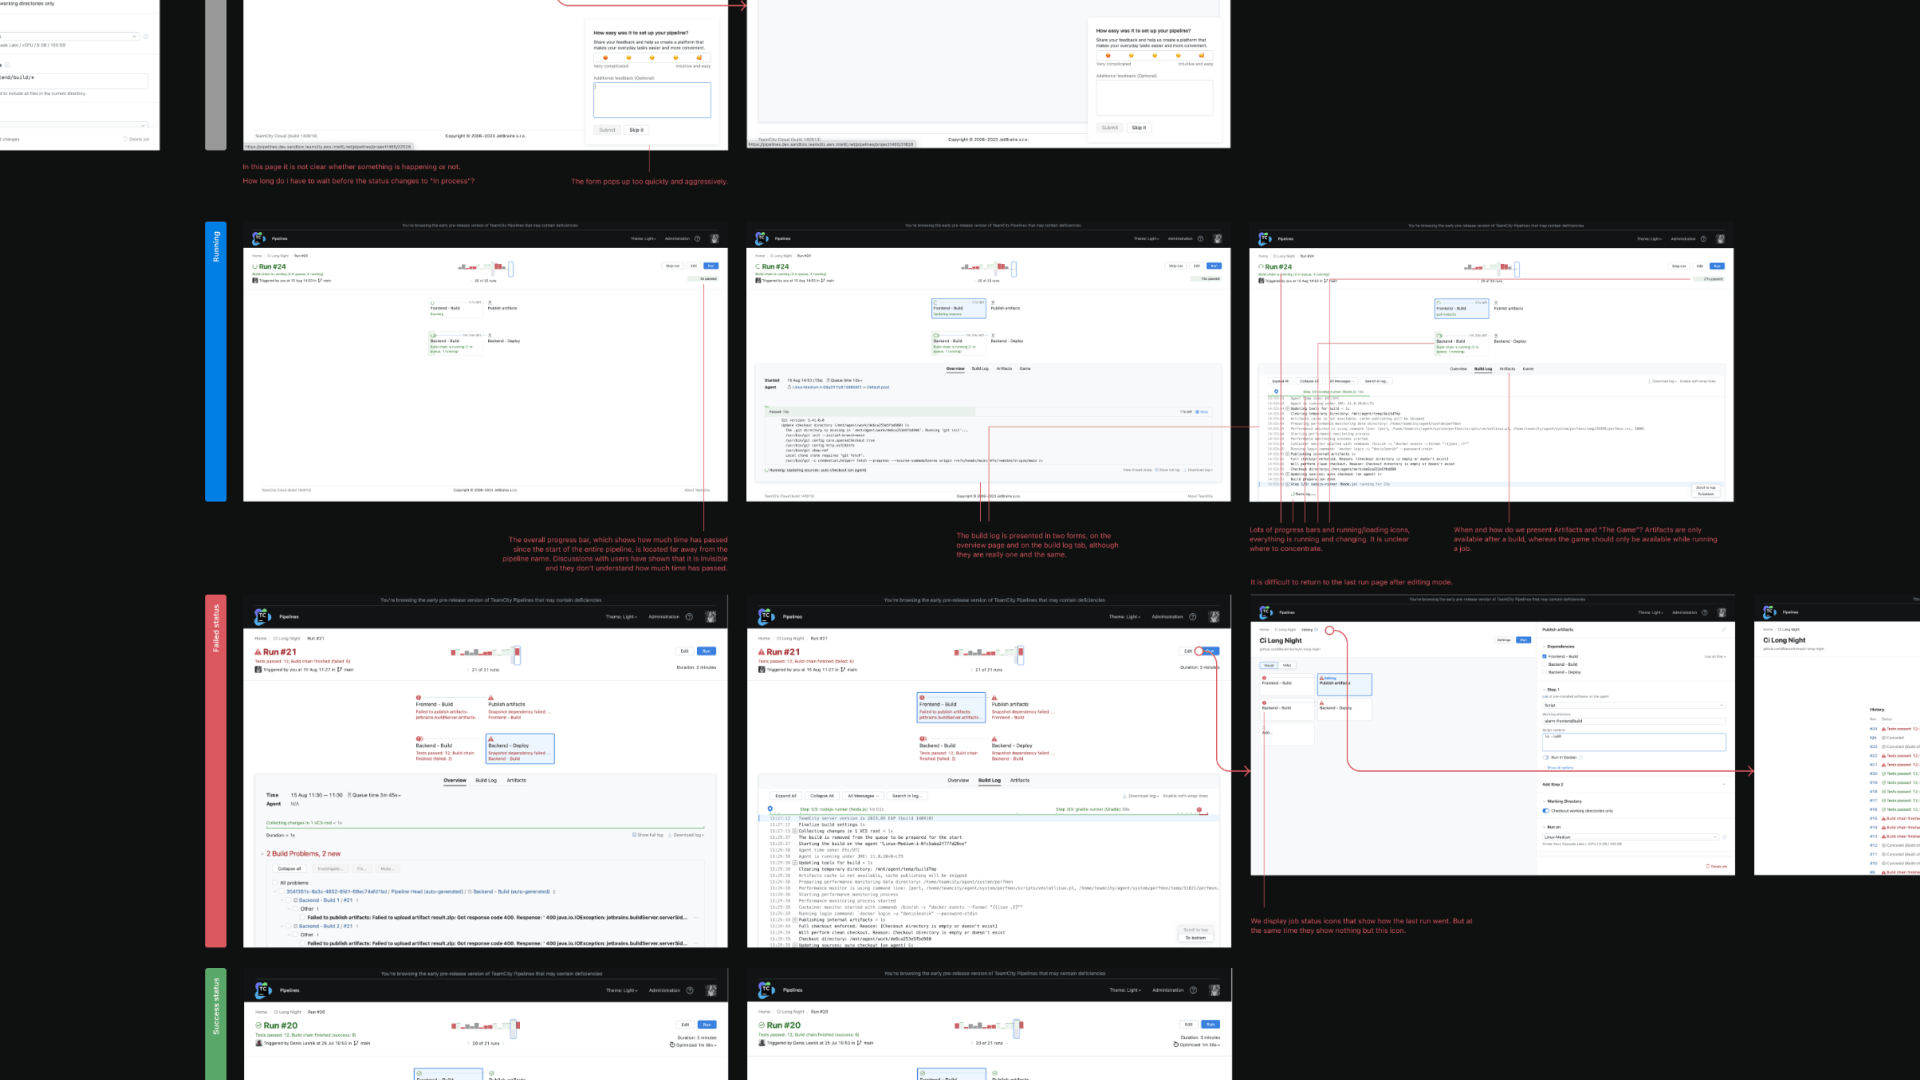
We usually start by analyzing the existing solution, if there is one. In the example below, you can see the designer rethinking the old Run Pipeline page. Notice all the red lines and text?
The first step doesn’t end here. User feedback collected through tools like customer journey maps (CJM) and interviews further refines our understanding of what specific experience the feature should provide.

It’s also important to analyze the problem that we’re trying to solve with the design. The problem might have several parts, so to get a more complete understanding of what the problem is, it’s helpful to talk to various stakeholders and users.
Here’s the analysis of the existing UI/UX problems for creating and editing the first pipeline:

Coming up with a hypothesis
Once all data is collected, we form potential solutions phrased as hypotheses – statements suggesting potential outcomes or explanations drawn from previous knowledge, observations, or data.
Previously, the problem that we faced was that hypotheses would prescribe a specific design solution without addressing why the solution was necessary in the first place.
Instead, we switched to a different approach. Now, our hypotheses don’t contain a specific action but rather assumptions about a certain solution and why we made these assumptions.

Analyzing competitors
No product exists in a vacuum – there are always competitors out there. While we’re not implying that you should blatantly copy what others are doing, it makes sense to research how others are solving the same problem you’re trying to solve. What are they doing well? What do you think could be improved?

It’s worthwhile to take a look at competitors’ products and consider the approaches they’ve taken and layouts they’ve used. Their solutions may not be related to your specific problem, but sometimes you can draw inspiration from them.
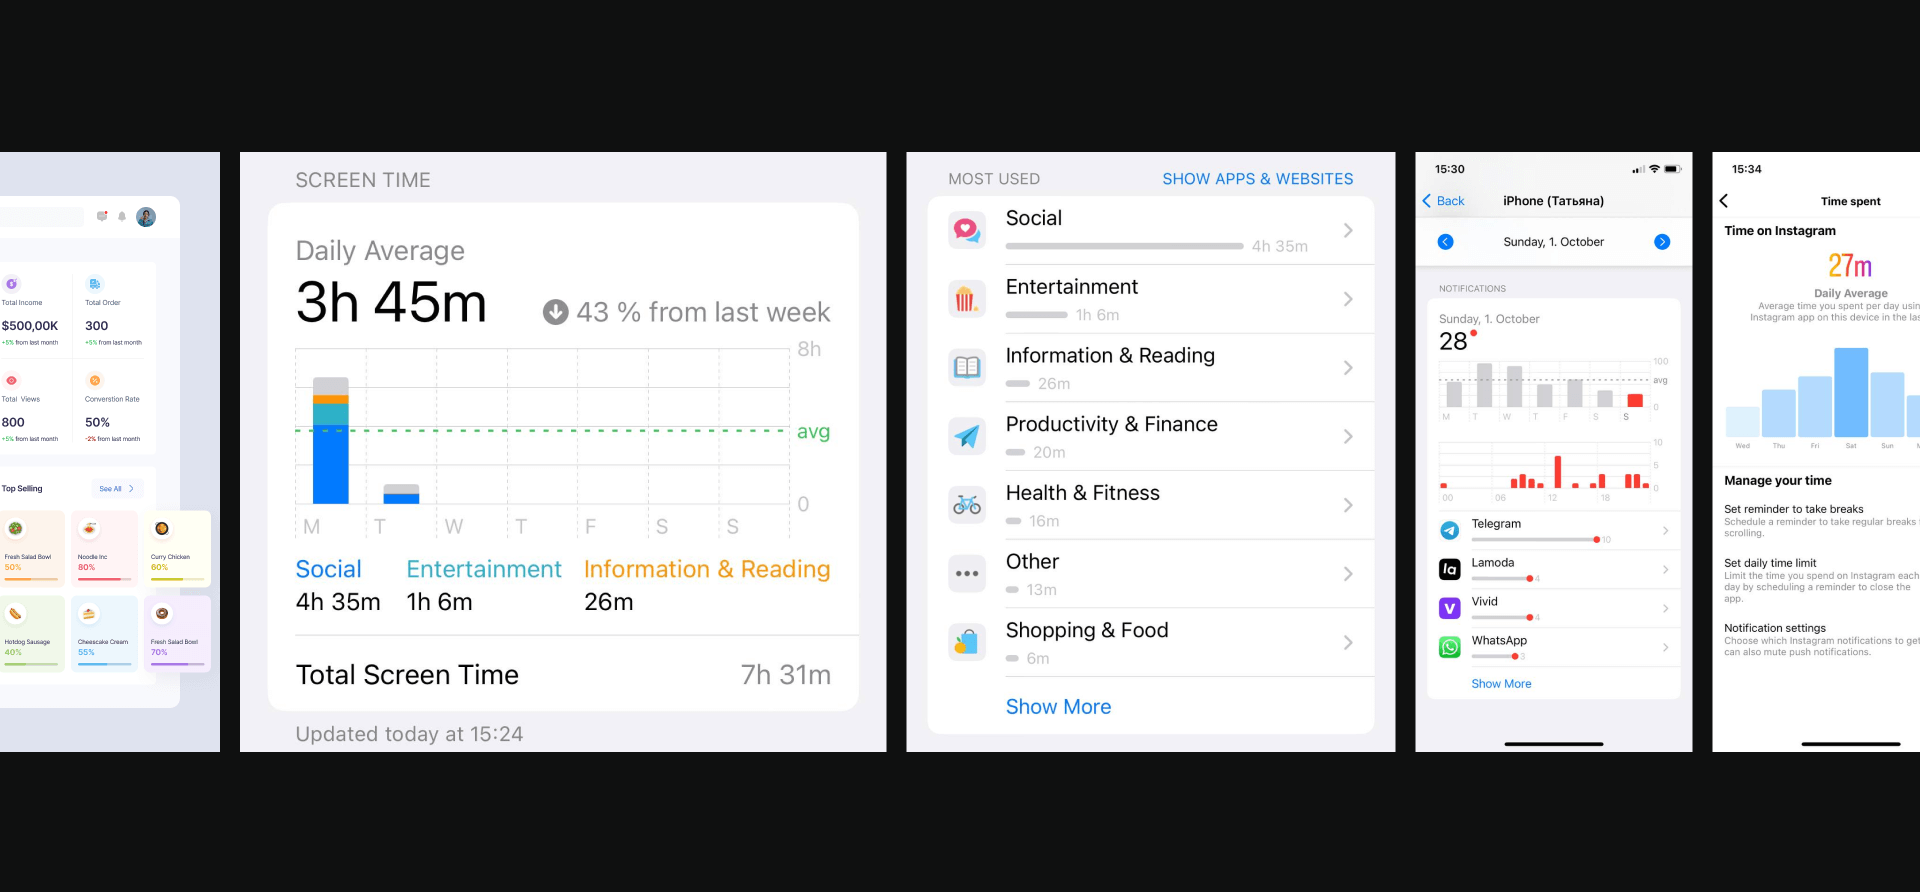
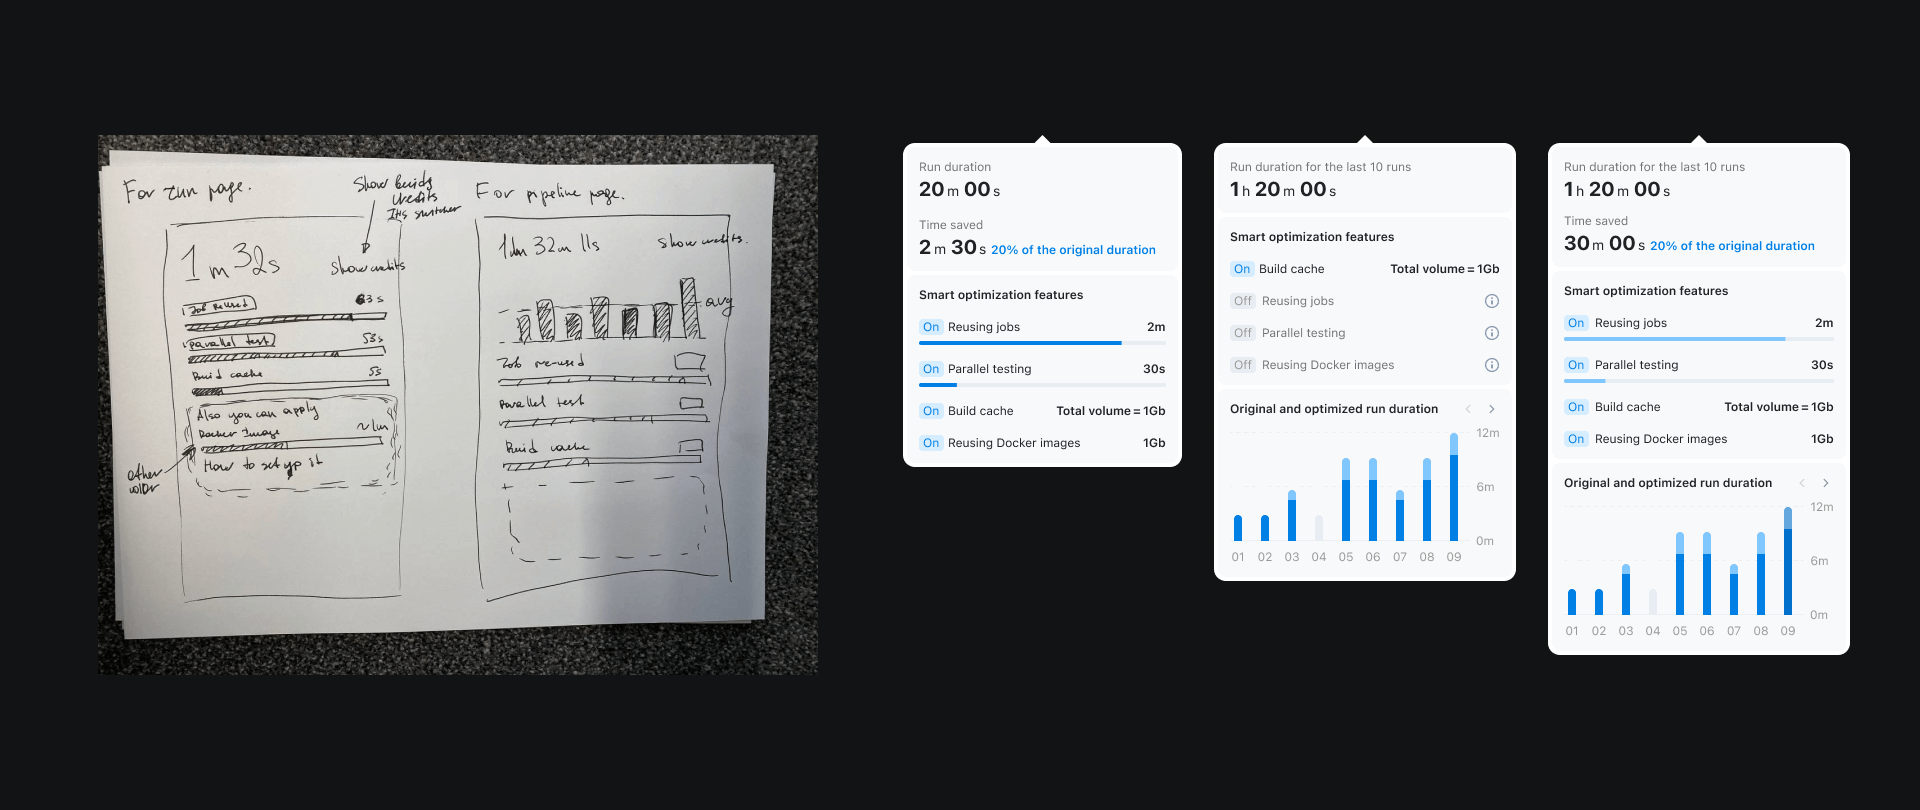
For instance, here’s how we started working on the Optimizations feature in TeamCity Pipelines. The feature shows how much time TeamCity saved on each run by using smart optimization options (job reuse, test parallelization, etc.)
We took inspiration here from the Screen Time report feature on Apple devices. If you have an iPhone, you can easily pull up this report (just be warned that you might not like your stats).
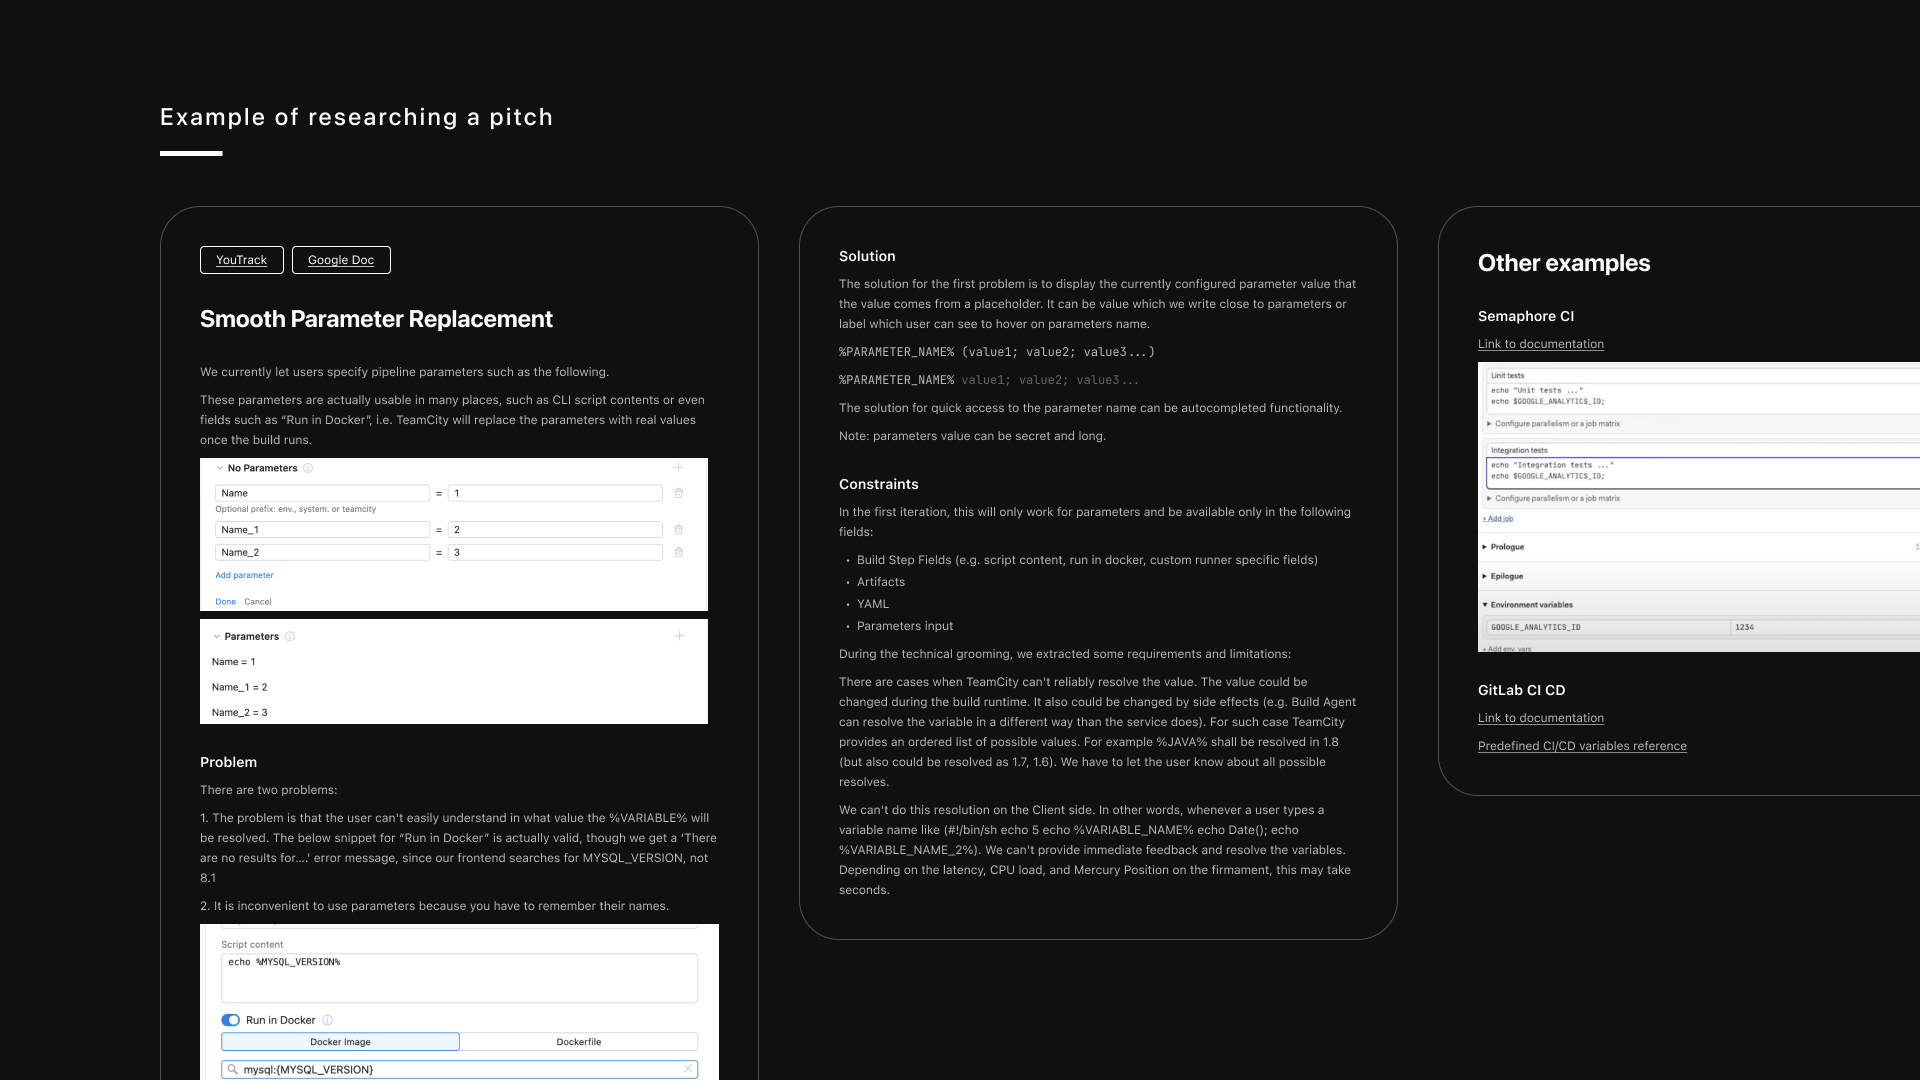
Once the research is complete, the final feature description from the designer’s standpoint would look like this. It would describe the problem, the potential solution, and constraints.
Step 2: Creating a solution
Once the research is done, we start creating a design solution. First, we start with a user flow. How do users get to the feature in the first place? What are they trying to accomplish?
Here is an example of a user flow for the task YAML configuration as code. We ended up rethinking the solution in the end, so the example below isn’t entirely current, but the idea is still valid.

Creating a system solution
Here, we start with sketching. It’s not just about designing the interface, but rather about crafting a system to address various user scenarios.
Typically, we start with a sketch, arranging potential elements and experimenting with combinations. However, these ideas are based on the data we gathered during the research phase.
Here’s one of the sketches for the optimization block alongside its final version. While they may differ significantly, you’ll notice some similarities.
When working on a system solution, we also create master components with all of the states and elements necessary for the feature.
We typically construct a component based on insights gained from research. Subsequently, we test it in real-world scenarios and refine it accordingly. This process may involve several iterations until we are confident in its functionality.
Here is an example of a component we created for the sidebar where users can configure their pipeline:
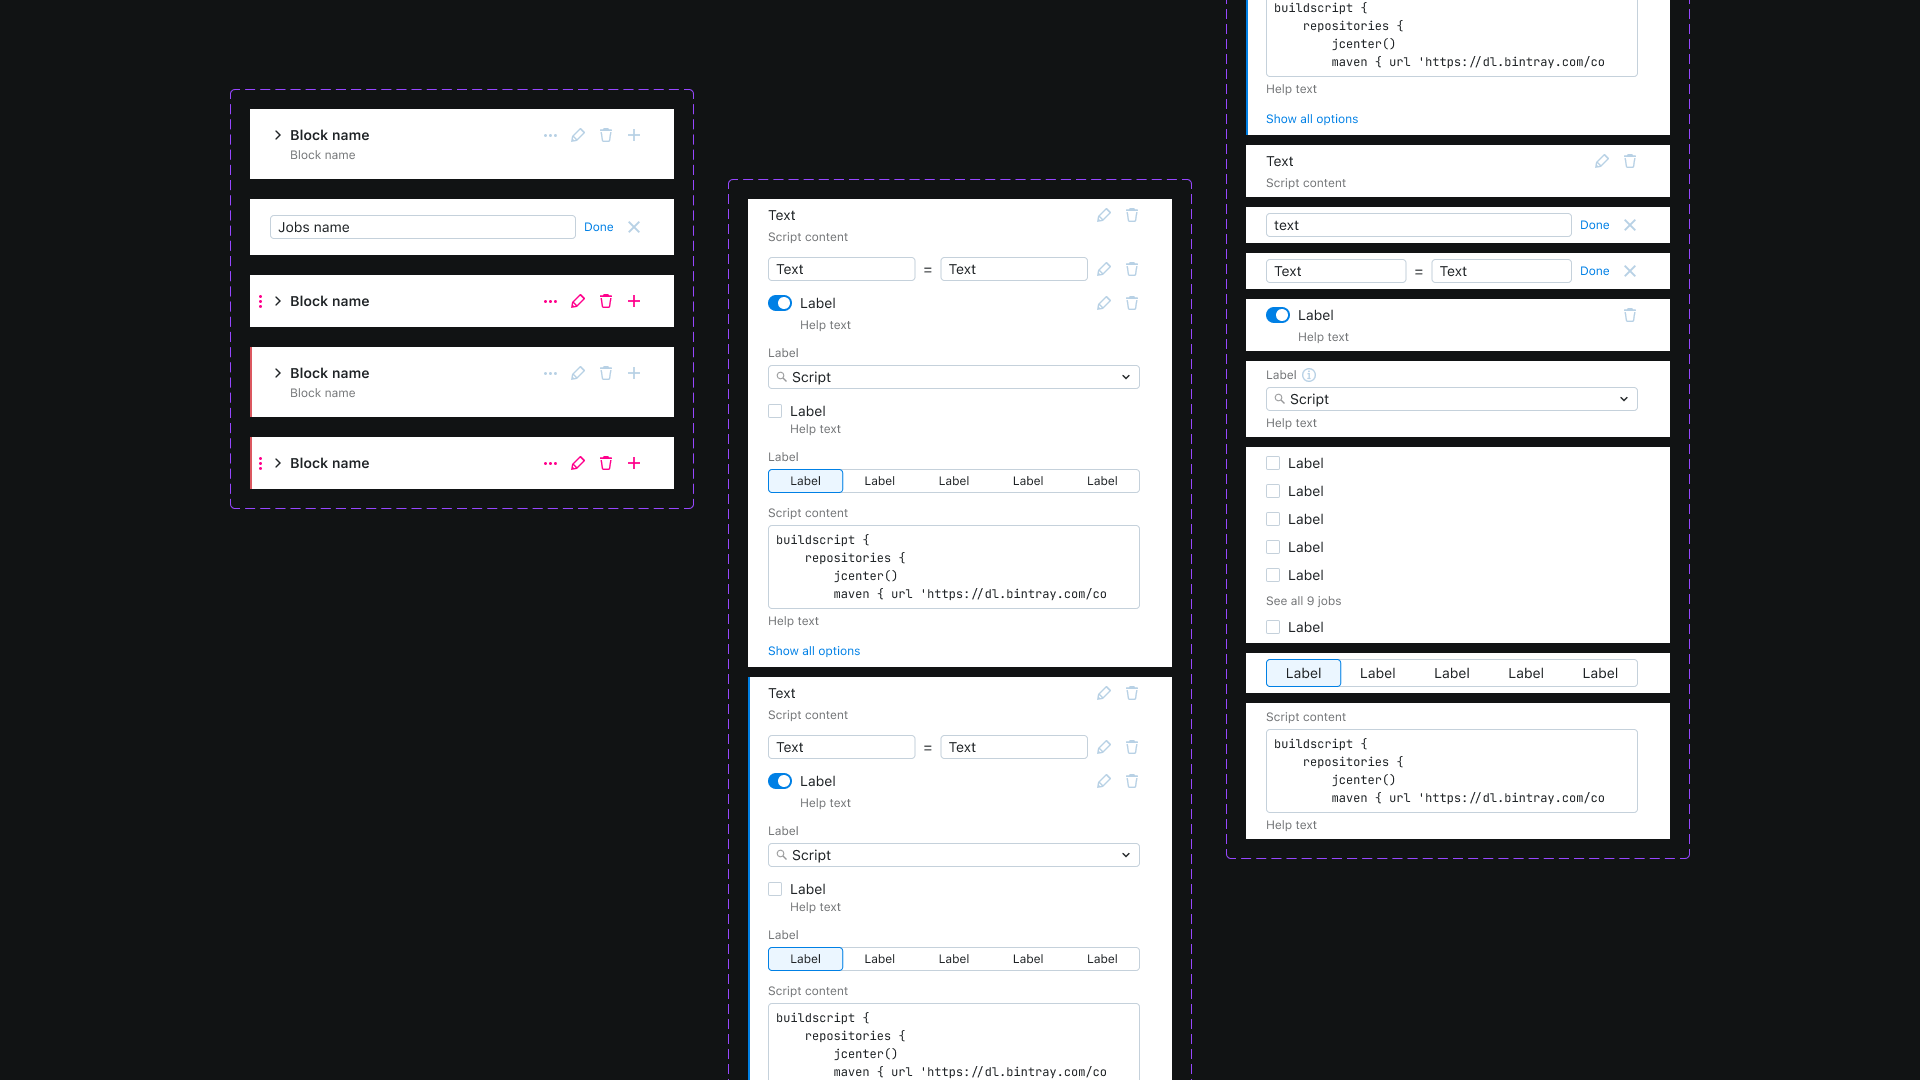
And here are different scenarios for each component that test how strong the system is:

Prototyping is an important stage in design validation. We iterate through it multiple times, thoroughly checking how the system will work. This prototype also serves as a tool for showcasing the solution to developers, demonstrating it to product managers, or conducting user testing.
Here’s an example of a prototype for a task that addressed the navigation issue in TeamCity Pipelines:
Another example of a prototype is the Run pipeline page with the Optimization features that we mentioned earlier:
The final result, however, looks different from what you see in the prototypes.
Step 3: Verification
Each design solution goes through the verification stage. The goal of this stage is to confirm whether the proposed design solution is viable and solves the users’ problem as intended.
Here, we conduct demo sessions and engage in discussions about this decision with managers, owners, and other experts. Oftentimes, we also conduct user tests among our colleagues at JetBrains and ask for their feedback. Dogfooding at its best! 🐶
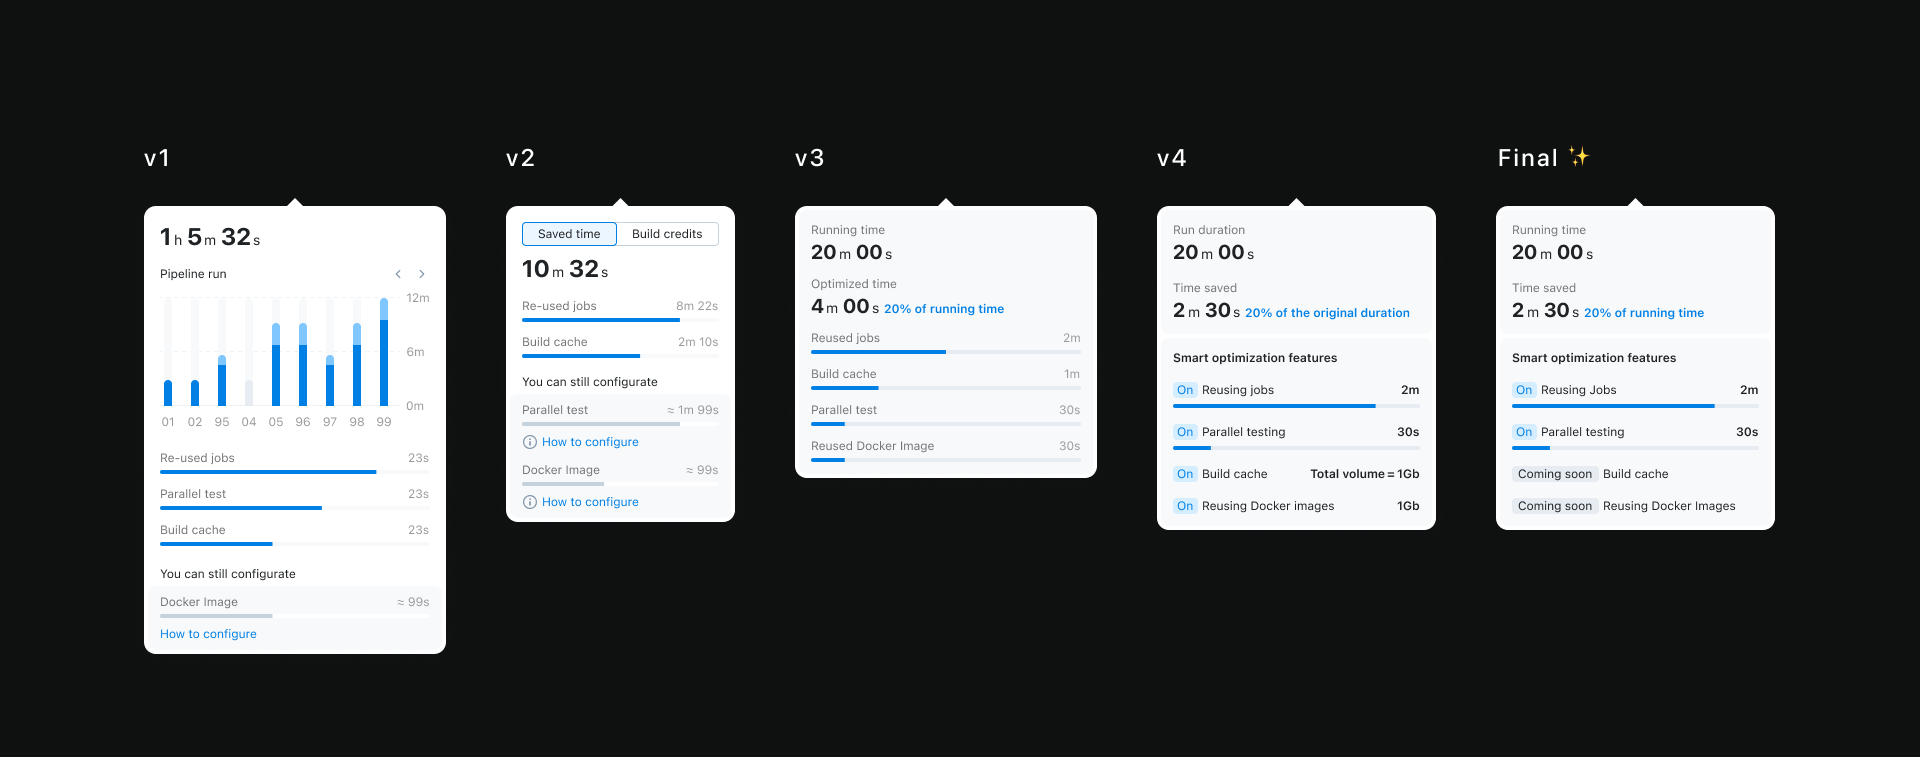
Here, you can see how the Optimization section evolved over a few demo sessions and discussions with end users.
Step 4: Documentation
Once everyone is happy with the proposed design solution and user testing is successful, we start mock-up preparation sessions for development. This stage includes grooming, UX copywriting, layout preparation, and documentation.
Here’s an example of the design library for the header section of TeamCity Pipelines. The designer prepared the mock-up with various states of the header elements. We try to describe all possible states so that developers have fewer questions.
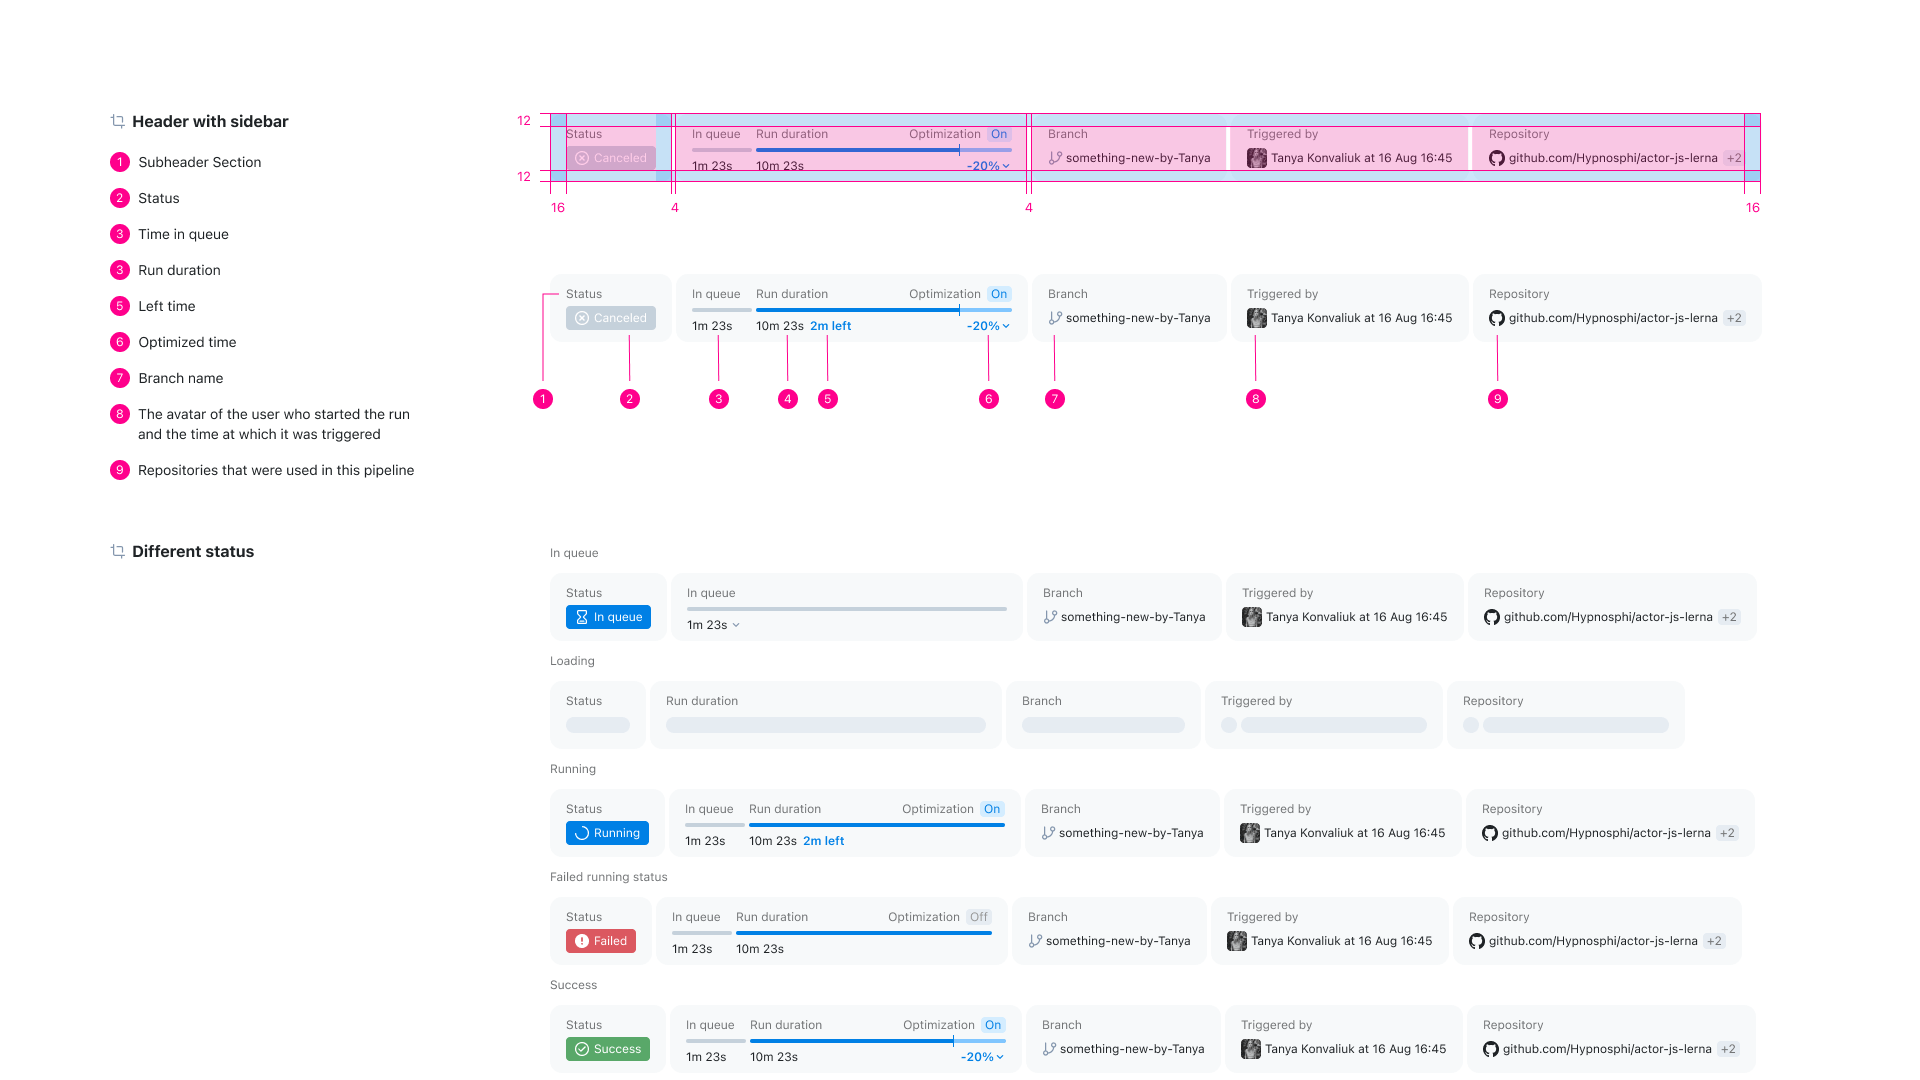
A quick glance at the dark theme version:

When the design is ready to be passed onward to development, the final results look something like this:
Step 5: Design review
Even after we submit the layouts for development, our work is not over. Since developers may encounter new problems during the development process, they might still need support from the design team.
When the feature is ready, the developers share the finished, production-ready version with the designers. This way, we can ensure that everything worked the way we thought it would.
Step 6: Get feedback
After the feature launch, we receive feedback from end users and go for a new round of product improvements. The process isn’t linear – it’s cyclical.
In this blog post, we briefly describe how we approach designing new features for TeamCity Pipelines, our new product that offers a brand-new approach to the whole CI/CD process.
The product is now in public Beta, and we’re very much looking forward to user feedback and suggestions. Let us know what you think!
Subscribe to TeamCity Blog updates


