Feature Spotlight: Python remote development with PyCharm

This blog post is from 2015. If you are using PyCharm 2018.1 or later, see this blog post instead.
Happy Friday everyone,
In today’s blog post I’m going to cover some basic principles and features in PyCharm that make Python remote development easy as pie. To demonstrate them I’ll use a very simple flask web application from the official flask github repository. Enjoy the read!
Note: Remote development functionality is only available in PyCharm Professional Edition. For more details please see the editions comparison page.
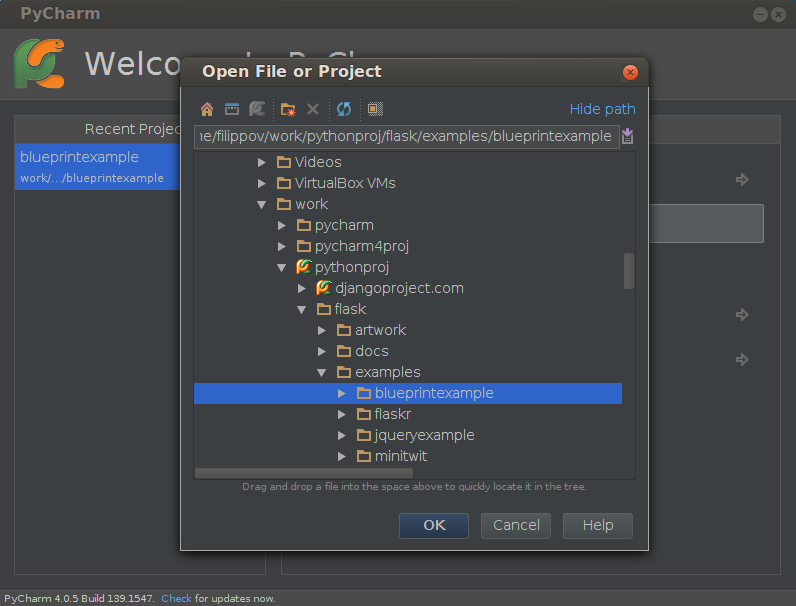
First I clone the official flask repository from https://github.com/mitsuhiko/flask. Then from the PyCharm’s Welcome screen I open the blueprintexample directory, which stores the source of the super simple flask application I’m going to use for the demo:
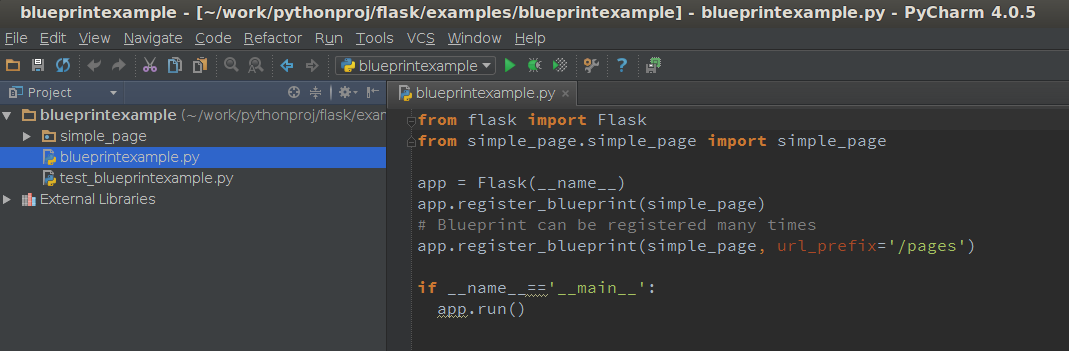
PyCharm opens the directory and creates a project based on it:
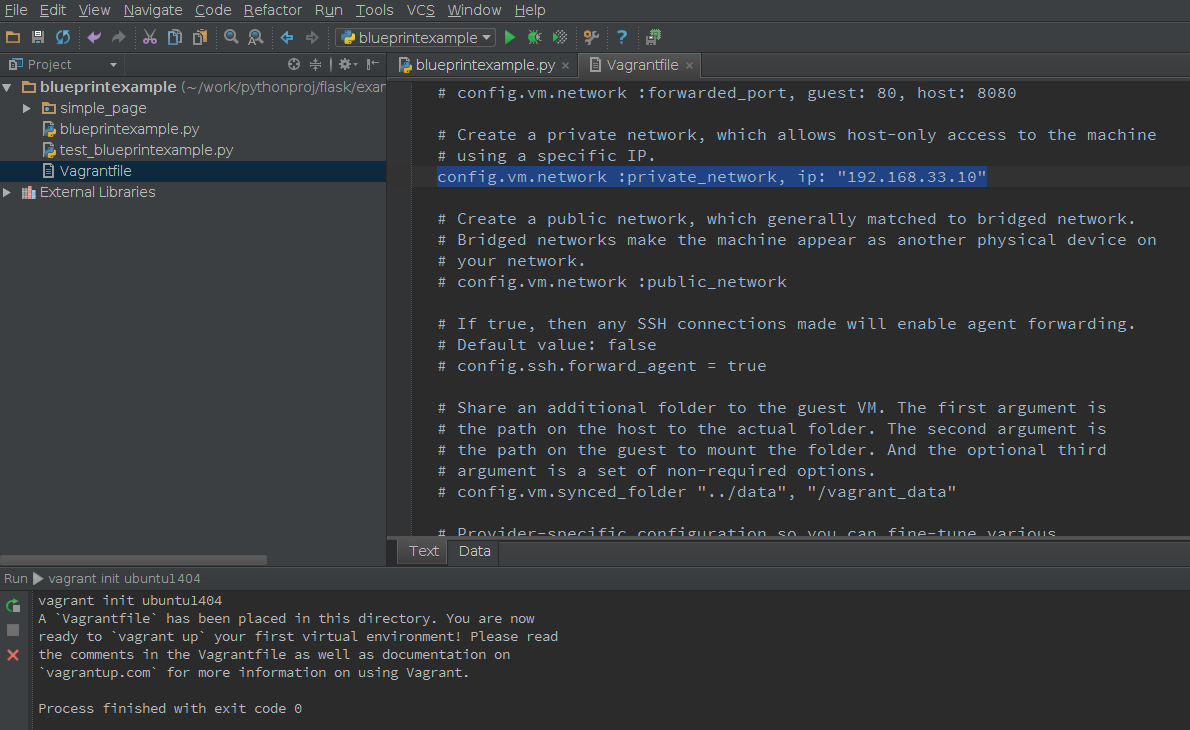
Now I’m going to set up the remote machine to start with the remote development. I use Vagrant which PyCharm offers great support for. In one of my previous blog posts I already covered Vagrant integration, so here are just the straight steps to provision and run a VM. I go to Tools | Vagrant | Init in Project Root and select the Ubuntu 14.04 image which was previously imported from the collection of vagrant boxes. This creates the Vagrantfile in the project root. Now, I’m going to edit this file to configure a private network and make my VM visible from my host machine:
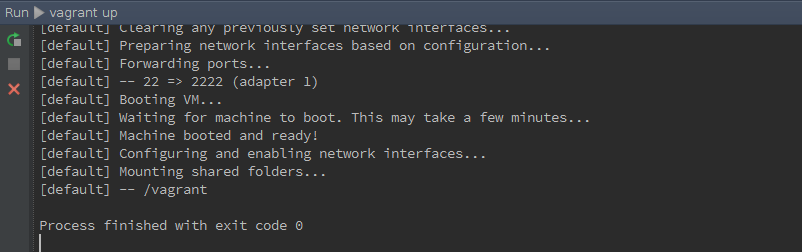
Next, I run the VM with Tools | Vagrant | Up and PyCharm shows me that the VM is up and running:
We can open a local terminal inside PyCharm to test the VM:
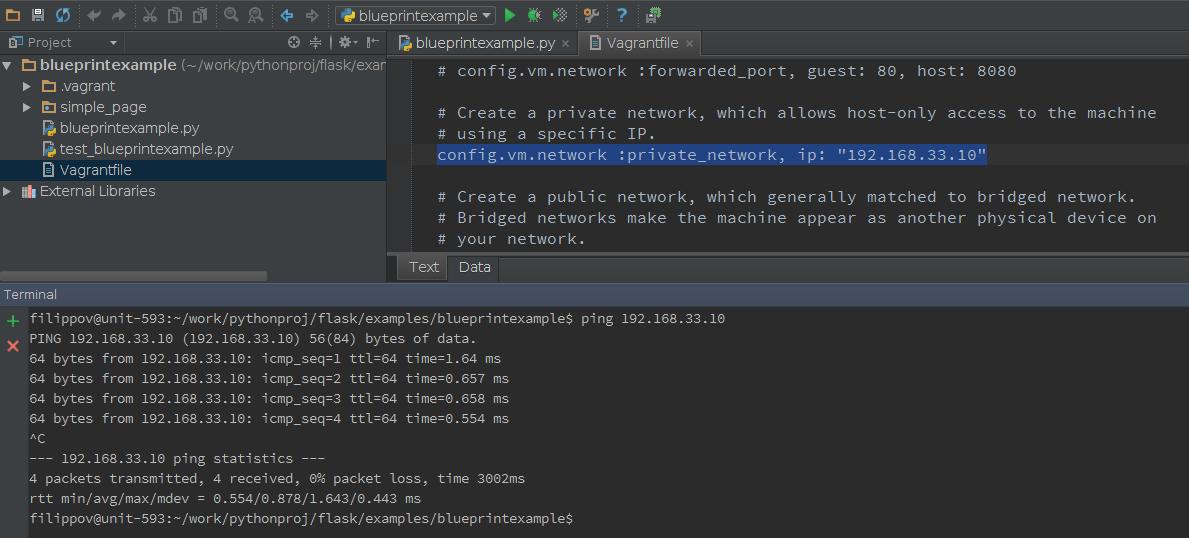
Alright, the VM responses to ping. Now, I want to run my web application on the VM, so I need to copy my project sources to the remote host. This is easily done with the Deployment tool inside PyCharm.
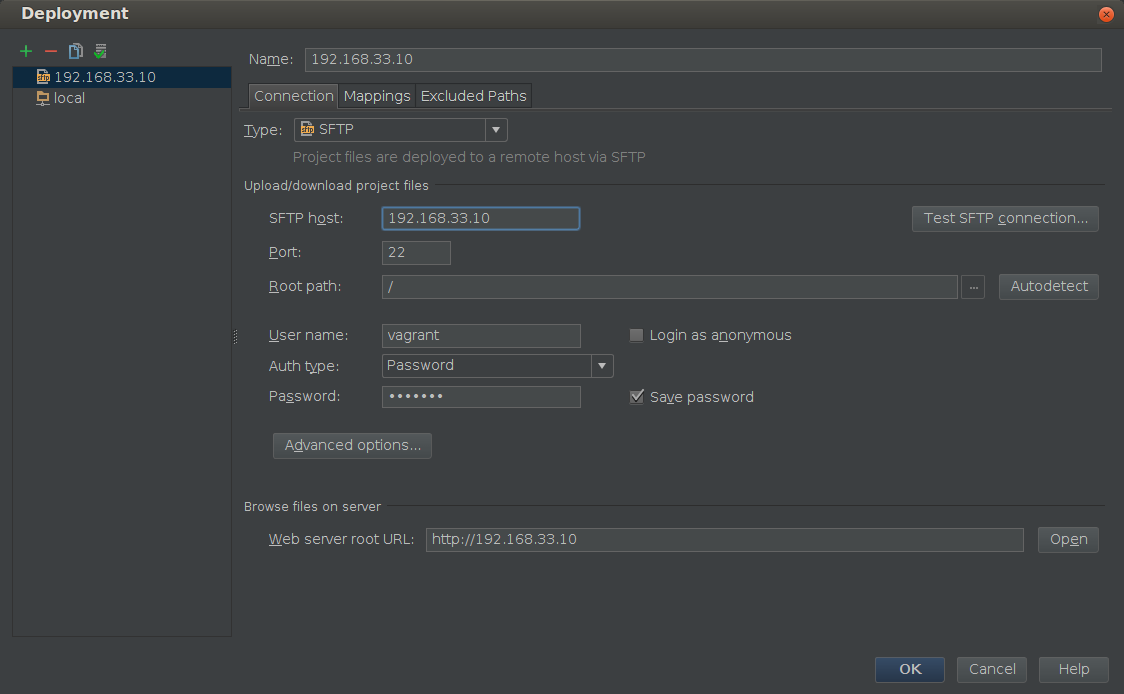
I go to Tools | Deployment | Configuration and specify the connection details for my VM:
On the Mappings tab in the same window I specify the path mapping rule:
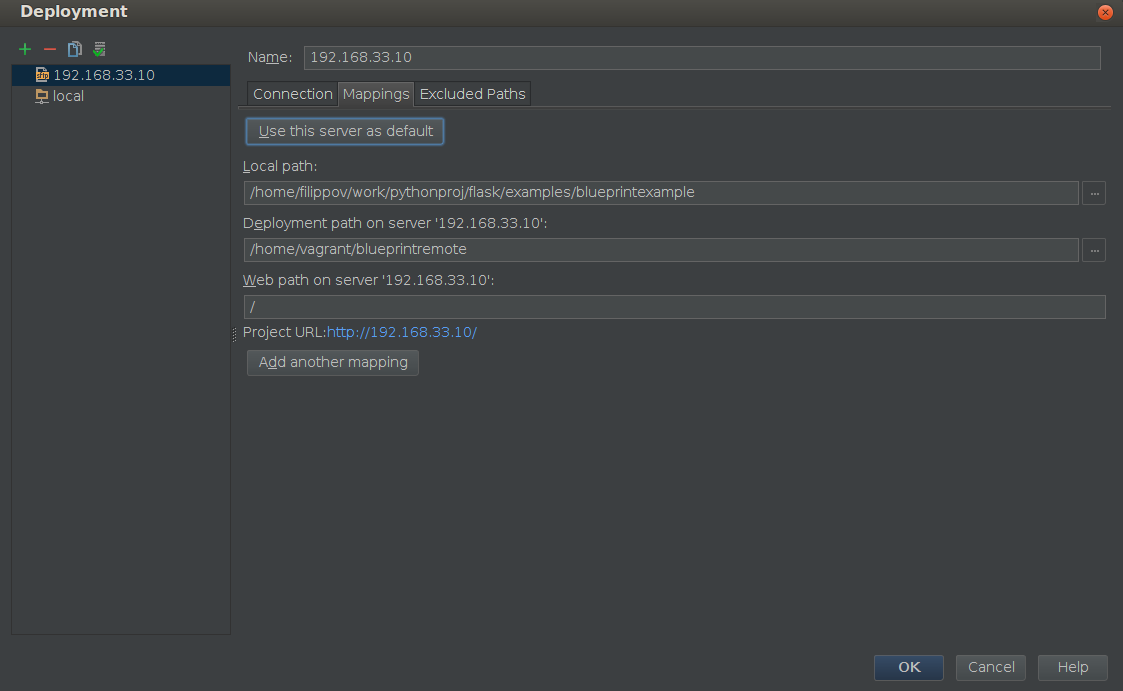
In my case I want my current local project directory blueprintexampe to be mapped to remote /home/vagrant/blueprintremote.
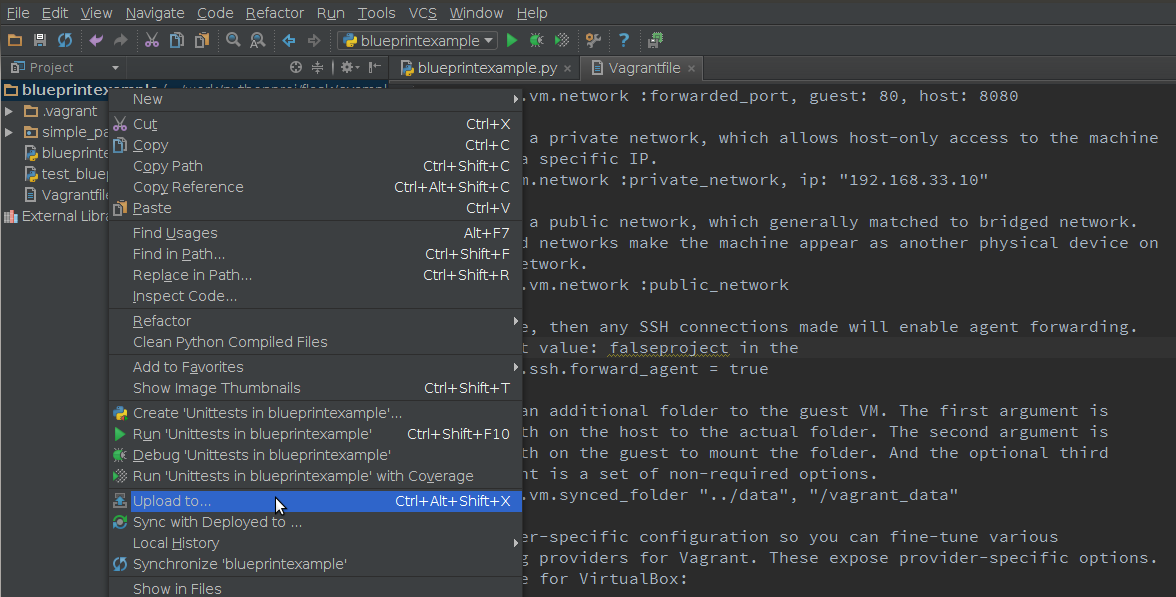
Now I can right-click my project in the project view and select Upload to:
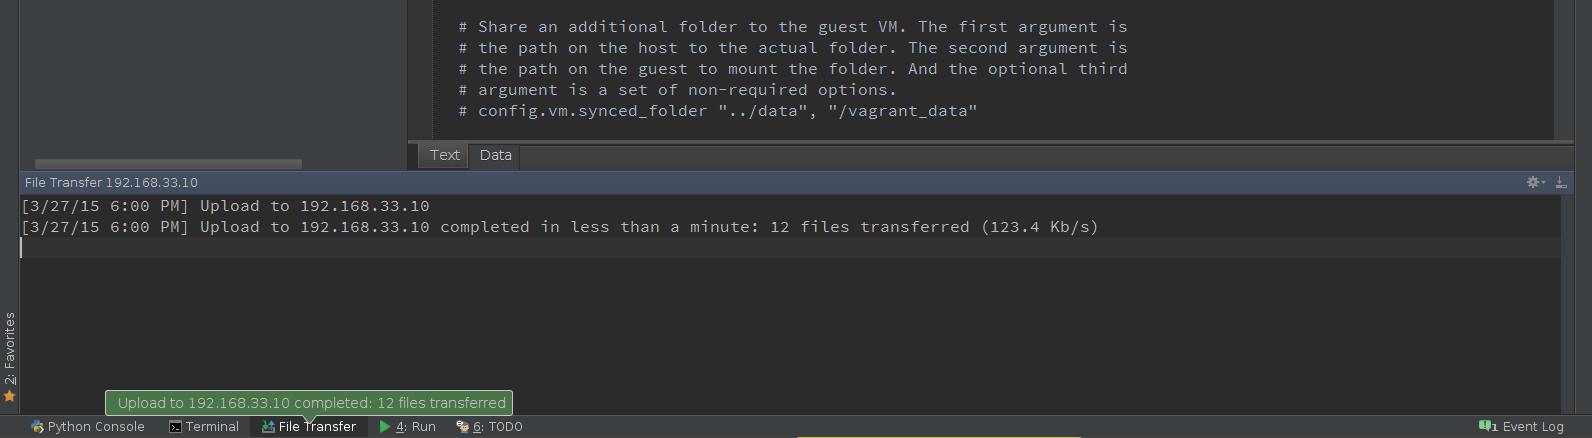
And this will upload my project to the specified directory on the remote machine:
One of the handiest features is that you can set up automatic upload to the remote machine by simply clicking Tools | Deployment | Automatic Upload:
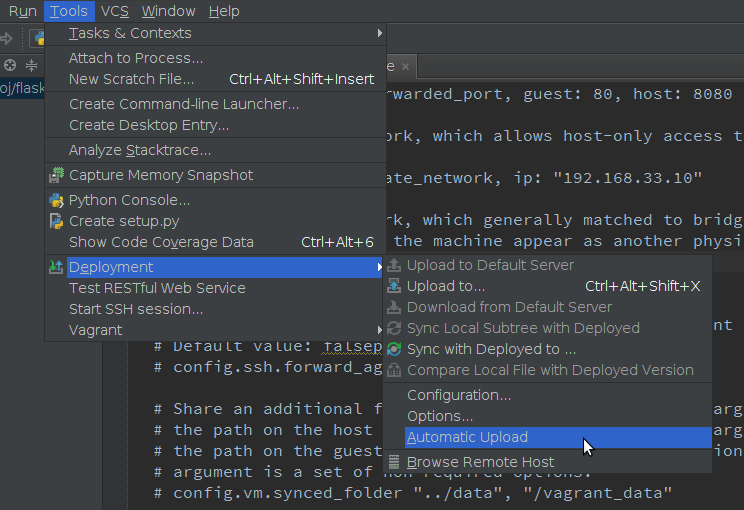
From this point on, all changes made locally will be uploaded to the remote machine automatically, so you don’t need to worry about having fresh sources on the remote host. Cool, isn’t it?
So now, I’m going to modify one of the files in my project, so the flask application will be visible remotely (adding host=’0.0.0.0’ as a parameter to the app.run() ), and PyCharm automatically uploads the changes to the remote machine:

Next, I specify the python interpreter to be used for my project. I go to File | Settings (Preferences for Mac OS) | Project | Project Interpreter. By default, PyCharm sets the local Python interpreter as a project interpreter, so I’ll change it to the remote one:

As I’ve already created a deployment configuration, PyCharm offers to export Python interpreter settings from the existing deployment configuration:
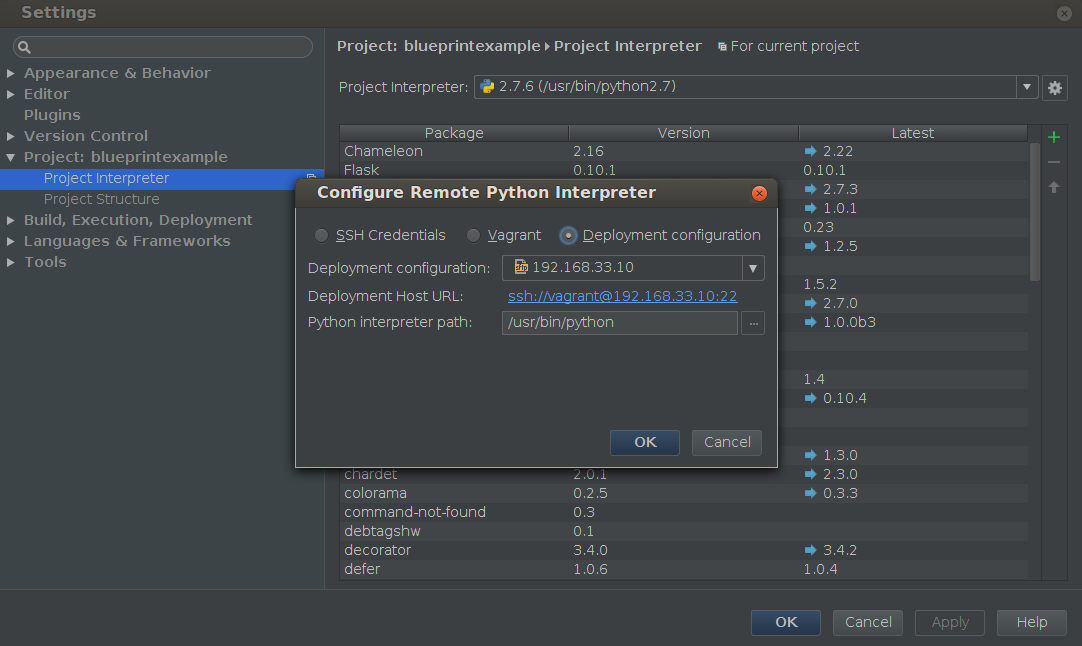
But I can also specify the remote interpreter manually, using SSH credentials or a Vagrant configuration. Here I’ll do it manually:
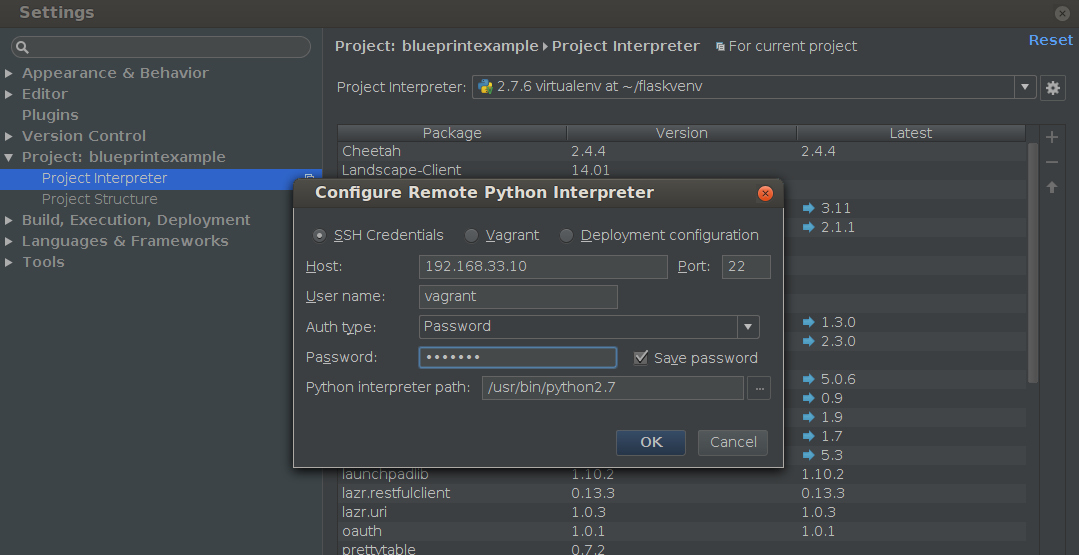
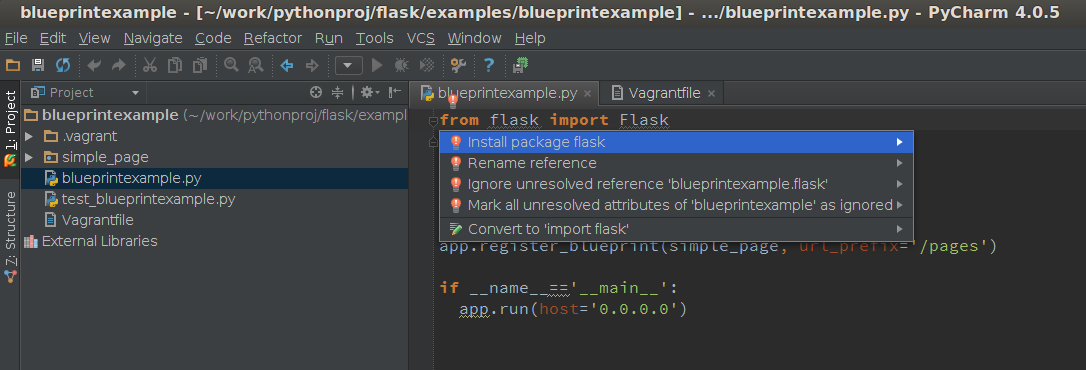
After I specify the new remote python interpreter, PyCharm starts indexing and finds that the flask package is not installed on the project interpreter:

I can fix this easily with Alt + Enter on the unresolved reference error highlighted with red:
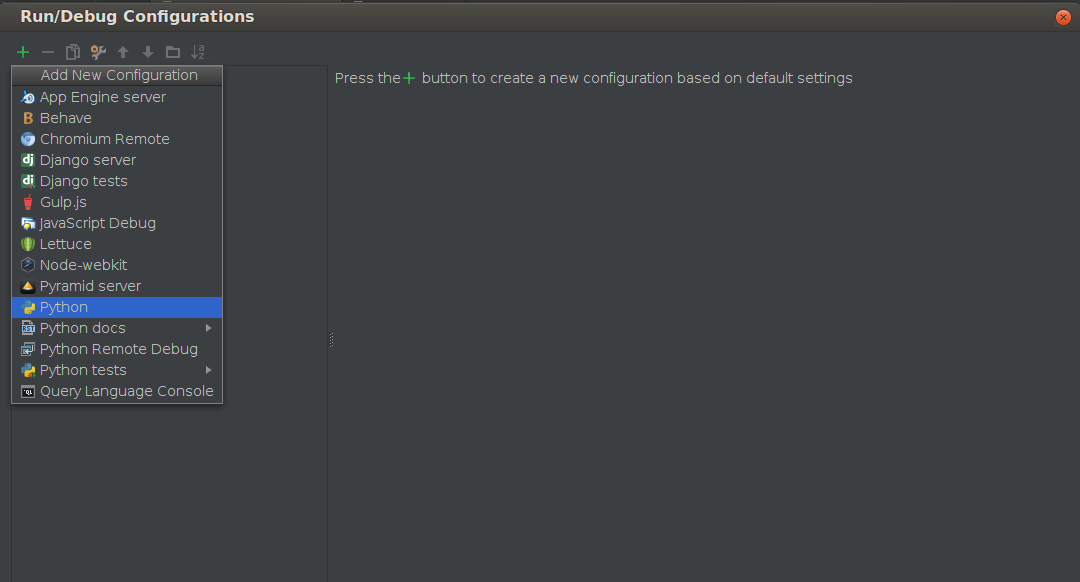
Alright. Now everything is ok, so we can finally specify Run/Debug configuration and launch our application. Let’s go to Run | Edit Configurations and add a new Python run/debug configuration:
In the Run/Debug configuration dialog, I specify the name for my new configuration and the script to be executed on the remote host. PyCharm sets the project interpreter (remote in this case) by default for this new run configuration, and finally I need to specify path mappings for this particular run configuration:
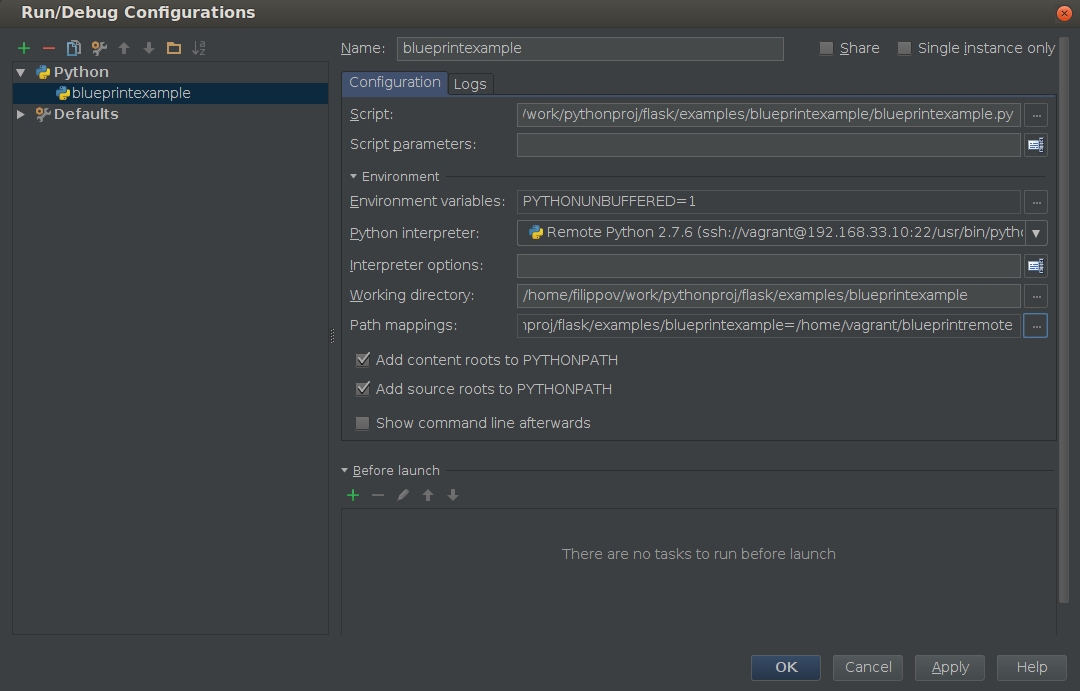
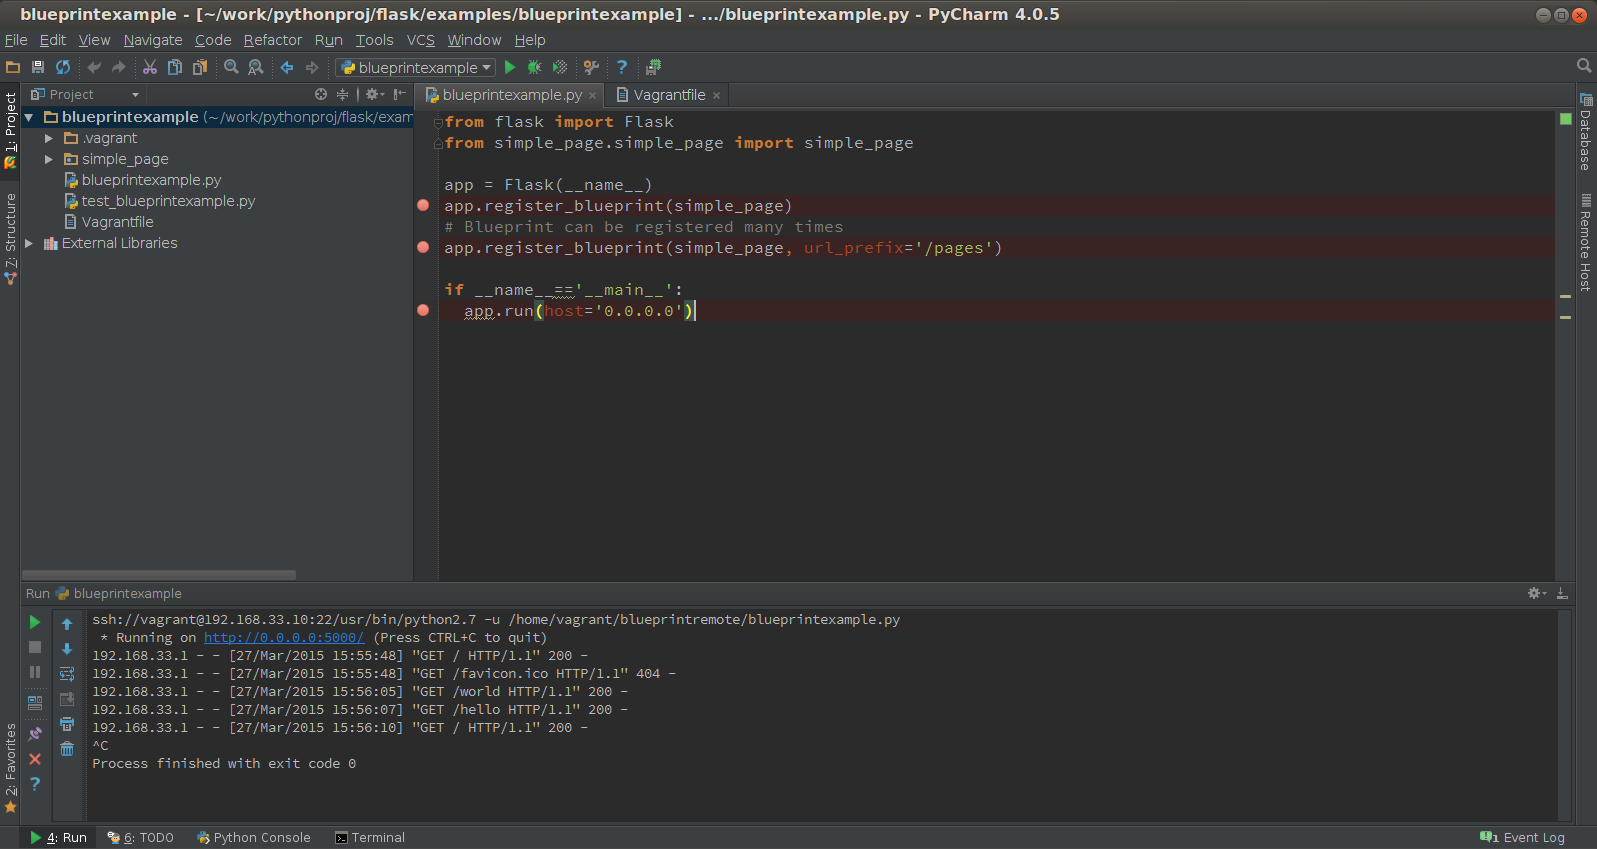
It seems we’re all set. I click the Run button:

PyCharm shows that the application is up and running on port 5000 on the VM.
I open the browser to check that the application is really working:
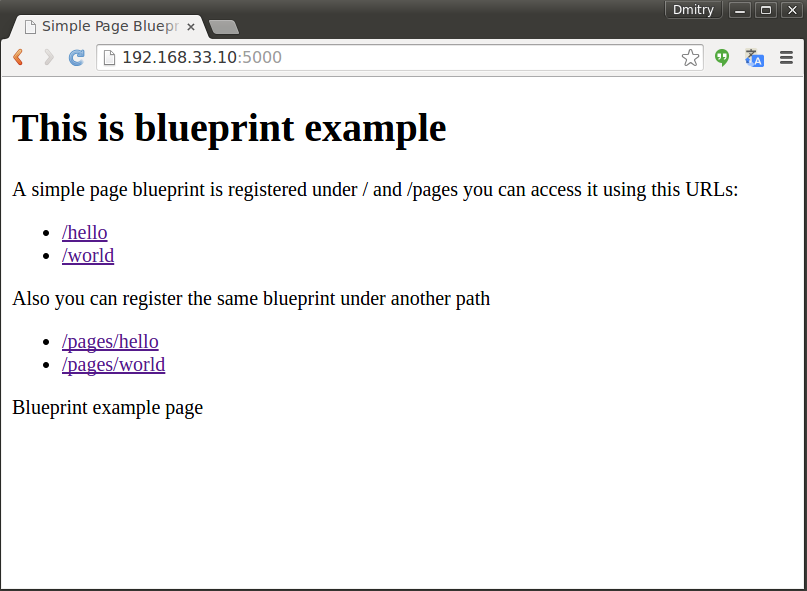
From this point on, we can work with this project like with a normal local project. PyCharm takes care of uploading any changes to the remote machine and keeps the VM up and running.
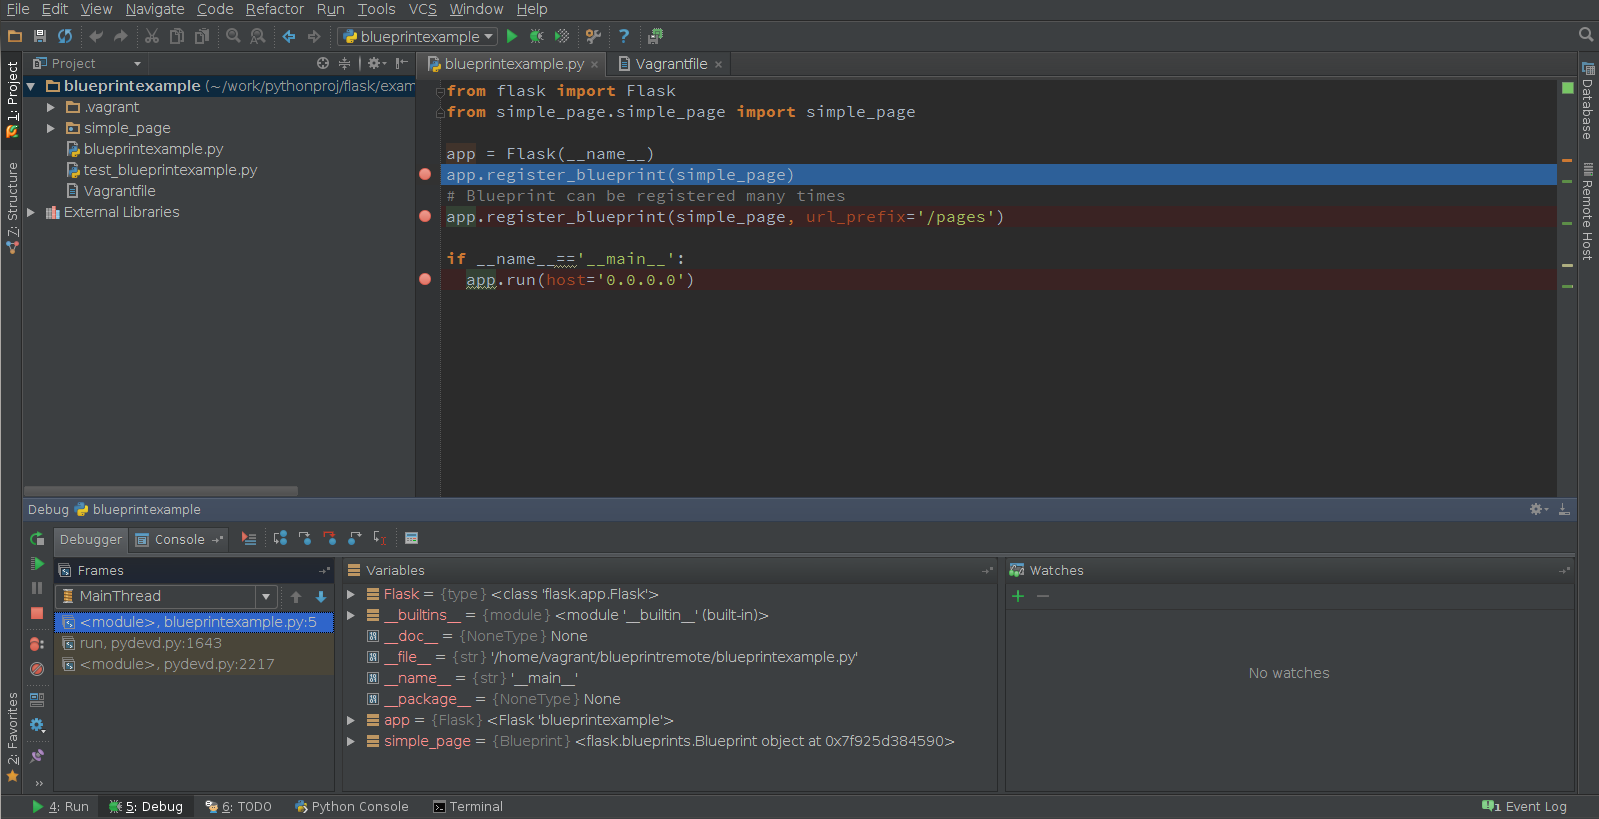
With the same Run/Debug configuration, we can do a simple remote debug session putting a few breakpoints right in the editor:
Click the debug button or go to Run | Debug:
That’s it! Hopefully you’ll appreciate this remote development functionality in PyCharm that makes Python remote development a breeze.
If you’re still craving for more details on PyCharm remote development capabilities, as well as other remote development features, please see the online help.
Talk to you next week,
Dmitry