First Steps in Game Development With Rust and Bevy

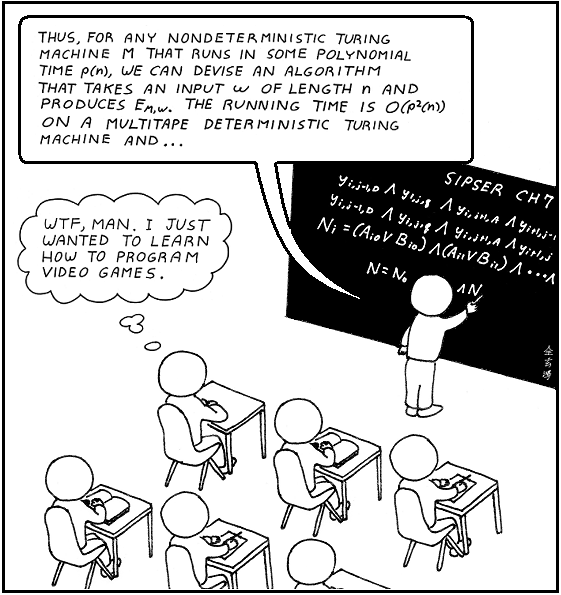 Some of us might remember this 15-year-old Abstruse Goose comic about our choices in life. Learning the theory of computations might not be the most direct path to video game development. However, you still need to learn programming, some math (at least geometry), and mechanics – or as it’s often somewhat erroneously labeled – physics. Many years ago, I did a course on rigid body dynamics that was definitely a part of the theoretical mechanics curriculum, not physics! Then, you’ll probably also need a bit of materials science, optics, and a smattering of other subjects. The good news is you’ll have loads of fun along the way. And while you’re still learning, game development engines and libraries can help you keep on top of some of the accidental complexity and give you enough functionality to implement the things you want, albeit at a fairly basic level.
In this blog post, I’ll try to give you enough knowledge to kick off your journey in game development with the Rust programming language, the Bevy game engine, and RustRover, a dedicated JetBrains IDE for Rust developers. We’ll start with a tiny example and develop it a bit further, discussing the most important concepts and ideas along the way. You’ll also find some tips on where to find additional resources to help you continue on your learning journey.
Why use an engine? Why choose Bevy?
Let’s start with the first question: Why do we need an engine at all? Well, creating even the smallest and simplest game imaginable requires implementing many things. You need a game loop, some game data, and a place to store everything. Some sort of UI, whether textual or graphical, will also be required so that we can render our game data. The game state will also need to change in reaction to human player inputs. At some point, you’ll need to render a 3D object, and this will force you to consider light, shadows, and reflection. It’s even possible that two geometrically complex bodies will collide, an action that will then need to be detected and processed. All these tasks are important game components, and some sort of system should be in place to make sure they’re available.
Implementing a full-fledged game engine or certain parts thereof from scratch is an extremely popular use case. While this is an interesting topic in its own right, this blog post will focus on Bevy, the most popular Rust game development engine. Bevy is full-featured, so we can do a lot of different things. It’s flexible, so we can do whatever we want without constraint. It’s also extendable, so we can add external plugins to get new functionality. Bevy is a project under active development, so we should expect many changes to come with every release. Still, it’s crucial to have a basic grasp of its core concepts and features if we want to be able to follow its future progress.
Your first Bevy application
Let’s look at our first Bevy application:
use bevy::prelude::*;

fn main() {
   App::new()
       .add_plugins(DefaultPlugins)
       .run();
}
Even in this tiny example, we create an application, add some default plugins, and then run it. The App::run method runs the main game loop, even though we haven’t asked it to do anything yet. Nonetheless, some of the plugins will run their own internal processes.
If you create an empty project in RustRover and paste this code into main.rs, you’ll immediately see a suggestion to add a dependency for the bevy crate to your Cargo.toml file:
[package]
name = "bevy-first-steps"
version = "0.1.0"
edition = "2021"

[dependencies]
bevy = "0.15"
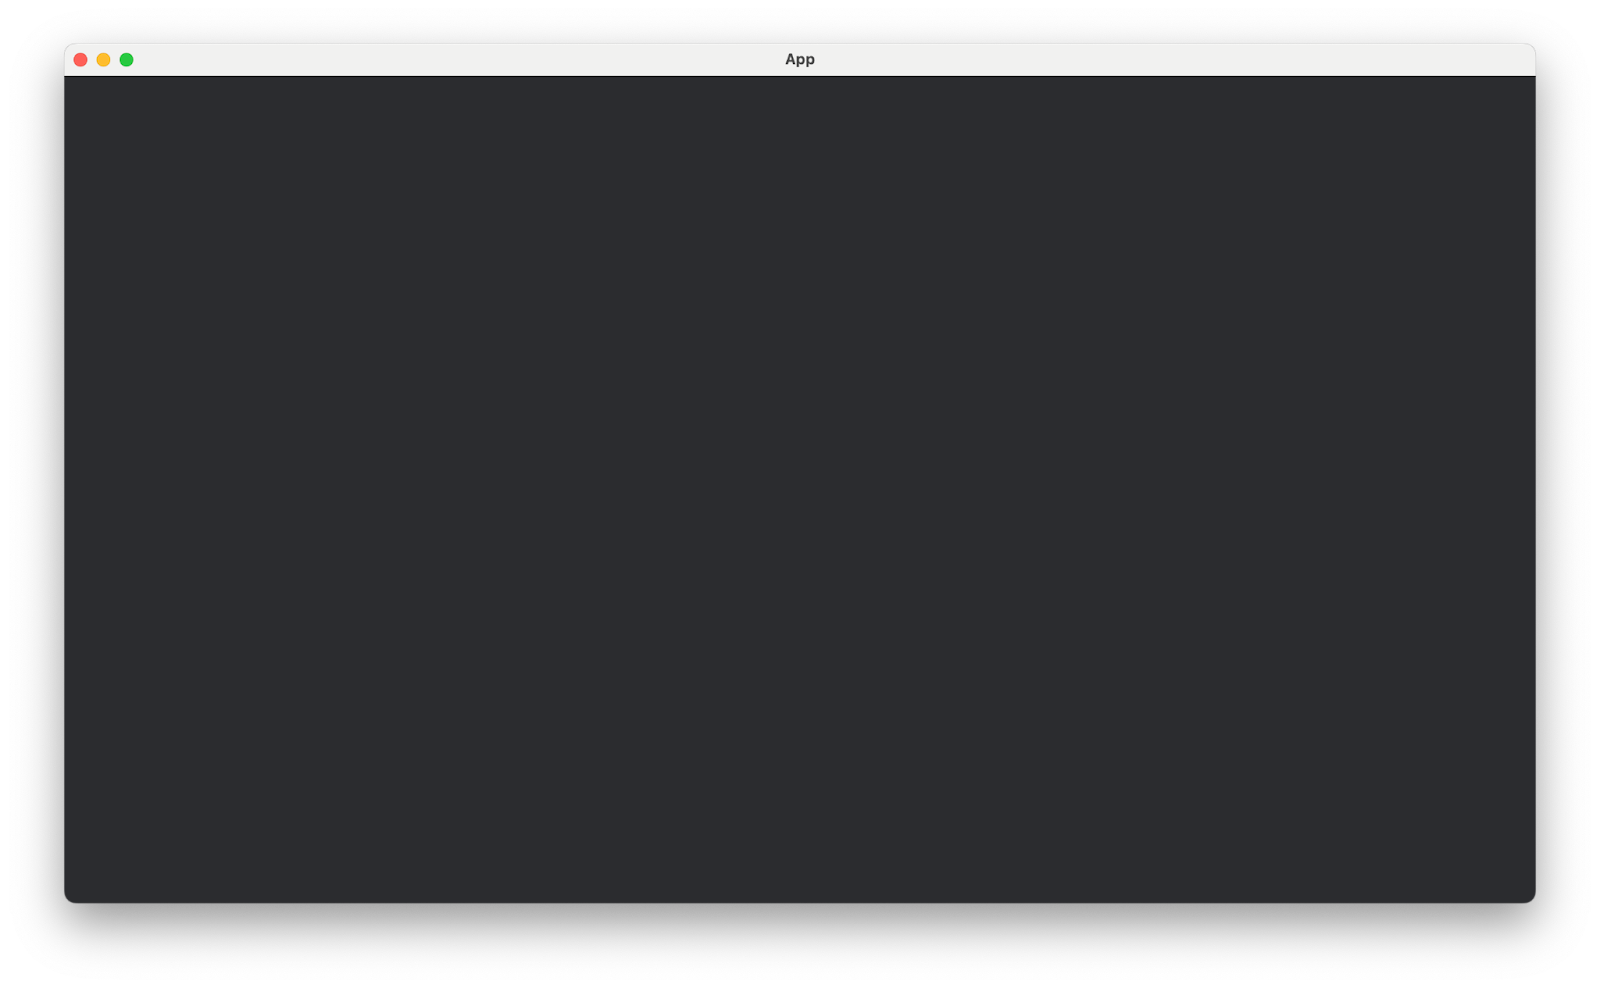
You can also get a sneak peek of what is included in the set of default plugins:
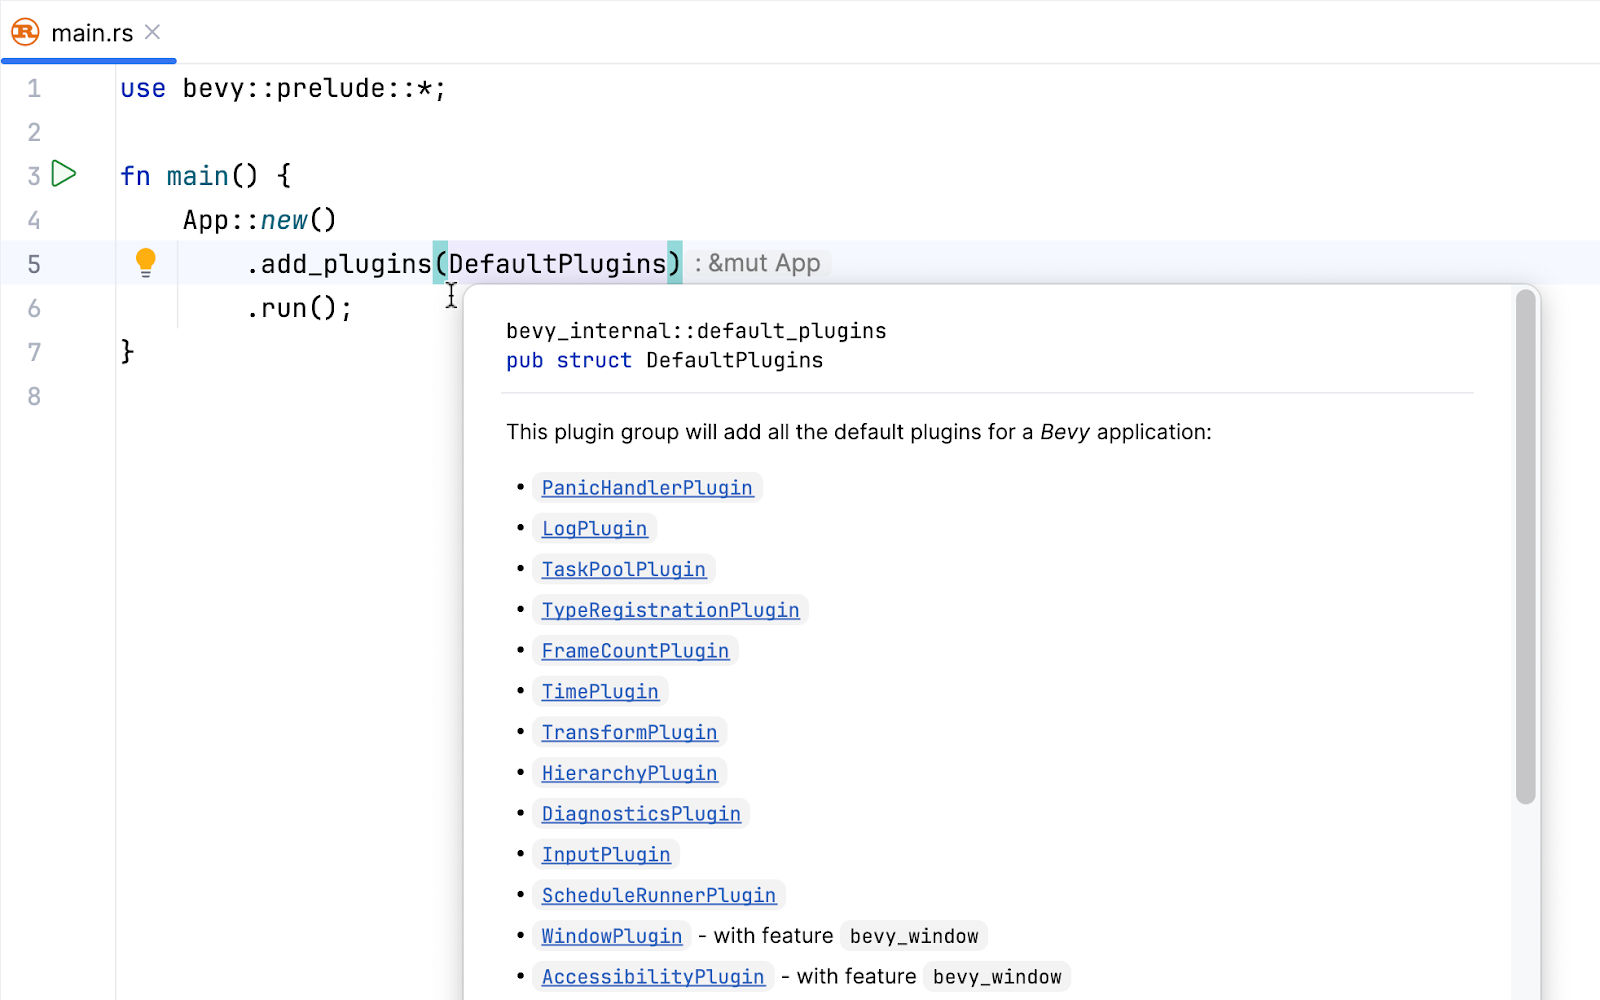
For example, there’s WindowPlugin, which creates an empty application window:
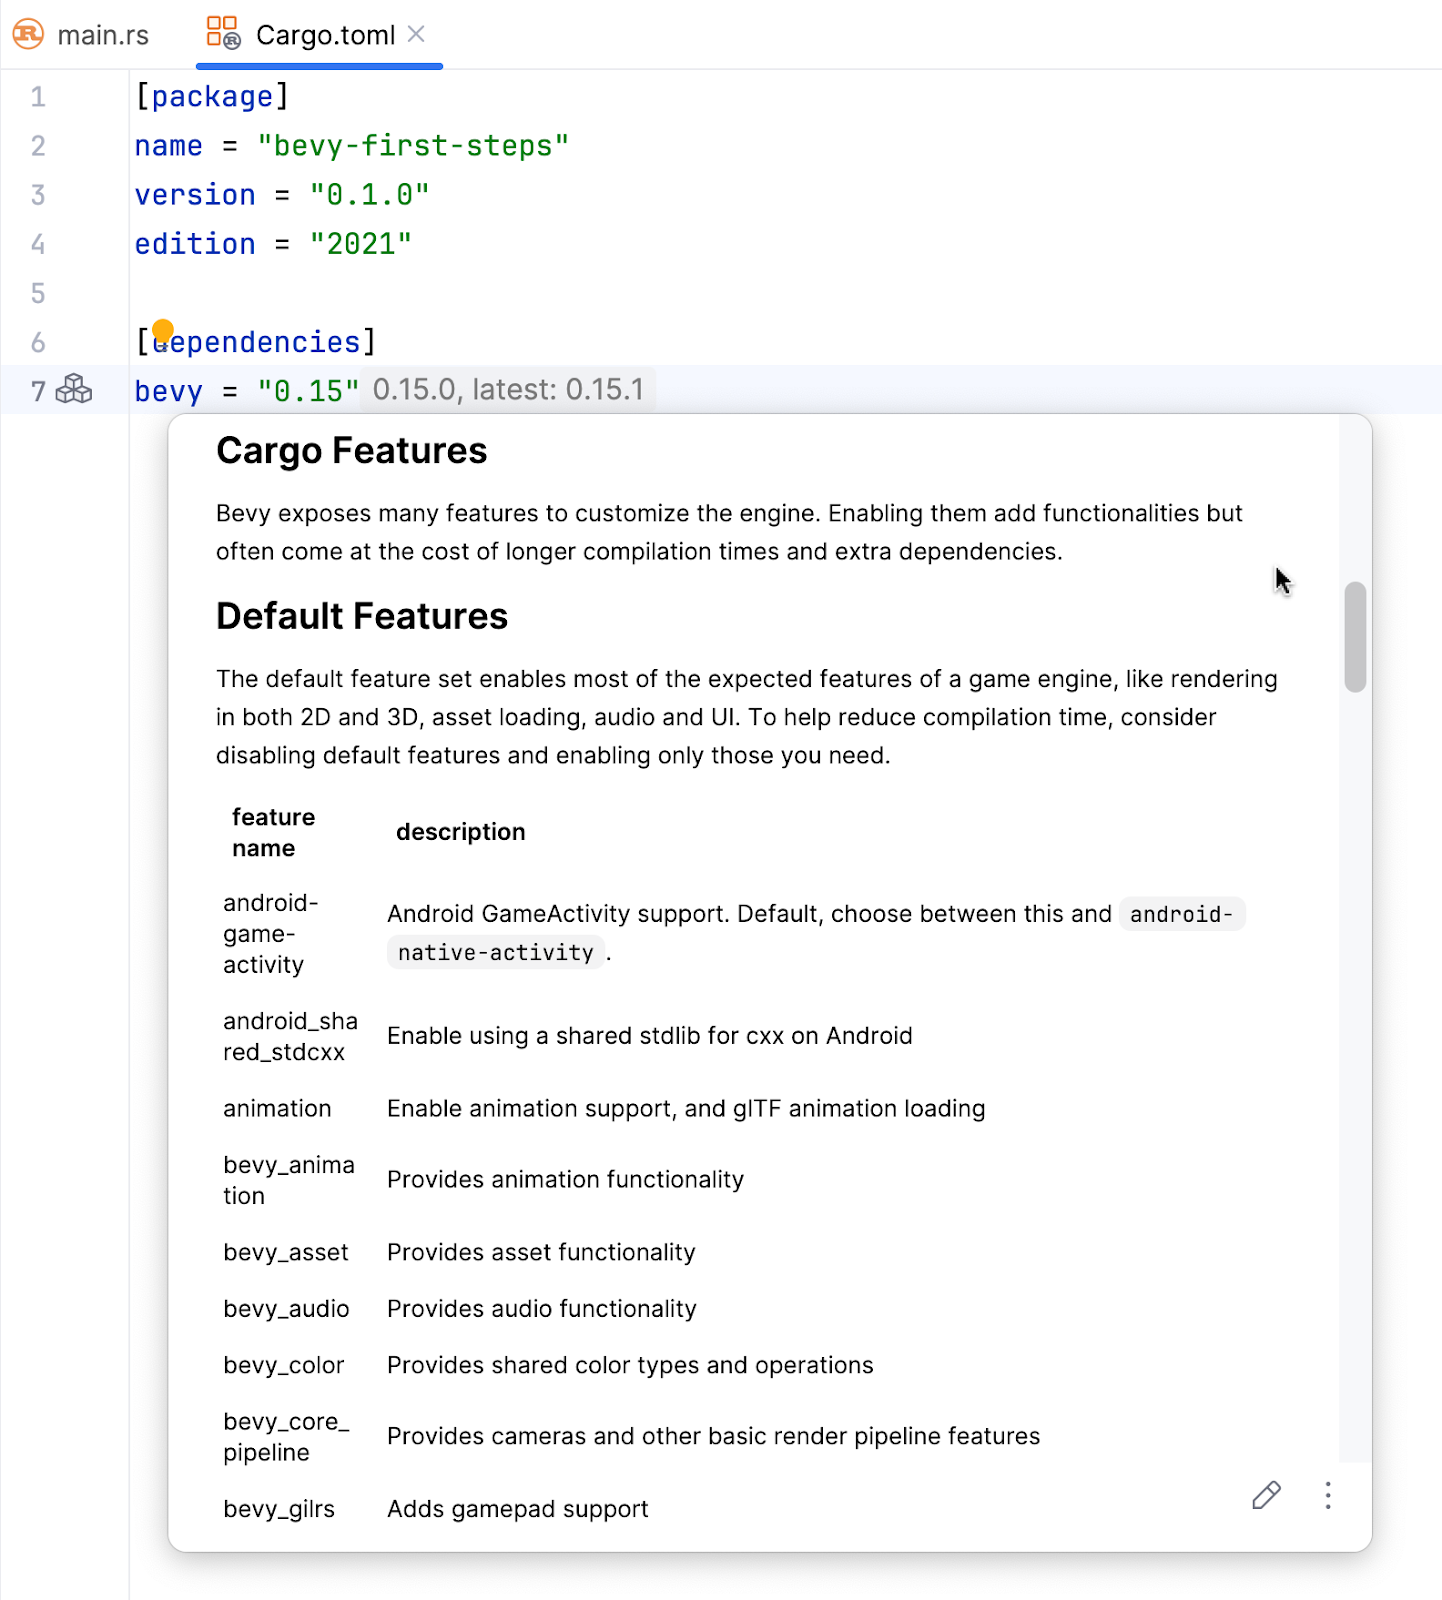
With TimePlugin, we get time-measuring functionality, and LogPlugin adds the ability to write logs. The documentation popup also mentions the bevy crate features. Plugins and features allow Bevy to be flexible: We can easily switch features on and off and add or remove plugins to get the desired set of functionality. You can read more about the default set of features in the documentation:
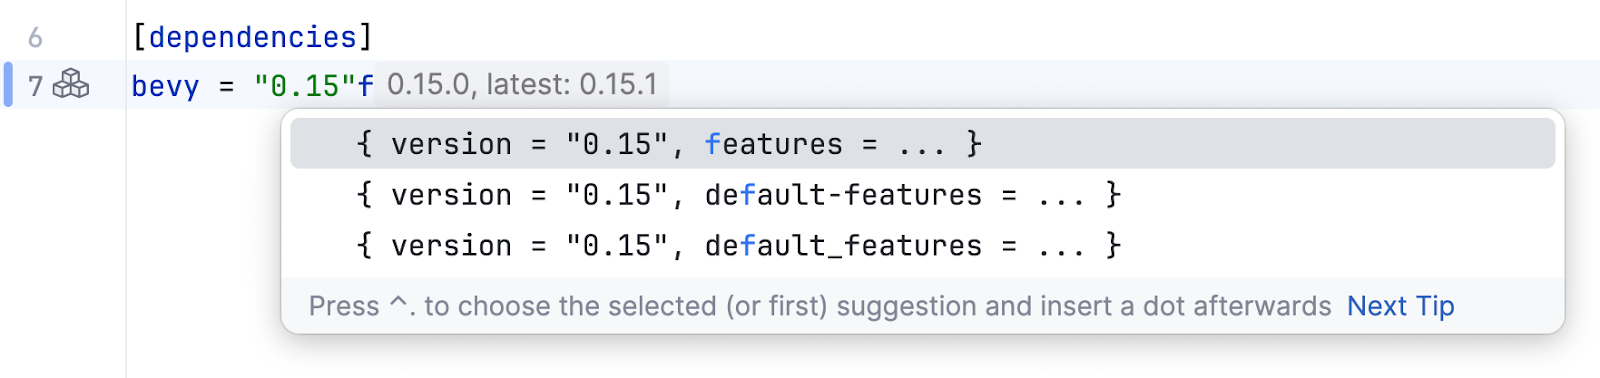
If you want to customize a set of enabled features, just start typing in the Cargo.toml file, where you’ll get full editing and completion support from RustRover:

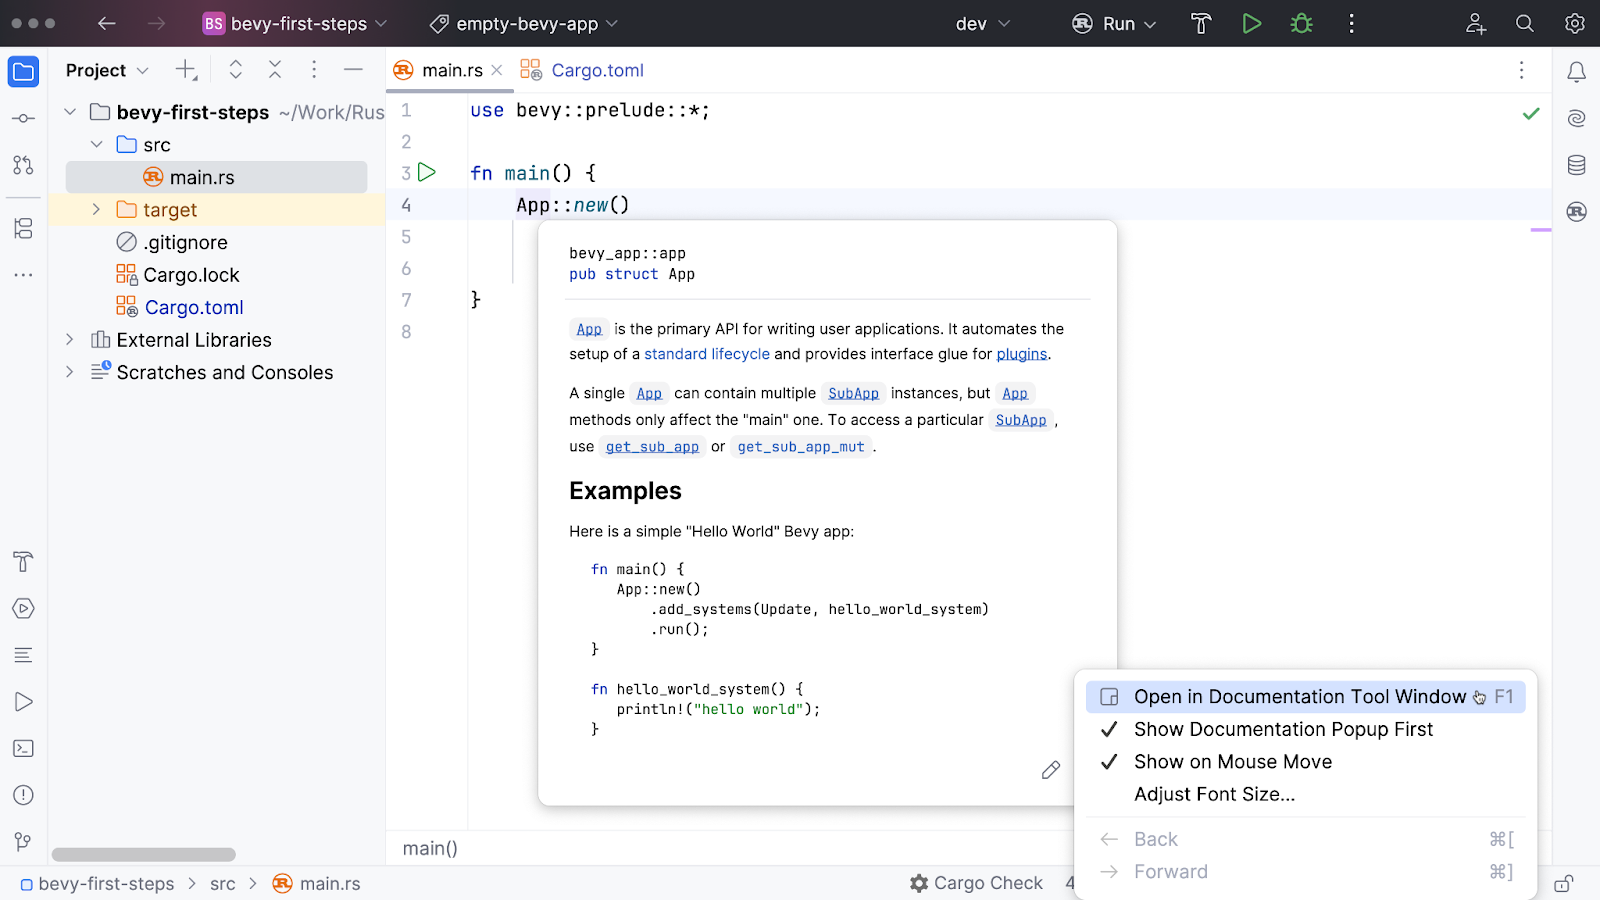
Bevy has excellent documentation, and the sections you might need are easily accessible from RustRover. You can read sections in popups, follow links, or even open the dedicated Documentation tool window:
Now that we know how to get help in case of emergency, we’re ready to implement our first game element. So without further ado, let’s create our first object in the game world and make it jump!
Time to jump
Before we get to the technical part, we’ll begin by considering what it actually means for a game object to jump. There are several key points that we need to keep in mind:
- We need an object with geometrical parameters (width, height, and initial position within the graphical window).
- Jumping means changing an object’s position in time, but not its size in our case (in contrast to a jumping ball, for example, which does change its size when it meets the ground – it’s not a rigid body!).
- Just like in real life, an initial force should be applied to an object to change its velocity and, consequently, its position.
- In games, it’s usually up to a player to decide when to apply that force. Hence, we need to wait for and process user input (for example, when a user presses the space button).
- Right after an object gets its initial velocity, gravity influences it and works to return it to the ground.
- For smooth visualization, we must ensure that our jumping object is rendered in various positions above the ground.
So, as it turns out, jumping is not that easy after all! And we haven’t even started to implement all these things in Bevy. Now, let’s talk about the concepts and actions from the list above in the direct context of Bevy:
- A game object is an entity, but it’s not the only entity we need in this program. For example, we need an entity for a camera to see something rendered in the graphical window. The ground can be represented with an entity as well. At least, we’ll need to render it. An entity is just an ID of an object (our jumping object or something coming from the engine), not an object itself. We need IDs to refer to and manipulate objects. To use the language of Bevy, we spawn entities.
- To specify an object’s parameters, we use components and bundles of components. For example, an object’s velocity is a component (a 3D vector, as we’ll see soon). The marker structure we’ll use to associate a spawned entity with a jumping object is also a component. An object’s position is a component. This component is used for rendering an object. Bevy’s camera is a complex bundle of components (fortunately, we don’t have to analyze them in detail).
- When we spawn entities, we also associate them with their related components. Later, we’ll be able to query the actual values of components (for example, to change them or to render the corresponding game objects).
- User input is represented in Bevy as a stream of events. We need to read those events and act accordingly.
- All changes and visualizations in the game world are represented by systems, Rust functions that spawn entities, query the values of components, mutate them, read event streams, delete entities, and much more. In Bevy, systems are responsible for doing virtually everything. Bevy’s core functionality and anything provided by a plugin also take the form of systems. In this tutorial, you’ll see how we can implement our own systems.
- Bevy doesn’t run systems chaotically. Instead, it uses schedules to decide what to run and when. Some systems need to be run only once at launch, while others run repeatedly on every frame.
- The game is structured around frames: Any game is a sequence of frames that follow one another. The
App::runmethod we saw in our first code sample generates frames by calling a variety of our own systems and other internal ones on every frame.
Now, we are ready to create the following mental model of any Bevy application: We first set up entities with components and then change them into systems run by Bevy that are then rendered frame after frame. Bevy is an ECS (entity, component, system) framework, and everything we do with Bevy follows this pattern.
I know you’re waiting for the code, so let’s go right ahead and spawn our first entities for the example of a jumping object:
const GROUND_LEVEL: f32 = -100.0;
const PLAYER_X: f32 = -300.0;

#[derive(Component)]
struct Player;

#[derive(Component)]
struct Velocity(Vec3);

fn setup(mut commands: Commands) {
   commands.spawn(Camera2d::default());

   // Player
   commands
       .spawn((
           Player,
           Sprite {
               color: Color::srgb(0.5, 1.0, 0.5),
               custom_size: Some(Vec2::new(30.0, 50.0)),
               anchor: Anchor::BottomCenter,
               ..default()
           },
           Transform::from_xyz(PLAYER_X, GROUND_LEVEL, 0.0),
           Velocity(Vec3::ZERO)
       ));

   // Ground
   commands.spawn((
       Sprite {
           color: Color::srgb(0.5, 0.5, 0.5),
           custom_size: Some(Vec2::new(800.0, 10.0)),
           anchor: Anchor::TopLeft,
           ..default()
       },
       Transform::from_xyz(-400.0, GROUND_LEVEL, 0.0)
   ));
}
The setup function is a system. In this system, we are spawning three entities:
- One entity for Bevy’s camera.
- Another entity for a jumping object (a player). Note that we represent a player with a bundle of components:
- A marker struct
Player. - A sprite – Bevy’s concept that allows us to specify the visual identity of an object including color, size, and potentially many other parameters – even your own graphics.
- A transform – Bevy’s concept for an object’s position, used by Bevy to render our object in a correct place in the graphical window.
- A velocity.
- A marker struct
- The third entity represents the ground – we need it to see when jumping starts.
The setup system takes Commands as an argument. Commands are used to change the structure of the game world, such as by spawning or deleting entities. As we’ll see later, we don’t need them to read or change the values of components. We’ll use queries for that.
Look at the anchor and transform components associated with the last two entities. We want the object (a rectangle) to stand on the ground. These two objects share the same y-coordinate in their initial positions but use different anchors. As a result, the player’s bottom side is the same as the ground’s top side.
Nothing will be rendered even if you copy this code to the example. Why? Because we need to run this system as part of our game loop. To do that, we register it within the application:
fn main() {
   App::new()
       .add_plugins(DefaultPlugins)
       .add_systems(Startup, setup)
       .run();
}
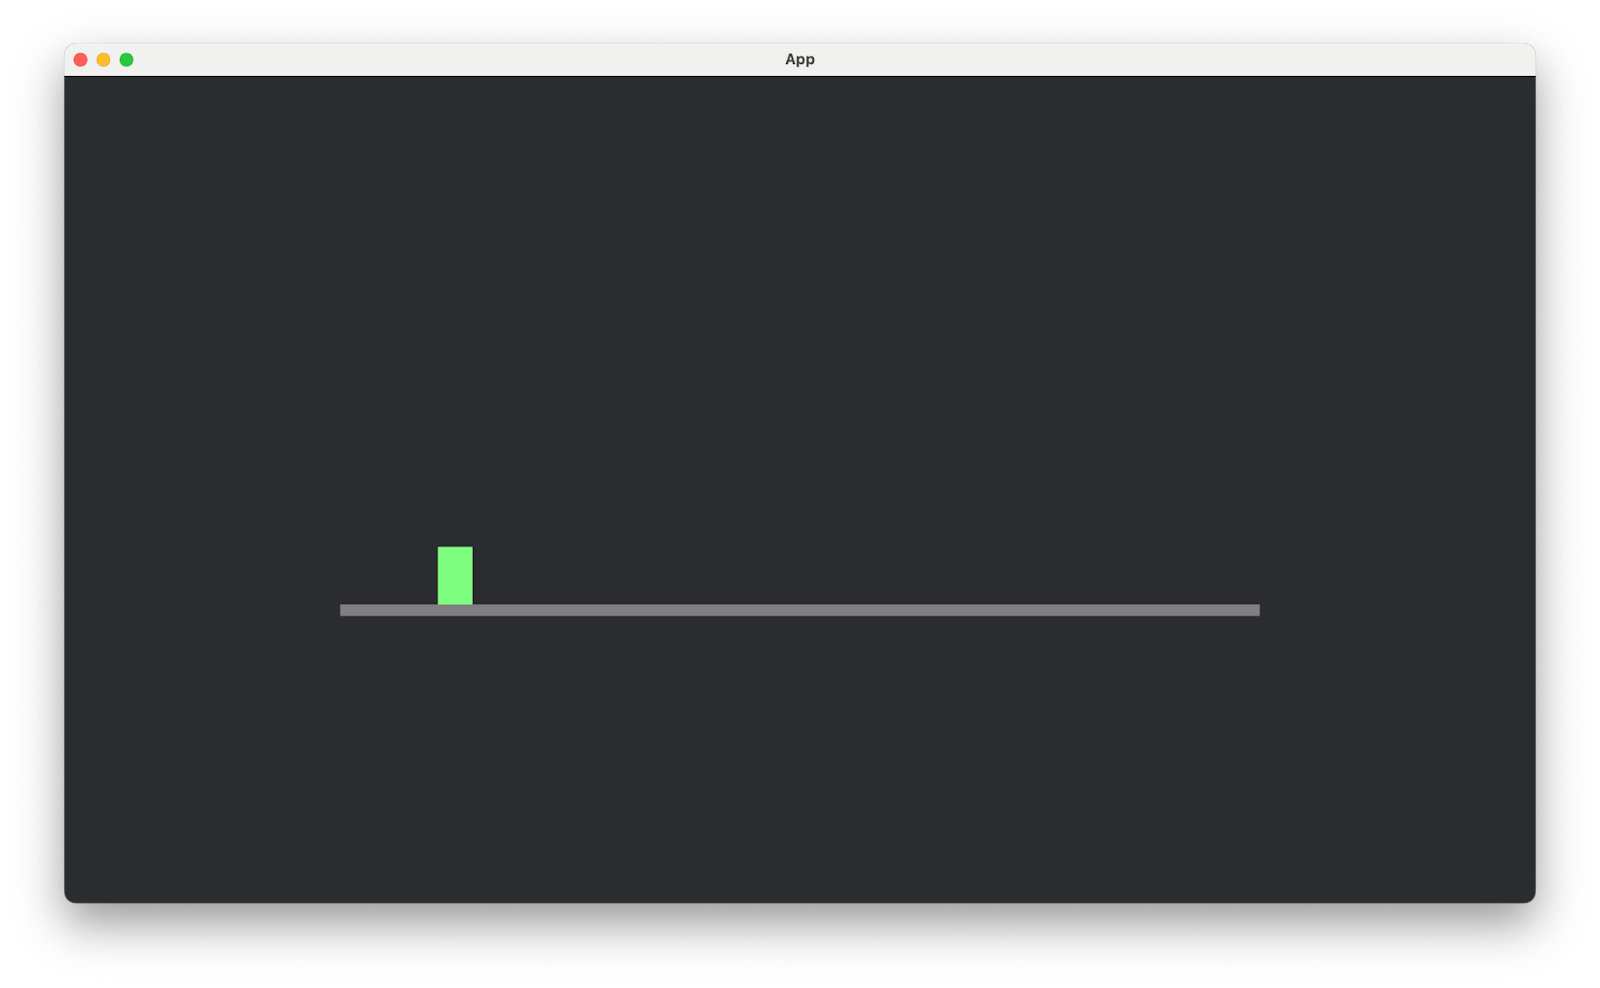
Note the Startup schedule. Our entities only need to be set up once during startup. Once this is done, we can see our amazing game object standing on the ground!
Hey, but that’s not jumping, right? Right, just bear with me. We’re almost there. We simply need to process user input and change the player’s velocity and position by applying the jumping force and gravity. As opposed to just being launched at startup, this behavior needs to be applied to every frame. To implement it, we’ll need to write three systems:
- The
jumpsystem, which applies a jump force to the game object and sets the player’s velocity to a positive value when requested by a user. - The
apply_gravitysystem, which slows the object down by decreasing its velocity. This requires checking the time that passes between consecutive frames. In Bevy terms, time is a resource, a global value that exists independently of entities and any components associated with them. Remember theTimePluginthat was added along with the other default plugins? This is the plugin that provides us with access to this resource. - The
player_movementsystem, which is responsible for recalculating the player’s position. This system also needs to know the actual time because the more time that has passed, the further the player has been moved.
These systems run between frame updates, hence the Update schedule that we use to register them within the application:
fn main() {
   App::new()
       .add_plugins(DefaultPlugins)
       .add_systems(Startup, setup)
       .add_systems(Update, (jump, apply_gravity, player_movement))
       .run();
}
These three systems don’t manipulate entities. Instead, they read events (user input), query and mutate the components, and consult the time. In Bevy, we give them access to all this information by specifying system parameters: EventReader, Query, or Res for resources.
Let’s look at the jump system first. We start by checking the event stream, and if we see a user pressing the space key, we apply a jump force:
const JUMP_FORCE: f32 = 600.0;
fn jump(
   mut events: EventReader<KeyboardInput>,
   mut query: Query<(&mut Velocity, &Transform), With<Player>>
) {
   for e in events.read() {
       if let Ok((mut velocity, transform)) =
               query.get_single_mut() {
           if e.state.is_pressed() && e.key_code == KeyCode::Space
               && transform.translation.y <= GROUND_LEVEL {
               velocity.0.y = JUMP_FORCE;
           }
       }
   }
}
Sometimes it can be helpful to read the list of parameters out loud:
- We’re getting an event reader with keyboard input.
- We’re querying velocity and transform (position) for entities marked as
Player. The velocity is expected to be a mutable reference because we’re going to change it.
With Bevy, it doesn’t take long to start parsing complex query types. Query types specify what we are looking for in the entities and associated components. Bevy will then call these functions and supply them with the requested parameters.
In the system’s code, we check for all the unprocessed events that are available when Bevy runs this system. We get the queried components for every event, ensure the space key has been pressed, check that the player is on the ground (it’s a bit difficult to jump in the middle of another jump!), and finally make the jump happen by setting the velocity’s y-coordinate to some positive value. And we’re off!
Here’s an essential consideration: With Bevy, we never attempt to do many things at once in a single system. It’s much easier to reason about game logic when we have multiple systems, each responsible for its own thing. Jumping is not about changing positions, it’s about applying the initial force. We’ll deal with changing positions in a system responsible specifically for that, namely player_movement:
fn player_movement(
   time: Res<Time>,
   mut query: Query<(&mut Transform, &mut Velocity), With<Player>>
) {
   for (mut transform, mut velocity)
           in query.iter_mut() {
       transform.translation.y += velocity.0.y * time.delta_secs();
       if transform.translation.y <= GROUND_LEVEL {
           transform.translation.y = GROUND_LEVEL;
           velocity.0.y = 0.0;
       }
   }
}
In this system, we request access to time, player position, and velocity. In the code snippet, we simply iterate through all of the query results to find the one we need, even though we know there’s only one player. But imagine having many players. We need to be prepared!
We update the player’s y-coordinate for every transform and velocity according to the time that has passed between frame updates. We also ensure that our player never gets below the ground level by ensuring velocity is zeroed when ground level is reached.
While it would be nice to be able to fly like a bird, in our game world, we need gravity.
const GRAVITY: f32 = -800.0;
fn apply_gravity(
   time: Res<Time>,
   mut query: Query<&mut Velocity, With<Player>>
) {
   for mut velocity in query.iter_mut() {
       velocity.0.y += GRAVITY * time.delta_secs();
   }
}
Gravity is a force that decreases the player’s velocity when jumping. Note that, once again, there is no need to recalculate position here. We need to apply gravity, so we apply gravity and nothing more.
I recommend exploring this example’s code in RustRover. Play with the declared constants and initial values of components, run the application many times, explore Bevy’s types and methods, and check their signatures and documentation. There’s a whole world of stuff happening behind the scenes.
When you’re ready, we’ll turn this game into an endless runner: Our player will jump over randomly emerging obstacles, crash into them, lose health points, and eventually die, effectively putting an end to our game.
For an endless run!
Here’s our plan for this section:
- Spawn and despawn entities, and move them to mimic horizontal movement.
- Implement a simplified collision detection system.
- Organize a method to count health points and end the game when all the health points have been lost due to collisions.
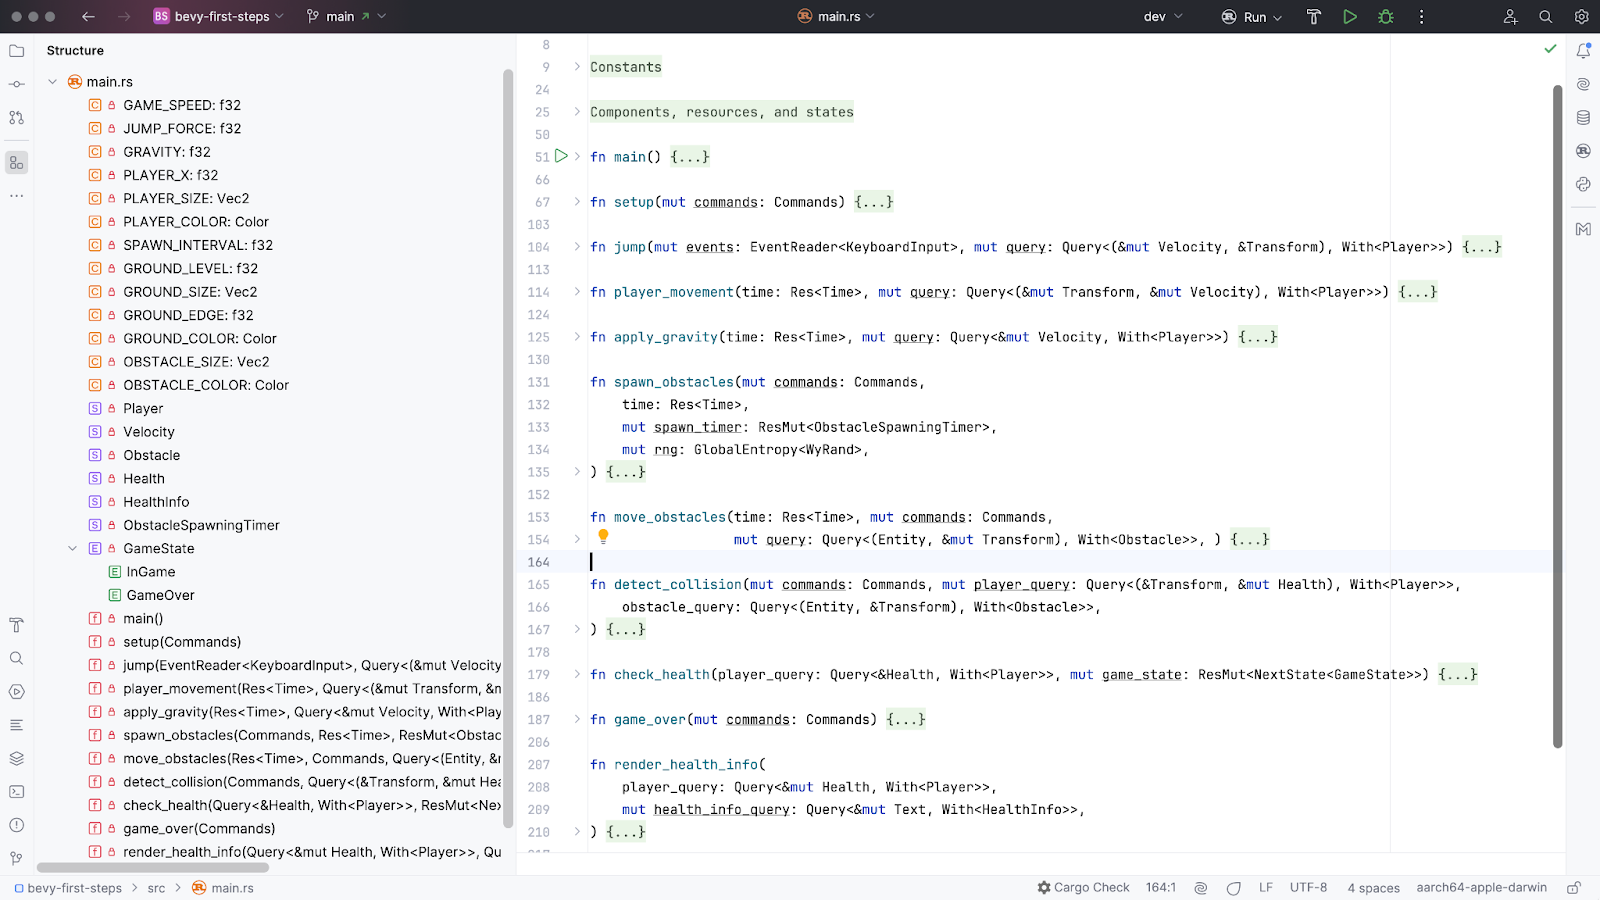
In RustRover, we can use either the Structure tool window or the Collapse All action (Folding | Collapse All in the popup menu) to get a quick view of the final result:
I realize the gameplay is far from rivetting, but hopefully you can enjoy playing it for a few seconds at least!
From here on out, we’ll show more code examples and provide fewer explanations. The goal is to focus on introducing new Bevy parts without carefully analyzing what’s happening. Don’t forget to consult the documentation!
Dealing with obstacles: more timers and random numbers
The idea is to spawn a new obstacle every second. We already know how to consider times between frame updates with Res<Time>. Those times are smaller than a second, so we need another way to work with this specific time interval. Let’s create another resource for measuring one-second intervals. This requires a couple of changes. First, we need to define a constant and a structure with a timer:
const SPAWN_INTERVAL: f32 = 1.0;

#[derive(Resource)]
struct ObstacleSpawningTimer(Timer);
Second, we initialize the timer and register it within the application:
App::new()
   .add_plugins(DefaultPlugins)
   .add_systems(Startup, setup)
   .insert_resource(ObstacleSpawningTimer(
                       Timer::from_seconds(SPAWN_INTERVAL,
                                  TimerMode::Repeating)))
Now we can advance this timer with every frame update and spawn a new obstacle once the timer has counted down to zero:
fn spawn_obstacles(
   mut commands: Commands,
   time: Res<Time>,
   mut spawn_timer: ResMut<ObstacleSpawningTimer>,
) {
   spawn_timer.0.tick(time.delta()); // Advancing
   if spawn_timer.0.finished() {
       // Spawn the obstacle
       // ...
   }
}
Thanks to TimerMode::Repeating, our timer repeats after finishing, so we get an infinite sequence of obstacles. There’s one issue, though. We want obstacles to have random positions. So, how do we get random numbers? One common solution would be to use the well-known rand crate, but the problem here is that we’re not in complete control of our application: Bevy is. What we need is a random number generator. But how do we make one available in our systems? When working with Bevy, it’s best to look for crates that implement the required functionality but are also integrated with Bevy and its ECS framework. Fortunately, we have the bevy_rand crate that provides everything we need. I recommend reading the tutorial, as quite a few things should be considered when working with randomization in Bevy.
To introduce random numbers to our project, we add the following dependencies to our Cargo.toml file:
rand_core = "0.6.4"
bevy_rand = "0.9"
bevy_prng = { version = "0.9.0", features = ["wyrand"] }
Then, we add a plugin to the application:
App::new()
   .add_plugins(DefaultPlugins)
   .add_plugins(EntropyPlugin::<WyRand>::default())
   // ...
Finally, we’ll add a random number generator to the required system using the usual Bevy approach as follows:
fn spawn_obstacles(
   mut commands: Commands,
   time: Res<Time>,
   mut spawn_timer: ResMut<ObstacleSpawningTimer>,
   mut rng: GlobalEntropy<WyRand>,
) {
   spawn_timer.0.tick(time.delta());
   if spawn_timer.0.finished() {
       let obstacle_x = GROUND_EDGE;
       let obstacle_y = GROUND_LEVEL + (rng.next_u32() % 50) as f32;
       commands.spawn((
           Obstacle,
           Sprite {
               color: OBSTACLE_COLOR,
               custom_size: Some(OBSTACLE_SIZE),
               anchor: Anchor::BottomCenter,
               ..default()
           },
           Transform::from_xyz(obstacle_x, obstacle_y, 0.0),
       ));
   }
}
The movement of obstacles is implemented by decreasing their x-coordinates. Thus, users feel like the player is moving forward (from left to right):
fn move_obstacles(
   time: Res<Time>,
   mut commands: Commands,
   mut query: Query<(Entity, &mut Transform), With<Obstacle>>,
) {
   for (entity, mut transform) in query.iter_mut() {
       transform.translation.x -= GAME_SPEED * time.delta_secs();


       // Remove obstacles once they're off-screen
       if transform.translation.x < -GROUND_EDGE {
           commands.entity(entity).despawn();
       }
   }
}
One interesting thing about the system above is that we can easily despawn entities once they are off the screen. We use Commands and the entity method to access the entity we’re interested in. We use the time between frame updates to recalculate current positions, just as before. By playing with the GAME_SPEED value, we can make the game slower or faster, for example, to increase or decrease the difficulty level. To do that at run time, we must make this constant a resource and access its value as needed.
Health points, collision detection, and text rendering
Now we want to implement health points, set them to some initial value at the beginning of the game, and then decrease them with every collision. In other approaches, we need to add a heath field to some structure containing other information about the player. But that’s not the approach we use in Bevy. Instead, we define a new component:
#[derive(Component)]
struct Health(usize);
Then we associate it with the player’s entity at spawning:
// Player
commands
   .spawn((
       Player,
       Sprite {
           ...
       },
       Transform::from_xyz(PLAYER_X, GROUND_LEVEL, 0.0),
       Velocity(Vec3::ZERO),
       Health(initial_health)
   ));
Now we can access the health value in order to read or mutate it depending on our use case. When we detect a collision, we decrease it. To render health information on the screen, we only require read access to the data.
Let’s look at this simplistic implementation of collision detection:
fn detect_collision(
   mut commands: Commands,
   mut player_query: Query<(&Transform, &mut Health), With<Player>>,
   obstacle_query: Query<(Entity, &Transform), With<Obstacle>>,
) {
   if let Ok((player_transform, mut health)) =
                               player_query.get_single_mut() {
       for (entity, obstacle_transform) in obstacle_query.iter() {
           let collision = player_transform.translation.distance(
                                obstacle_transform.translation) < 50.0;
           if collision {
               health.0 -= 1;
               commands.entity(entity).despawn(); // Remove obstacle
           }
       }
   }
}
We just compare the player’s position with that of obstacles, and if the player is close enough, then we count the situation as a collision and decrease the health points accordingly. The obstacle entity is despawned immediately.
We also need to render health information on the screen. To use the language of Bevy, we need to define a component, and then spawn and render a corresponding entity:
#[derive(Component)]
struct HealthInfo;

fn setup(mut commands: Commands) {
   // ...
   commands.spawn((
           HealthInfo,
           Text::new(format!("Health: {}", initial_health))
       )
   );
   // ...
}

fn render_health_info(
   player_query: Query<&mut Health, With<Player>>,
   mut health_info_query: Query<&mut Text, With<HealthInfo>>,
) {
   if let Ok(mut health_info) = health_info_query.get_single_mut() {
       if let Ok(health) = player_query.get_single() {
           health_info.0 = format!("Health: {}", health.0);
       }
   }
}
In the render_health_info system, we access the player’s health and info components and then update the text node with the actual data. Follow the documentation on the Text component to learn how to position the corresponding UI node and change its properties, such as font, size, color, etc.
Game states and advanced system scheduling
What should we do when a player loses all their health points? In other words, how should we implement the game over situation? The problem is that some systems need to stop being executed while others should start executing right when we reach this state. For example, we must prevent obstacles from moving and the player from jumping, while also displaying the “Game Over” text on the screen. To implement the desired behavior, we’ll apply Bevy’s states and use its additional scheduling features.
We need to introduce two states into our gameplay:
InGame, which corresponds to the time we are playing.GameOver, which means that the game is over.
We might have more states in more advanced games, for example, for pausing the game or navigating a menu. In Bevy, we define the following structure with states and derive the required definitions:
#[derive(States, Debug, Clone, PartialEq, Eq, Hash)]
enum GameState {
   InGame,
   GameOver,
}
Then we register our initial state within the application:
App::new()
   // ...
   .insert_state(InGame)
   // ...
While in the game, we should consult the player’s health and then switch to GameOver if there are no health points left:
fn check_health(
   player_query: Query<&Health, With<Player>>,
   mut game_state: ResMut<NextState<GameState>>
) {
   if let Ok(Health(health)) = player_query.get_single() {
       if *health == 0 {
           game_state.set(GameOver);
       }
   }
}
When the game is over, we display a huge banner in the center of the window:
fn game_over(mut commands: Commands) {
   commands.spawn((Node {
       position_type: PositionType::Absolute,
       left: Val::Percent(10.),
       right: Val::Percent(10.),
       top: Val::Percent(15.),
       bottom: Val::Percent(15.),
       justify_content: JustifyContent::Center,
       ..default()
   },))
       .with_children(|builder| {
           builder.spawn((
               Text("GAME OVER".to_string()),
               TextFont::from_font_size(160.0),
               TextLayout::new_with_justify(JustifyText::Center)
                    .with_no_wrap(),
               TextColor(Color::srgb(1.0, 0.0, 0.0)),
           ));
       });
}
Of course, we also need to specify when any given system should and should not be executed. We do that using the run_if schedule modifier and the OnEnter(GameOver) schedule as follows:
App::new()
   // ...
   .add_systems(Update, (jump, apply_gravity, player_movement)
       .run_if(in_state(InGame)))
   .add_systems(Update, (spawn_obstacles, move_obstacles,
                         detect_collision, render_health_info,
                         check_health)
       .run_if(in_state(InGame)))
   .add_systems(OnEnter(GameOver), game_over)
   .run();
So, if the current state is InGame, we have eight systems to execute within the Update schedule (meaning on every frame update) and a single game_over system when we enter the GameOver state (meaning it is executed only once).
I encourage you to play with the final implementation and try implementing many more features, for example:
- Spawning stars.
- Giving rewards for collecting stars.
- Using more advanced graphics for game objects instead of boring rectangles.
- Implementing game levels.
And beyond
It takes a lot of time to master game development and Bevy, which means it’s crucial to start applying your knowledge as early as possible. Make your own game right now! To help flatten the learning curve, I’ve composed the following list of helpful resources:
- Bevy’s website is a great resource: You can find links to the documentation, community links, and official examples (make sure you check them out!), as well as a collection of third-party assets, learning resources, crates, and apps.
- Bevy GameDev Meetups host a wide selection of general talks about Bevy as well as numerous deep-dives into specific features.
- The Bevy Cheat Book can prove very helpful when you need to implement some highly specific functionalities.
- Migration guides like this one are also must-reads. Things in Bevy change frequently, so be prepared.
- It’s also highly advisable that you learn about at least one physics engine for Bevy (e.g. avian), and I would recommend following Chris Biscardi and his This Week in Bevy project for valuable insights.
- UPD. If you want to see how far you can go starting with the simple implementation in this blogpost, look at this Chrome Dino game clone (and don’t miss the origin story in README – I was deeply touched!)
The fast pace of Bevy development creates many issues for both content creators and AI assistants. Materials on the internet and any AI-generated suggestions can easily be outdated. You should always keep in mind the Bevy version you are targeting and check the migration guides if you encounter any issues.
Conclusion
Game development with Rust and Bevy is an exciting journey that requires a combination of creativity, problem-solving, and technical skills. From setting up your first Bevy project to implementing core game mechanics, every step reveals the power and flexibility of this ecosystem. Bevy’s entity-component-system (ECS) architecture might initially seem challenging, but its logic and elegance become increasingly apparent as you practice, enabling you to create scalable and maintainable games.
While this blog post provides a solid foundation, learning begins when you start experimenting. Don’t hesitate to dive deeper into advanced topics like collision detection, procedural generation, or physics integration. Bevy’s vibrant community and extensive resources, including documentation, meetups, and third-party assets, will prove invaluable as you continue your educational journey.
Remember, game development isn’t just about writing code but crafting experiences. Challenge yourself to create something unique, whether it’s a simple platformer or a complex simulation. Each project will teach you new concepts, spark new ideas, and bring you closer to mastering this craft.
Bevy’s rapid development pace is both an opportunity and a challenge. Stay informed about new updates, consult migration guides, and engage with the community to keep your skills sharp and your projects up to date. Whether exploring game design for fun or building a career in the industry, the combination of Rust, Bevy, and your creativity is a recipe for success.Now it’s time to roll up your sleeves, launch RustRover, start coding, and bring your game ideas to life. Good luck, and happy coding!