JetBrains Academy
The place for learning and teaching computer science your way
Educational Products: New Features for Course Creators

JetBrains’ Educational Products now support Java, Kotlin, and Python. Technically, all the educational features are implemented as a special EduTools plugin, so you have a choice of IDEs to use – IntelliJ IDEA, Android Studio, or PyCharm – in your learning and teaching. One of the major advantages of making a plugin for us as developers is the freedom to share new features. No matter what release stages our IDEs are on, we can update the plugin anytime and let you try all the freshly baked features while they are still hot from the oven.
Last week, we updated the EduTools plugin to version 1.5 and want to tell you about some major features you can now try.
Open a course as an educator
Group lessons into sections
Create tasks with dependent answer placeholders
Write task descriptions, with full IDE support
To get the plugin update, choose Help | Check for Updates (for Windows or *NIX) or <Your IDE> | Check for Updates (for macOS) on the main menu: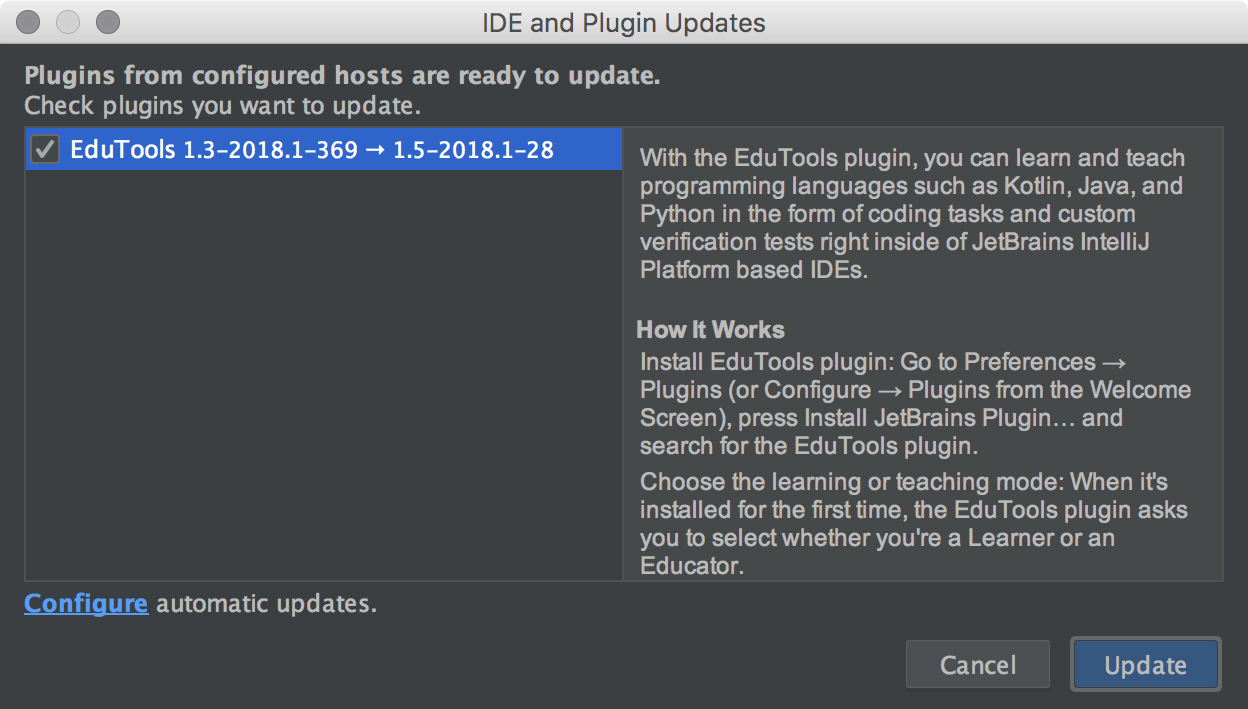
Open a course as an educator
When creating a new course, it is often much easier to start with some existing course as a template rather than creating everything from scratch. If you’ve chosen Educator as your primary role, you can now open any available course in the editor mode.
For example, you can choose our Kotlin Koans course to take a closer look at all the code tasks and tests. Go to Browse Courses from the Welcome Screen, find the Kotlin Koans course, and click the (brand new) arrow icon next to the Join button: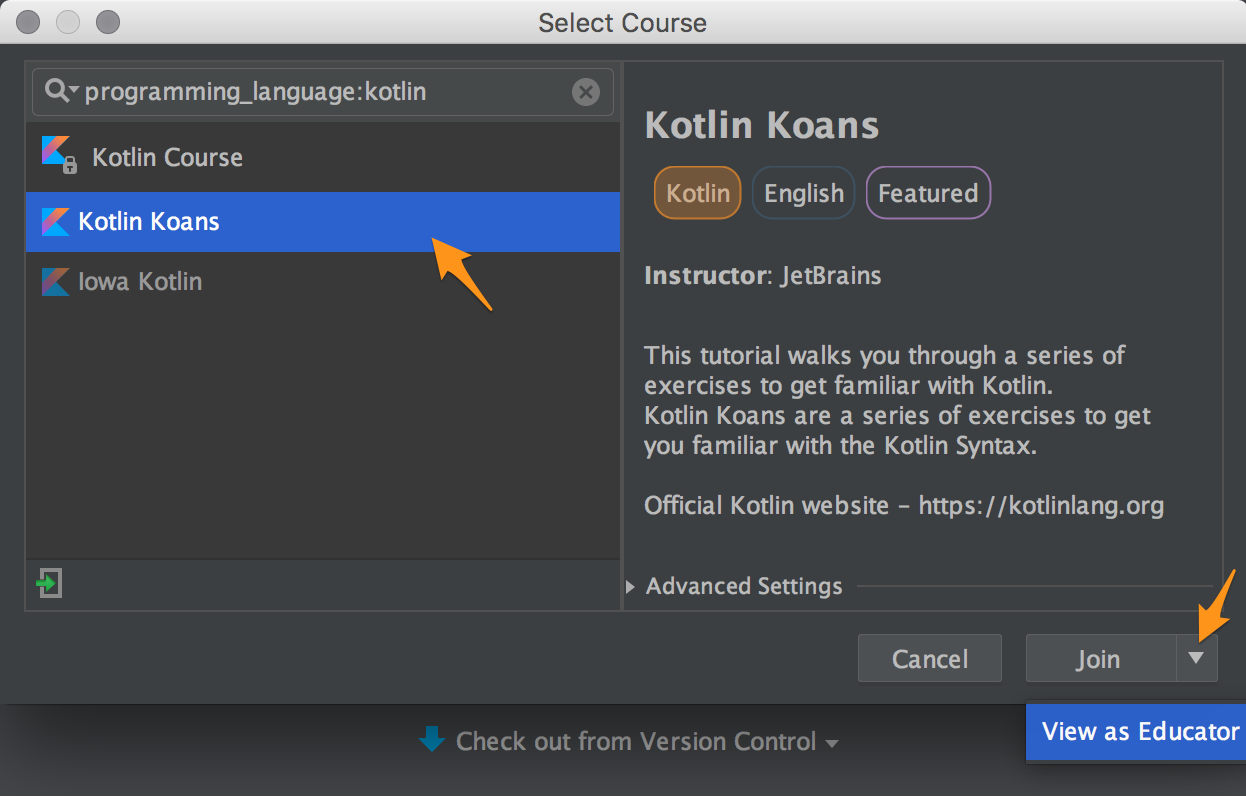
The IDE will create a local copy of the course, with all the source files available to dig into and customize: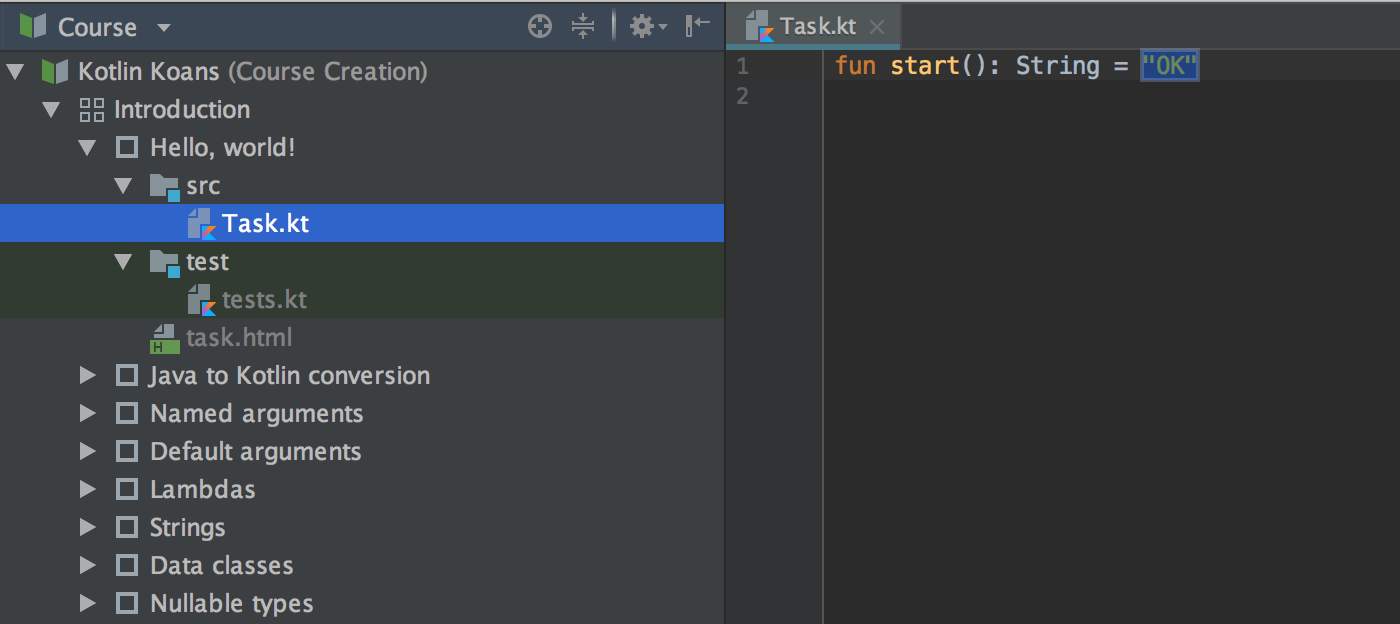
Group lessons into sections
So far, every course created with an IDE has been structured as a list of lessons, with each lesson containing some tasks. Now, you can group lessons into sections.
Let’s go back to the copy of Kotlin Koans course we’ve just created and rearrange it a little. Let’s say we want to add a new Intro section to the course and add a Hello, World! first lesson to it. To create a new section, right-click the course and select New -> Section: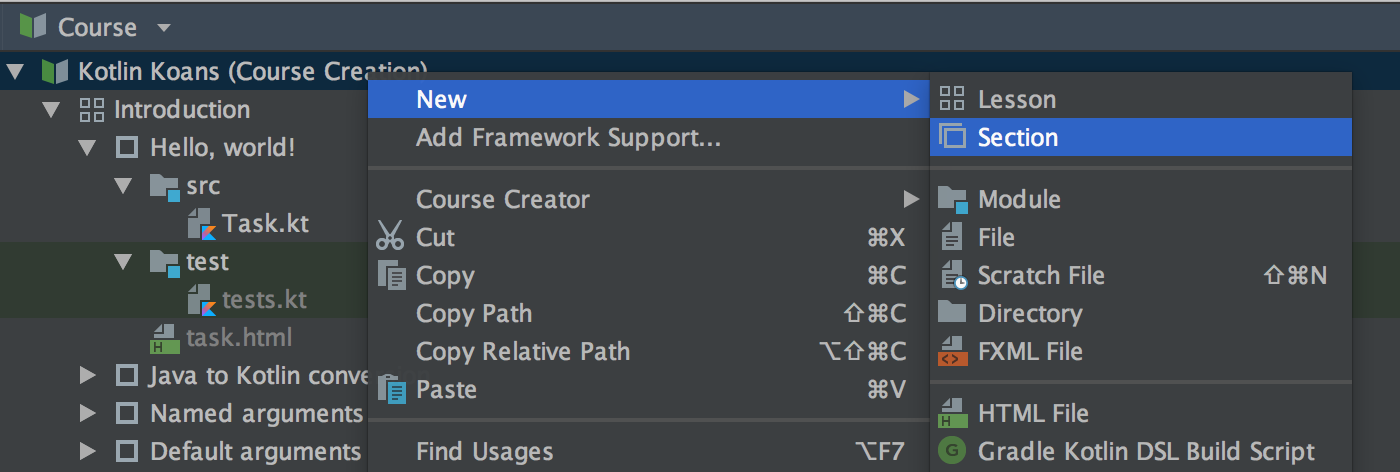
Then drag the new section to the top of the course: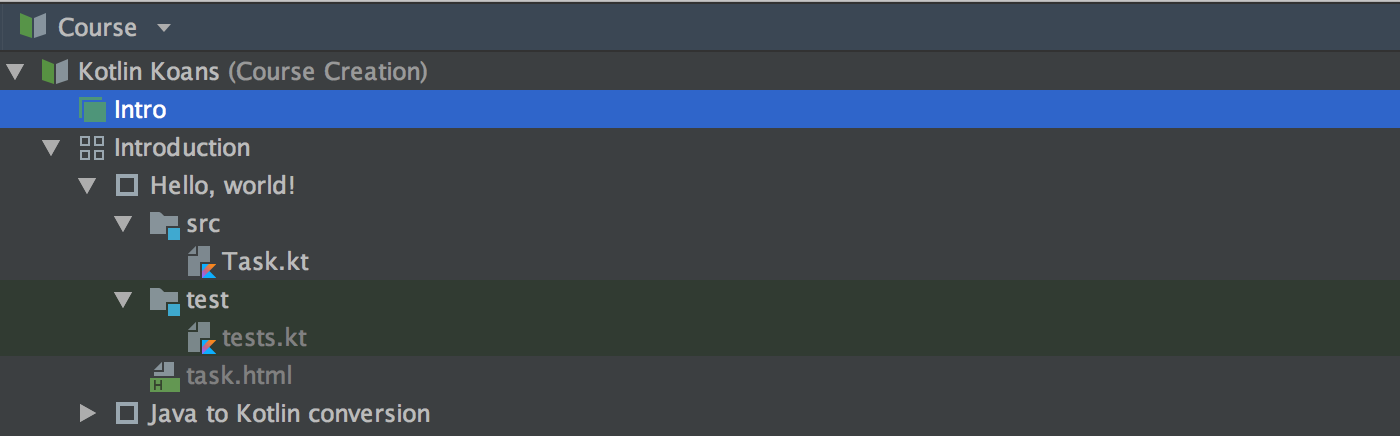
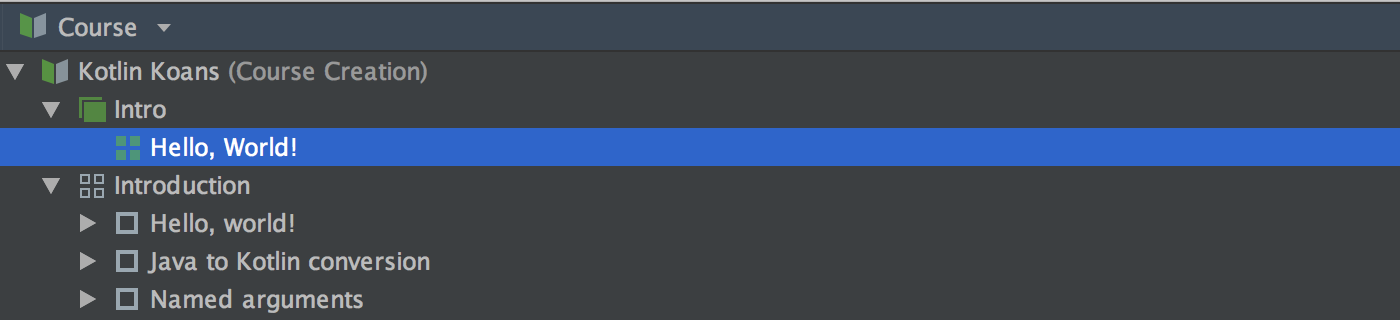
Now we can create a new Hello, World! lesson: right-click Intro and select New -> Lesson: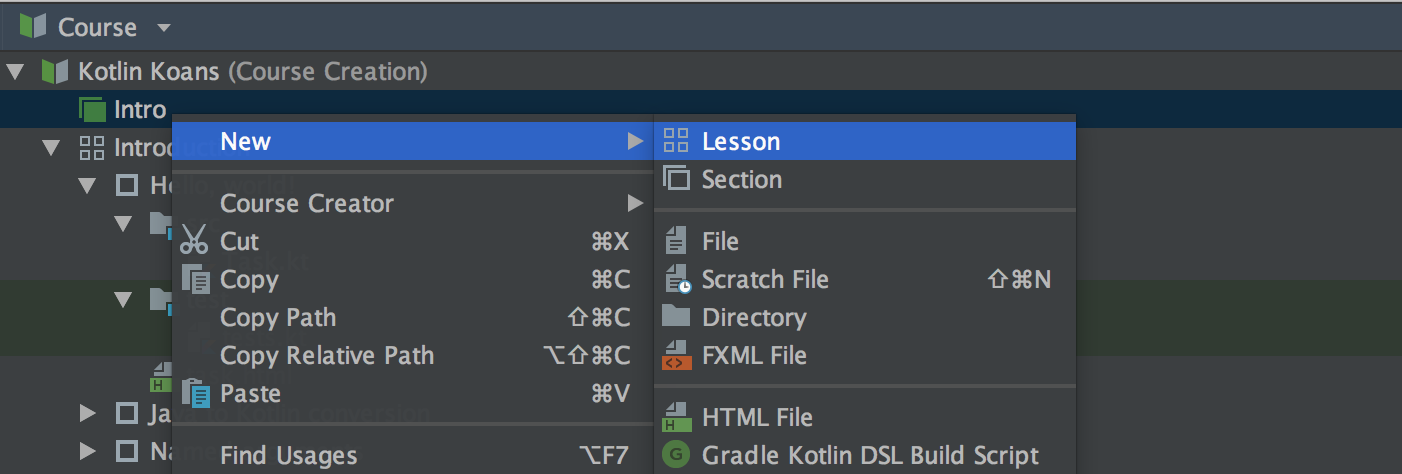
You can also drag lessons from one section to another.
Create tasks with dependent answer placeholders
If you want to give learners an opportunity to work with the same code fragment and reuse code they have already written in previous tasks, you will be glad to know there is now a way to do so.
In the course we’ve been working with in this post, we have a simple Hello, world! task. Learners should make the start function return "OK":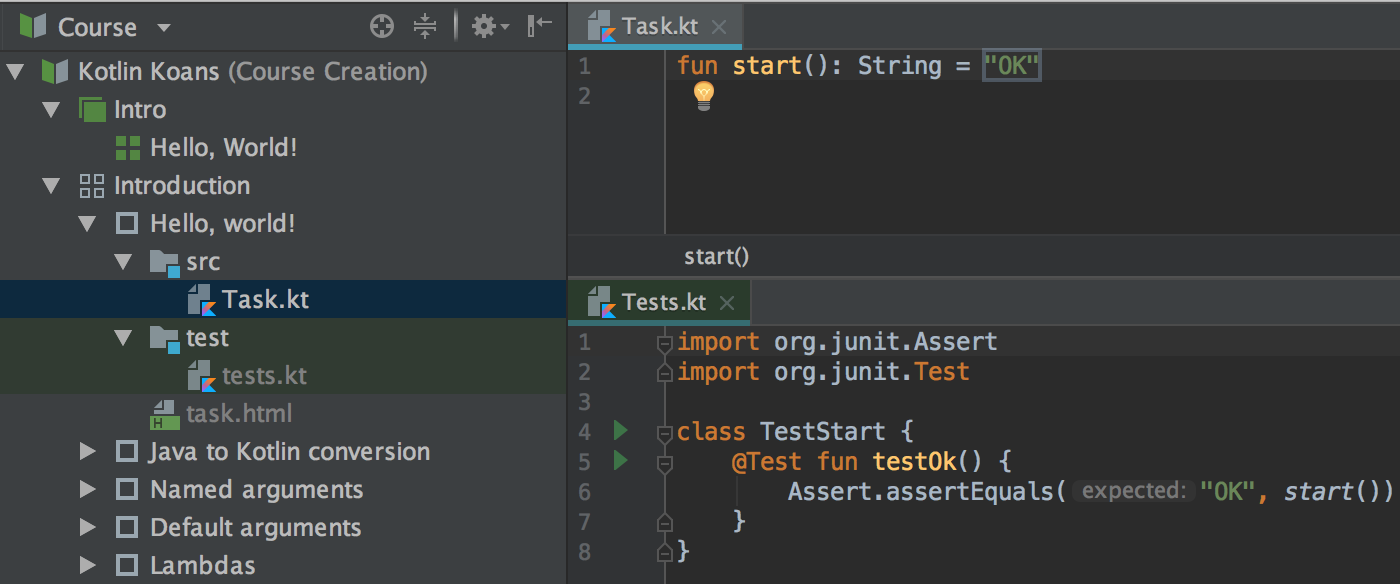
This is a very simple first task that traditionally proves to the learner that their environment is working. It also shows some simple function syntax. What if we want to add one more step and show the learner some simple variable syntax as well? We can also familiarize the learner with the idea that even a simple program may be written in multiple ways, all producing the same result.
So, as a first task, we’ll ask the learner to make the function return “OK”:
fun start(): String = "OK"
As a second task, we want them to change the code and make the function return the value of an extracted String variable:
var str: String = "OK"
fun start(): String = str
Note that in the second task, we want to reuse the string value “OK” from the first task. Let’s see how we can implement this.
We have already created the new Hello, World! lesson in our new course. We are going to have the first task of the new Hello, World! lesson be exactly the same as an existing Hello, world! task in the original Kotlin Koans course. So we drag the existing Hello, world! task to the new Hello, World! lesson: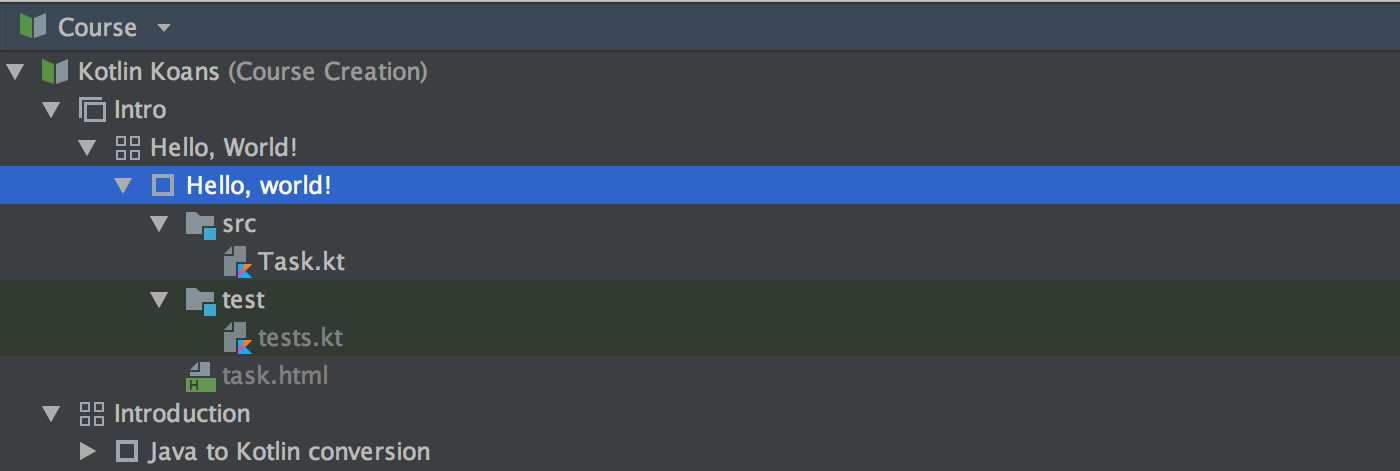
Then we rename it to task1 (select Refactor -> Rename in the task’s right-click menu):
We also need to create a task2 (New -> Task from the lesson’s right-click menu) in this lesson, and then add the code with the string variable to the task file: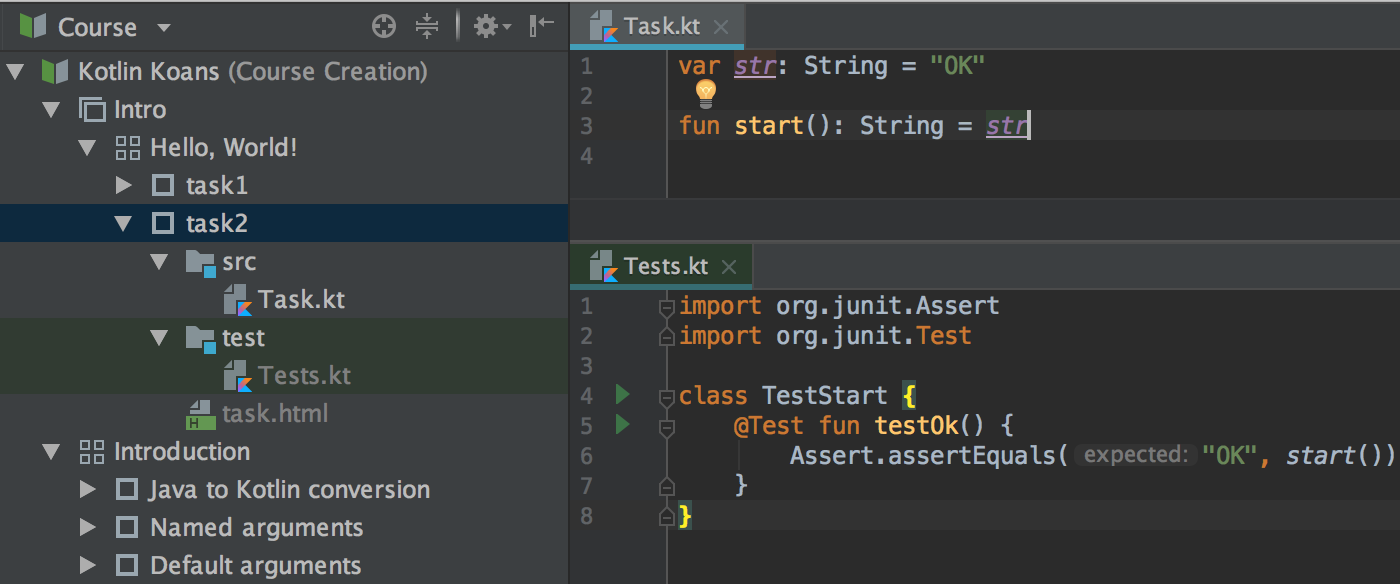
The test will be the same, because the start function should still return “OK”.
Now we need to add placeholders to task2. We will have two placeholders there, but the first one should depend on the placeholder from the task1, because it has the code we want to reuse. Let’s create it first: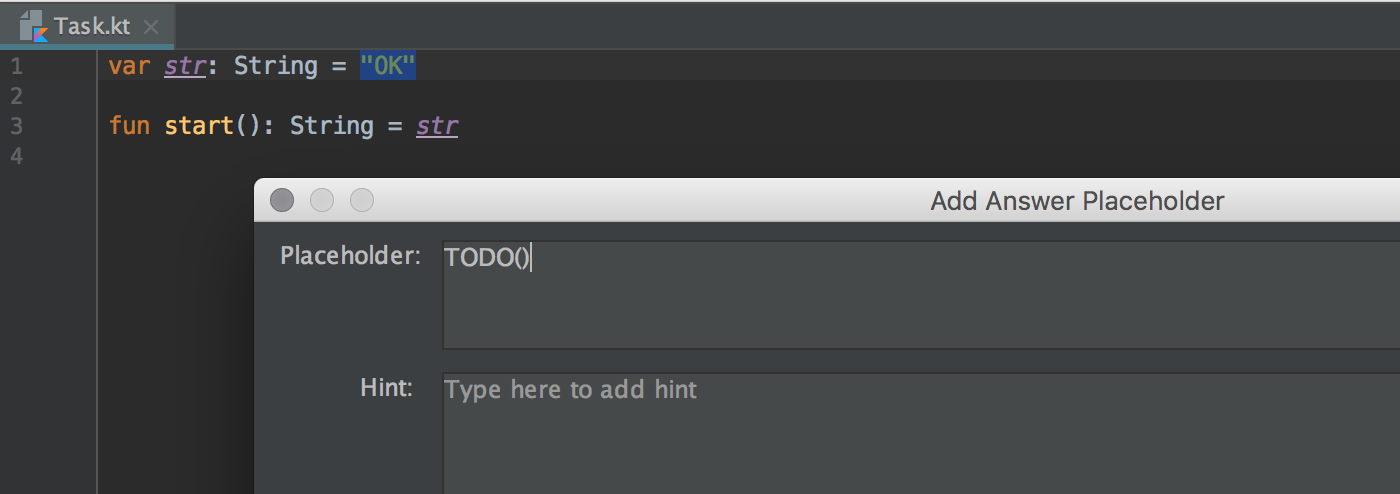
Now we need to add a dependency. Right-click the answer placeholder and select Answer Placeholder -> Add Dependency: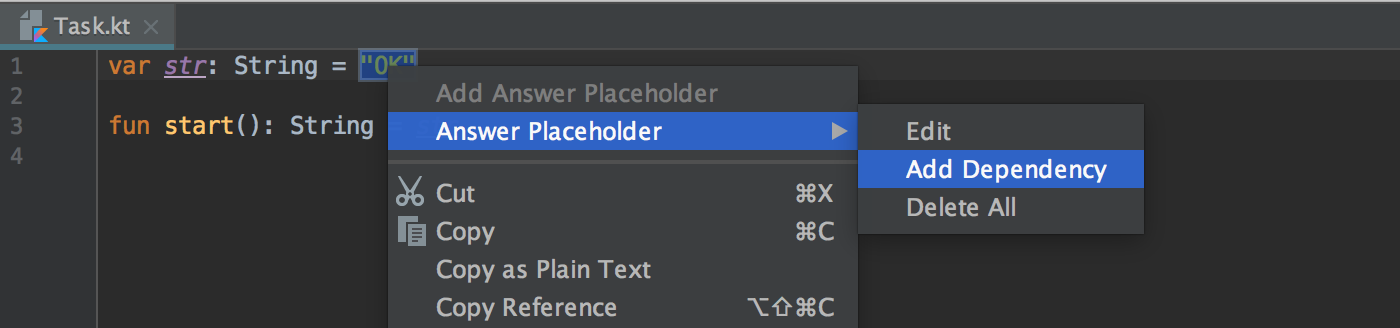
We also need to write the full path <section name>#<lesson name>#<task name>#<task file>#<placeholder number> for the placeholder from the task1: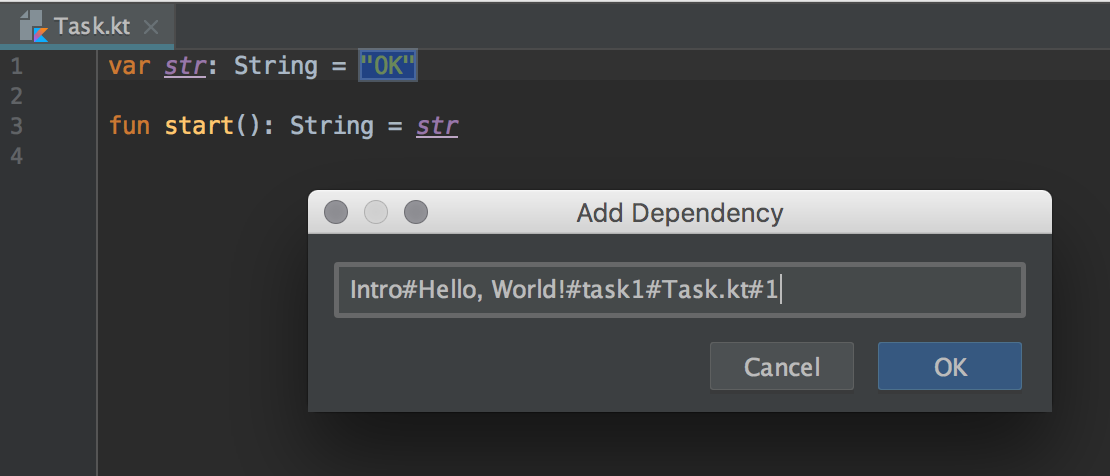
Now let’s create the second placeholder: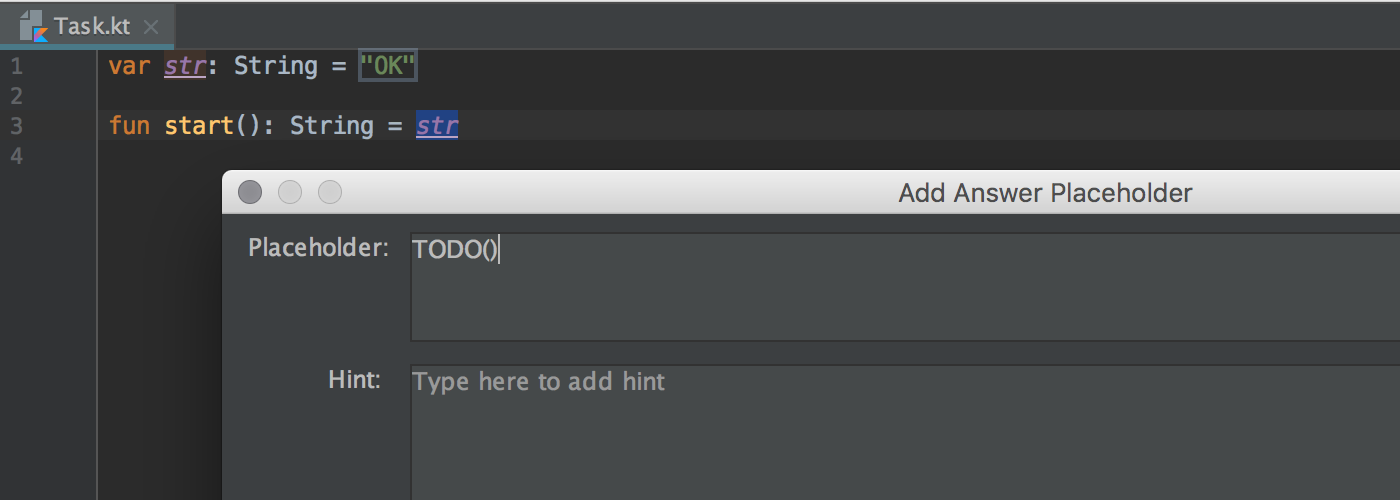
Finally, it’s time to check how this all looks from the learner’s perspective. We make a course preview (right-click the course and select Course Creator -> Create Course Preview) and choose the learner’s look.
From their point of view, the first task looks the same as it did in the original Kotlin Koans course: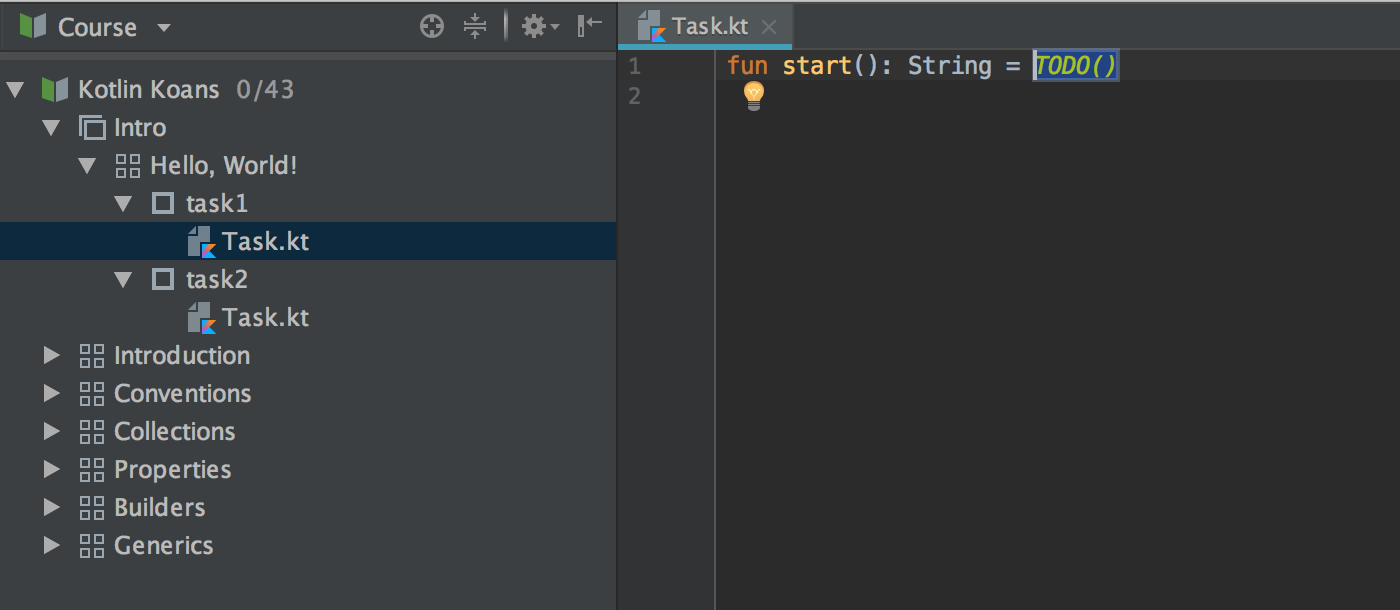
But there is also the second task, which notifies the learner they should solve task1 first: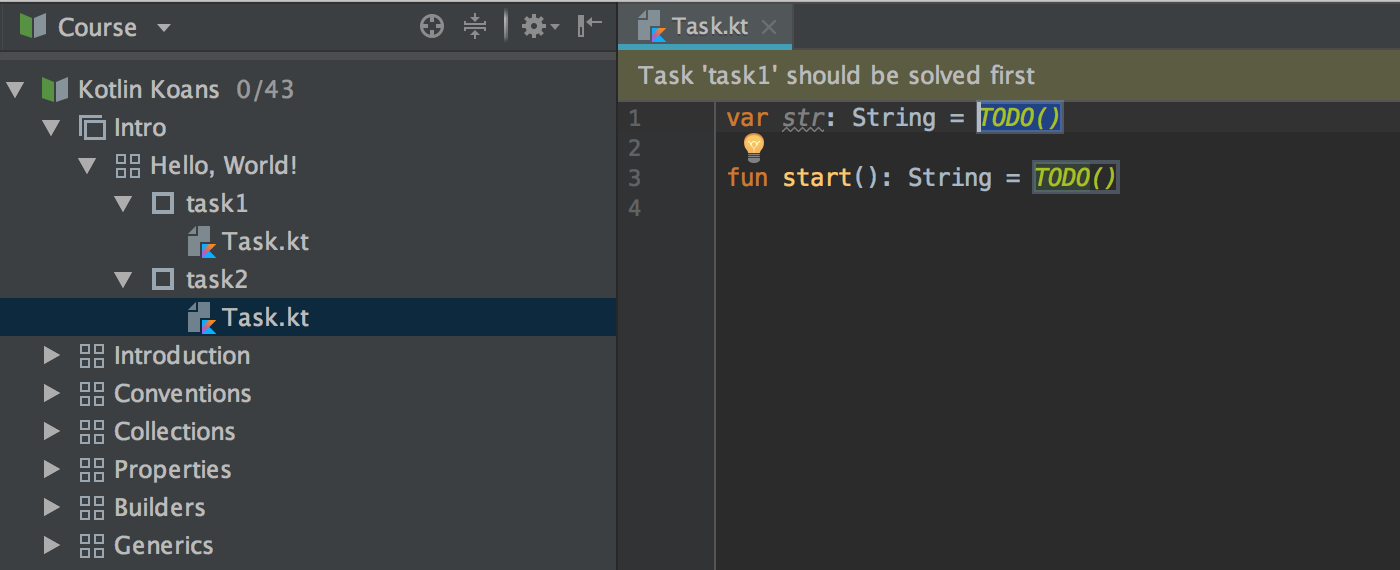
When the first task is solved…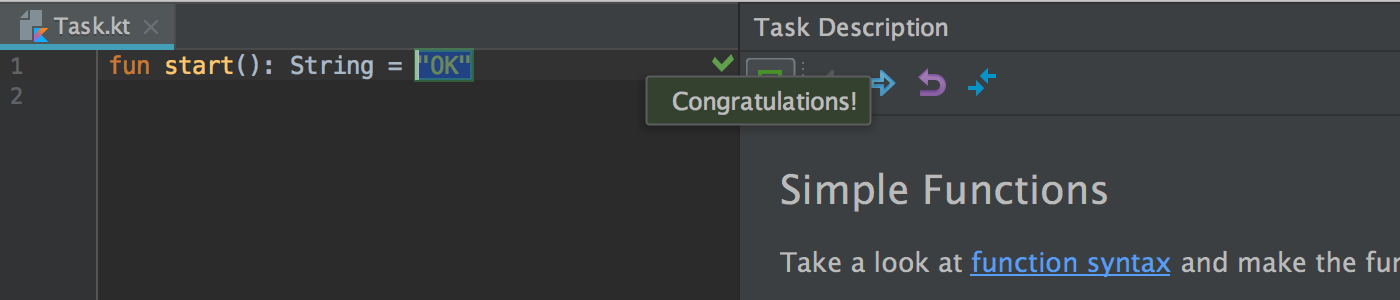
…the dependent placeholder in the second task is automatically replaced with the right answer, so the learner can focus on the second placeholder: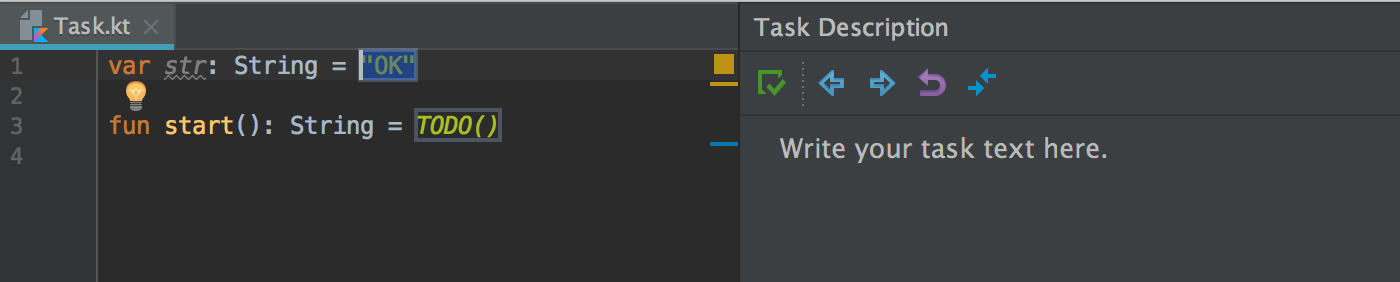
Write task descriptions, with full IDE support
Writing task descriptions is a major part of creating a course. We want you to be able to do this part of your work while having all the possibilities and power that our IDEs can offer. That’s why you can now edit task descriptions right in the editor, with all the HTML code completion and other IDE features available, including instant preview on the Task Description panel.
Let’s get back to our course and add a description to task2. Go to Task Description panel and click the Edit button:
This will open task.html for editing: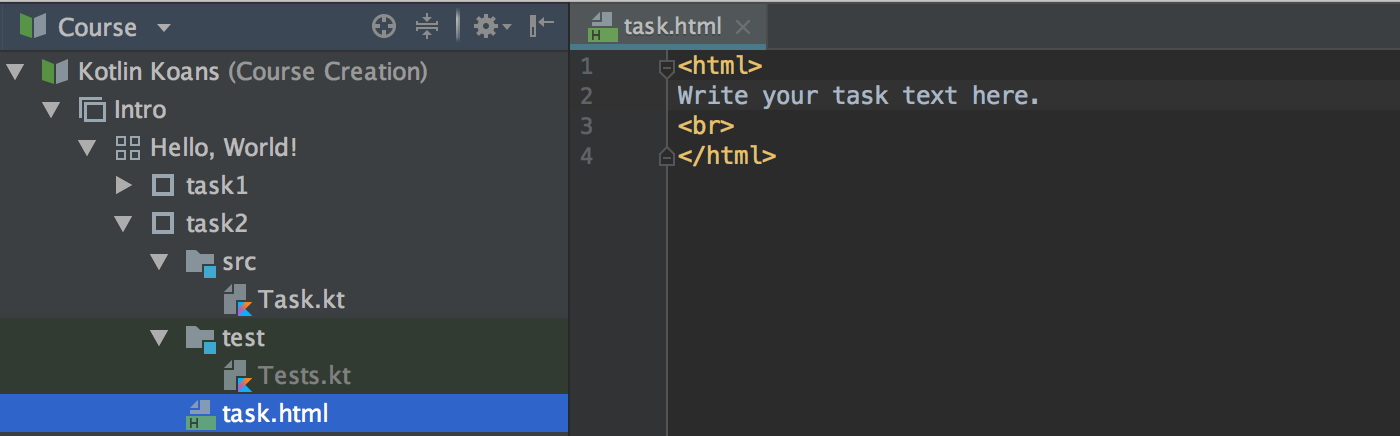
Note that you can rename this file to task.md if you want to use Markdown instead of HMTL: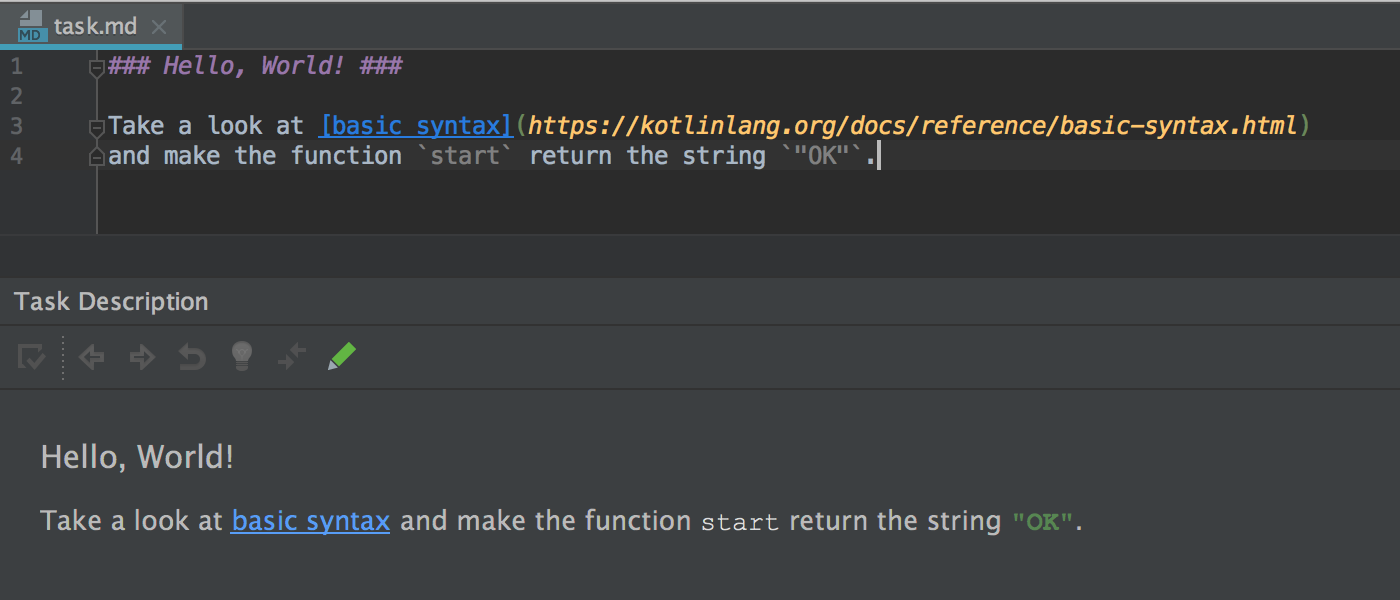
Any changes in the file are immediately reflected on the Task Description panel.
Our work on all of these new features is still in progress. We’re going to improve and polish them, but we need your feedback to go in the right direction! Please give them a try and leave a comment here, or tweet at us. Thanks!
The Educational Products Team