Stay local, let your IDE do remote work for you!
The recording of our webinar Remote Development with CLion is available on the JetBrainsTV YouTube channel.
Outline:
- Initial remote projects support – what’s that?
- How to configure a remote project in CLion?
- Remote development – what can I do?
- What’s going on in CLion under the hood?
- Resync with Remote Hosts
- Stay fully remote all the time with ease
CLion’s issue tracker has dozens of important and interesting feature suggestions to implement. With limited resources, we are always having to prioritize the features we include with the direction we have in mind for the product’s evolution. 3-digit issues with over 800 supportive votes – these are the kinds of requests we can’t leave out! Can you guess the one we’re working on for v2018.3? It is all about remote projects support!
Initial remote projects support – what’s that?
We’ve started with a particular set-up, though we do plan to cover and come to up with more cases in the future. So we are calling the current support state – initial. What exactly was implemented then?
- Local client machine: macOS, Linux or Windows
- Remote host: Linux
- Sources location: originally on the local host, CLion will synchronize to the remote machine for you.
- Project model: only CMake projects
rsyncis required to be installed on a remote host in case your local machine is macOS or Linux, when Windows is used as a local machine – CLion usessftpandgzipcompression to synchronize the sources.
We know there are many other cases for remote development and we are planning to extend our support for it in the future. Just sit tight and stay tuned!
How to configure a remote project in CLion?
It is much easier than you imagine! Just follow these steps.
- First of all, go to Settings/Preferences | Build, Execution, Deployment | Toolchains:
- Create a new toolchain (we call it Remote in our sample)
- Select the Remote Host option
- Configure the credentials to access the remote host:

- Set paths to the CMake executable and debugger on the remote host (it has to be done manually for now, while the default /usr/bin/cmake and /usr/bin/gdb are set for you)
Now, if the remote host is accessible by ssh with the given address, port, username and password, the toolchain check will finish successfully and the toolchain will be available for use in CLion:

- Now you need to connect a CMake profile (the one that currently exists, or a newer one) to the newly added remote toolchain. Do this under Settings/Preferences | Build, Execution, Deployment | CMake:

Later in this blog post, we’ll see how we can skip this step by simply making the remote toolchain the default one.
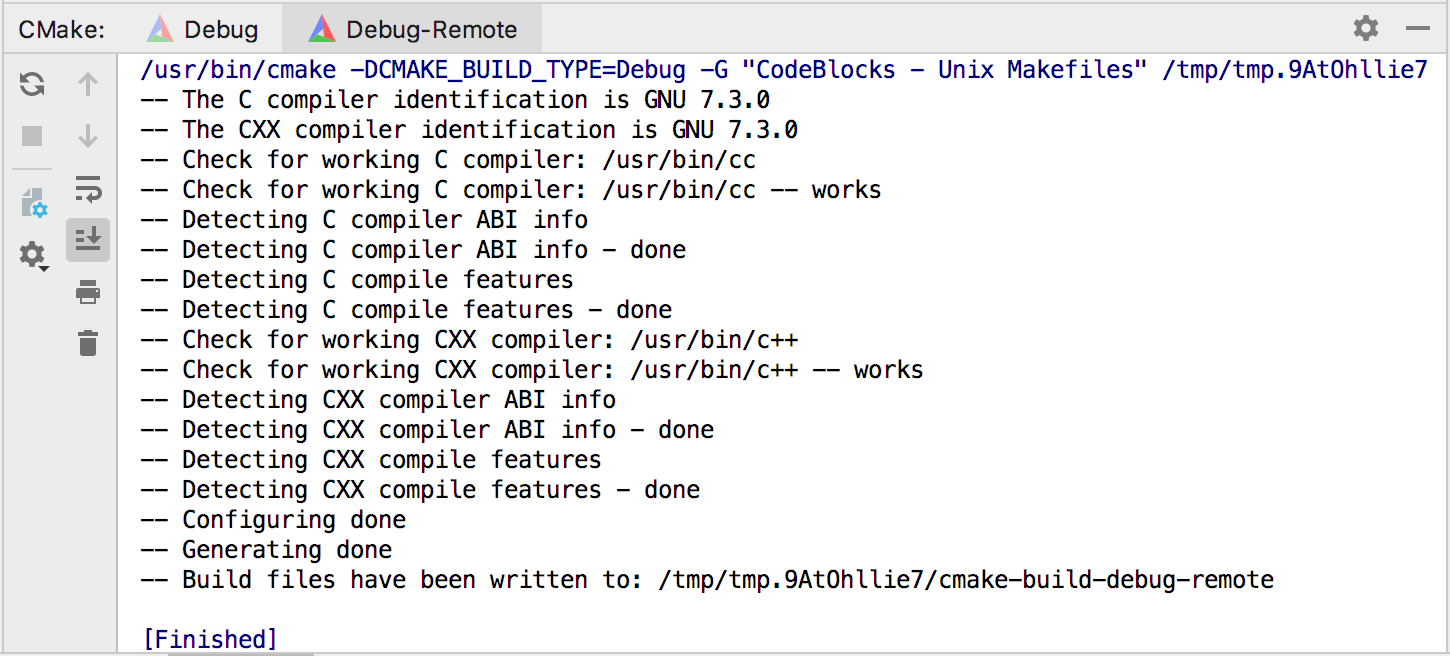
After applying these changes, CLion will reload the CMake on this project and you’ll then be ready to start working remotely with your project in CLion:
Remote development – what can I do?
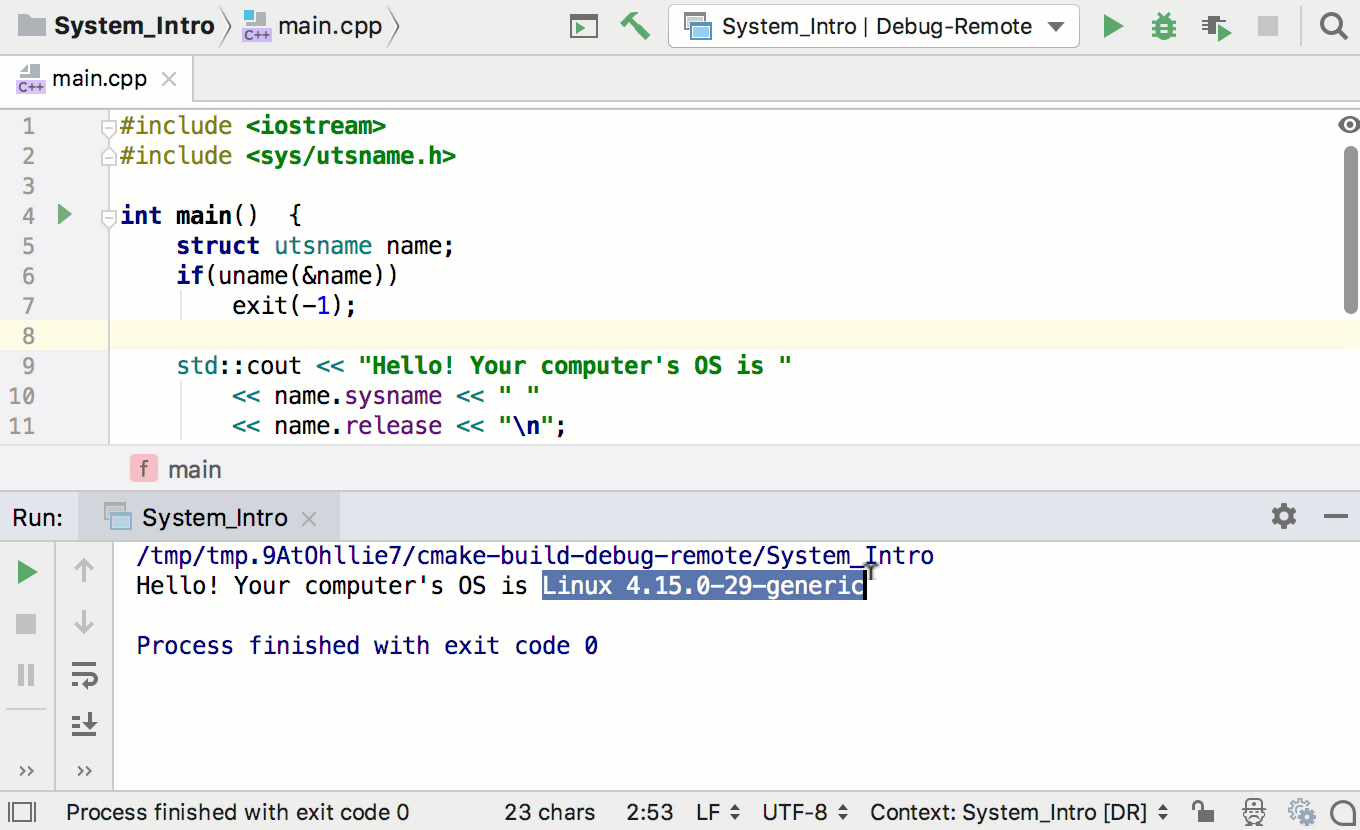
Now you have a remote toolchain configured and a CMake profile that uses it. Using then our Debug-Remote as an example. You can now:
- run your app
- debug your app
- run tests
- debug tests
All completely remotely from the instance of CLion on your local machine. And it’s really then as easy as just selecting a proper CMake profile in the build type switcher:
The same goes for tests:
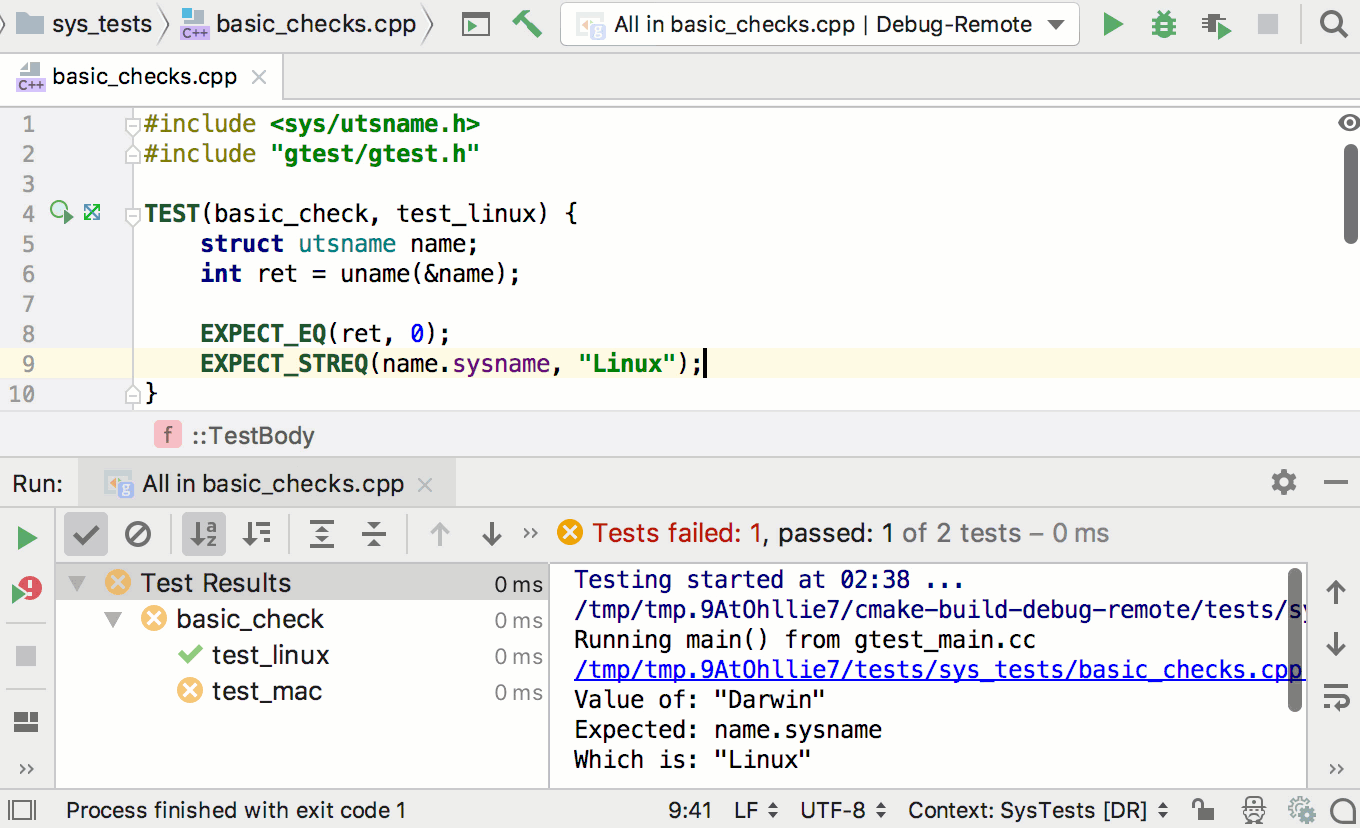
We hope to enable Valgrind and Google Sanitizers in the remote mode soon as well.
What’s going on in CLion under the hood?
Let me now briefly explain what CLion actually does when the described ‘remote configuration’ operations are performed. If you are not interested in the inner mechanics, then feel free to simply skip this part.
During the first step the connection entity is created, you can review the settings under Settings/Preferences | Build, Execution, Deployment | Deployment:
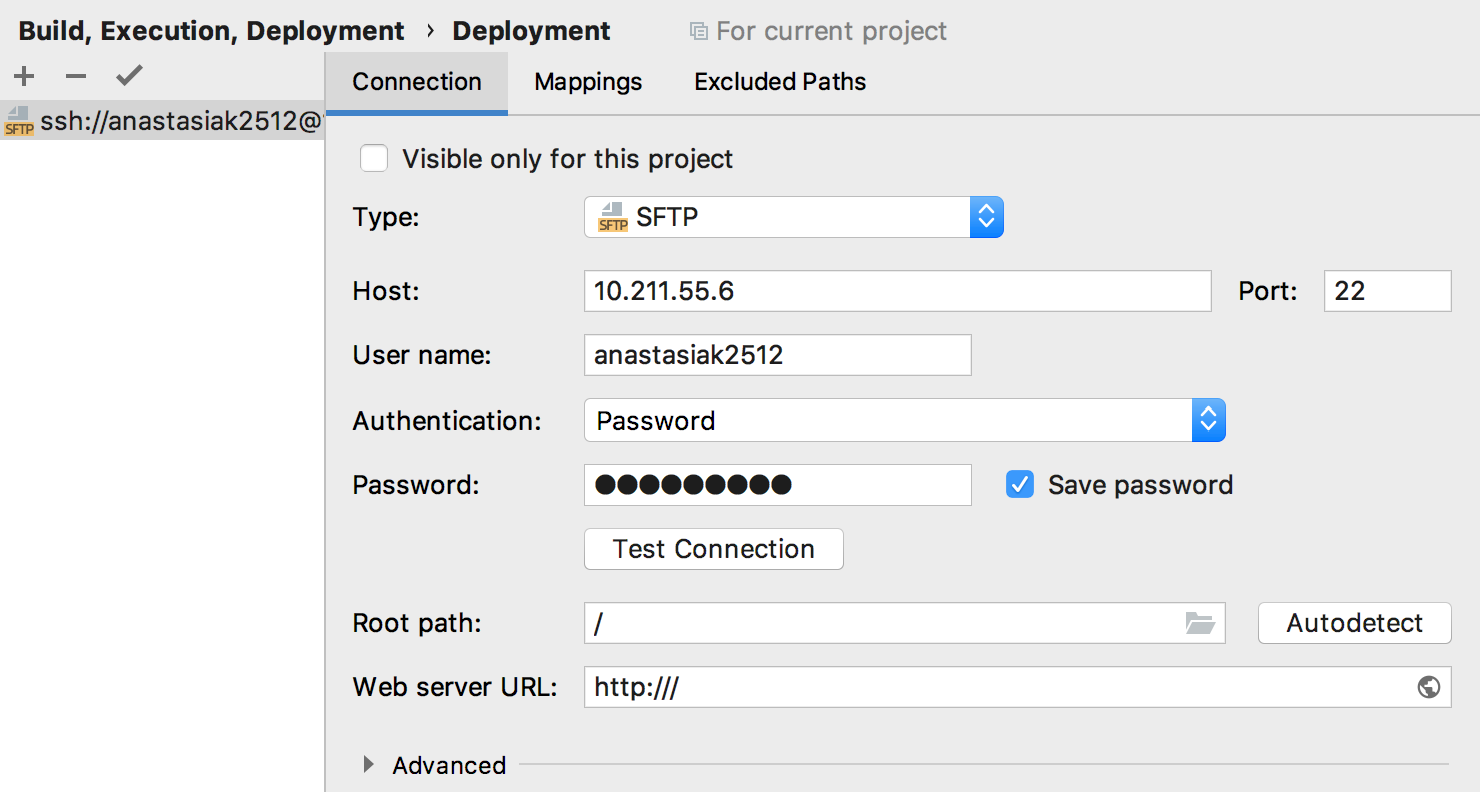
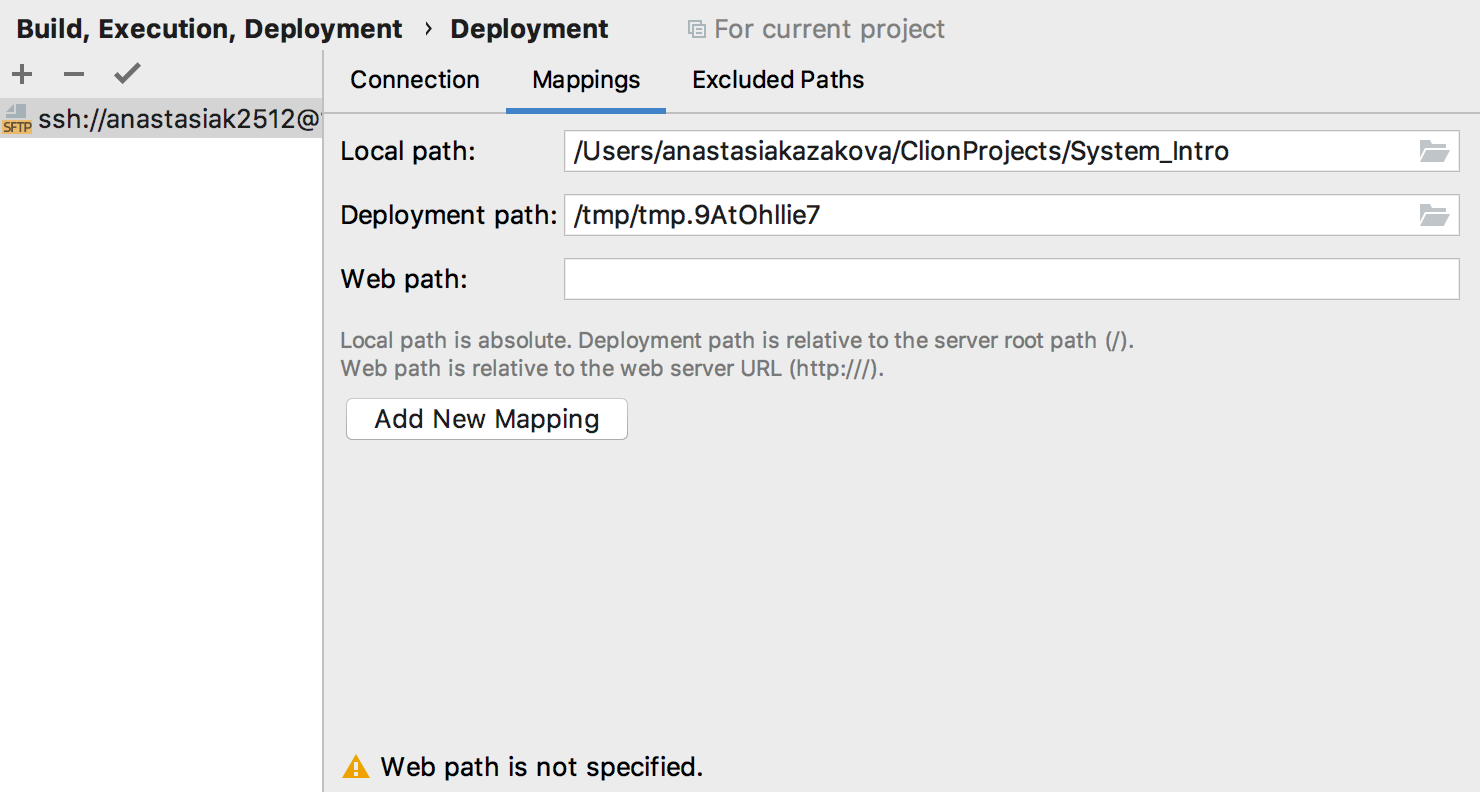
Mappings tab settings, the deployment path, in particular, is configured automatically by CLion and has the path to the remote host where CLion synchronizes your project code:
The synchronization process is displayed in the File Transfer tool window (View | Tool Windows | File Transfer):
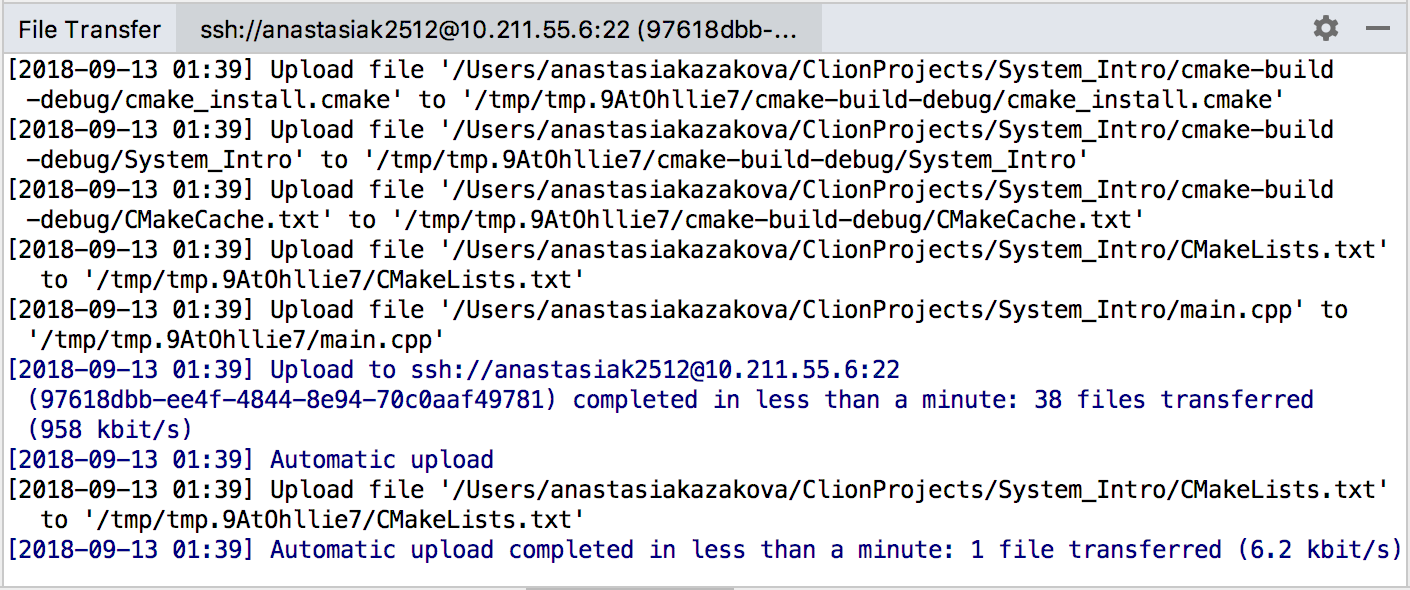
Apart from synchronizing the local files to the remote host, CLion also grabs header search paths with all the content to the local host, so it can resolve your code correctly. This means that the standard library headers, for example, are taken from your remote machine, but you can navigate to them as you would to the local files with CLion’s editor.
Resync with Remote Hosts
In the full remote development mode, the CLion instance runs locally and synchronizes header search paths from the remote machine to the local host (to resolve the code correctly in CLion). Triggering the synchronization of the header search paths on every CMake reload might be a time-consuming task. Thus the resync is performed only when triggered manually, by calling Tools | Resync with Remote Hosts.
The registry option clion.remote.resync.system.cache allows you to change the behavior and resync on every reload.
Starting CLion 2019.1.2 update you can enable clion.remote.upload.external.changes registry option (Help -> Find Action, type Registry). If this option is enabled CLion will automatically resync changes which were made out of IDE scope, e.g. changing VCS branch or updating git repo in terminal.
Stay fully remote all the time with ease
To end this introduction into this awesome new feature, we’d like to share with you a very simple way to use CLion in this remote mode for all your projects, existing and new.
Go to Settings/Preferences | Build, Execution, Deployment | Toolchains and make your remote toolchain a default one by simply moving it to the top of the toolchains list:
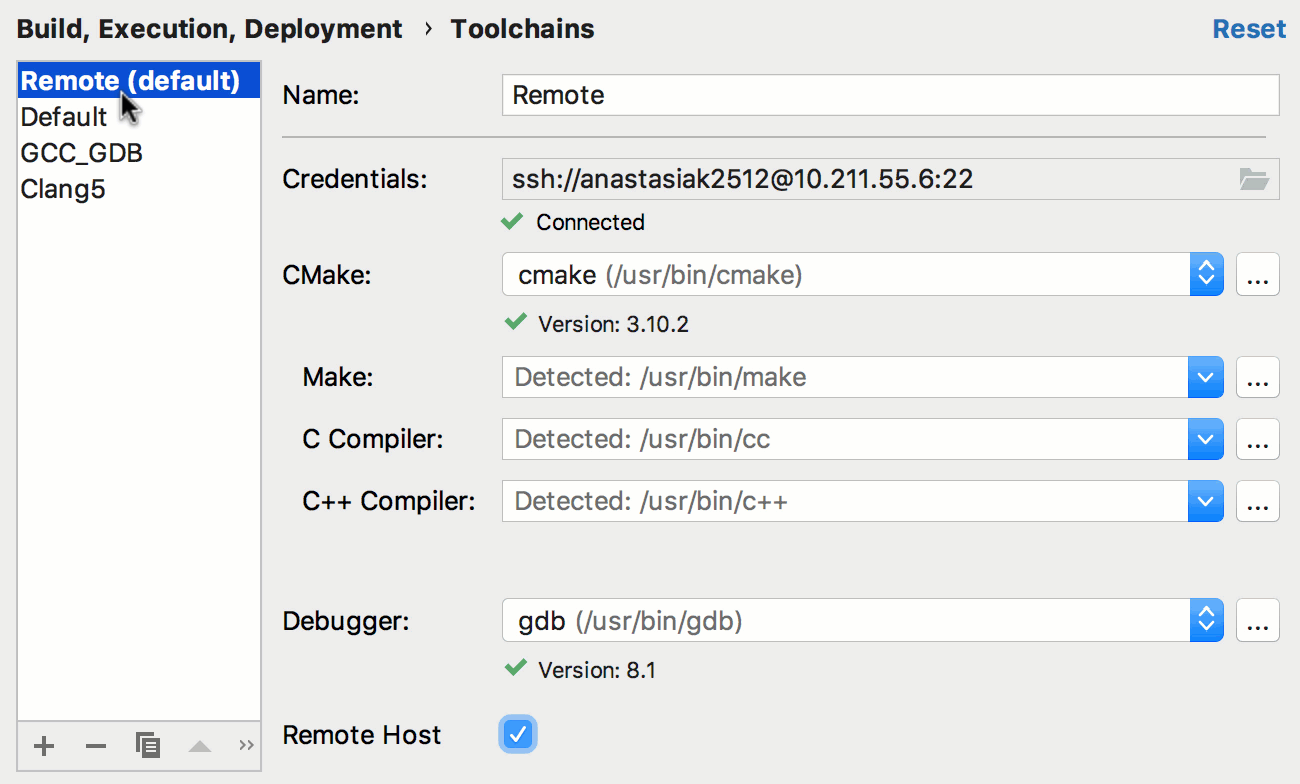
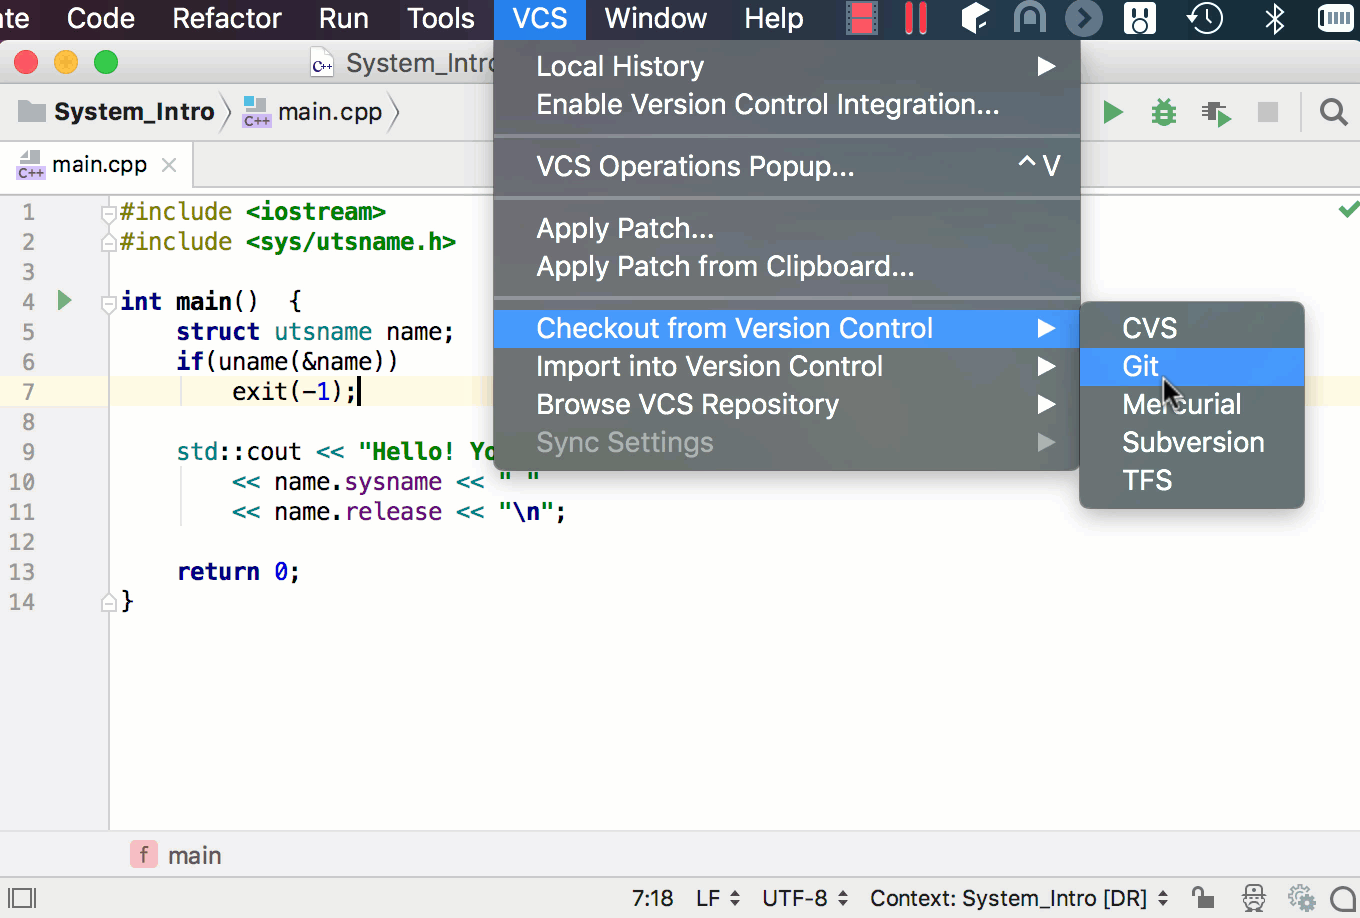
Now, this remote toolchain will be used automatically for all the projects you open in CLion. For example, when you checkout a new project from Git:
There are a few known issues already, they are linked to the parent ticket here. For example, a potential performance issue when too many remote toolchains are created.
That’s it! Give this CLion remote development feature a try and let us know what you think!
Your CLion Team
JetBrains
The Drive to Develop
Subscribe to CLion Blog updates


