Getting Started with the Conan CLion Plugin
Wondering how to add a package to your C++ project? In this guest blog post Javier G. Sogo from JFrog shares how to start with Conan package manager in CLion.
 |
Javier G. Sogo @jgsogo Software Engineer at JFrog After several years of C++ development, I moved to Python to learn the best practices and tools. Now I’m back building Conan, the C/C++ package manager. |
Writing a C++ project from scratch is always a delightful challenge. Starting from a blank page writing your code and creating your functionalities, all the way through to building on top of solid and high-performance libraries… but wait! Sometimes it’s not easy to get those libraries available for your project to compile and link, and possibly you are not experienced in that build system or the library may require some patches to be built for your platform.
The lack of a package manager in the C++ world has slowed many projects down, requiring dedicated efforts to handling external libraries or rewriting functionalities to avoid using third parties.
Conan is an open source, decentralized package manager that simplifies the process of integrating and reusing C and C++ libraries and packages. It automatically manages and reuses binaries for any possible configuration, increasing development speed. Conan is also able to build and cross-build packages from sources, it integrates with any build system, with very high flexibility and customization capabilities.
In this blog post, we will show how to use Conan in your CLion workspace to get your preferred libraries ready to use in your project. We will use the Conan-CLion plugin to integrate both applications smoothly, for example, by building an MD5 hasher using an already available implementation from the Poco libraries.
Installing all the parts
1. Conan-CLion Plugin
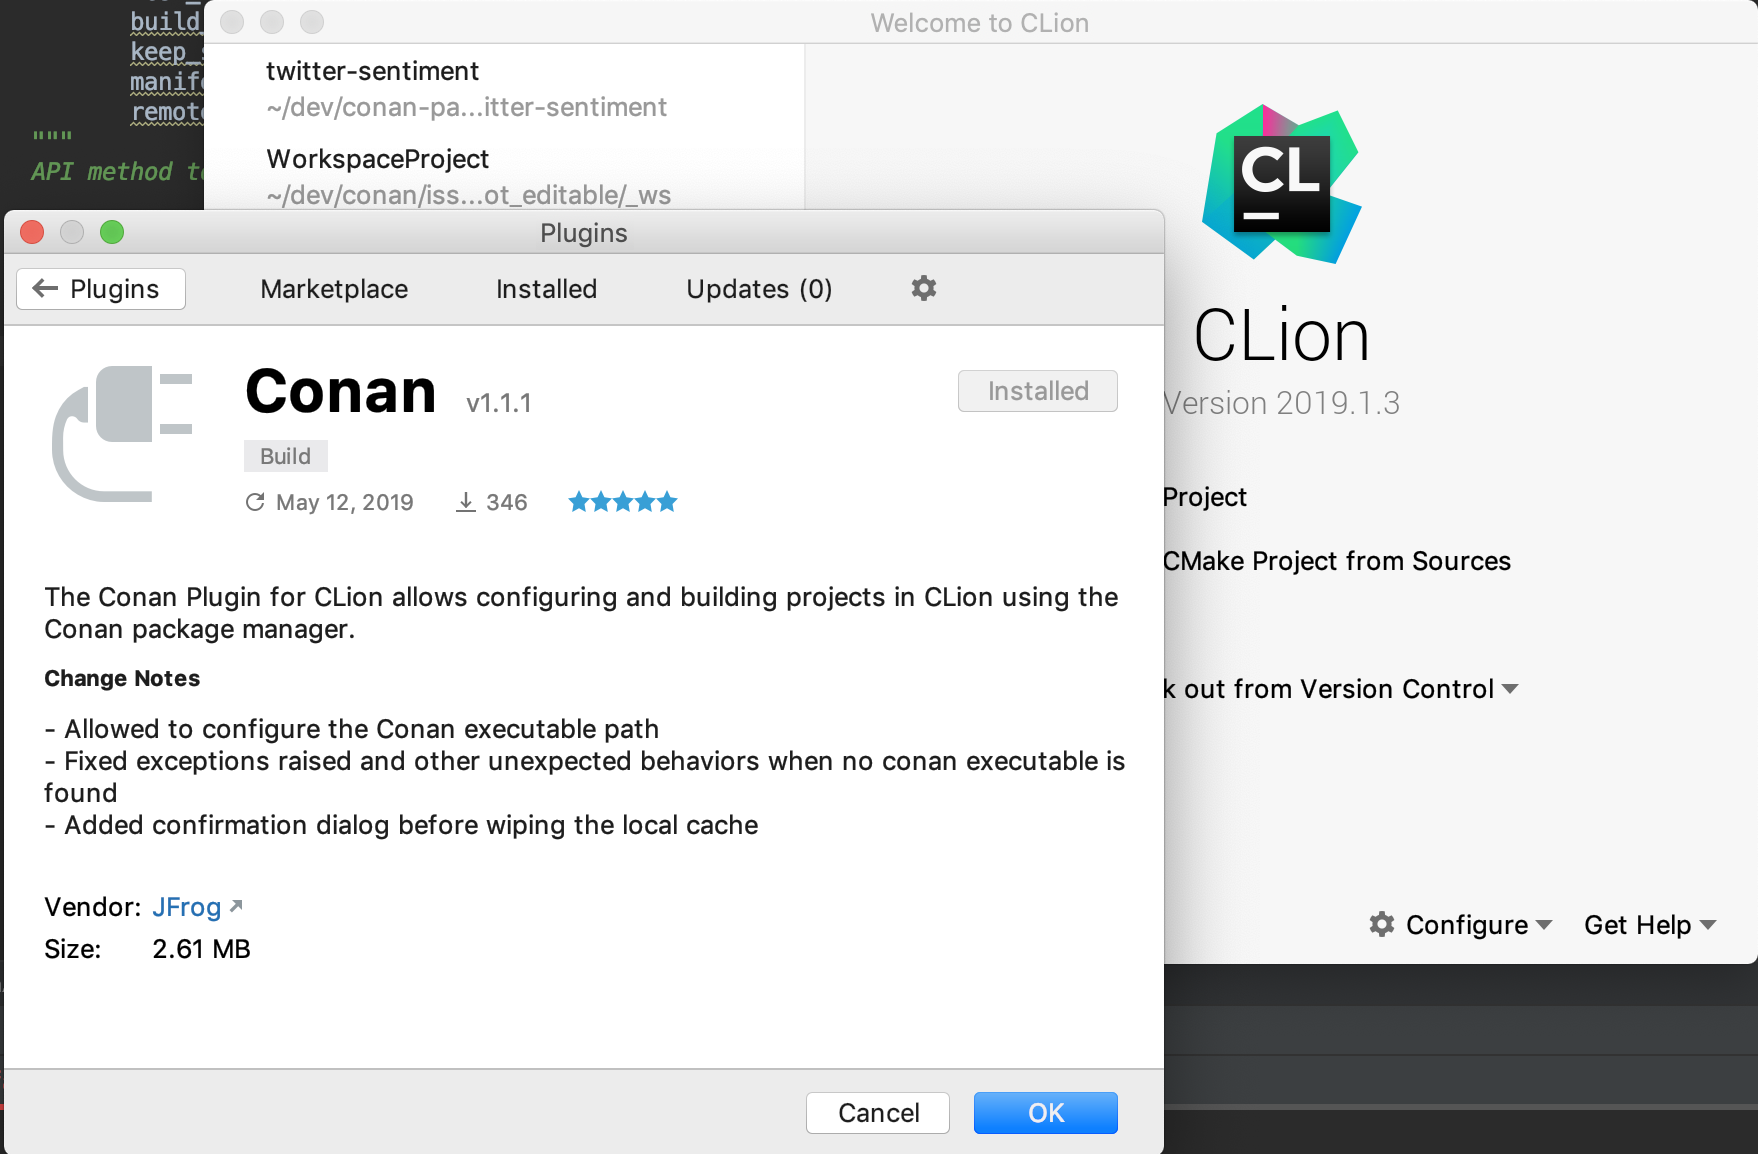
To follow along with this example, you’ll need to install the Conan by JFrog plugin from the JetBrains marketplace. It can be easily installed using the Plugins section in the Preferences/Settings window, or from the welcome screen using the Configure>Plugins option.
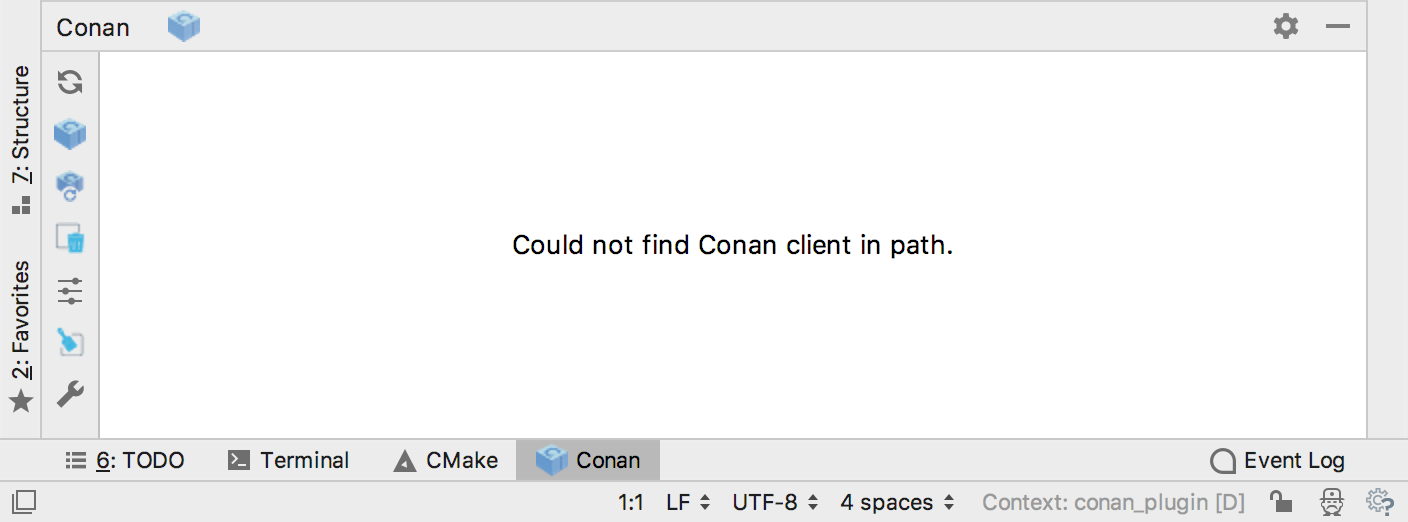
After restarting CLion a new “Conan” tool window will appear at the bottom of the IDE, which is ready for you to use.
2. Conan Client
Next, you’ll need to install Conan. Conan is a python application, you can install it using pip (pip install conan) inside a Python virtual environment or system-wide, or you can download a standalone application and unpack it into your system, choose the way that best fits your needs from the download page.
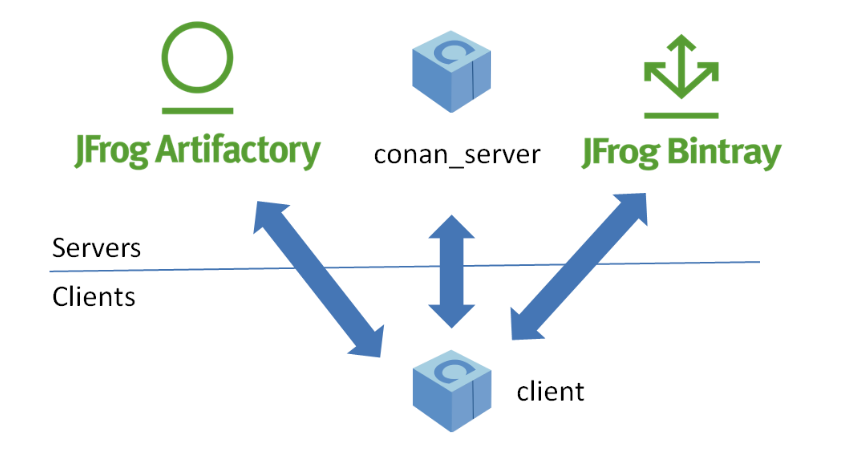
We highly recommend that you read the Conan documentation; although the default configuration is enough for this example, it is important for you to know about many other important features that are not covered in this article. Including, the distributed nature of Conan that allows mixing different origins for your libraries, JFrog Artifactory integrations, workspaces, etc. These features will help you in developing high-quality software.
3. Conan Plugin Configuration
There are a couple of configuration points we need to address before running our example, these configurations only need to be done once for all your projects. First of all, you will need to provide the path to the Conan executable you want to use in the Preferences window (leave it empty to use Conan from the PATH).

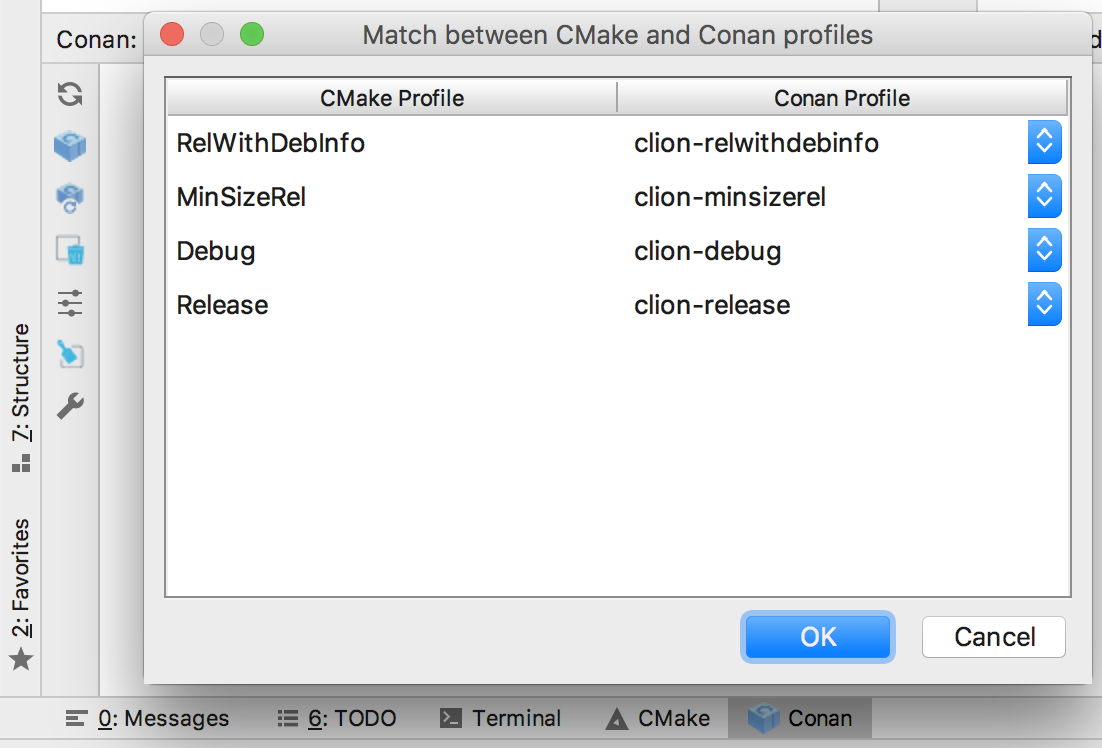
Second, we need to define the correspondence between CLion CMake profiles and Conan profiles. CLion profiles are a handy way to create different configurations to build your project, the same as Conan profiles, that’s why both should match.
[settings]
os=Macos
os_build=Macos
arch=x86_64
arch_build=x86_64
compiler=apple-clang
compiler.version=10.0
compiler.libcxx=libc++
compiler.cppstd=gnu17
build_type=Release
[options]
zlib:shared=False
[build_requires]
cmake_installer/3.13.0@conan/stable
[env]
A Conan profile is a file where the user defines a set of settings, options, environment variables, and build requires, that can be reused to build any package. These files can be handled individually using `conan profile` commands or, if you are working with other people, you will probably want to maintain a shared configuration with your colleagues using `conan config install` commands. Create as many profiles as you want using the command line or copy an URL with your shared Conan configuration into the plugin settings. For more information related to this core feature of Conan, the documentation about using profiles is a good starting point.
Once your profiles are ready, match them with the CLion ones using the ![]() button, a window will pop up for you to make these assignments.
button, a window will pop up for you to make these assignments.
Creating the C++ project
After the configuration is complete, we can leap into C++. The following example demonstrates the MD5 hashing utility in the Poco library, a few lines of code should be enough to get us started:
#include "Poco/MD5Engine.h"
#include "Poco/DigestStream.h"
#include <iostream>

int main(int argc, char** argv)
{
     Poco::MD5Engine md5;
     Poco::DigestOutputStream ds(md5);
     ds << "abcdefghijklmnopqrstuvwxyz";
     ds.close();
     std::cout << Poco::DigestEngine::digestToHex(md5.digest()) << std::endl;
     return 0;
}
If we try to compile this project using CLion it will fail, because the Poco libraries are missing. This is where our package manager comes into action.
Getting your dependencies with Conan
Conan uses a separated file to store information related to a project. This can either be a plain `conanfile.txt` file, or a python `conanfile.py` file that handles more complex logic regarding your dependencies. The Conan plugin can work with both of these file types.
For this example we only need a couple of lines in a `conanfile.txt` that you should add to your repository:
[requires]
Poco/1.9.0@pocoproject/stable

[generators]
cmake
[requires]
These lines notify Conan that our project requires the Poco library, and provide the version and origin for it. Conan will look in the remotes and retrieve the recipe for Poco from there, it will also grab the binaries if they’re available for your configuration and, if not, it will trigger a compilation from sources. All of this will be done using the Conan install button, ![]() , that can be found in the Conan tool window.
, that can be found in the Conan tool window.
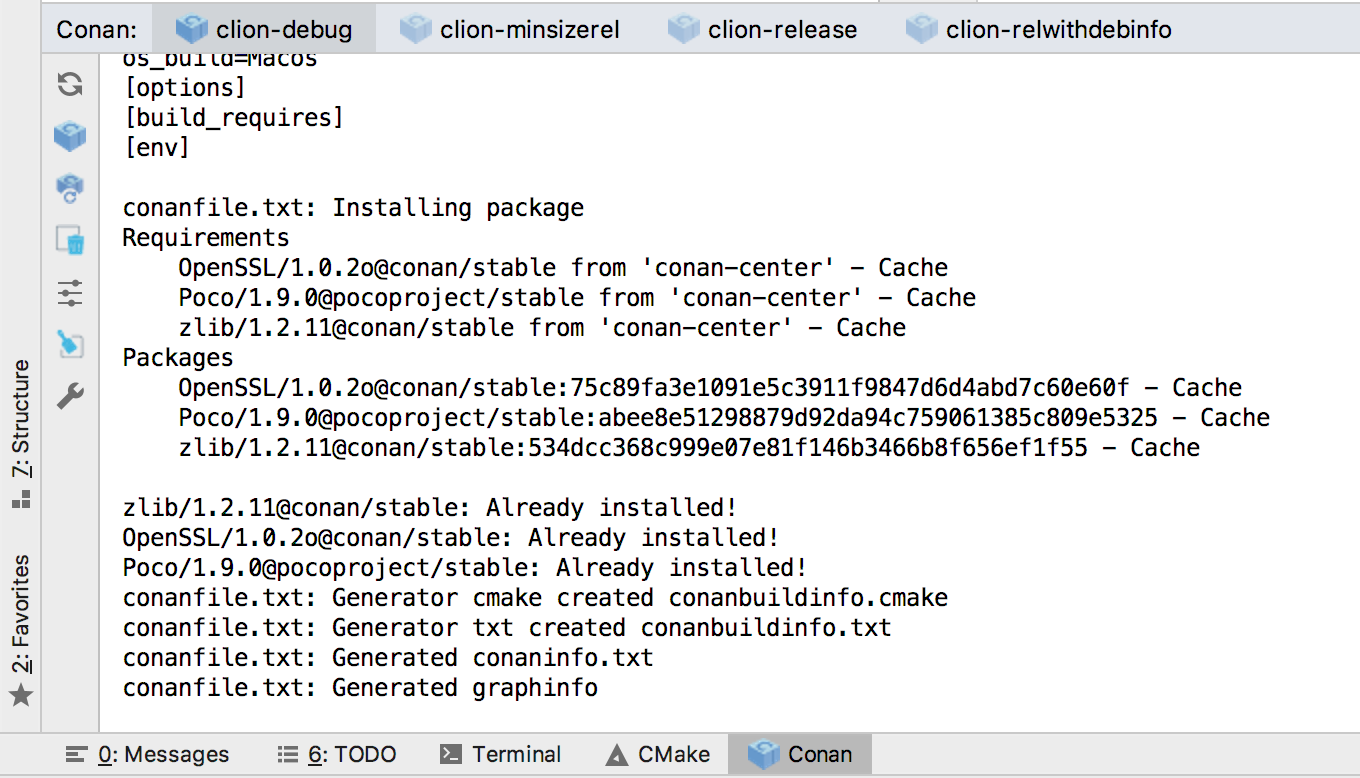
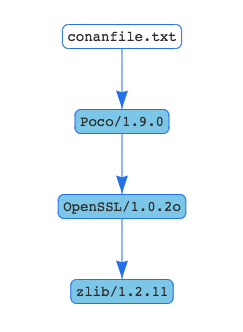
As you can see, Conan not only installed the Poco libraries, but also OpenSSL and ZLib too. This is because they are transitive dependencies of Poco. If binaries matching your configuration are available in the remote, Conan will just download them, otherwise, Conan will compile these packages from sources no matter if they use CMake or other build systems (OpenSSL uses Makefiles).
[generators]
Conan will create a file for each of the generators listed here, as CLion uses CMake we need that generator. These files contain all the information of the requirements, including: paths to includes, libraries or resources, and compile flags. Basically, everything that needs to be consumed by your project. You only need to include this file into your build system, there is no need to change anything else, and you’re ready to go.
Modify your `CMakeLists.txt` to include this automatically generated file, named `conanbuildinfo.cmake`:
cmake_minimum_required(VERSION 2.8.12)
project(MD5Hasher)

include(${CMAKE_BINARY_DIR}/conanbuildinfo.cmake)
conan_basic_setup()

add_executable(md5_hasher main.cpp)
target_link_libraries(md5_hasher ${CONAN_LIBS})
Compile again and run your project. Conan will take care of your dependencies, by locating and downloading (or compiling) them, making them available for your project. If you feel that this implementation requires modifying your project, you can try other CMake related generators available in Conan, such as `cmake_find_package` or `cmake_paths`. Additional information on how to activate these generators can be found in the Conan documentation.
Conclusion
Alongside CMake and CLion, Conan has become one of the big C’s for the C++ language. Having a package manager encourages the community to share their libraries and build functionalities on top of existing ones, modernizing the C++ ecosystem towards a more mature and useful one. It also allows companies to have a professional tool to build all their internal libraries and third-parties using the same process, preserving consistency and reproducibility of their builds, and keeping their developers focused on their job.
The plugin in its first version implements just some basic functionalities of Conan, we highly recommend you to use it in your projects, but also to explore all the functionalities that Conan provides. We’re always happy to receive feedback related to both the CLion plugin and Conan in general.
Happy Coding!
Subscribe to CLion Blog updates


