Working Windows Subsystem for Linux (WSL) in GoLand

https://blog.jetbrains.com/go/2021/02/12/goland-2021-1-eap-3/#run_target_for_wsl
Please provide feedback for it.
Thank you!
Windows Subsystem for Linux, or WSL as it’s commonly known, allows Windows 10 to run Linux inside Windows. We are going to have a look at WSL 1 since, as of the publishing of this article, WSL 2 is not officially released yet.
After installing WSL 1, and enabling your preferred Linux distribution on it, you can set up Go as you would on a normal Linux installation. You should also install Go for Windows since the IDE will still run on the Windows side of things.
With these two Go installations in place, some additional configuration is needed. Make sure to point the GOPATH both in Windows and Linux to the same directory. This will allow us to have the project/dependencies in a single place.
Note: This is important for projects using Go Modules because the caching for Modules dependencies is under GOPATH/pkg/mod by default.
As mentioned before, the IDE configuration will point to the Window Go installation, so that it can resolve the Go SDK dependencies, fetch dependencies, and so on.
Running Go applications in WSL
Running an application under WSL is a bit more complex as we can’t use the regular tooling anymore.
We’ll need to configure a couple of External Tools and make them generic for us to allow us to run them in different projects.
Go to File | Settings | Tools | External Tools and then click the + button to add two different tools.
We will name the first one WSL "go build".We’ll set Program to "wsl", the Arguments to "/usr/local/go/bin/go build" (without the quotation marks), and finally, the Working directory to $FileDir$, and then we click the OK button. This assumes that Go is installed under the default location inside WSL, but if not, you should adjust it accordingly.

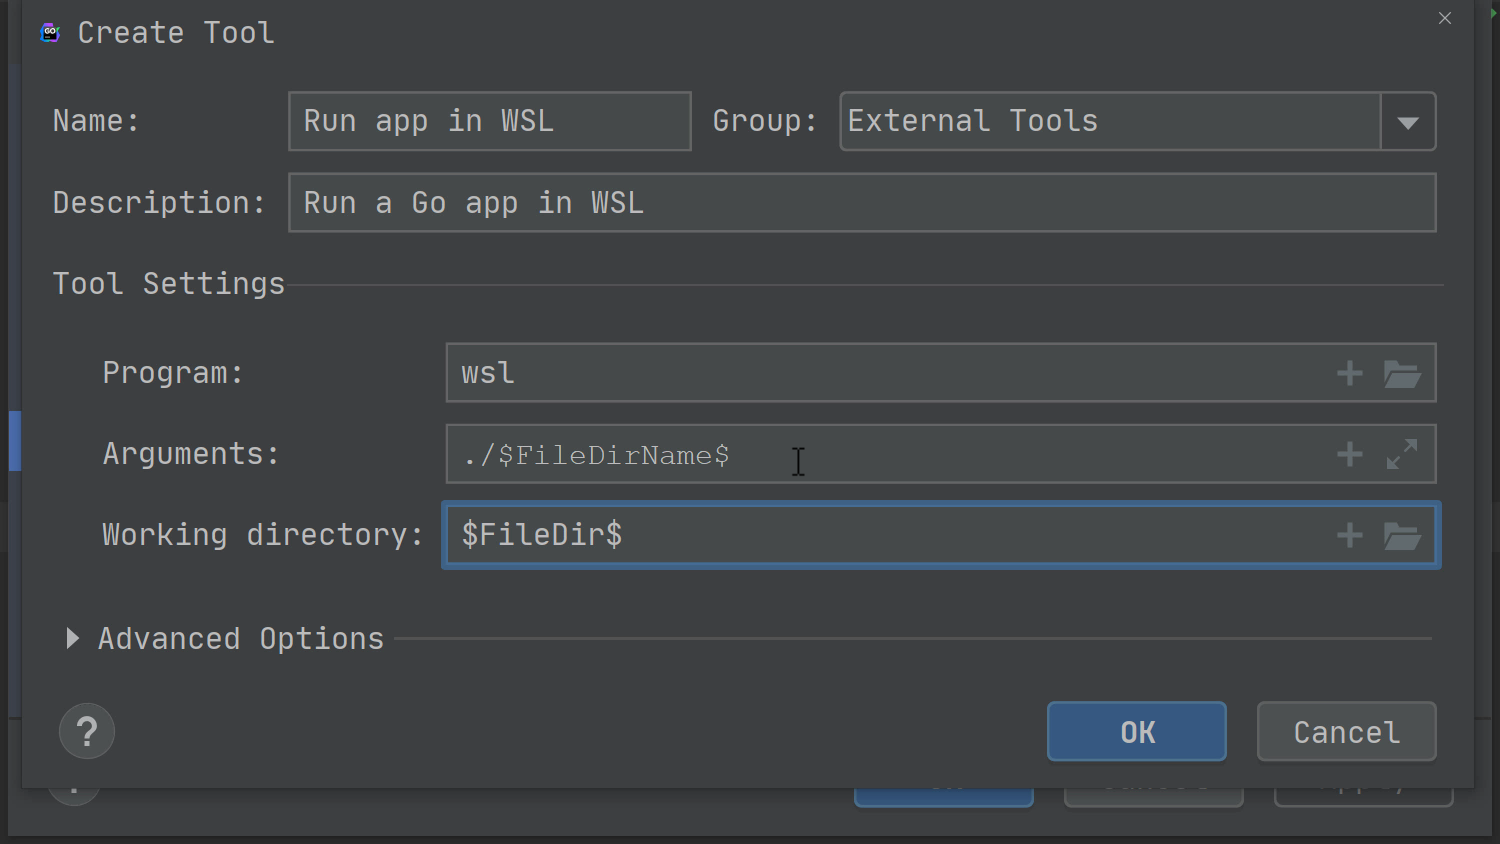
For the second external tool, we’ll want to configure it to run our compiled application. That is where Go’s property of building a binary with the same name as the parent directory of the file with the main() function comes in handy. As such, our configuration will look like this:
Name: Run app in WSL
Program: wsl
Arguments: ./$FileDirName$
Working directory: $FileDir$
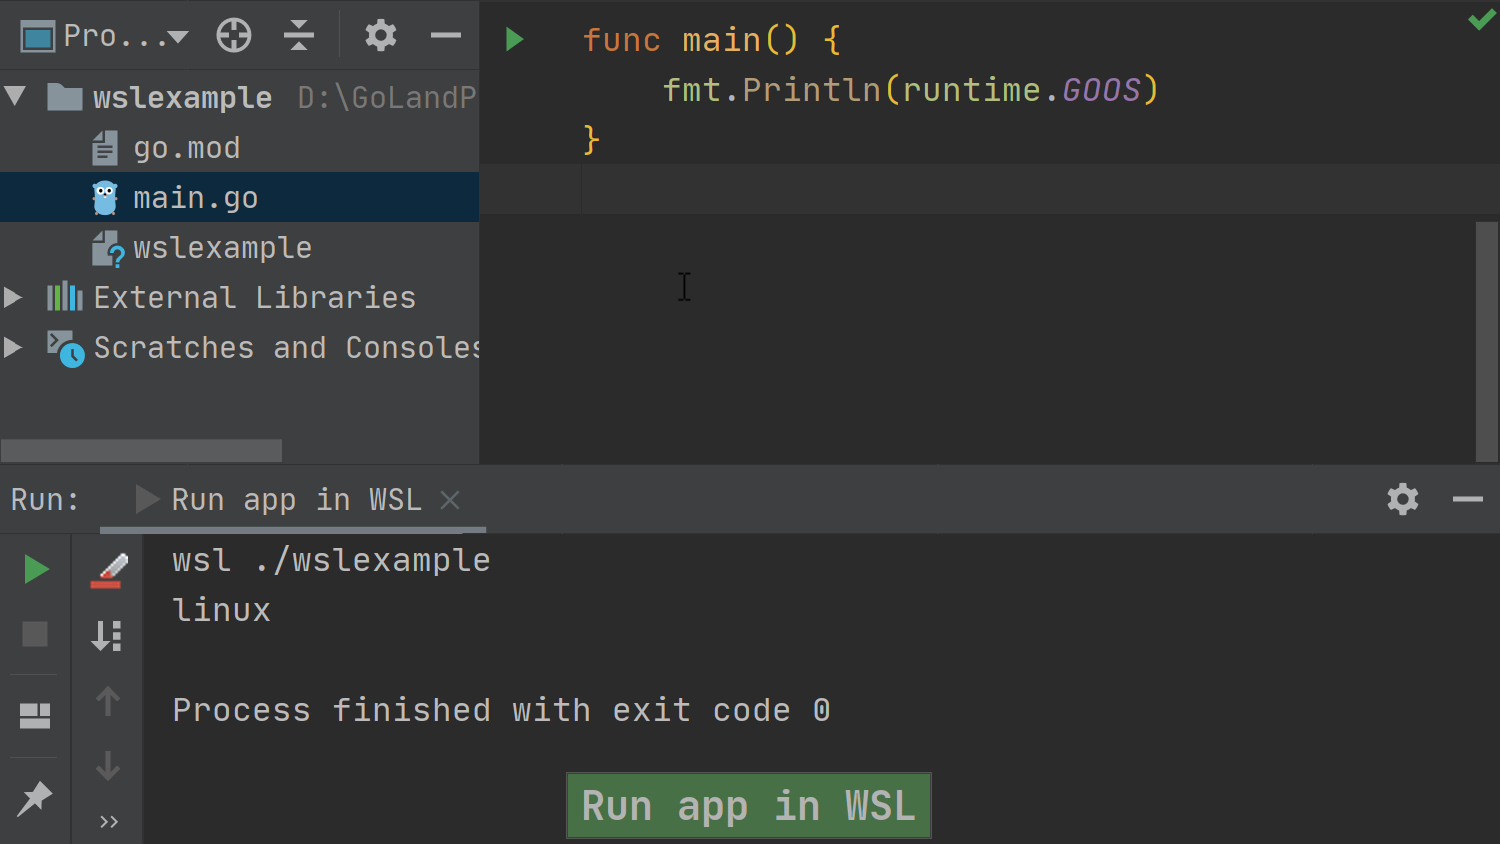
And now, let’s see both tools in action:
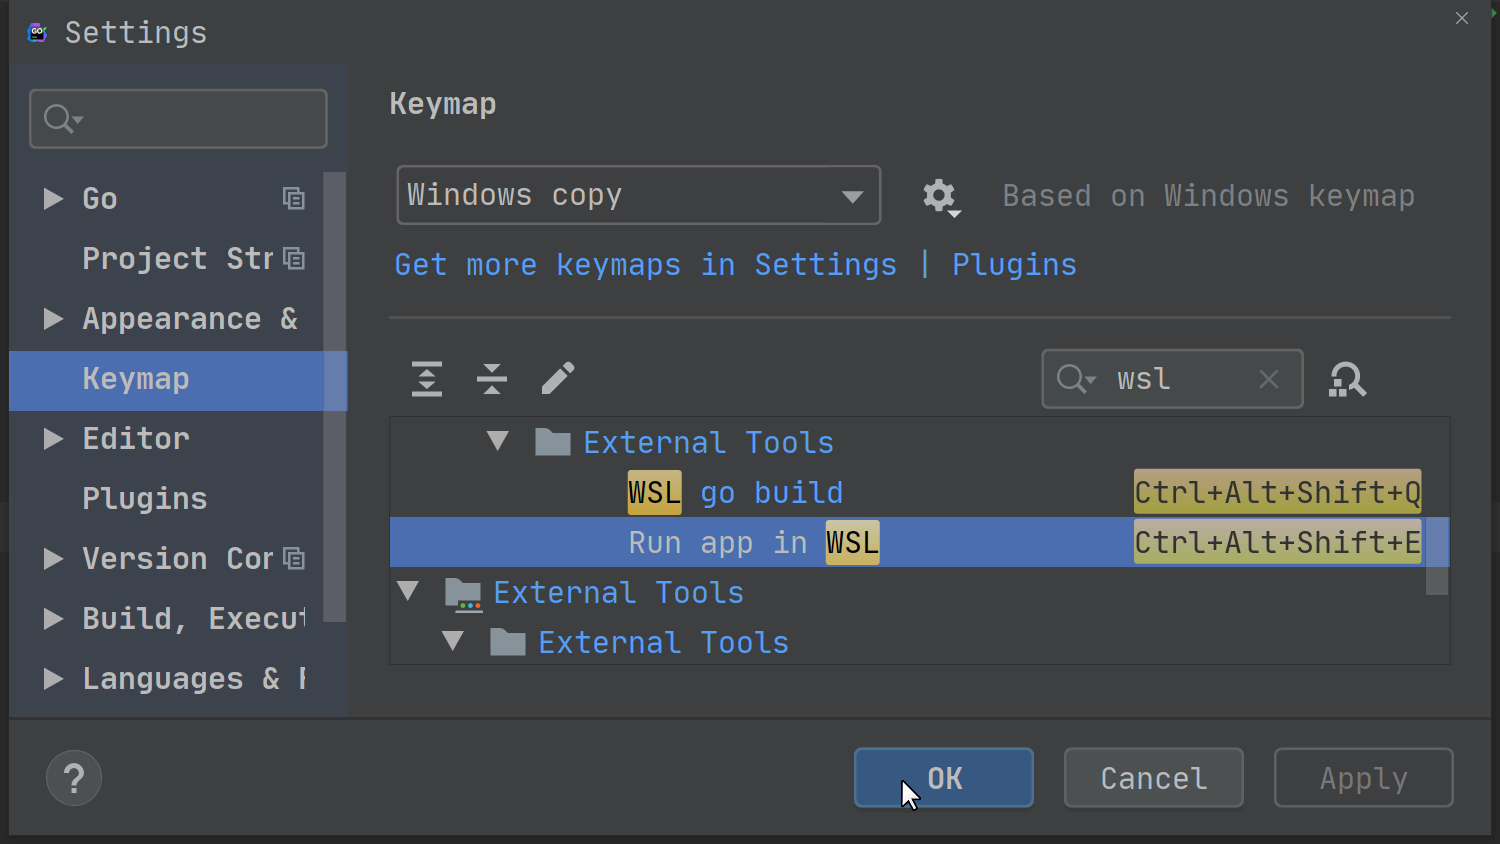
Pro tip: External tools can have individual shortcuts. To do this, head over to File | Settings | Keymap and search for WSL, and then assign the desired shortcuts to both tools.
Note: The Working directory will set the working directory of WSL, which will also be the working directory of the application.
Note: At the moment WSL 1 does not support the necessary APIs for Delve to work, so debugging will not be possible for applications running under WSL.
Using WSL as the default Terminal in the IDE
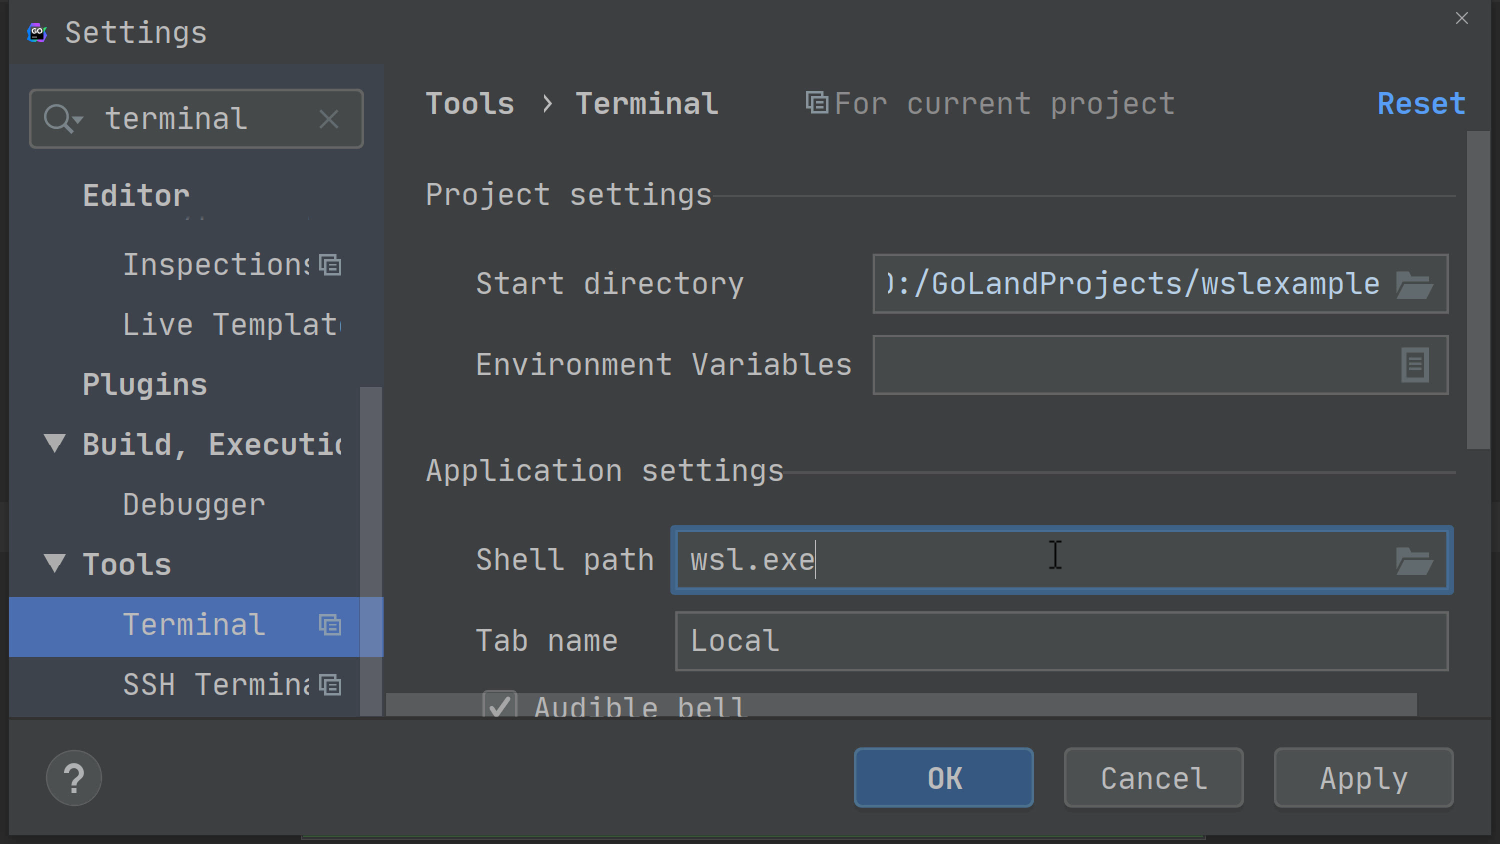
We can have WSL come up by default, by using File | Settings | Tools | Terminal and changing the Shell path property from the default to wsl.exe.
After that, invoking the Terminal will bring up WSL by default for the project.
Pro tip: If you wish to change this for all new projects, go to File | New Project Settings | Settings for New Projects | Tools | Terminal and make the same selection there.
The future of WSL integration with GoLand
As you can see in this post, some of the workflows that you might be used are not yet available. We recognize this and, as such, we created this ticket to track the requests for better integration. You can watch/vote for it to receive updates when we’ll have any for it.
This concludes our post for today. Please let us know what you’d like to see next. And don’t forget to send your feedback either on our issue tracker, here in the comments section, or tweet @GoLandIDE.