How to Use a Spec-Driven Approach for Coding with AI

Let’s see how this works with Junie, the AI coding agent by JetBrains.
What you’ll get from this guide
Developing complex software features can be daunting. Such tasks often feel overwhelming due to the sheer size of the codebase, the uncertainty of dependencies, and the difficulty of keeping all requirements in mind. With the advent of AI coding agents like Junie, developers now have powerful new assistants to help them navigate this complexity.
However, there’s a catch: these agents are most effective when they’re given clear structure and guidance. Handing them a vague instruction like “refactor this module” can result in unpredictable outcomes. The key lies in refining high-level requirements into a detailed development plan and task list. This structured approach ensures clarity, control, and predictability, turning ambitious goals into manageable, trackable units of work.
Start with clear requirements
Every project starts with an idea of what needs to be built. Maybe you’re cleaning up legacy code, replacing an outdated algorithm, adding tests to a neglected module, or introducing persistence for new data. While these are all valid goals, they are too broad for an AI agent to act on directly.
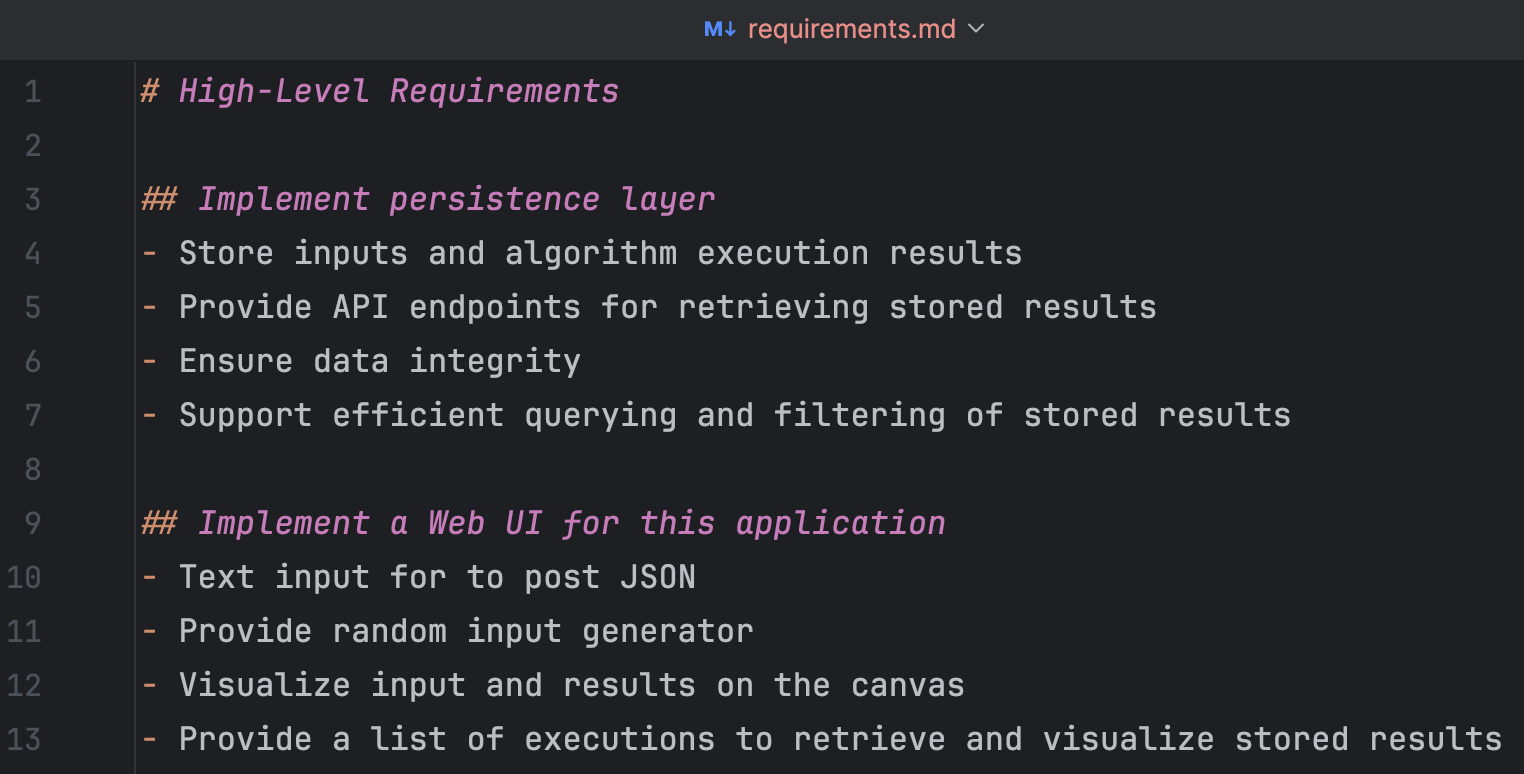
That’s where high-level requirements come in. They describe what should happen, not how to do it. Think of them as your North Star: a short list of desired outcomes that provides context for the agent without boxing it in. Writing them down in a file, say requirements.md, is a small step that pays off later. It gives both you and the agent a shared starting point that doesn’t vanish after one conversation.
Sure, agents like Junie can scan your project and suggest improvements on their own. But when you define the initial direction yourself, you set the boundaries and priorities. You tell the agent what matters, and in return, the agent will help you to figure out how to get there. That’s a much better deal than letting AI guess.
Generating a detailed development plan
Once you’ve written down the high-level requirements, it’s time to move from what needs to be done to how you might approach it. This is where the development plan comes in. It’s a bridge between the big picture and the actual implementation.
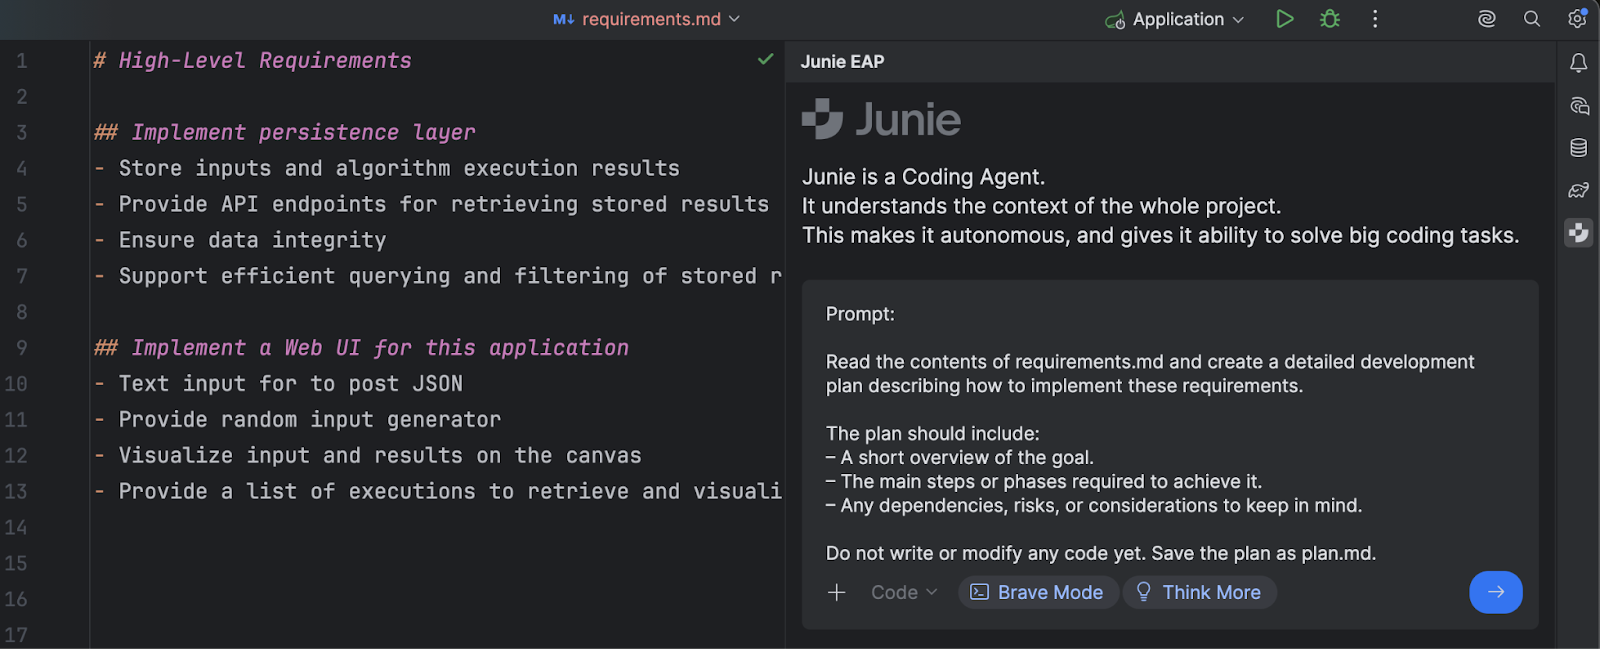
Ask Junie to read your requirements.md file and create a detailed implementation plan in plan.md. This step is important: you’re not asking the AI agent to start coding yet. You’re asking it to think first. It makes sense to enable the Think More toggle to force the agent to refine the plan in more details. “Think More” encourages Junie to think more deeply. It uses the LLM’s reasoning parameter and adjusts prompts and workflow to facilitate more careful thinking and result verification.
By writing the plan into a file, you create a checkpoint – a space where you can review the strategy before any code changes happen.
A good plan outlines the approach, the sequence of work, and potential risks. Junie sometimes includes small code examples to illustrate ideas. That’s fine, but if you prefer a higher-level overview, you can tell it to focus only on the “what,” not the “how.” The goal is to create a document that describes the steps needed to turn your requirements into reality – something you can read, tweak, and approve before moving on.
Here is the prompt for you to try:
Read the contents of requirements.md and create a detailed development plan
describing how to implement these requirements.

The plan should include:

– A short overview of the goal.

– The main steps or phases required to achieve it.

– Any dependencies, risks, or considerations to keep in mind.

Do not write or modify any code yet. Save the plan as plan.md.
Tip: If you prefer a strategy-only document, phrase your prompt explicitly: “Generate a plan focusing only on what needs to be done, without code examples.”
Creating a task list for execution
Now that the plan is in place, you have a solid overview of what needs to happen. However, plans are rarely ready to execute as is. They contain a mix of strategy, commentary, and implementation hints. The next step to making them useful in practice is breaking the plan down into a clear, ordered list of tasks that the agent can follow and that you can track.
Ask Junie to take plan.md as input and based on that create a task list for implementing this plan, and store it in the tasks.md file, where each item represents a verifiable action.
The tasks should be specific enough that you can mark them as complete once finished, but not so granular that they devolve into meaningless busywork. Think “implement new data repository” rather than “write a function.”
This file becomes your control panel. It gives you a persistent, external record of what’s happening, independent of Junie’s internal context. You can review, reorder, or refine tasks at any time. You can also tell Junie to complete the next task, mark it as done, and then stop.
In short, plan.md explains the approach, but tasks.md makes it actionable. It turns the agent’s abstract reasoning into a list of steps you can monitor. That’s how you move from theory to execution without losing control of the process.
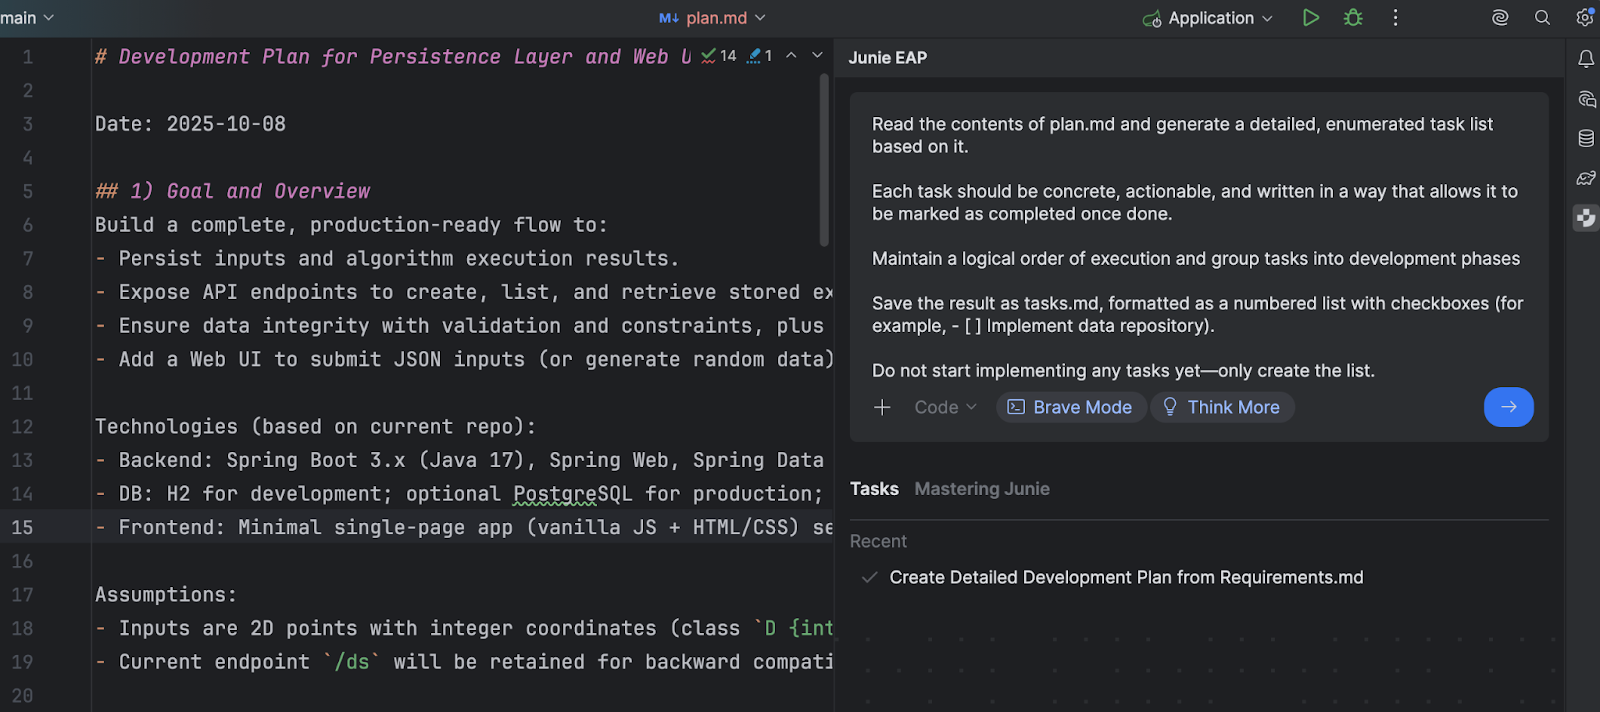
Here’s a sample prompt:
Read the contents of plan.md and generate a detailed, enumerated task list based on it.

Each task should be clear, actionable, and written in a way that allows it to be marked as completed once done.

Maintain a logical order of execution. Group the tasks logically into phases.

Save the result as tasks.md, formatted as a numbered list with checkboxes (for example, - [ ] Implement data repository).

Do not start implementing any tasks yet—only create the list.
The resulting markdown file will look like this:
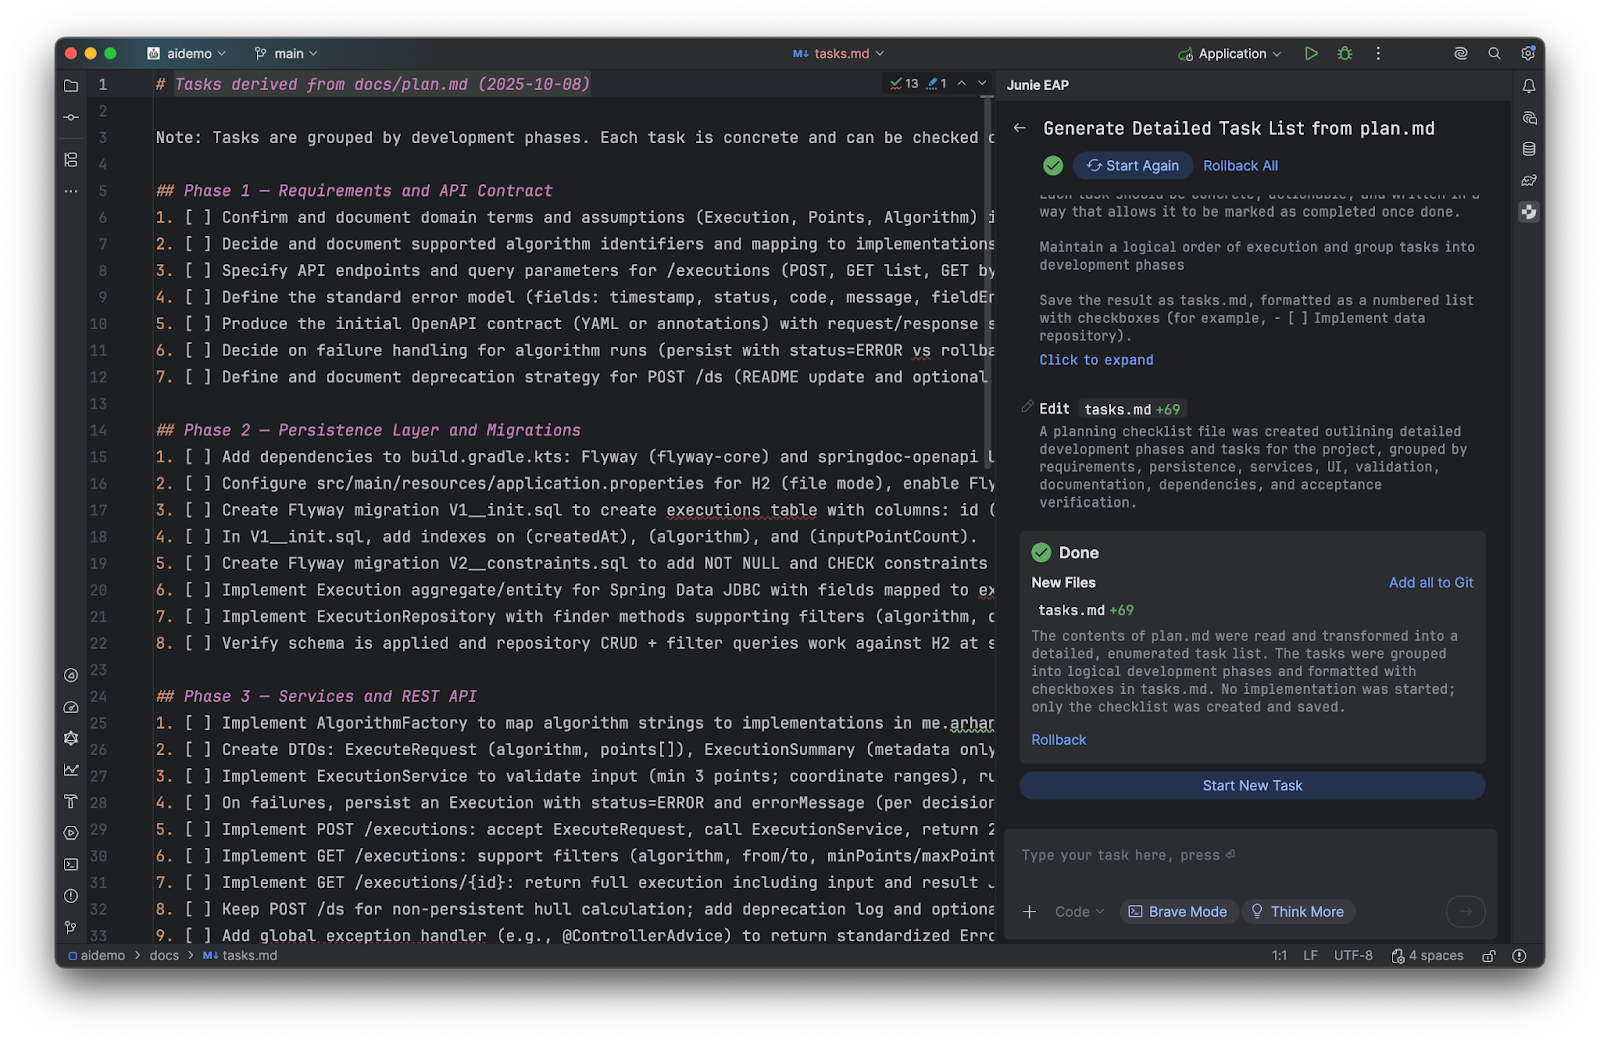
Tip: Think of tasks.md as your project manager’s checklist – persistent, reviewable, and external to Junie’s memory.
Managing execution and workflow with precision
With the task list in place, you’re ready to execute. Keep in mind, that the execution is a phase where control really matters. AI agents work best when they focus on a bounded unit of work, rather than trying to do everything simultaneously.
Best Practices for Execution:
- Work in phases. Don’t ask Junie to “do everything in tasks.md” in one go. Instead, start with a subset: “Complete tasks 1–2 from tasks.md and mark them as completed.”
- Mark progress. Require Junie to update tasks.md with checkmarks or completion notes. This gives you visibility into what’s done and what remains.
- Review after each phase. Before moving to the next set of tasks, review code changes, run tests, and confirm correctness.
- Control pacing. If a task uncovers unexpected complexity, update the task list to reflect new sub-tasks before proceeding.
This “controlled iteration” workflow keeps you firmly in the driver’s seat while still taking advantage of Junie’s ability to rapidly implement code.
Tip: Use descriptive prompts like:
Proceed with the implementation steps for Phase 1 according to the tasks listed in tasks.md.
Mark the tasks as done [x] upon completion
This phrasing naturally enforces boundaries, scoped to the tasks in Phase 1, without requiring a built-in stop command.
Complete prompt for spec-driven development with Junie
All of the above practices are very generic and should work for any AI coding agent. However, the different agents have subtle differences in their configurations, instructions, and rules. This time we create a complete prompt that will prepare the spec-driven workflow artifacts, including requirements.md, plan.md, and tasks.md files, but also update the agent guidelines (.junie/guidelines.md).
Paste this prompt into the Junie input and add your high-level task description into the input section in the prompt.
# Spec-Driven Development Prompt

Transform the provided high-level requirements into a complete set of project planning artifacts for spec-driven development.

## Instructions:

You must produce **four files** inside the `docs/` and `.junie/` directories:

- `docs/requirements.md`
- `docs/plan.md`
- `docs/tasks.md`
- `.junie/guidelines.md`

Follow the methodology below step by step:

---

### Step 1: Create `docs/requirements.md`

- Title: **Requirements Document**
- Introduction: Summarize the application purpose and key functionality.
- Requirements section:

  - Use sequential numbering (1, 2, 3, …).
  - Each requirement must include:
    - **User Story** in the format:

      > As a user, I want [goal] so that [benefit/reason]

    - **Acceptance Criteria** in the format:

      > WHEN [condition] THEN the system SHALL [expected behavior]

- Guidelines:

  - Focus on user goals and benefits.
  - Make acceptance criteria specific, testable, and precise.
  - Cover normal flows, edge cases, error handling, persistence, and UI/UX.
  - Group related requirements logically.

---

### Step 2: Create `docs/plan.md`

- Analyze `docs/requirements.md`.
- Develop a **detailed implementation plan**:
  - Link each plan item explicitly to the corresponding requirements.
  - Assign priorities (e.g., High, Medium, Low).
  - Group related plan items logically.
- Ensure comprehensive coverage of all requirements.

---

### Step 3: Create `docs/tasks.md`

- Based on the implementation plan in `docs/plan.md`, produce a **detailed enumerated technical task list**:

  - Each task must have a placeholder `[ ]` to mark completion.
  - Link each task both to:
    - the development plan item in `docs/plan.md`
    - the related requirement(s) in `docs/requirements.md`
- Group tasks into **development phases**.
- Organize phases logically (e.g., Setup → Core Features → Advanced Features → Testing & QA).

---

### Step 4: Update `.junie/guidelines.md`

- Add **concise technical instructions** on how to work with the `docs/tasks.md` checklist.
- Instructions should include:
  - Mark tasks as `[x]` when completed.
  - Keep phases intact but add new tasks if needed.
  - Ensure every new or modified task stays linked to a requirement and plan item.
  - Keep formatting consistent with the existing style.

---

## Input:

[INSERT YOUR HIGH-LEVEL REQUIREMENTS FOR THE APPLICATION YOU WANT TO CREATE; ASK THE USER]

## Output:

1. `docs/requirements.md` – structured requirements document
2. `docs/plan.md` – implementation plan with priorities and links
3. `docs/tasks.md` – detailed enumerated task list grouped into phases
4. `.junie/guidelines.md` – updated concise instructions for working with the task list
Conclusion
Spec-driven development brings structure to how you work with AI agents. First, you establish clear requirements. Then, you refine them into a plan and break that plan down into tasks that the agent can execute step by step.
The real benefit here is a control. Instead of asking the agent to build an entire feature in one go, you guide it through small, scoped patches. You stay in the loop by reviewing, adjusting, and approving each change without losing perspective on the bigger goal.
It’s a steady, transparent way to develop complex software with AI: you keep the direction, the agent keeps the momentum.