Using GitHub without leaving PhpStorm

![]() In a previous post we saw how PhpStorm handles Version Control Systems (VCS). A very popular VCS is Git, driven by the collaboration that’s possible using GitHub. In this post, we’ll explore several integrations with GitHub that are available from within your IDE:
In a previous post we saw how PhpStorm handles Version Control Systems (VCS). A very popular VCS is Git, driven by the collaboration that’s possible using GitHub. In this post, we’ll explore several integrations with GitHub that are available from within your IDE:
- Create a GitHub repository
- Clone a GitHub repo
- Create a gist on GitHub
- Open in browser
- Use the GitHub issue tracker
Next to those actions, PhpStorm provides full support for the Git VCS like commit and update file/directory or an entire project, changelists, revision support and so forth. More on these features can be found in our earlier VCS overview post.
This functionality is available in IntelliJ Idea, PyCharm, WebStorm, PhpStorm, RubyMine, and AppCode. Before we start, make sure that PhpStorm knows the path to your Git executable. Refer PhpStorm web help on how to do this (“prerequisites”).
It’s also best to make sure that you have registered your GitHub account credentials or signed up for a GitHub account through PhpStorm. Doing this ensures that you don’t have to provide your GitHub account details every once in a while.
Create a GitHub repository
Whenever you want to start a new project on GitHub, there’s always a bit of a chicken-egg problem. Do you start coding and then push the initial code to GitHub? Or do you create a project on GitHub, clone it locally and then start coding? Depending on what you like for breakfast (chicken or egg), PhpStorm supports both, right from the IDE.
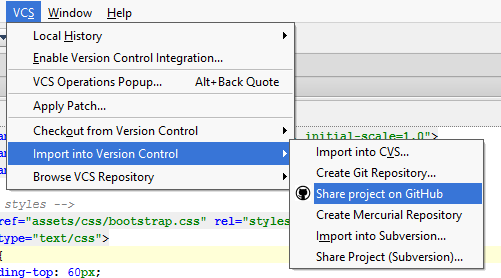
Once our project is ready to be published on GitHub, we can use the VCS | Import into Version Control | Share project on GitHub menu item to start publishing the project.
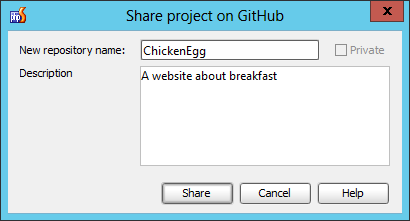
PhpStorm will then ask us to provide a repository name and description. After doing that, click the Share button.
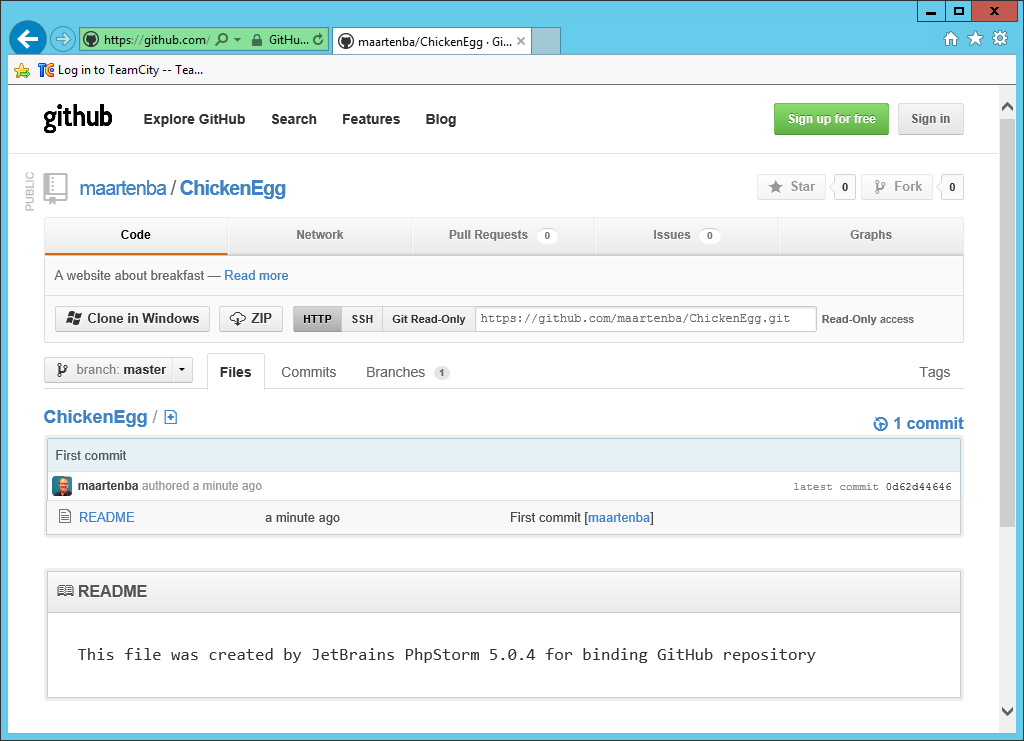
There we go: our project is now available on GitHub and we haven’t left our IDE! From now on we can use any other command from the VCS menu as described in this post.
Clone a GitHub repo
What if we want to continue working on an existing project hosted on GitHub? Typically, we would have to open a browser and navigate to the repository website to copy the URL we can clone using Git. Another approach would be memorizing the repository URL and cloning that. Why not clone a project from GitHub right from within PhpStorm?
From the VCS menu, we can use the Checkout from Version Control | GitHub command. This will fetch a list of all repositories that we can access using our account and allows us to clone those into a PhpStorm project:
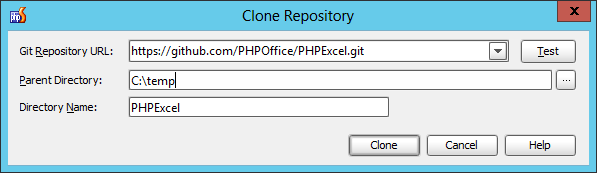
After clicking the Clone button, we’ll have the entire repository contents available locally and can code away. Once finished, simply use the traditional Git commands from the VCS menu.
Create a Gist on GitHub
If you’re unfamiliar with gists: they are a simple way to share snippets and pastes with others. They can be created, browsed and commented through https://gist.github.com/. Why copy/paste code from our IDE into a browser window if all it takes is a right-click?
From any file that’s opened in the IDE, we can make a selection of code, right-click and use the Create Gist… context menu. We can provide a description and optionally make the gist private or anonymous.
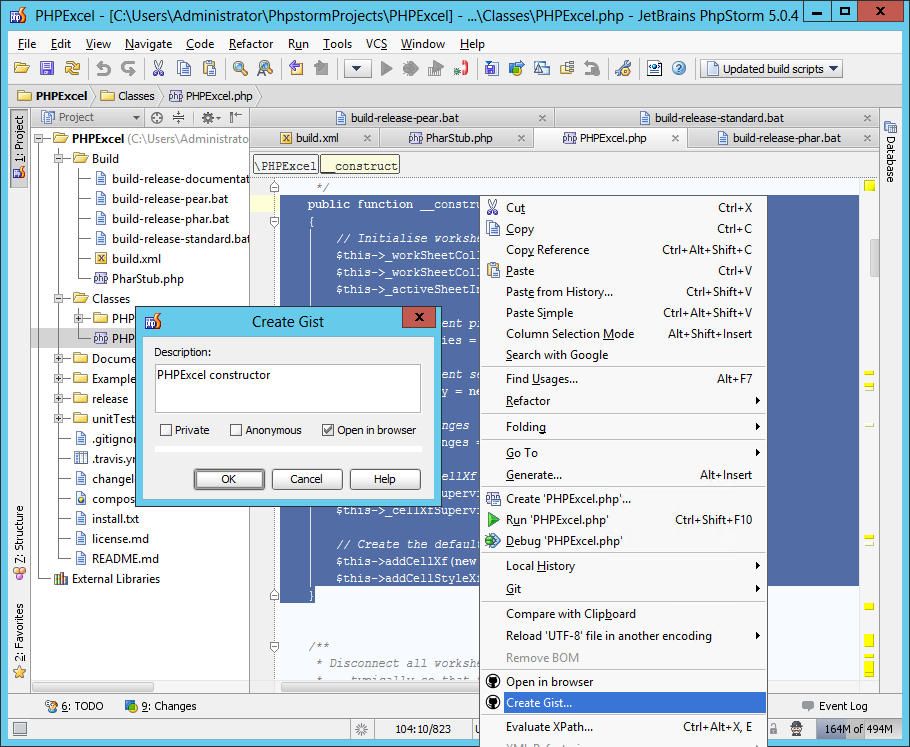
After you click OK, the selected code (or the entire file if no code was selected) will be uploaded as a gist to GitHub.
Open in browser
Ever wanted to see all details on the file you’re working on? Right-click a file and select Open in browser from the context menu. This will launch the default browser and open the file we’ve clicked on in GitHub. This allows us to see file history, explore branches and whatever other action we may want to do through the GitHub web interface.
Use the GitHub issue tracker
Working on a project often means working with issue tracking. And since GitHub has an issue tracker, let’s explore how that integrates with PhpStorm. To do so, there’s a small configuration step we have to take first.
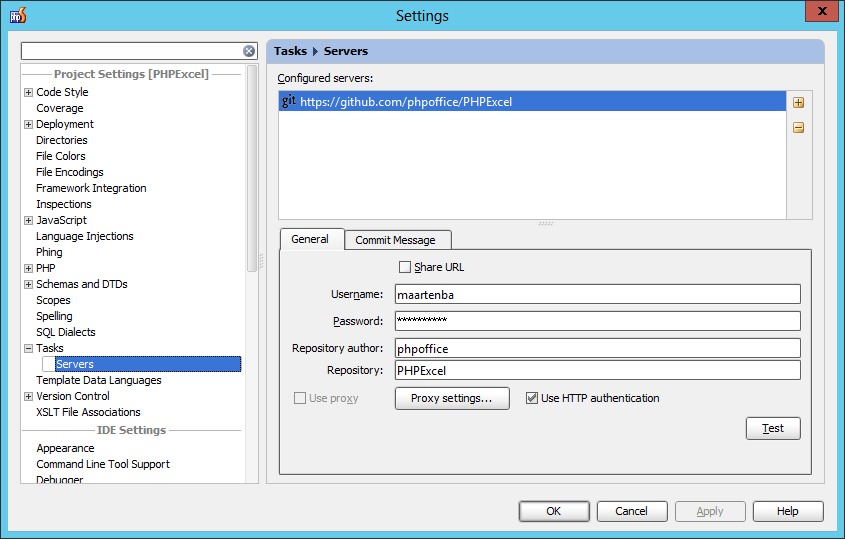
From the File | Settings menu, we’ll have to open the Tasks | Servers pane under the current project settings and do some minor configuration: add the issue tracking server we want to use. Add a new server, enter the URL to your GitHub repository and provide the required credentials. Under the Commit Message pane, enable the Add commit message option and optionally customize the commit message that will be generated when we complete a task.
From now on, we can work with issues from GitHub and correlate source code commits with specific issues and tasks. Let’s create a new task. On the main menu, choose Tools | Tasks & Contexts | Go to Task or simply press Alt+Shift+N. This will open up a dialog which allows you to select an existing task to work on or create a new task.
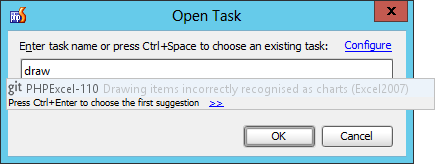 We can now enter the task we want to work on and press Ctrl+Enter (Mac: Cmd-Enter) if the suggested task is the one we meant to be working on. After clicking OK this dialog will close and PhpStorm will close all files currently opened and create a new context for the work we’re going to do. On a side note, if we wanted to have more details on the task we’ve just selected we can use the Tools | Tasks & Contexts | Open task in browser menu or press Alt+Shift+B. This opens up a browser window with the issue logged on GitHub if you require additional information.
After making some changes, we first have to make sure PhpStorm captures all changes made to our project in a changelist. Use the Tools | Tasks & Contexts | Create Changelist… menu to do so. A changelist is a set of changes in files that represents a logical change in source code. The changes specified in a changelist are not stored in the repository until committed (pushed).
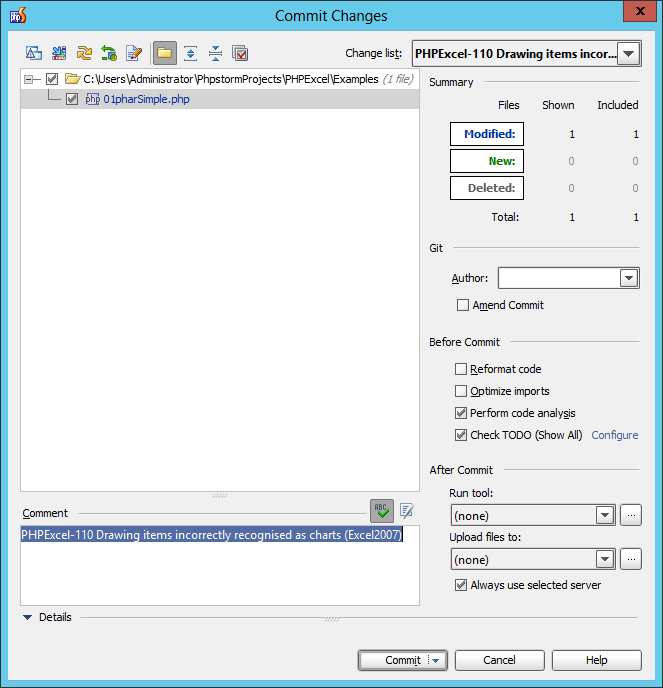
We can now work on other tasks and create changelists for them. Once we feel our code is good to be stored in the VCS again, we can use the VCS | Commit Changes… menu or Ctrl+K (Mac: Cmd-K) to commit changes to the repository. Note that the commit message is automatically generated based on the issue we were working on:
When working with PhpStorm, a lot of GitHub functionality is integrated in the IDE. We’ve done a couple of tasks that are normally performed either on the command-line or through the browser, right from the IDE. This integration will help you be more productive because there’s less context-switching occurring.
Develop with pleasure!
– JetBrains Web IDE Team