HTTP Client in PhpStorm Overview

When developing a web service, you would usually test it by sending all kinds of HTTP requests to it and examining what’s returned. In PhpStorm, you can do this directly in the code editor.
In this post, we’ll use the github.com/JetBrains/phpstorm-http-client-tutorial example project to demonstrate. You can clone it and navigate through its commit history to get to the corresponding phase of this overview. For each phase, run composer update to install and update what’s required, and then composer start to start the PHP web server.
Looking around
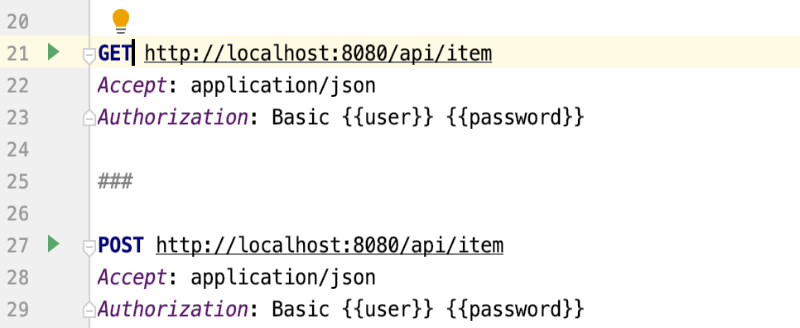
In PhpStorm, your HTTP requests are stored in regular files with a .http or .rest extension. Having created one, type the URL inside. For simple requests such as GET, this is enough, so you can press Alt+Enter and select Run to execute the request right away. The request is executed, and the response is displayed in the Run tool window.
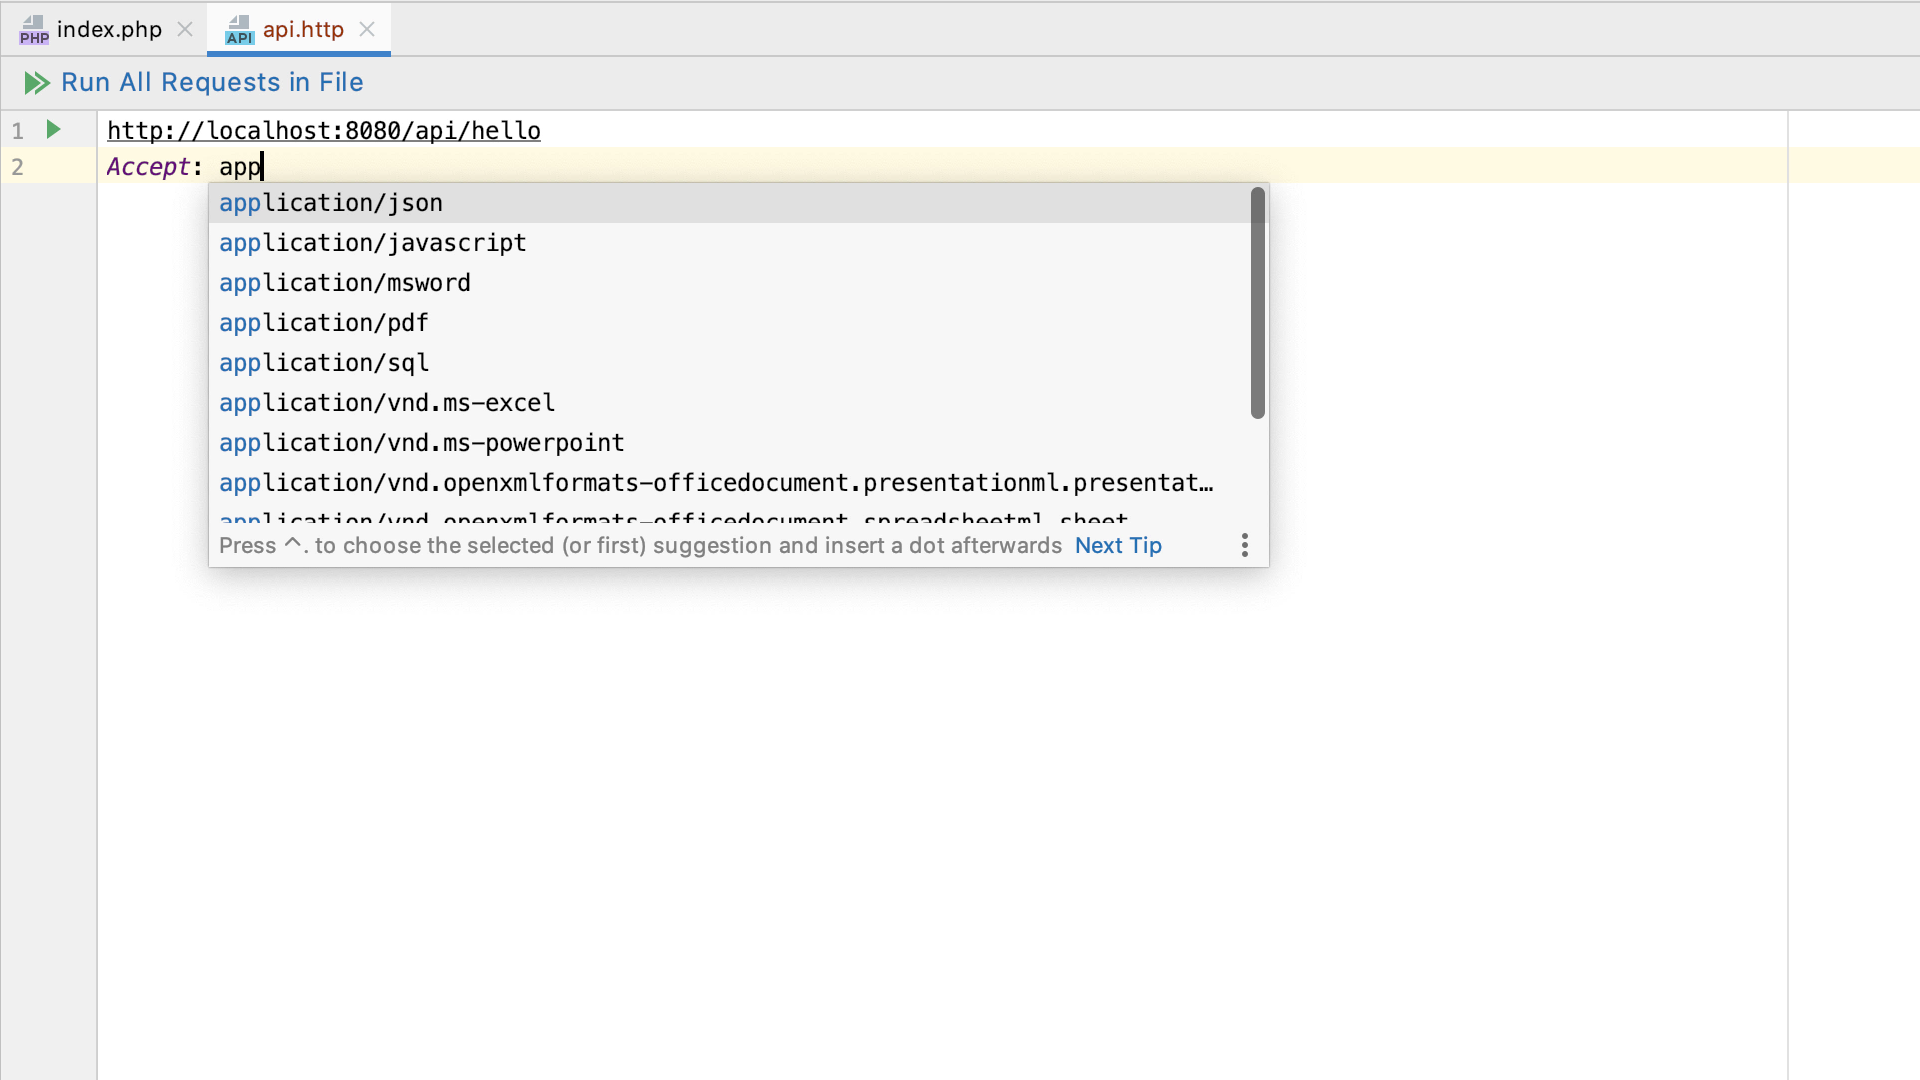
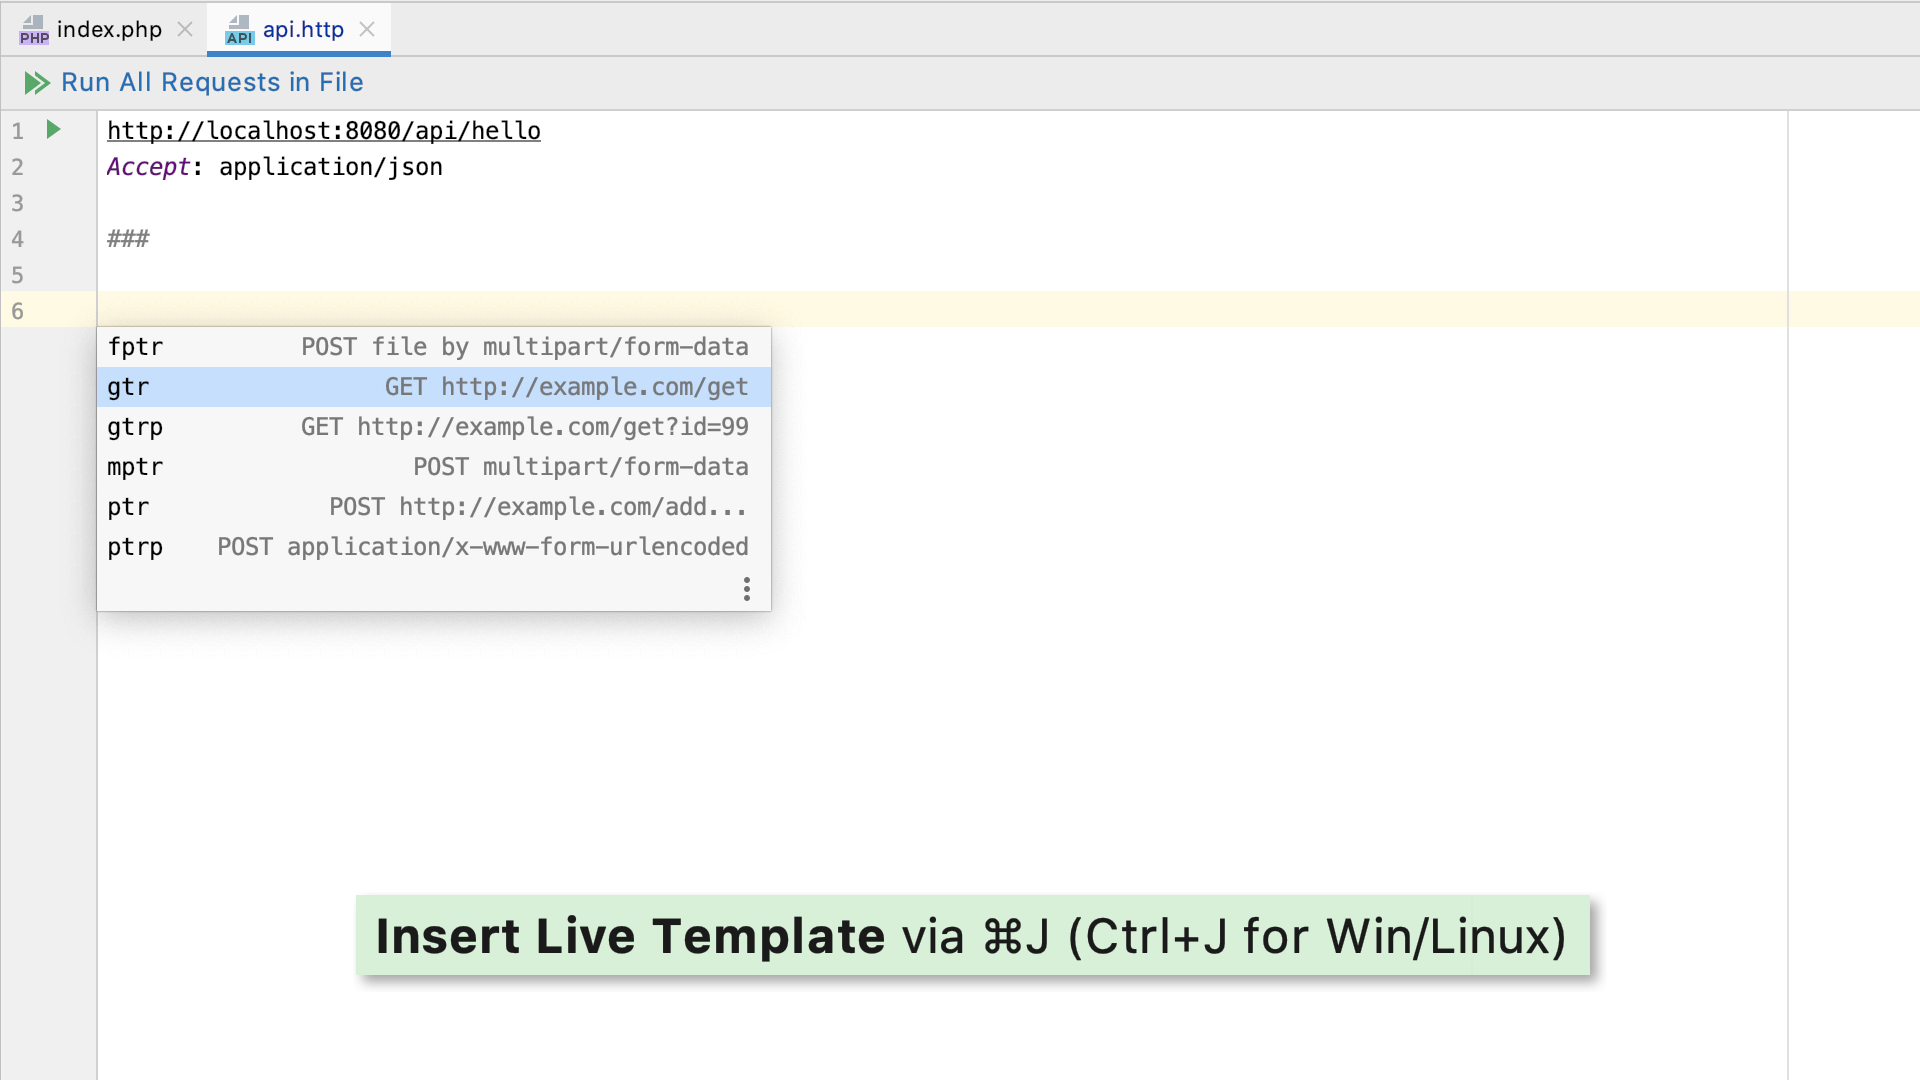
An .http file can hold as many requests as you need. You can separate them by typing ###. If you execute a request, PhpStorm will even add this separator automatically, saving you from the hassle of having to type it each time. Not only this but you can also cut down on typing and speed things up a little by using live templates. To view all the available templates, press Cmd+J (Ctrl+J on Windows). As an example, let’s use “gtr”, which expands into a GET request skeleton:
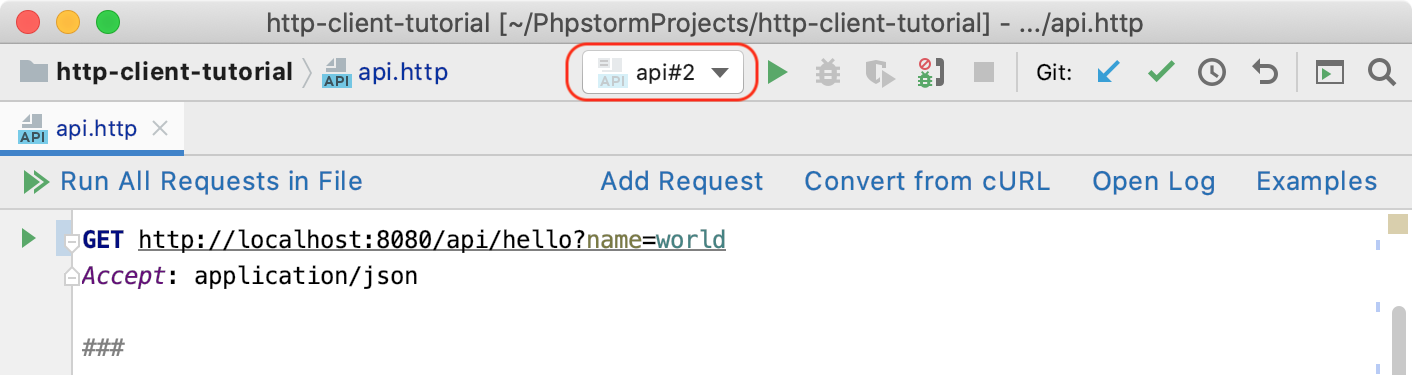
As soon as you run the request, PhpStorm automatically creates a temporary run configuration for it. Now, if you change something in your PHP code, you can press Ctrl+R (Shift+F10 on Windows) to rerun this configuration and test the changes right away, without switching context.
Sometimes you may want to perform some ad-hoc testing: run a particular method and compare what’s returned between requests. For this purpose, you can use Scratches. They behave like regular physical files, but are not meant to be stored inside the project.
To get started, create a new .http scratch file, and compose your request inside. When you run it, the information on the received response will be added in the very same file, directly under the request. Run it again to get the link to the next response, and so on. Now, you can click the button in the editor gutter, and compare the received responses on the spot via the differences viewer.

Scratch files are intended to be ditched as soon as they are not needed, but what if you like a particular request? Then you can keep it with the project: select Refactor | Move file and move it to a regular .http file. As with any other project files, you can now commit it to a VCS, share it with your team, and use it as a reference for testing or documenting your Web API.
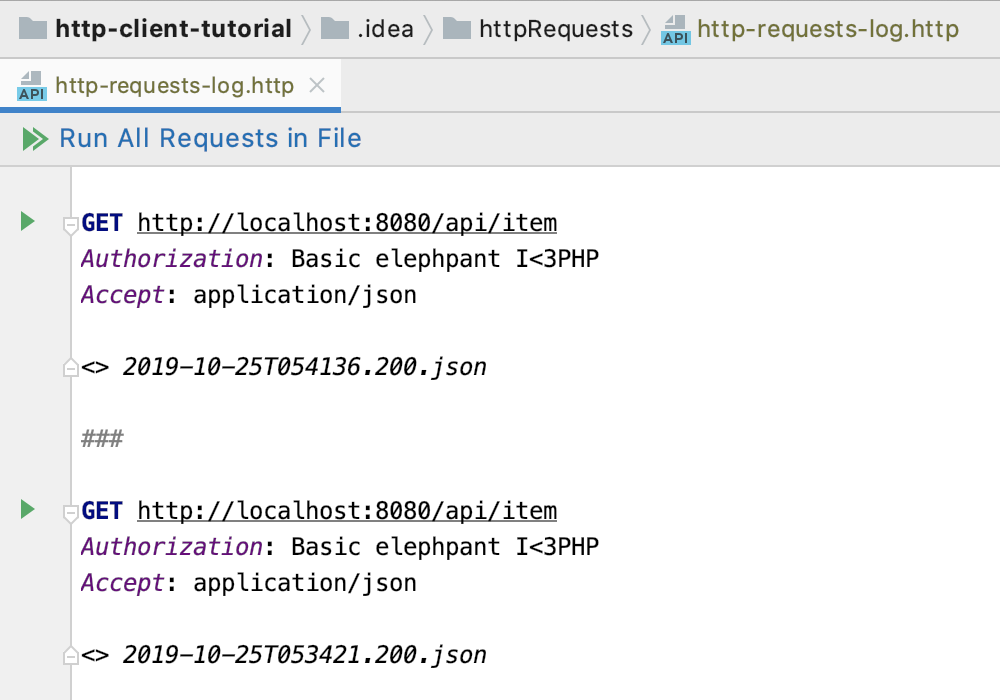
As a recap, click the Open Log link in the editor’s top right-hand corner. Here, you can view the last 50 executed requests, rerun any of them, or open the response file in the editor.
Authorization and Variables
If your web service requires authorization, you can access it by providing the Authorization header, the authentication method, and the required credentials in your HTTP requests. This way, however, your credentials become part of the request, and sharing them is probably not a good idea.
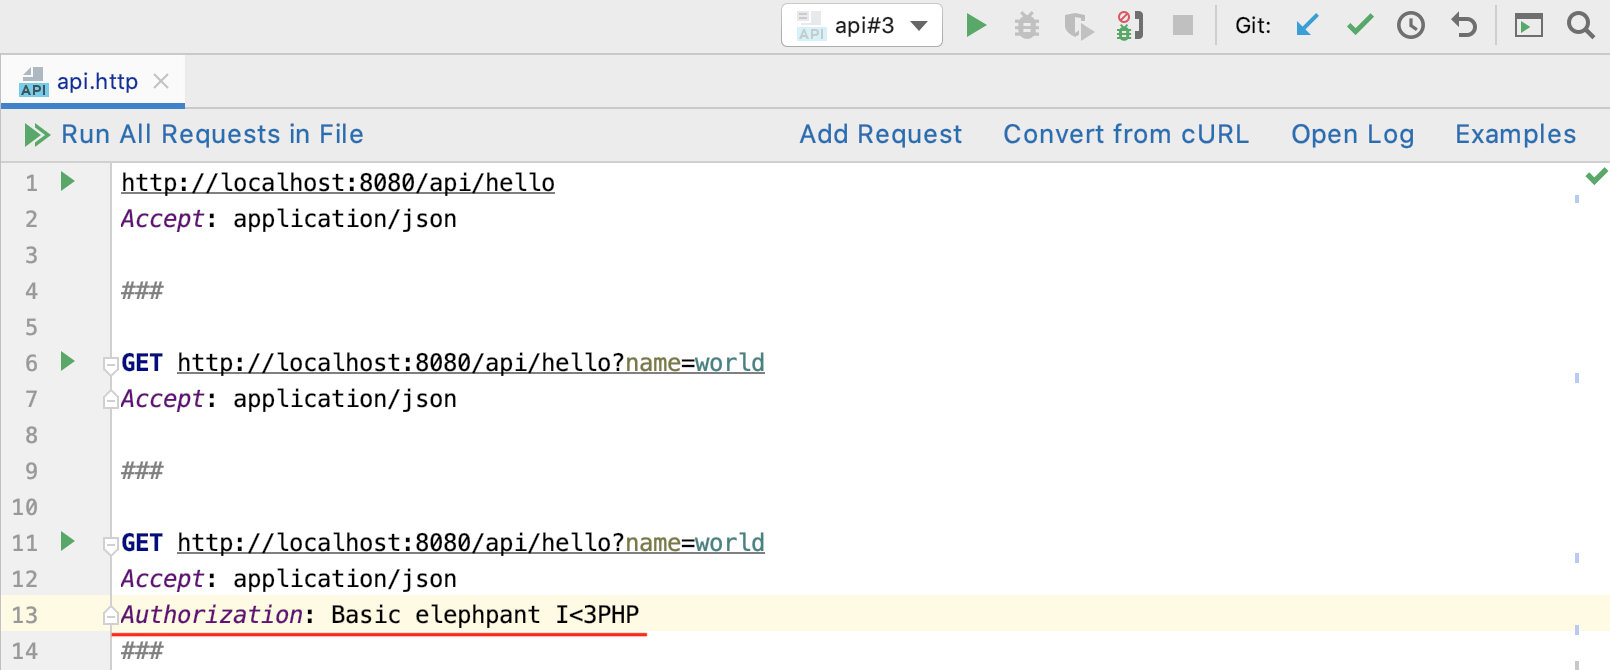
Here, environment variables come to the rescue: we can replace the desired values with variables and then put them in place as soon as the request runs. Inside the requests, variables are provided enclosed in double curly braces, like this: {{MyVariable}}.
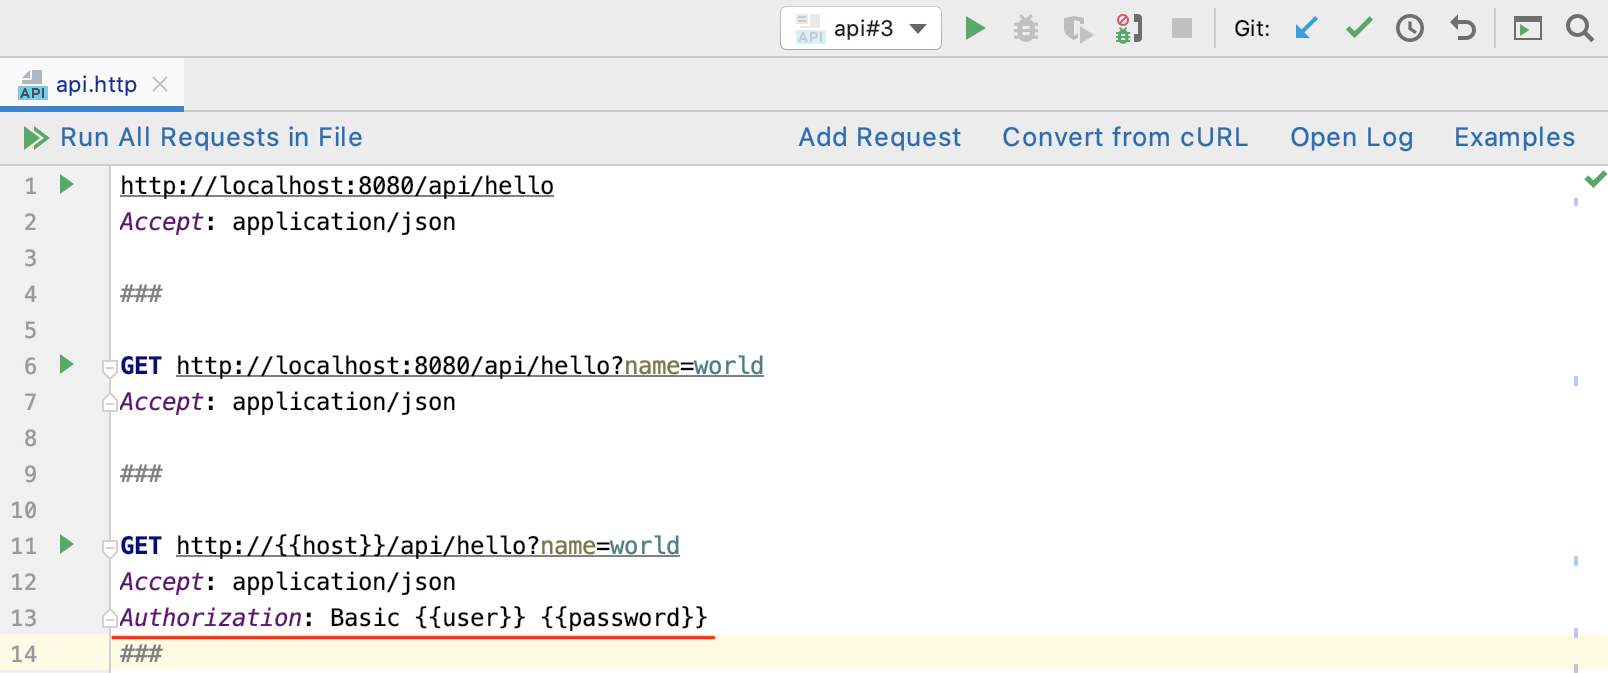
To have the possibility to target different servers, let’s start by replacing the host with {{HOST}}; then, we’ll replace the user and password values with {{USER}} and {{PASSWORD}}. This way, we’ve turned these values into variables.
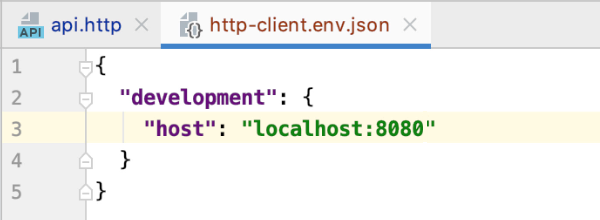
To define these variables, you need to create a new file and name it http-client.env.json. Inside the file, define the environment standing for a specific server, and a set of variables for it.
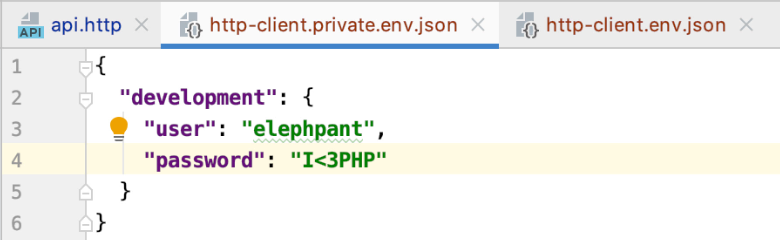
Since the http-client.env.json file will be shared with the project, too, we can take it a step further, and isolate username and password. So let’s create another file and name it http-client.private.env.json. Private is key here – this file is intended to hold sensitive data, and it even gets ignored by a VCS by default. Inside the file, we will replicate our environment, and then provide the username and password.
When we run the request, PhpStorm substitutes the variables with actual values. What’s more, your teammates can reuse the same request, but tailor it to their environments.
Scripting
In the HTTP client, you can see what the web service returned and can react to it programmatically.
Let’s consider this example: when we run the first request, our web service returns a JSON response. We can then compose a simple script that will modify it, so that we can send the modified data back to the server using the second POST request.
Response handler scripts are enclosed in > {% %}, written in JavaScript, and executed as soon as a response is received.
In our first script, we refer to the response object, which contains information about the received response, and then grab the response body JSON and modify its New features key’s value. Next, we refer to the client object, which stores the session metadata until you restart PhpStorm, and save the modified response body to a new myResponse global environment variable.
> {%
  response.body["Stable release"] = "2019.3";
  client.global.set("myResponse", JSON.stringify(response.body));
%}
When we rerun the request, the response gets modified and saved. In the second POST request, which sends the JSON data to the server, we can now set the myResponse variable as the request body, and run it to store the data on the server.
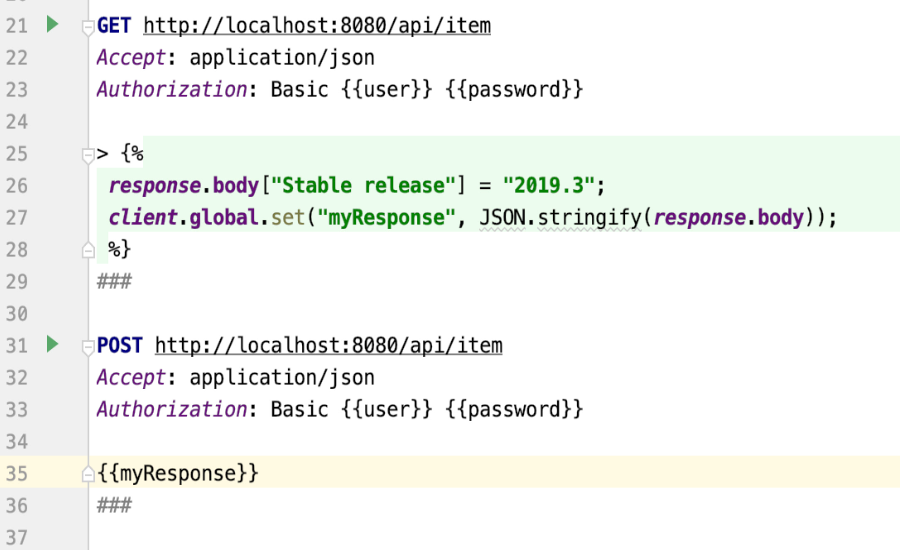
You can now rerun the first GET request – and make sure it returns modified data.
Testing
While it worked out pretty well this time, imagine having more scripts with all kinds of response values, conditions, or logic attached – checking each of them manually will eventually become a burden. Let’s make PhpStorm do it for us.
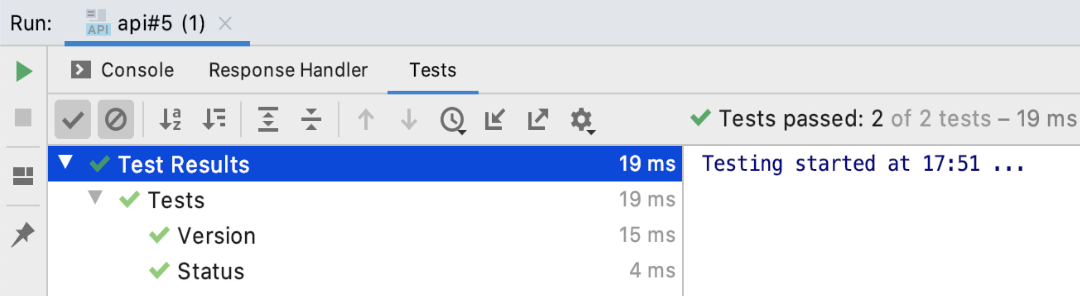
We will enhance the script so that it includes the actual test. Here, we use the test method, inside which we provide the name of the test, and then – the function that runs the test. Inside the function, we use the assert method, which checks the value of the response body JSON key, and outputs an error message if the condition is not met. You are not limited to a single check, of course – notice that we also added a condition checking the response status.
> {%
  client.test("Version", function() {
  client.assert(response.body["Stable release"] === "2019.3", "Returned no info on the latest
release");
});

  client.test("Status", function() {
    client.assert(response.status === 200, "Response status is not 200");
  });
%}
Now, when you run the request, PhpStorm will provide you with the tests’ results on the dedicated Tests tab. Should anything go awry, the test will fail, but you will know exactly what went wrong and can fix it right away.
We hope that this post sheds some light on what’s possible with the HTTP Client. See the HTTP Client docs to learn more, and make sure to check out the PhpStorm blog from time to time to keep up with the latest features.