TeamCity
Powerful CI/CD for DevOps-centric teams
Your First Migration: Moving a Single Project From Jenkins to TeamCity Painlessly

This article was brought to you by Rajkumar Venkatasamy, draft.dev.
Migrating from Jenkins can feel risky. Your pipelines work, your jobs run, and your scripts hold everything together. Jenkins isn’t broken, but over time, plugin sprawl, configuration drift, and upgrade headaches can quietly drain engineering time.
But what if there’s another option?
TeamCity’s user-friendly interface, built-in features, and seamless integrations can streamline your DevOps while reducing your reliance on plugins.
You don’t need to migrate everything at once. Start small. Move a single standalone project (a basic build or unit test job) and run it in parallel with Jenkins. This lets you evaluate TeamCity’s built-in features, cleaner configuration, and reduced maintenance overhead without disrupting your existing workflows.
In this guide, we’ll walk you through how to migrate one project step by step, so you can test TeamCity before committing to a full transition.
How to move a single Jenkins project to TeamCity without breaking things
In this article, we’ll walk you through the migration process step by step so you can replicate it confidently. The key is methodical preparation, careful implementation, and thorough validation.
To really benefit from this guide, it’s best if you understand basic DevOps concepts and have hands-on experience with DevOps tools like Jenkins/TeamCity.
Preparation
Before touching TeamCity, take stock of your Jenkins job. This inventory phase is important because it uncovers dependencies that could trip you up later.
Start by selecting a simple, standalone job. An ideal candidate is a basic build-only task or a set of unit tests that aren’t constrained by complex pipelines or shared resources.
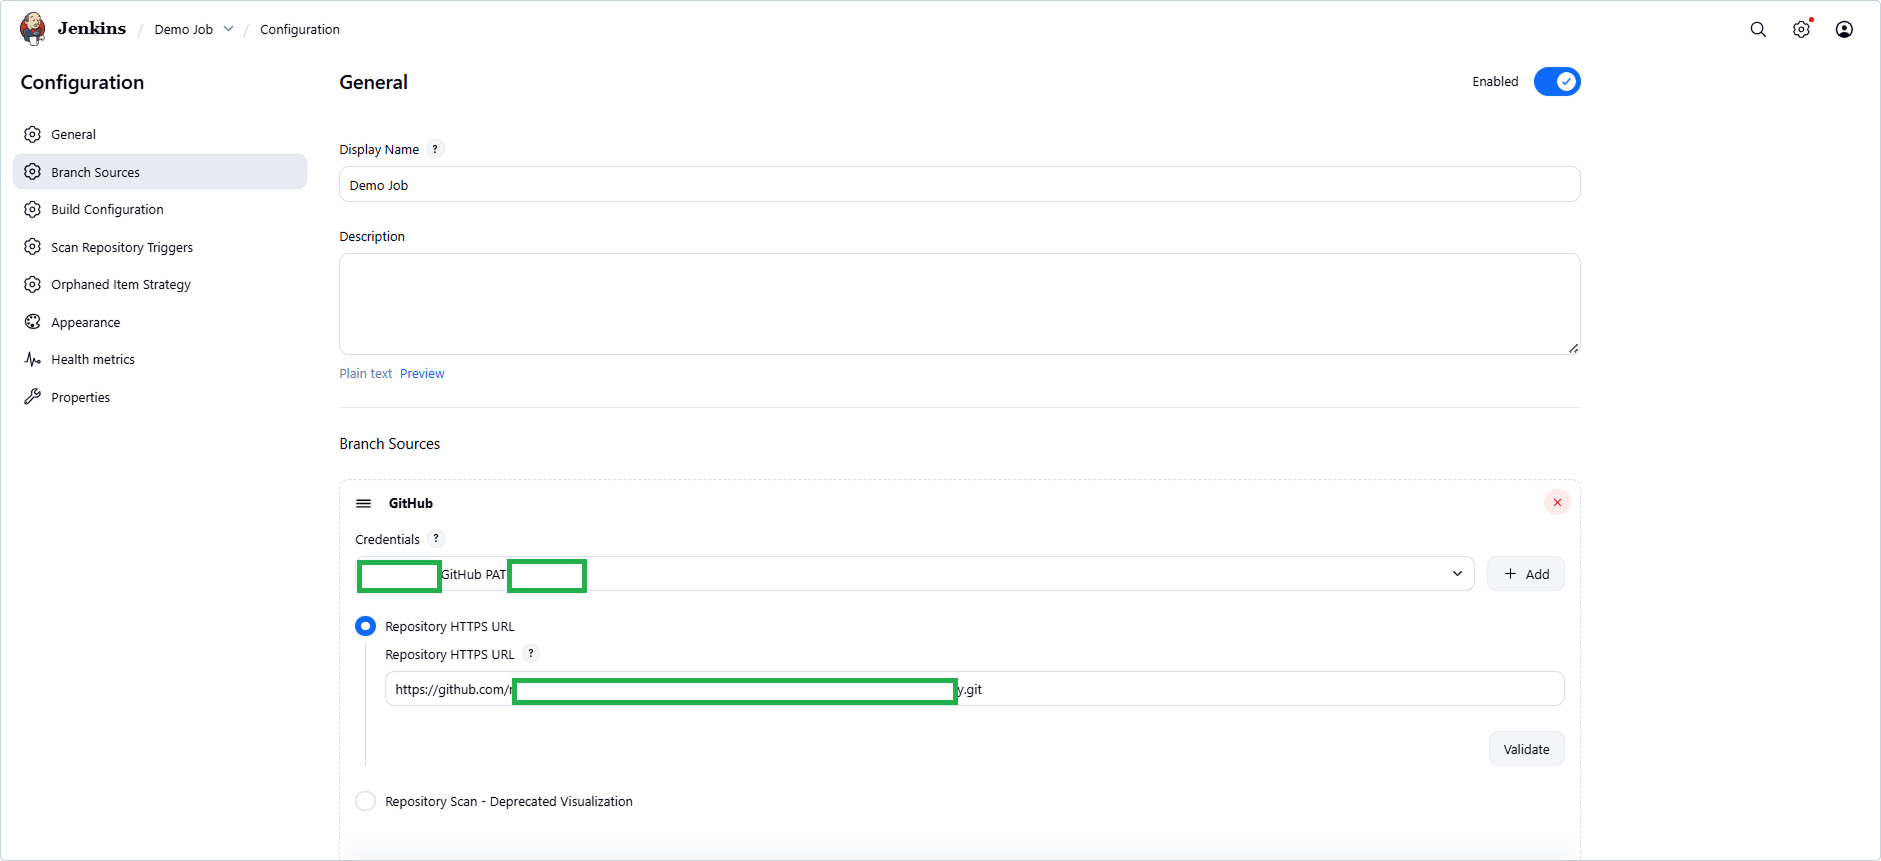
For example, log in to your Jenkins instance and navigate to the job’s Configuration page. Document everything: The source code repository (e.g. Git URL and branch), triggers (like on-commit webhooks or schedules), environment variables, and any build steps (such as shell commands or Maven/Gradle goals for a Java project):
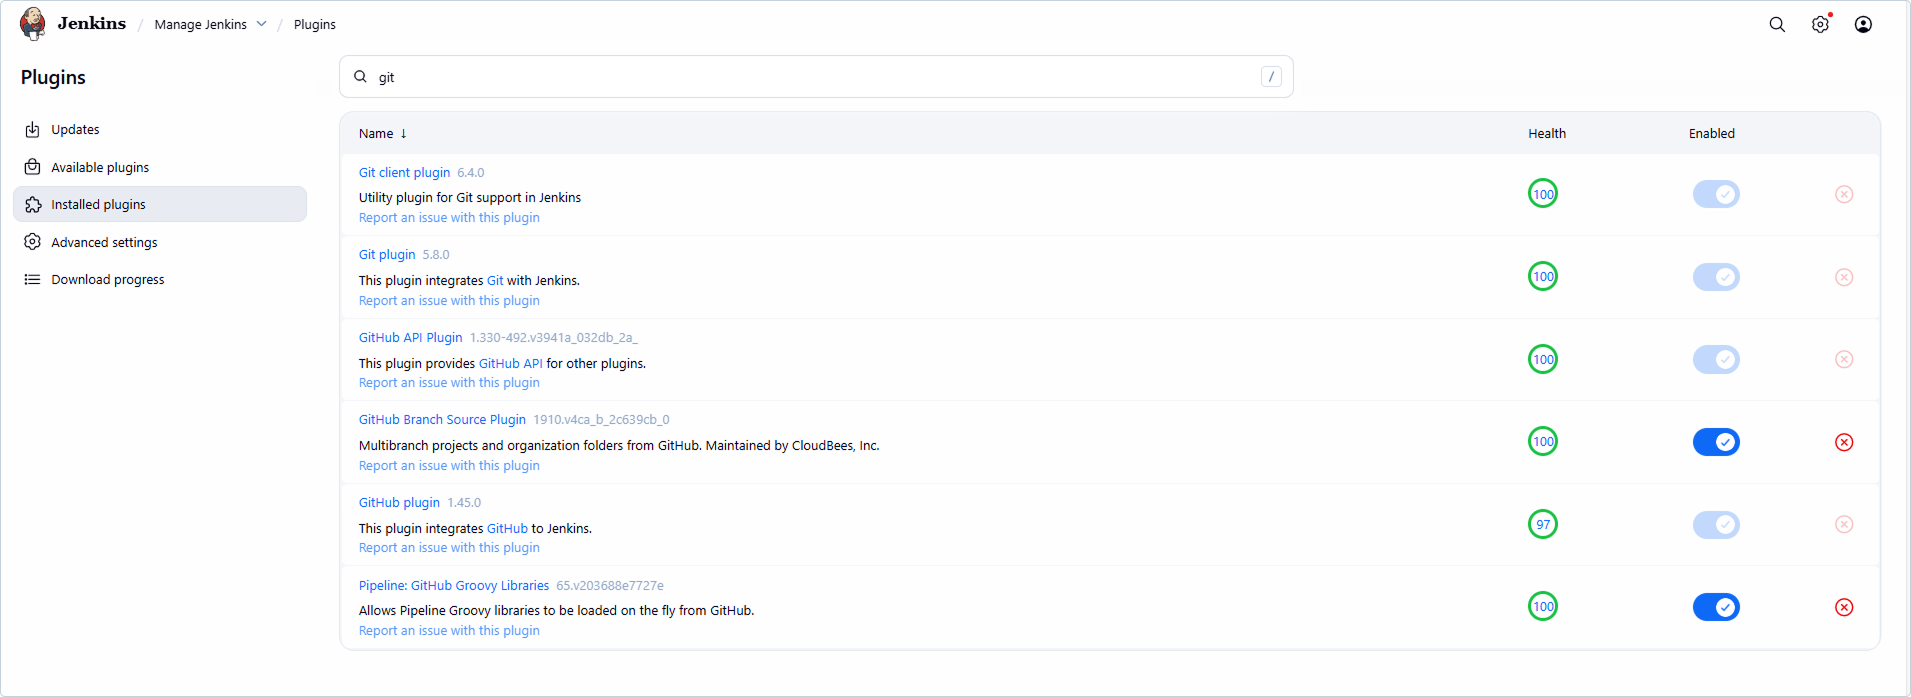
Note the plugins in use. Jenkins often relies on plugins for basic integrations (like the Git plugin), whereas TeamCity handles much of this functionality natively:
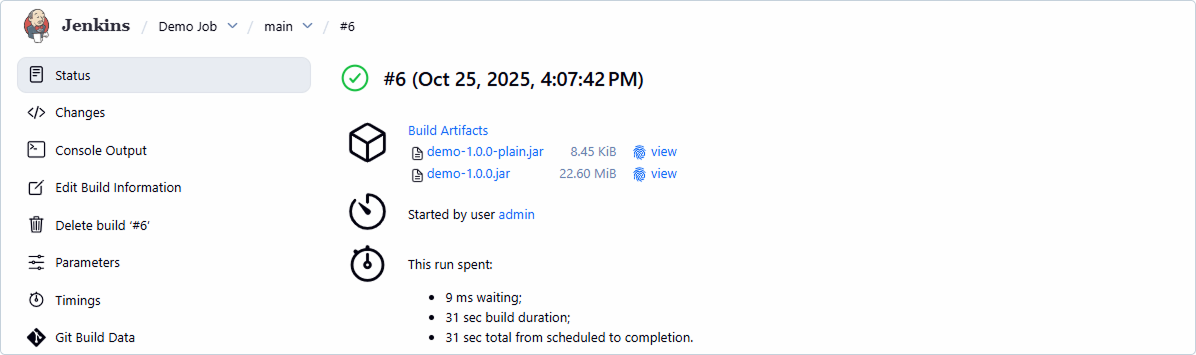
It’s also helpful to note performance baselines, like the build-run wait times and duration. This gives you metrics to compare post-migration:
If your Jenkins job uses credentials, list them securely:

Spending 30 to 60 minutes tracking down all this info can save hours of debugging.
Implementation
When you’ve completed your preparation phase, it’s time to bring TeamCity online.
Start by setting up your TeamCity server by choosing one of the following options: TeamCity Cloud or on-prem. TeamCity Cloud is great for quick, managed hosting. It’s also ideal for testing, as it’s hassle-free and requires no provisioning.
However, the trial is only fourteen days, so make sure that you’ve set aside time for testing. You can also choose to install our on-premises version for full control.
Creating a new project and connecting your repository
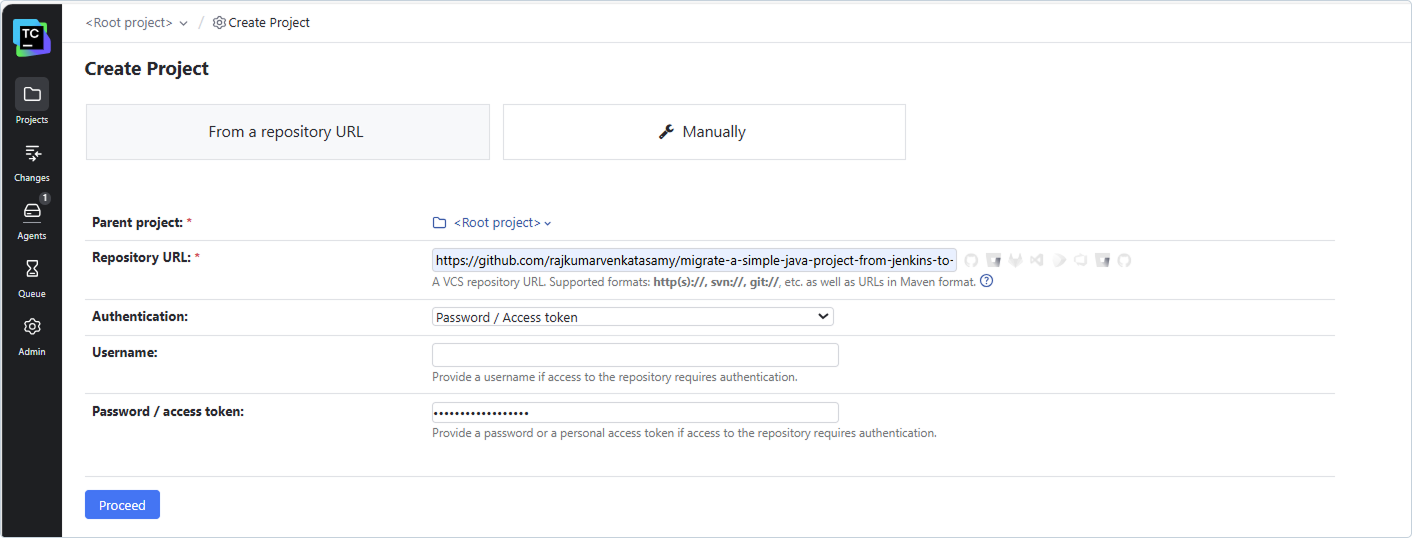
Once the TeamCity setup is complete, log in to the UI and create a new project. Enter your GitHub repo URL (e.g. https://github.com/yourorg/yourrepo.git) and configure authentication. Use an access token or SSH key for security, depending on your repo setup. TeamCity supports major providers out of the box. This ensures that builds automatically pull the latest code.
TeamCity handles branching and change detection natively using webhooks and path filters, so you get faster, more reliable triggers without having to install or maintain any plugins.
Adding and customizing build steps
Once your project is created, TeamCity looks at your pom.xml or build.gradle and suggests the next Maven or Gradle build steps, which you can customize as needed.
You can then replicate the required build steps from your Jenkins job in the TeamCity project’s build configuration.
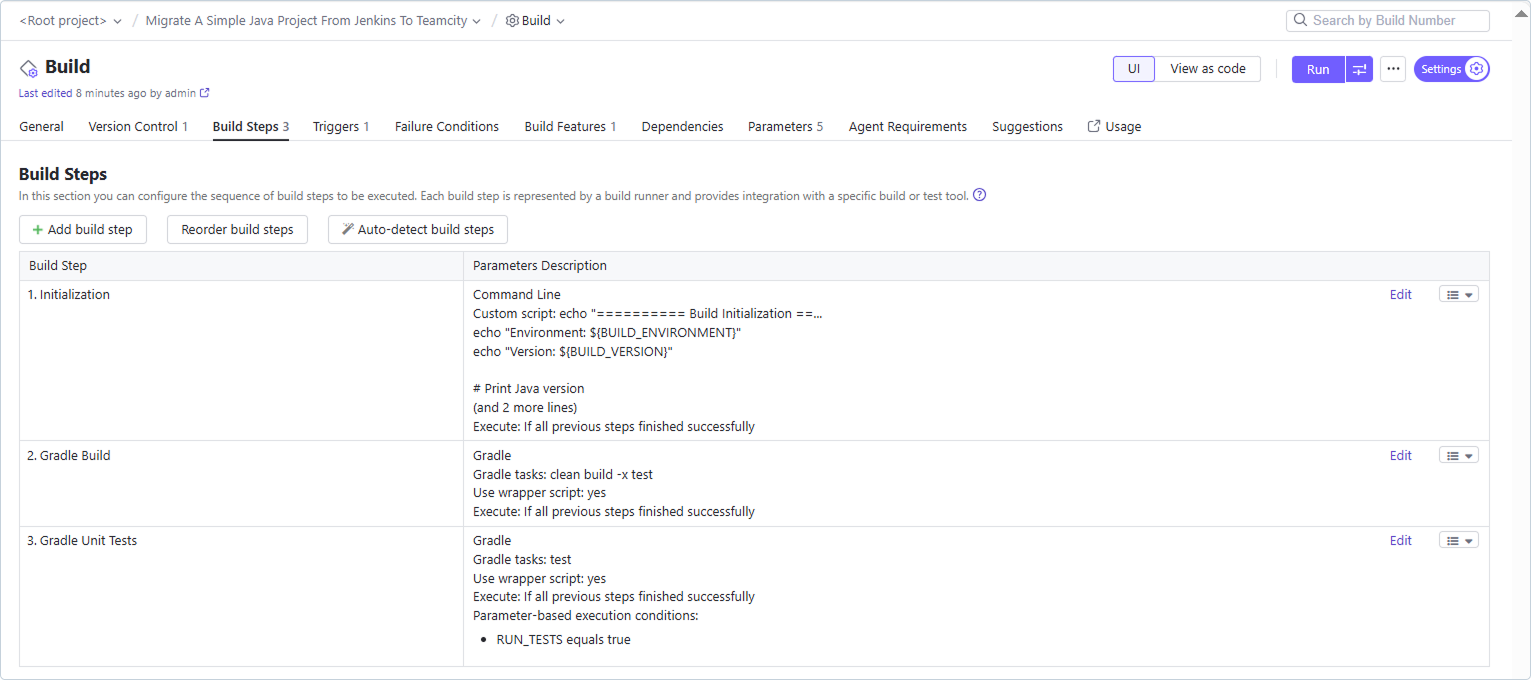
TeamCity provides numerous built-in runners with no plugins required. For a Maven build, select the Maven runner and input goals like “clean package”; for Gradle, choose the Gradle runner and enter your tasks the same way. You can find detailed instructions for tweaking runners and adding extra options in this guide.
If your Jenkins step was a generic shell command, opt for TeamCity’s Command Line runner. Unlike in Jenkins, where you might default to “Execute shell” for everything, which often results in less-structured, harder-to-maintain jobs, TeamCity encourages more organized, maintainable build steps.
If you’re more code-oriented and prefer scripting over UI clicks, TeamCity offers configuration as code via the Kotlin DSL. This is helpful for version-controlled setups, similar to Jenkins’s Groovy pipelines, but with type safety and IDE support. It lets you commit your configs to Git, enabling reviews and rollbacks, which is perfect for teams who treat infrastructure as code.
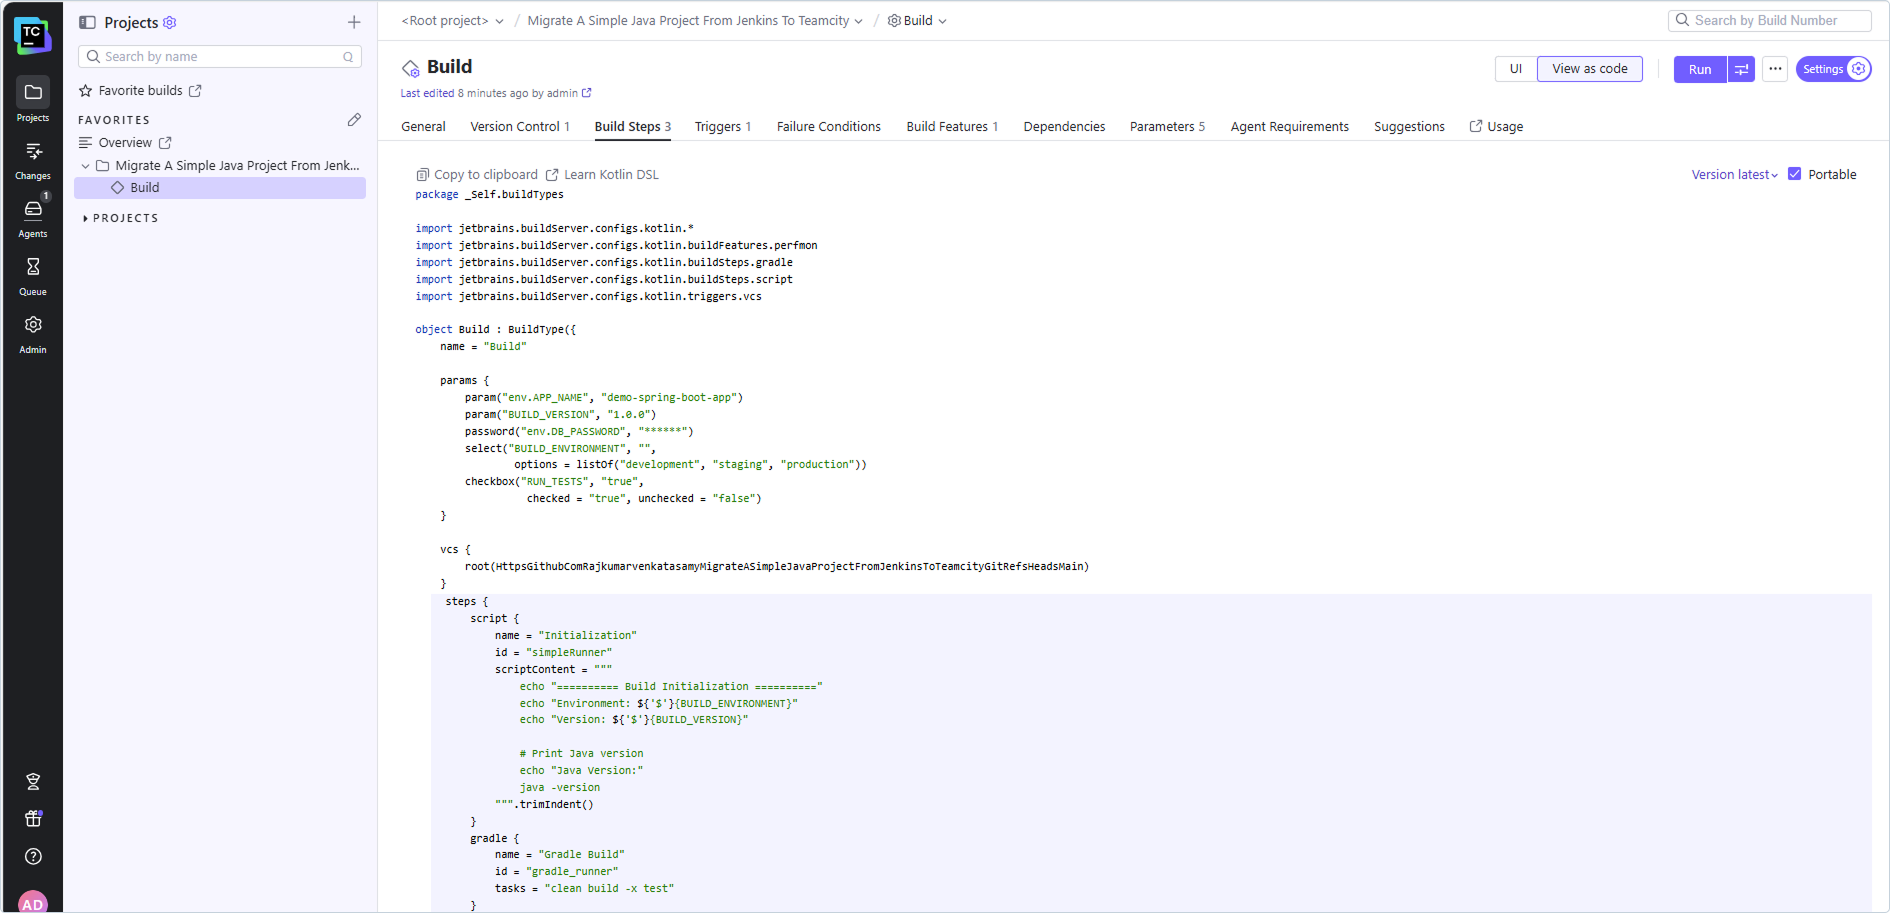
And here’s the best part: You don’t have to choose between UI and code! You can start in the UI, play around with your build configuration, get everything working, and when you’re ready, click View as code. TeamCity autogenerates clean, ready-to-commit Kotlin code based on your UI setup.
This means you can learn visually, validate that everything works, then export to code with zero friction and no retyping.
If you’re interested in learning more, check out this developer’s guide on shifting from Groovy DSL to Kotlin DSL.
Setting up build triggers for automation
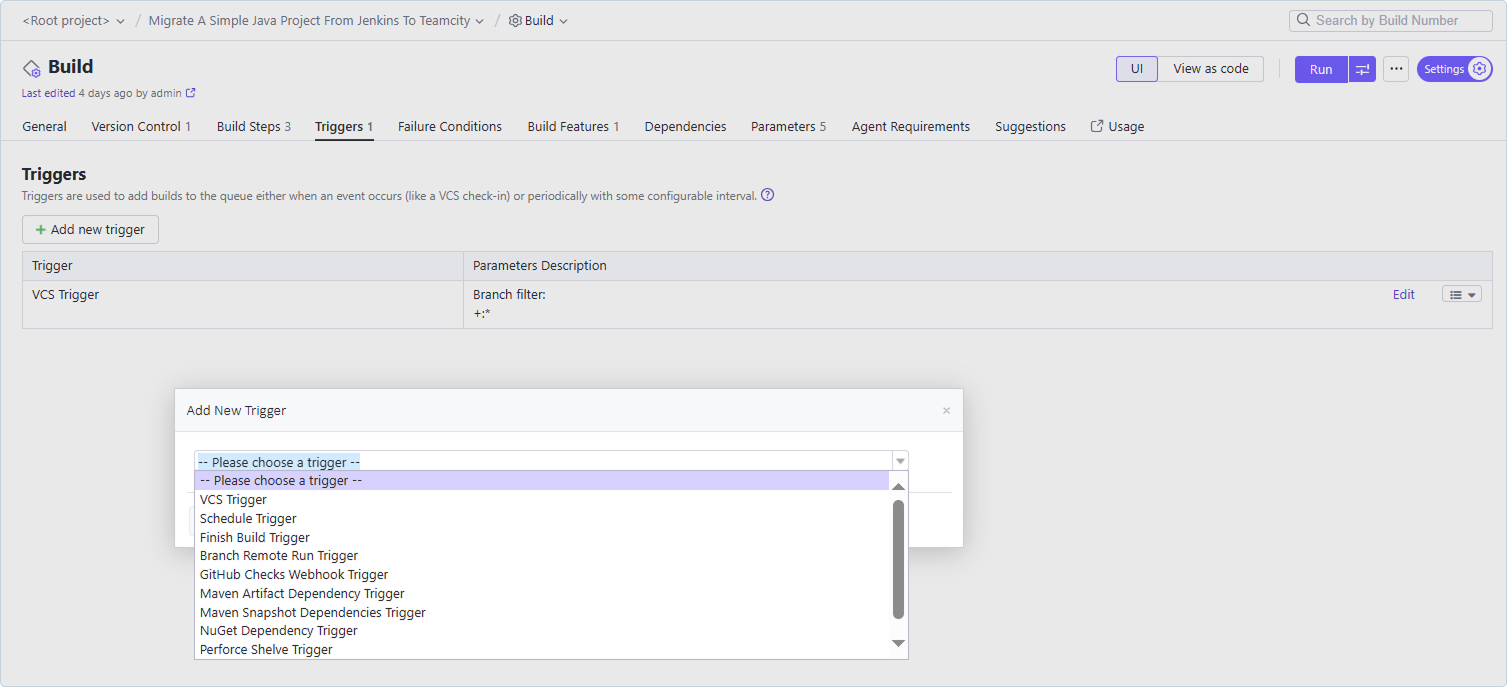
Once you’ve customized build steps, configure build triggers to automate runs. In the triggers section of TeamCity’s Build configuration, add a VCS trigger for on-commit builds. This enables the tool to watch your repo for changes and kick off builds. For scheduled jobs, use Schedule trigger to specify cron-like expressions.
TeamCity’s build triggers go far beyond “run on commit” or “run on a schedule”. They include Finish Build Trigger, VCS Trigger, and Retry Build Trigger:
Advanced triggering: Chaining builds without plugins
TeamCity only lets one build configuration automatically start another when a specific condition is met.
In Jenkins, achieving the same level of orchestration often means installing and configuring extra plugins (like the Parameterized Trigger plugin or Pipeline: Multibranch), each of which adds maintenance overhead and potential version-compatibility headaches.
With TeamCity, these capabilities are available out of the box, so you can chain builds, promote artifacts, or gate deployments without leaving the core product.
Real-time GitHub status updates
TeamCity also instantly posts detailed commit statuses back to GitHub as Passed, Failed, or In Progress, with direct links to the exact build log.
This real-time feedback loop, powered by TeamCity’s native GitHub integration, doesn’t require additional plugins or webhooks. Developers see the outcome seconds after pushing, not minutes later after a polling interval or a misconfigured webhook or plugin.
Managing parameters and environment variables
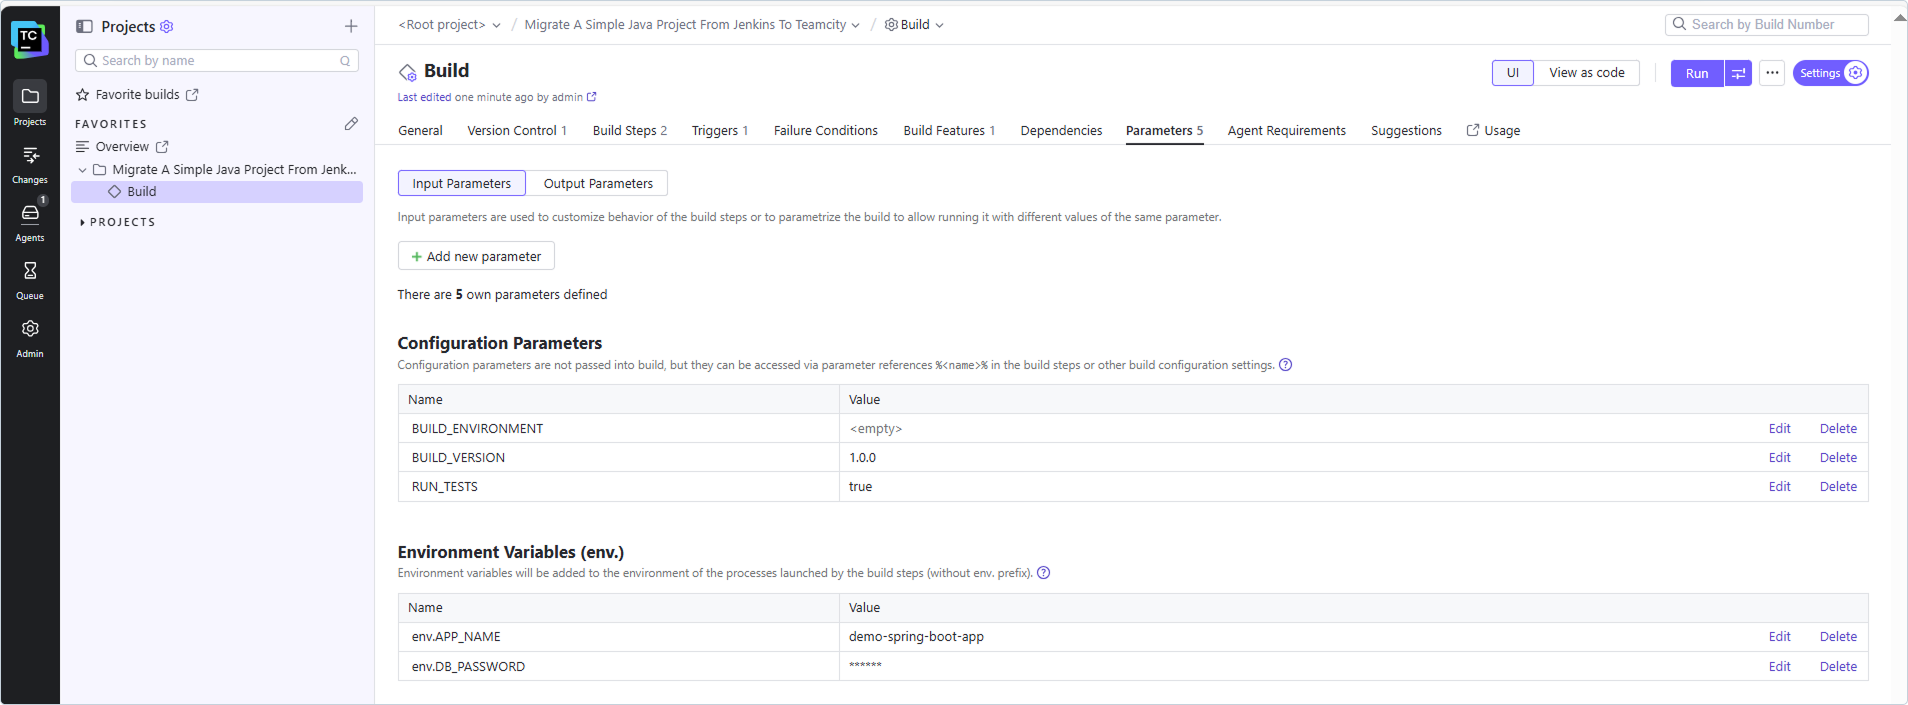
Add build parameters and environment variables. TeamCity’s model backing the parameters and environment variables configuration is flexible and secure. You can define both parameters and environment variables (be it sensitive or nonsensitive variables) in the Parameters section by choosing text for simple strings, password for secrets (stored encrypted on the server, never exposed in logs), or select for dropdown options.
For instance, if your Jenkins job uses a nonsensitive env var like APP_NAME, create a new environment-variable input parameter with the value type set as text, and key in the value as Your_APP_NAME.
If your Jenkins job uses a sensitive env variable like DB_PASSWORD, create a password parameter in TeamCity. You can refer to these env variables as %DB_PASSWORD% in steps or as ${DB_PASSWORD} in custom scripts within TeamCity.
Secure secrets handling
Unlike Jenkins, which requires separate plugins for secrets management and vault integration, TeamCity has native support for external vaults, like HashiCorp Vault, keeping sensitive data centralized and audit-friendly.
This step builds resilience as parameters allow easy overrides for different environments without rewriting or setting up the build configuration for each environment.
Validation and cutover
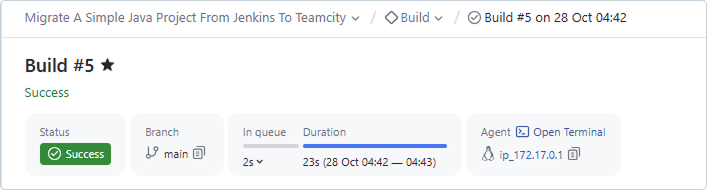
Once you’ve built the project in TeamCity, you need to verify that it works. Start by manually triggering a build in TeamCity. Watch the logs in real time; TeamCity’s interface highlights errors and provides timestamps for you to easily observe and troubleshoot when needed. Compare the artifacts and results against your Jenkins baseline.
If issues occur during the build process execution, common causes could be path mismatches (TeamCity’s checkout directory might differ, and in such a case, make adjustments in the VCS settings) or permissions (ensure agents have access to the build tools, like Gradle or Maven, used by your project).
In general, while troubleshooting, do it systematically. For instance, you have to check environment vars if builds fail on missing dependency variables or verify credentials for auth errors.
Additionally, during your first migration phase, run jobs in parallel (i.e. keep Jenkins active while testing TeamCity). Trigger the build for the same commit in both tools and compare the outputs. This parallel run builds trust and helps you see which tools actually perform better.
Once it’s validated (e.g., after a few successful autotriggered builds) retire the Jenkins job. Disable it first, monitor for a day, then delete. This gradual cutover minimizes risk, letting you roll back if needed.
Conclusion
If you followed along, you just finished migrating a single Jenkins project to TeamCity. You’ve demystified the process, learned more about TeamCity’s intuitive tools, and likely spotted efficiencies like reduced plugin bloat or superior secrets management. This isn’t just a tech swap; it’s a step toward a more reliable, developer-friendly CI/CD.
Now that you’re comfortable, imagine scaling this across your portfolio. TeamCity’s project hierarchies and templates make it easy, but planning is key for larger migrations.
Whether you’re a developer tweaking builds or a DevOps engineer orchestrating workflows, this first win should inspire confidence.