High-Speed Coding With Custom Live Templates
 Usually in our code we have a lot of pattern structures such as conditionals (if, else), loops (for, while, foreach), tag structures (HTML tables, ul listings) and others. One of the most important things we should think about while coding is performance – these code patterns are 100% reusable, we don’t use our brain in order to employ it – just mechanically type and this typing requires some time, so that the key factor in making your coding a high-speed one is to spend as little time on routine coding as possible.
Live template is a feature helping you to type less and be more productive easily creating and using pattern structures in your code. Live templates contain predefined code fragments so that you can use them to insert frequently-used or custom code constructs into source code quickly, efficiently, and accurately. There are numerous pre-defined templates for CSS, HTML, XSL, JS including Zen Coding and some others, however, sometimes it’s not enough. Today we are going to learn how to create custom live templates in order to type less.

This functionality is available in IntelliJ Idea, PyCharm, WebStorm, PhpStorm, RubyMine, AppCode.
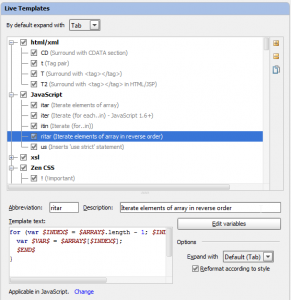
Each live template is identified by a template abbreviation. Just to understand how does it work let’s check predefined example “Iterate elements of array”. Enter itar abbreviation in JS file and press TAB. We’ve got complete and valid JS code and the only thing you need to do is to change variables.

There are a few types of live templates:
- Simple template (some fixed code that expands into plain text) CTRL+J / META+J
- Parameterized template (contains plain text and variables that enable user input) CTRL+J / META + J
- Surround templates (work blocks of selected text) CTRL+ALT+J / META + ALT + J
Use hotkeys in order to get list of templates or use it. You can also type template abbreviation and use TAB to make it do coding for you.
Let’s check how can we create a custom template. Just go to Settings | IDE Settings | Live Templates. We can see a list of predefined Live Templates by groups.
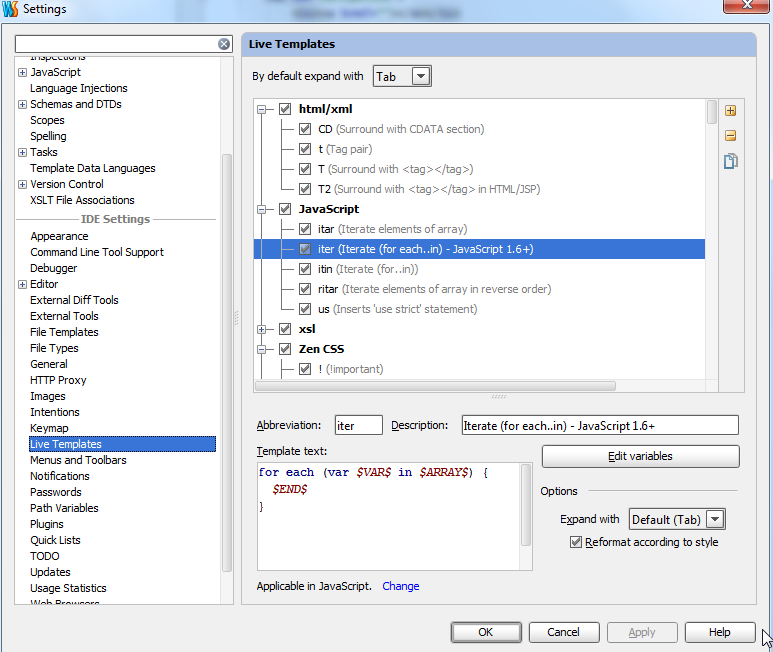
It would be quite useful to examine predefined Live Templates in order to understand how is it created.
In order to create a new Custom Live Template go to the Live Templates Settings dialog and click on add (+) button in order to add new template. It will be added to user group. Enter abbreviation (name by which we are going to invoke this template) and Description. After that you need to add Template text (you can also have Template text set for you in case you select a block of text and invoke menu Tools | Save as Live Template). If we are writing Simple Template then just enter text here. For parameterized and surround templates things are a little bit more complicated so we are going to create parameterized template below.
For example, we want to have custom table with class and id and one row and three columns inside.
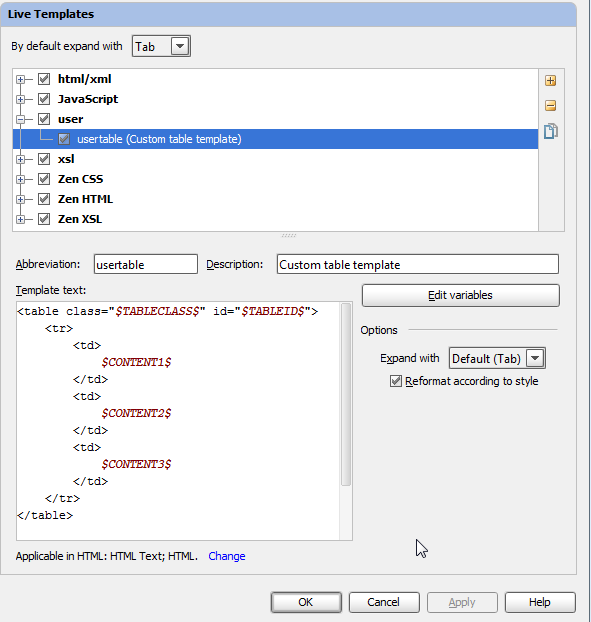
Template variables in live templates enable user input. After a template is expanded, variables appear in the editor as input fields. Variables are declared as $VARIABLE$. They are defined by expressions, and can accept some default values.
Two predefined live template variables are supported: $END$ (position of the cursor after template is expanded) and $SELECTION$ (for surround templates – the code fragment to be wrapped).
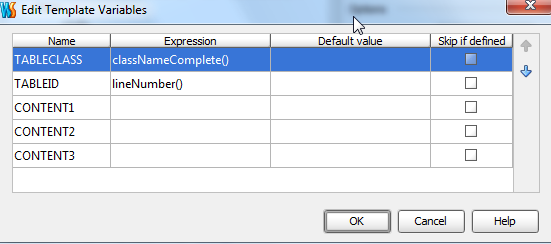
In order to edit variables definitions click on Edit variables button. You can choose an expression and put default value here.
Don’t forget to define contexts we are going to employ our template (Such as HTML, CSS, JS, etc).
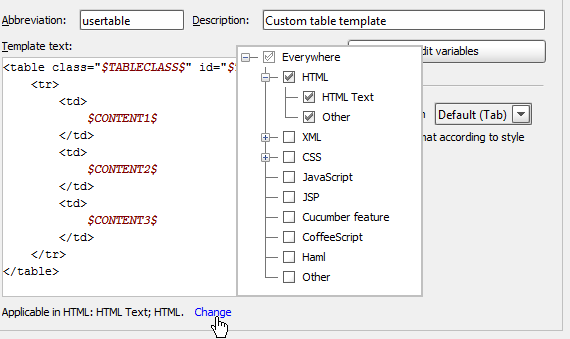
Just save template and go to the editor. Enter our custom live template abbreviation usertable and press TAB.
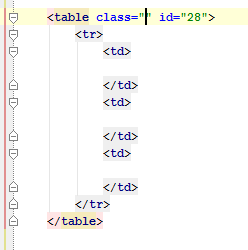
We’ve got our table and ready to enter class and other variables (you can switch between them using enter).
You can define as many custom live templates as you need in order to minimize routine coding.
Develop with pleasure!
– JetBrains Web IDE Team
Subscribe to WebStorm Blog updates


