Creating and Using Code Snippets With Placeholders

In our previous blog post, we walked you through the basics of how you can save time with code snippets, or as they are called in WebStorm, PhpStorm, and other JetBrains IDEs, live templates.
Let’s look at how you can create even more powerful live templates by customizing them with variables. Whenever you expand such a template, you’ll see these variables rendered as placeholders where you can type appropriate values. Alternatively, WebStorm can use these special functions to define their values.
For this tutorial, we’ll use the ngcomp template from the previous blog post and make it a bit more powerful. We’ll add two variables, with one of them dependent on the other. Here’s what we’ll cover:
- Select the code for a template
- Specify the template name and the abbreviation to expand it
- Introduce variables
- Apply the template
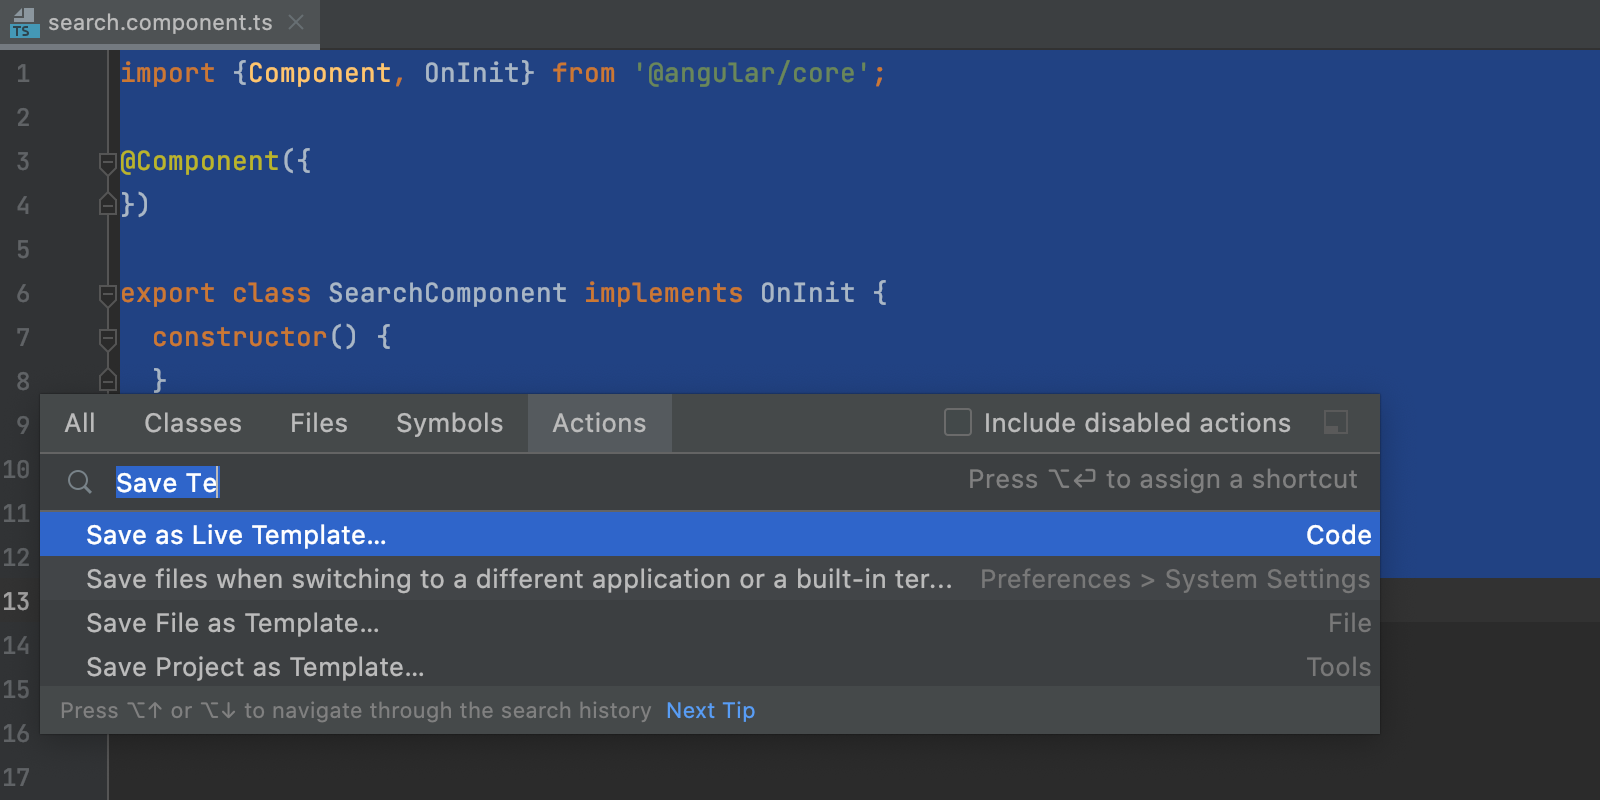
Select the code to use for a template
First, select the code you want to use for the new live template in the editor, press ⇧⌘A / Ctrl+Shift+A, and search for the Save as Live Template… action.
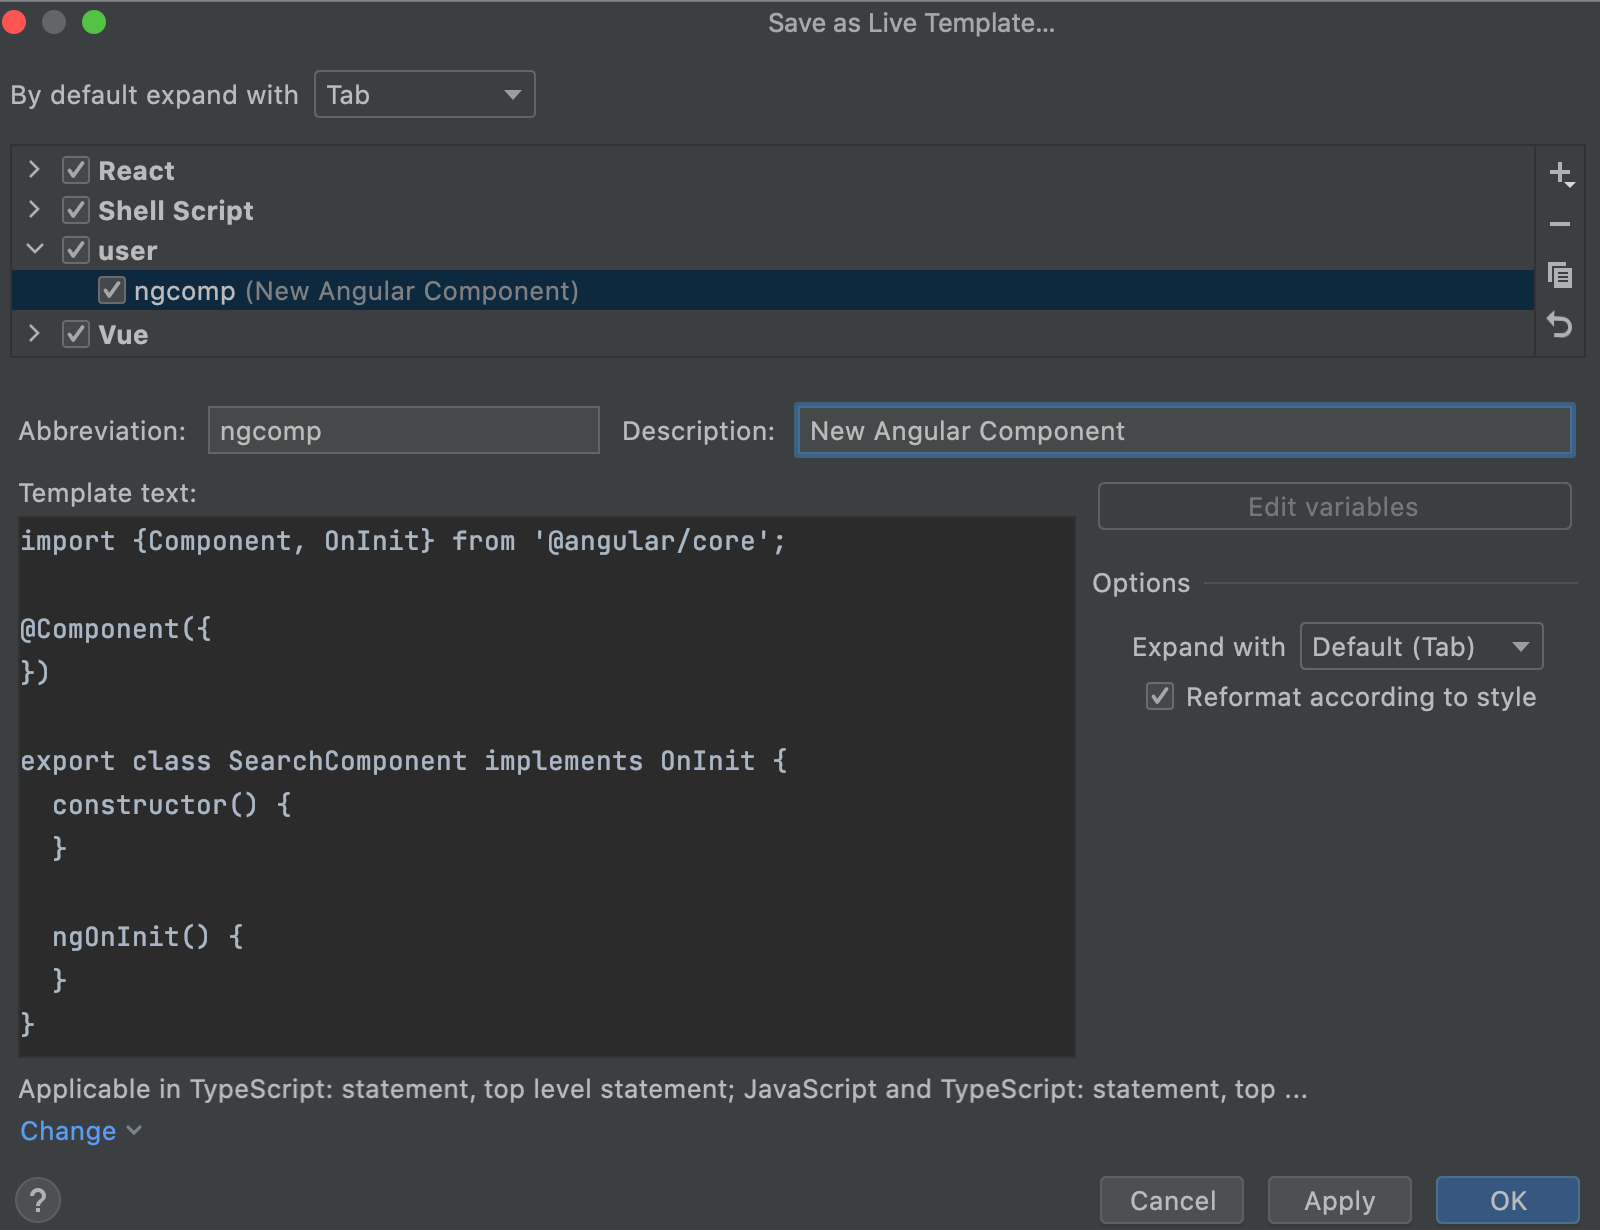
Specify the template name and the abbreviation to expand it
In the Preferences / Settings | Editor | Live Templates dialog that opens, enter the abbreviation that you’ll be using to invoke the template. We’ll go with ngcomp.
Now, let’s add a description for our new live template, for example, New Angular Component.
Introduce variables
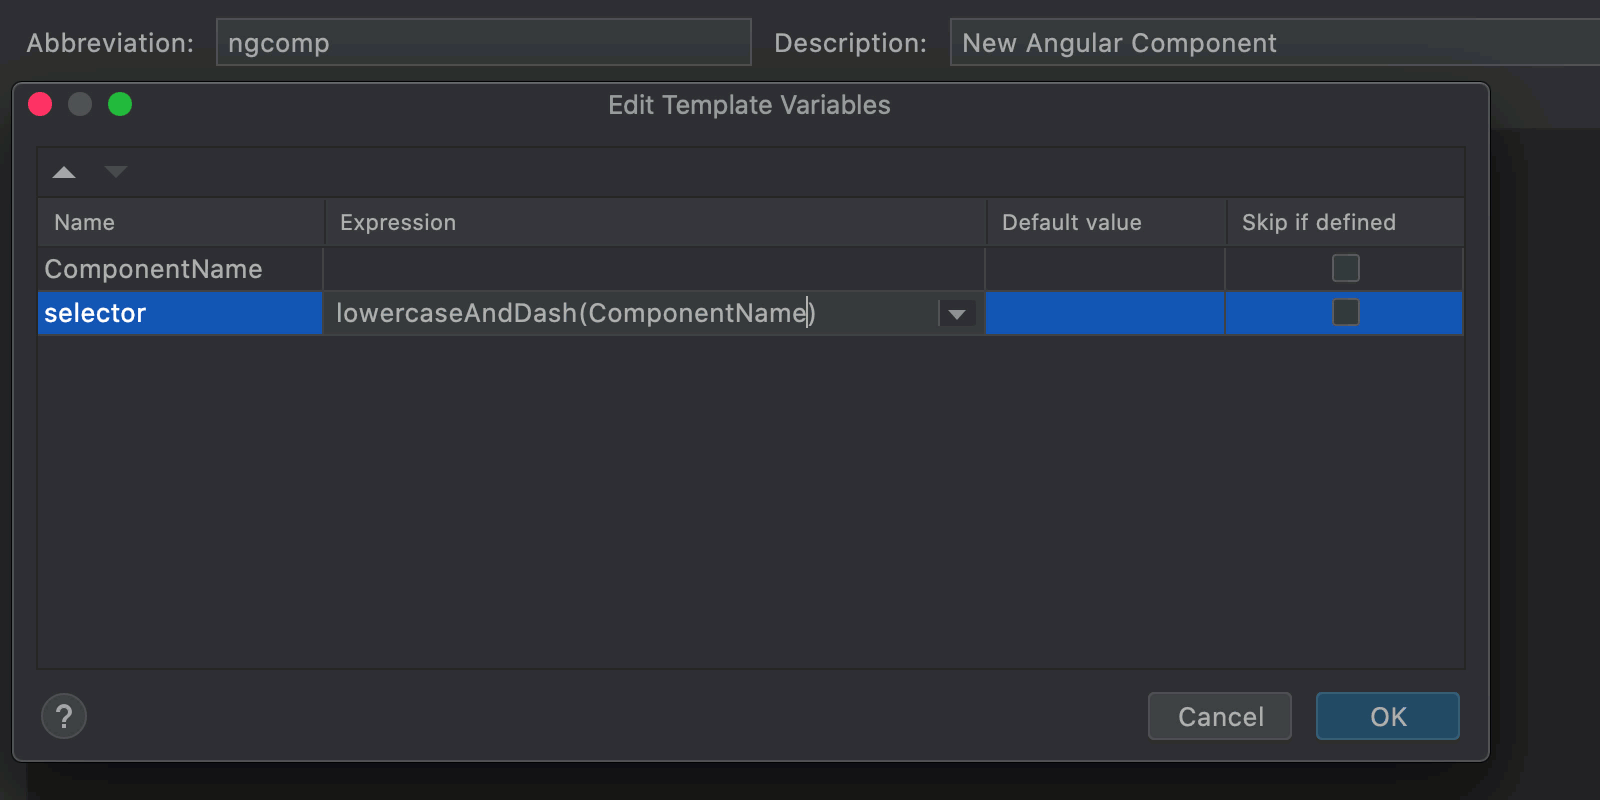
Let’s add two variables: the name of the component class ($ComponentName$) and the name of the component selector ($selector$).
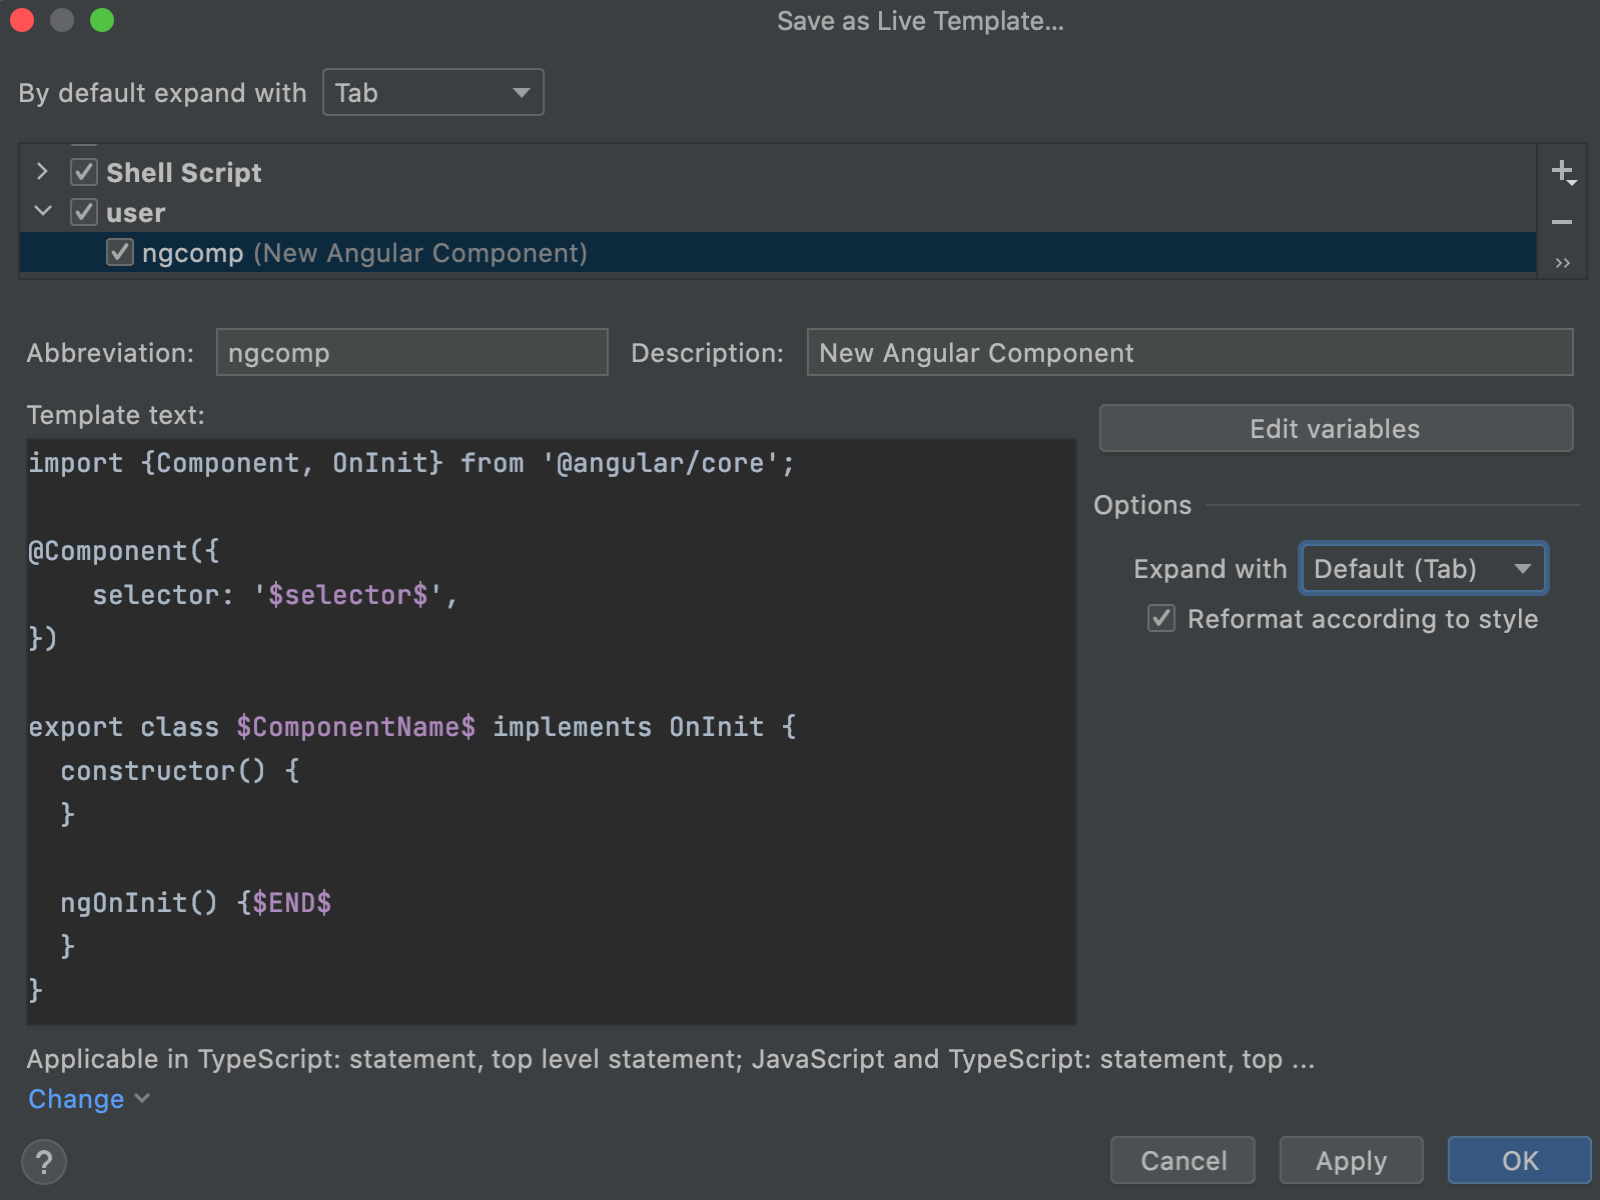
Here we face a problem. According to the Angular Style Guide, selector names are usually a dashed-case version of the component name, so it would make sense to specify the component name first. However, the selector comes first in the code.
To solve this problem, let’s click Edit variables and adjust the order of variables using the arrow icons. Now ComponentName comes first.
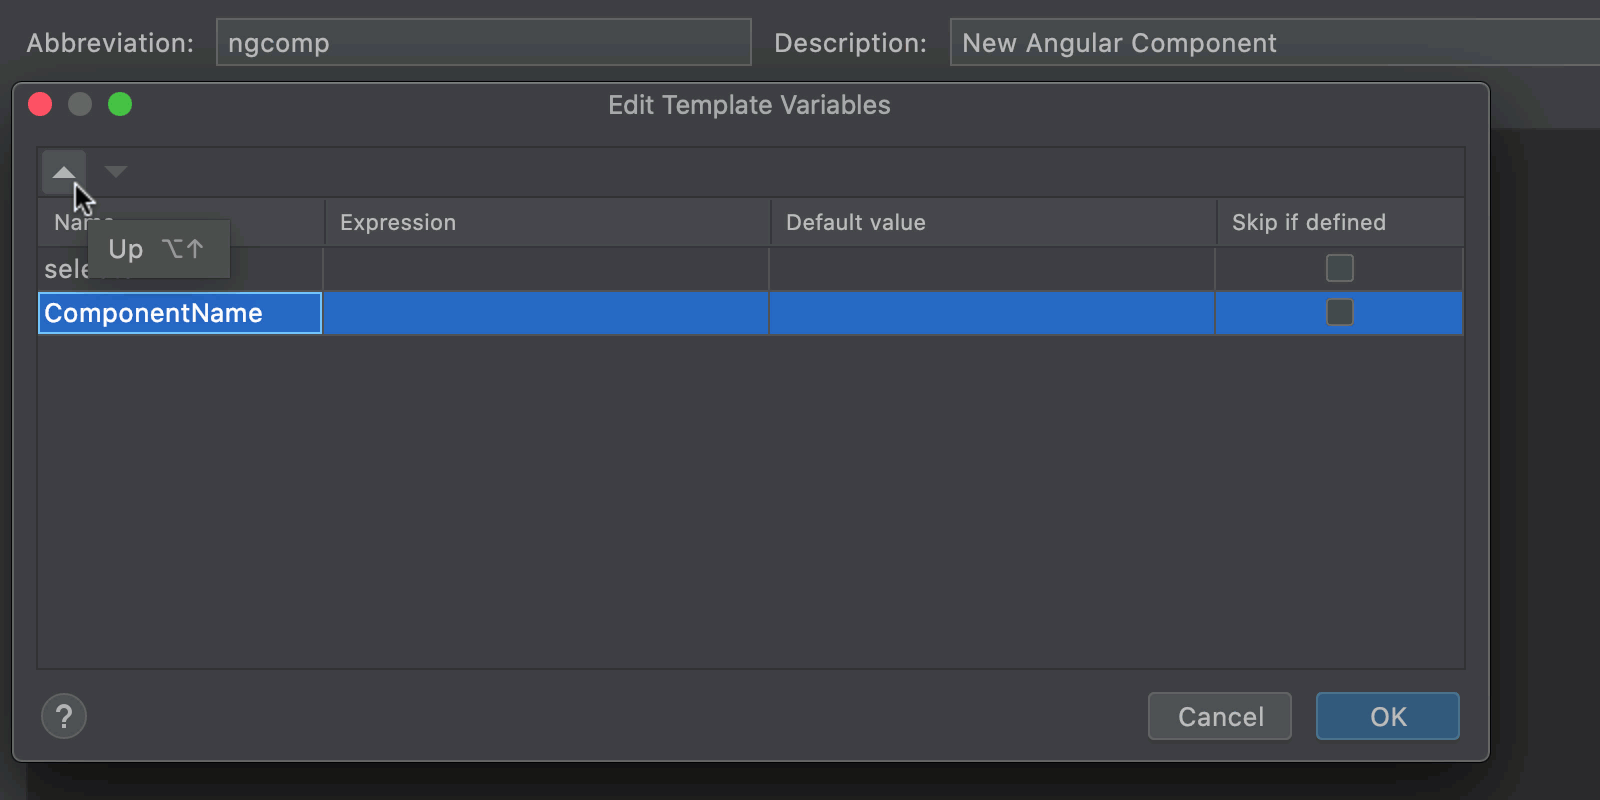
Next, it would be great if we could specify the class name and have the selector name filled in automatically through the class name transformation. To do this, click the Expression field next to the selector variable and select the lowercaseAndDash function from the list, and type ComponentName as parameter.
In the Edit Template Variables dialog, the names of variables are used without opening and closing $ characters.
Apply the template
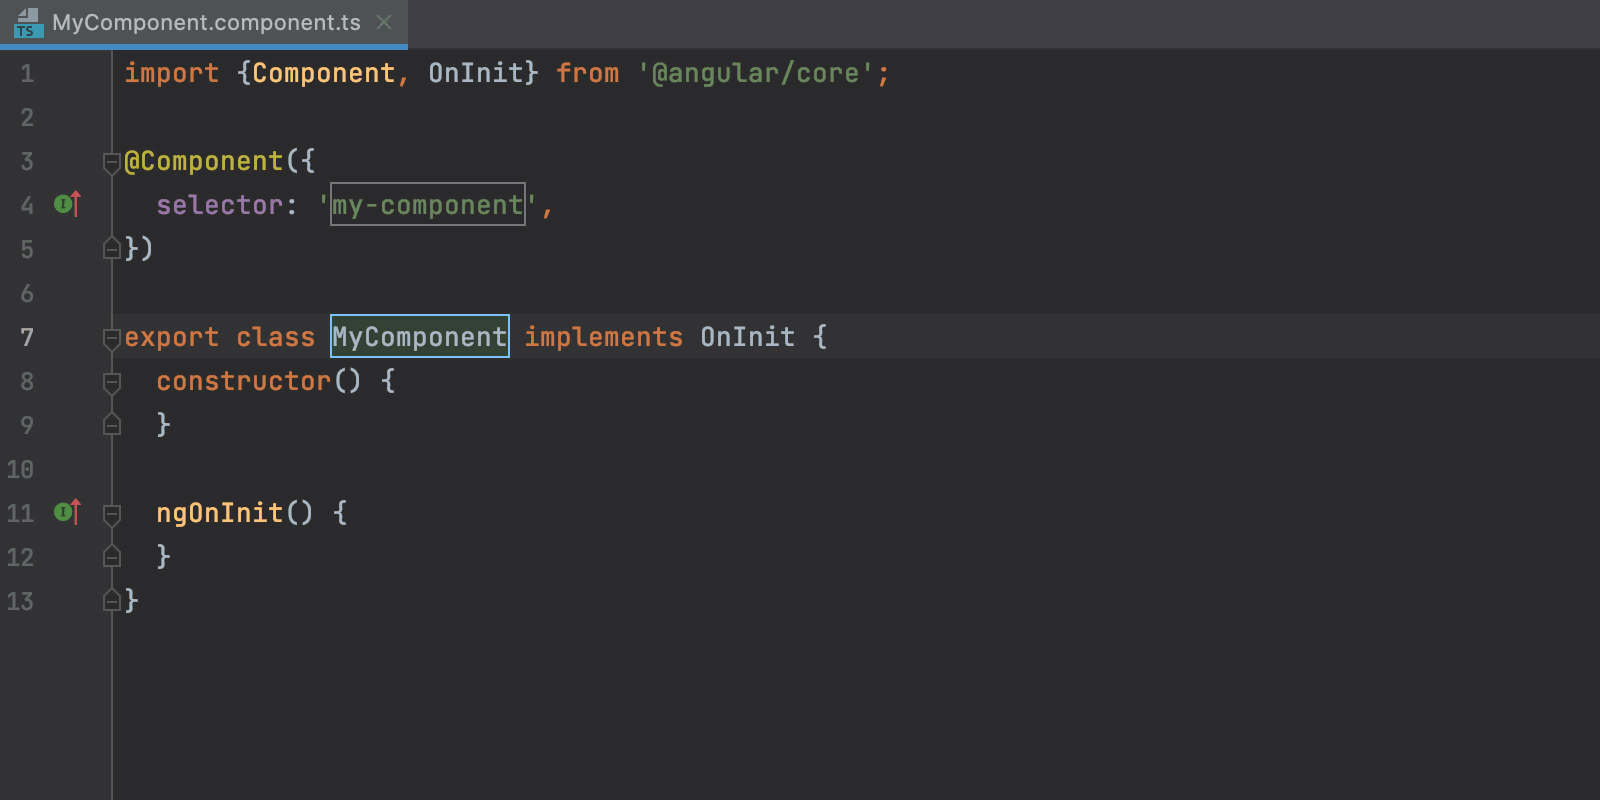
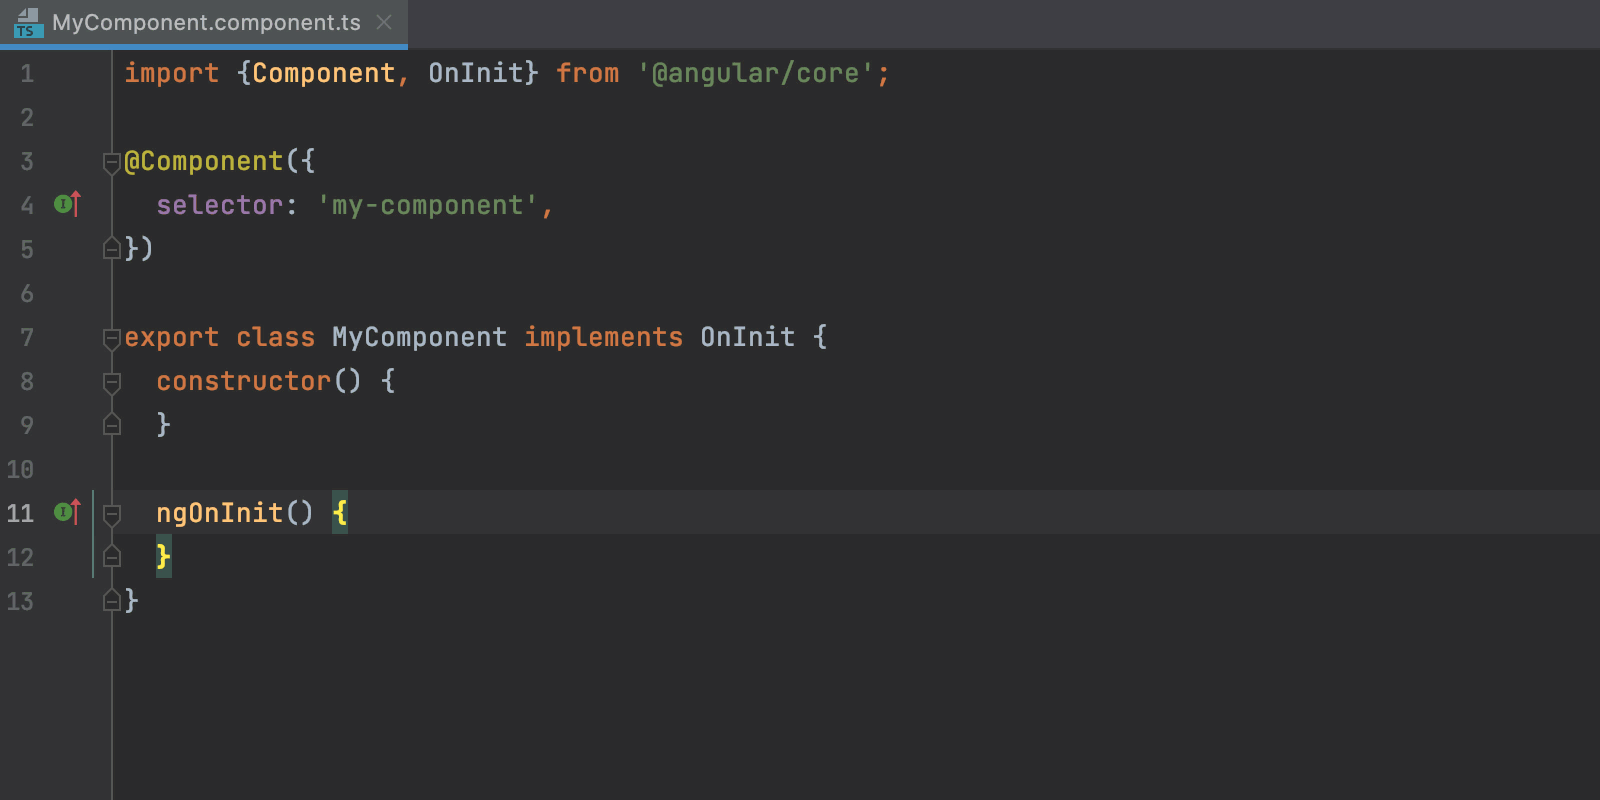
Let’s see our new live template in action:
Other customization options
We can also select Skip if defined next to our selector variable.
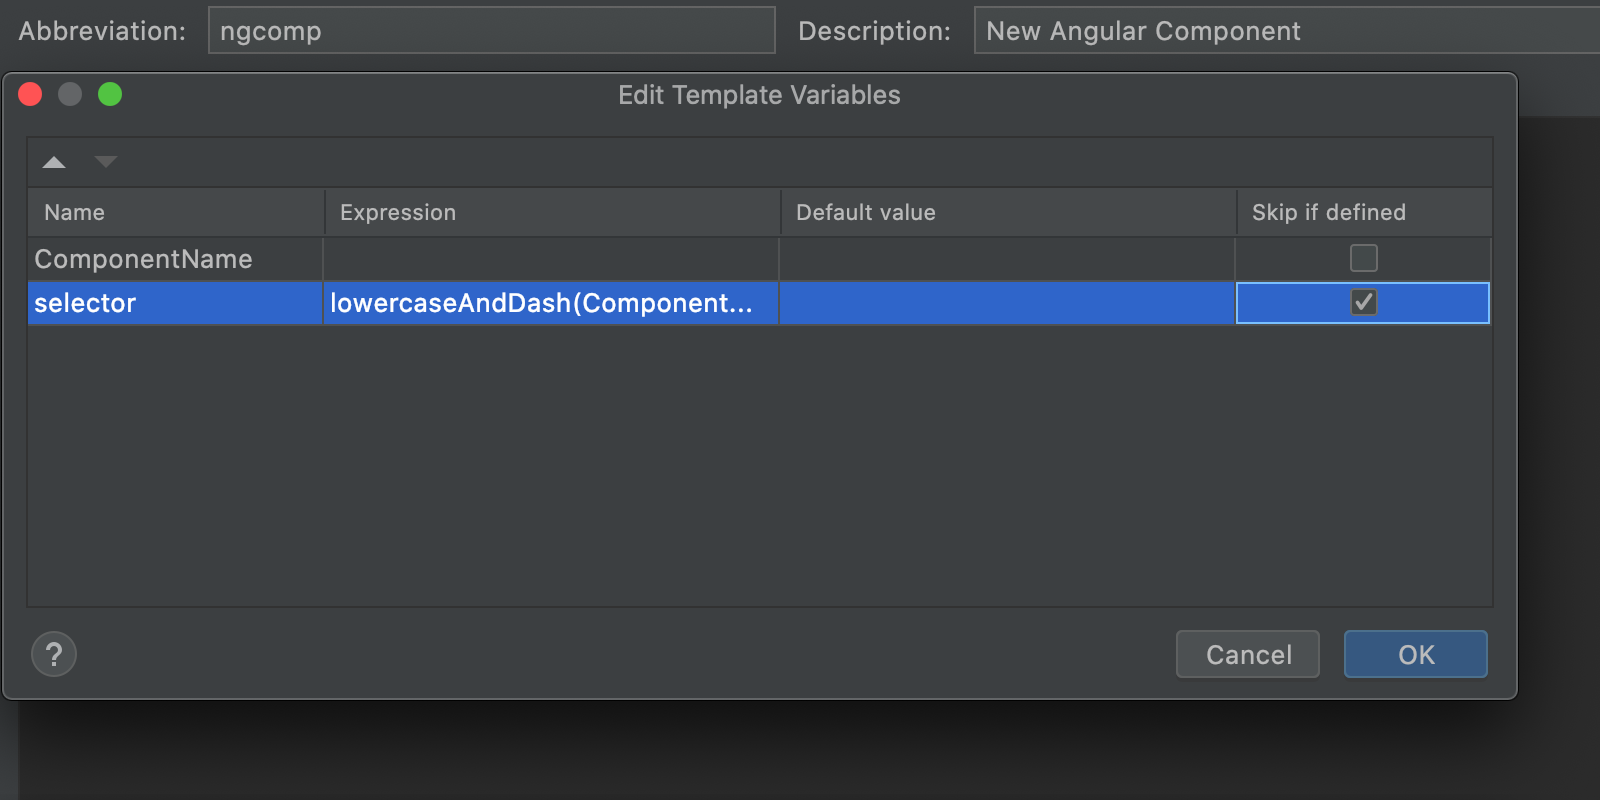
In that case, after we’ve edited the component name and pressed Enter, the cursor will go to the end position and not to the selector.
That’s it for today. If you have any questions or feedback, please don’t hesitate to post them in the comments below.
The WebStorm team