IntelliJ IDEA
IntelliJ IDEA – the Leading IDE for Professional Development in Java and Kotlin
The Truly Hidden Gems of IntelliJ IDEA
The IntelliJ IDEA: how2pro blog series showcases useful yet little-known features in IntelliJ IDEA. This time we decided to take it a step further and collect a bunch of features that even most of us at JetBrains didn’t know about! Let’s take a look at some true gems of the IDE you thought you knew so well.

Preview files from search results
IntelliJ IDEA provides several options for previewing files from the Project tool window. For example, you can use the Preview tab or press Space to preview a file in a popup.
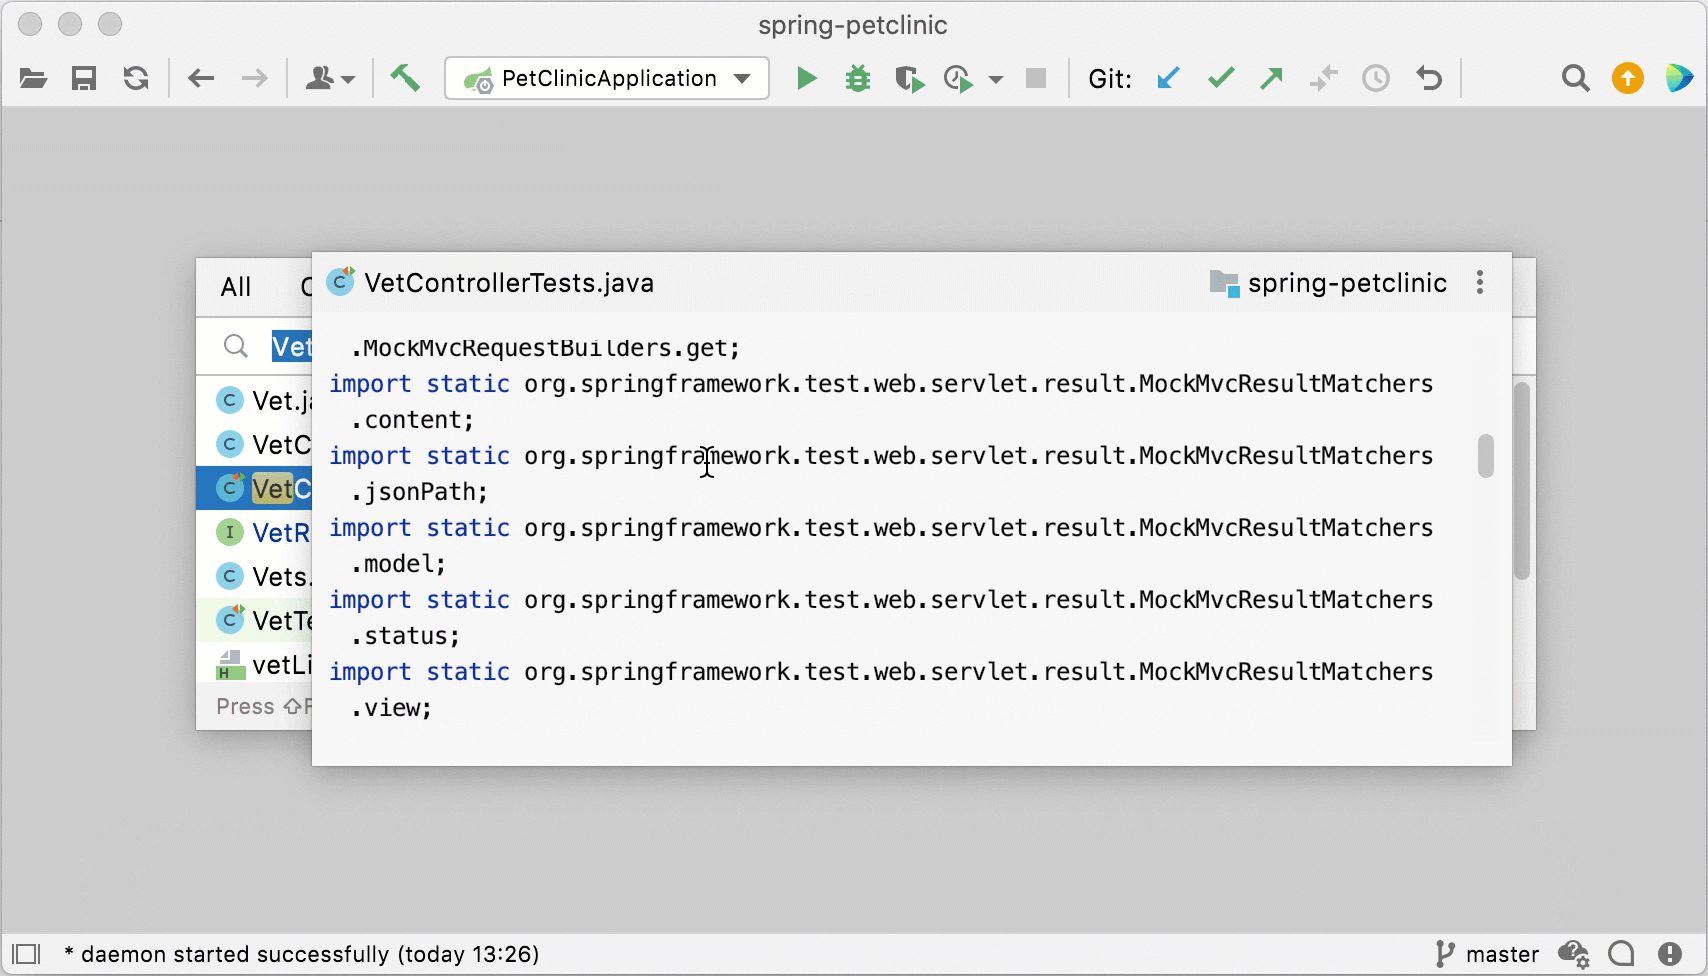
But that’s not all. Did you know you can also preview files from search results, like in the Search Everywhere or Go to File dialog?
Press ⇧⌘O on macOS / Ctrl+Shift+N on Windows and Linux in your project to open the Go to File dialog. Start searching for a file, and once you see your search results, select any item in search results and then press ⌥Space on macOS / Ctrl+Shift+I on Windows and Linux.
The selected file opens in a popup, allowing you to go through its contents and decide whether or not you want to open it for editing. Press Esc to close the popup and continue working with the search.

Convert a Maven dependency to Gradle
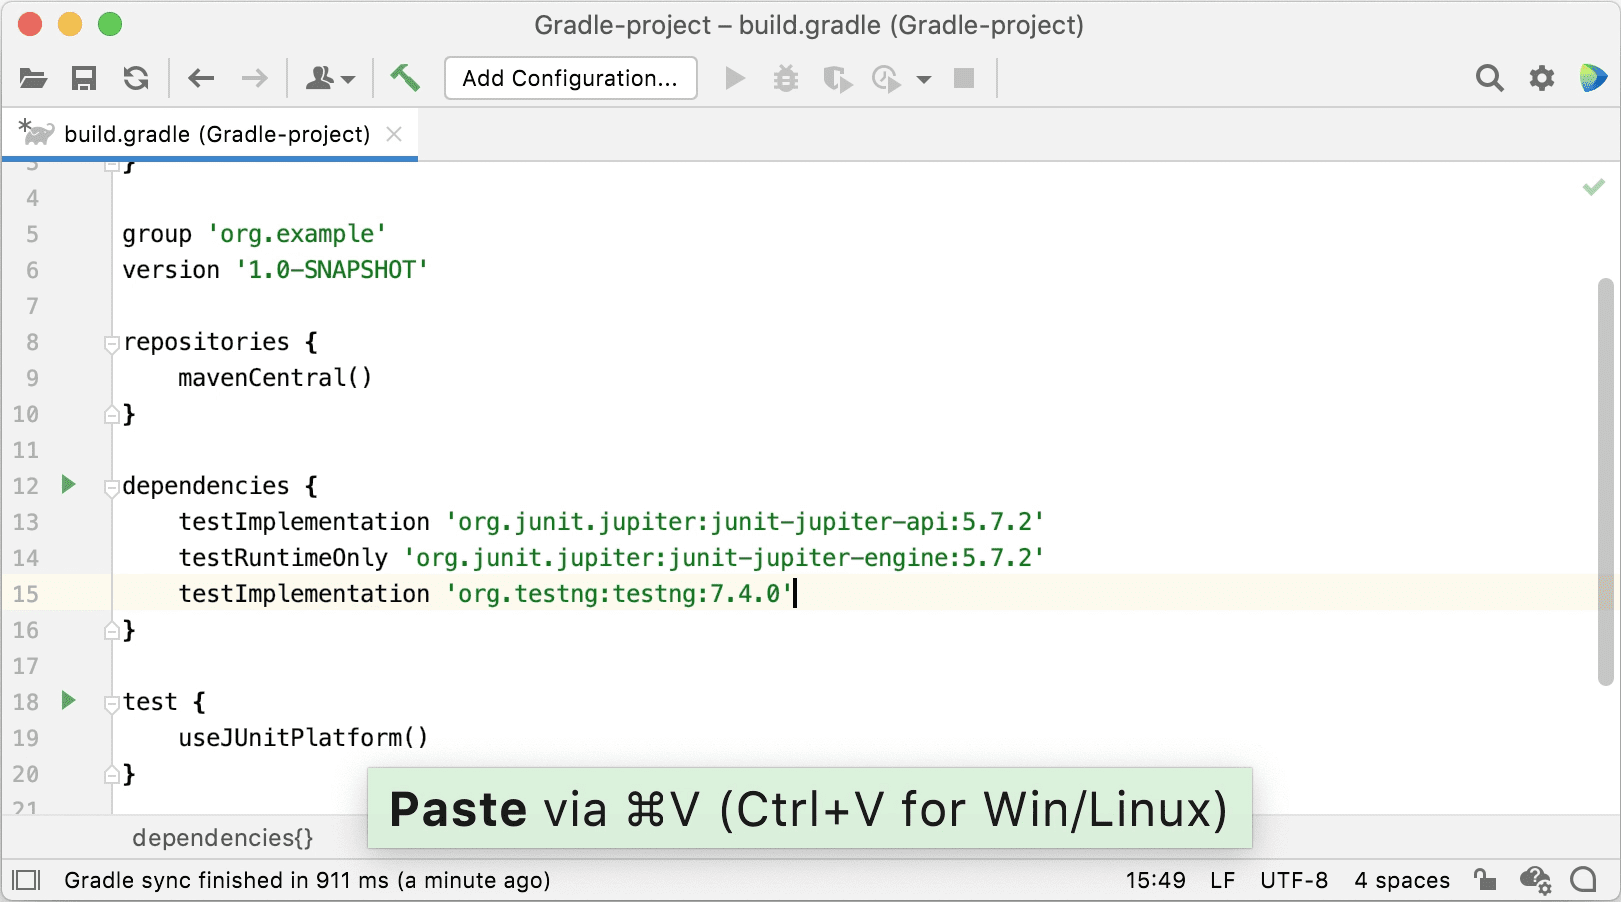
If you have a Maven dependency that you want to use in your Gradle project, you don’t need to search for this dependency in Gradle. Just copy this Maven dependency and paste it to your Gradle build file as is.
IntelliJ IDEA recognizes the format, automatically converts Maven XML to Gradle DSL, and pastes it as a Gradle dependency.

Paste Java code like a pro
You can paste Java classes to your project in a quick and convenient way.
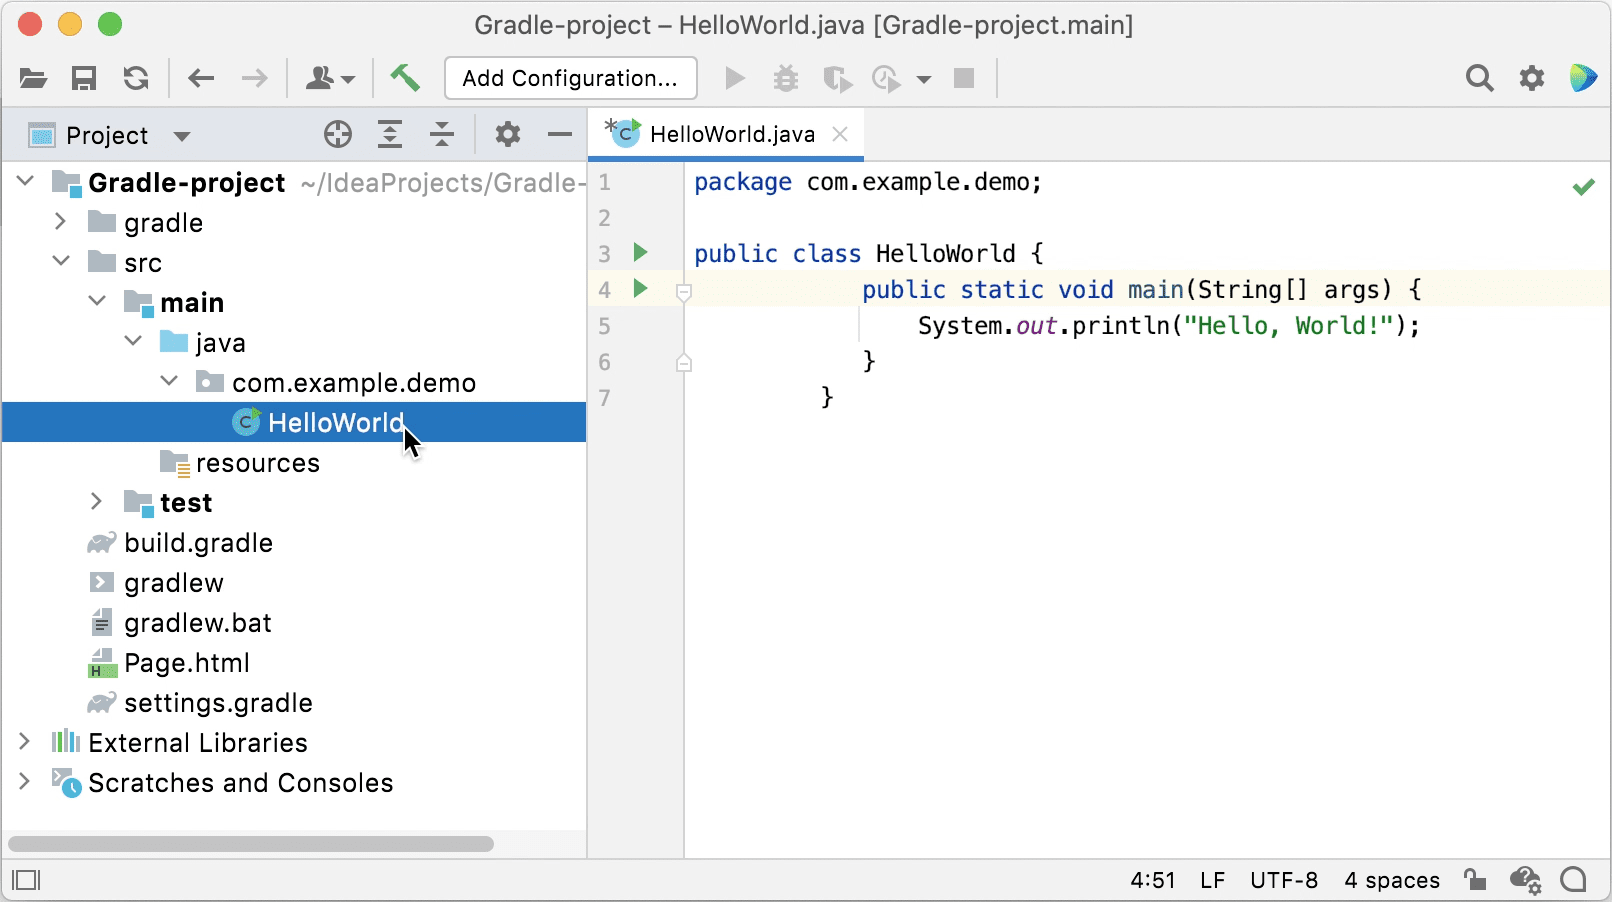
Copy the necessary class from elsewhere so that you have it in your clipboard. Then, switch to the IDE and press ⌘1 on macOS / Alt+1 on Windows and Linux to open the Project tool window.
In the tool window, select the folder to which you want to paste your code. Press ⌘V on macOS / Ctrl+V on Windows and Linux, or right-click the folder and select Paste.
IntelliJ IDEA automatically creates a file with the correct class name and puts the contents of the clipboard into that file.

Compare anything
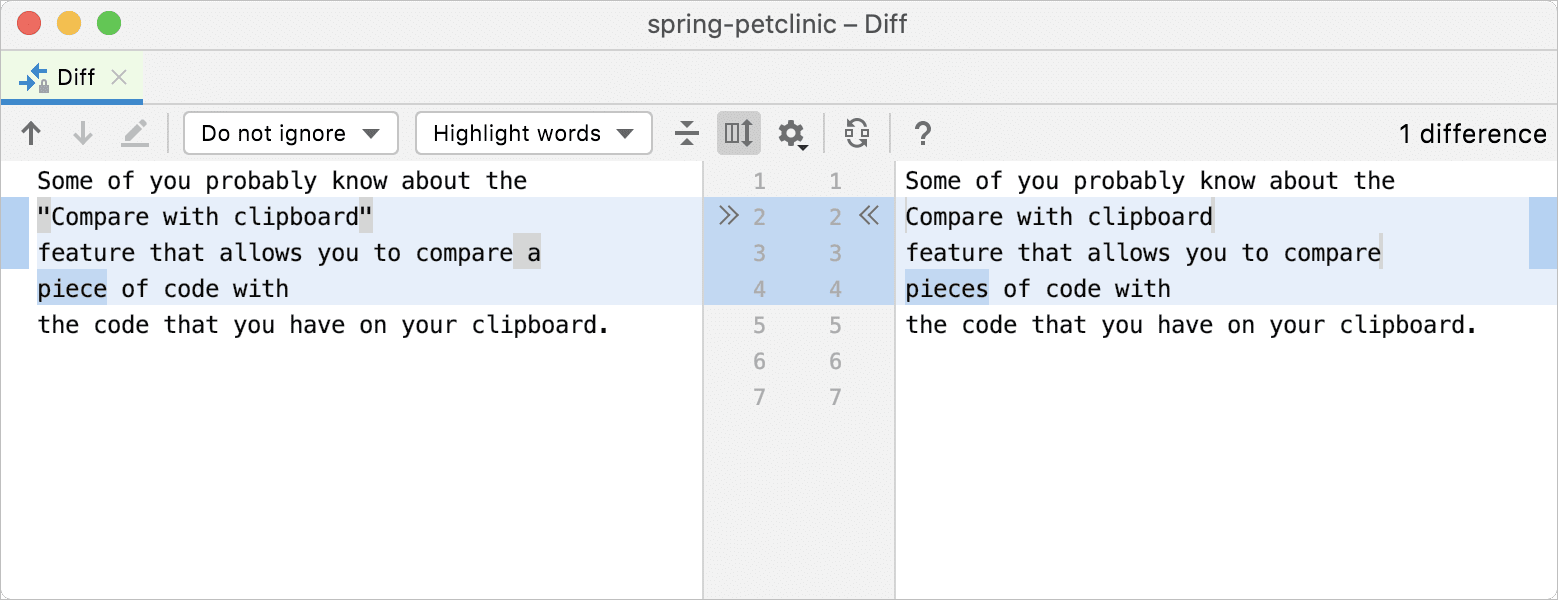
You may know about the Compare with Clipboard feature that allows you to compare the selected piece of code with the code that you have in your clipboard. IntelliJ IDEA has a similar feature that enables comparing two versions of almost anything.
Press ⇧⌘A on macOS / Ctrl+Shift+A on Windows and Linux to open Find Action and type ‘Open Blank Diff Window’. In the tab that opens, paste two versions of any code or text you like and see how they differ.

Sometimes, even the things that we know in-and-out can still hold surprises. We hope that one or two things we mentioned in this post managed to surprise you. Leave us a note in the comment section with the feature that you find the most head-spinning, and stay tuned for more awesome IntelliJ IDEA features!
Oh, and we’ve just released the brand new IntelliJ IDEA 2021.2, now available for download on our website. We’ve been working on it for the last several months and we’re excited to hear your feedback!
Subscribe to IntelliJ IDEA Blog updates


