How to Use Git With Jupyter Notebooks in DataSpell

If you’re like me and many other data scientists, you’re more of a casual user of Git and mostly use it to keep track of changes to your notebooks and share them with others. As I tend to work on the same project for months, I am always forgetting Git basics such as how to convert a local directory to a Git repository or sync with a remote repository. In addition, the format of a Jupyter notebook is not as straightforward as plain source code, meaning that tools which display the difference between notebook commits show the underlying JSON rather than rendering the notebook itself. This makes it hard to see the actual changes that were made to the code, markdown, and outputs.
Luckily, DataSpell has a rich range of functionality for working with Git, which means it’s easy to perform core tasks through the UI such as setting up a repo, adding and pushing notebooks, and viewing differences between commits of notebooks – without having to remember a single Git command!

Convert existing workspace into Git repository and sync with a remote repository
In this first section, we’ll explore how to convert an existing workspace in DataSpell into a Git repository, and then sync it with a remote repository on Github.
To get started, we create a new workspace by selecting File | Attach Directory…, and then by creating a new folder called my-versioned-workspace. To convert this workspace into a Git repository, we first need to right-click on this workspace and select Enable VCS Integration.

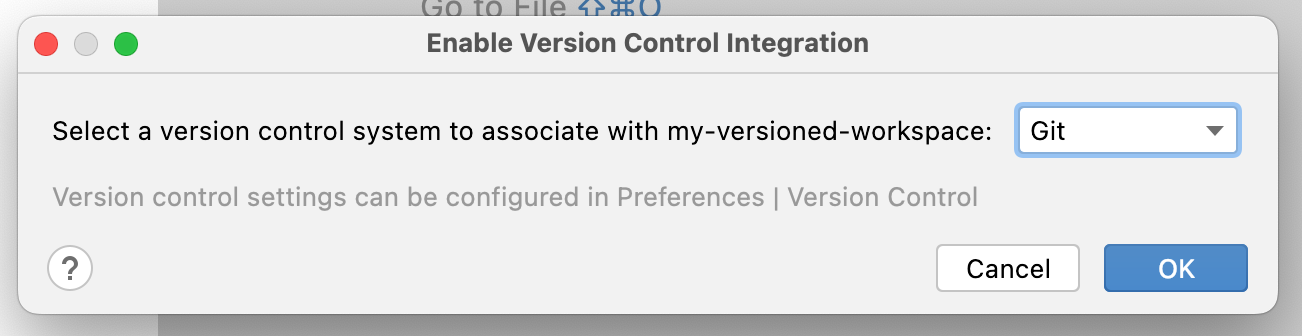
Following this, we will be presented with a popup window where we will be asked to select which version control system we want to use. In our case, it’s Git, so we select this option from the dropdown menu and click OK.
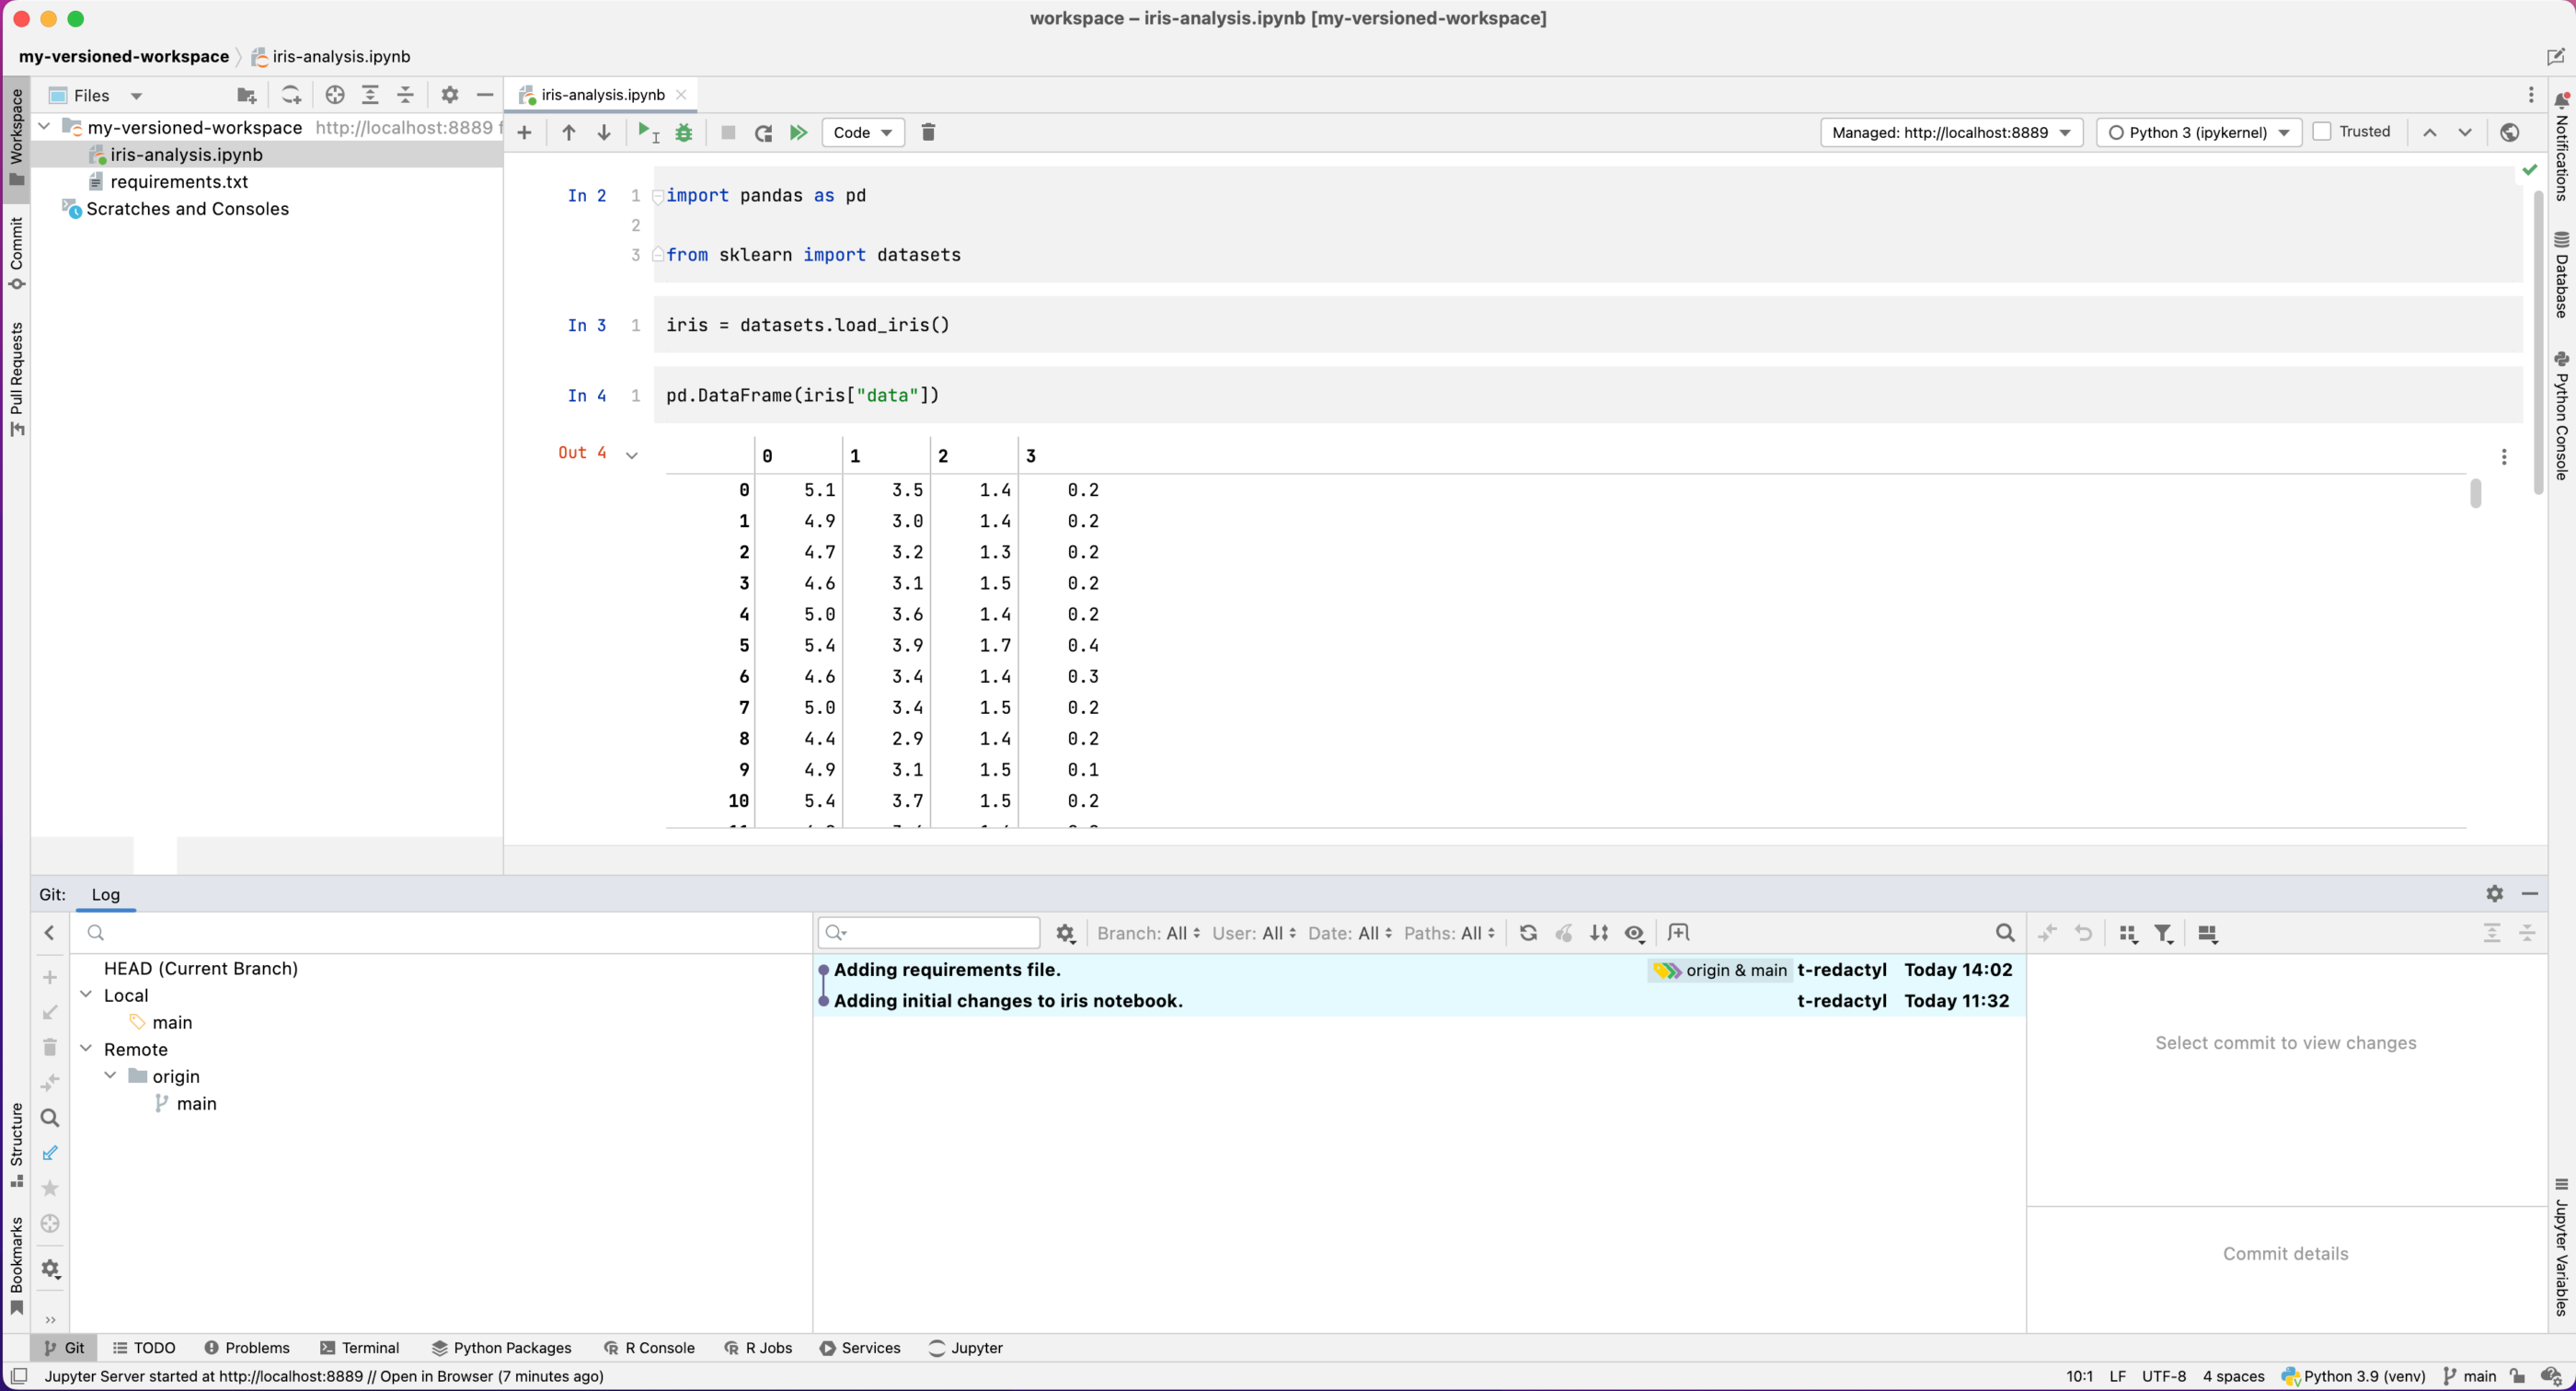
We can now start adding files to our newly created Git repository. Let’s create a notebook called iris-analysis.ipynb. So far, in this notebook we’re reading in the Iris Dataset from scikit-learn and displaying the features in a pandas DataFrame.
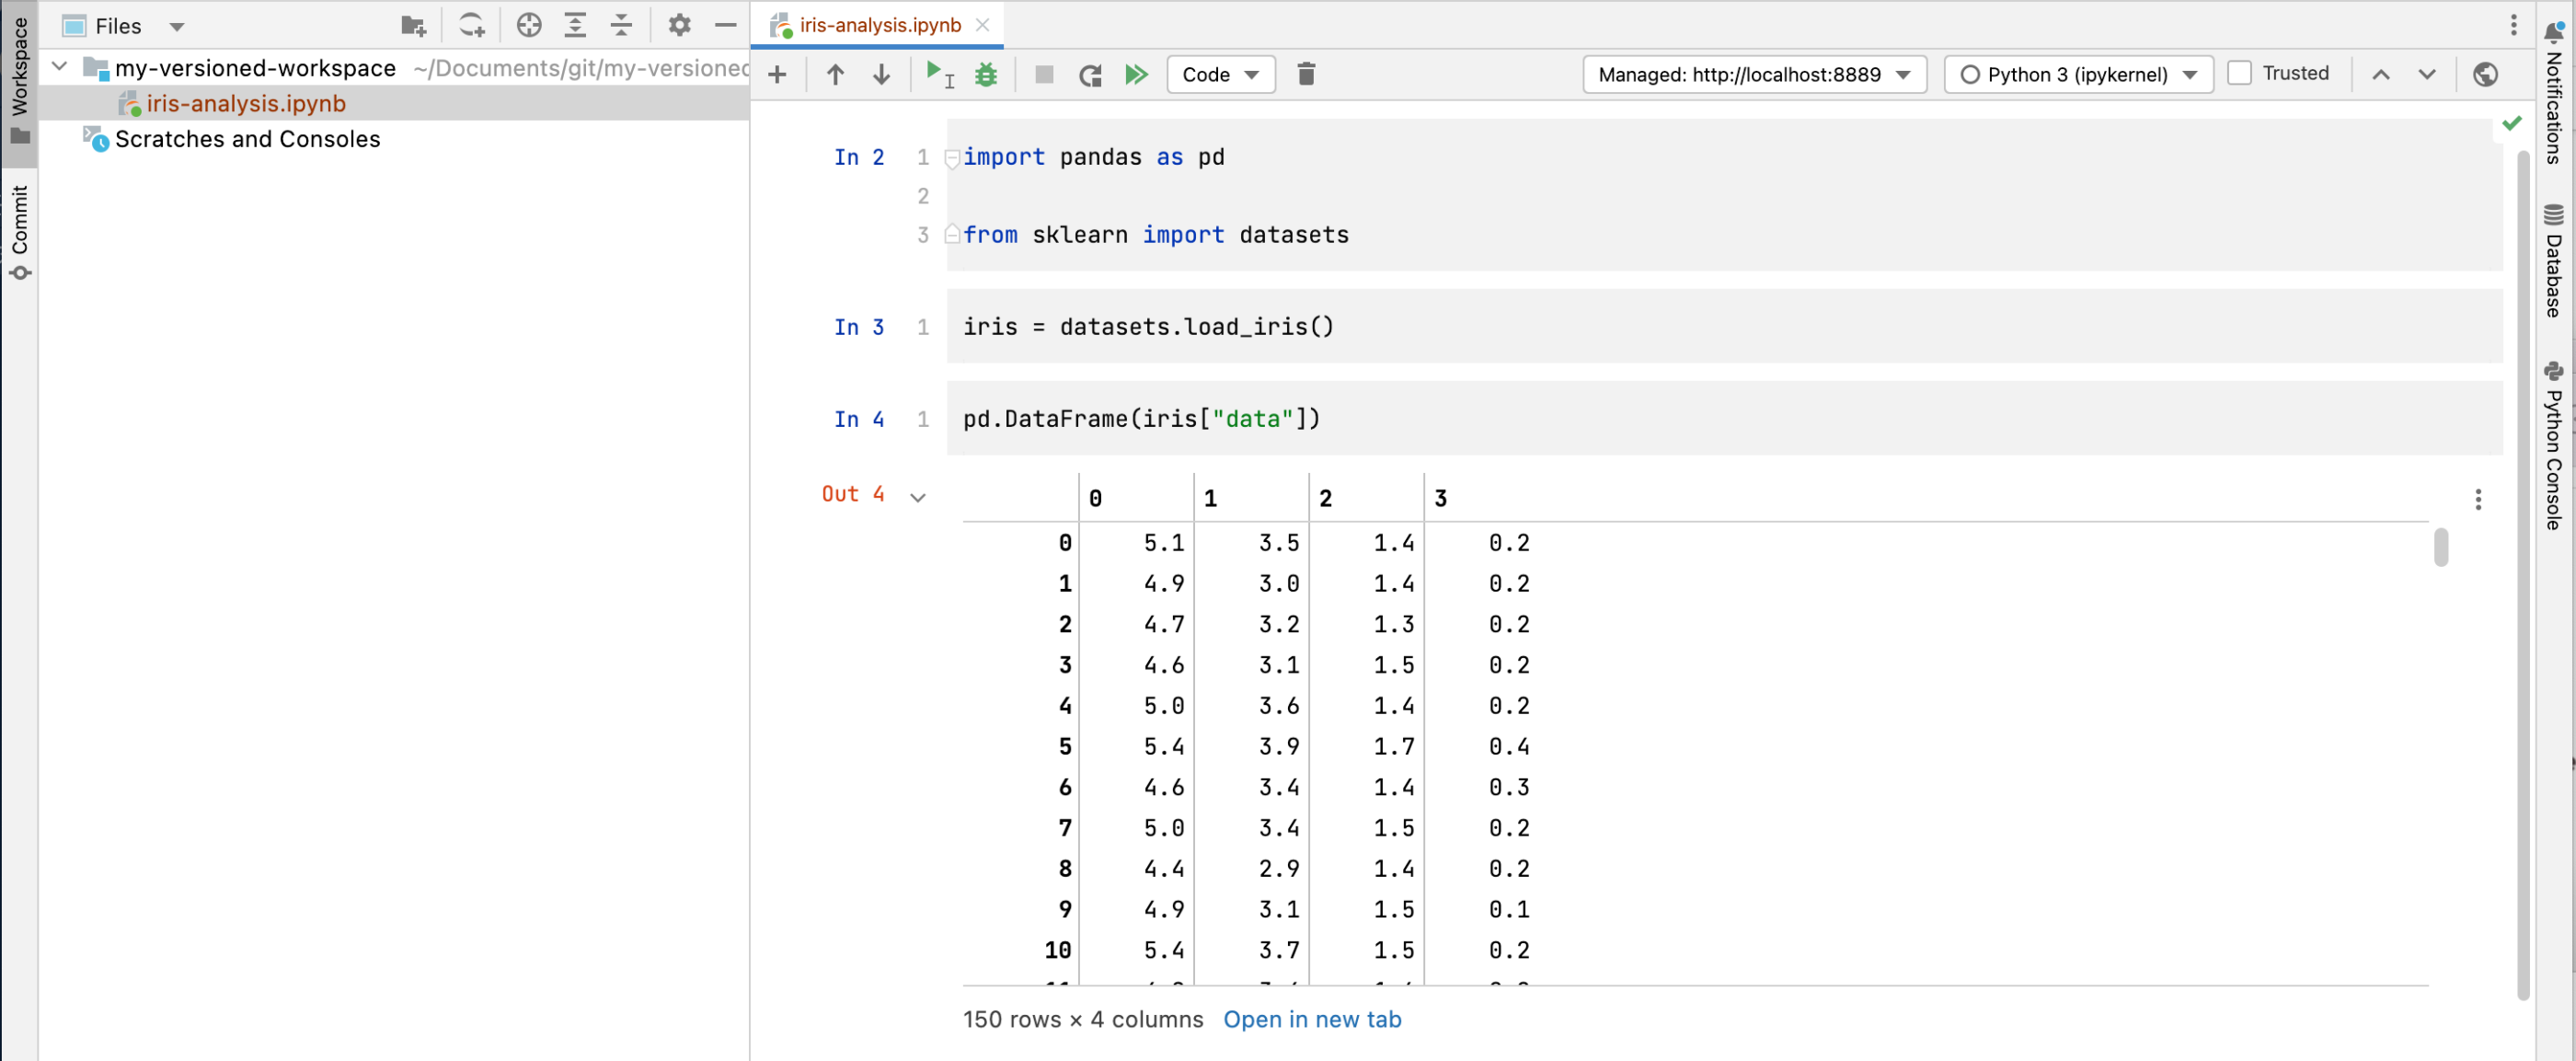
You can see that iris-analysis.ipynb is displayed in red in our workspace, which indicates that this file is not yet being tracked by Git. Let’s commit the changes we’ve made to our notebook so far. Go to Git | Commit… , and DataSpell’s Commit tab will be displayed.
Expanding the Unversioned Files directory, we can see our notebook displayed with a checkbox next to it. We can also see two other files that DataSpell has generated, modules.xml and my-versioned-workspace.iml. These contain metadata about how DataSpell is configured and our attached workspace directory. It is optional whether you add them to VCS, but as we’re only interested in versioning the code in our notebook we will not track these in our repository.
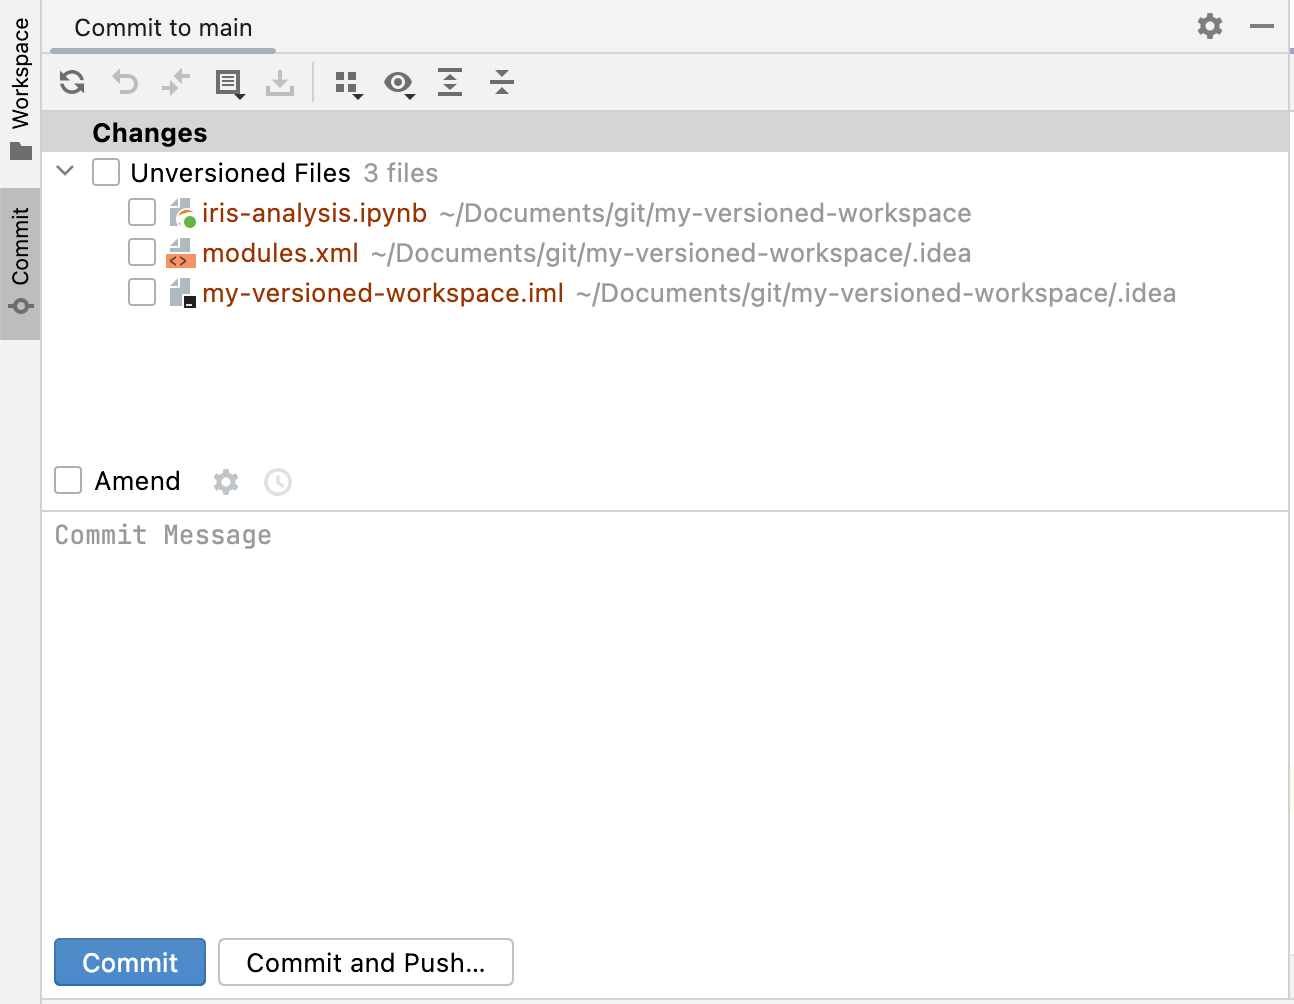
Select the checkbox next to iris-analysis.ipynb and then write a commit message in the window below.
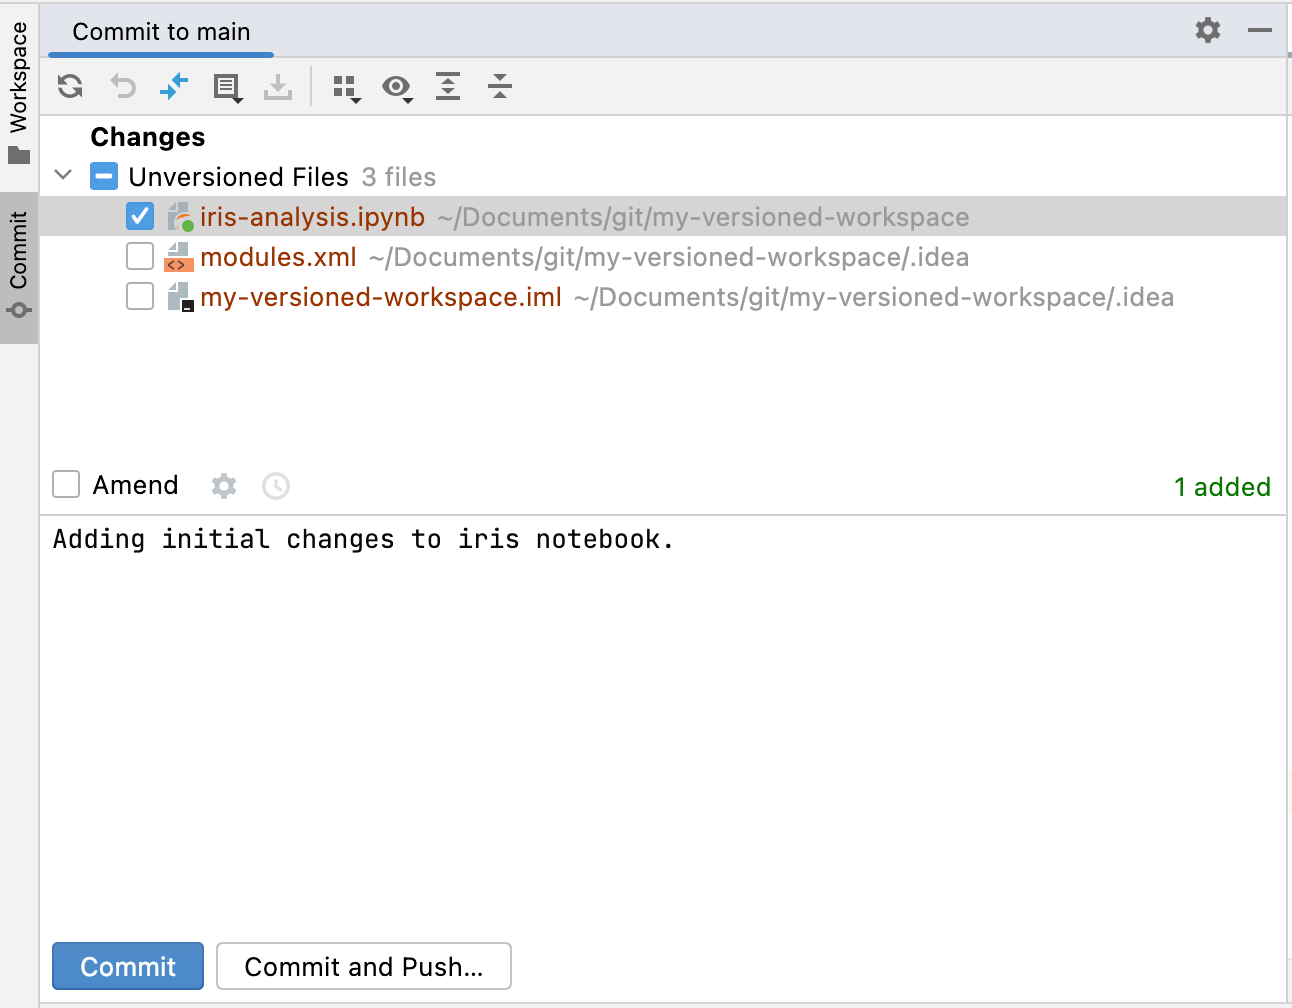
We have two options at this stage. If we just want to commit the changes locally, we can select Commit. However, as we want to sync these changes with a remote repository, we’re going to select Commit and Push…. In the subsequent popup window, select Define remote, where we will be prompted to enter the URL of our remote repository.
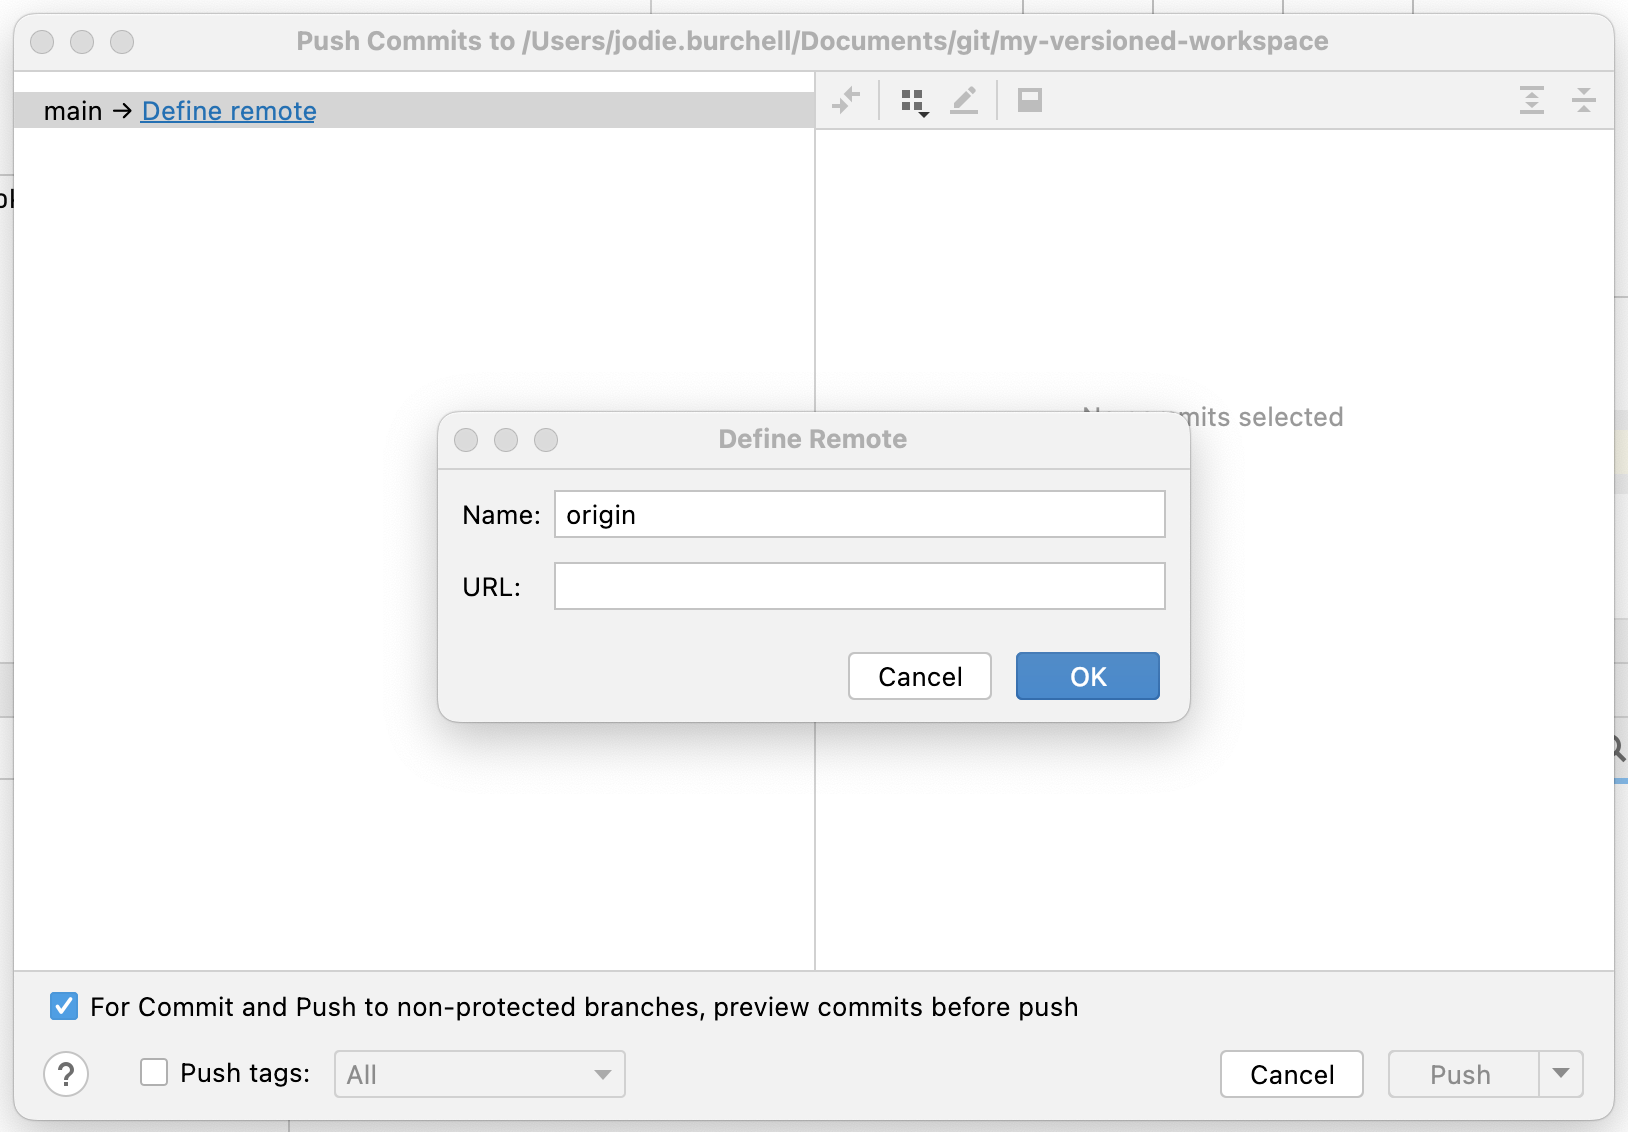
Where do we get this URL from? In our case, we’re going to use GitHub, so we simply navigate over to our GitHub account and create a new repository (instructions on how to do this are here). After the repo has been created, we will have the option to copy the repository’s URL as shown below (make sure you select the HTTPS option).

We can then paste this URL into the box and then select OK, and then Push.
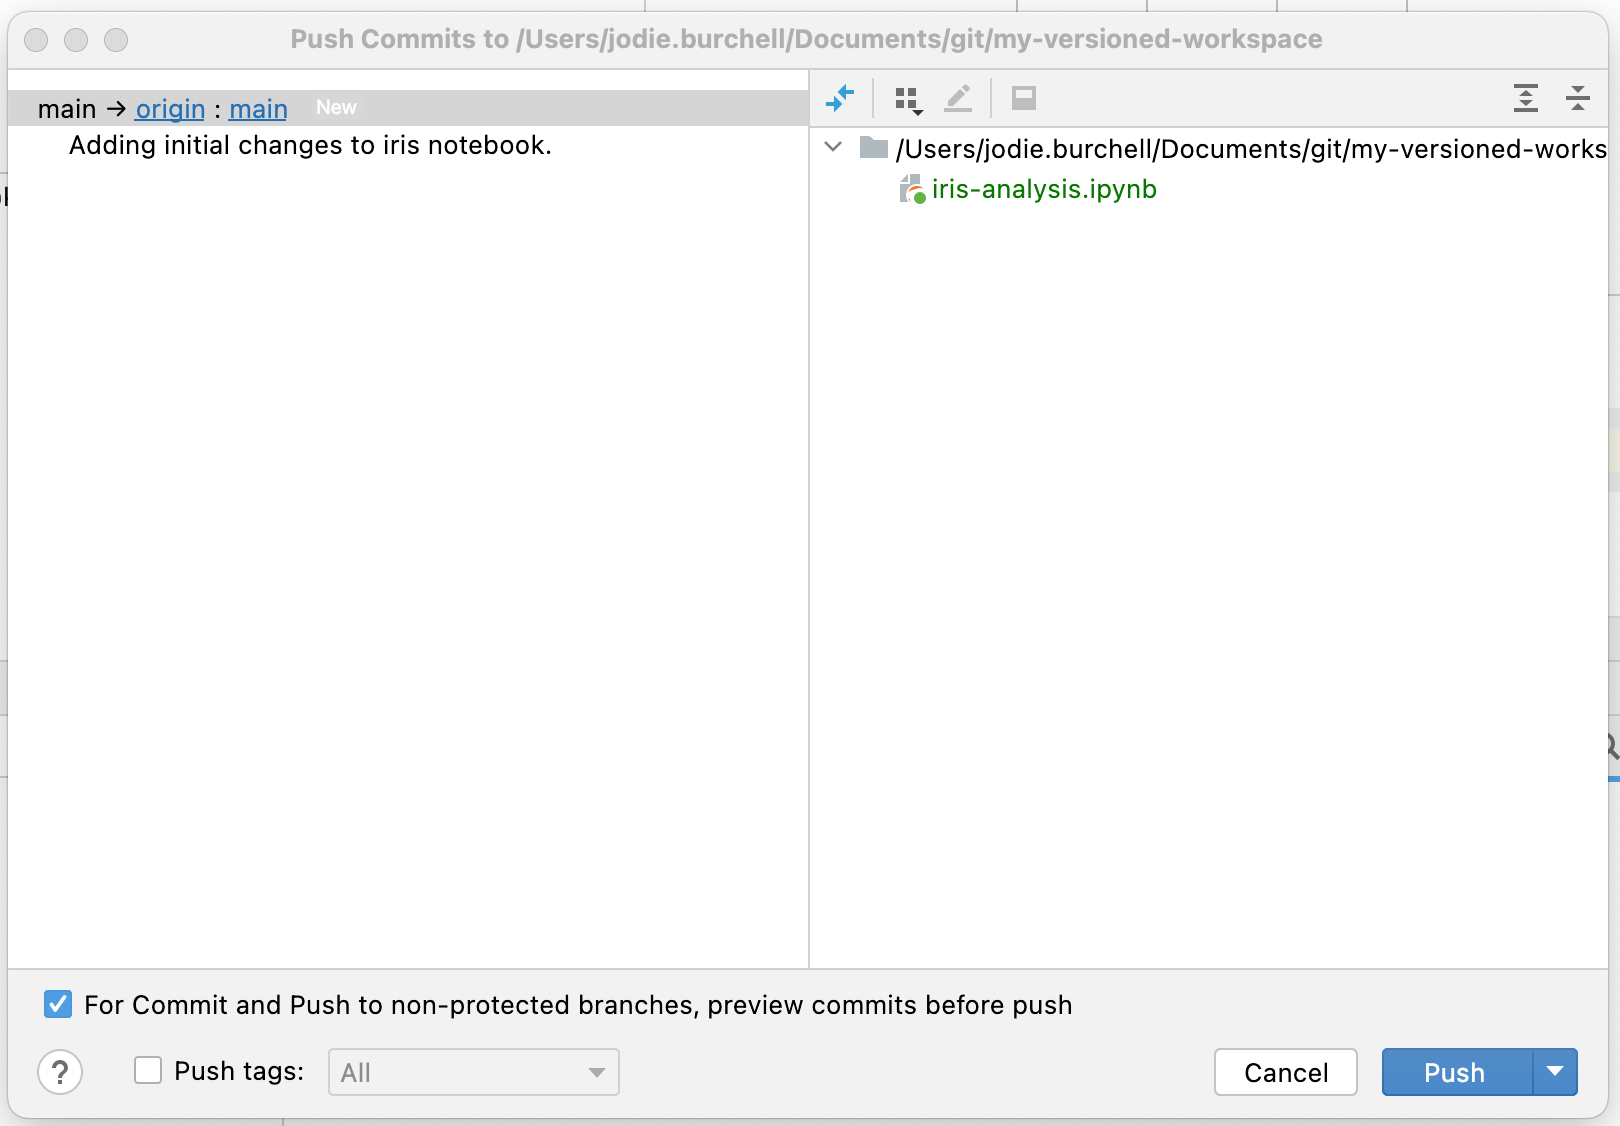
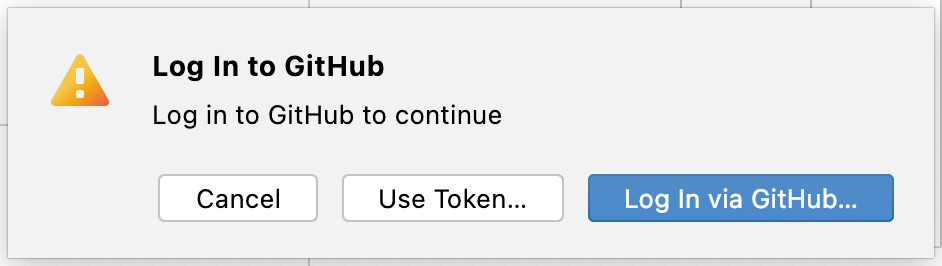
You may now be prompted to log in to GitHub before you can push. The easiest option is to select Log In via GitHub…, where you will be directed to a browser window and asked to Authorize in GitHub. Following this, DataSpell will be able to push the changes made to your local repository to the remote you just created. However, if you prefer, you can also carry out this authorization using an authorization token, by selecting Use Token….
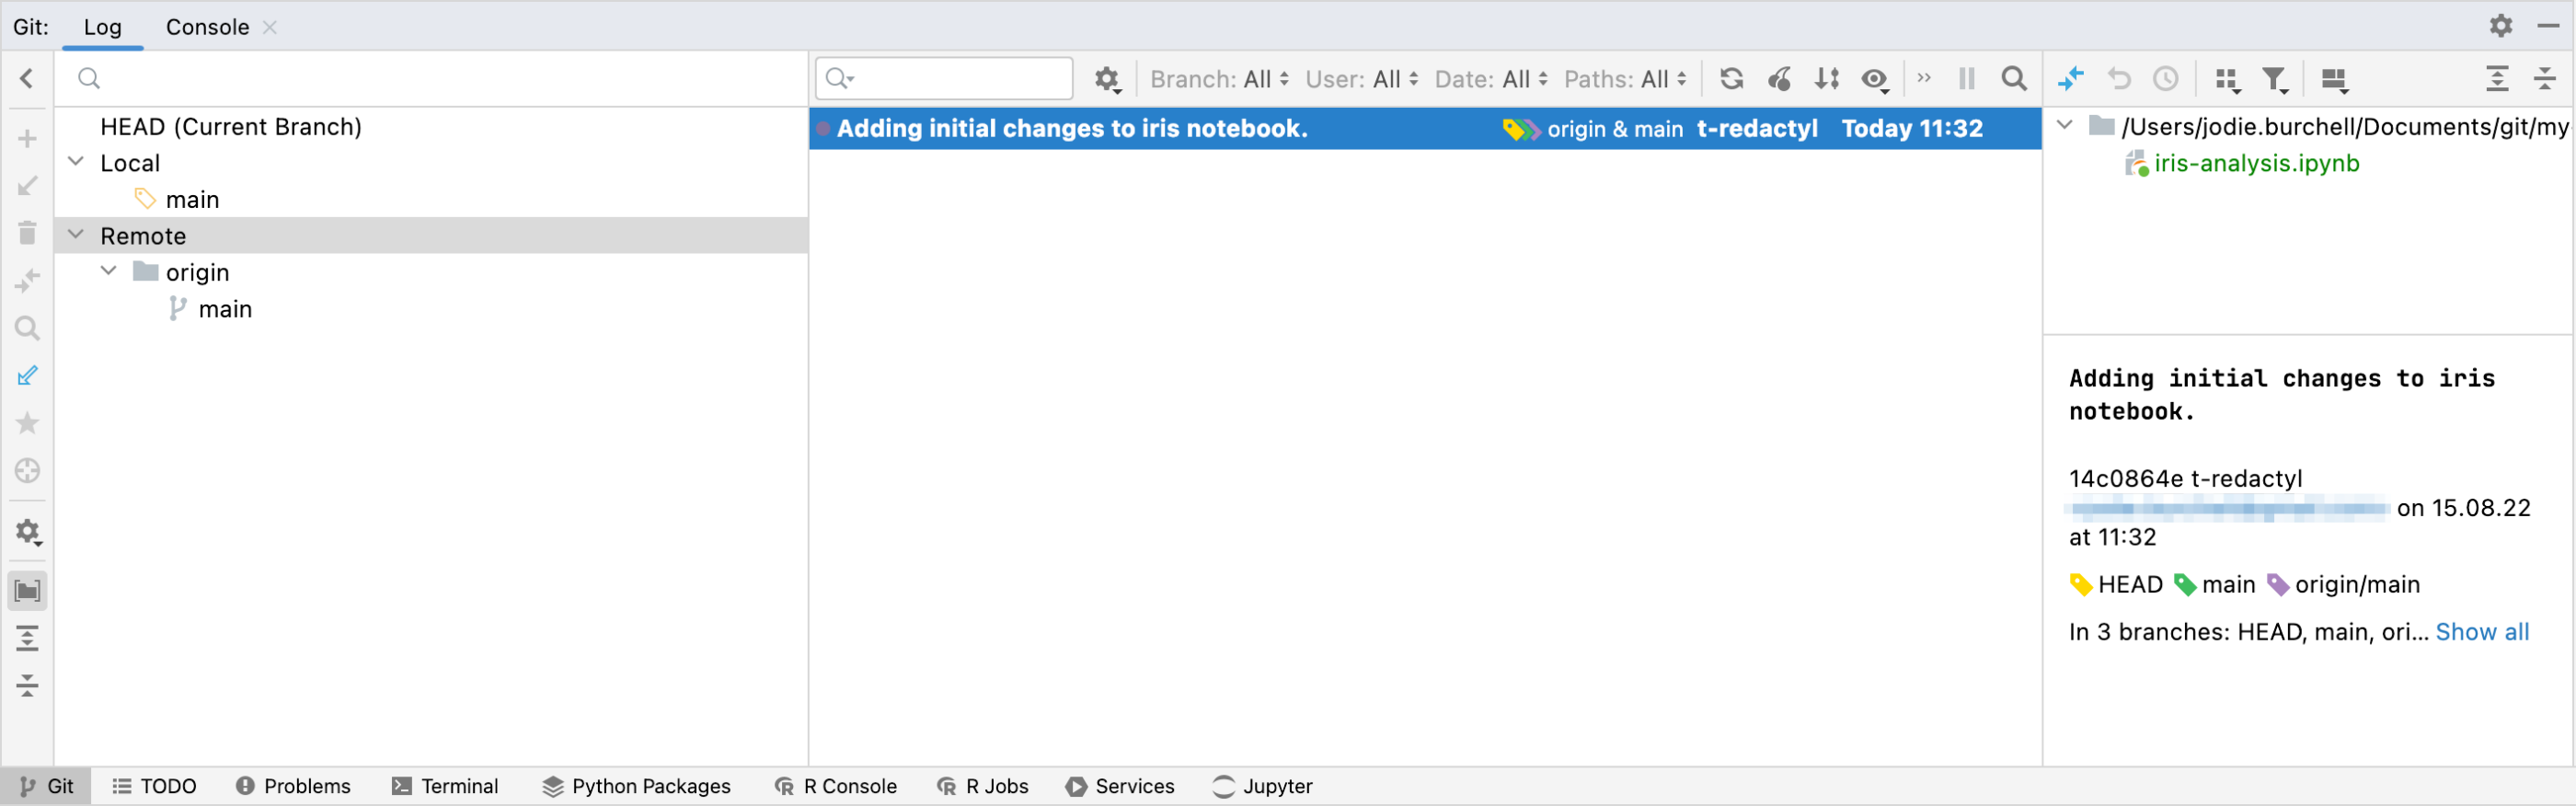
Navigating to the Git tab within DataSpell, we can see that the commit has been made and pushed to the main branch both locally and remotely. We’ve now successfully converted our local workspace into a Git repository which is synced with a remote repository on GitHub.
Clone a remote repository as a local workspace
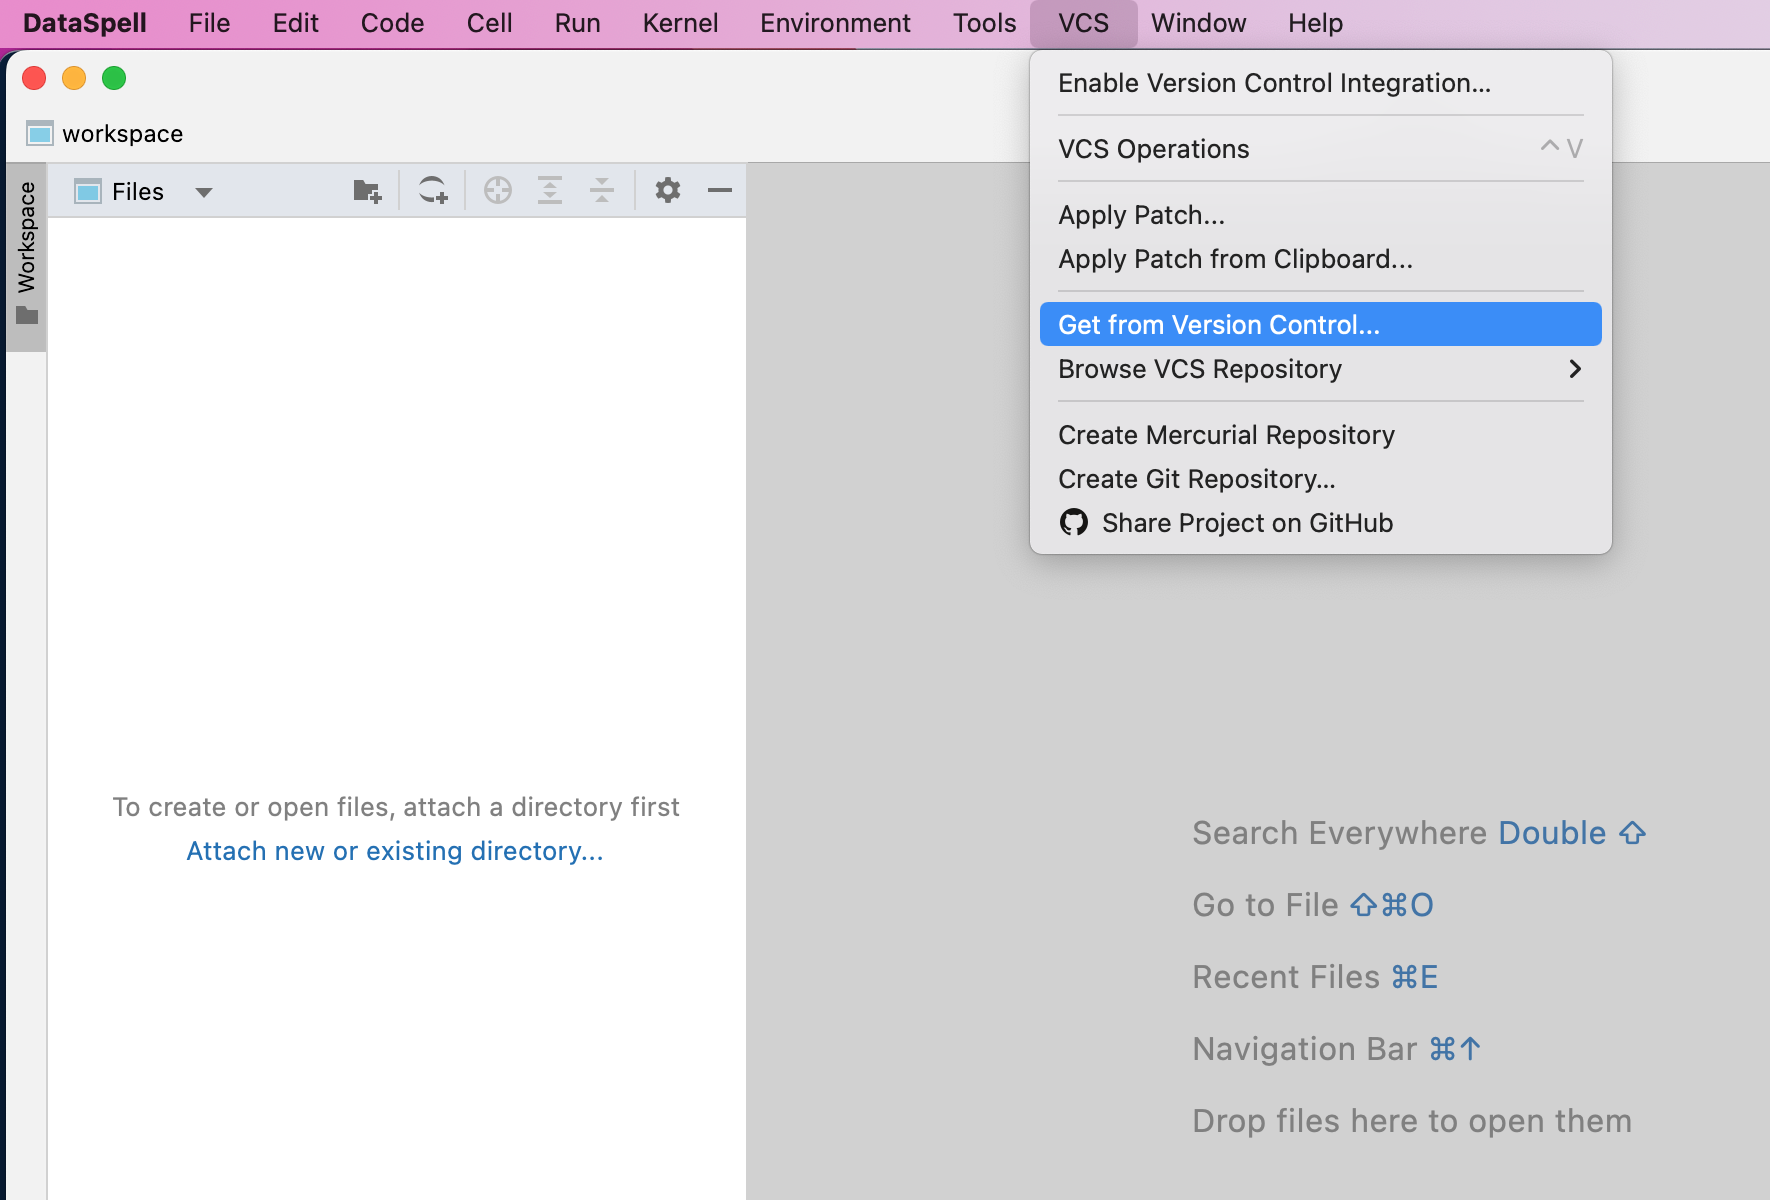
What if we have the opposite situation? Let’s say we want to work with an existing remote repository. To get started, we need to go to VCS | Get from Version Control, or if you have already opened a local Git repository as a workspace, go to Git | Clone.
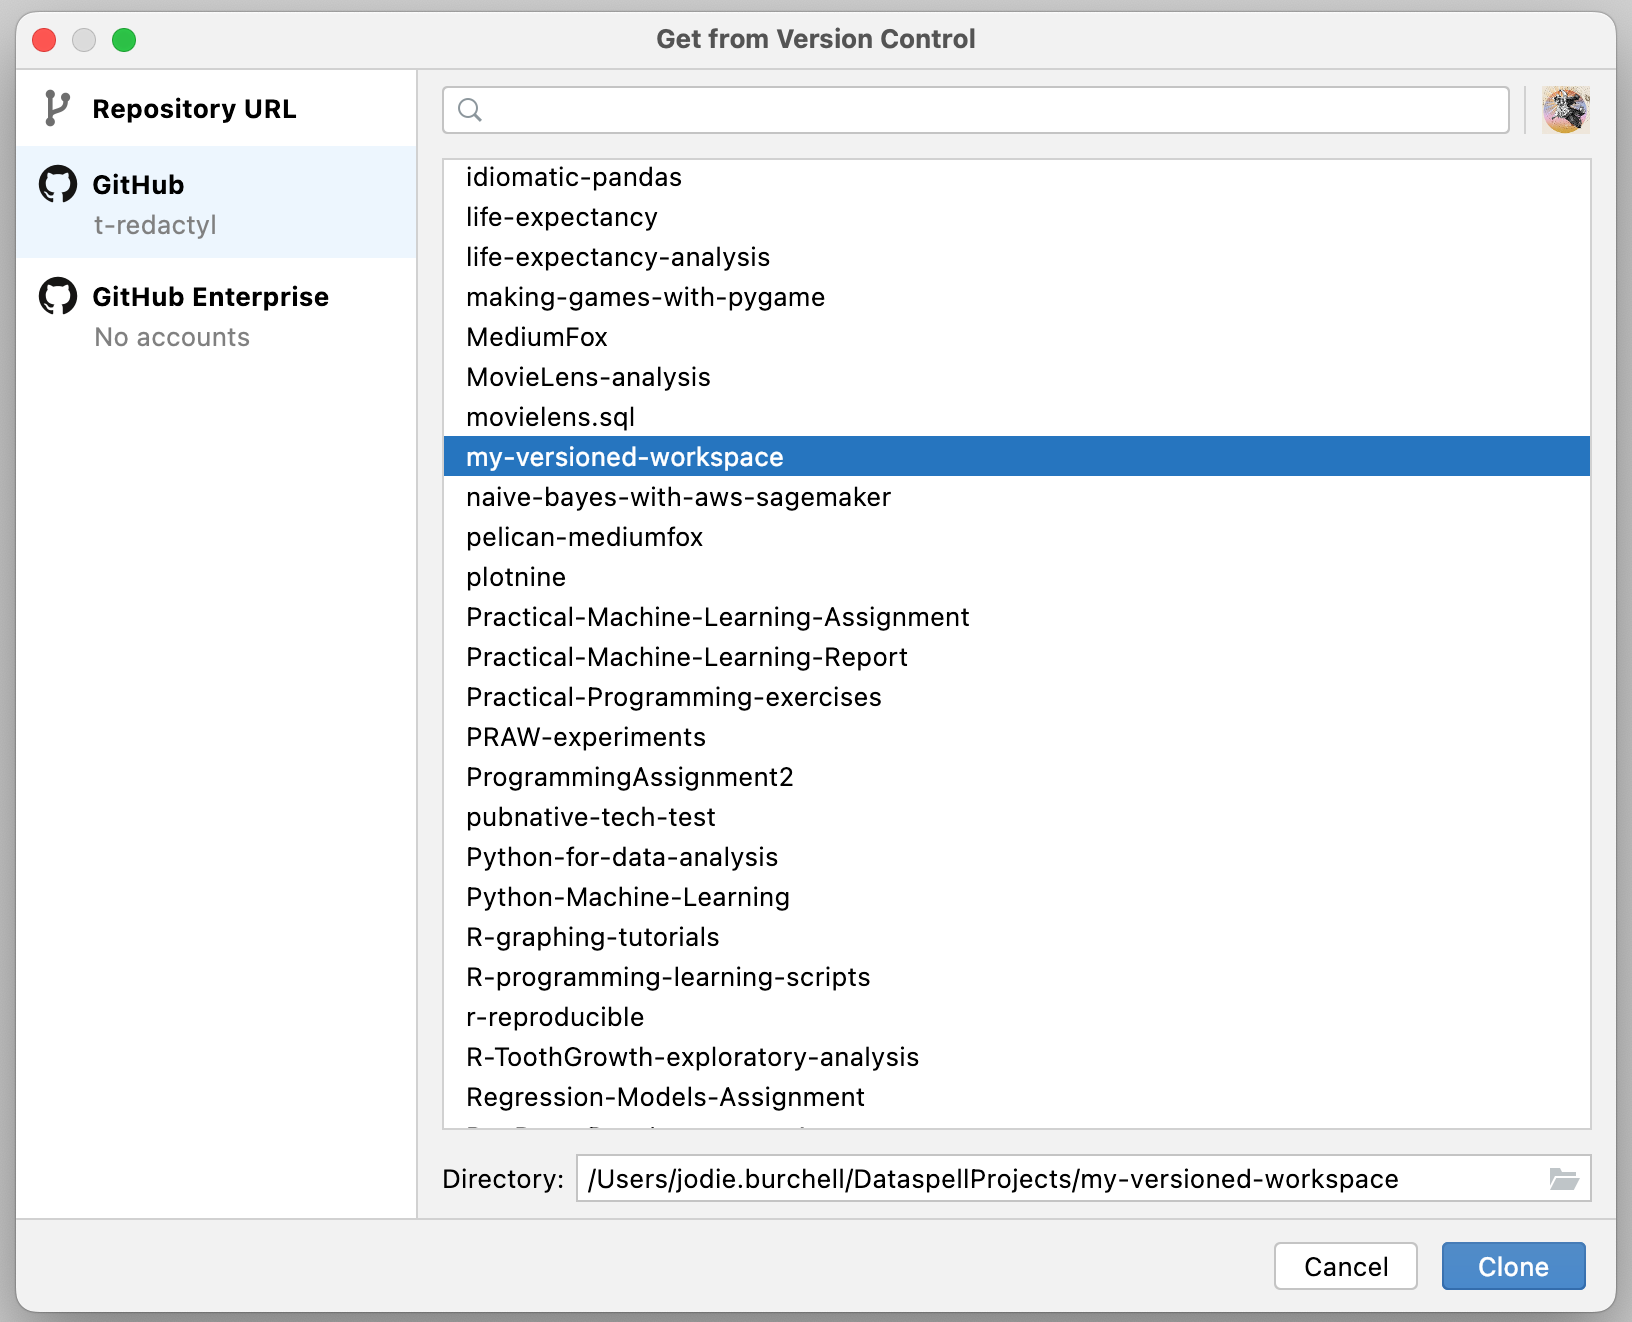
We then get a popup which allows us to clone our remote repository, either by using the repository’s URL or through logging into GitHub. If you’d like to use the repository URL, copy the URL from GitHub as we did in the previous section and paste it in the box provided under the Repository URL tab. Conversely, if you’d like to log in to GitHub to be able to access all of your remote repositories, select Log In via GitHub under the GitHub tab to sync your account with DataSpell. If you haven’t already logged in to GitHub through DataSpell, you’ll be redirected to a browser window where you should select the option Authorize in GitHub. Once you have completed the authorization, you can select your remote repository from the provided list. Also note that, at the bottom of this popup in the Directory box, you have the option to change the location where DataSpell clones this repository. DataSpell will clone to the DataspellProjects directory by default, but you may want to keep your work in another location.
One final trick: If the remote repository contains a requirements file, we can recreate the repository’s environment locally. First, create a new virtual environment by following these directions. Make sure that this virtual environment is your current interpreter by checking that it is displayed in the bottom-right corner of DataSpell.
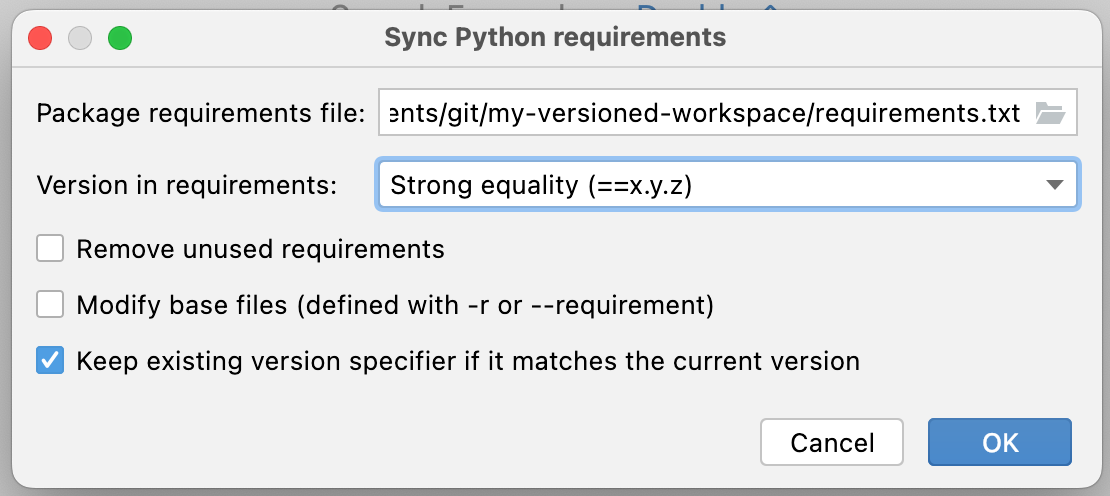
Next, go to Tools | Sync Python Requirements…, and in the Package requirements file window, select the repository’s requirements file. In the Version in requirements dropdown menu, select how you want the package versions to be handled. If you know that you want the exact versions that are contained in the requirements file, select Strong equality. However, if the requirements file might be out of date, you may want to update the dependencies by selecting Greater or equal or Compatible version.
Once you’ve imported your dependencies from the requirements file, you’ll see the requirements file open and a prompt to either Install requirements or Ignore requirements. Select Install requirements, and the remote repository’s dependencies will be installed in your local virtual environment.

Pulling, committing, and viewing changes between notebook versions
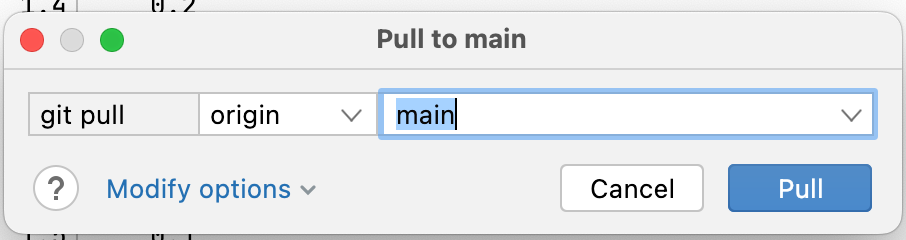
Let’s say that a collaborator has made some changes to our Iris analysis by tidying up the pandas DataFrame and adding a seaborn pairplot. If we want to pull those changes, all we need to do is go to Git | Pull…, and we will then be prompted to select which branch we want to pull our changes to. As we only have a main branch, we’ll leave this unchanged.
You can see the changes between DataSpell before and after pulling. We can clearly see the changes to the Jupyter notebook, with the pairplot now displayed as part of the output. We can also see the additional commit has been added to the Git tab. Finally, we can see that our iris-analysis.ipynb notebook file is now displayed in blue, indicating that the file has been modified.

Let’s say that we want to make our own change by fitting a decision tree to the data. If we want to commit this change, we simply need to go to Git | Commit… and we’ll again get the Commit tab displayed. This time, as our notebook is already being tracked, we can see it under the Changes directory.
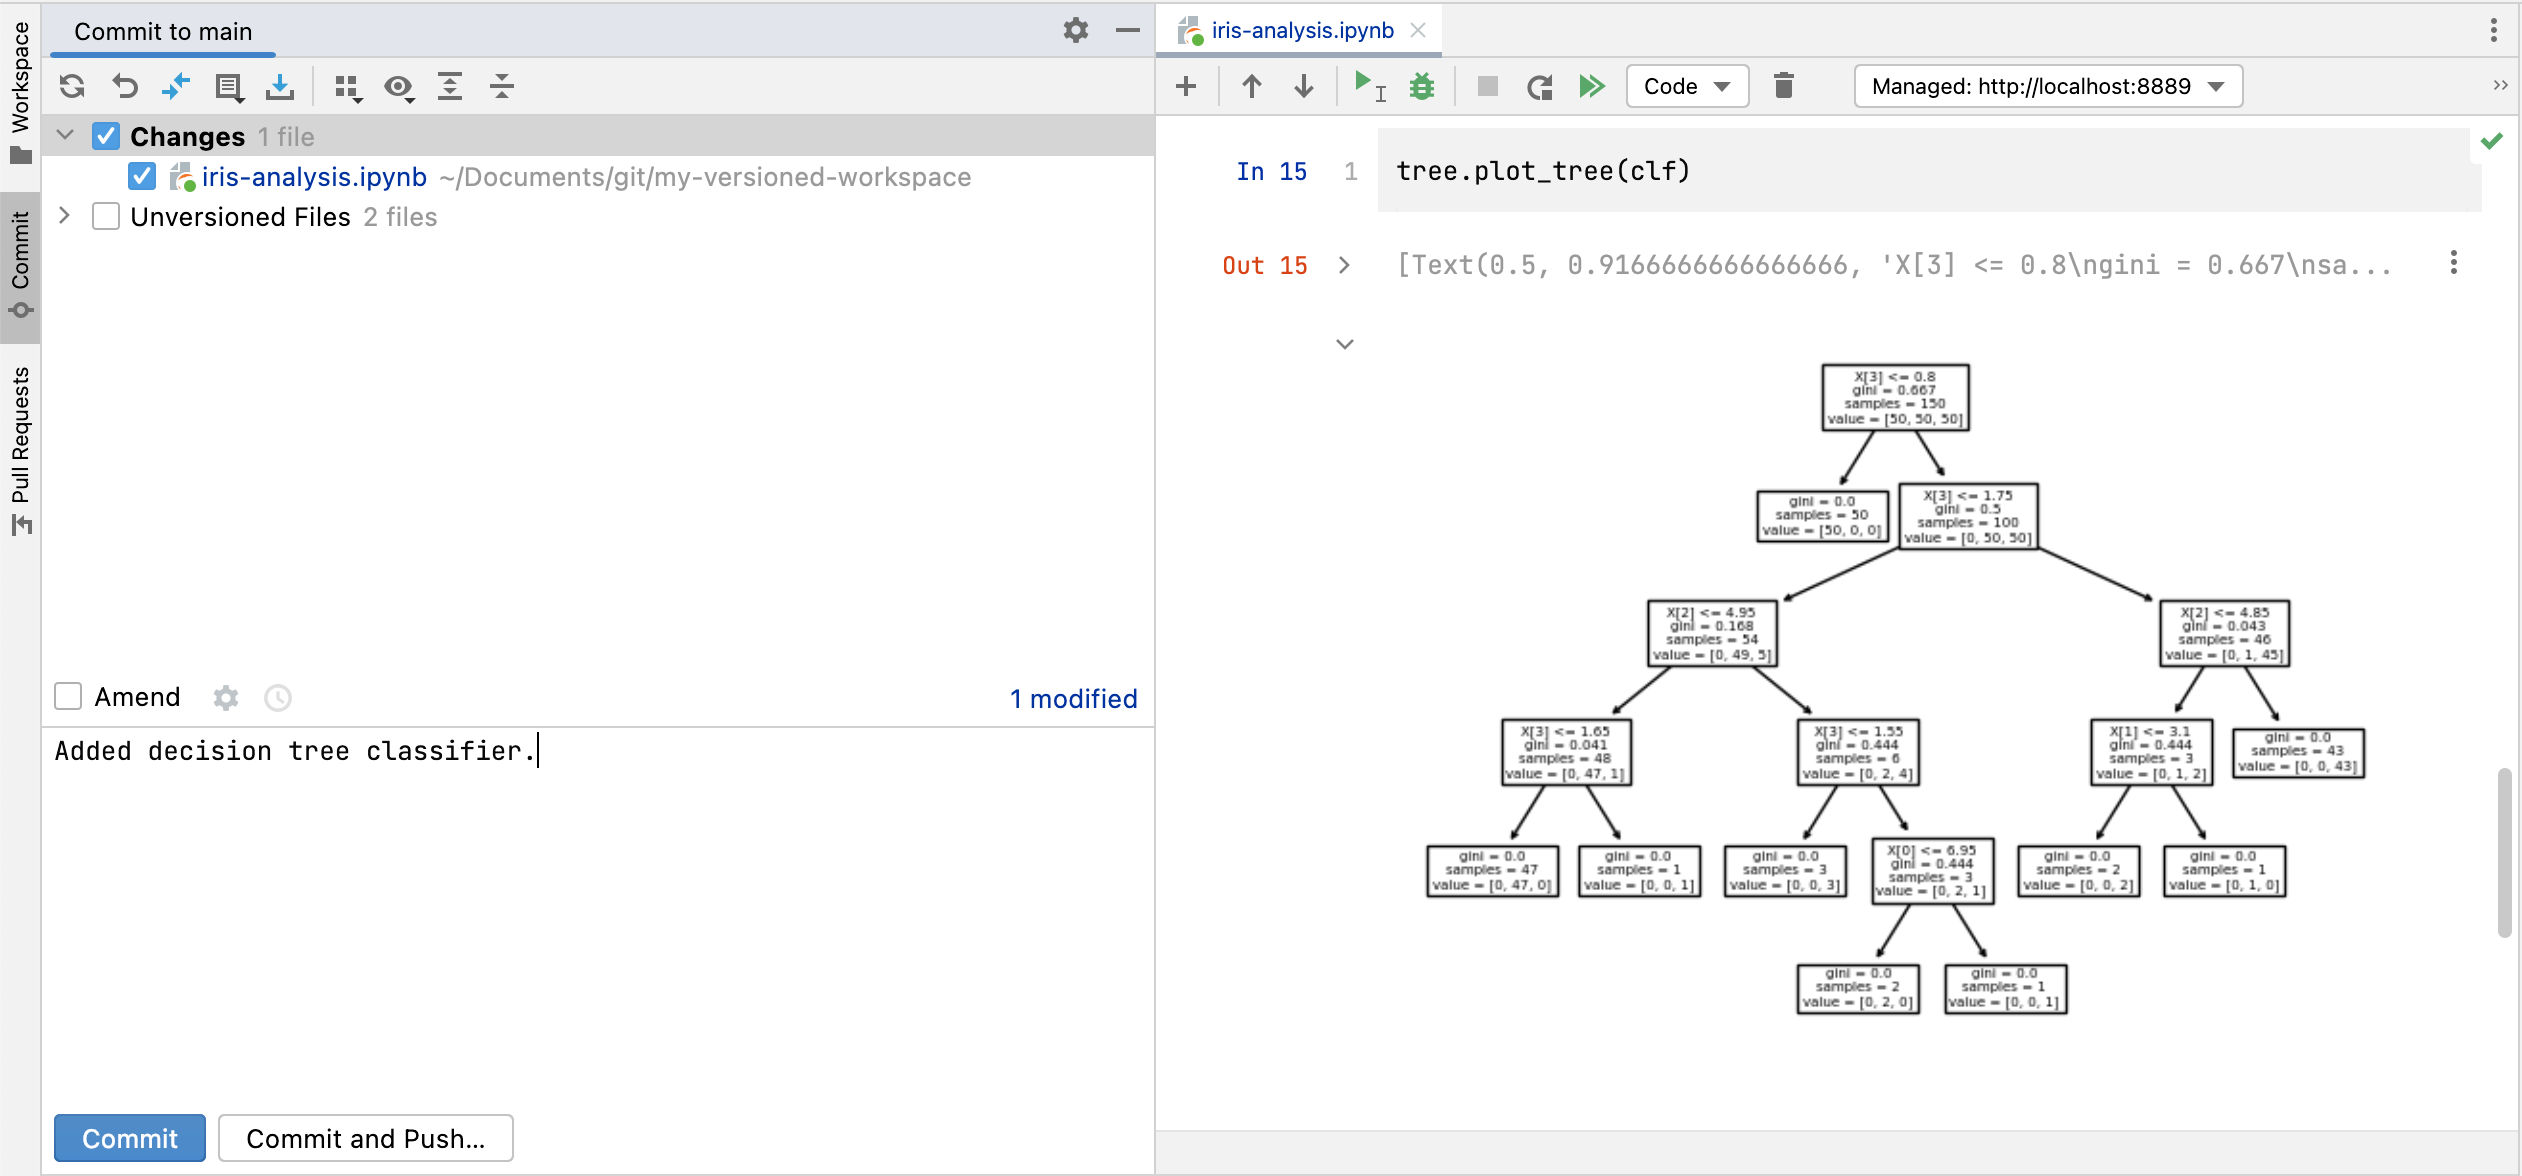
Again, we simply need to select Commit and Push… in order to add, commit, and push our changes to the remote repository.
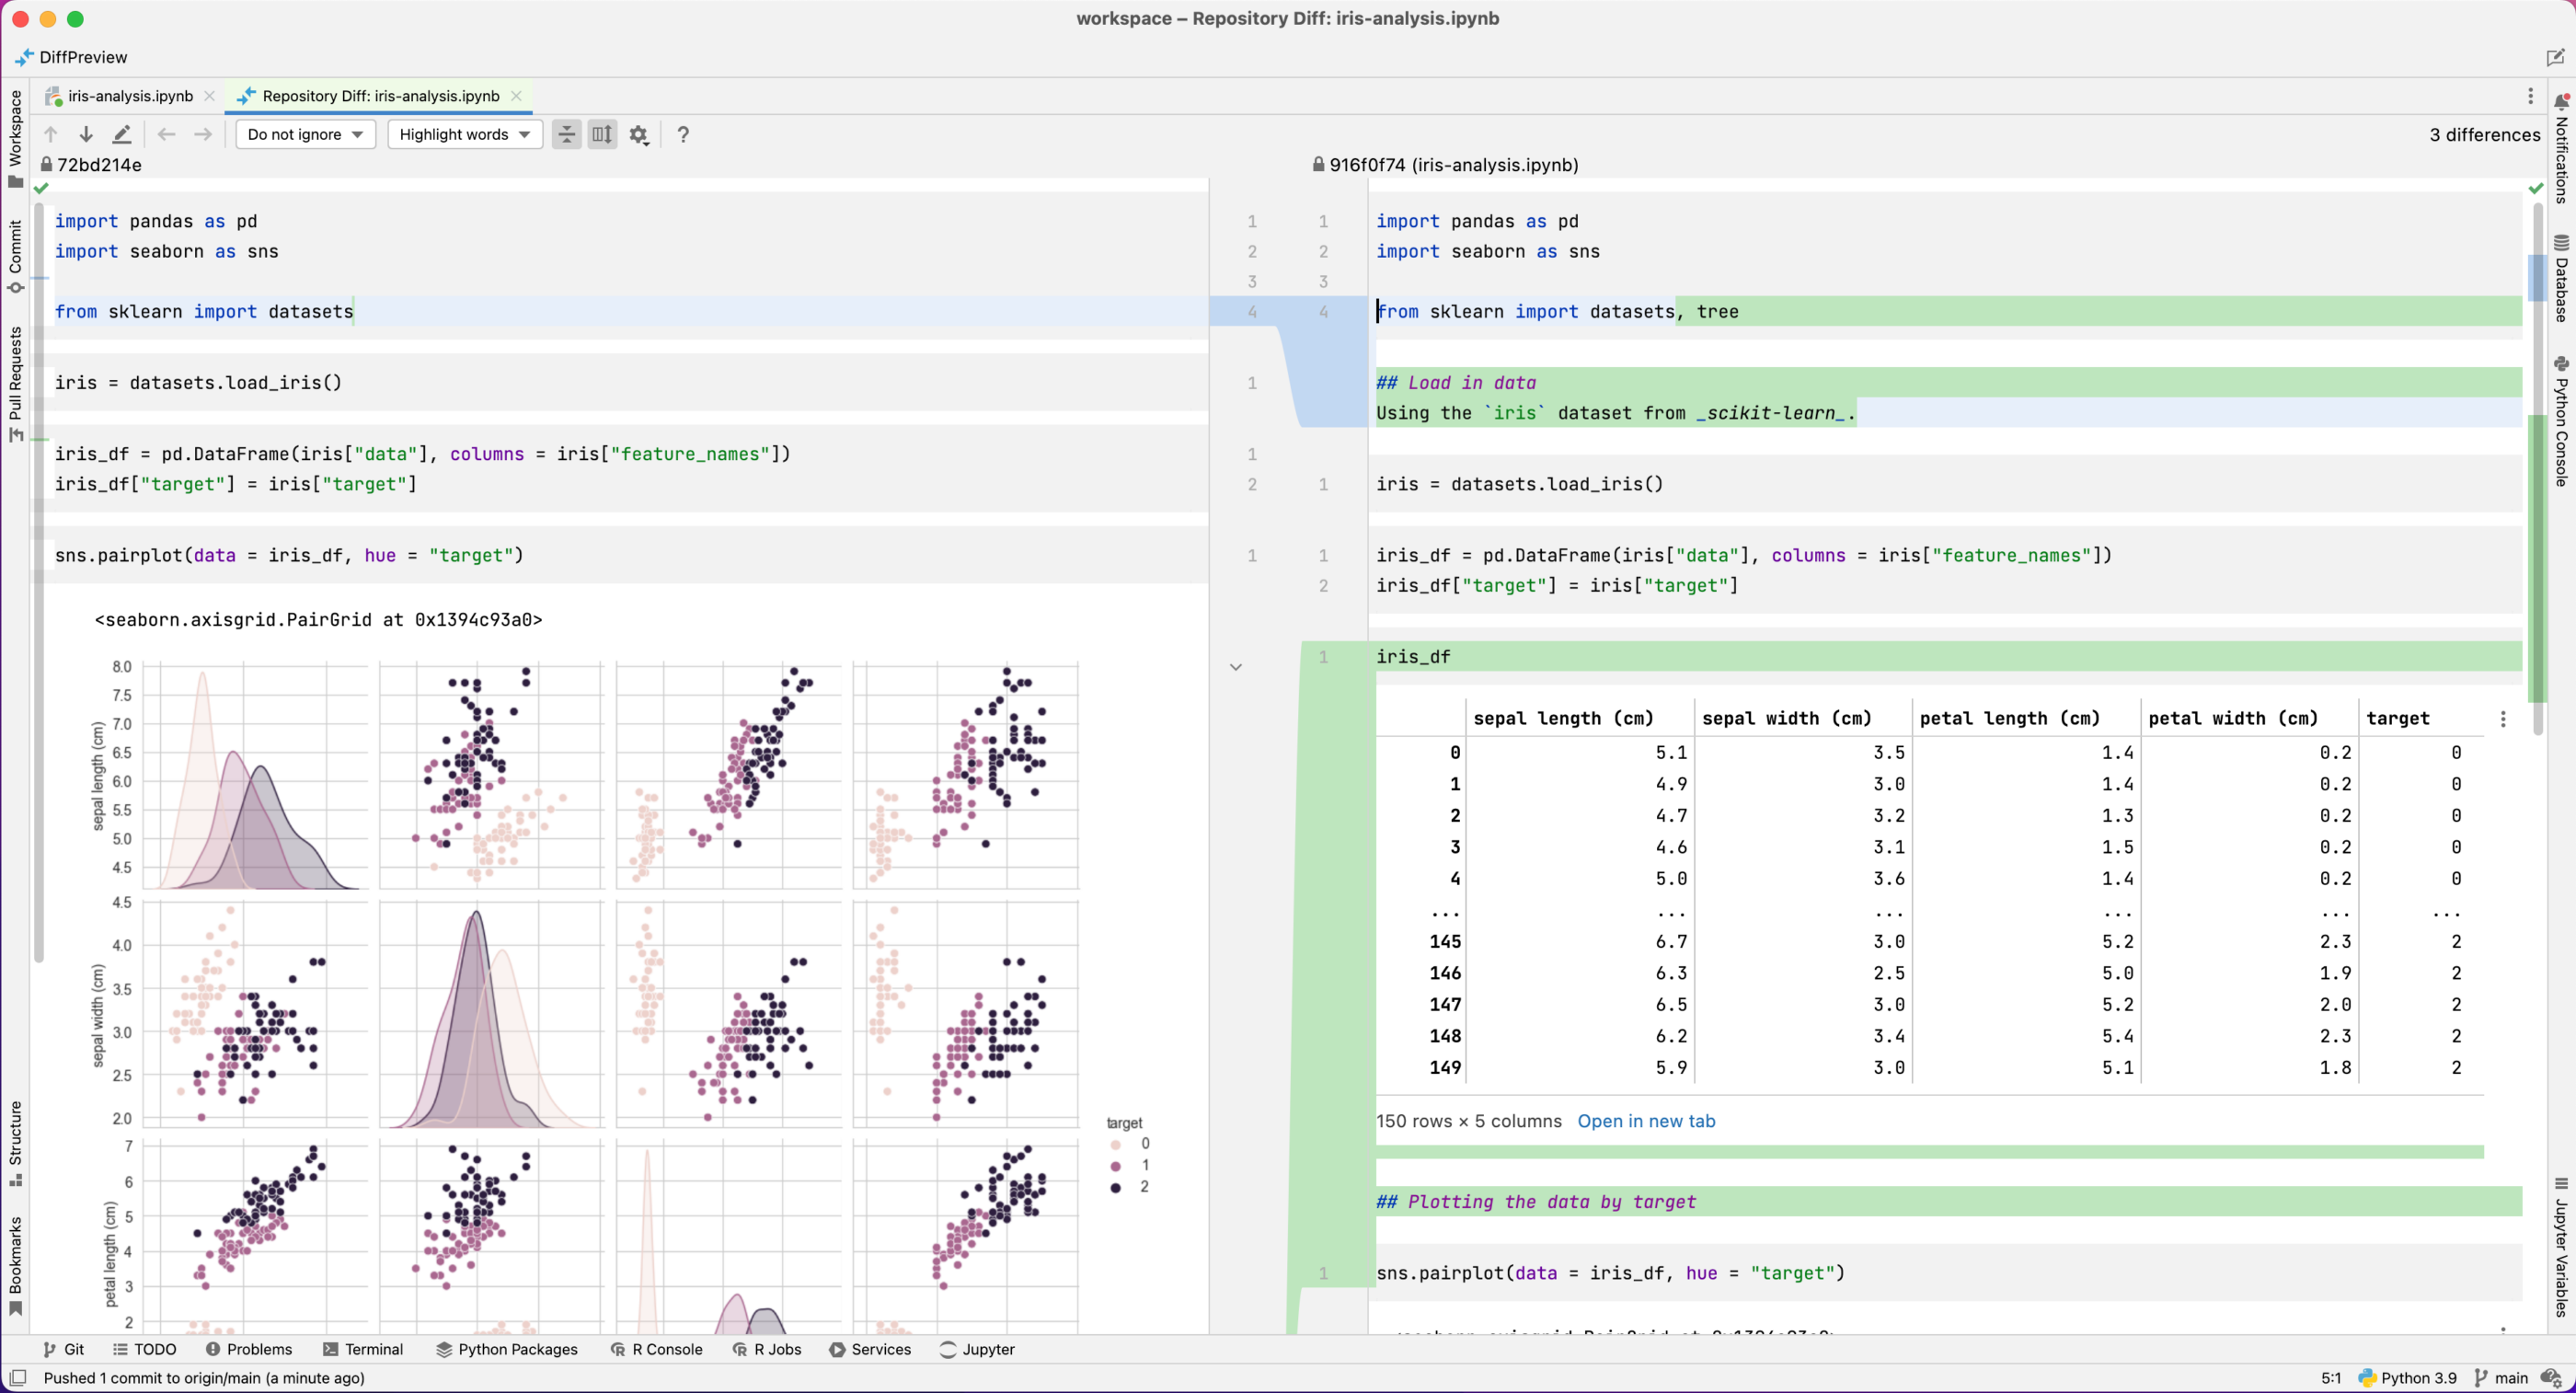
Finally, a very nice feature of Git in DataSpell is the ability to see the differences between commits to Jupyter files as fully rendered notebooks. In order to do this, go to the Git tab and select any commit, then click on the Show Diff button as shown below.

I have selected the latest commit, therefore Show Diff displays the changes between the latest commit and the one prior. As the notebooks are rendered, you can see differences between commits easily. It’s clear that we’ve changed the code in the first cell by adding an additional import and that we’ve added markdown cells. Additionally, important outputs such as charts and DataFrames are rendered, meaning that you can compare differences between not just the notebook inputs but also the results that were produced.
I hope this post has given you some useful tips and tricks on how DataSpell can make using Git with Jupyter notebooks easier and faster – and maybe now you won’t have to google “how to initialize a git repository” for the hundredth time!