Working with Go Modules

In this blog post, we’ll explore how to work with Go Modules when creating new Go projects or working with existing ones.
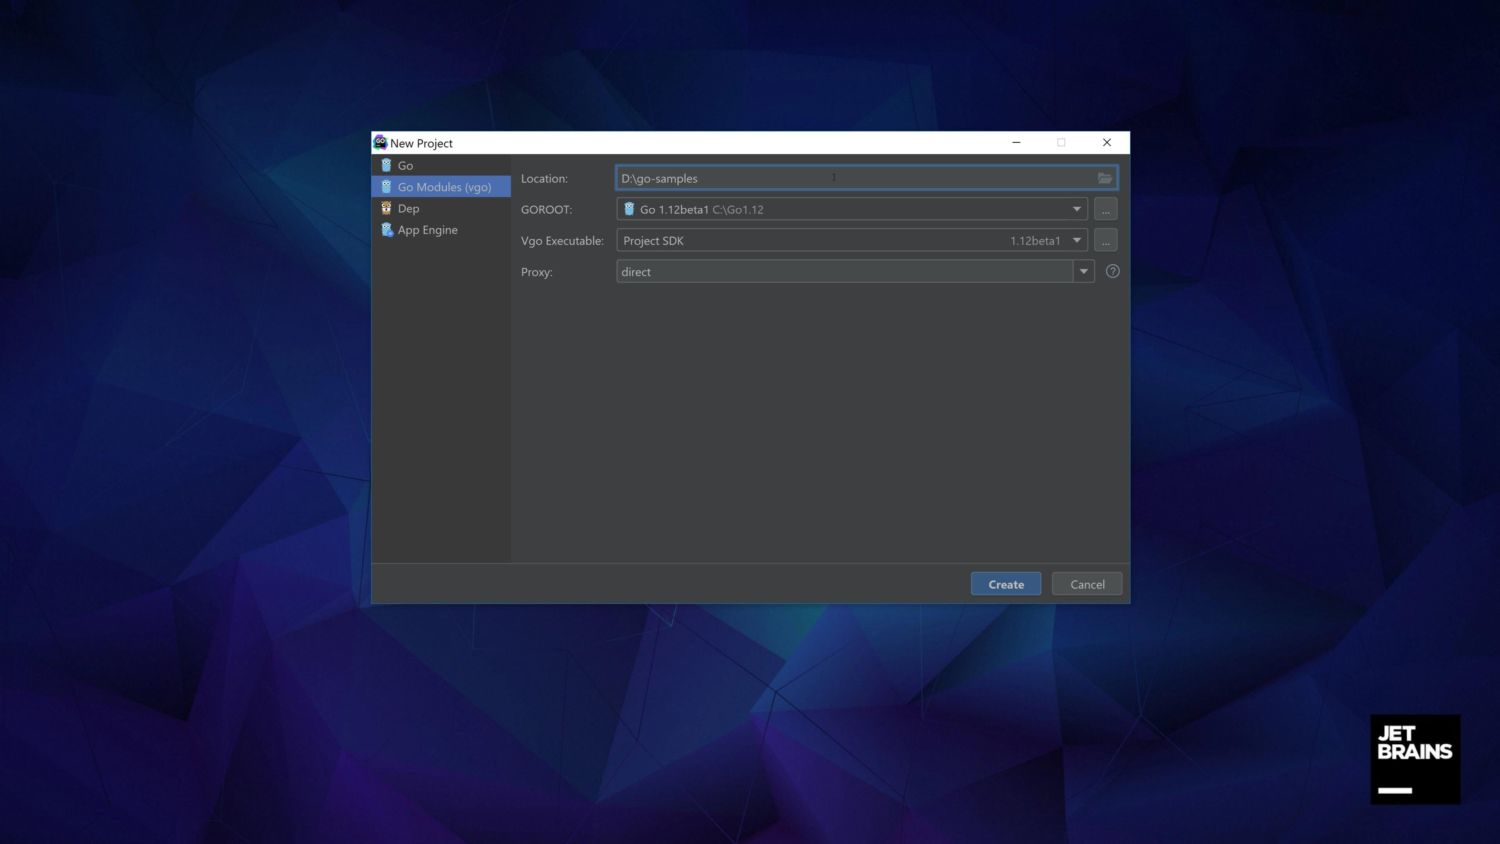
First, let’s create a new project by selecting New Project from the Welcome Screen. Then choose Go Modules (vgo) as the project type. We can then specify the location of the project, which can now be set outside of the GOPATH, to any directory in your system.
Ensure that GOROOT points to a Go SDK which is 1.11 or newer. While Go 1.10 with the special vgo binary installed can be used, this is not recommended as vgo is not updated as frequently to be on par with the Go releases and might have an unforeseen impact in a mixed Go versions environment.
Finally, we can use the Proxy field to specify if we want to download the Go Modules (or packages) directly from the Internet (default setting), or via a proxy system such as Athens or JFrog’s Go Registry in case you want to store the dependencies in a central place for everyone in the team to have access to the same versions in a better-managed environment.
After the project is created, we can see that it already contains a go.mod file. We can edit the file to change the module name to better suit our needs. For example, we’ll publish this under github.com/JetBrains/go-samples so others can use the import statement “`import “github.com/JetBrains/go-samples”“` in their code.
Next, creating a Go file is done as before, so nothing changes here. We can use the Simple Application type instead of Empty File to move past the boilerplate part.
After writing a small HelloWorld function, let’s say we want to handle errors in our code using the popular github.com/pkg/errors package. To import this dependency, write the import statement “`import “github.com/pkg/errors”“` and use the Sync packages of github.com/JetBrains/go-samples quick-fix on it. This will run the required Go commands to download and install the desired version of our dependency.
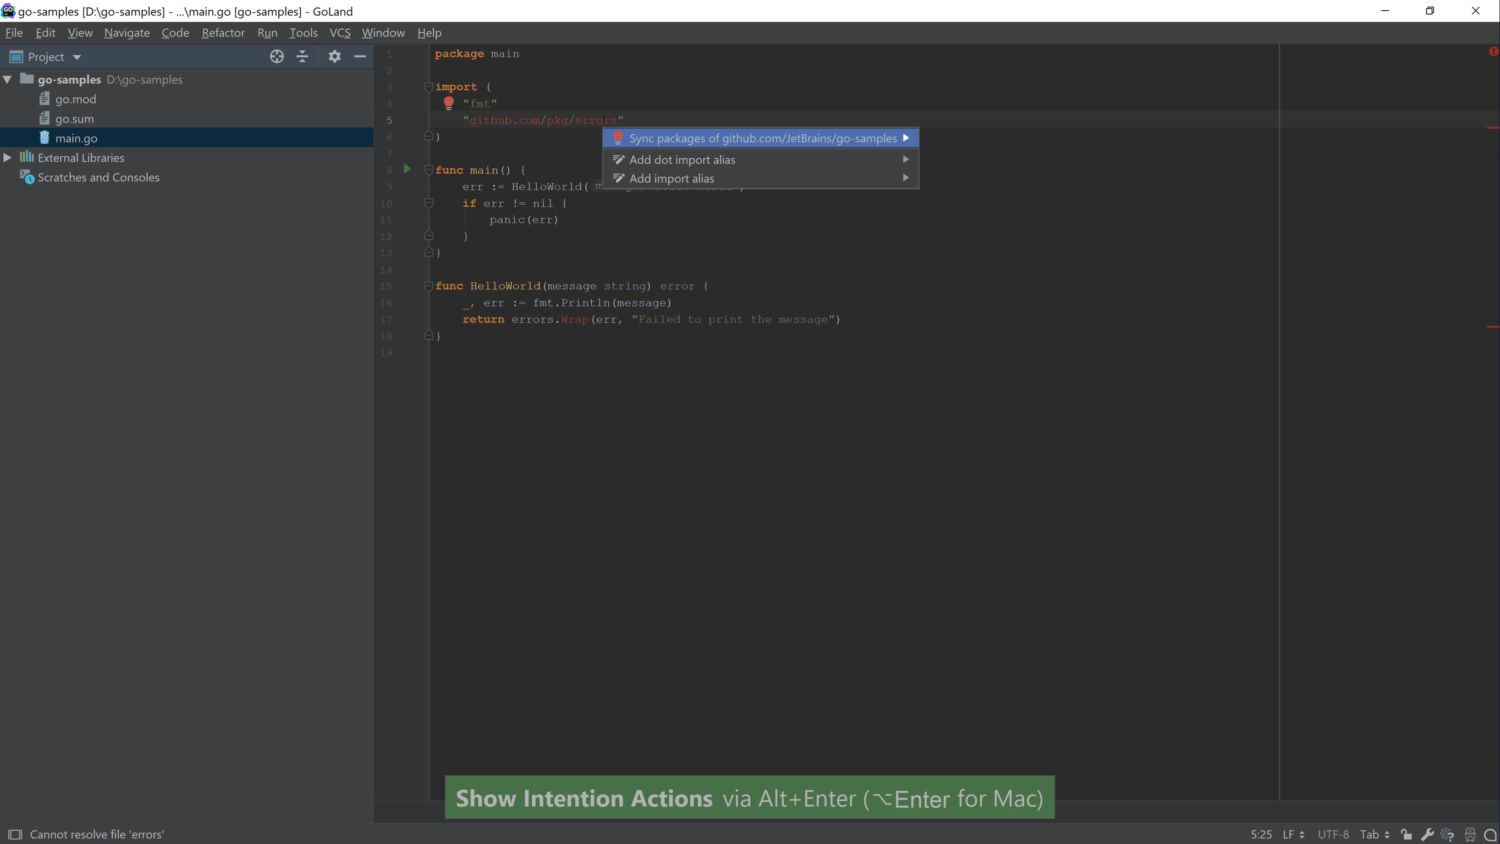
At the time of writing, github.com/pkg/errors is at version 0.8.1, so this version will be installed as we did not specify anything in our go.mod file. If we want to use version 0.8.0 instead, we can edit the go.mod file manually, which will trigger a refresh of the dependencies and use the expected version.
If you don’t want to download the dependencies twice, as described above, then you can first edit the go.mod file and add the following line at the end of it require github.com/pkg/errors v0.8.0 then go to the Go file and add the import statement “`import “github.com/pkg/errors”“` and invoke the quick-fix to download the dependency.
To edit dependencies of the current project, Go Modules have a special directive called replace . This allows us to replace a dependency in a few different ways, the most important one being that we can work on a local copy of that dependency.
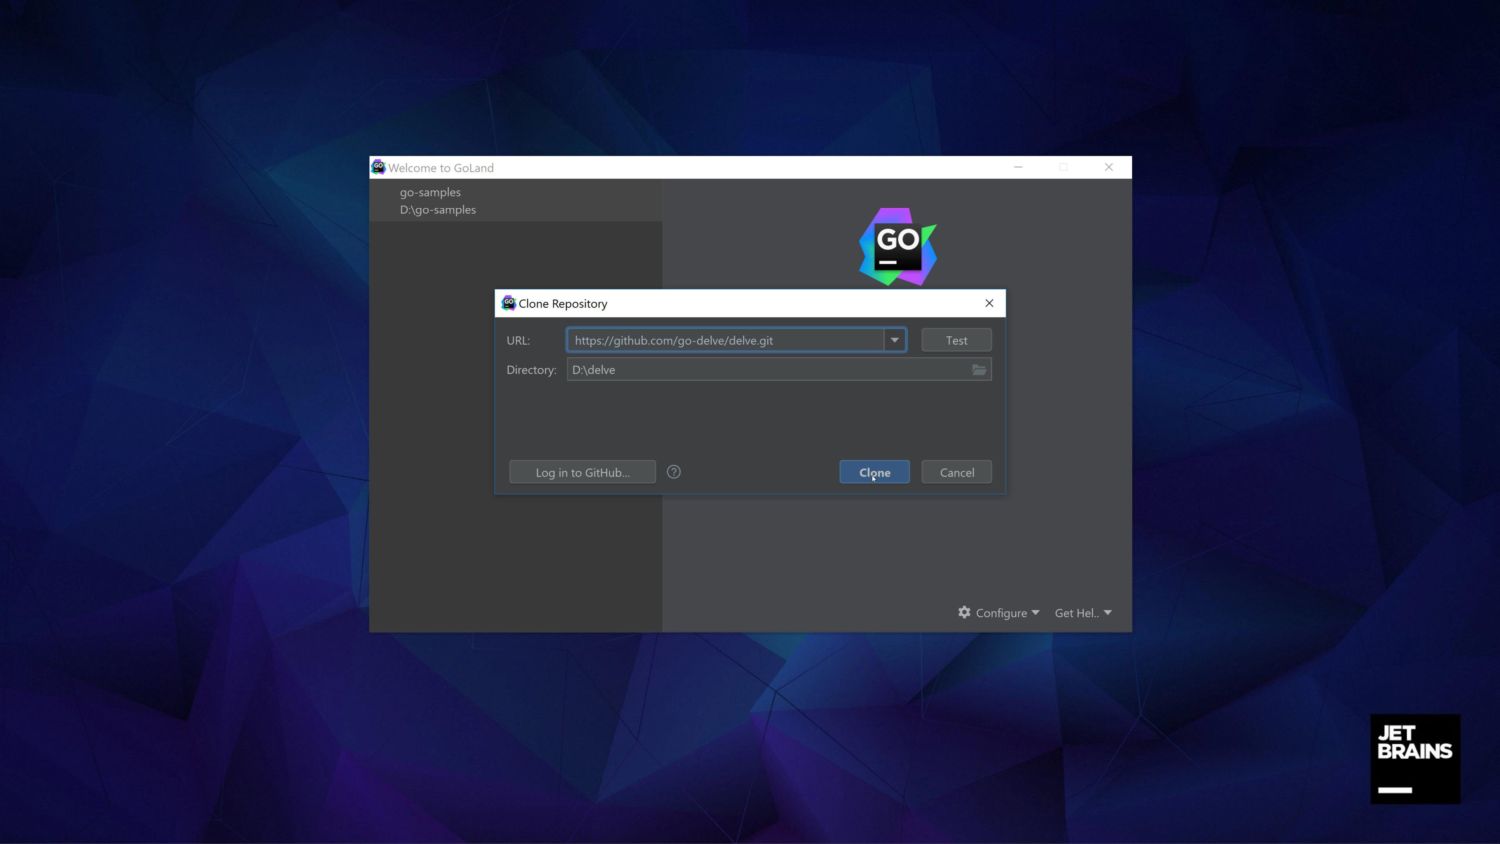
Let’s explore a more complex example by closing the current project and going back to the Welcome Screen. There, we can perform the following steps to use a different project Delve, the Go Debugger, as an example:
- click on Check out from Version Control option and select Git
- in the URL field use https://github.com/go-delve/delve.git as a value, and in the Directory field, use any directory outside of GOPATH
- after the clone operation finishes, open the project
- go to Settings/Preferences | Go | Go Modules (vgo) and make sure that the Go Modules check is enabled and if it’s not, enabled it.
After we enable the Go Modules support, we can now go back to editing the application and adding the library to the active editor.
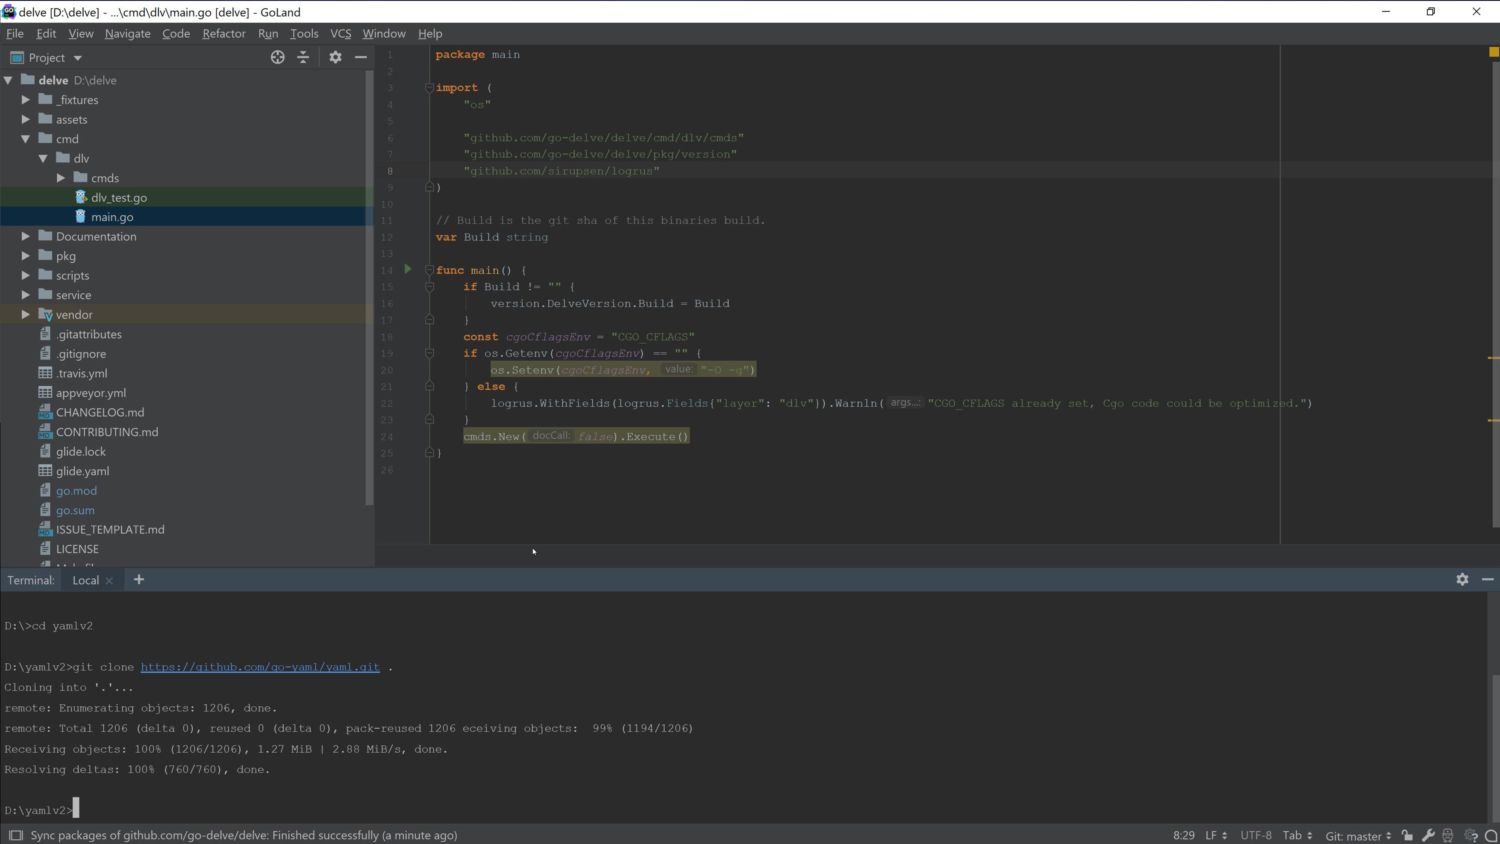
To make sure all the dependencies are downloaded in go’s cache, we can invoke the go mod download command manually in the built-in terminal, or by opening any file, such as cmd/dlv/main.go and invoking the Sync packages of github.com/go-delve/delve
Now, let’s clone the gopkg.in/yaml.v2 next to our delve clone by using the URL https://github.com/go-yaml/yaml.git and then check out the code at v2.2.2, the one used by Delve at the time of writing this article.
After we have the library locally available as well, what we need to do is to add a new directive at the end of the go.mod file to tell the go command to use the local version of the library instead of the cached one. This directive would look similar to this: “` replace gopkg.in/yaml.v2 => d:/yamlv2 “`. The first argument of the replace directive is the original module we want to replace and the second one is the path on the local filesystem to where the module can be found. There are additional usages for the replace directive, which can be found in the Go Modules wiki documentation.
And the last step would be to tell the IDE to load the dependency for editing alongside our project. This can be done via the usual File | Open workflow, pointing the IDE to the dependency location, then clicking on the Attach button from the confirmation dialog.
Now we can work on both on our main project and the dependencies it has. Detaching the dependencies can be done via the right-click menu then selecting Remove directory from current project option, and don’t forget to remove the replace directive from the go.mod file before committing the changes from the main project.

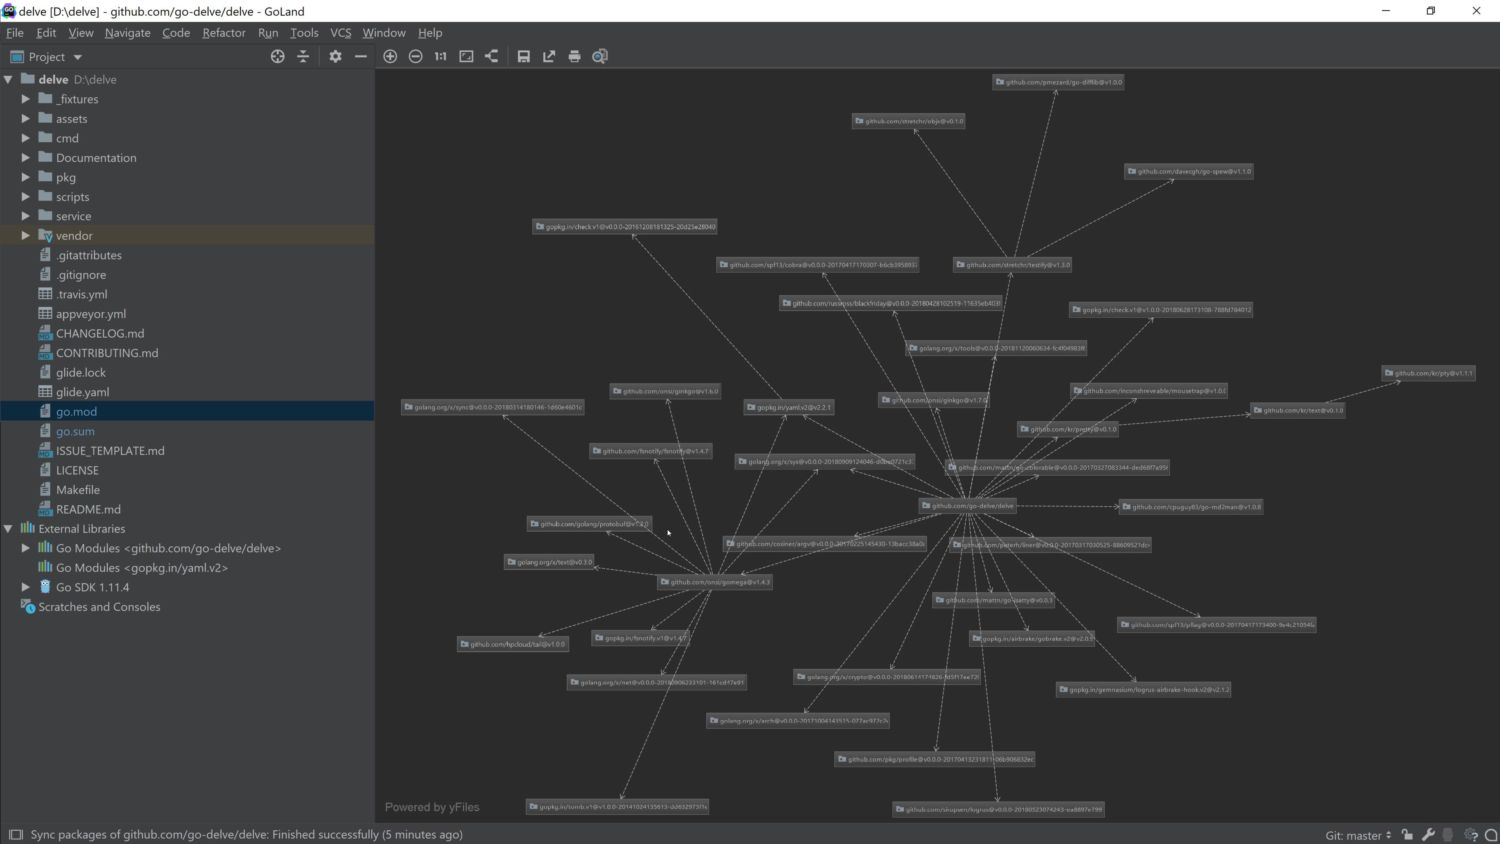
Another feature that we can use in our work with Go Modules is to visualize a map of our dependencies and how they interact with each other. To bring this visualization up, we need to right-click on the go.mod file in the Project window and select Diagrams | Show Diagram…
You may ask about the debugging part, which is essential to any reasonably complex application. We’ll cover this in an upcoming article focused on all the debugging features of the IDE, so stay tuned to our blog or newsletter to get notified when this article will be available.
This wraps up our short overview of working with Go Modules and GoLand. Please let us know your thoughts on this and any feedback or questions you have in the comments section below, on Twitter, or on our issue tracker.
Subscribe to GoLang Blog updates