Go development with Docker Containers

Updated and validated on November 17, 2022. You can find more tutorials on how to use containers here. You may also refer to the Docker and Kubernetes sections of our Help documentation.
- Go development with Docker Containers (this post)
- Debugging a Go application inside a Docker container
- Running Go applications using Docker Compose in GoLand
- Using Kubernetes from GoLand
Today we start a miniseries of articles about the support inside GoLand for Docker, Docker Compose, and Kubernetes and how it can help us write (micro-)services in Go.
We’ll look at how to configure the project in the IDE, how to use either Docker or Kubernetes to run or debug our project, and how to connect the project to our database of choice, PostgreSQL.
Let’s start with a presentation of the normal Docker workflow, then we’ll build our container and run it.
Before we continue, we’ll need GoLand 2020.1.1 or newer, which ships with the latest Docker plugin. We’ll also need a reasonably modern version of Docker, such as 17.06 or newer.
Note: While older versions of the IDE will work to a certain degree, this article makes use of new features, and the appearance of the IDE may be different.
Project setup
Let’s start by setting up our project.
We can create a new Go Modules project or use an existing one.
The project structure should be similar to the one found at this repository.
This tutorial won’t cover how to install and configure Docker for your system.
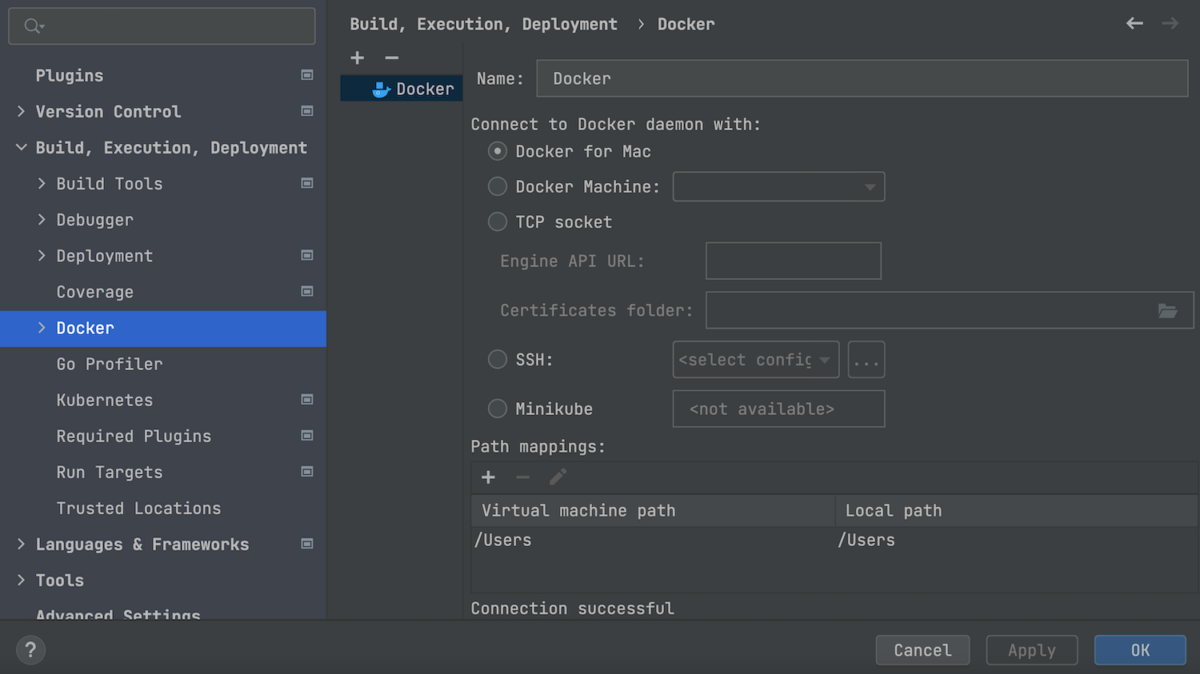
Instead, we’ll start by configuring a Docker server so that we can run our application. Once Docker is installed in your system, go to Settings/Preferences | Build, Execution, Deployment | Docker, and click on the + button to add a new Docker server connection.
By default, the plugin will create a connection to the local machine Docker server, which is good enough for our tutorial. Click the OK button to create a server configuration.
Working with a Dockerfile
First, let’s open the Dockerfile in the root of the project.
# Compile stage
FROM golang:1.17 AS build-env

ADD . /dockerdev
WORKDIR /dockerdev

RUN go build -o /server

# Final stage
FROM debian:buster

EXPOSE 8000

WORKDIR /
COPY --from=build-env /server /

CMD ["/server"]
This Dockerfile uses a multi-stage build process that allows us to produce the smallest Docker image because the Compile stage, when the binary for our application is built, is separate from the Final stage when the container is built.
Once we paste the above code into the Dockerfile, a green arrow appears next to the first FROM [...] directive. This is the quickest way to run the container.
However, we’ll need to do some editing before we can run it, as we need to expose the correct port for the container to receive connections.
Creating a new Run Configuration for our container
Let’s create a new Run Configuration. We’ll give this one the name “Docker – Web – Standalone” and select all the options we need for it to run the Docker container. We’ll then name the container “dockerdev-web-standalone”, and in the Bind ports field we’ll set both the Host port and the Container port to 8000 so we can access the application.
Now we can click the Run button at the bottom of the dialog, which will start our container.
Understanding the Services Tool Window
After Docker finishes the build process, we can take a look at the Services Tool Window and see the newly created container in the Containers section. We’ll also see the image that was used in the Images section.
For each container, the following tabs will be available:
- Build Log, which displays the log for building the container
- Log, which displays the output of the container
- Attached console, which allows us to interact with the application/shell of the container, if one is available
- Properties, which will display more information about the container, such as the Image ID or the Container ID
- Environment variables, which show the environment variables used by the container
- Port bindings, which show any ports that are exposed to the host by the container
- Volume bindings, which show the volumes that are mounted for the container
- Files, which allows us to browse the files in a container if it supports running the ls command. For Alpine based containers like ours, we can add the `RUN apk add –no-cache coreutils` directive to enable this functionality.
On the left-hand side, we can see various buttons. First, there’s the Redeploy button, which allows us to run the container’s build configuration again.
Then we have the Edit Configuration button, which is for making any adjustments to the container’s Run Configuration.
We also have the Start/Stop buttons, which start or stop containers, and the Delete button for removing a container.
There are a few more useful features that can be accessed by using the right-click action on the container.
We can see the list of running processes with List Processes or we can use Exec to execute commands inside the running container.
Finally, Inspect will provide even more information about the container and what its current configuration is.
Pro tip: You can see the container’s uptime if you hover over the container name.
Pro tip: To speed up the building of containers, you use vendoring mode for Go. Running the `go mod vendor` command inside the IDE Terminal ensures the IDE will automatically pick up the vendor folder. You’ll also need to add GOFLAGS=”-mod=vendor” to the list of environment variables of the container in the build step to achieve this.
That’s it for today’s post, in which we discussed creating and running Docker configurations.
In our next article, we’ll see how to debug our application. Share your feedback with us, either in the comments section below, on our issue tracker, or by tweeting to us at our Twitter account.