IntelliJ IDEA
IntelliJ IDEA – the Leading IDE for Professional Development in Java and Kotlin
Using Dev Containers in JetBrains IDEs – Part 1

As cloud technologies and containerization evolve, we enter a new era of software development where flexibility, scalability, and efficiency become key requirements for any project. Dev Containers, or development containers, represent an approach to creating developer workspaces that allows you to focus on the code while worrying less about dependencies and surrounding infrastructure. This tool opens new horizons for simplifying development and ensuring projects’ consistency throughout their lifecycle.
What are Dev Containers?
Dev Containers are Docker containers containing everything necessary for software development, including IDEs, specific software, tools, libraries, and even configured services, in an isolated environment that can be easily transferred and launched on any computer or cloud infrastructure. This solution allows developers and teams to abstract from the specifics of their operating system and maximally approximate the development conditions to the productive environment.
In simpler terms, they`re Docker containers (run locally or remotely) that include your project, IDE, and everything needed for development. The container’s settings are defined in a devcontainer.json file. If dependent containers are needed, for example, with databases or other services, Compose is supported. The Docker container can be launched from existing Docker images or built using a Dockerfile.
Advantages of using Dev Containers
- Environment consistency. Whether you are at the start of development or in the process of migrating an existing project, Dev Containers ensure that every team member works in an identical environment. This eliminates the “it works on my machine” problem when an application behaves differently on different machines.
- Quick workspace setup. Project launch and setup are reduced to a few commands, allowing new employees to start almost instantly and minimizing the time spent on costly environment setup.
- Security and isolation. Each Dev Container is fully isolated from your operating system, facilitating experimentation with new tools and technologies without affecting the settings or compatibility of your current tooling.
- Ease of maintenance and updates. Updating tools and dependencies in a containerized environment does not require the lengthy and complex procedures often associated with traditional working environments.
- Remote development capability. The container can be run in a remote environment, and its resources and capabilities become available during development.
Getting started with Dev Containers
To start with Dev Containers on your computer, you need:
- Git 2.25+
- Docker (if you plan to work only with Docker on a remote server, Docker CLI is sufficient)
- JetBrains IDE or JetBrains Gateway
If you want to run a Dev Container on a remote host, you’ll also need:
- Linux (including Linux on WSL2)
- OpenSSH Server with the option to connect from the client machine
- Docker with user-level rights
Does the project need to be prepared to run in a Dev Container?
If you are just starting to work with Dev Containers, there’s no need to initially configure anything in your project or worry about projects that do not yet support Dev Containers. Your JetBrains IDE will recognize that the project is not set up for Dev Containers and will offer a convenient wizard to help you select the necessary environment for launching the project. The Git-cloned project or the mounted project will be mapped to the user’s directory within the Dev Container.
Subsequently, you can fine-tune all necessary Dev Container environment parameters in the devcontainer.json configuration file.
If devcontainer.json is located in one of the standard places, it will be automatically found by the IDE when creating a Dev Container:
.devcontainer/devcontainer.json.devcontainer.json.devcontainer/<folder>/devcontainer.json(where<folder>is a sub-folder, one level deep)
In all these cases (unless otherwise defined in devcontainer.json) – the root of the Git-cloned project or the root of the mounted project will be mounted to the root of the project in the Dev Container.
We also support locating devcontainer.json in any project folder, for example:
infra/devcontainer.jsonservice1/devcontainer.jsonservice2/devcontainer.json
This is useful when working with monorepos containing microservices in different programming languages (requiring different environment settings) or those involving employees with different roles – developers, SRE/DevOps, testers, documentators, etc. In this case, when creating a Dev Container, you will need to explicitly specify where devcontainer.json is relative to the project root (through Specify Path). At the same time, the folder containing devcontainer.json (unless otherwise defined) will be mounted to the root of the project in the Dev Container.
Creating your first Dev Container by cloning your project
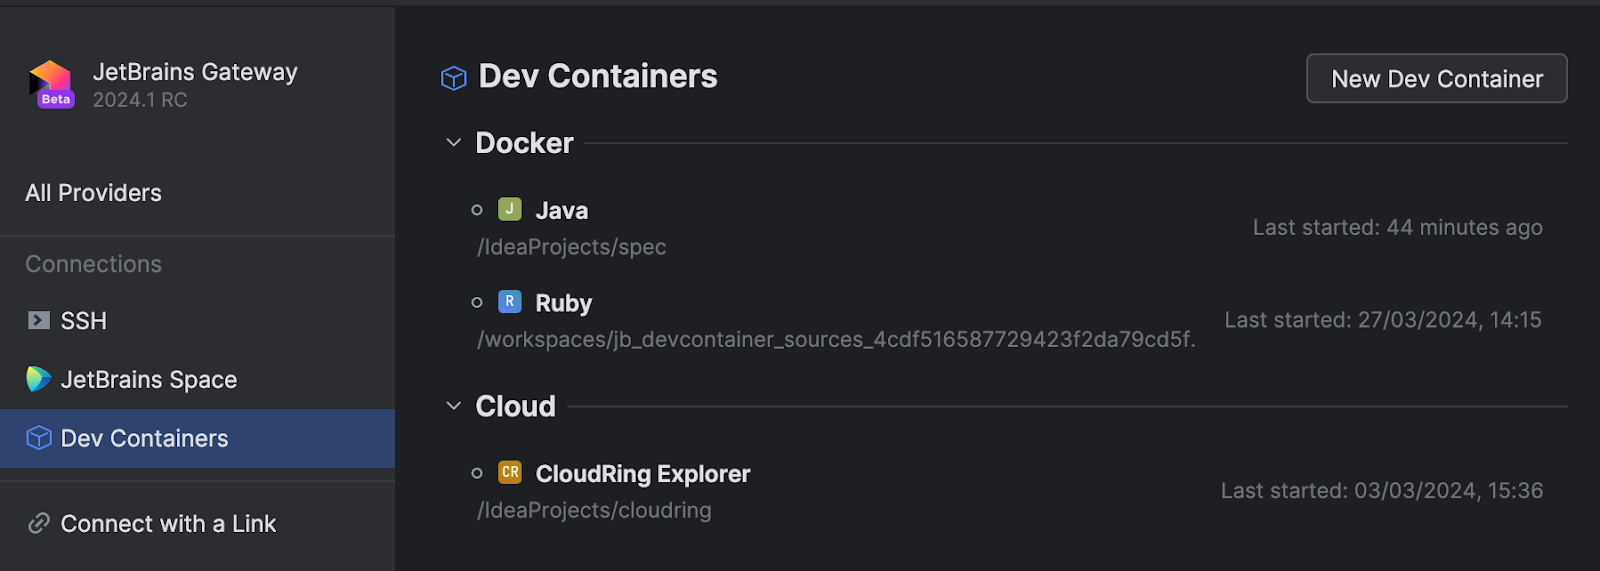
Open JetBrains Gateway or the Welcome Screen in any JetBrains IDE.
Go to the Dev Containers section and click on New Dev Container.

You can create a Dev Container from a VCS or local project.
In this example, we will create a Dev Container from a VCS project.

In the Docker section, you can choose where to create the Dev Container. The local Docker is offered by default, but you can click on “…” and add additional Docker servers from the cloud or WSL, for example, and set up the connection via SSH.
In the next section, we will discuss cases where this is useful.
In the Git Repository section, insert a git@ or https:// link to clone the repository into the Dev Container. Note that when cloning via SSH, you must have access to the cloned repository. Remember to add your key if you have not already done so.
In our first example, we will use the repository git@github.com:devcontainers/spec.git, where there are no specific configurations for Dev Containers – it could be any of your repositories.
After adding, you can select the necessary Git branch (we will use main).

If there are no Dev Container configurations in standard places in the project (and no non-standard placement of devcontainer.json is explicitly stated via Specify Path), then in the next step, you will be prompted to choose a template for building the Dev Container.
To continue, press Build Container And Continue.
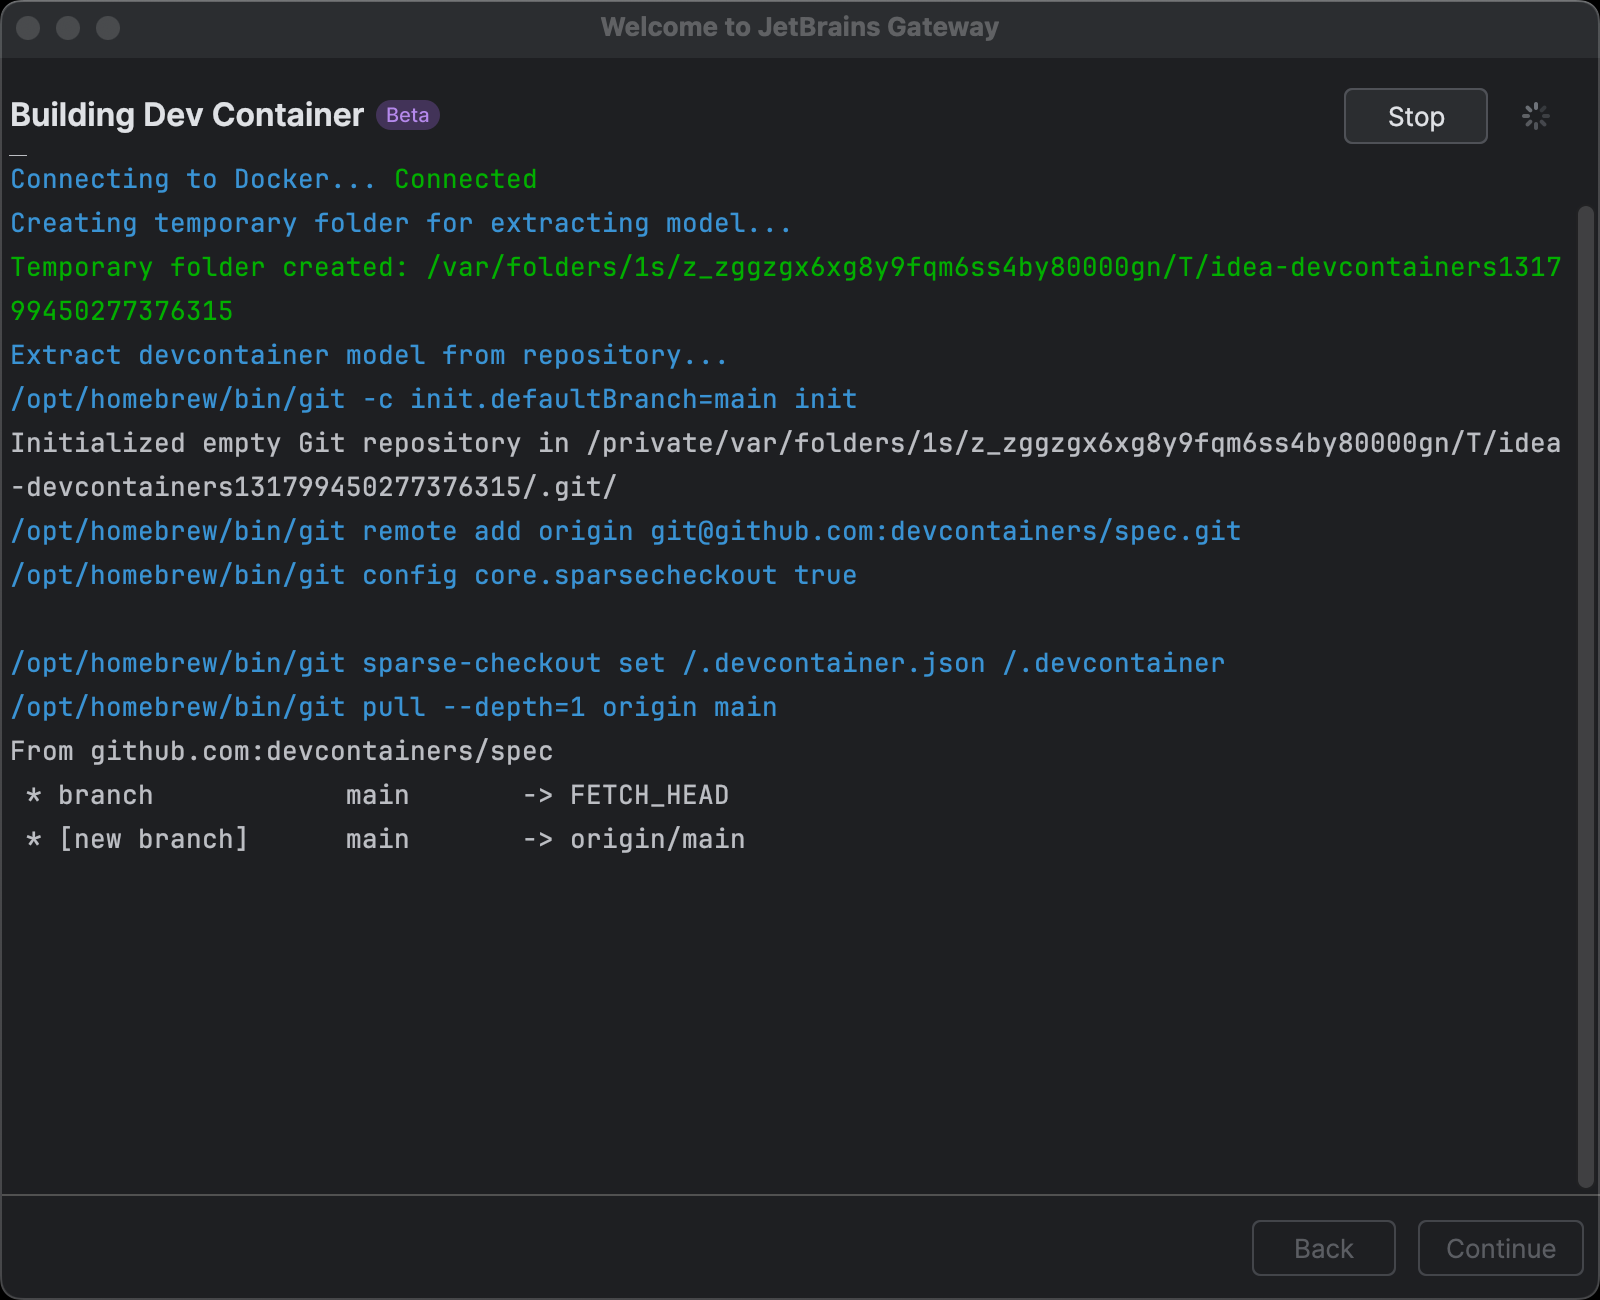
The Dev Container starts being built in the previously selected Docker location. A necessary temporary directory structure is created. Then, Git sparse-checkout is performed to try to find devcontainer.json metadata in standard locations (or explicitly specified non-standard ones).
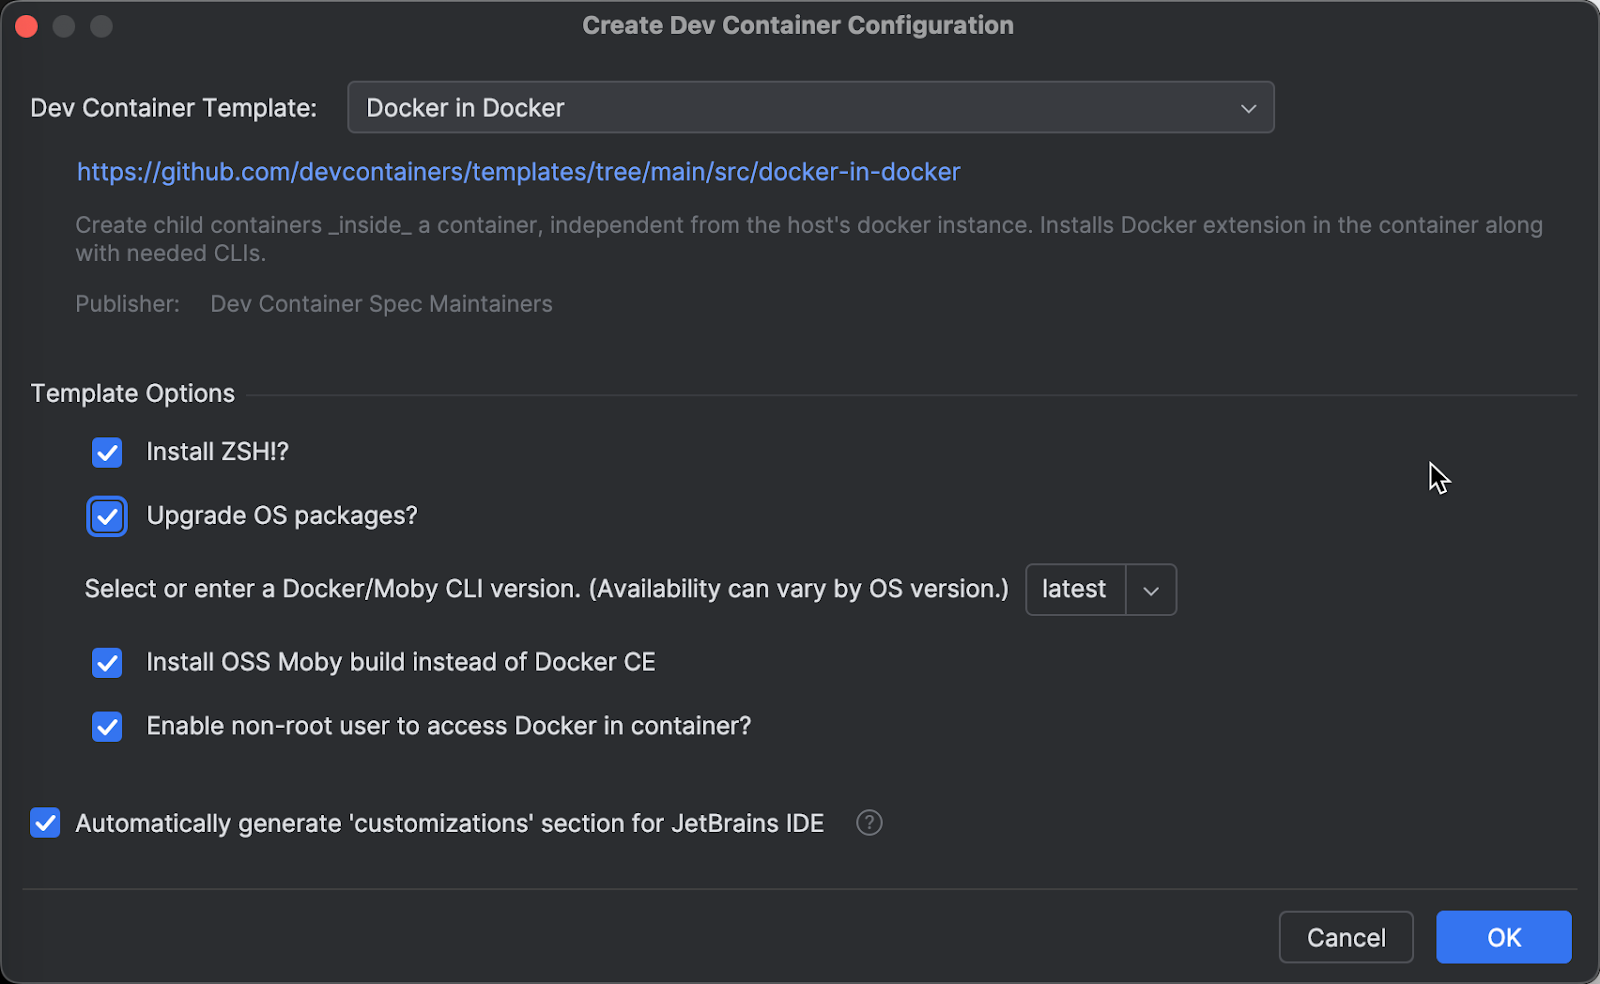
If metadata is not found, as in our example, a Create Dev Container Configuration wizard opens, where you can choose the necessary configuration and options:
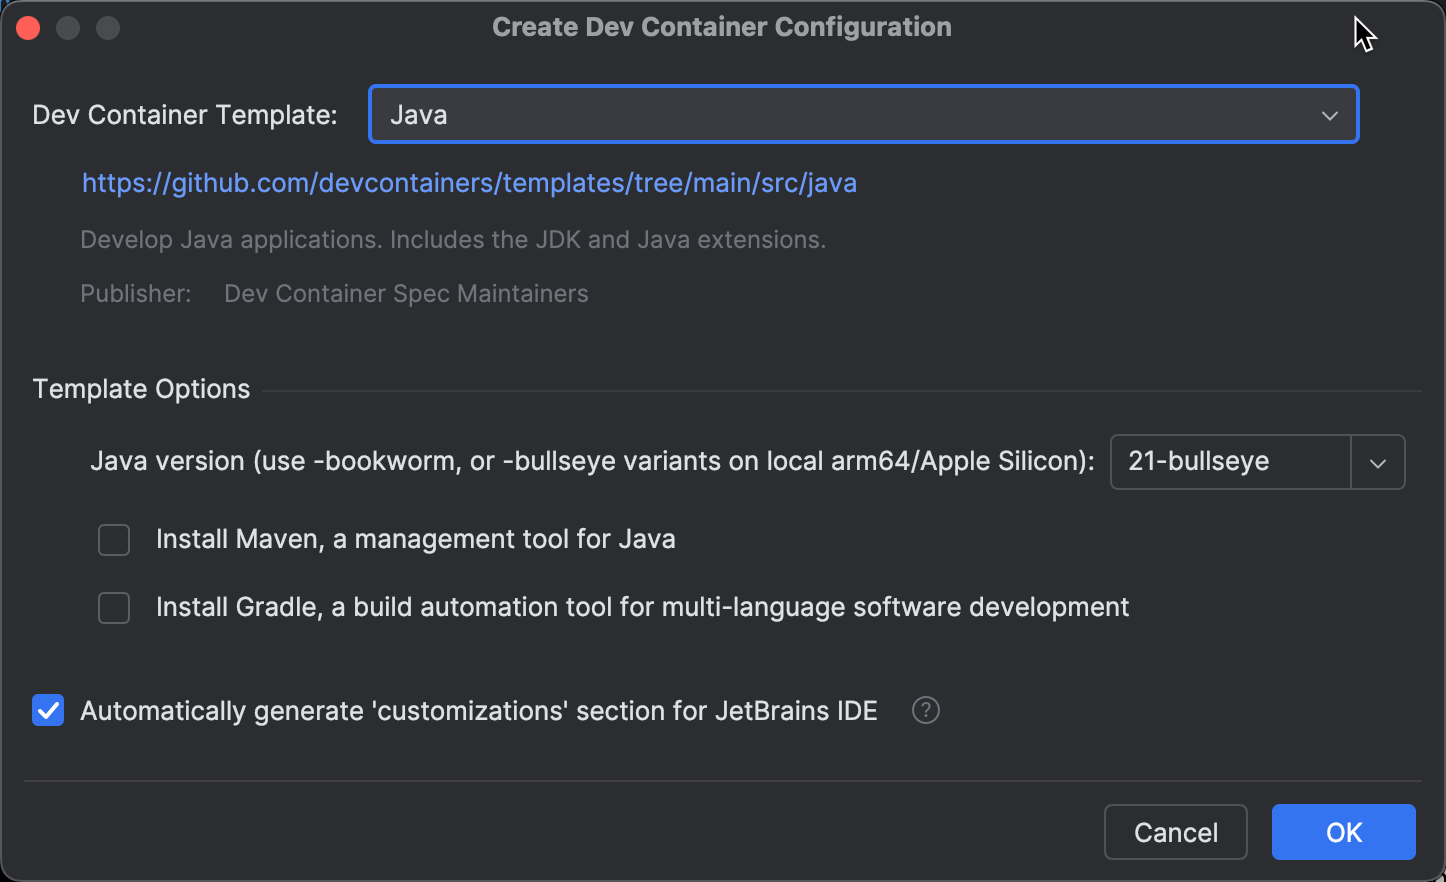
After selecting the required configuration, the Dev Container starts being built. This is very similar to the way a typical Docker container is built, except here, the configuration described in the template or devcontainer.json metadata is applied, and the source texts are cloned into the container.
If the building process is successful, you will be able to choose the necessary IDE backend, which will be installed in the container and launched (even if not installed locally). You don’t necessarily have to make this selection every time – you can specify your IDE in devcontainer.json itself, and then that specific backend IDE will be launched automatically.
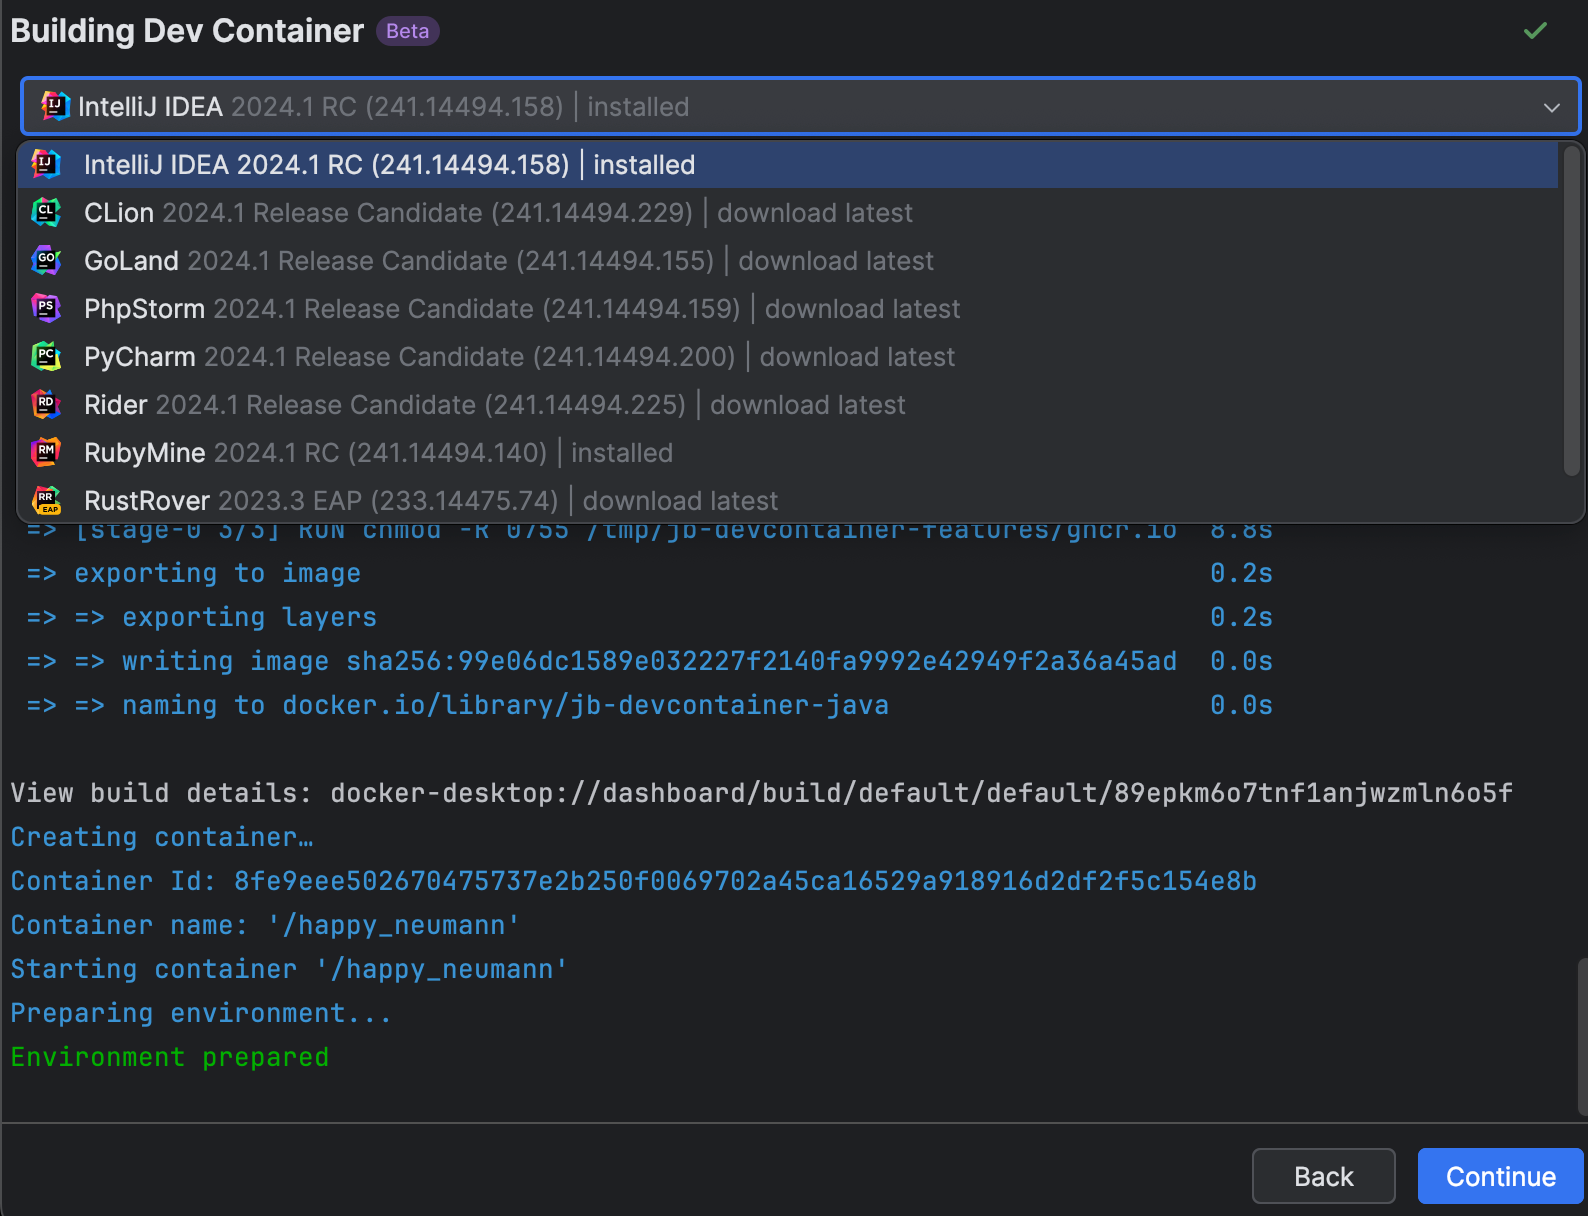
After selecting the necessary IDE, click Continue. The necessary IDE backend will be downloaded (if it hadn’t been downloaded and cached previously), the container will be launched, and the IDE frontend (Gateway or Welcome Screen) will automatically connect to the IDE backend in the container.
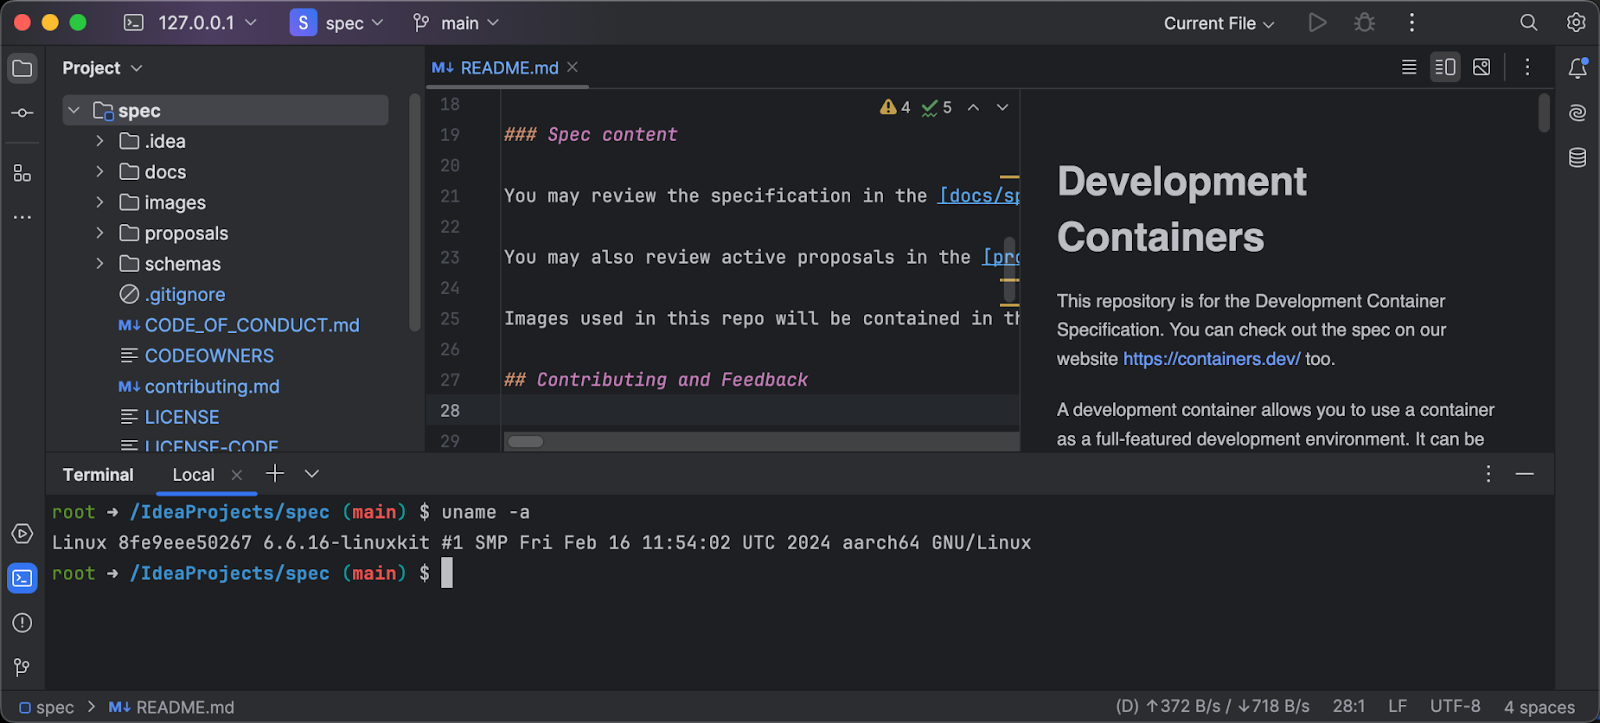
Now, you can start coding!
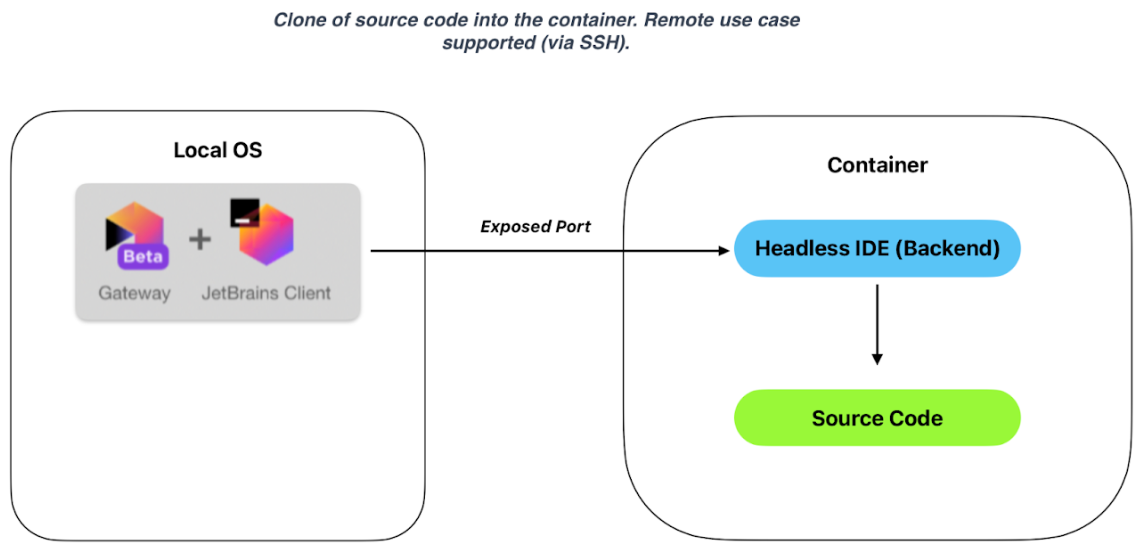
From an architectural point of view, this works as shown here (if you are creating a Dev Container in Docker on a local machine):
When you create a Dev Container in Docker on a remote machine (or in WSL with Docker and openssh-server installed), it works like this:
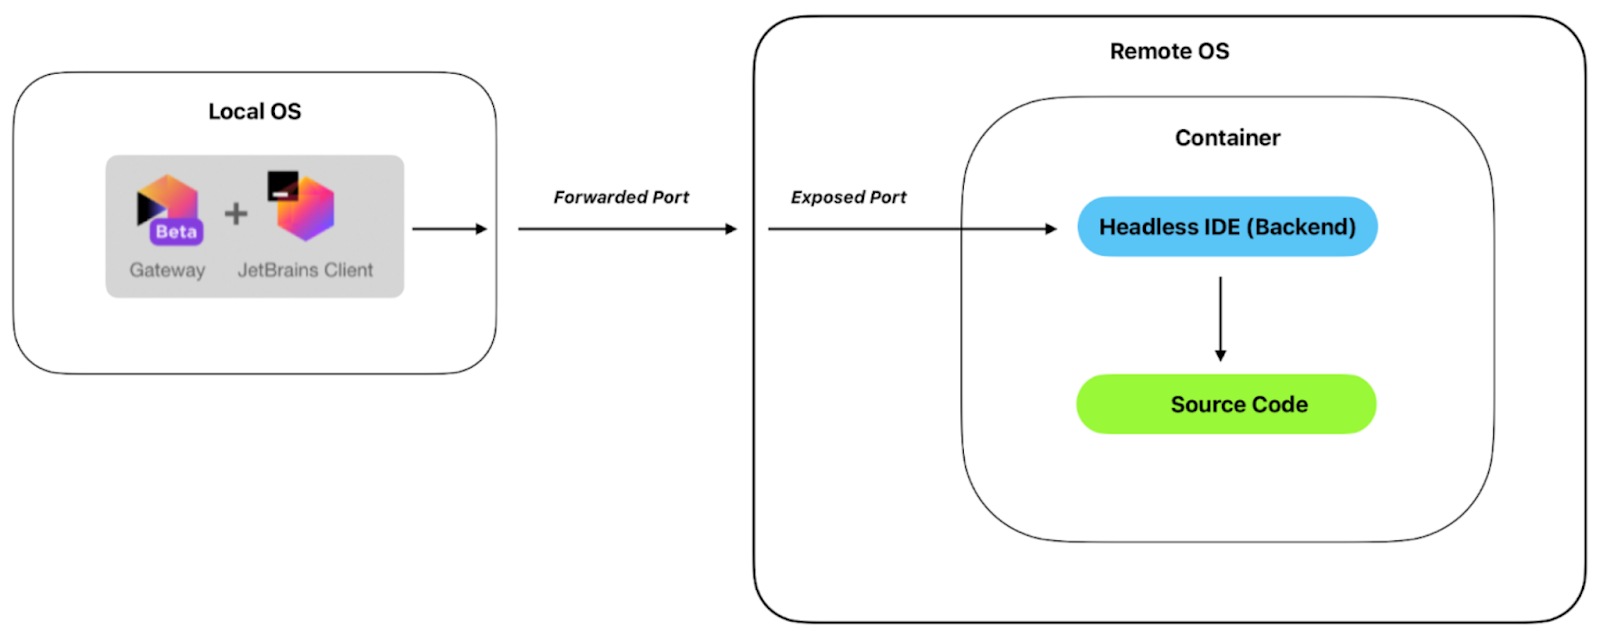
The IDE backend is launched in the container, and the source code from the specified repository is cloned. The IDE client connects to the backend, forming a Remote Development variant for working in the container (IDE Split Mode). When the frontend and backend communicate, a very efficient RD protocol is used – Rider has used the same protocol for many years – providing a local experience during remote development.
If you need to reconnect to the Dev Container, you can do so with one click from the Gateway or JetBrains IDE Welcome Screen. From here, if necessary, you can rebuild or remove Dev Containers.
Writing a Dev Container in a local project and launching with source texts mounted
Open any of your local projects in a JetBrains IDE. In the context menu at the project root, click New| .devcontainer.
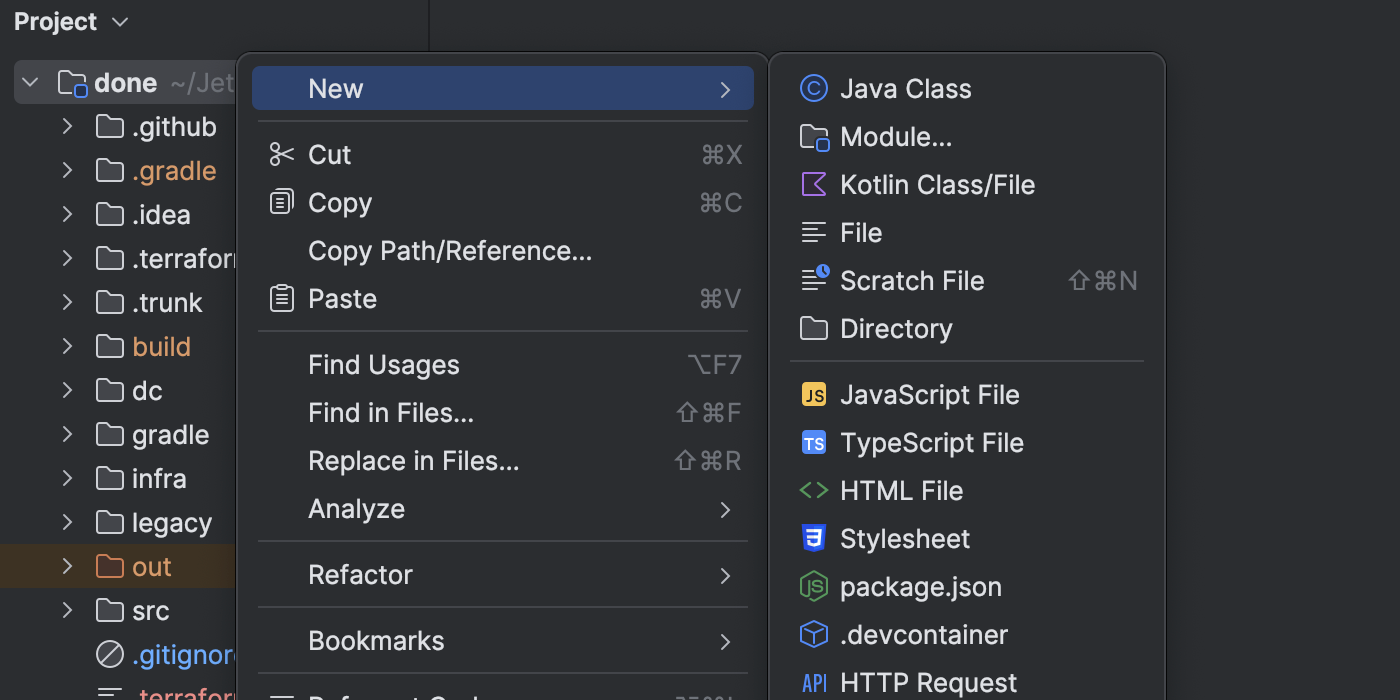
You will be offered a choice of templates from which you can create a devcontainer.json file. Let’s choose, for example, the Docker in Docker template, which allows working with deeper containers inside the container.
If you do not want to use templates, you can simply create a devcontainer.json file with the necessary content (pay attention to naming rules for auto-discovery in the repository).
The minimum necessary options for building are the container’s name and the name of the image from which it needs to be built.
{

 name: "Examples of Dev Containers",

 image: "ubuntu:latest"

}
To build the Dev Container, click on the gutter (the blue Dev Container icon next to the code), select Create Dev Container and Mount Source…, and then choose the IDE that you need in the container. 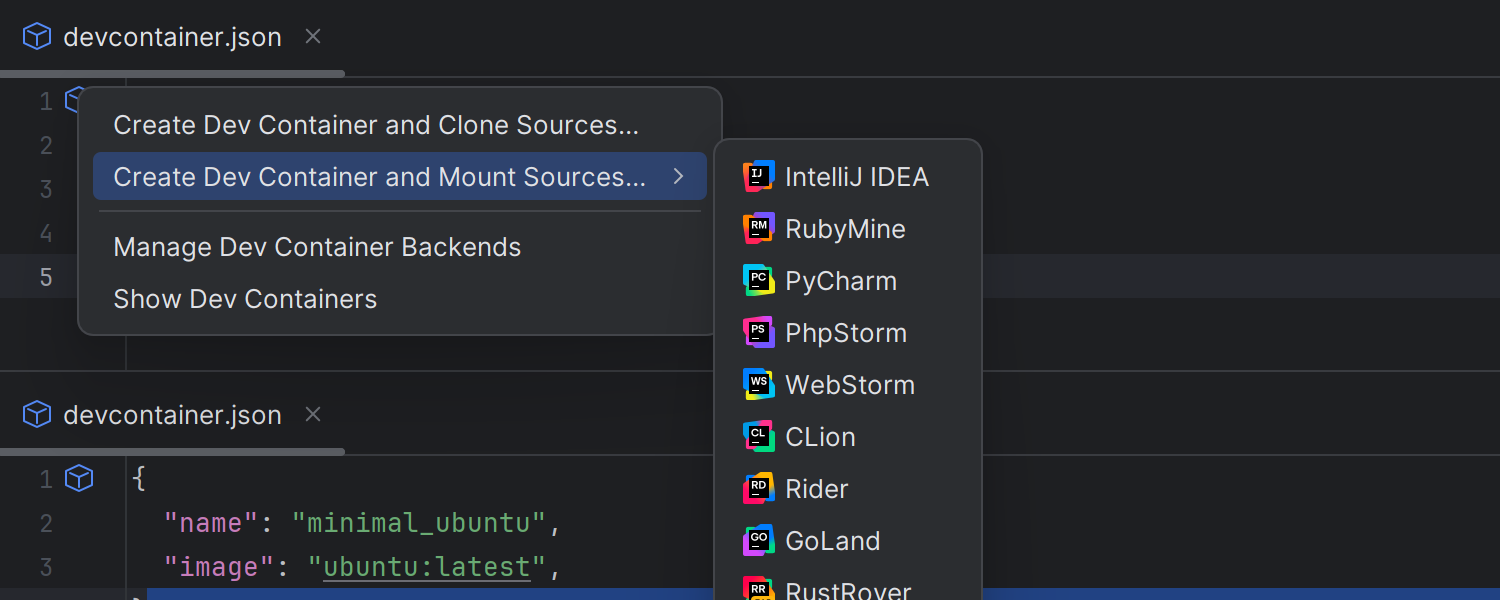
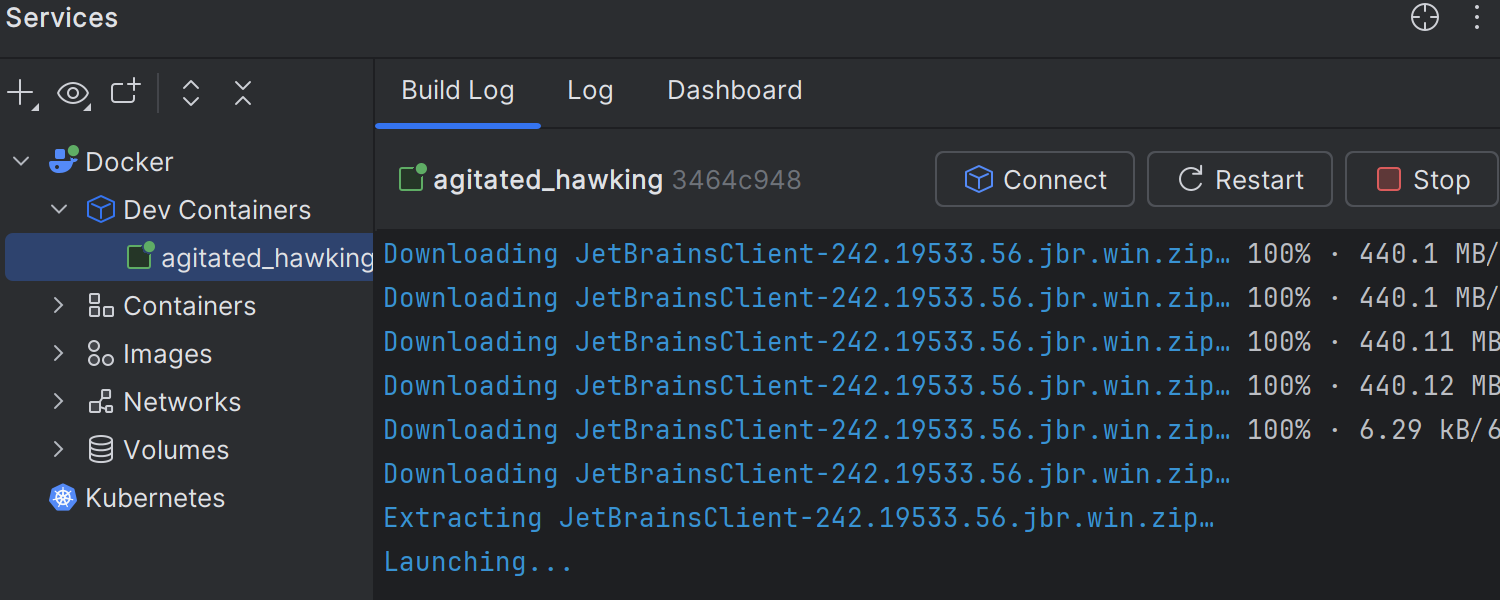
The Dev Container will be built and launched, and you will connect to the container.
The Mount Sources mode is convenient for debugging Dev Containers but is not recommended for permanent use due to the slower disk performance compared to Clone Sources… mode, which is recommended by default.
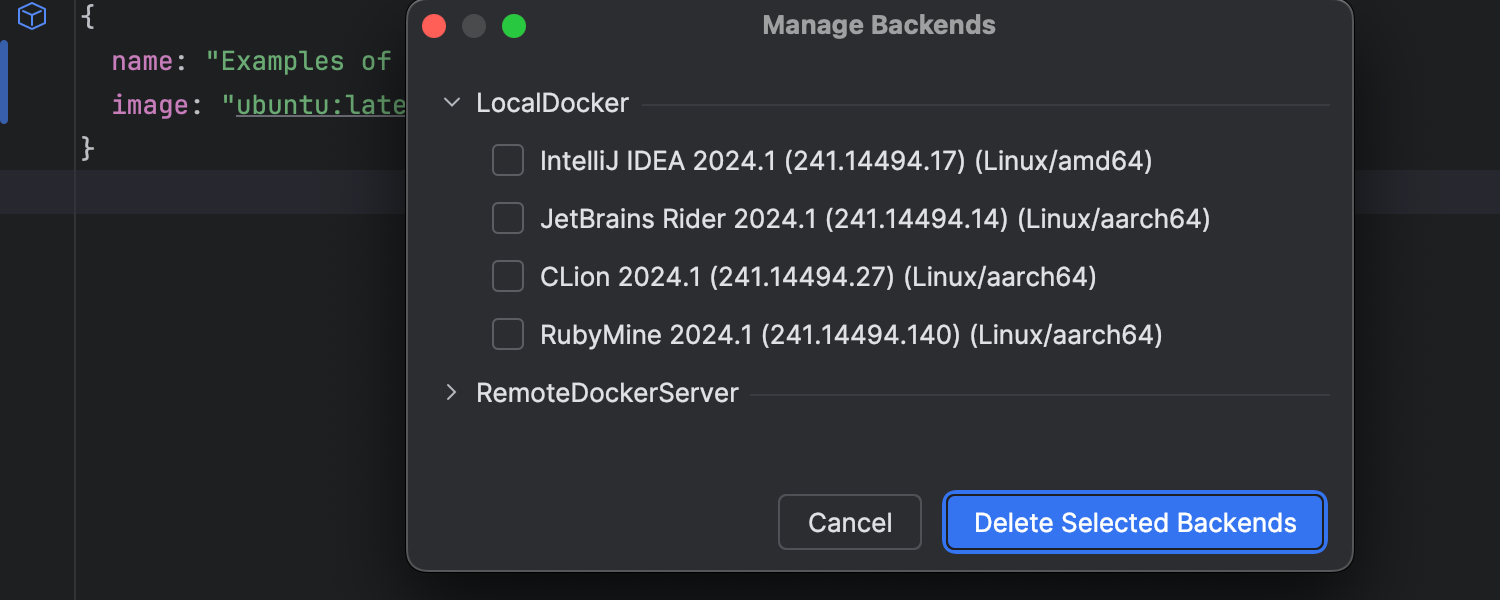
The first time any Dev Container is launched, the IDE backend is downloaded. When the same Dev Container is used again, downloading is not required. You can view the list of downloaded backends in the Manage Dev Container Backends section.
Conclusion
More information on the Dev Containers specification can be found on the containers.dev website and guides for using it can be found in the official documentation. In the following articles, we will take a more detailed look at devcontainer.json directly, with Dockerfile, Compose, and features, as well as writing the features themselves. We will also look at how to define IDE settings in the customizations section.
If you have questions about using Dev Containers, leave a comment. In subsequent articles, we’ll try to answer the most popular questions. If you have encountered a problem, write to us, and we’ll gladly help.