IntelliJ IDEA
IntelliJ IDEA – the Leading IDE for Professional Development in Java and Kotlin
Advanced Code Analysis in IntelliJ IDEA
This series of blog posts covers several ways that code analysis in IntelliJ IDEA can help you find and fix problems in your code. In the previous posts, we first looked at how the IDE can help you prevent problems while working with code in the editor before moving on to how to resolve problems throughout your entire project using predefined inspections.
- Part 1: Introduction to Code Analysis in IntelliJ IDEA
- Part 2: Code Analysis for Your Projects With IntelliJ IDEA and Qodana
While the predefined inspections in IntelliJ IDEA and Qodana are very useful, occasionally you might need something different. In this blog post, we will look at how to find specific patterns in your code using IntelliJ IDEA’s various search functions, such as structural search and replace (SSR), as well as how to create custom inspections using either SSR or RegExp.
Find and replace strings
If you are looking for a specific string in your code, you can use Find in Files (⌘⇧F on macOS / Ctrl+Shift+F on Windows/Linux). For example, if you are searching for where an error is thrown, or a log line is written. You can use this option to find text strings. To replace text, use Find and Replace (⌘⇧R on macOS / Ctrl+Shift+R on Windows/Linux).
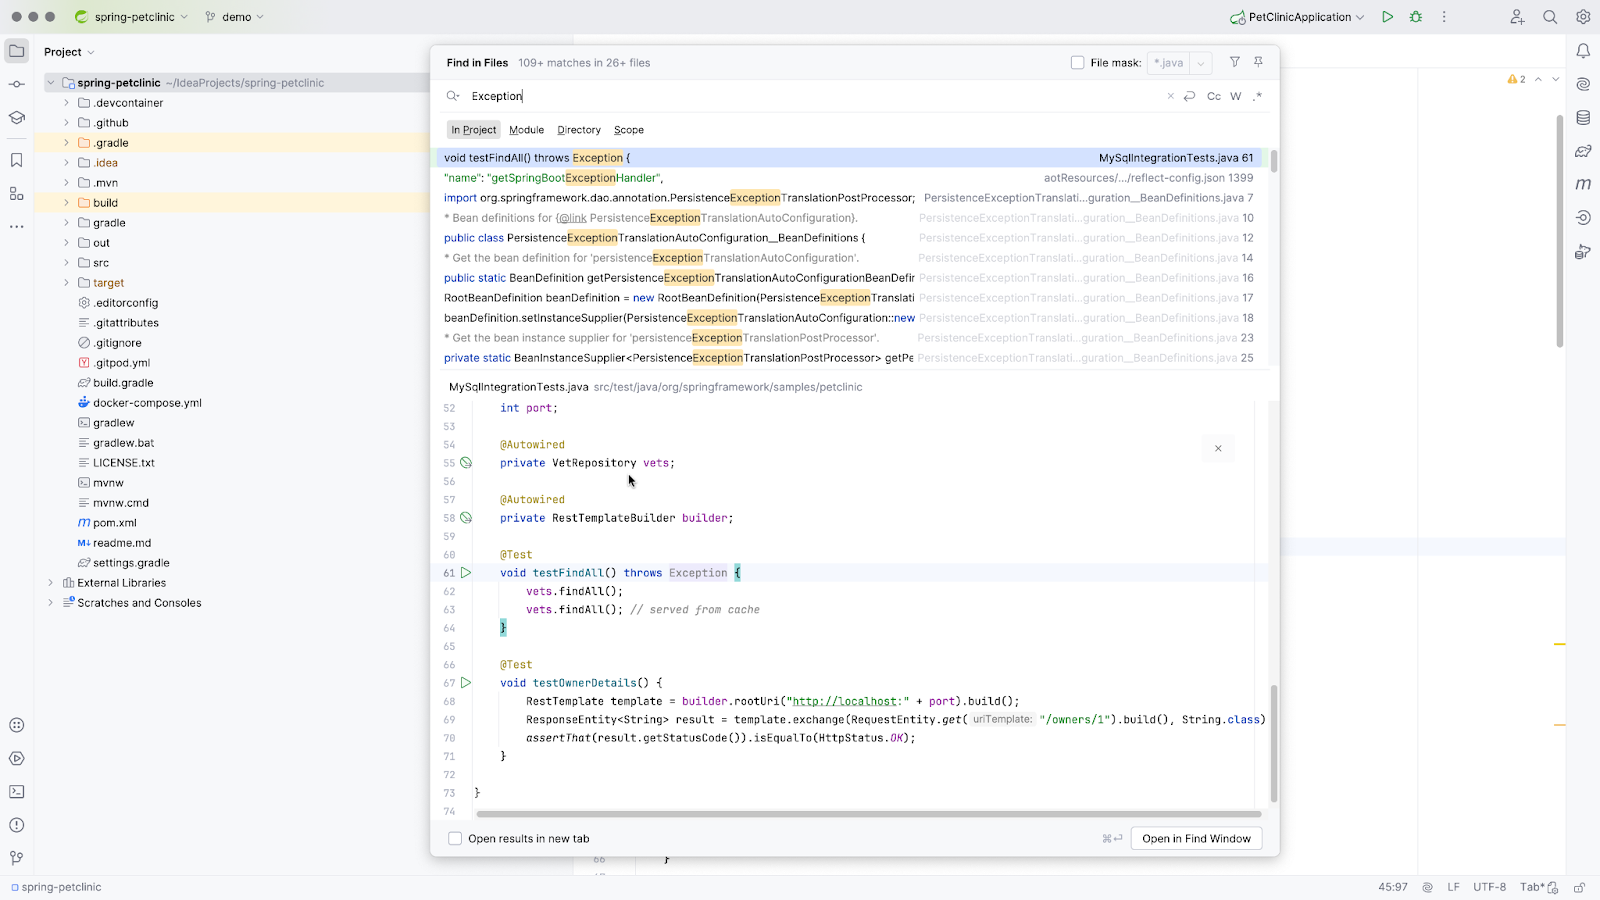
You can narrow your search by selecting options such as Words or Match case to find the exact word in a project or match the letter case. Alternatively, you can use the File mask option to narrow your search to a specific file type, for example, Java classes or markdown files.
Structural search and replace
To search for more complicated code patterns, you can use structural search and replace.
Start by opening the Structural Search feature via Edit | Find | Search Structurally… or by entering it into Search Everywhere (⇧⇧ on macOS / Shift+Shift on Windows/Linux) and finding it there. You can either reuse existing templates or create your own. Below, we will illustrate how each of these methods works.
Reuse existing templates
When you open Structural Search, you’ll see that there are numerous search templates available, and these are grouped by language or type.
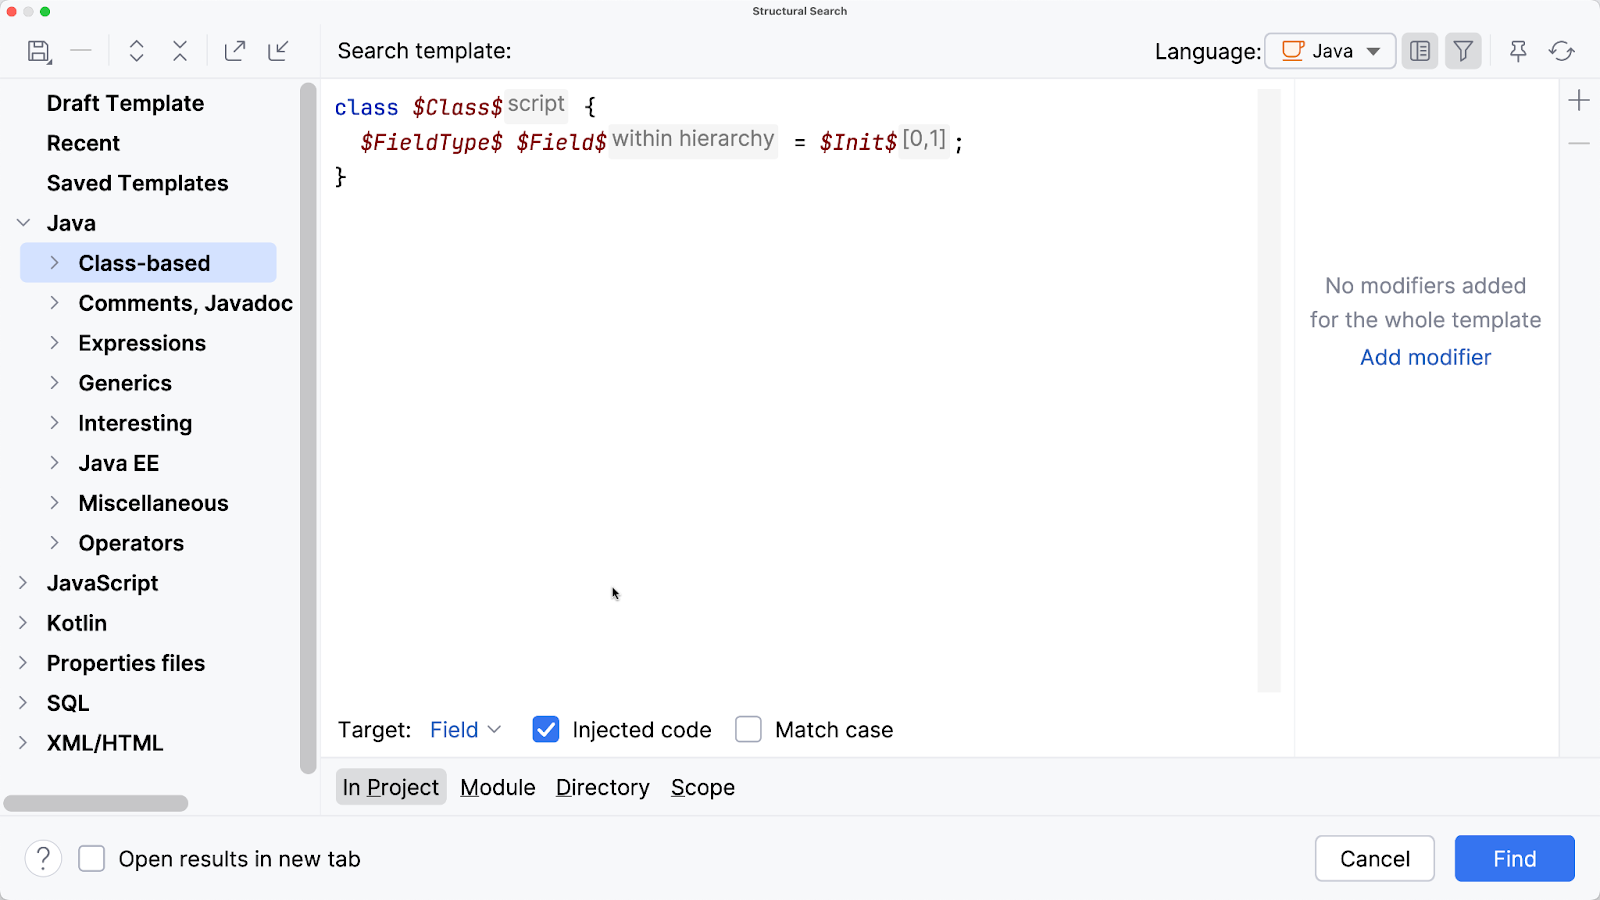
You can reuse existing templates and use modifiers to look for what you need. For example, let’s look for methods or constructors that use more than five parameters, as this could be considered a code smell. The quickest way to do so is to reuse an existing template. As you may know, menus in IntelliJ IDEA are searchable. Select the menu on the left, press Find (⌘F on macOS / Ctrl+F on Windows/Linux), and search for the template you want. In this case, if you enter the words “constructor” and “method”, you’ll find the existing Constructors & methods template. Select this template and change the minimum count value of the method parameters to 5. Then, run the search by clicking Find.
Create your own template
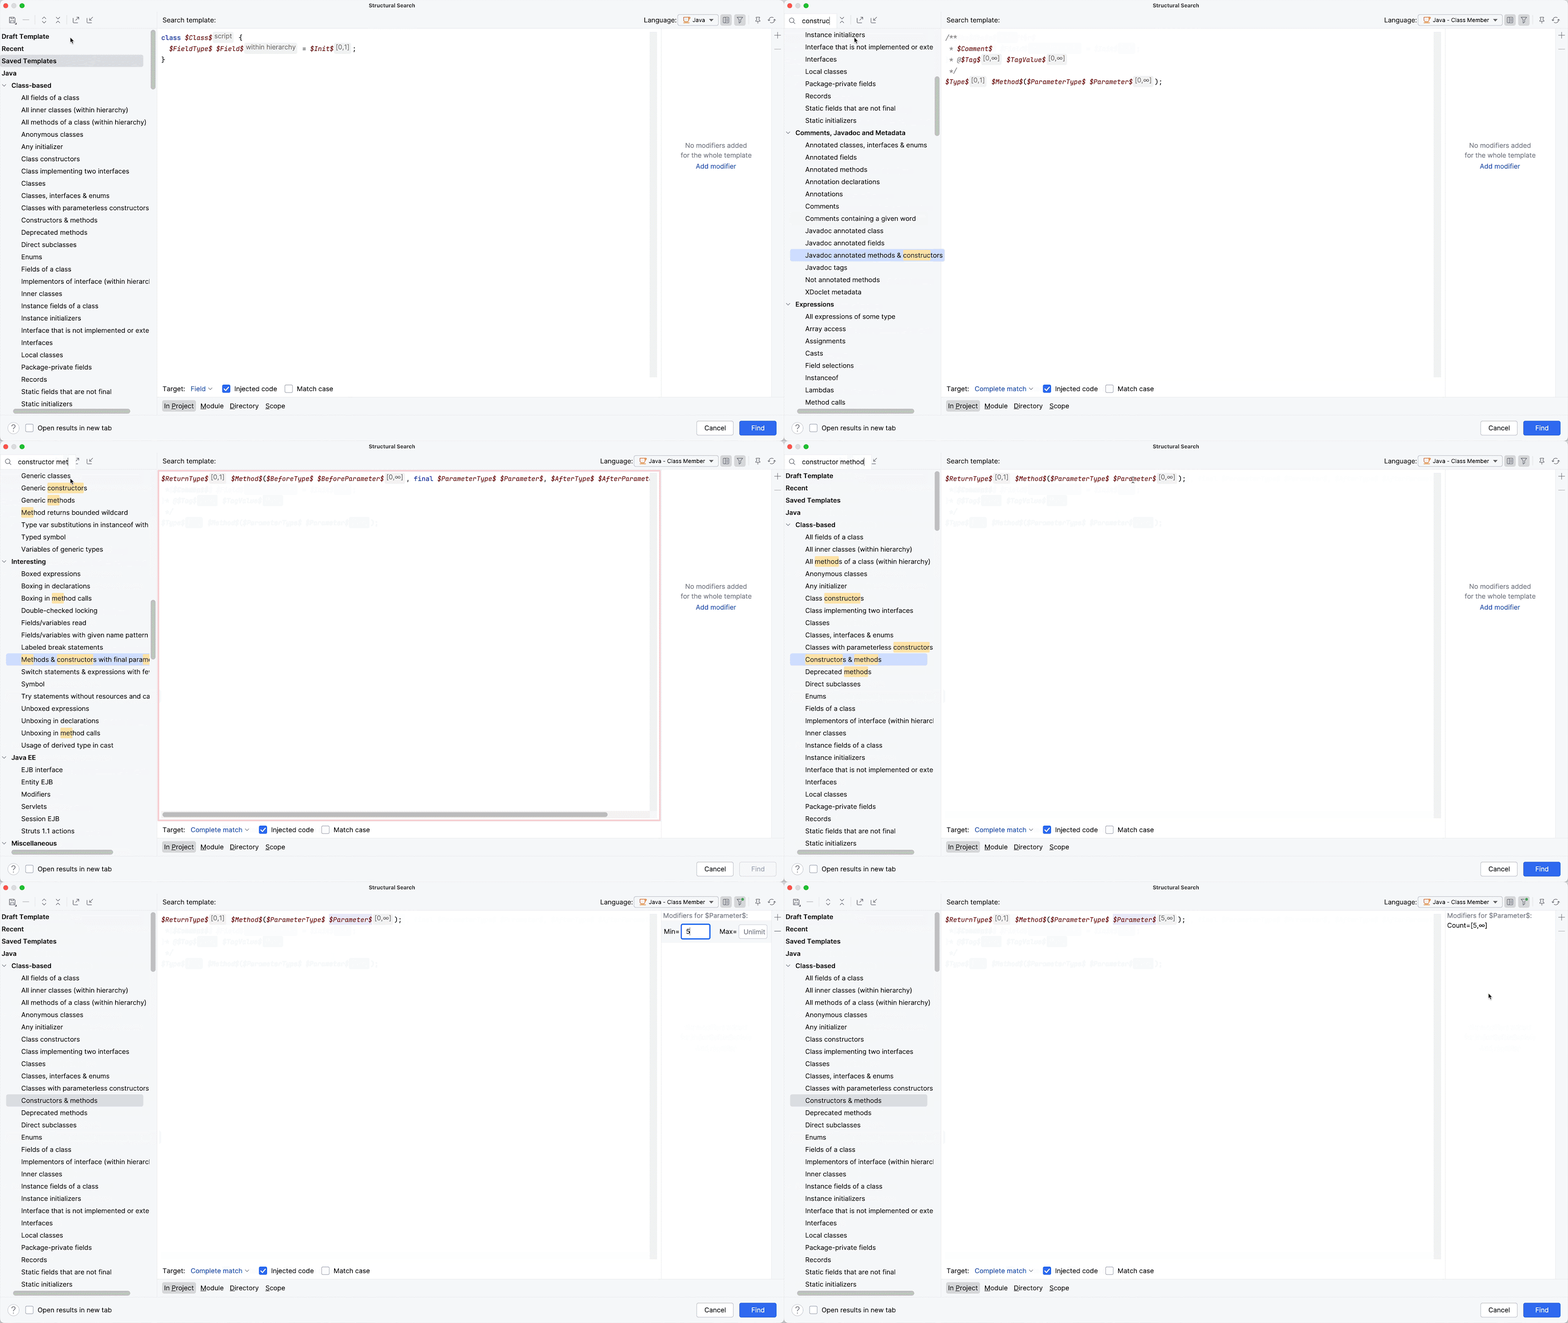
Alternatively, you can create your own template.
For example, let’s consider the following code:
String value = opt.orElse(null);

if (value == null) {

   throw new IllegalArgumentException("Missing value");

}
In this example, the null check can be integrated into Optional using orElseThrow(), as follows:
String value = opt.orElseThrow(() -> new IllegalArgumentException("Missing value"));
Rather than finding each occurrence of this pattern in our code base and changing them manually, you can create a custom inspection to do this for you.
Select an occurrence of the code pattern you want to change and open the Structural Search window via Search Structurally.
When you open Structural Search with your chosen code selected, the snippet will be prefilled in the Search Template field inside the Draft Template.
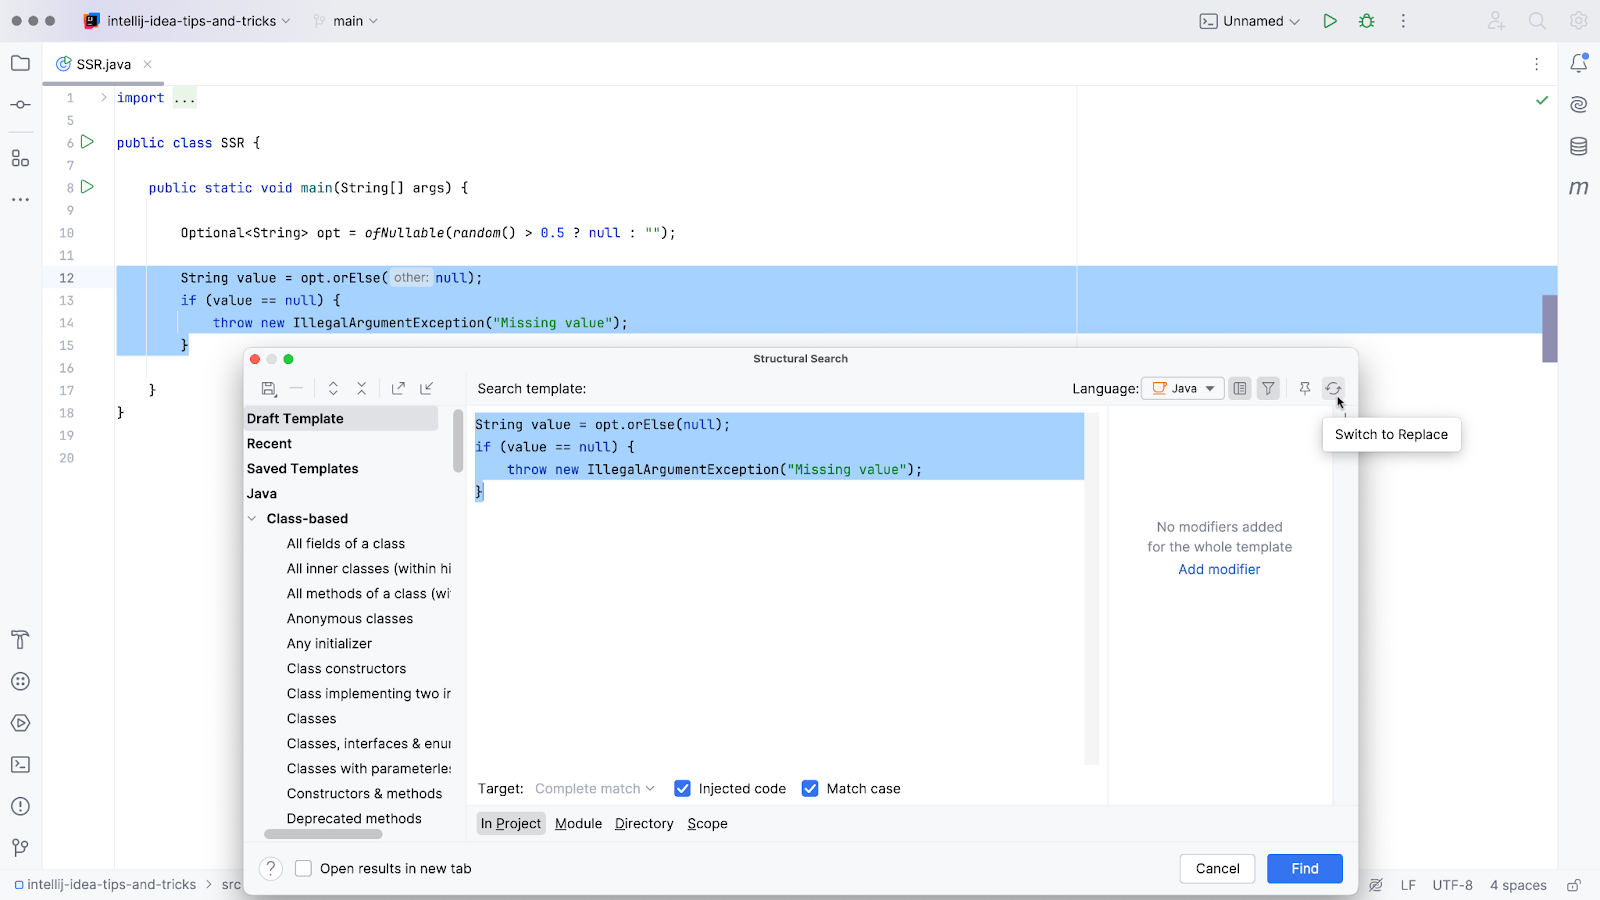
Since you want to replace this code pattern, you can click the Switch to Replace button in the top right-hand corner. Alternatively, you can go to Edit | Find | Replace Structurally… or use Find Action (⌘⇧A on macOS / Control+Shift+A on Windows/Linux) to open it directly. Then, add the desired pattern to the Replace template field in the Structural Replace popup.
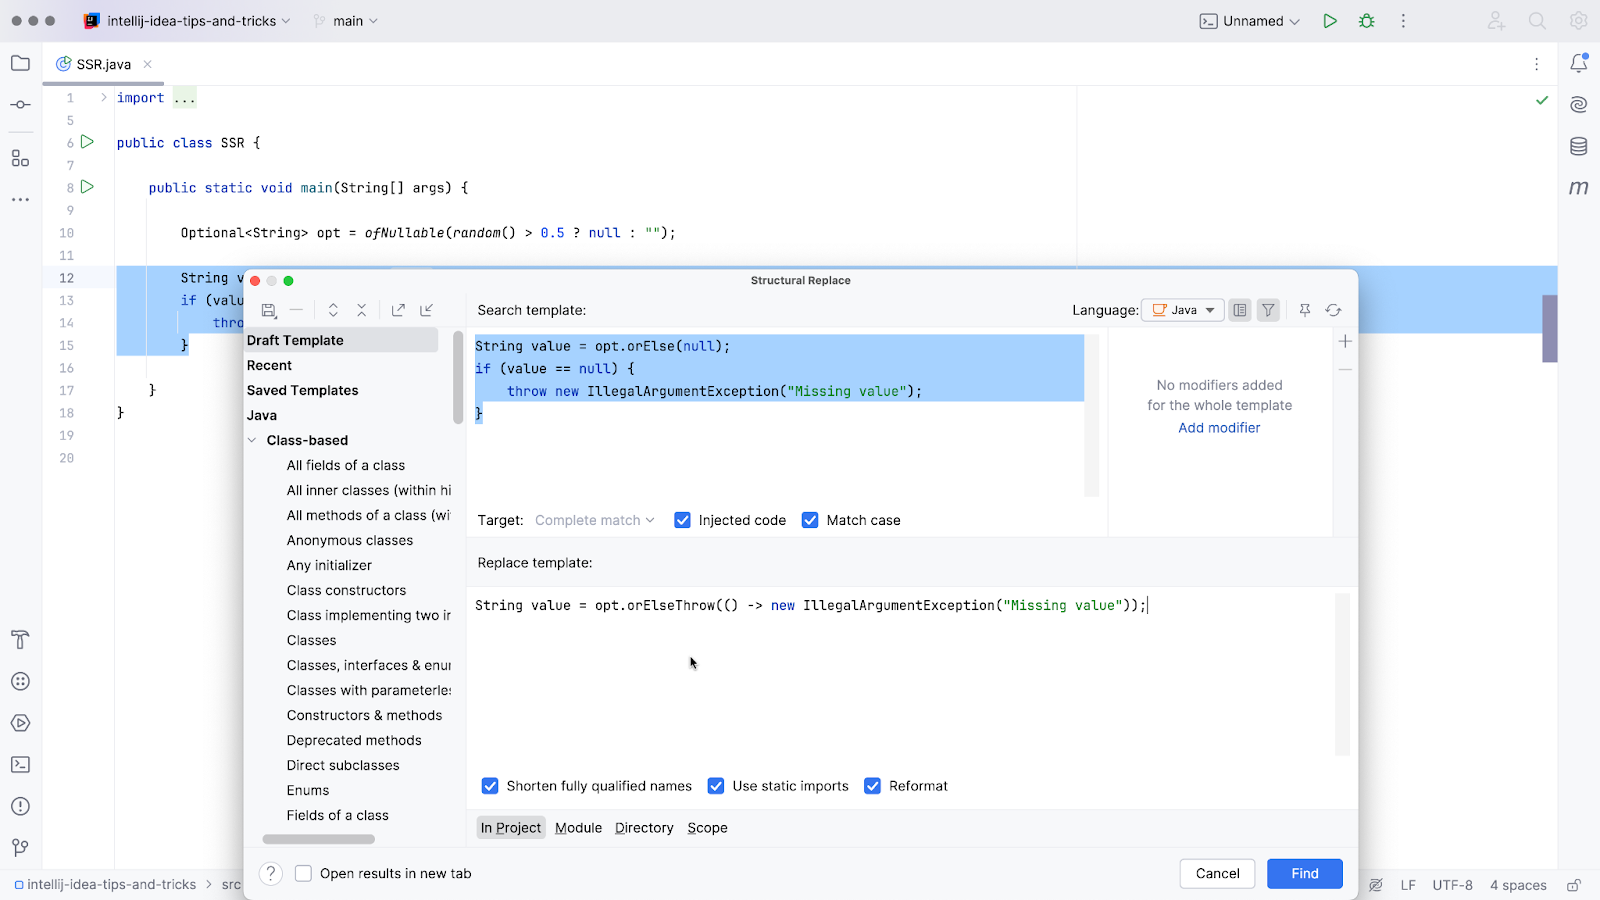
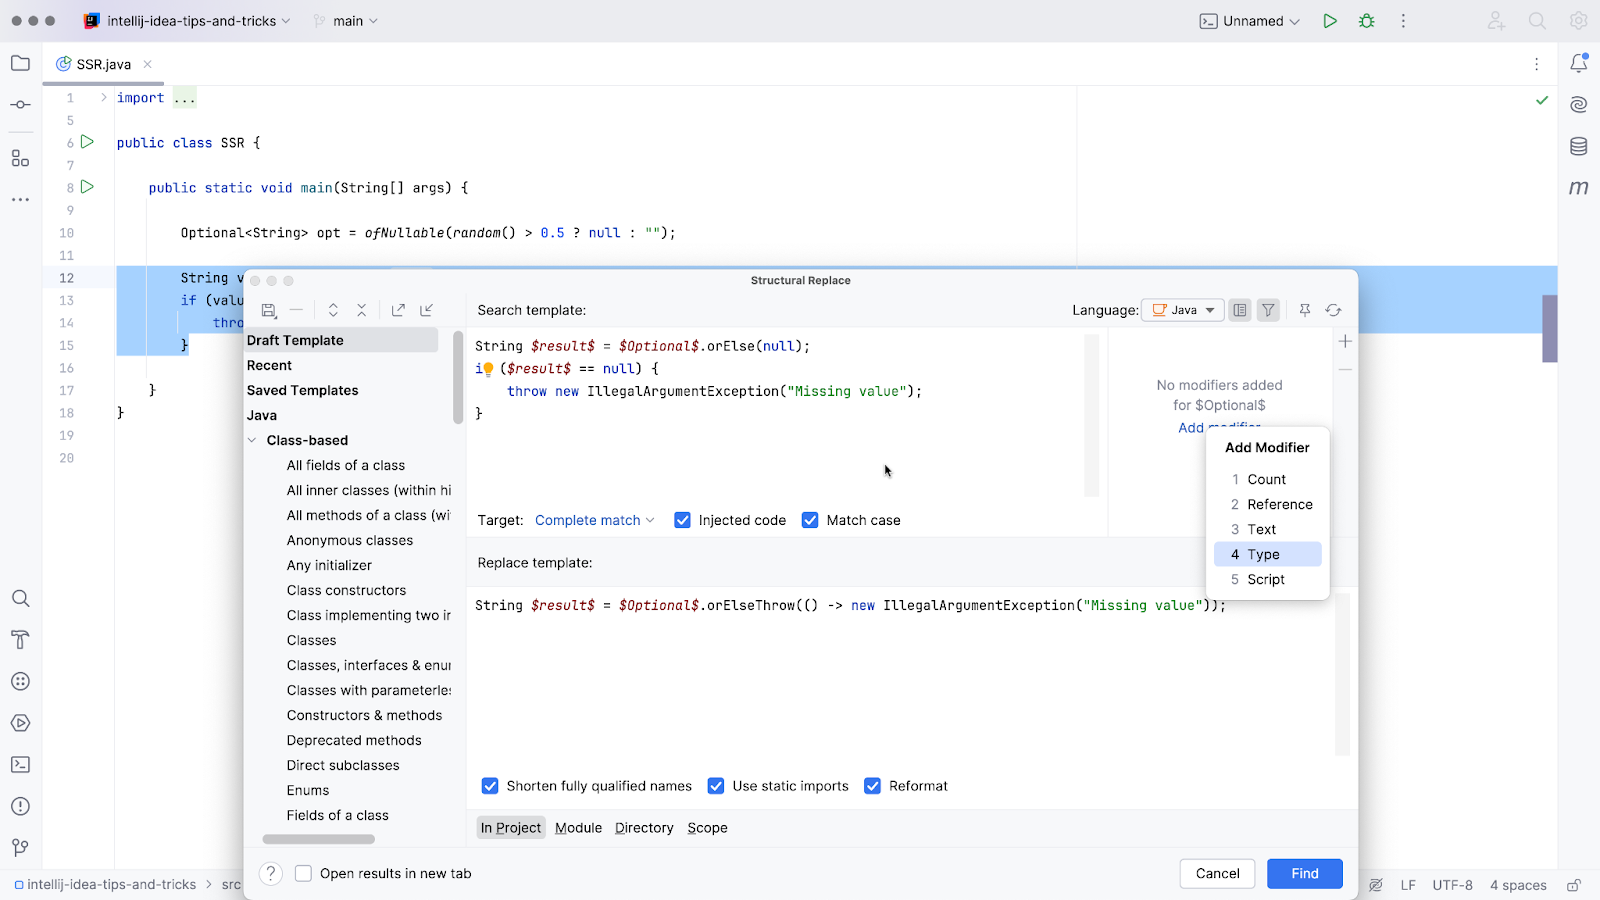
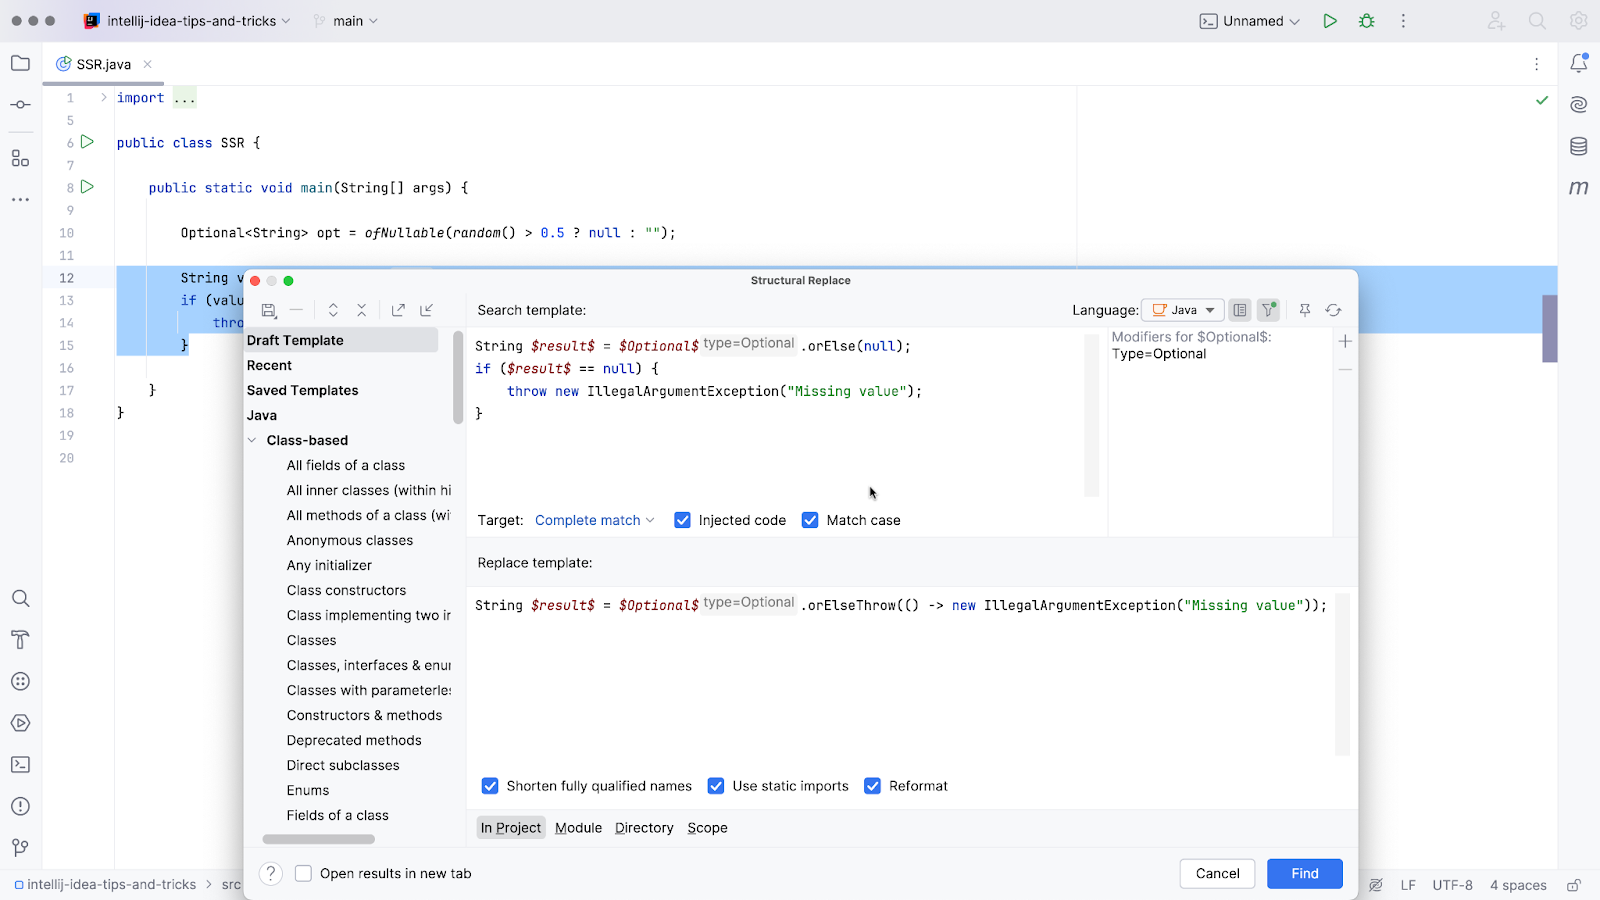
Now, you can define placeholders in the templates and add modifiers where needed. Make sure to match the placeholders from the Search template to the corresponding variables in the Replace template. In both templates, replace the value and opt variables with the placeholders $result$ and $Optional$, respectively. With the caret on $Optional$, click Add modifier in the right-hand pane, select Type, and set the Type to Optional.
The resulting template will look like this:
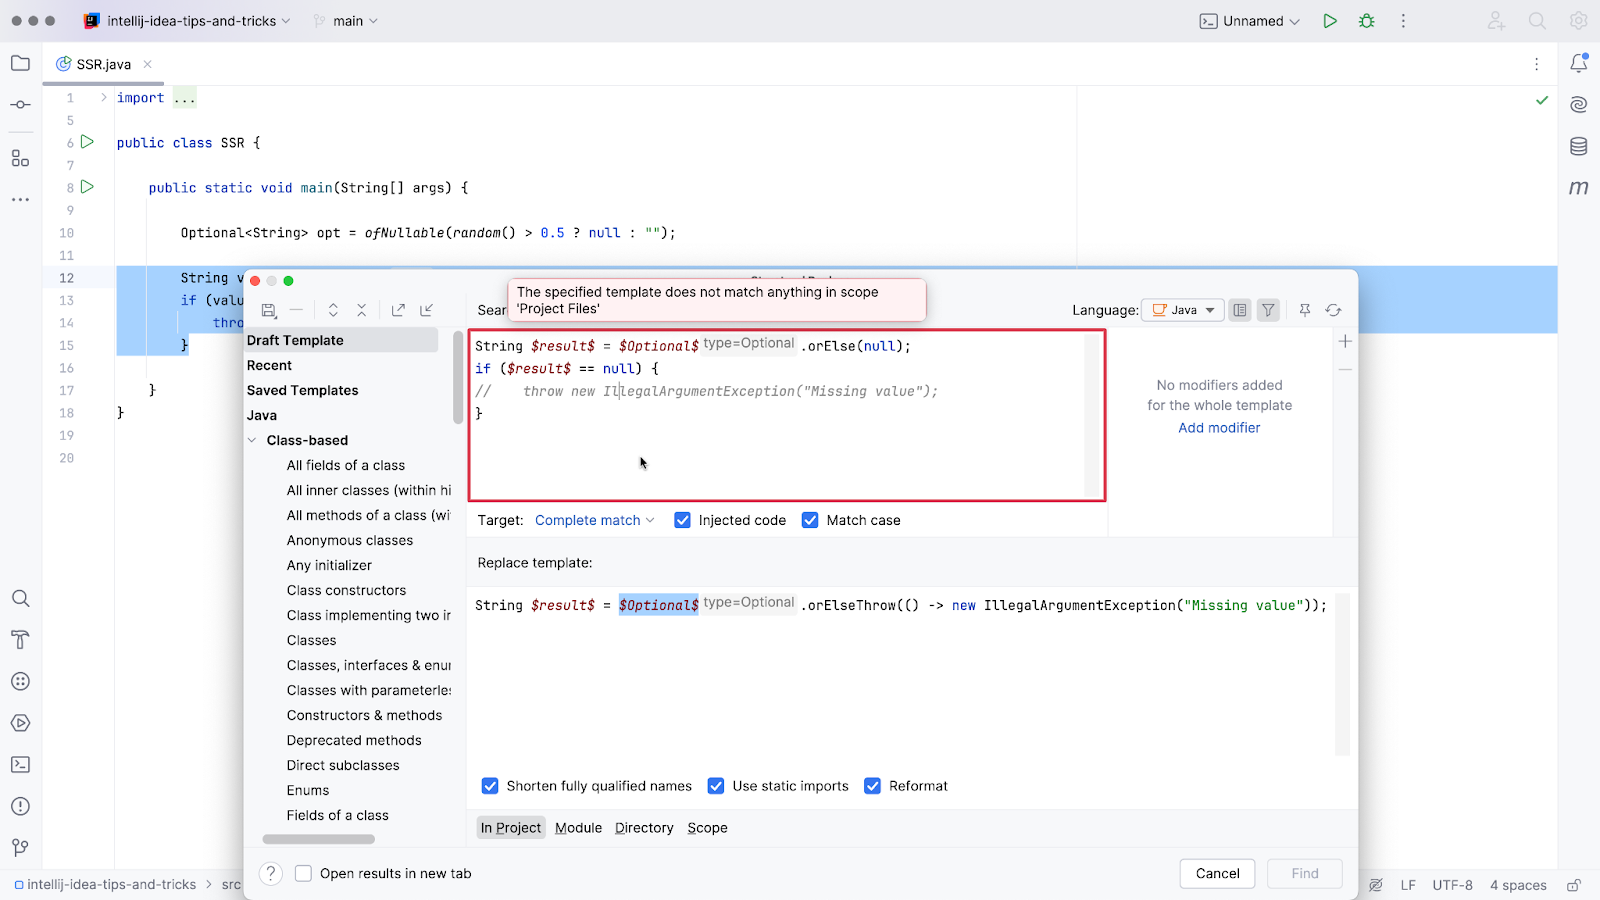
When you have an example in our code for the template you are creating, you can make sure your template matches the code. IntelliJ IDEA will tell you right away if there are no matches to the specified template in your project.
Click the Find button to find all matches to the specified search pattern in your code.
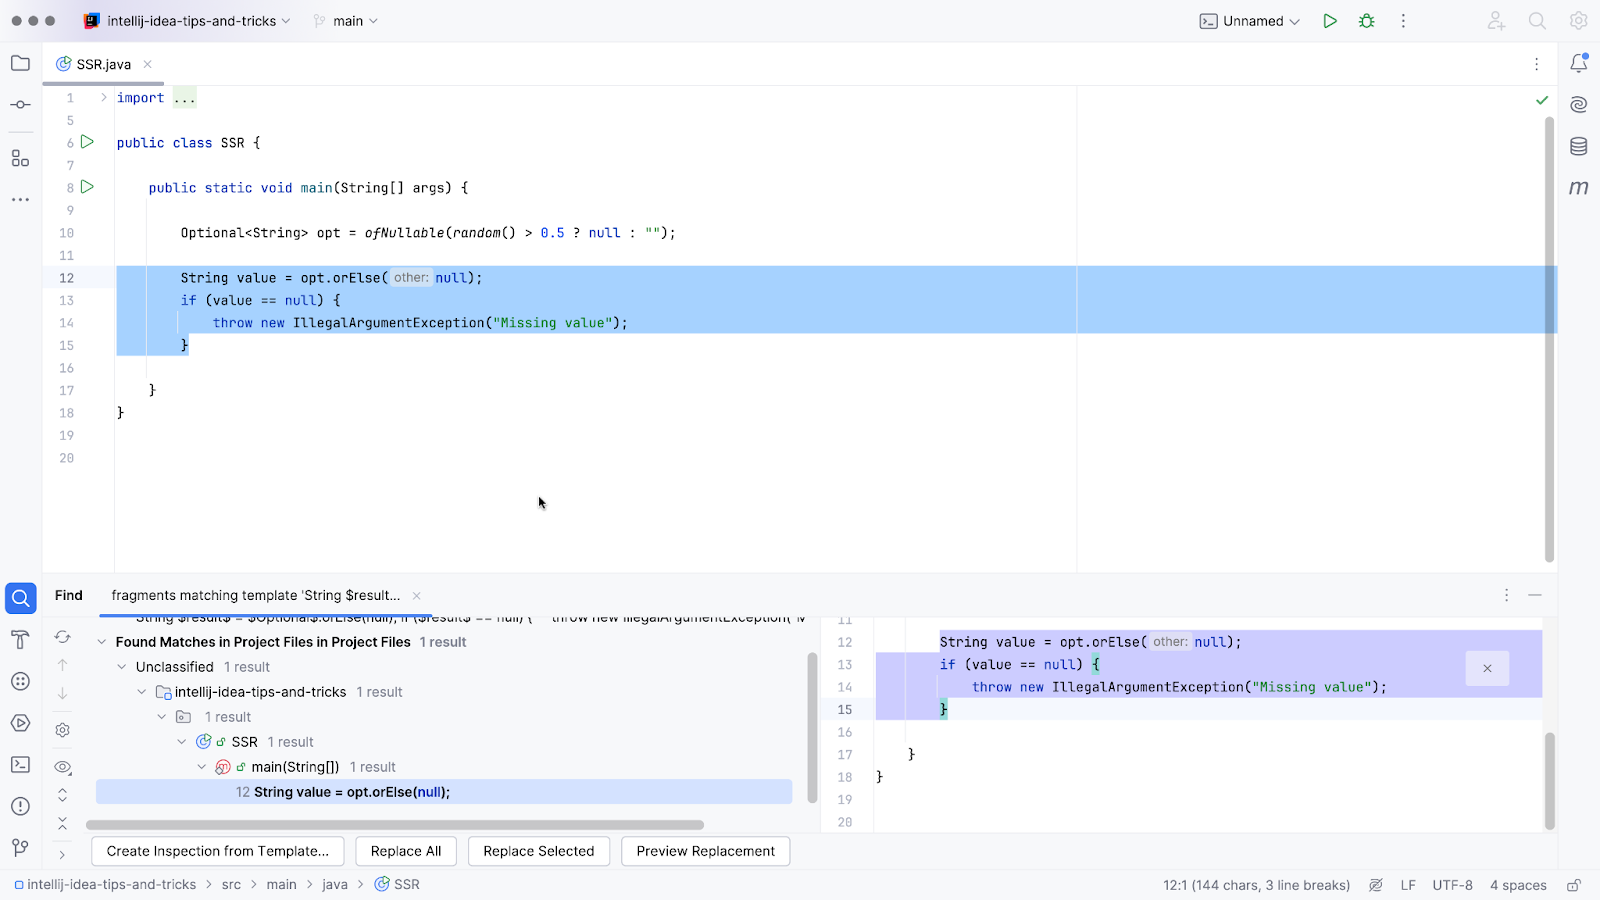
In the Find results, you can choose to Replace All or Replace Selected to replace code according to the template you defined. Use Preview Replacement to see what the replacement will look like.
Alternatively, you can create an inspection from our template, either by using the Draft Template or by clicking Create Inspection from Template… in the Find results.
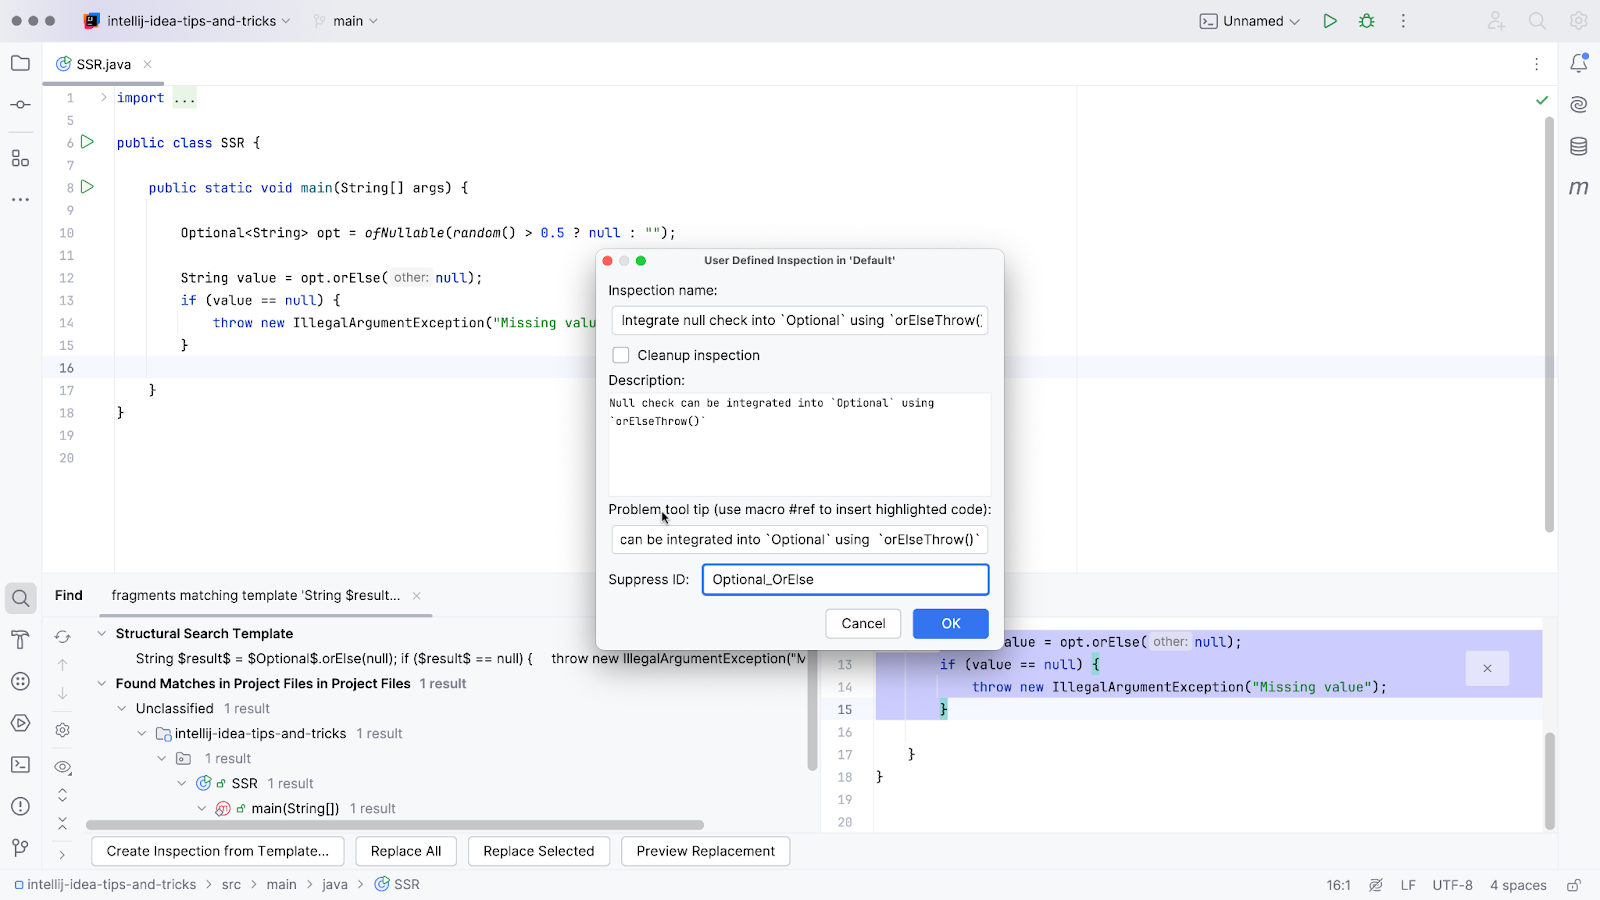
In the popup, you can fill in the metadata desired for your inspection, including an Inspection name, a Description, a Problem tooltip, and a Suppress ID.
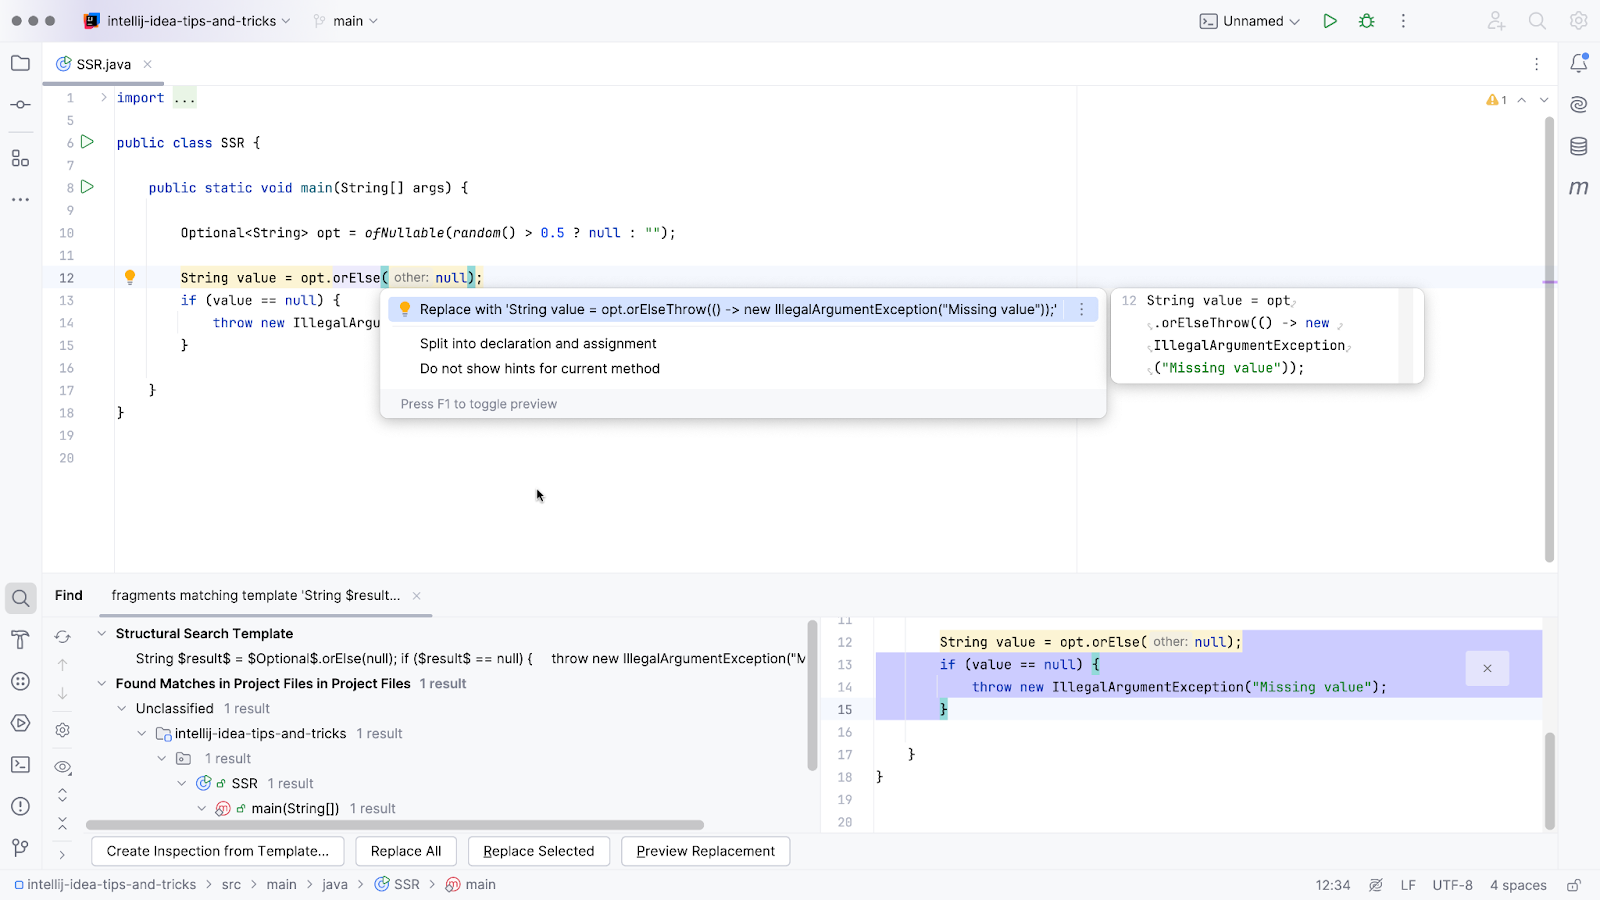
Once you click OK, you’ll see that the code matching the newly created inspection is highlighted in the editor. Now, when you click Alt+Enter on the highlighted code, IntelliJ IDEA will suggest replacing the code according to your template.
If you wish to edit your custom inspection further, you can find it in Settings under Editor | Inspections.
Custom inspections
As described above, you can create a custom inspection from a search and replace template.
If you already know that you want to create a custom inspection, you can go ahead and do this right away.
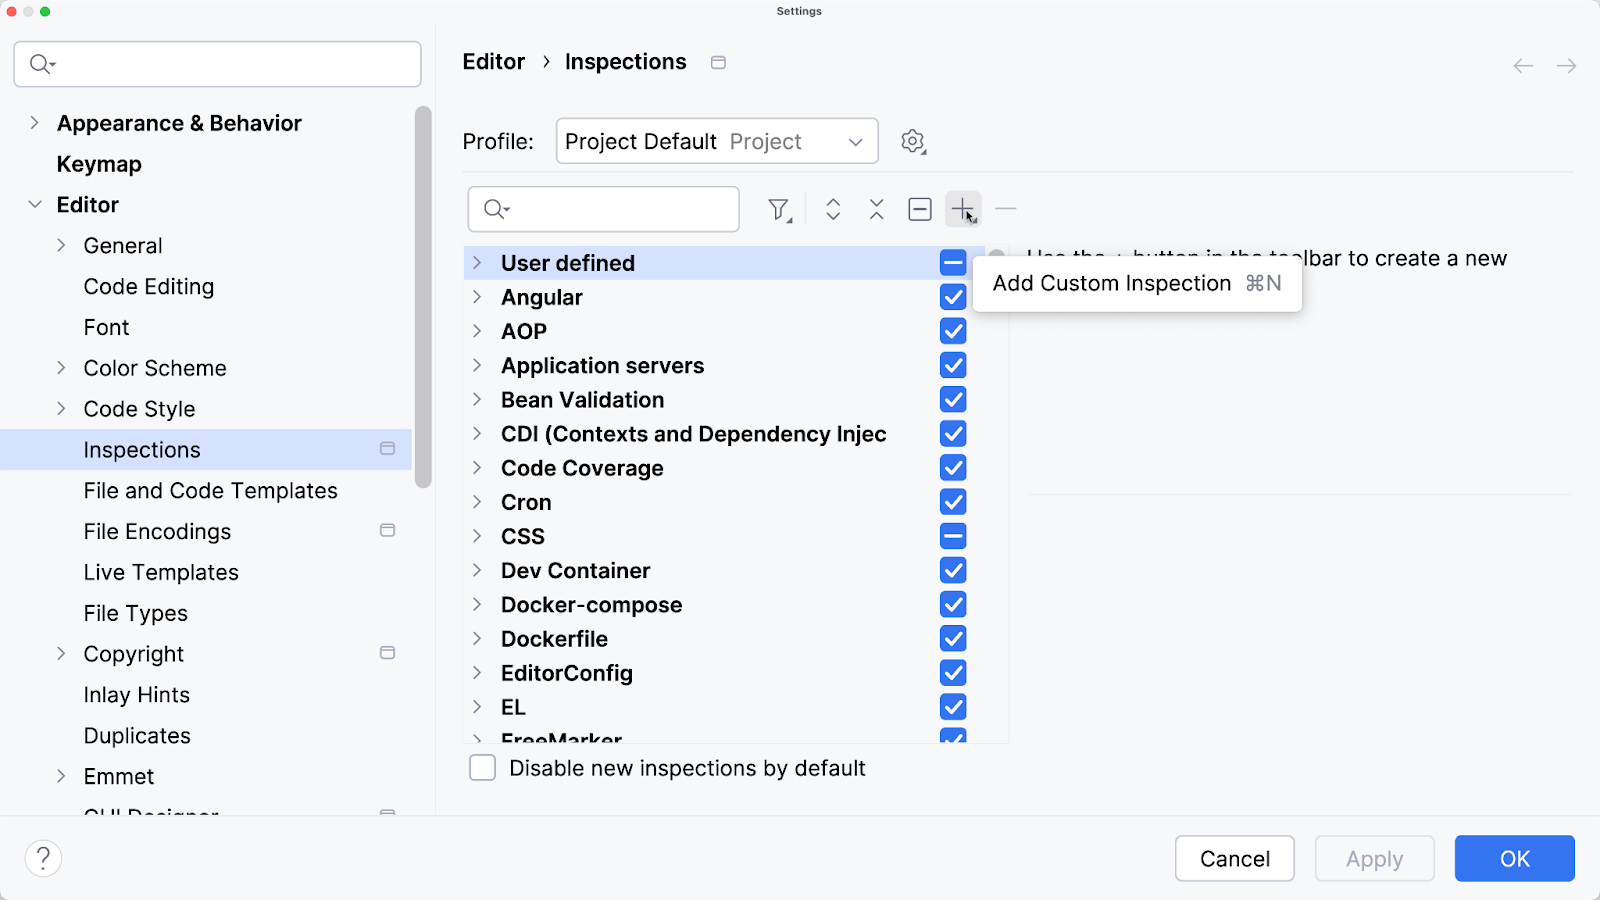
To create a custom inspection, go to Settings | Editor | Inspections, click Add Custom Inspection (⌘N on macOS) / Alt+Ins on Windows/Linux), and select the type of inspection you want to create. You can use search and replace templates or RegExp to do this.
Custom inspections using Structural Search
To create an inspection using Structural Search, select Add Structural Search Inspection. To include a quick-fix in the inspection, select Add Structural Replace Inspection.
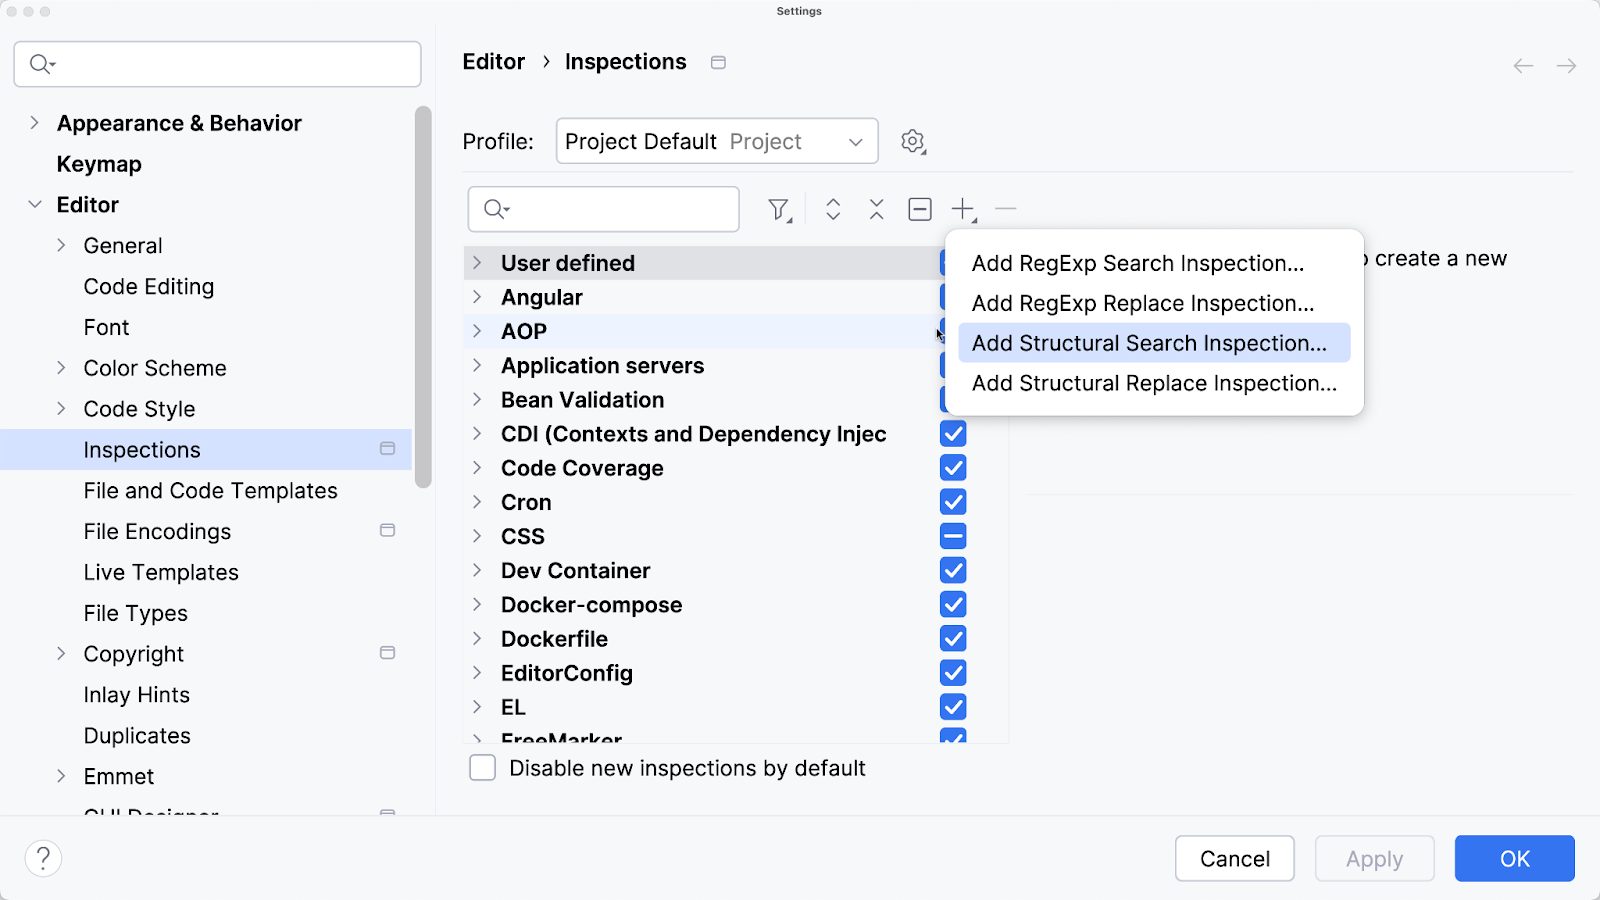
For example, you can create an inspection for the example above where you’re looking for methods or constructors that use more than five parameters.
Just as in the previous example, you can use the existing Constructors & methods template and modify the minimum count value of the method parameters to 5. You can change the inspection name and add a tooltip that will show in the editor.
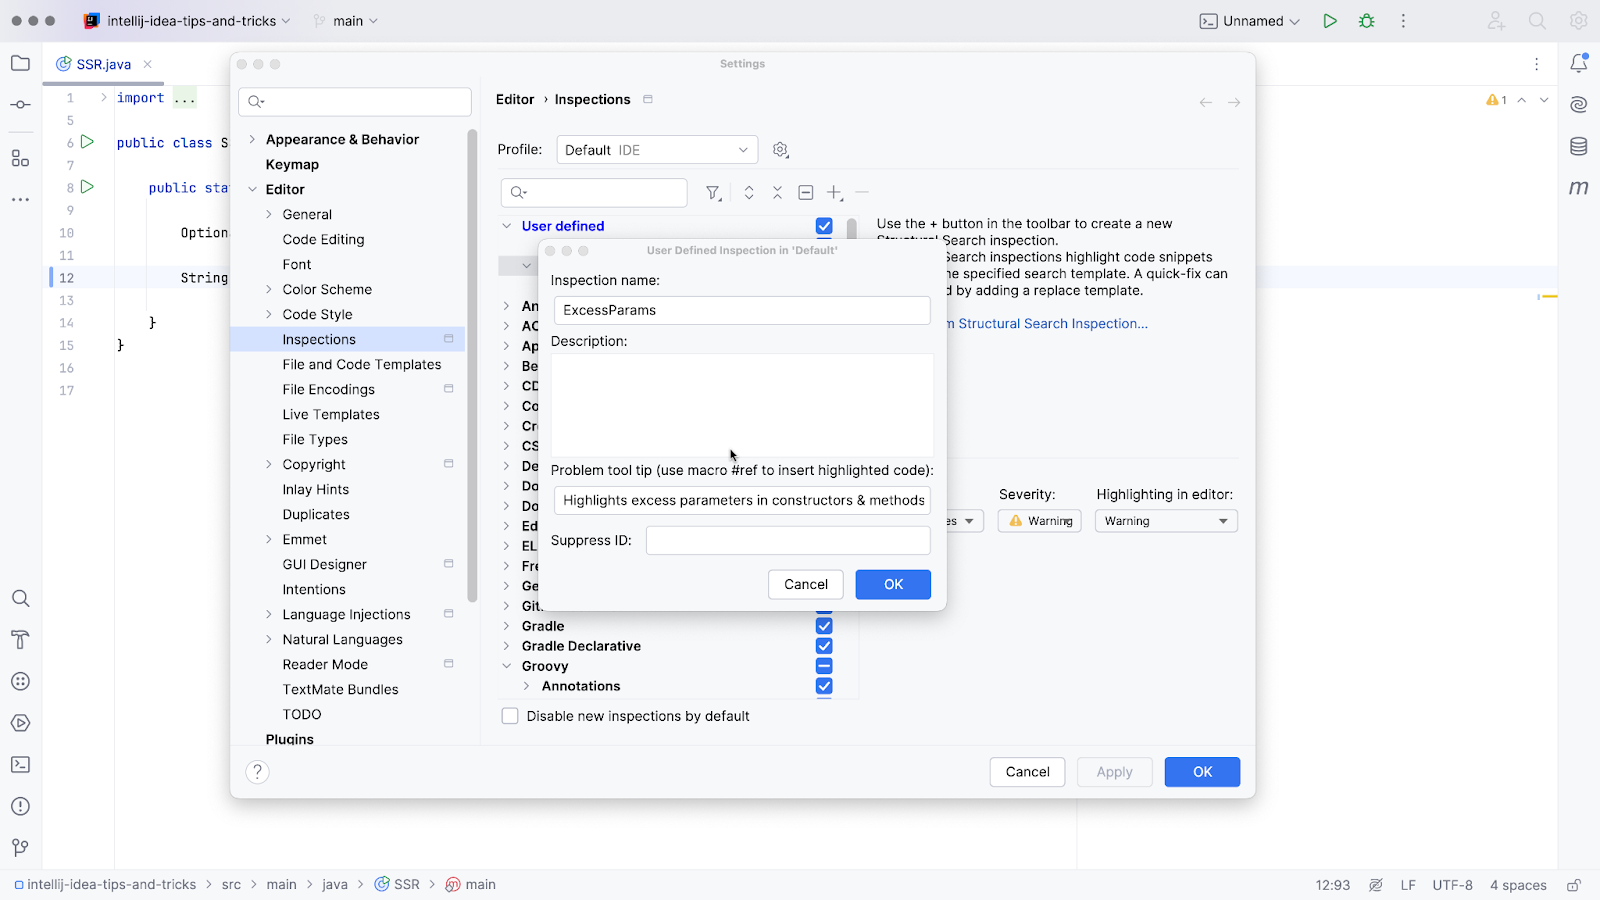
You can also edit the Severity and Highlighting in editor fields.
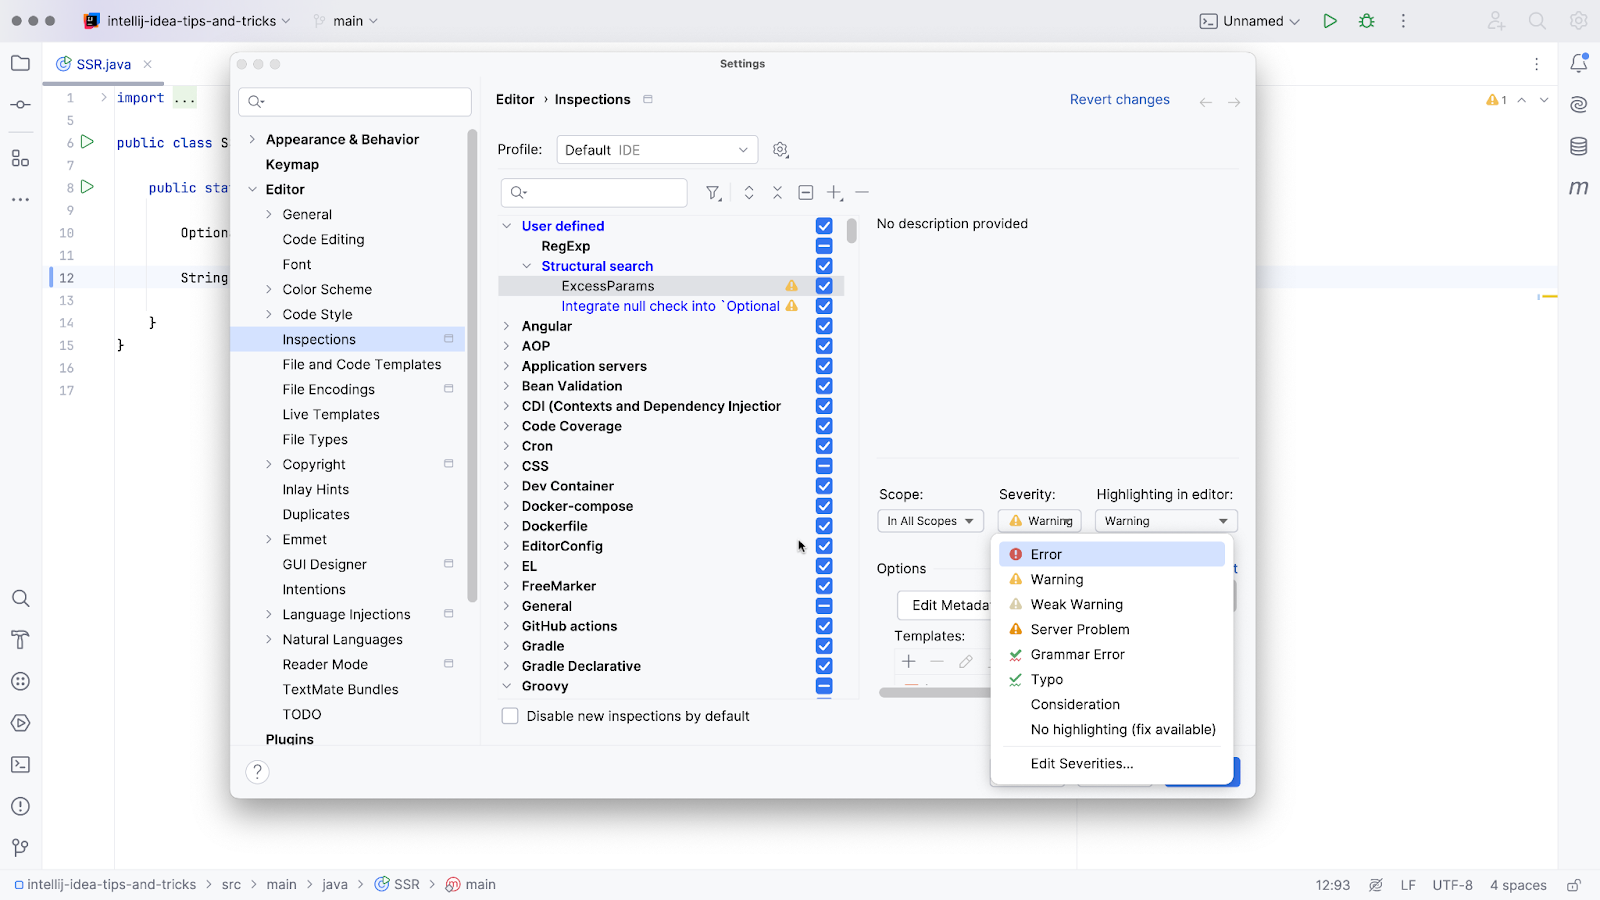
You can edit or remove your custom inspection via Settings at any time.
Custom inspections using regular expressions
Alternatively, you can create inspections using regular expressions to search for and replace specific patterns of text.
To create an inspection, open Settings and go to Editor | Inspections. Under User defined, select Regexp and click the + button on the right-hand side of the screen. Then, select Add RegExp Search Inspection….
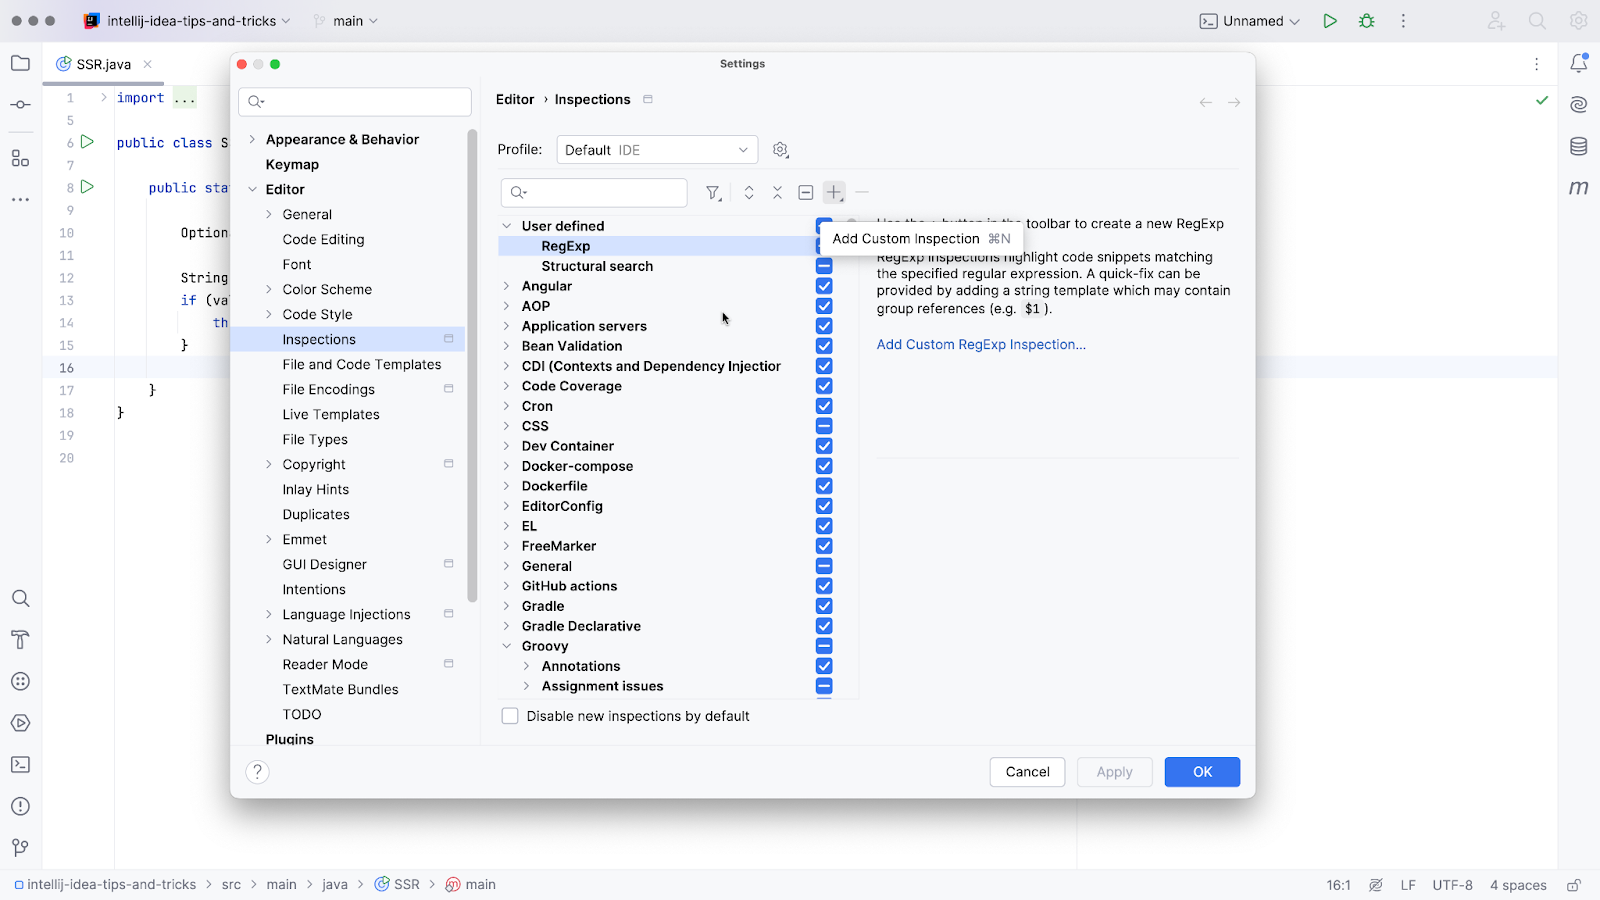
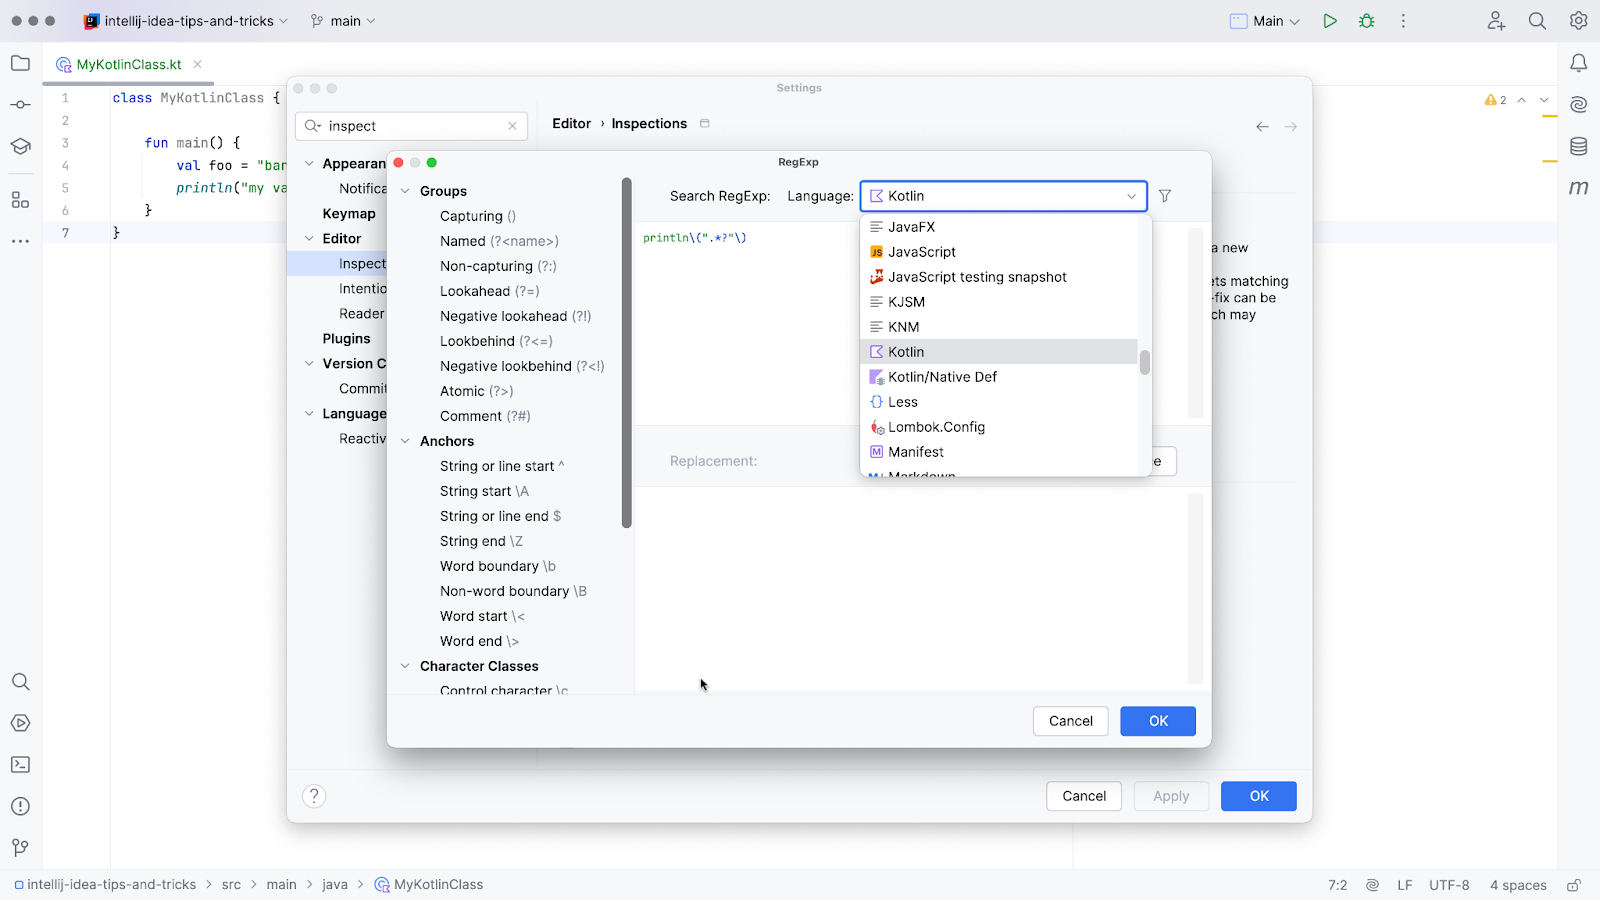
You can now create your inspection by typing the regular expression. As this example uses Kotlin, select Language = Kotlin from the dropdown menu in the top right of the window.
In this example, let’s look for println() methods, as you probably don’t want your debugging statements to end up in production. Since you are using regex, you’ll need to escape the brackets. Search for println(".*?") to find any println() method with an argument.
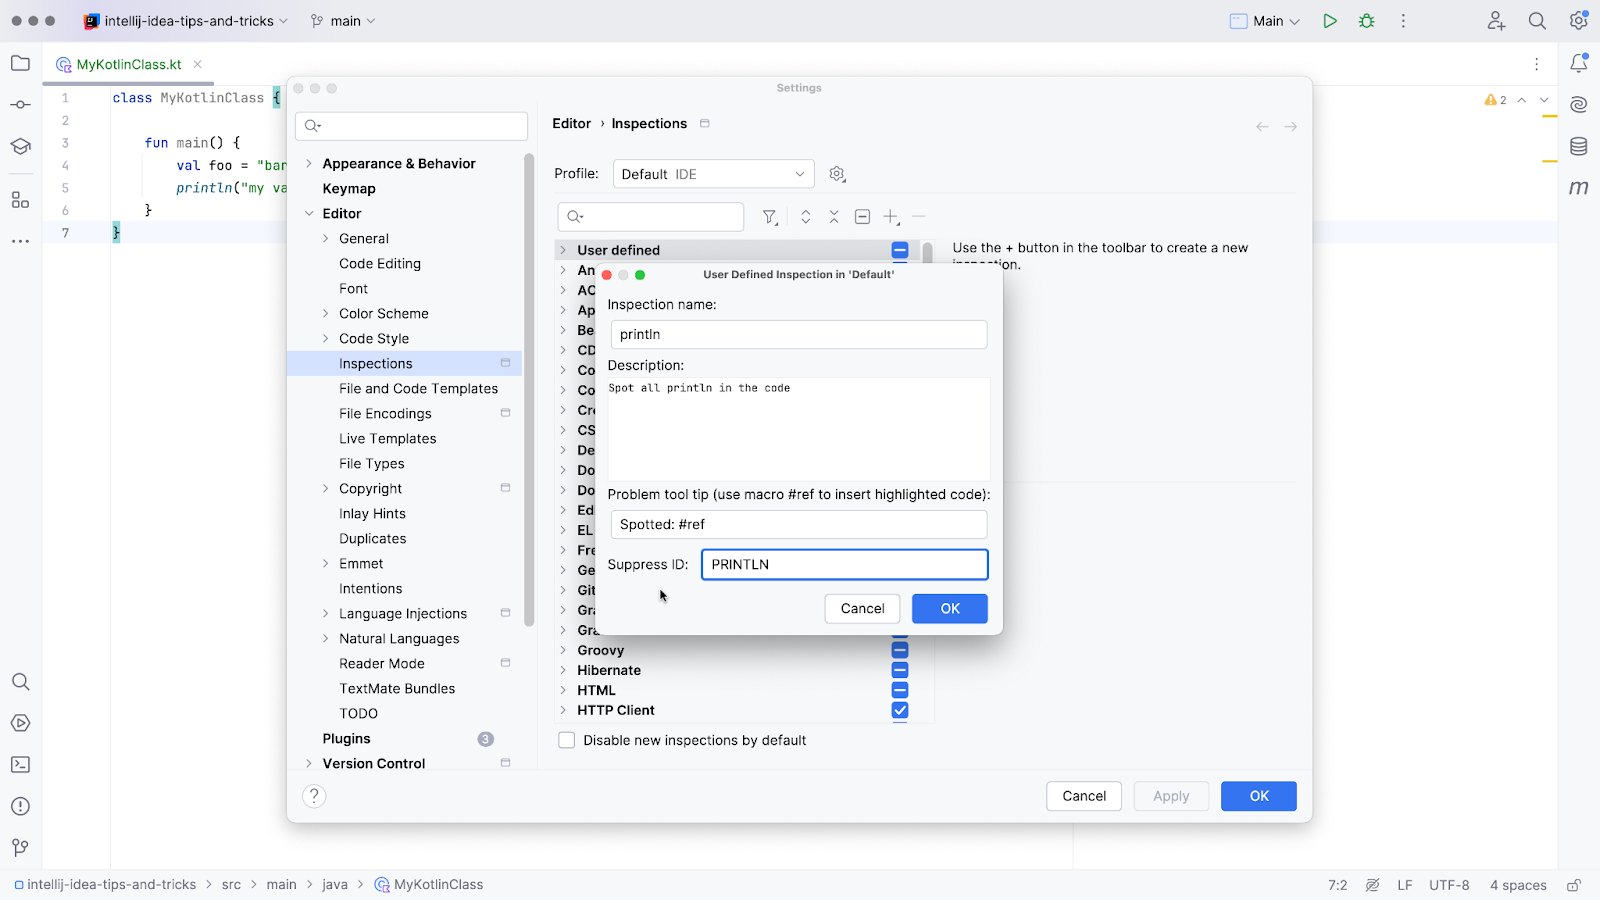
Click OK to go to the User Defined Inspection in ‘Default’ popup and fill in the details for the inspection. For example, you can enter “println” in the Inspection name field, “Spot all println in the code” under Description, and “Spotted: #ref” in the Problem tooltip, where #ref will refer to the code in which println has been found. Finally, enter “PRINTLN” under Suppress ID and click OK.
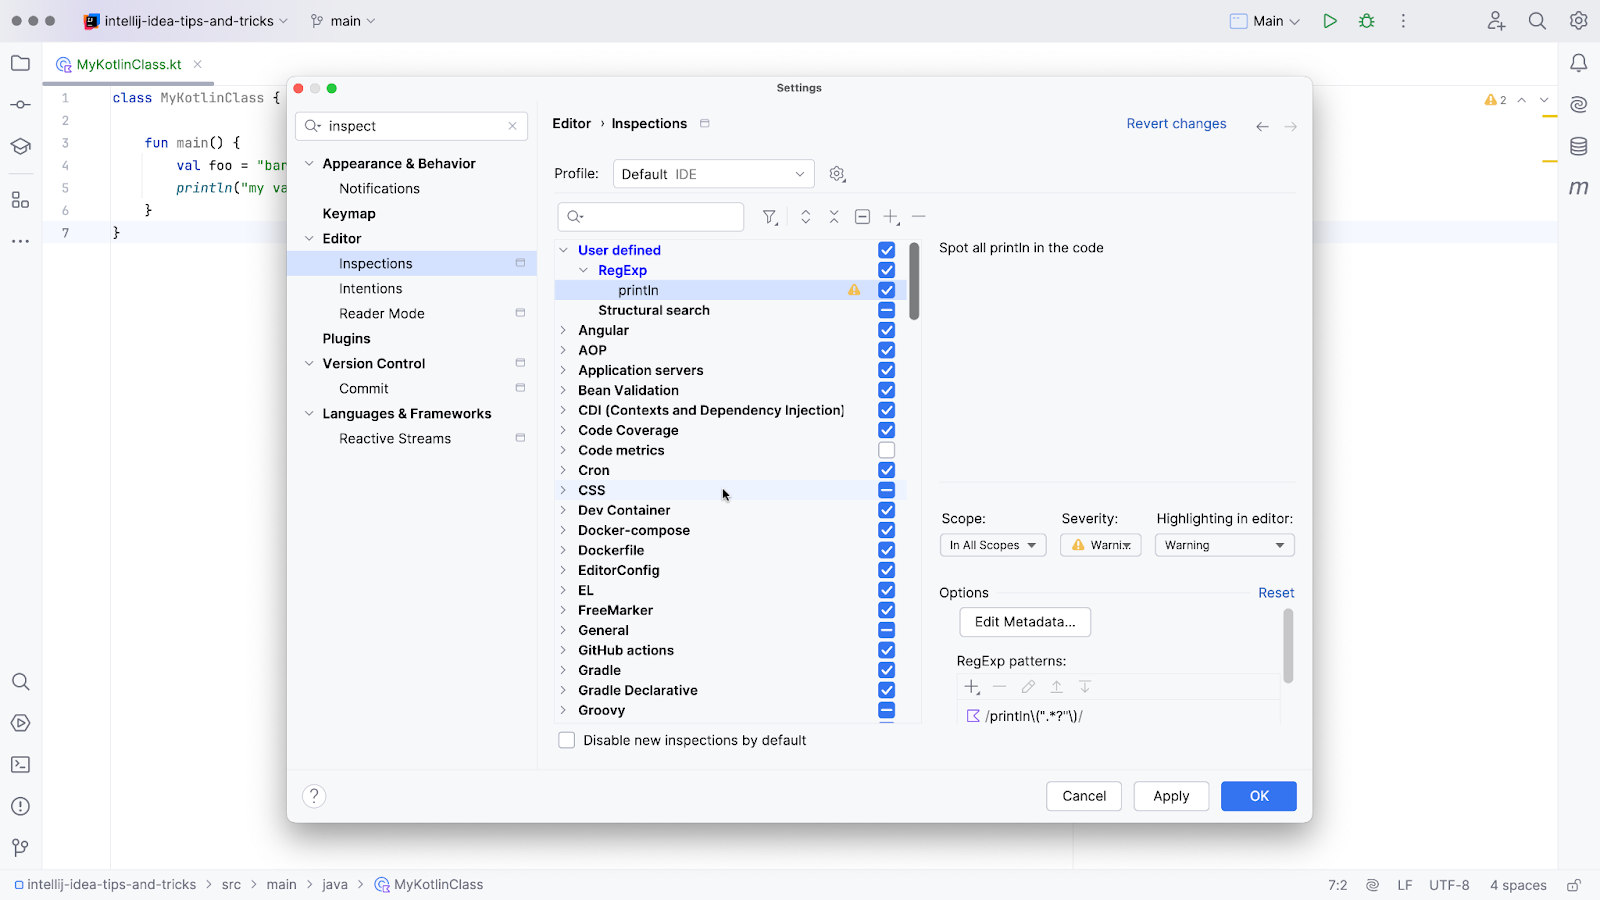
You will now see the created custom inspection under User defined | RegExp with an exclamation mark, as the current Severity value is Warning. You can change the severity level as well as how this inspection will be highlighted in the editor in the panel on the right-hand side of the screen.
Now, any code that meets this inspection will be highlighted in the editor. You might also want to add a quick-fix to the inspection. To do so, you’ll need to edit the inspection you just defined.
In Settings, go to Editor | Inspections, select the RegExp pattern in the bottom right-hand corner of the Settings screen, and click the Edit button.
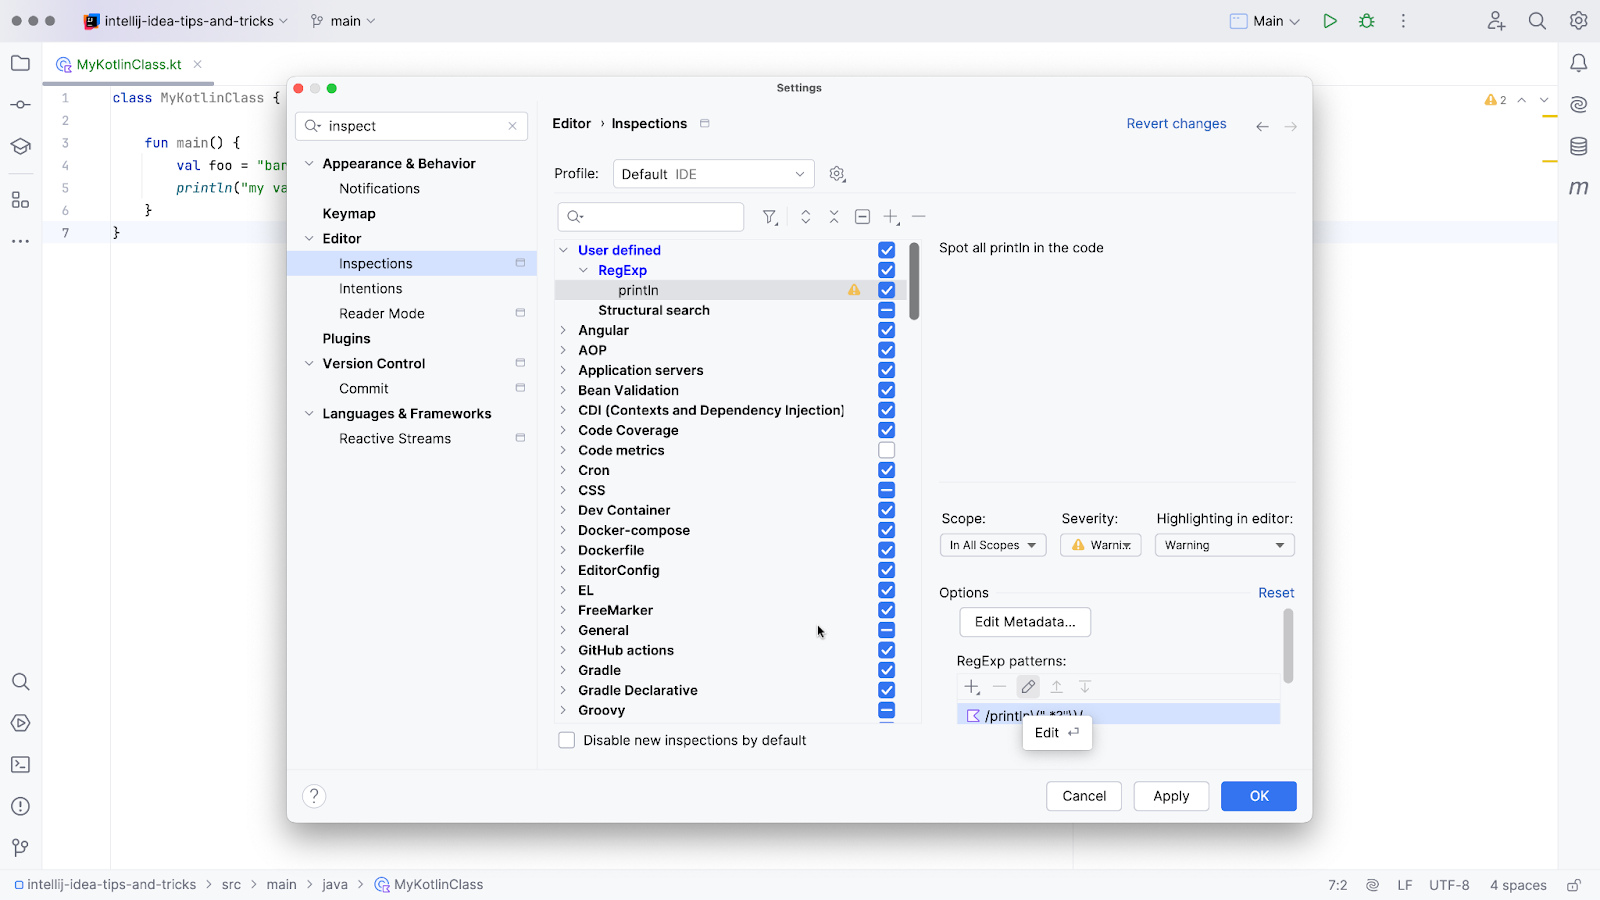
In the RegExp popup that opens, click the Enable Replace button.
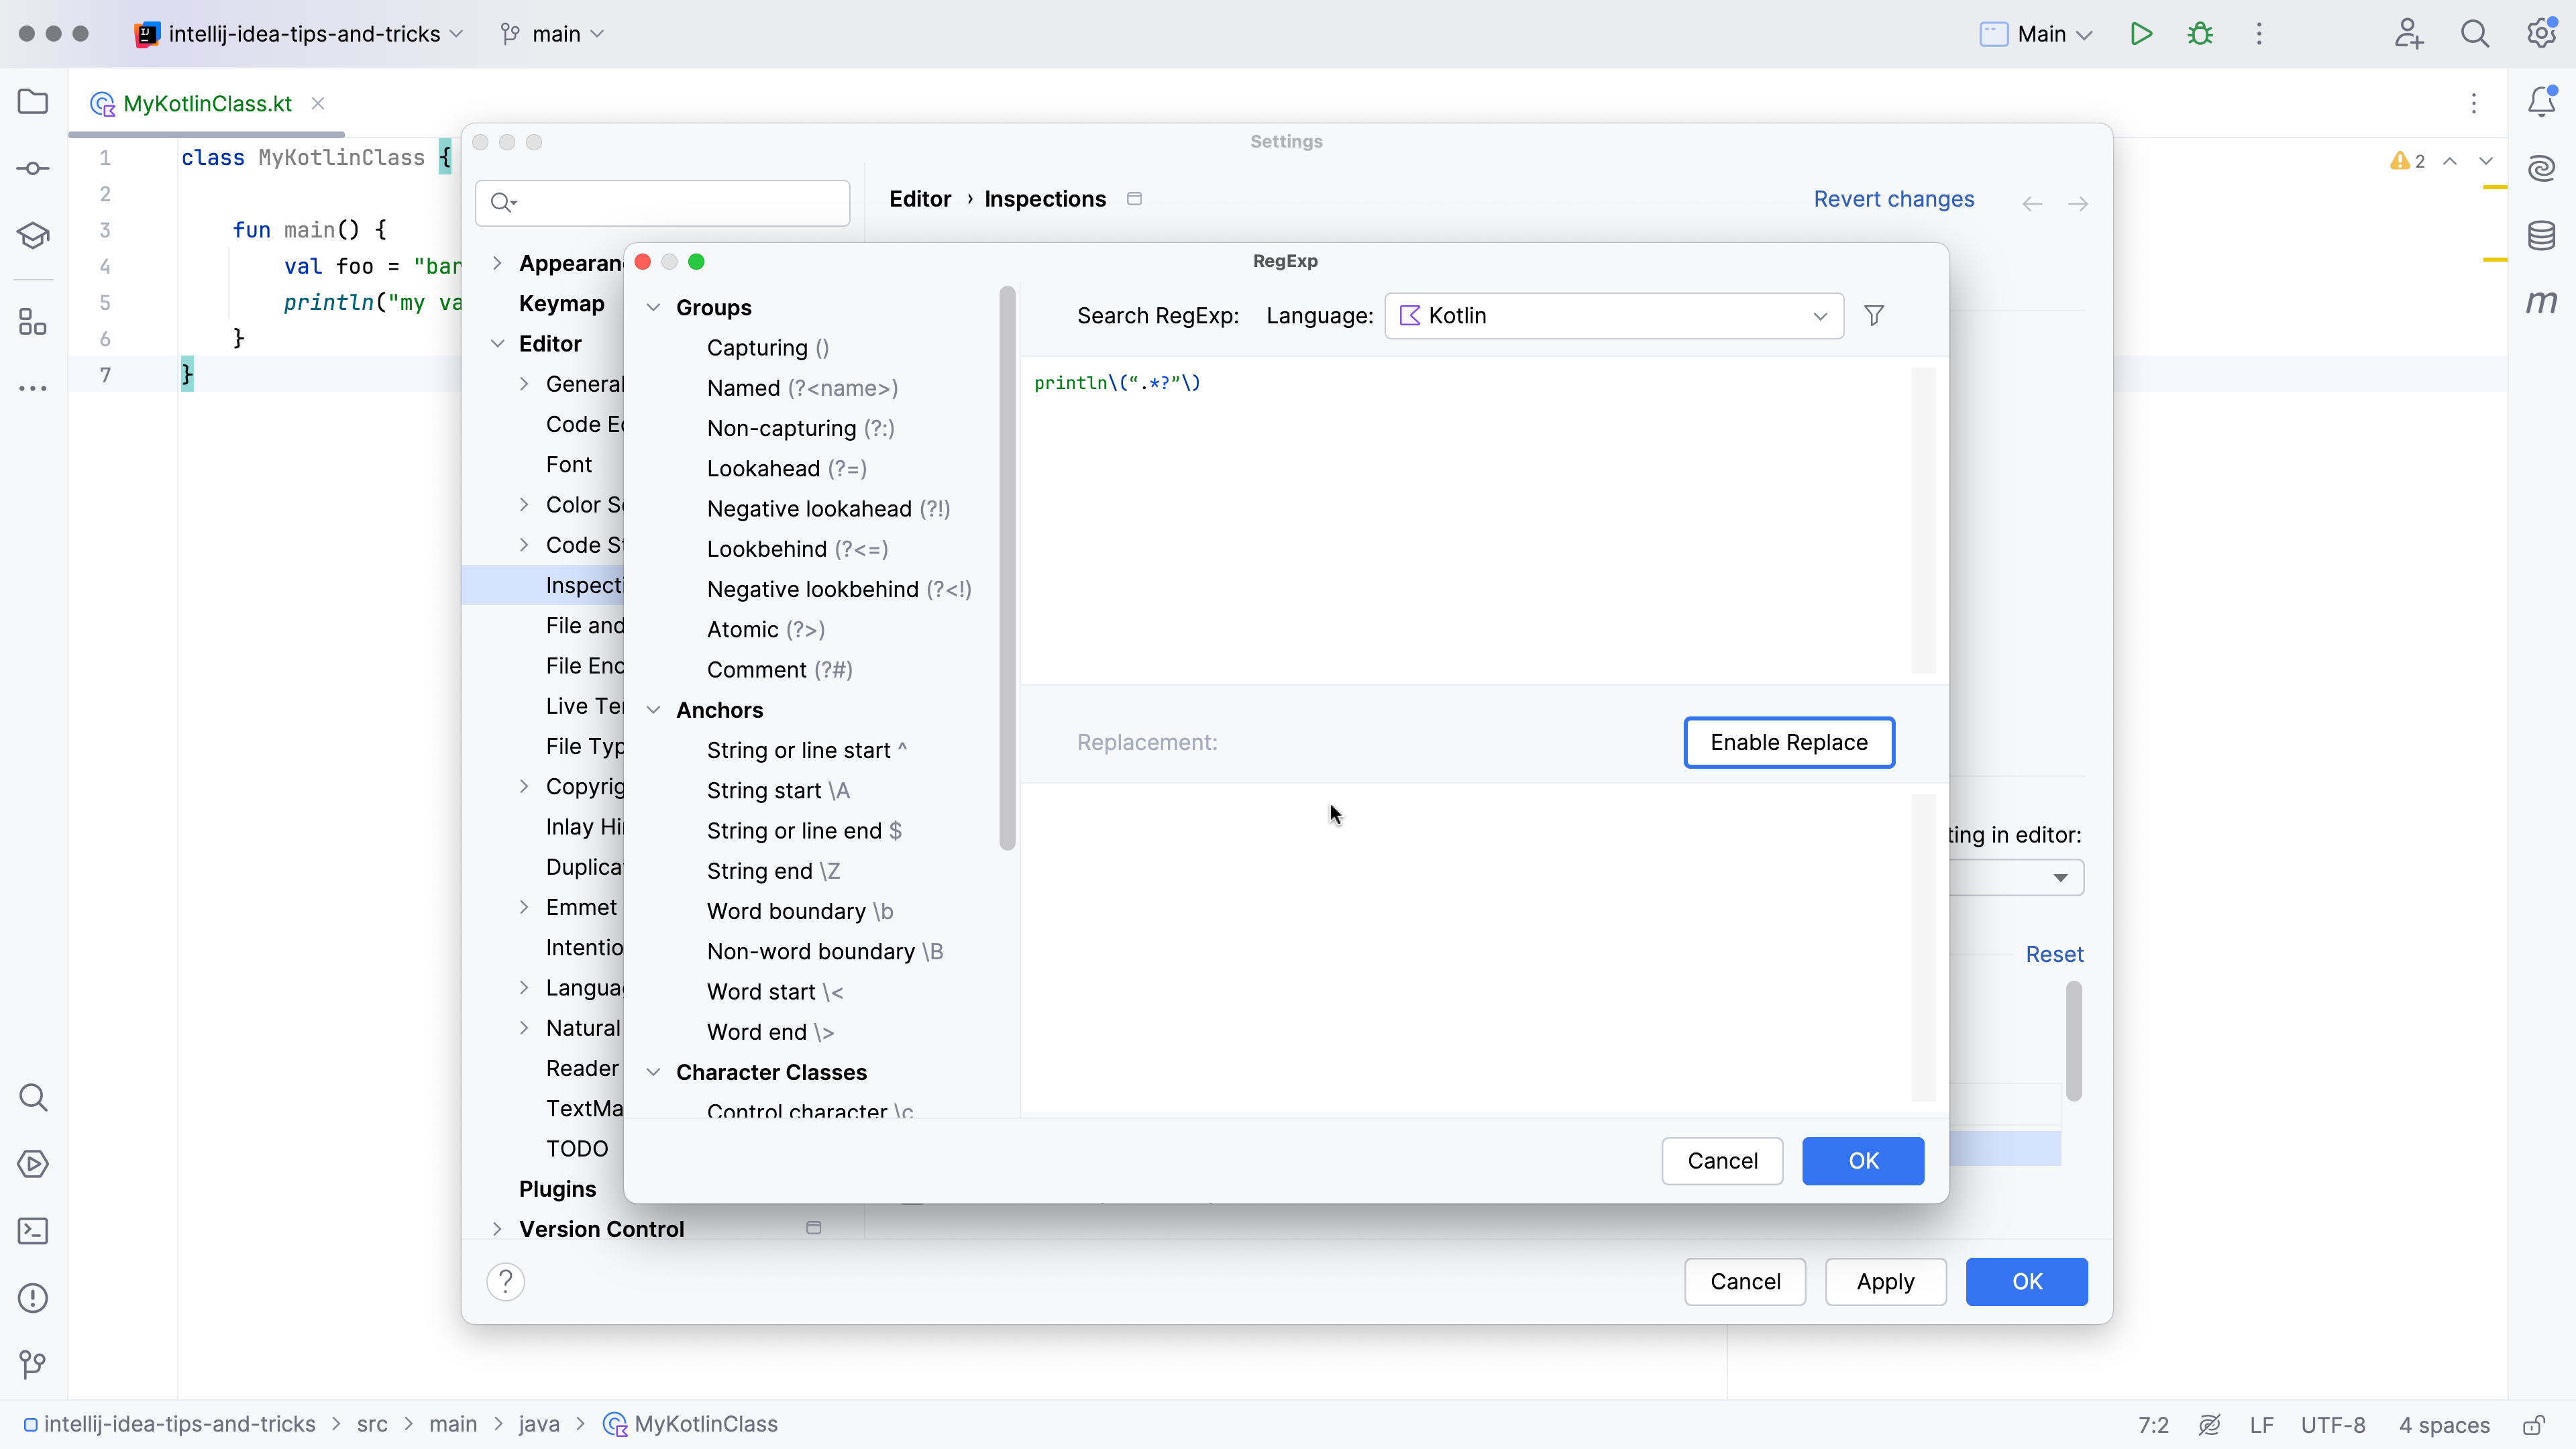
In the Replacement field, you can enter any code you like. For example, you might decide to add // to comment out the code.
In order to refer to the code you want to replace, you’ll need to capture the entire piece of code that you want to use in the Replacement field. You can do so by wrapping the code with brackets as follows: (println(".*?")). This will now be your first regex group, and you can refer to it in the Replacement field as $1.
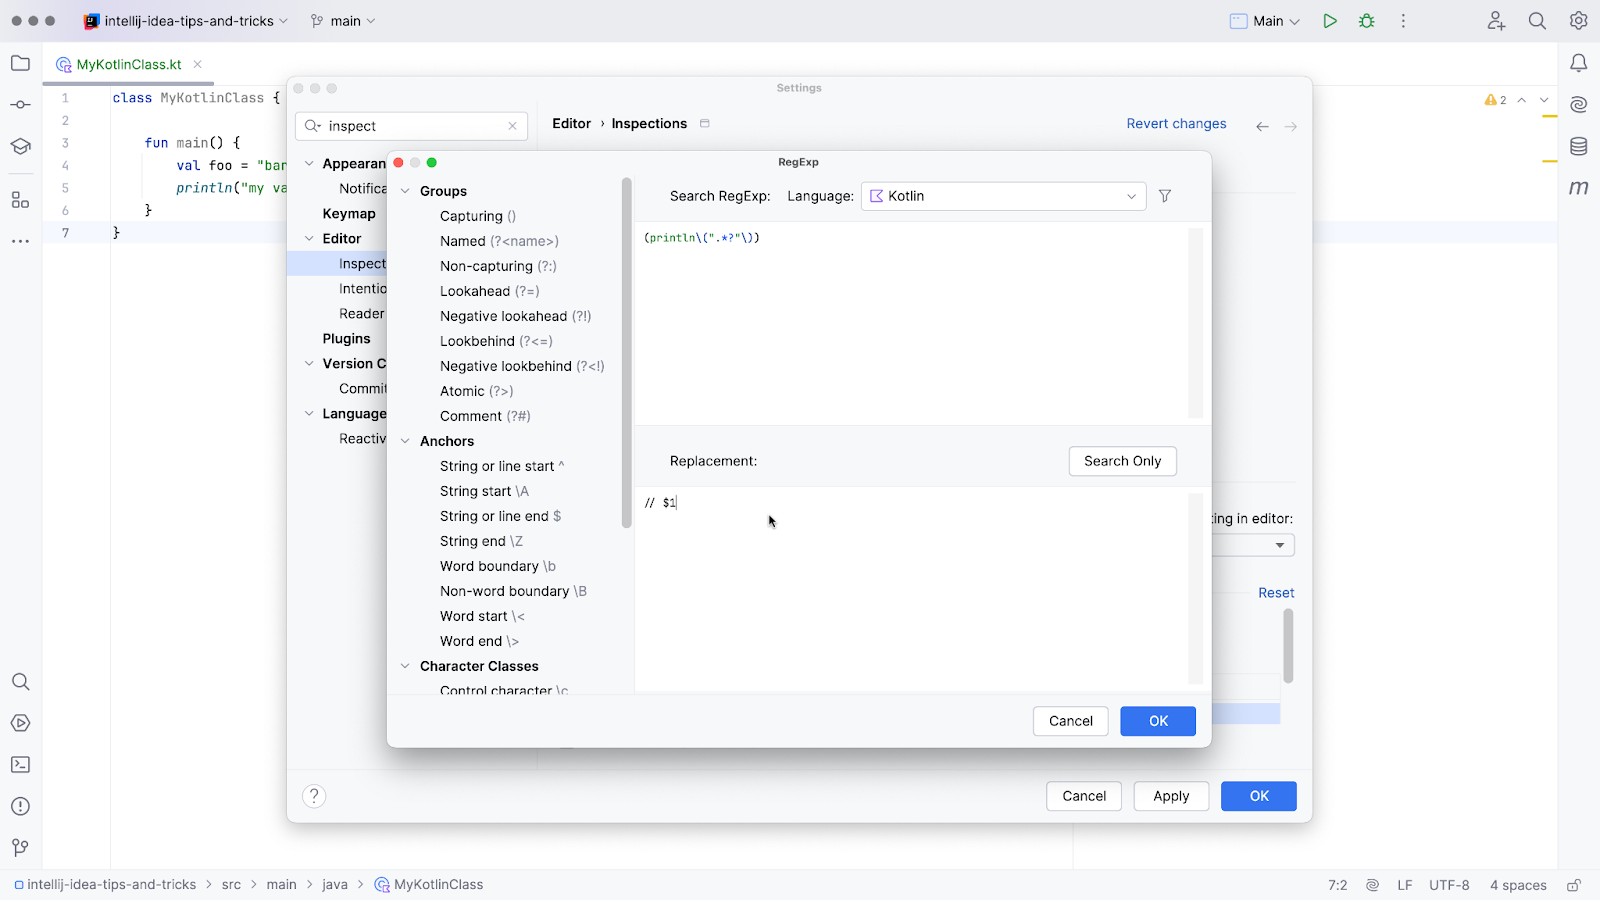
Now, when you press Alt+Enter on the highlighted code, you’ll be given the option to replace the code according to your RegExp template.
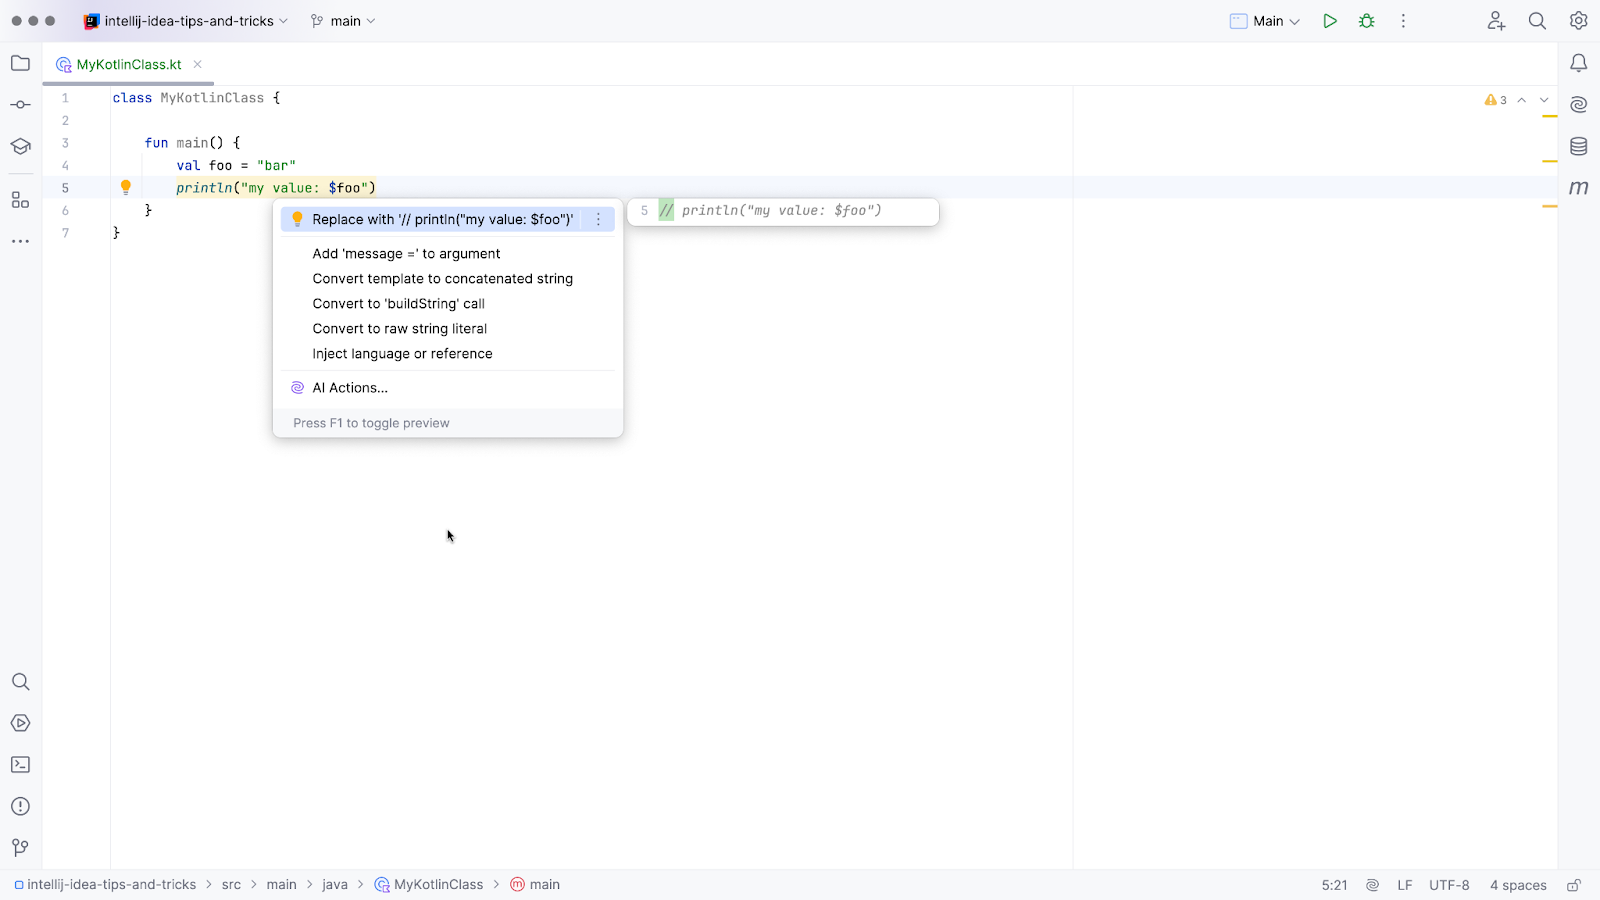
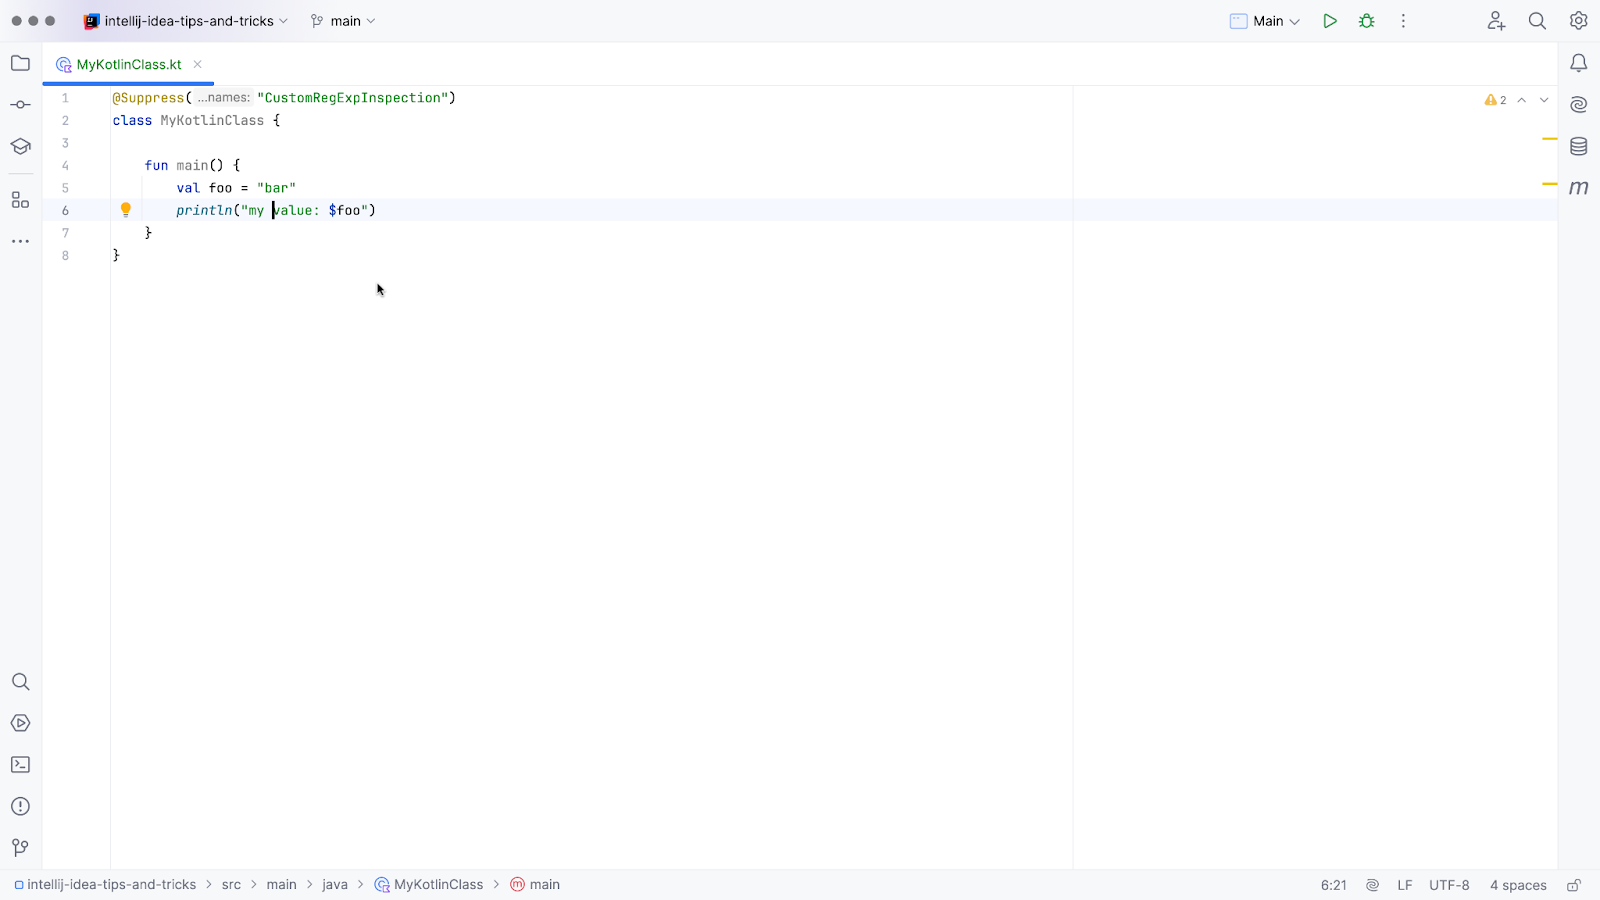
If you don’t want to replace the code according to the quick-fix, you can also suppress this inspection. Click the kebab menu (three dots) to the right-hand side of the inspection (or press the right arrow key), and select one of the Suppress options from the menu to suppress this inspection for the current file, method, or statement.
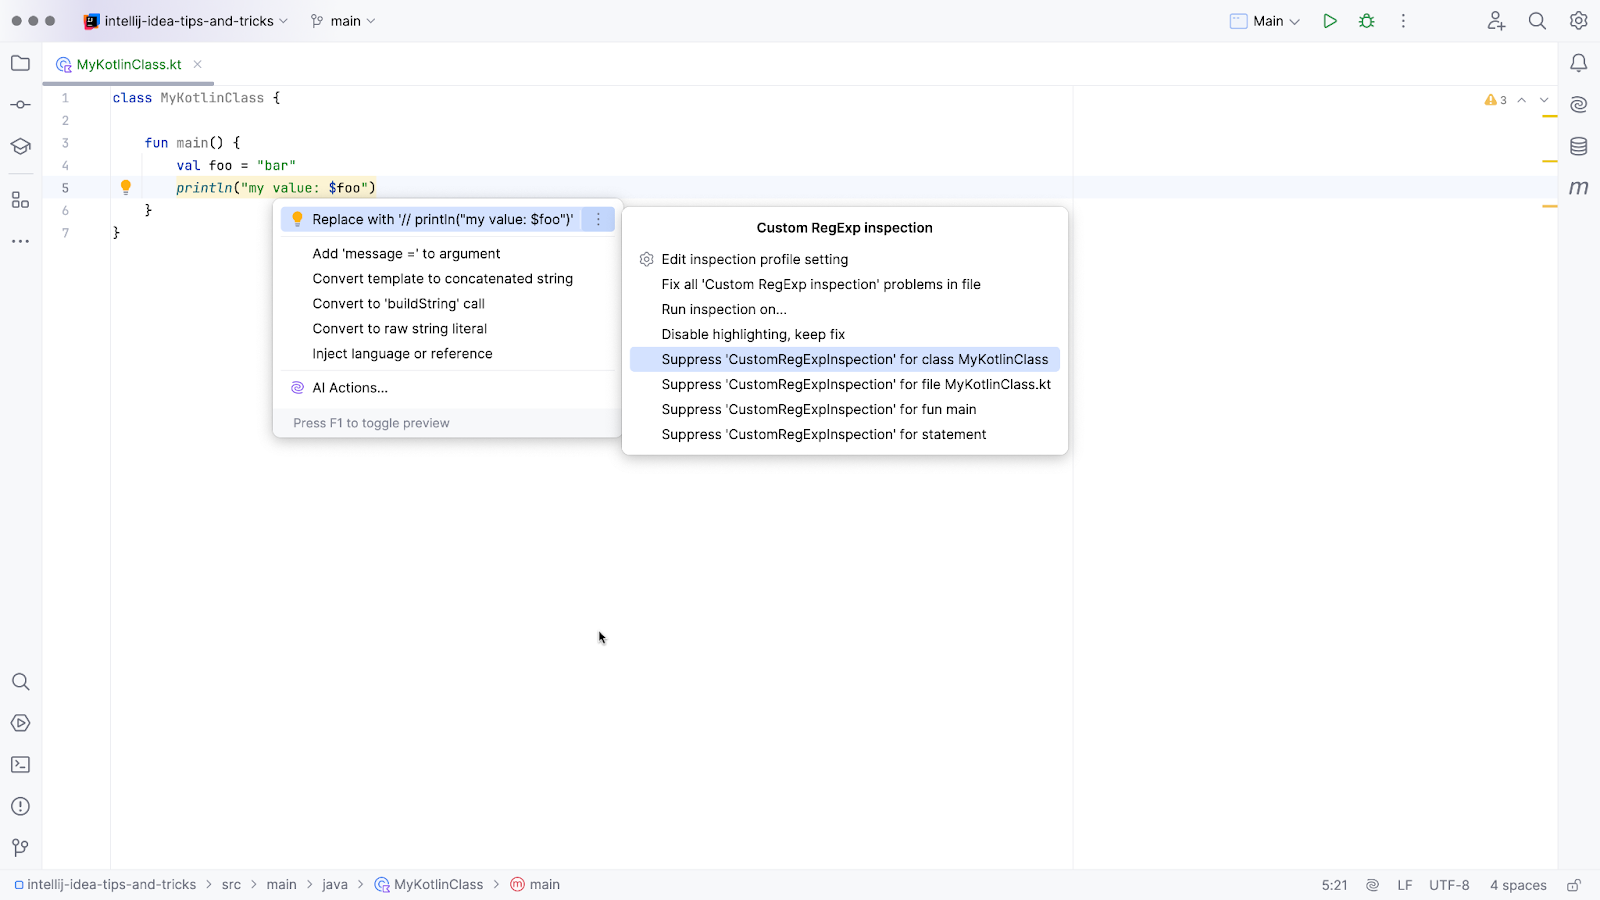
Selecting this option will add a @Suppress statement to the file.
Conclusion
While IntelliJ IDEA comes with a large set of useful inspections, sometimes you may want to look for something specific in your project. You can search for specific strings or use Structural Search to look for patterns in your code that cannot be captured by a text string. You can also create custom inspections using either Structural Search or RegExp and even choose to define quick-fixes for them if you wish. This functionality makes improving your code base quicker and easier.
In the previous posts of this series, we looked at how to use inspections in the editor and how to run inspections on our project with JetBrains Qodana. We hope you have enjoyed this series and hopefully learned something new. Please let us know in the comments!
Subscribe to IntelliJ IDEA Blog updates


