Kotlin
A concise multiplatform language developed by JetBrains
Introducing Kotlin Notebook

Please note: Starting with v2026.2, JetBrains will sunset Kotlin Notebook as a product and will no longer maintain it. Kotlin Notebook will be unbundled from IntelliJ IDEA and continue as an open-source, community-driven project hosted on GitHub.
The first experimental version of the Kotlin Notebook plugin for IntelliJ IDEA is now available! This post will offer insight into the plugin’s functionality and use cases, but before launching into that, we’d like to let the plugin speak for itself:
What is the Kotlin Notebook plugin?
A notebook is an interactive tool that allows you to combine code, visualizations, and text in a single document. In notebooks, you can write and run code snippets (cells), view the results, and document your thought process all in one place.
Notebooks are already widely adopted and trusted for rapid prototyping, analytics, and data science. The Kotlin Notebook plugin brings the power of interactive development to IntelliJ IDEA, supplementing the full power of the IDE’s language support for Kotlin combined with the versatile visualization capabilities of browsers.
Let’s dive into technical details to see what this plugin can do and how it works.
Installation
To get the plugin, you simply need to install it from Marketplace in IntelliJ IDEA Ultimate’s Settings | Plugins tab. You should be using at least version 2023.1.2 of IntelliJ IDEA. You may also be able to install the plugin on previous versions, but it will be unstable.
During the installation process, you will see a suggestion to install the Python plugin, which you should accept. Don’t worry, this will not install Python on your workstation. Kotlin Notebook simply has some dependencies on UI components that are located in the Python plugin. We plan to remove these dependencies soon.
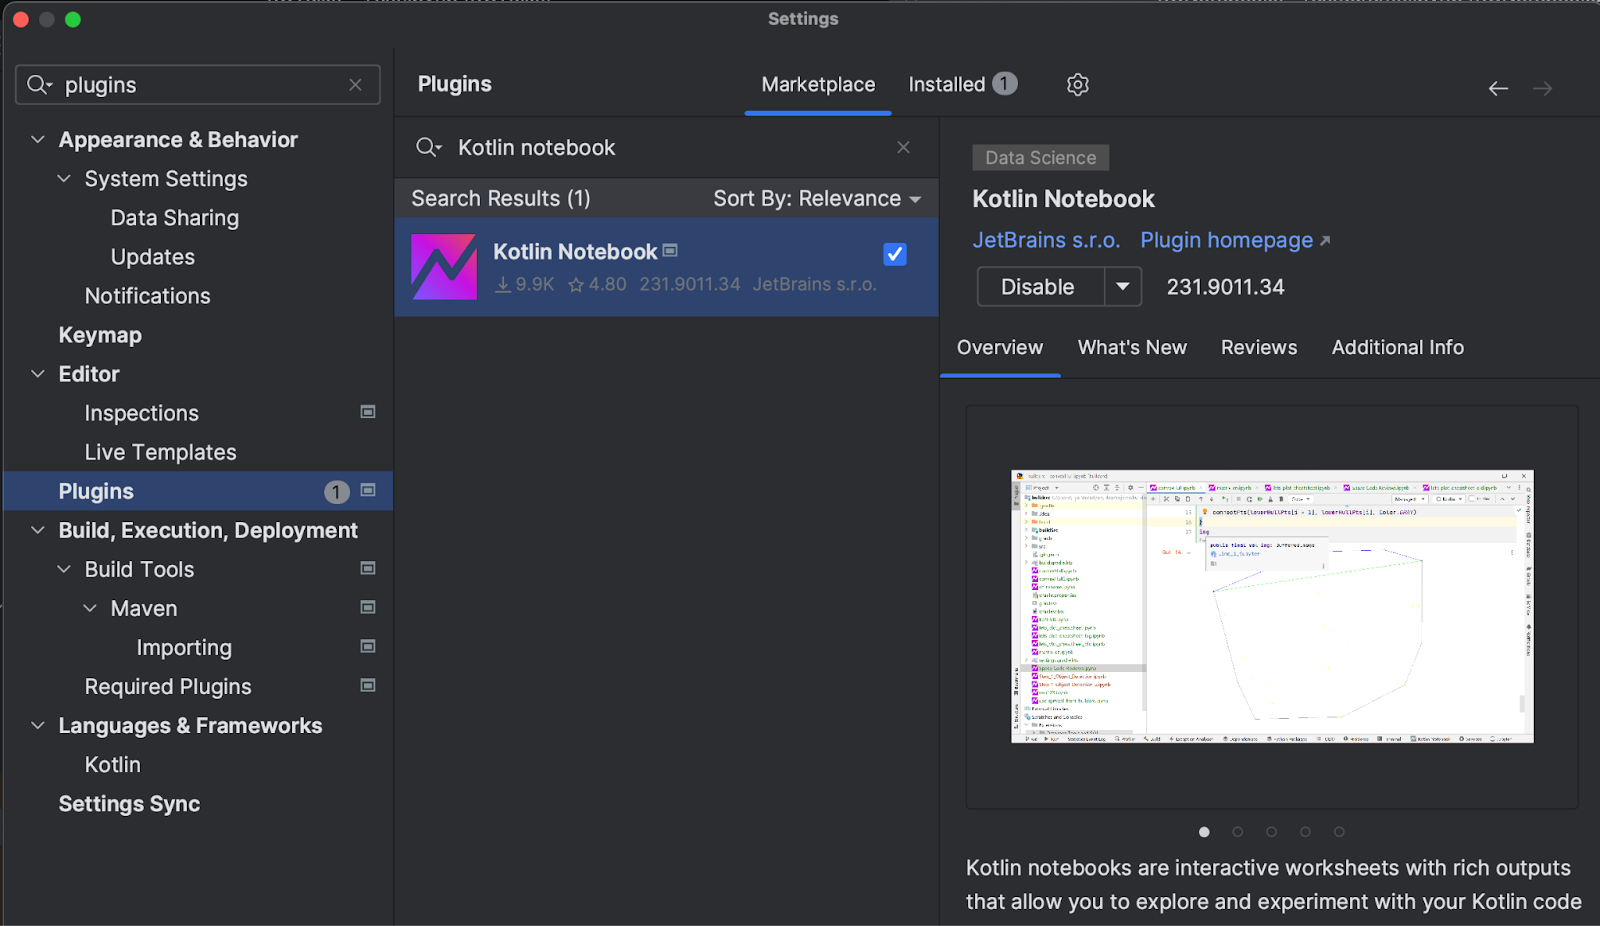
Note that the Kotlin Notebook plugin currently works only in IntelliJ IDEA Ultimate.
Getting familiar with Kotlin Notebook
After installing the plugin, you’ll be ready to create your first notebook. Essentially, a notebook is just a file on a disk, so it can be created anywhere in the Project view by using the New | Kotlin Notebook action.
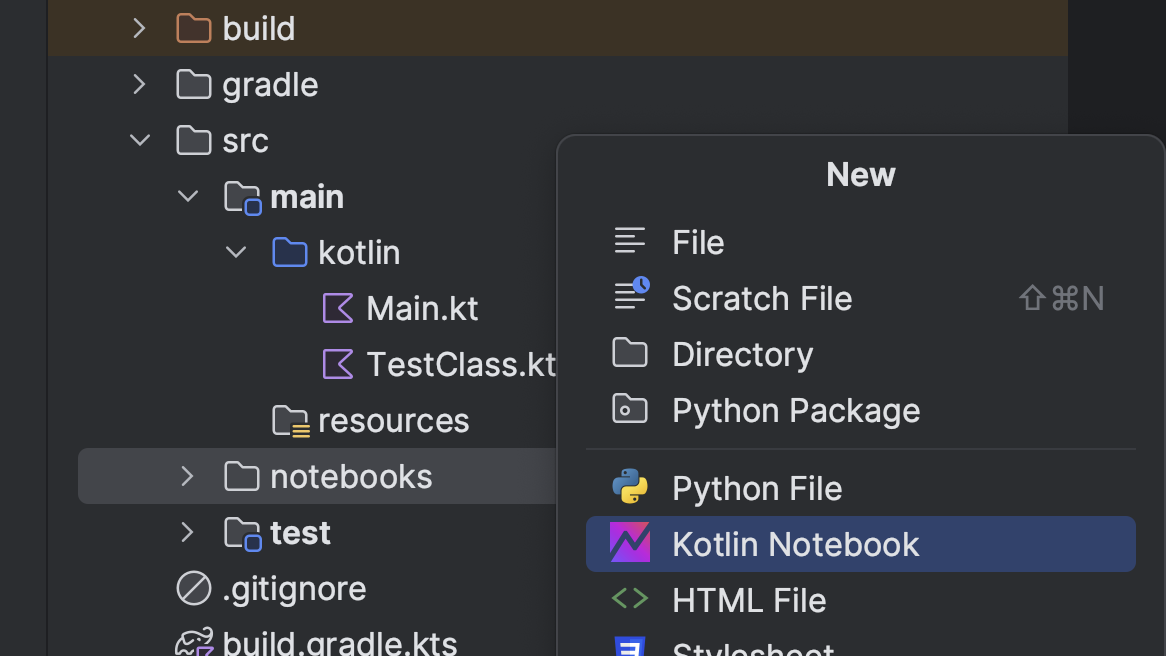
A file with an .ipynb extension will be created. If you are already acquainted with Jupyter notebooks, this extension should be quite familiar to you. Internally, Kotlin notebooks follow the same structure, format, and protocol, meaning these files can be viewed on GitHub or in Jupyter notebooks or JupyterLab with the Kotlin kernel installed.
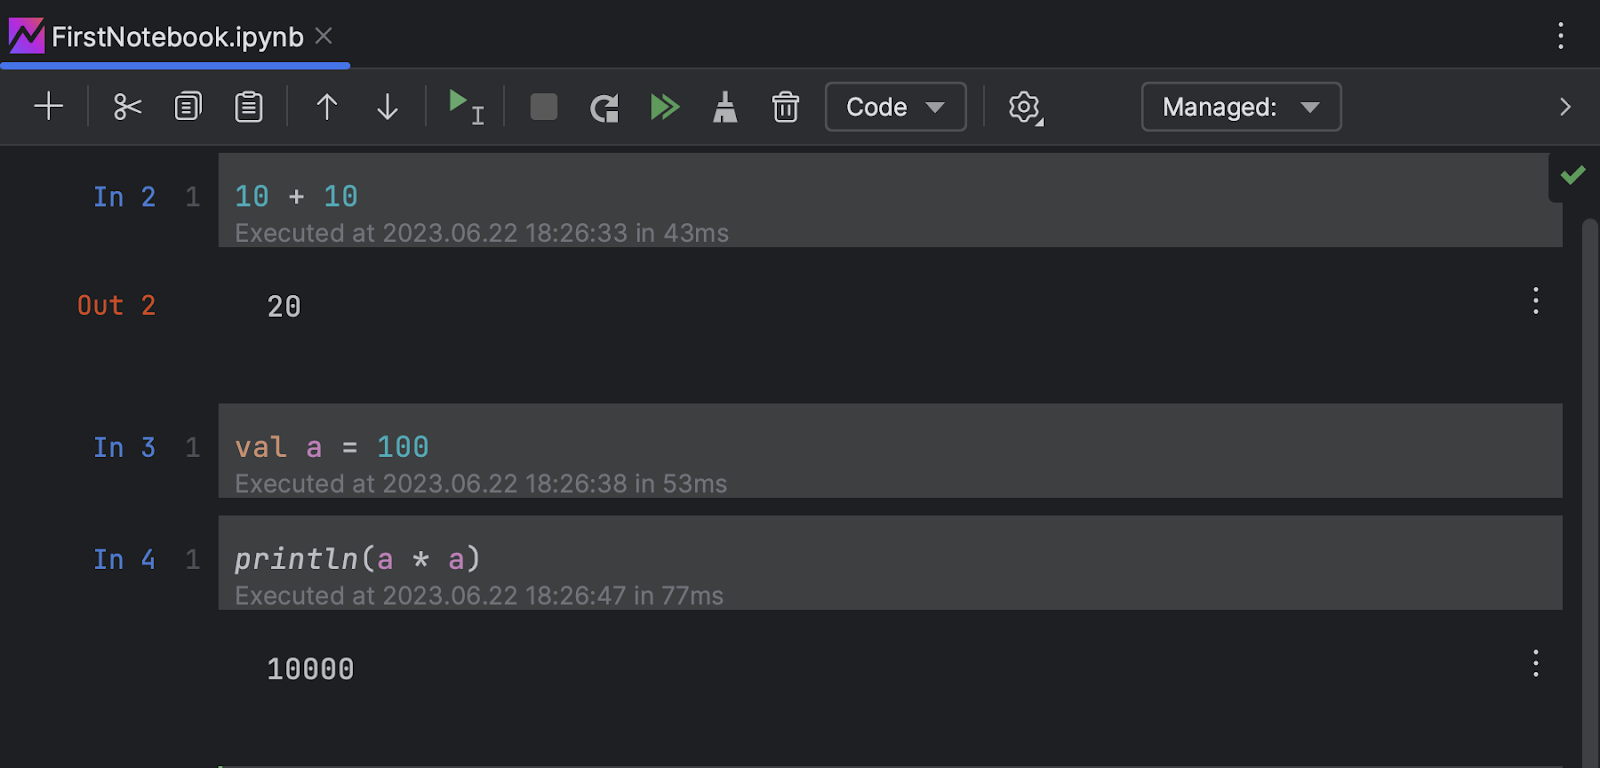
Once created, the notebook contains only the first empty cell. Cells are the main building blocks of notebooks, and they can contain either code or text. To run a code cell, you can simply select it and then click the Run button or use the Shift + Enter shortcut. The code will be executed, and any output or errors will be displayed below the cell.
You can also write text in Markdown cells, which support rich formatting options such as headers, lists, links, LaTeX and images. To render a Markdown cell and see the formatted text, you just have to run it in the same way you run a code cell.
Notebooks provide an interactive and iterative workflow. You can execute cells in any order, modify the code or text, declare and re-declare variables, and re-run the cells to see the updated results. This makes it easy to experiment, prototype, and document your work.
To experience firsthand the advantages of using notebooks for code explanation and documentation, we encourage you to download and explor this notebook. It demonstrates all the aspects of Kotlin notebooks discussed in this blog post, allowing you to pair theory with practice.
Outputs
One key feature that makes notebooks stand out is the variety of output types they support:
- Text: This is the simplest type of output, and it includes printed statements, variable values, or any text-based output from your code. If a cell’s result doesn’t fall under one of the categories below, it will be printed as text via the
toString()method. - HTML: Jupyter notebooks can render HTML directly, enabling rich text formatting, the use of tables, or even the embedding of websites.
- Image: Static images can be displayed in formats such as PNG, JPEG, and SVG. Results of the
BufferedImagetype are also supported. All these images can be images from files, generated graphs, or any other visual media. - Rich text: Markdown cells produce rich text HTML output, offering support for lists, font styles, code blocks, and more.
- LaTeX: Mathematical formulas and equations can be beautifully rendered using LaTeX, a typesetting system widely used in academia.
- Error and traceback: When code contains errors, notebooks display an error message and a traceback, providing insights for debugging.
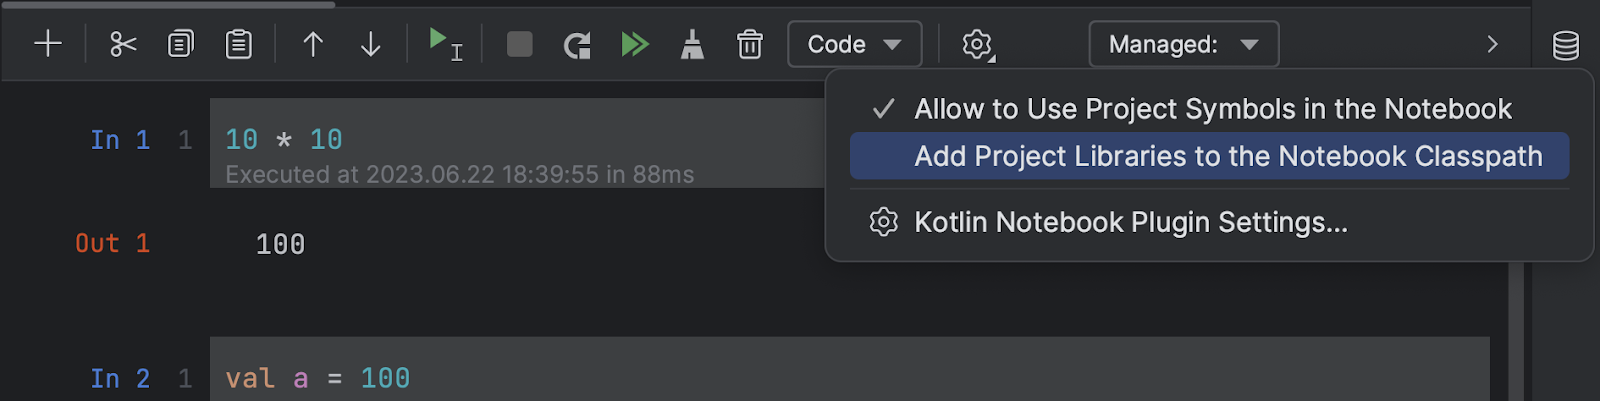
Notebook dependencies
It is also important to consider what dependencies your notebook will have. Obviously the standard library can be used out of the box, but it is often insufficient. Various options are available to you:
- You can utilize the dependencies of your project, ensuring that the notebook has access to the same classes.
- It is possible to use classes and other entities from the project itself within the notebook. In such cases, however, the project will be checked for changes and recompiled if necessary before the execution of each cell.
- You can load any library from the Maven repository by specifying its coordinates using a piece of Gradle-style syntax in any cell.
USE {
  repositories {
    maven {
      url = "https://my.secret.repo/maven/"
      credentials {
        username = USER
        password = TOKEN
      }
    }
  }
  dependencies {
    val ktorVersion = "2.0.3"
    implementation("my.secret:artifact:1.0-beta")
    implementation("io.ktor:ktor-client-core-jvm:$ktorVersion")
    implementation("io.ktor:ktor-client-apache-jvm:$ktorVersion")
  }
}
- Or you can use the shorter version via the
DependsOnannotation:
@file:DependsOn(“io.ktor:ktor-client-core-jvm:$ktorVersion“)
- Remembering and locating Maven coordinates can be a cumbersome task. To simplify this process, we’ve introduced a smarter and more convenient method for loading popular libraries. Simply use the
%usemagic command followed by the name of one or several libraries.
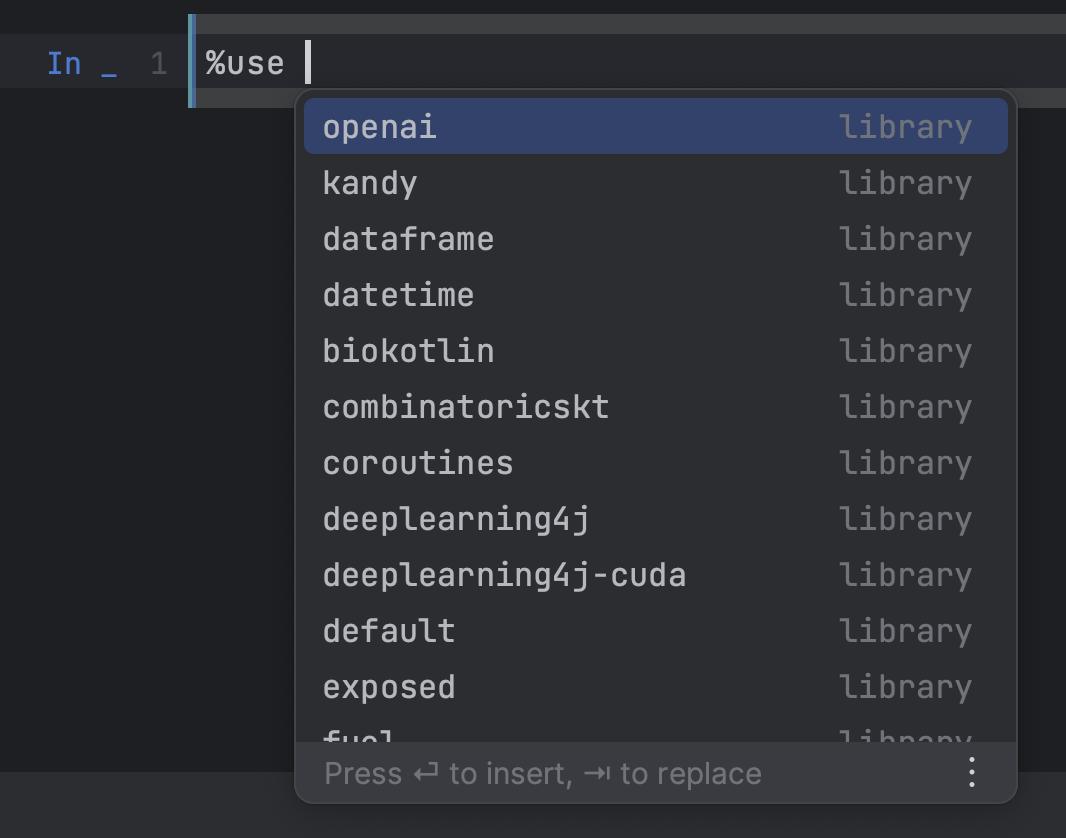
When the %use statement is executed, it not only downloads the library dependencies but also adds default imports to the notebook. Additionally, it registers renderers for the library’s types and includes various other functionalities discussed in the next section.
Library integrations
Kotlin notebooks offer a vast spectrum of library integration options.
For users, taking advantage of them as simple as adding a single line of code:
%use libraryName
For library authors, this same command serves as a springboard, enabling them to:
- Download library binaries from any Maven repository.
- Include initial imports.
- Execute code during initialization.
- Run code before and after each cell execution.
- Preprocess each cell’s code.
- Invoke a callback when creating variables of certain types.
- Craft custom renderers for a variety of types defined in the library.
- And much more.
Collectively, this provides almost infinite possibilities for creating an interactive user experience. Considering Kotlin’s static and AOT types, the capability for automatic, on-the-fly code generation offers an added level of flexibility and expandability.
Comprehensive documentation can be accessed here. We encourage all library authors to share their integrations in the common registry so they’re available to all Kotlin Notebook users. We’re especially thrilled to see that some libraries (like WebTau, Roboquant, Kaliningraph, and others) are already benefiting from this approach.
Sharing
It’s common to want to share your notebooks with others, both inside and outside your team. Because Kotlin notebooks adhere to the universal Jupyter format, they can be easily distributed using any notebook web viewer. Notably, GitHub has the ability to natively render them.
Additionally, JetBrains has the Datalore platform, which seamlessly supports Kotlin notebooks. Datalore offers more than just sharing capabilities; it also enables you to execute and edit notebooks and includes advanced features such as interactive reports, as well as the option to schedule notebook runs for added convenience and flexibility.
In essence
The first experimental version of the Kotlin Notebook plugin is ready for you to try in your project in IntelliJ IDEA Ultimate!
Here’s a sample notebook that you can download and learn the basics of Kotlin notebooks hands on:
If you are a library author, please consider adding an integration with Kotlin notebooks.
If you encounter any problems or bugs, please let us know by filing a ticket in the project’s issue tracker. We will also be happy to hear your feedback in the #notebook channel on Kotlin Slack.
Have a nice Kotlin Notebook!