SQL support and Database tools

 As you work with databases in your project, there are quite a lot of routine tasks that have to be performed on a regular basis. However, now there is a great way to do it right from your IDE. You can view database structure and easily modify it by refactoring affected code; manage data stored in the table simply editing or adding values; write SQL queries with smart code completion and syntax highlighting; and run SQL queries just from the code or the built-in SQL editor.
If you have more complicated tasks to perform, there are UML diagrams showing relations between tables and tools to compare databases and migrate from one to another.
We will give you a short overview of the Database tools and SQL support in our products.

This functionality is available in IntelliJ IDEA, PyCharm, PhpStorm, and RubyMine.
All the features are supported out of the box, without any external plugins. You can work with databases such as MySQL, PostgreSQL, Oracle, DB2 and others.
To take advantage of all the features, just add a data source to your project.
To open the Database Tool Window on the right, click the Database button or go to the main menu and select View | Tool Windows | Database, and then add DB Data Source.
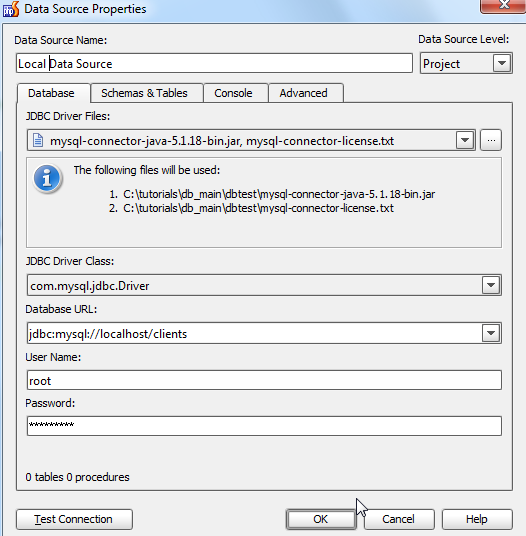
Enter the data source name, choose JDBC Driver (for example MySQL), then click to download the connector and specify the folder to save it to.
JDBC driver is a software component enabling an application to interact with a database. Most JDBC drivers cannot be bundled with the IDE because of license terms. However, even if no restrictions existed, it would be too much to force our users to download an IDE with all the popular (but not necessarily needed) libraries bundles, as software package size is important too. So, to download the required driver, you only need to click a few buttons.
Now that we have a JDBC driver installed, we need to configure it. If you are not fluent with JDBC connectors, please consult MySQL documentation for details about the correct MySQL JDBC URL syntax. Enter the Database URL, Username and Password. You can easily test connection in order to check if everything went well.
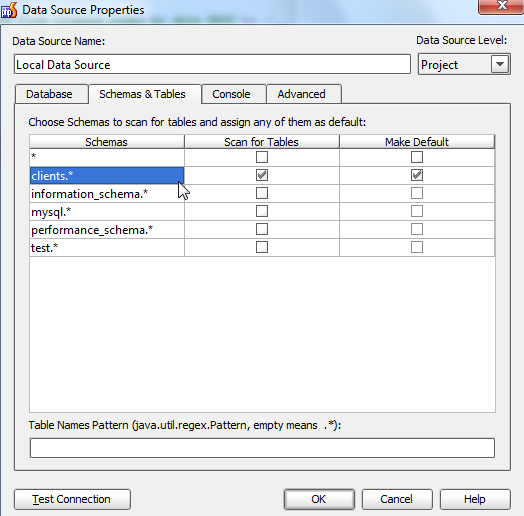
Next, specify the Schemas & Tables we need to scan. They’ll be used for autocompletion. Just select the ones you need in your project.
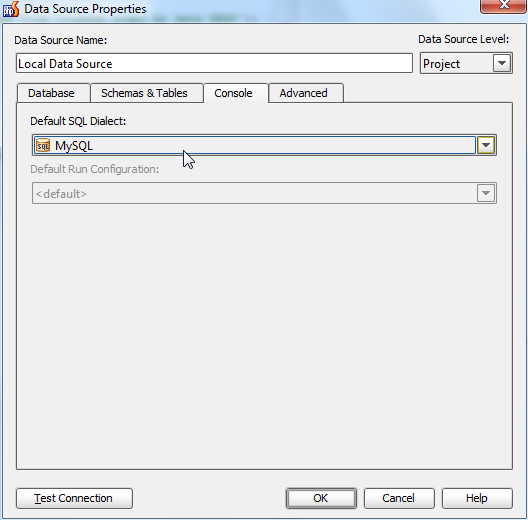
Don’t forget to specify the Default SQL Dialect on the Console tab. In our case it’s MySQL. The Default SQL Dialect should be selected in order to take advantage of smart SQL code completion in the SQL editor or inside your code.
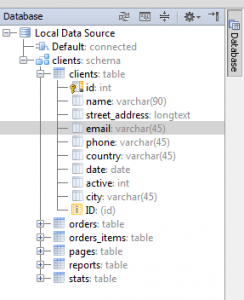
Just click OK. We’ve got our MySQL Database structure on the right: tables, columns (fields), indexes, etc. You can easily manage your database from the database tool window.

For example, let’s rename email field to email_new.
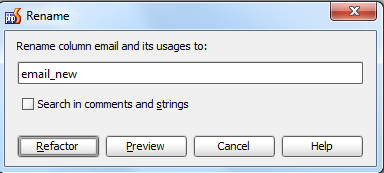
And with a single button we apply a refactoring to the whole project (just make sure to check what occurrences should be affected).
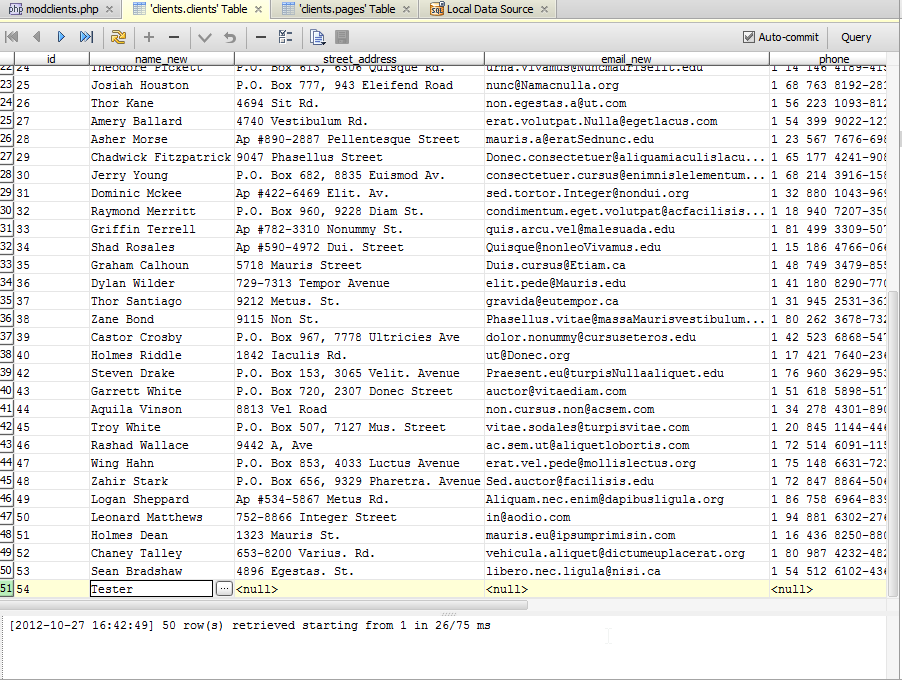
By the way, invoking ‘edit table dialog’ with F4 hotkey or double-click on the table will show you all the table data so that you can easily add/edit/remove values, order columns, export data to file, etc.
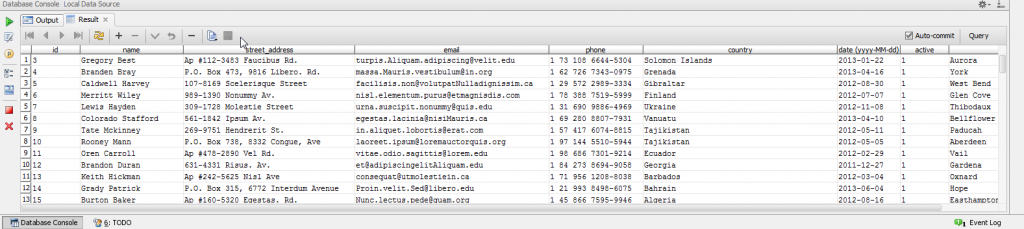
Open Database Console using hotkey Ctrl+Shift+F10/Cmd-Shift-F10 and enter a query in SQL editor, supported by syntax highlighting, smart code completion, on-the-fly code analysis, multiple intentions, and navigation.

Run it and get results immediately!
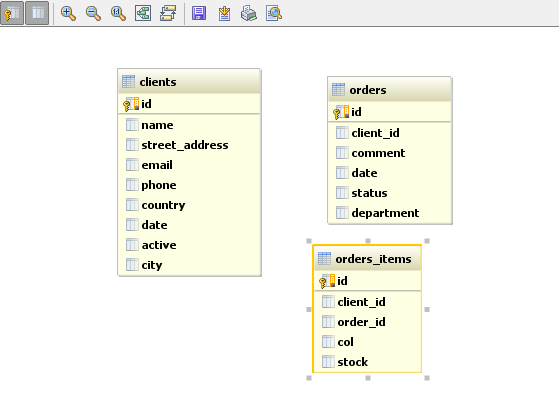
You can also use UML Diagrams in order to view tables and relations between them with Ctrl+Shift+Alt+U/Meta-Alt-Shift-U hotkey.
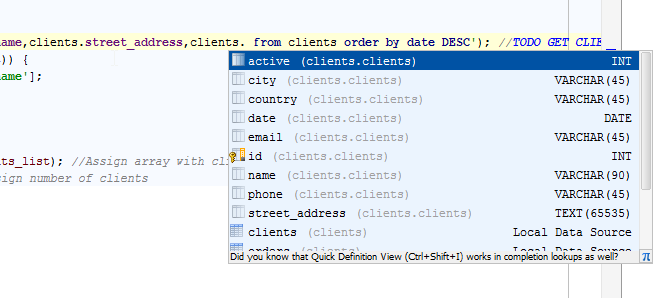
One more powerful feature is SQL code injection. You can use it easily while writing your code in order to get all the features of SQL editor inside PHP, JavaScript, HTML or other languages. In the editor, place the cursor within the string literal that represents the language injection of interest. Click on the yellow bulb or press Alt+Enter, and select the language to use (MySQL in our case).
Also, a piece of your code will be considered as injected code with automatic patterns from IntelliLang (for SQL predefined patterns are select/delete/insert/update/create and <<< SQL Heredoc). These patterns can be adjusted in Settings | Language Injections. Please note that it will not work on concatenated literals (such as “…WHERE VAR=”.$var.”…”).

That’s it! Now you have syntax highlighting, smart code completion, and on-the-fly code analysis for SQL inside your code.
Feel free to run SQL query in the console just from your code! Press Alt+Enter and select the appropriate option. Results will be shown in the database console. If any parameters are missing (for example, WHERE condition which depends on variable), the IDE will ask you to provide it in a special window.
You can also export and import DDL data sources just from the database tool window.
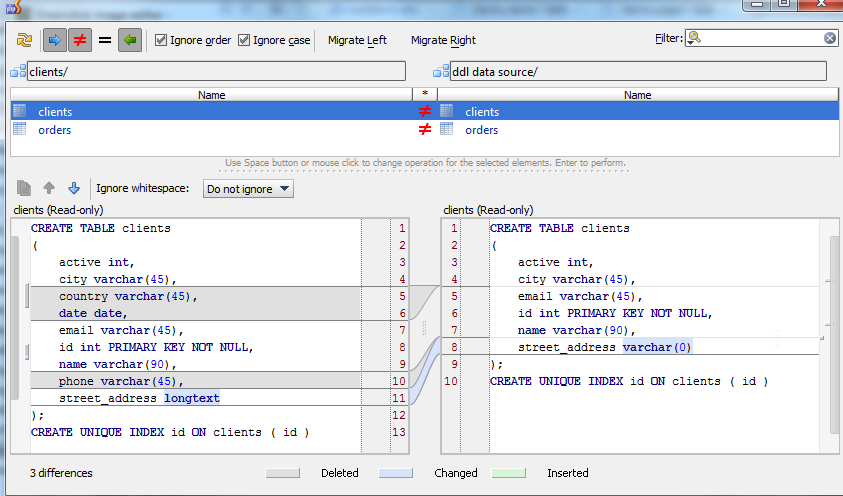
If we have several data sources, we can select them and compare. Found some difference? Migrate between data sources with a single button.
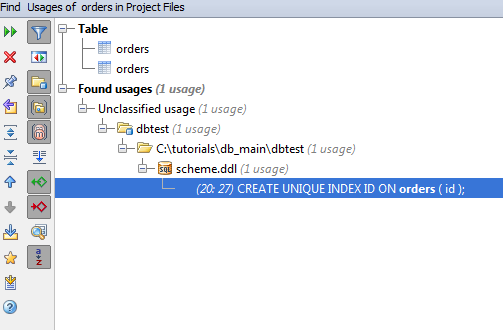
And one more important thing for today. Do you need to find where you use a certain column or table? Just select it in the database tool window and invoke Find Usages with Alt+F7:
Now you see why you really don’t need any external database management software. All you need is already inside your IDE! Just add a data source and start working with your database. No need to switch: you can handle your data quickly, conveniently and reliably using just one window.
Develop with pleasure!
-JetBrains Web IDE Team