Announcing PyCharm Edu 2.0.2: CheckiO integration

Today we have great news for everyone passionate about learning and teaching programming with Python.
First, we’ve released PyCharm Edu 2.0.2, an updated version of our free, easy and professional tool for learning programming with Python. This release consolidates many bug fixes and small improvements in different subsystems. Download PyCharm Edu 2.0.2 for your platform today!
Second, and it’s going to be the top story of this blog post: we announce the CheckiO plugin for PyCharm Edu.

CheckiO is a programming learning platform and a gamified website that teaches problem solving with Python. Its aim is to offer a safe environment to learn writing better code, for beginners and advanced programmers alike. Organized in a game format, CheckIO is very appealing to novice programmers, especially kids, who don’t have any previous coding experience and need to be engaged in the game process.
With CheckiO, programmers can take on missions such as computing the median value, to understand how to use Python and apply programming theory to solve real world problems. Read more and sign up on the CheckiO official website.
The CheckiO plugin is the first plugin for PyCharm Edu. Detailed information is available on the official plugin website. By using this plugin, you can combine the easy learning curve of CheckiO with the power of a real-world professional tool for Python programming. Learning programming with PyCharm Edu prepares you to smoothly advance to other professional development tools such as PyCharm Professional Edition, IntelliJ IDEA, and others.
To get started:
1. Download PyCharm Edu 2.0.2 for your platform and install it.
2. Download CheckiO plugin for PyCharm Edu from the official JetBrains repository.
Note: The CheckiO plugin requires Oracle Java 8. Please make sure the appropriate Java 8 is installed on your platform. This plugin works only with PyCharm Edu 2.0.2.
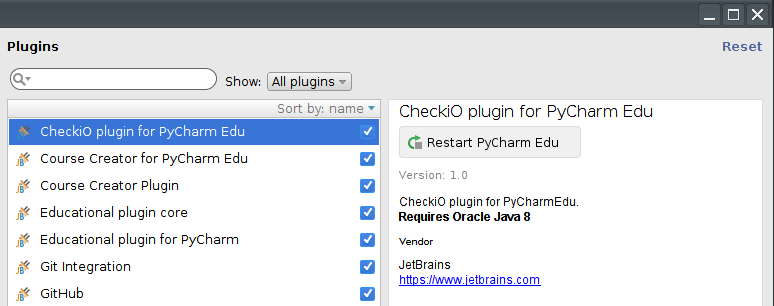
3. In PyCharm Edu, go to Settings (Preferences for Mac OS users) | Plugins and click the “Install plugin from disk” button.
4. In the opening dialog choose the downloaded CheckIOPyCharmPlugin.zip file and click ok.
5. Click ‘Restart PyCharm Edu’ in the same Plugins dialog:
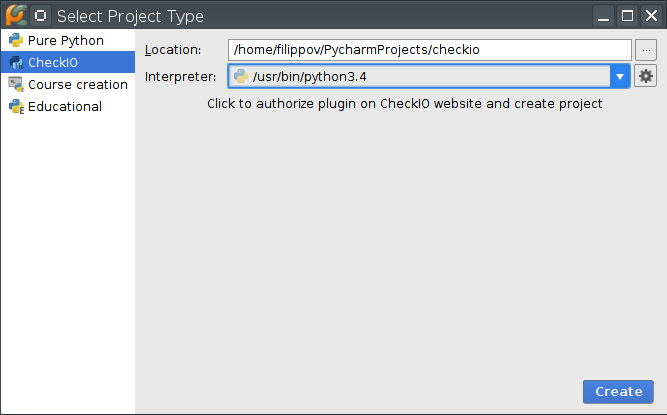
6. Go to File | New Project. Select the CheckiO project type, give it a name and select the Python interpreter for this project as shown on the screenshot, and then click “Create”:
7. PyCharm will open the CheckiO website and ask you to log in. After a successful login, the PyCharm Edu plugin will appear as authorized on the website.
8. Return to PyCharm to see something like this:
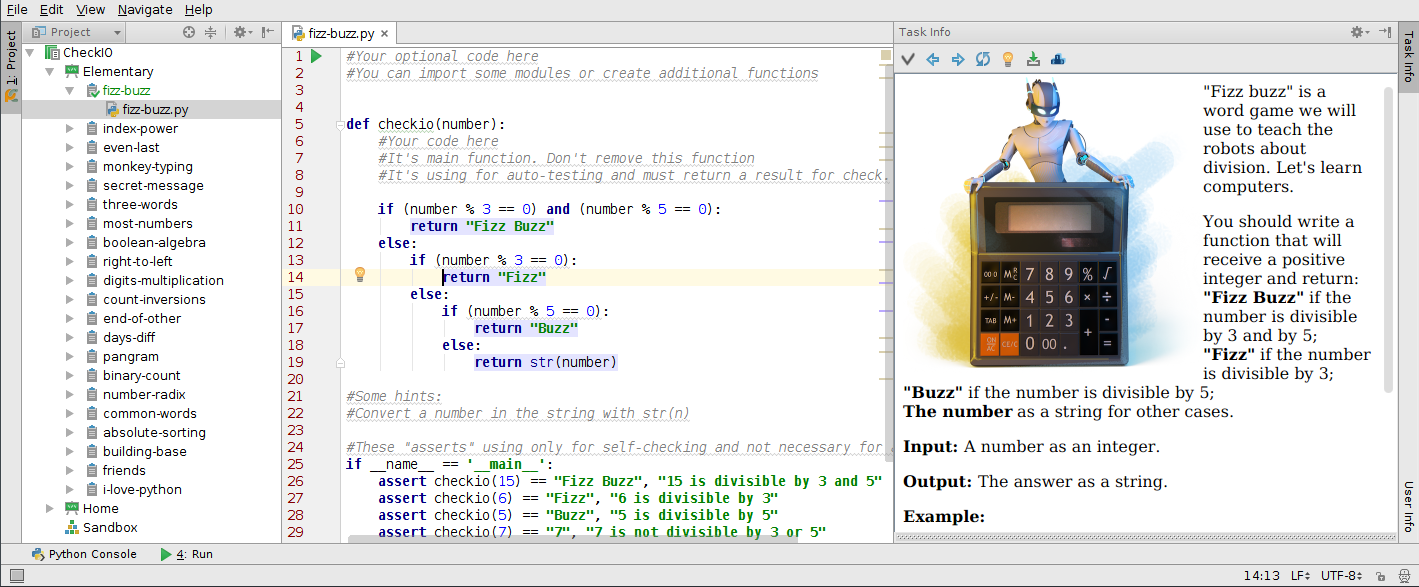
You can now perform CheckiO missions right inside PyCharm Edu and enjoy its assistance in solving various programming problems.
On the left-hand side you can see the Project View with a few stations (lessons) and missions (tasks) inside.
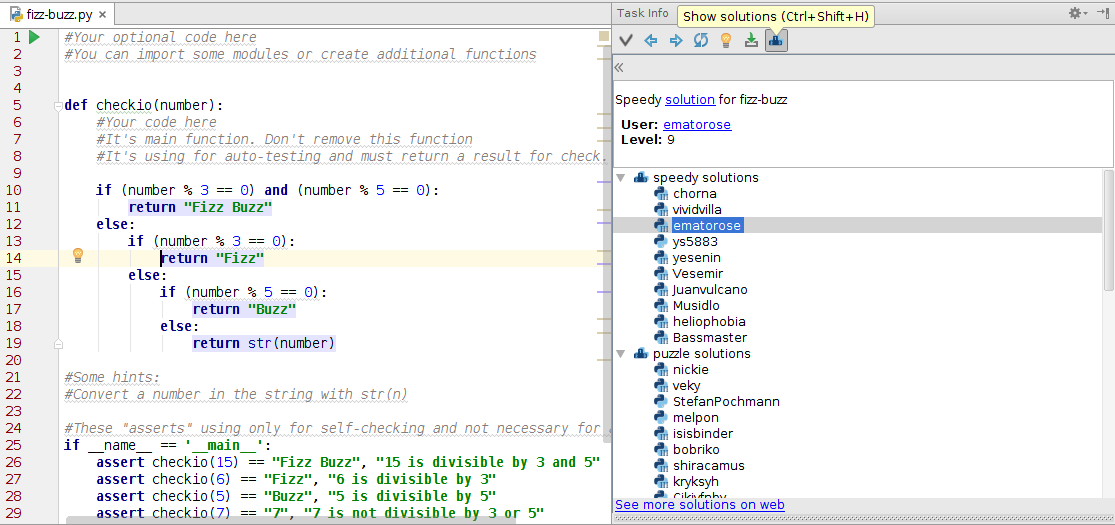
On the right-hand side there is a Task info window with the mission description and special buttons. You can submit your solution for checking, navigate to previous / next mission, reset your solution to the initial state, check hints for the mission, update the entire project, and view existing solutions from other CheckiO players:
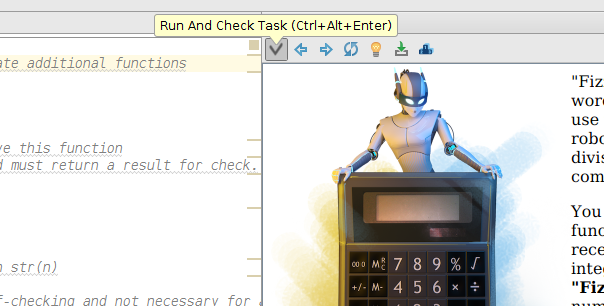
Use the editor to complete a mission. Once you’re ready to check your solution, click the ‘Run and Check’ button as shown below:
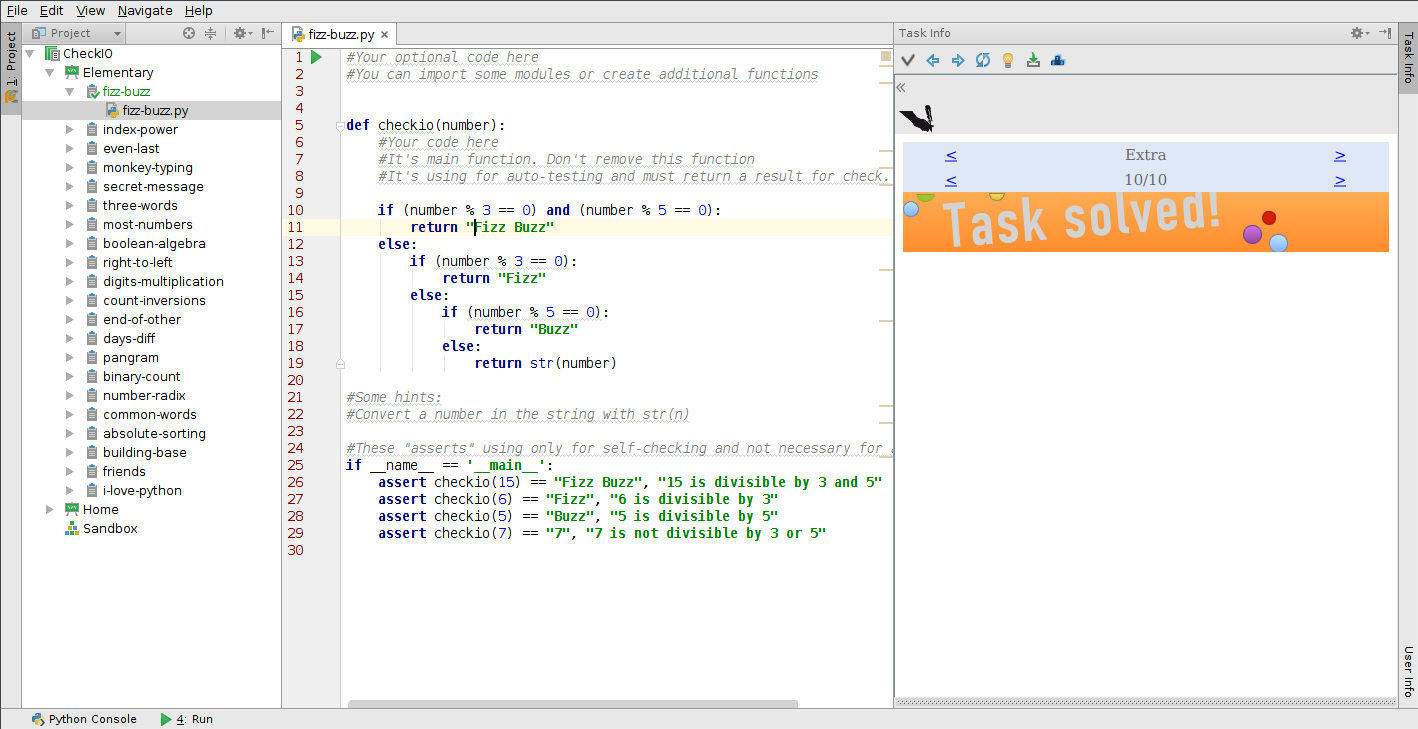
After successfully finishing a mission you are congratulated with “Task solved!” in the Task info, and the mission is marked as completed in the project view:
Continue to the next mission by using navigational buttons or choosing another mission in the project view.
In the bottom right-hand corner you may notice the “User Info” pane. Click it to see your progress:

Enjoy playing with CheckiO and PyCharm Edu, solving real world problems and learning!
Develop with Pleasure!
JetBrains PyCharm Team