Docker-Compose: Adding a Database Service

This tutorial continues where the previous Docker-Compose tutorial left off. If you haven’t read it yet, read about getting Docker-Compose and Flask running in PyCharm first. Like the first tutorial, this one was made on macOS, and although Linux should be similar there may be small differences. For details on using Docker Compose on Windows, see our blog post on using Compose on Windows.
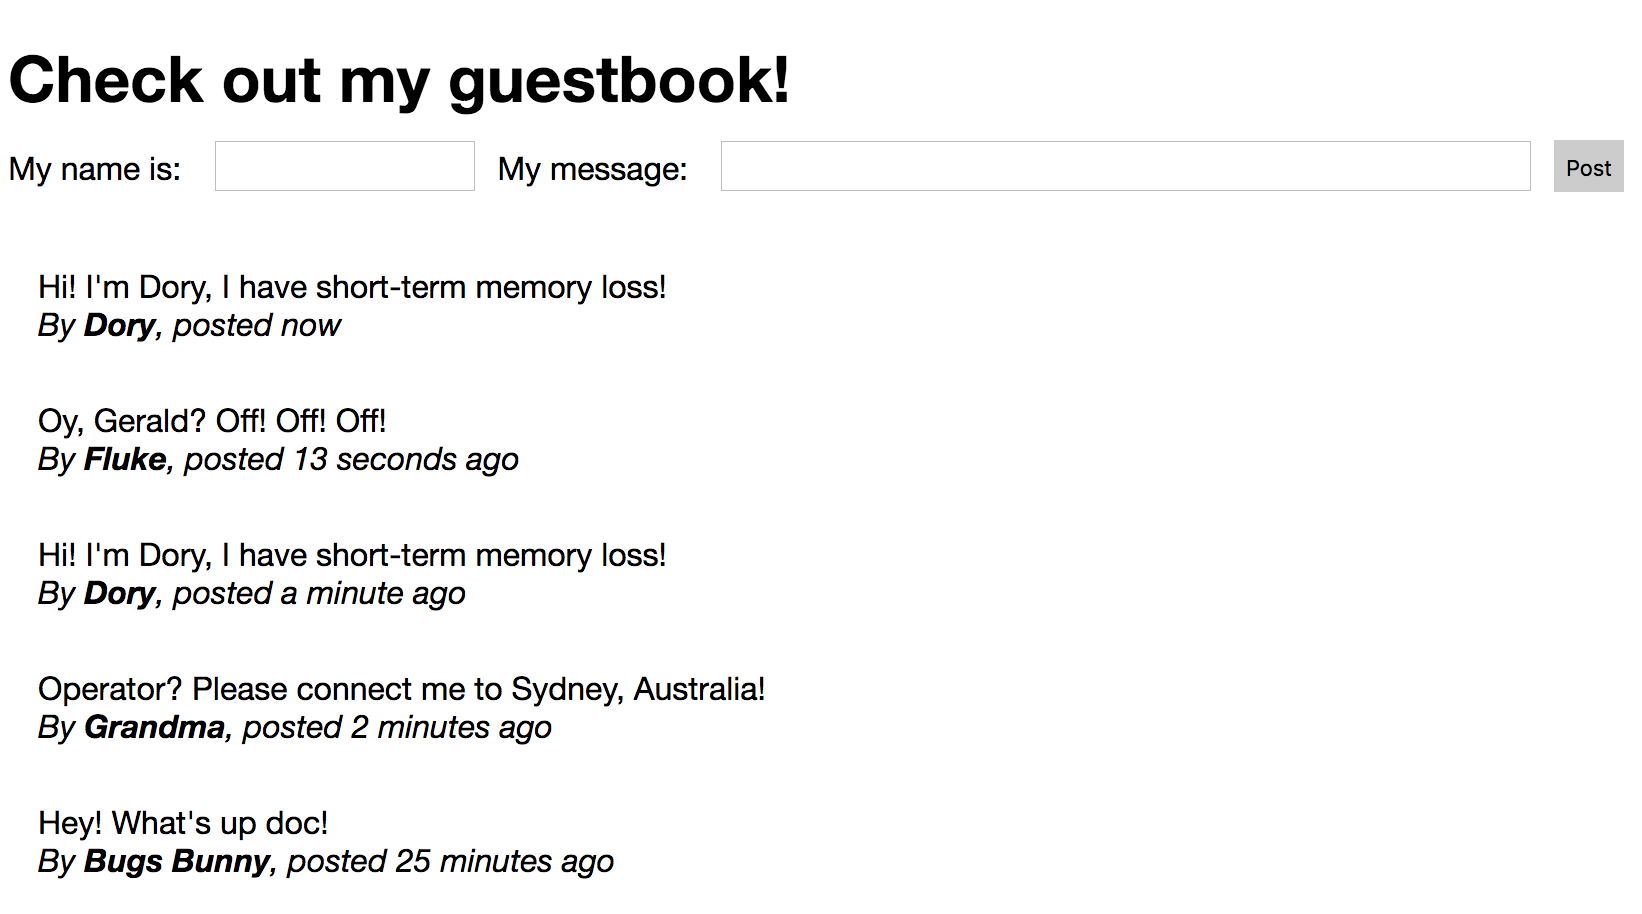
We’ll continue by making a Flask version of the hottest web app from the 90s, a guest book:
If you’d like to play along at home, or just have a look at the full code. You can find the code on GitHub. The code in the ‘master’ branch is for the previous tutorial, switch to the ‘with-database’ branch for the code for this tutorial.
Adding the Database
The first thing we need to do is to tell Docker that we would like to have a database as well. So let’s add a postgres service to our compose file. We do this by adding a service, we’ll use the postgres image from Docker hub, and configure it using environment variables. Read the postgres image’s description on Docker Hub for more information on its configuration:
  db:
    image: postgres
    ports:
    - "5432:5432"
    environment:
      POSTGRES_USER: "flaskapp"
      POSTGRES_PASSWORD: "hunter2"
We’ll also link the database from our web service, so we’re sure that the database is started whenever we start the web service.
Setting Up the Database
The next step is to connect PyCharm to the database. We exposed port 5432 in the compose config to ensure that we can connect to it from our host machine.
The first step is to build our containers, let’s open the terminal in PyCharm (press Alt+F12), and run `docker-compose up –build`.
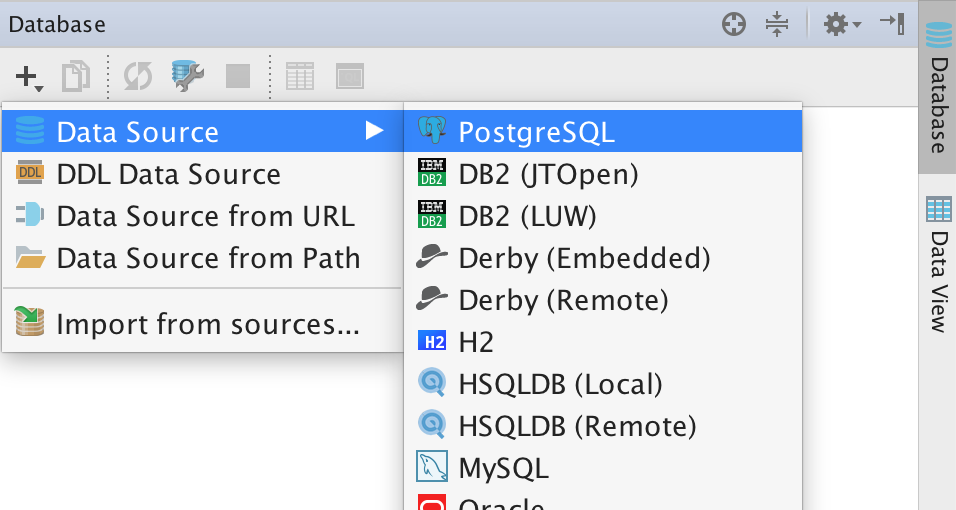
After Docker Compose has started the containers, we can connect to it in the databases panel. Open it in View | Tool Windows | Database. Then, add a database connection to a PostgreSQL database:
Now we can configure the connection using the credentials we used in our compose file:
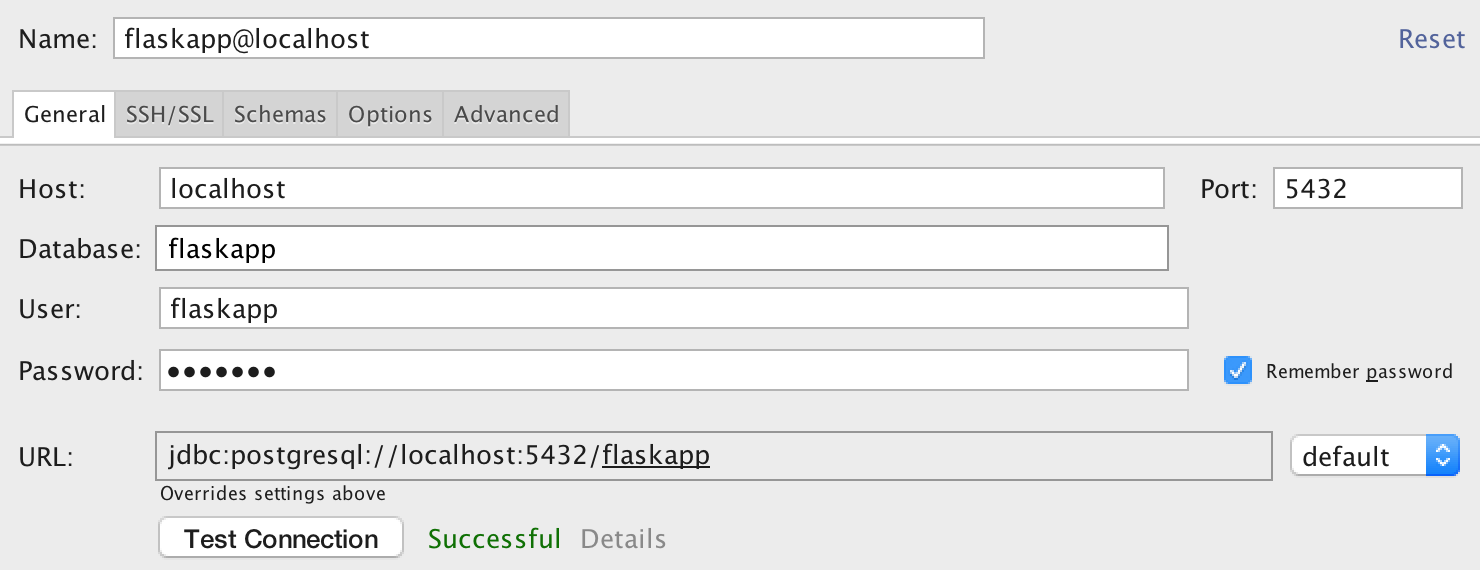
Keep in mind that by default the postgres image will name the database after your username.
If you’re having connection trouble: read the output of the docker-compose up command in the terminal to see if any issues occurred. And if everything looks right, also use `lsof -i tcp:5432` and verify whether docker is listening on port 5432.
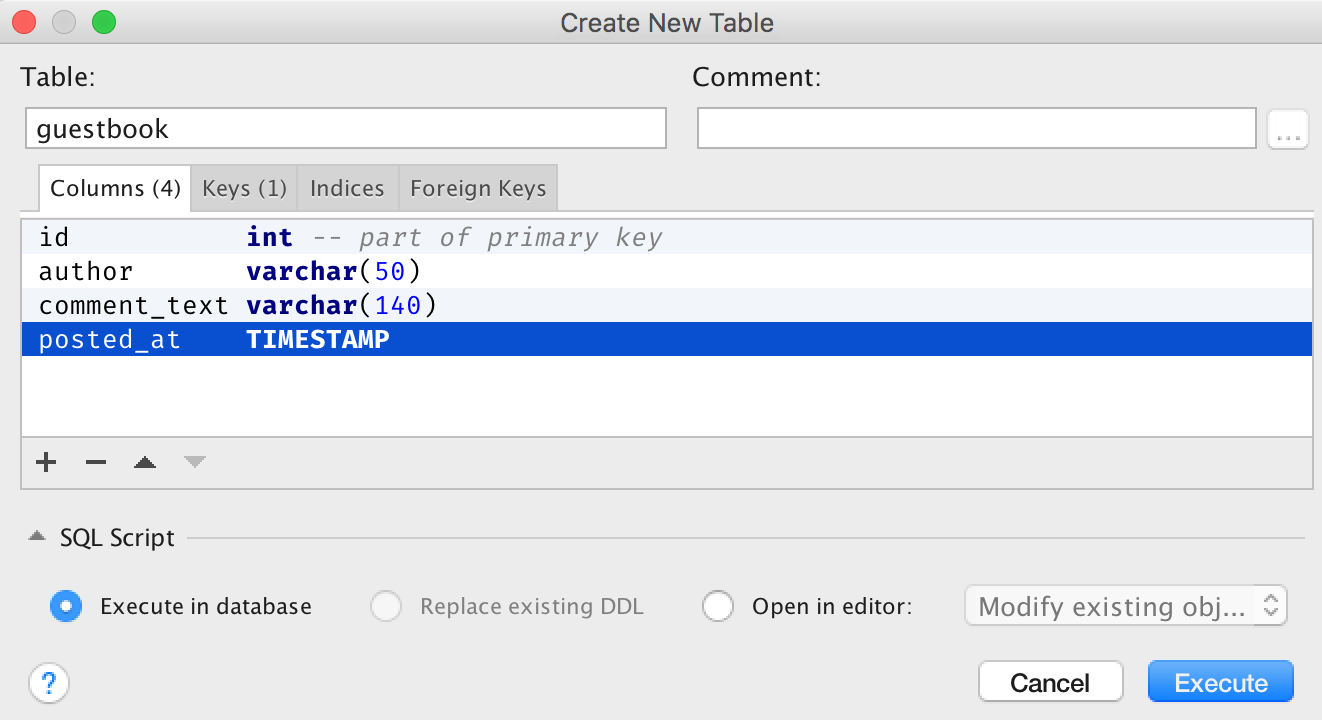
Now that we’ve got a connection, let’s add a table for our guest book. To make our app fit in slightly better in this century, we’ll add a 140 character limit to the posts. Our table definition should look like this:
- id – int – primary key – serial (auto increment)
- author – varchar(50)
- comment_text – varchar(140)
- posted_at – timestamp
Let’s use PyCharm’s database integration to create this table: 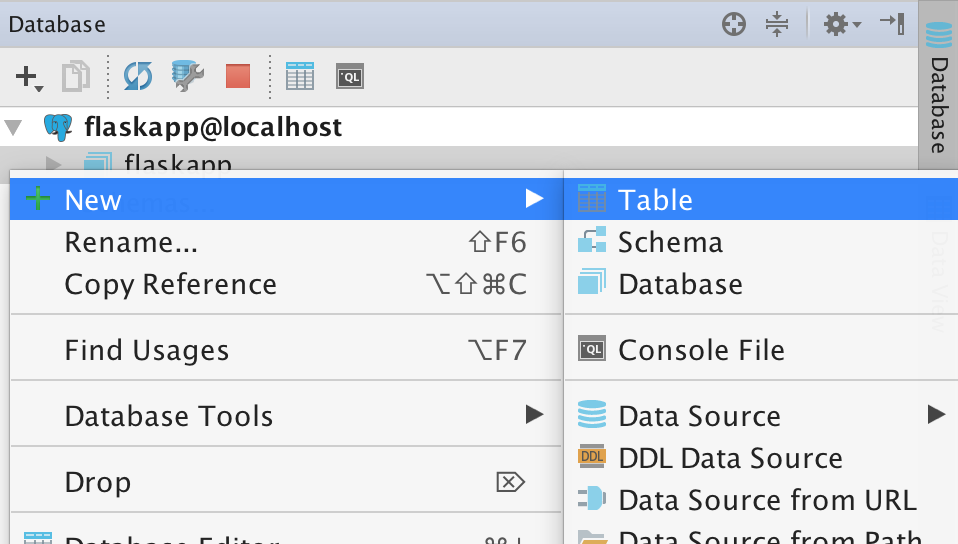
After creating the table, we can copy the DDL for the table into an SQL file by using the `generate and copy DDL` option from the context menu:
After we’ve copied it, create a new file ‘schema.sql‘, and paste it there (Cmd+V). We will just leave it there, if you’d like to learn more about executing these files using Flask, see the Flask documentation.
Writing the Application
Let’s create a simple page where the user can see recent posts, and post something new. We’ll need to connect to the database, so firstly we should add psycopg2 to the requirements file. You could of course use an ORM, but I actually like SQL, so I’ll just use psycopg2 directly. Let’s also add ‘humanize’ to the requirements so we can display the time in a nicer way.

After we’ve added the requirements, we need to rebuild the containers: the requirements are installed in one of the early steps in our Dockerfile. Let’s open the terminal (Alt+F12 within PyCharm), and run `docker-compose build`.
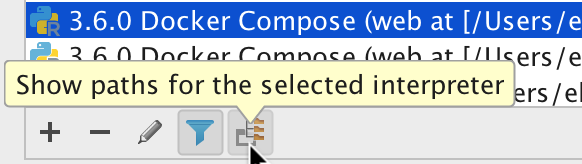
If we want to make PyCharm aware of the new packages in the Docker container, we need to reload the interpreter paths: go to Settings | Project | Project Interpreter, then use the ‘…’ button next to the selected interpreter and click ‘More’: 
Then, at the bottom of the interpreter overview, click the interpreter path button:
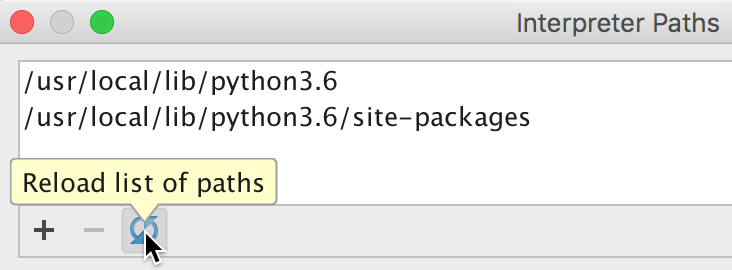
On the paths window, click ‘Reload paths’. It will look like nothing happened, but the paths will be reloaded after you’ve closed the settings windows:
And then click ‘Close’ on all of the windows you’ve just opened, PyCharm will now index the new packages.
Now that’s done, we can start to expand our Flask app. First, I’ll add get_db and close_db functions to connect and disconnect from PostgreSQL, see the Flask documentation for more details. To see my implementation, have a look at GitHub.
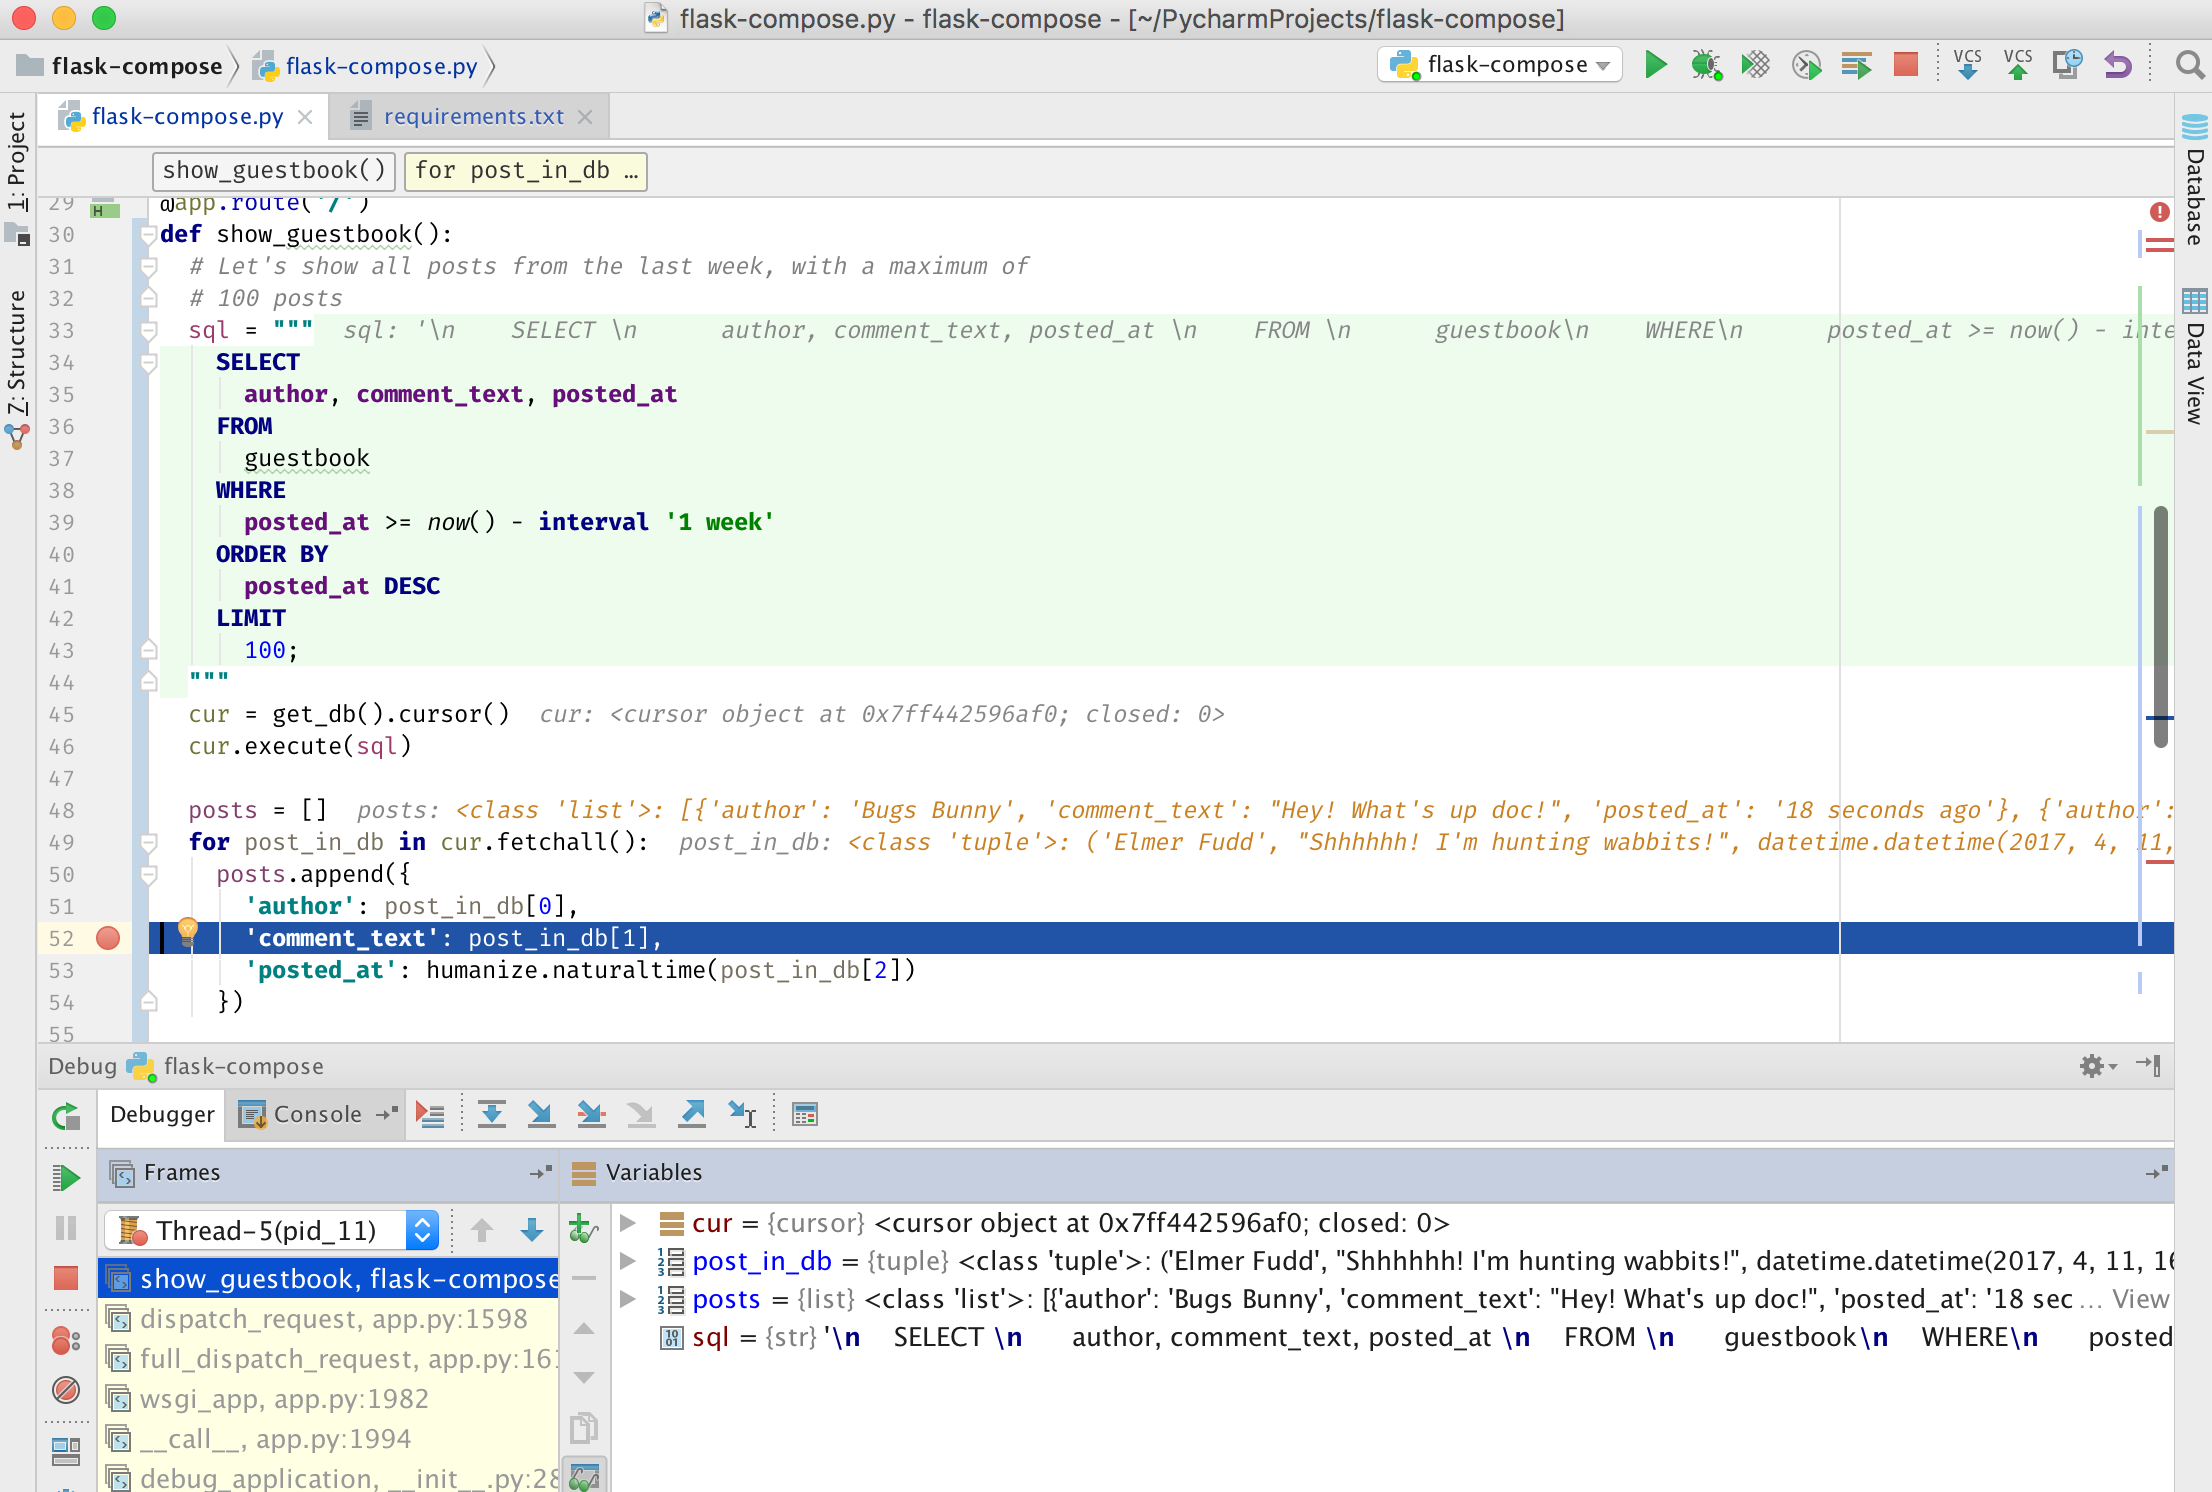
Let’s rename the `hello_world` route to `show_guestbook`, and add some code:
@app.route('/')
def show_guestbook():
  # Let's show all posts from the last week, with a maximum of
  # 100 posts
  sql = """
    SELECT
      author, comment_text, posted_at
    FROM
      guestbook
    WHERE
      posted_at >= now() - interval '1 week'
    ORDER BY
      posted_at DESC
    LIMIT
      100;
  """
  cur = get_db().cursor()
  cur.execute(sql)

  posts = []
  for post_in_db in cur.fetchall():
    posts.append({
      'author': post_in_db[0],
      'comment_text': post_in_db[1],
      'posted_at': humanize.naturaltime(post_in_db[2])
    })

  cur.close()

  return render_template('index.html', posts=posts)
Keep in mind that when you’re writing SQL in PyCharm, you can get code completion by pressing Alt+Enter, and then choosing “Inject language or reference”, and then selecting “PostgreSQL”. Similarly, we’ll add an `add_post` route to add a post to the guestbook:
@app.route('/add', methods=["POST"])
def add_post():
  sql = """
    INSERT INTO
      guestbook
      (author, comment_text, posted_at)
    VALUES
      (%s, %s, now());
  """
  db = get_db()
  cur = db.cursor()
  cur.execute(sql, (request.form['author'],
                    request.form['comment_text']))

  db.commit()
  return redirect(url_for('show_guestbook'))
Note how we’re inserting the user input in the tuple provided as a second argument to `cursor.execute()`. Please don’t ever interpolate user input directly, it leads to bad things.
To see the template and CSS file, check out GitHub.
At this point the Flask app is ready, and we can use the PyCharm ‘run’ and ‘debug’ buttons to use the run configuration we set up in the previous tutorial:
Let us know what you’re developing with Docker Compose in the comments!
PyCharm Team
-The Drive to Develop