How to use Materialized Views in Django

Repeatedly running queries that span multiple tables can be burdensome on your database. In this blog post, we’re going to talk about materialized views, how and why they help us cut down on query costs, and how to integrate them into your Django application. Read on to learn more or check out this video overview.
What is a materialized view
Materialized views are usually used to increase the performance of query retrieval, as they are cached, precomputed datasets derived from queries. Generally, you can benefit most from using a materialized view if the query is run frequently and the dataset is large. If your query matches these conditions and you aren’t already using materialized views, there is probably some room for optimization.
Let’s take a look at how to work with materialized views for your Django queries.
Let’s imagine that we own a resort with various facilities available for rent, and we use a booking application that collects all the bookings for our facilities.
How to create materialized views in Django
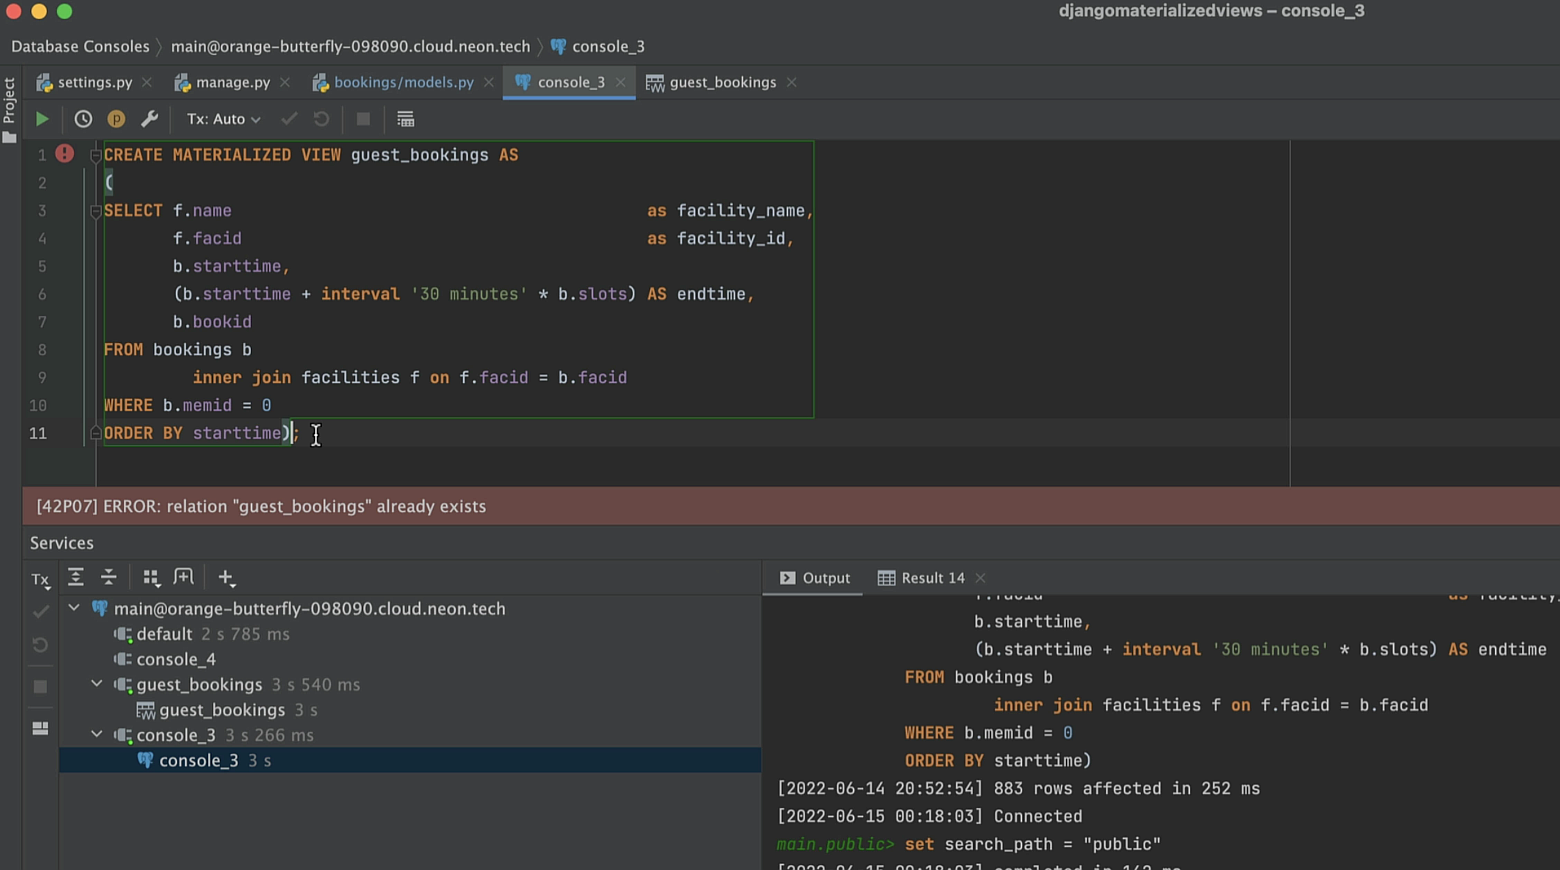
Let’s take a look at the database first. We are going to use PostgreSQL. Our main goal is to show the list of all of the bookings that guests have made at our facilities. Here is what the query looks like.
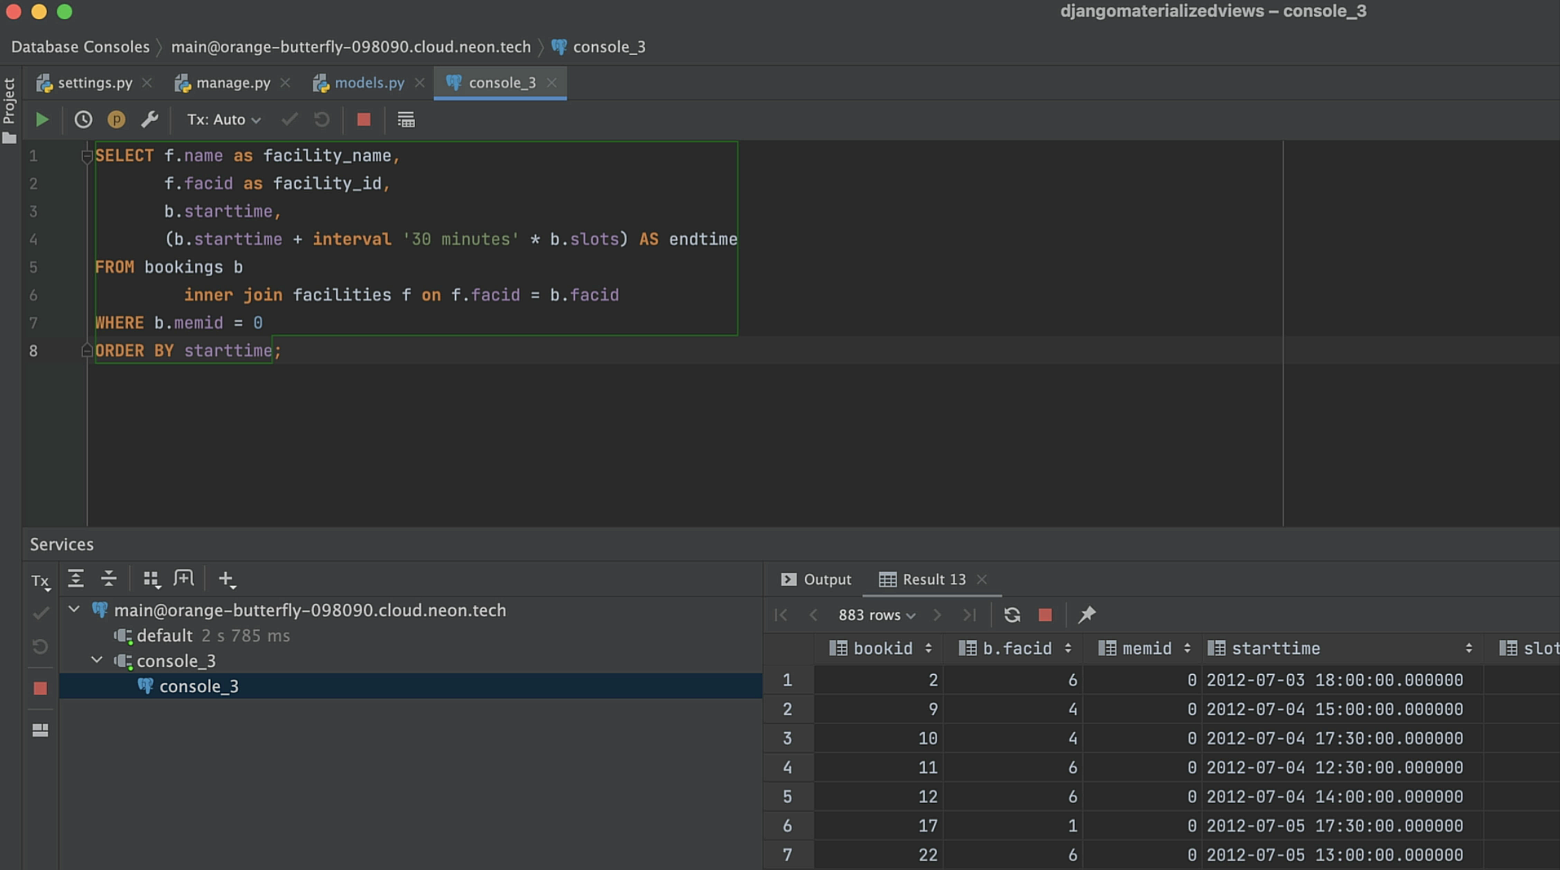
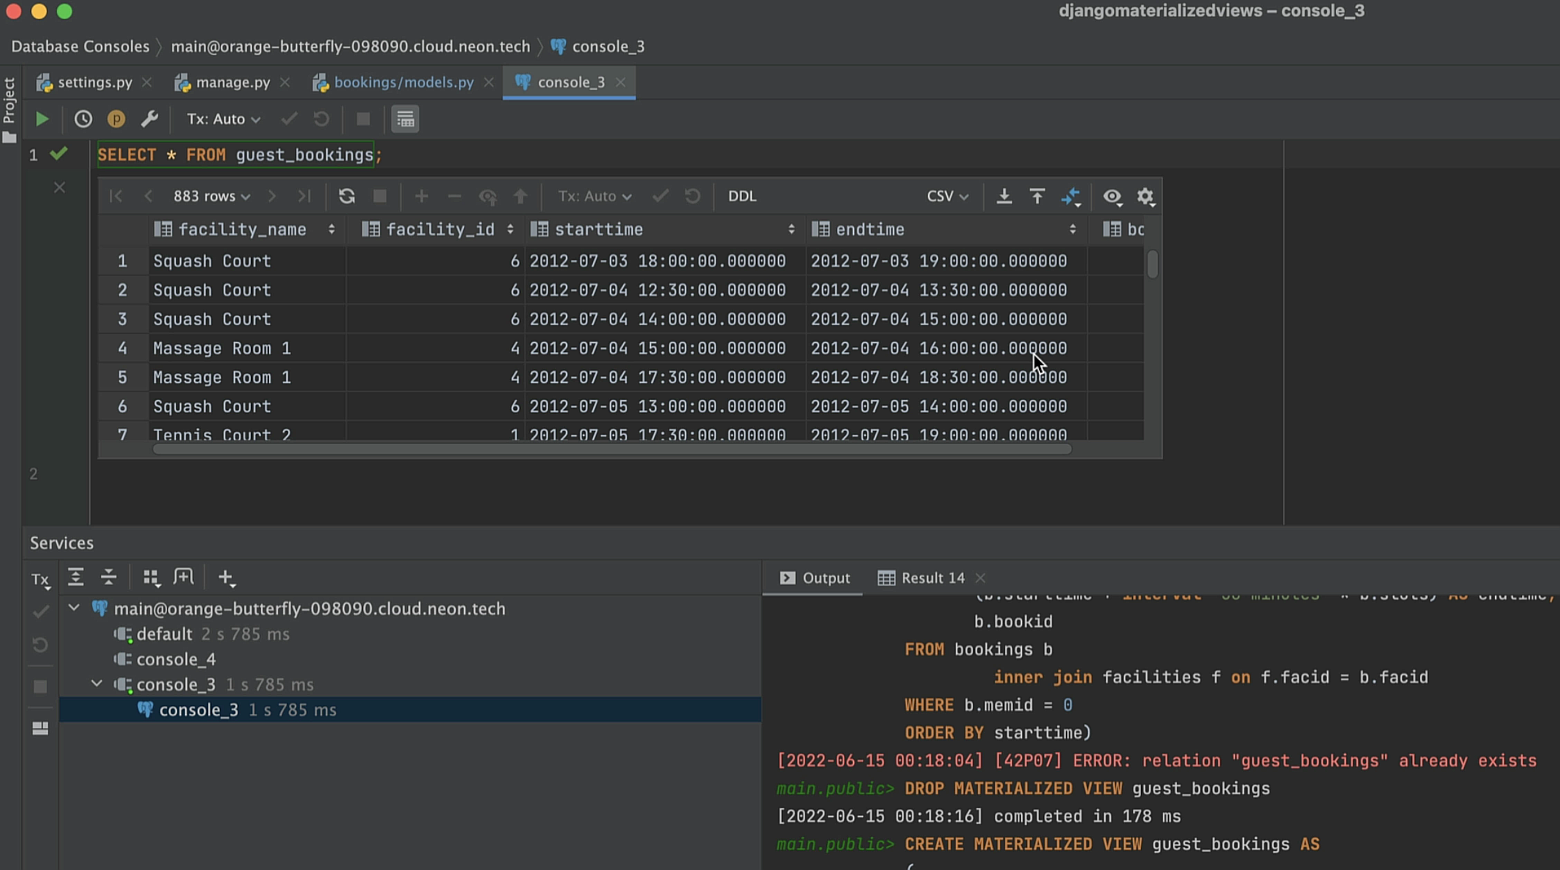
It’s a large view, and this does take quite a bit of time to render. So what we want to do is create a materialized view to encompass it. We’ll name it guest_bookings.
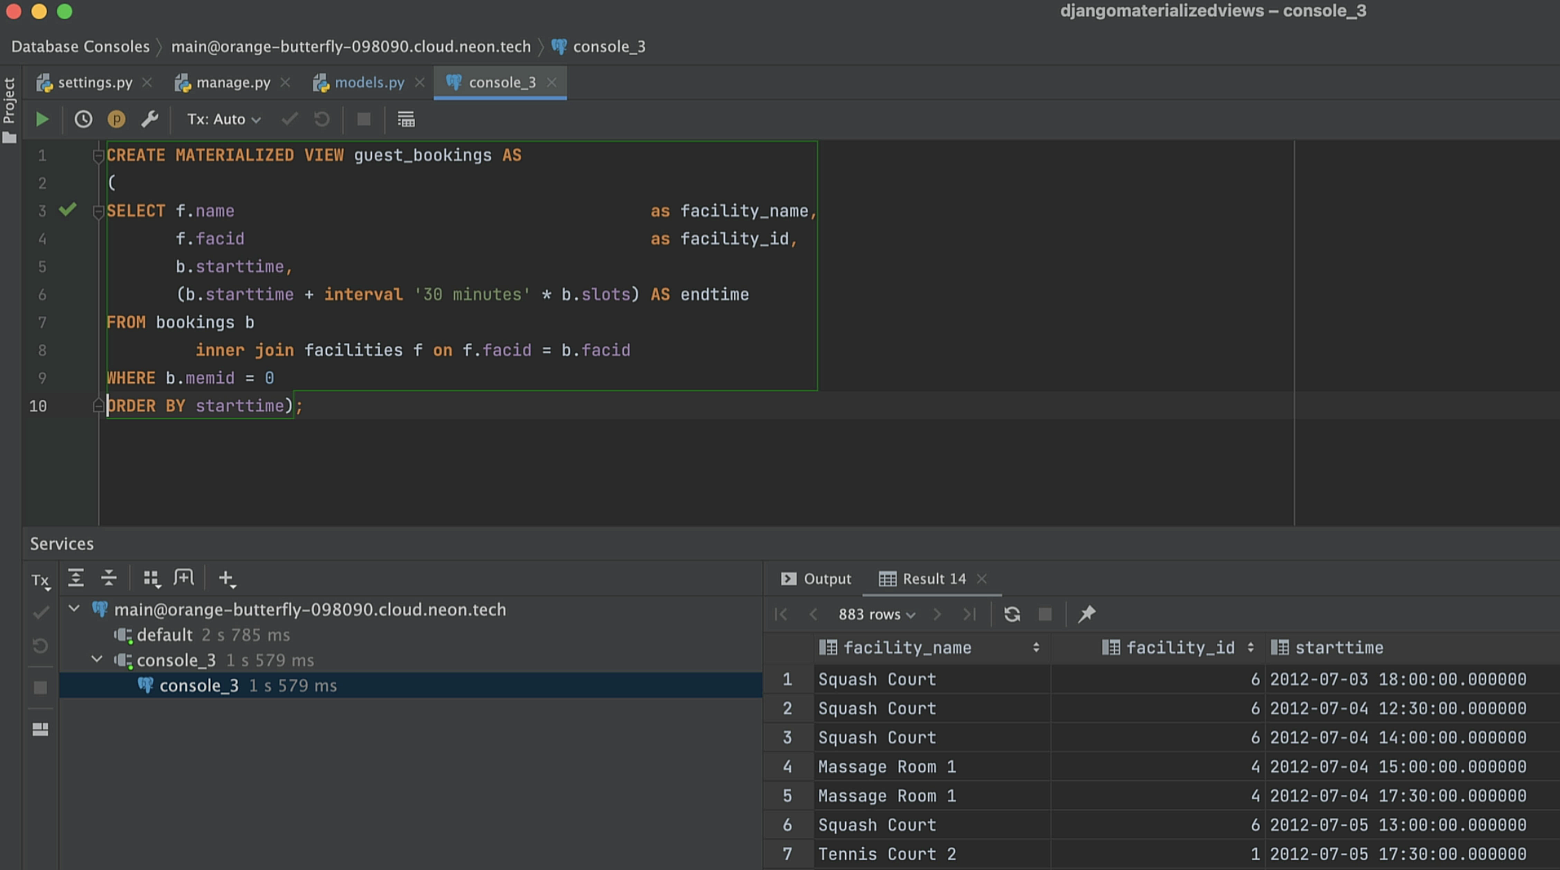
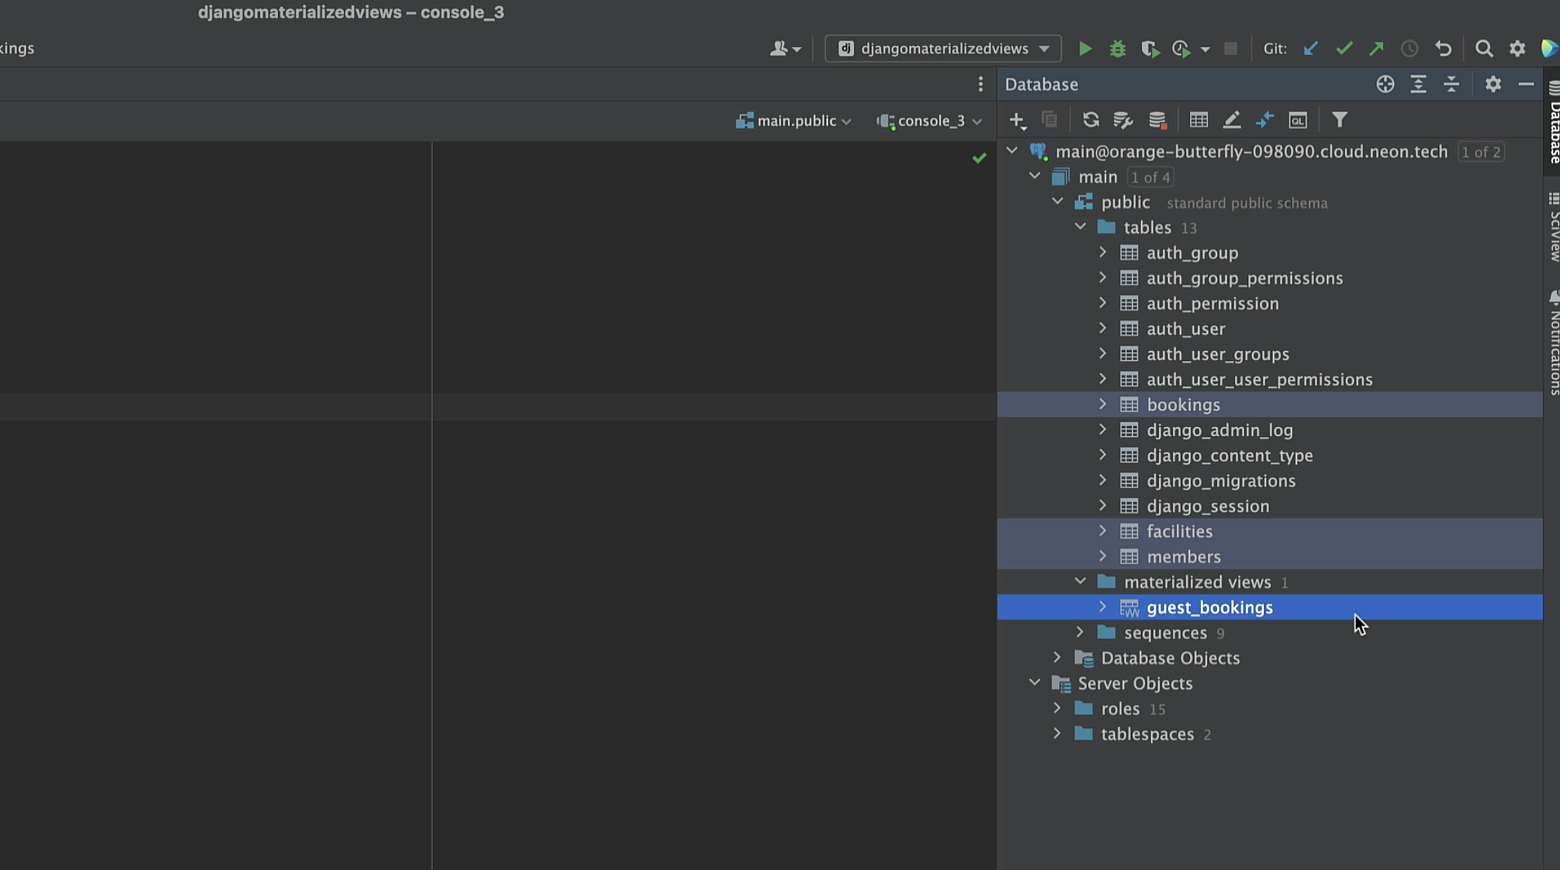
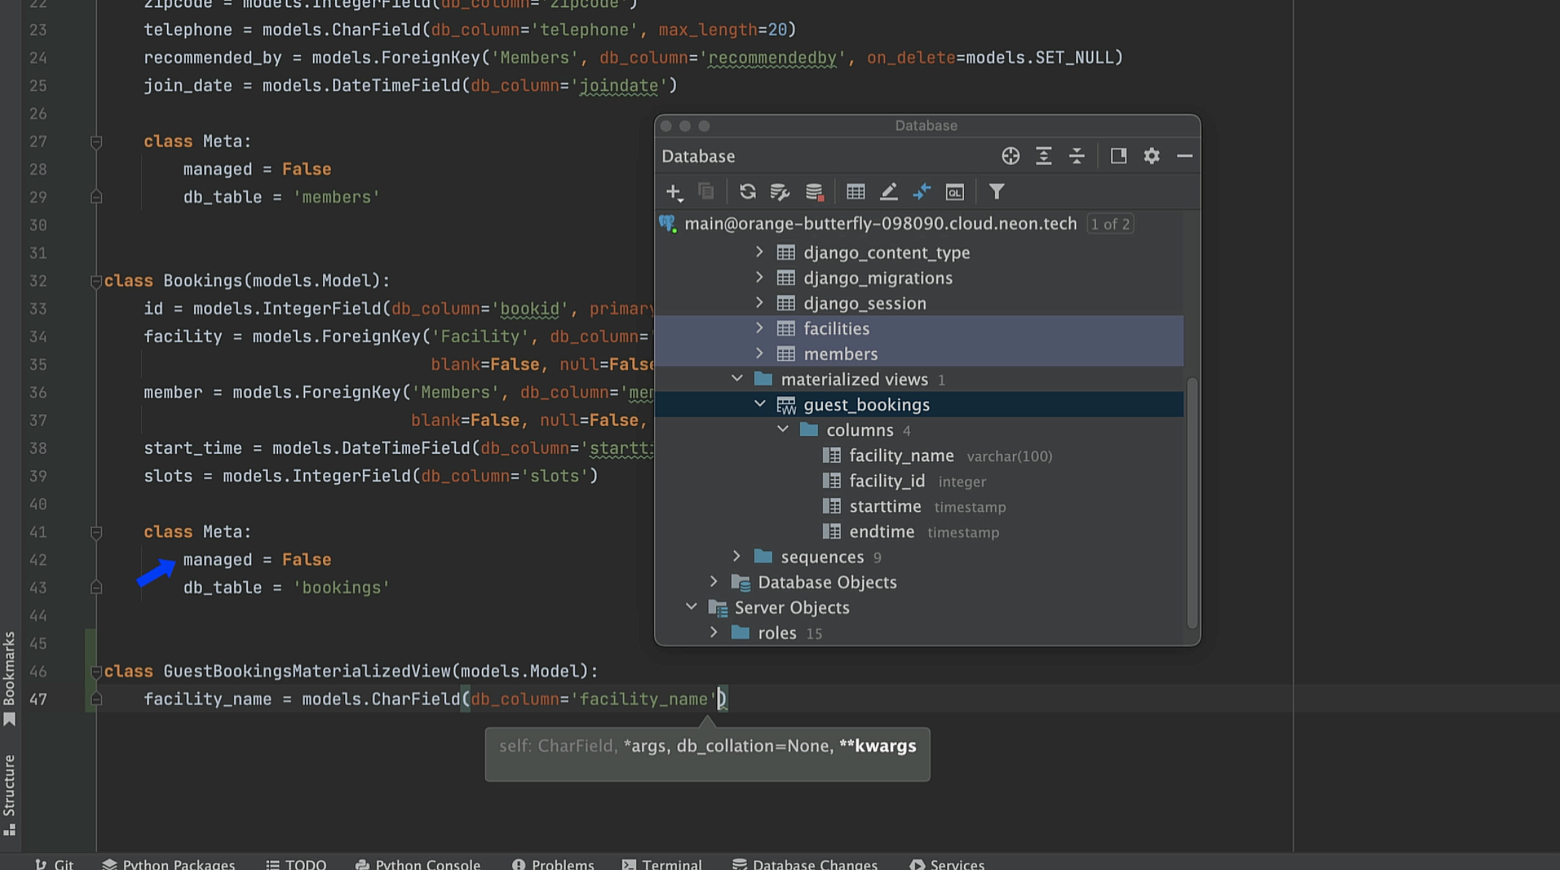
Now we’ll execute the materialized view. First the main schema should be introspected, and then we will be able to see the materialized view in the database panel.
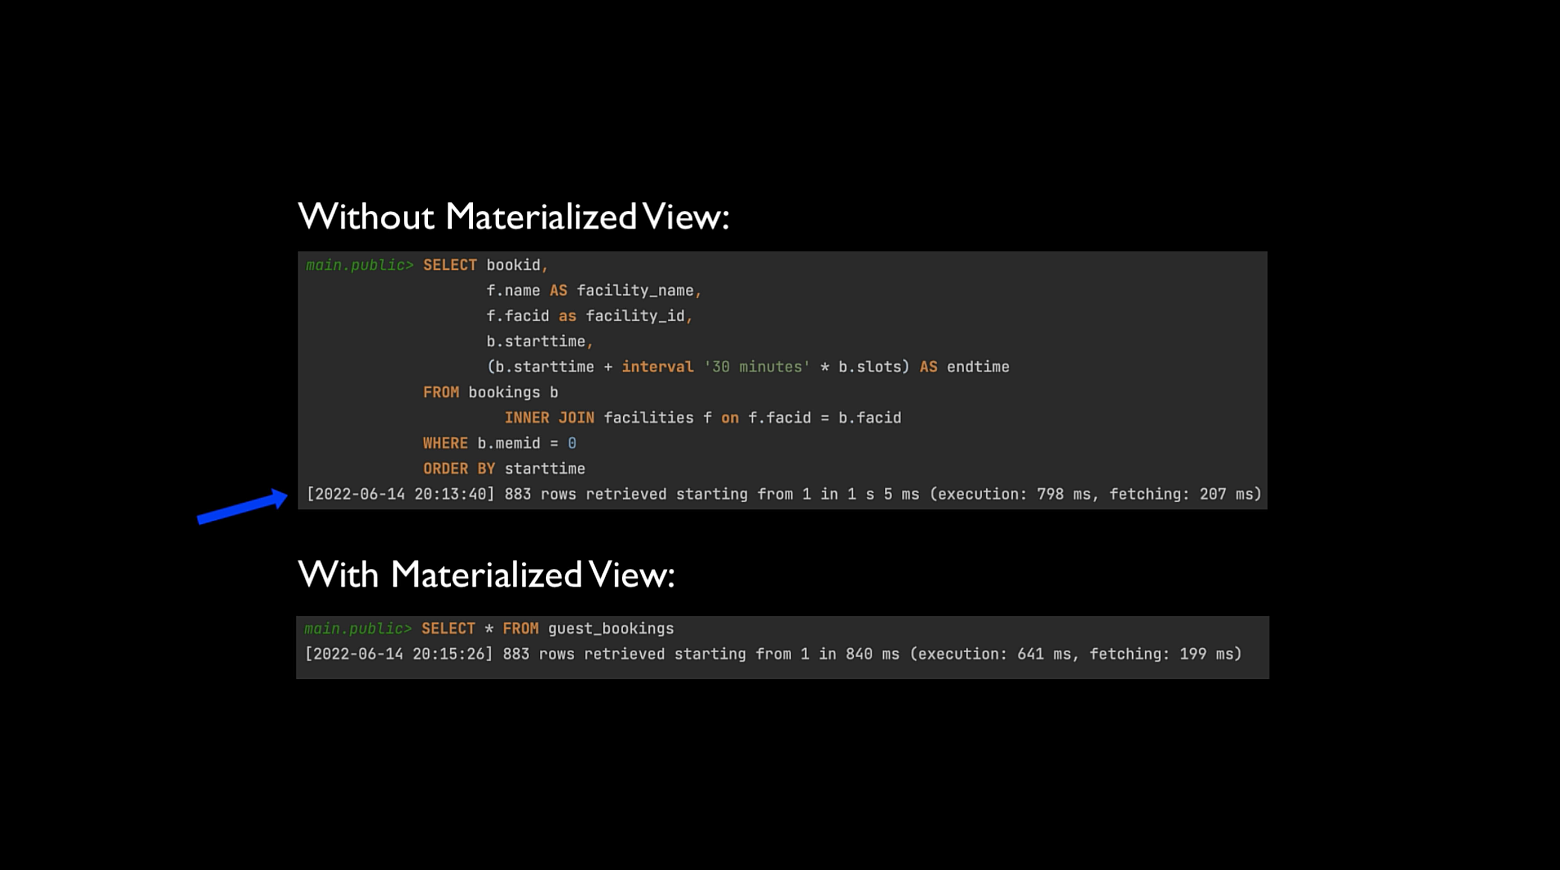
Now we can check the performance. With just the query selected, it takes around 800 milliseconds to execute, while the materialized view takes about 641 milliseconds.
Now it’s time to encapsulate this materialized view inside the Django model. We don’t want this model to be managed by Django, meaning that Django won’t perform any database table creation, modification, or deletion operations for it. So to make this model unmanaged by Django, we’ll set managed to False in the class Bookings.
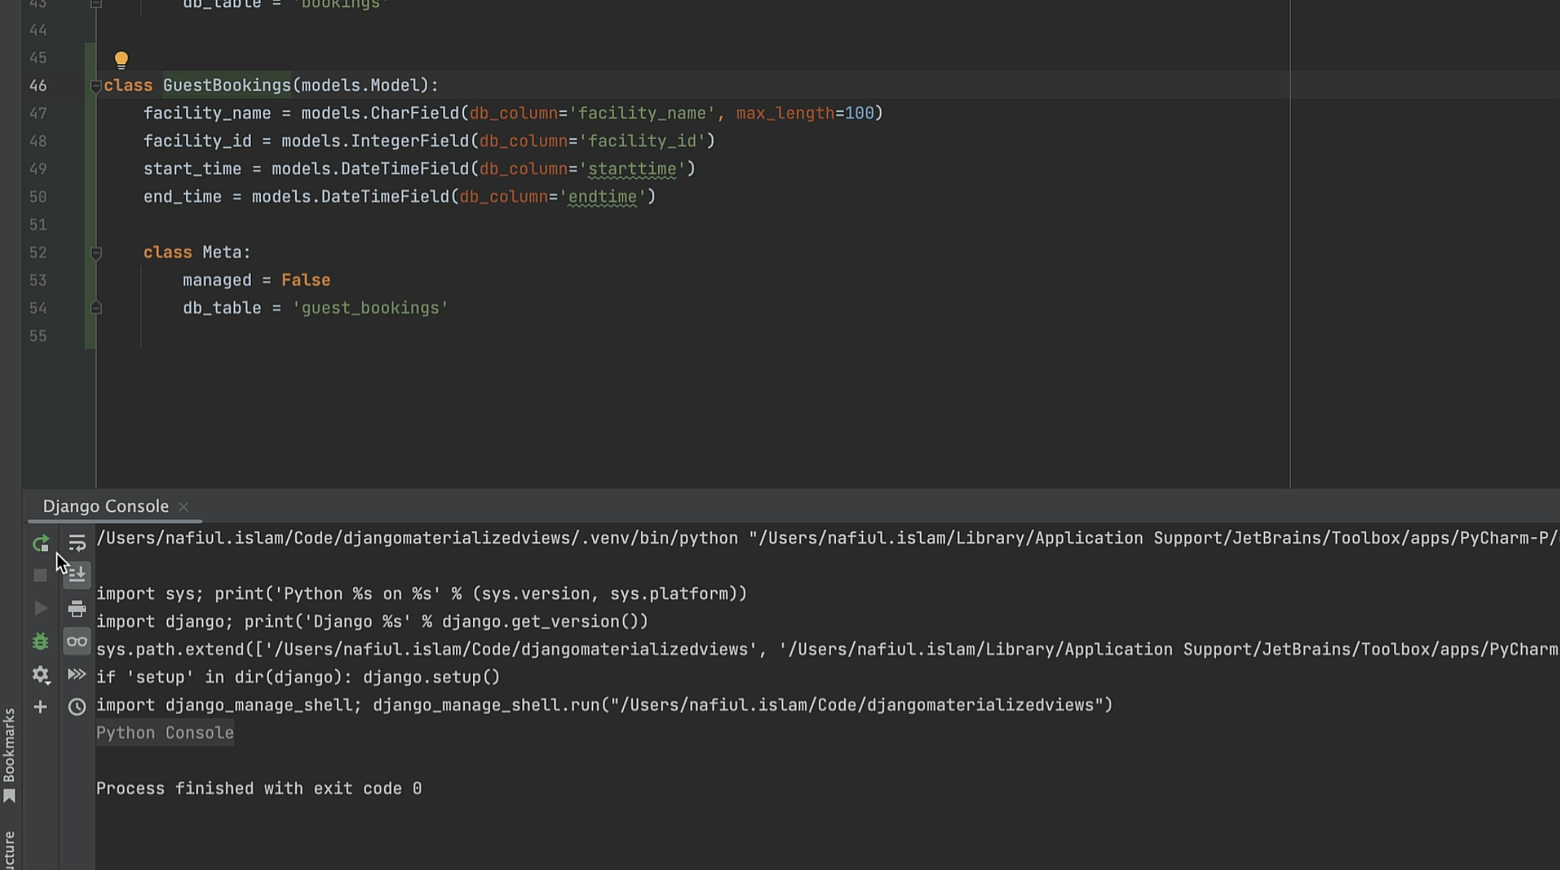
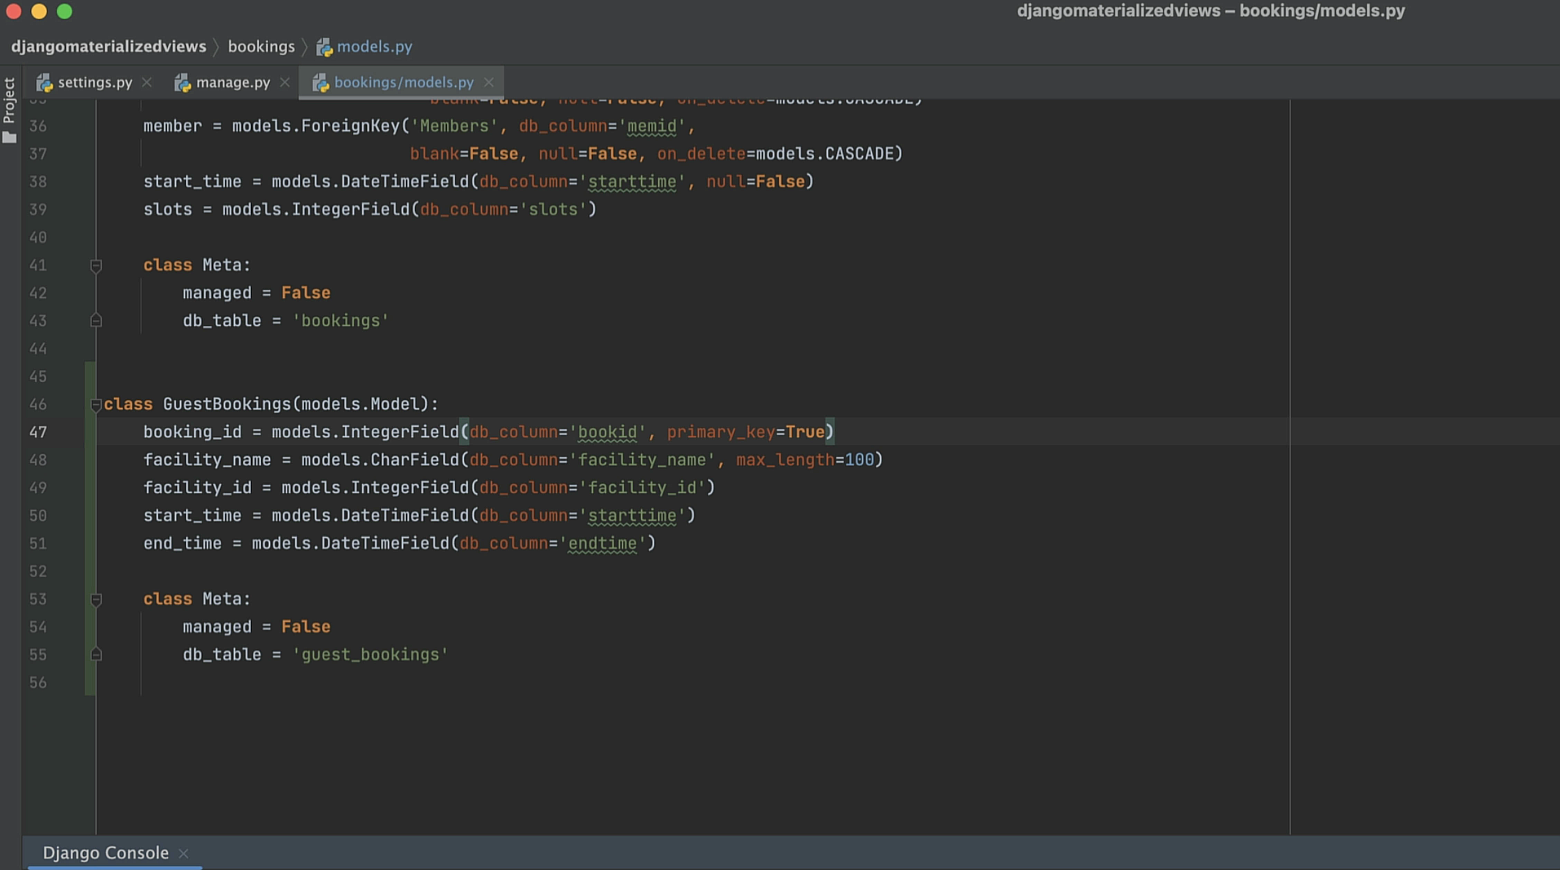
Here is our updated model:
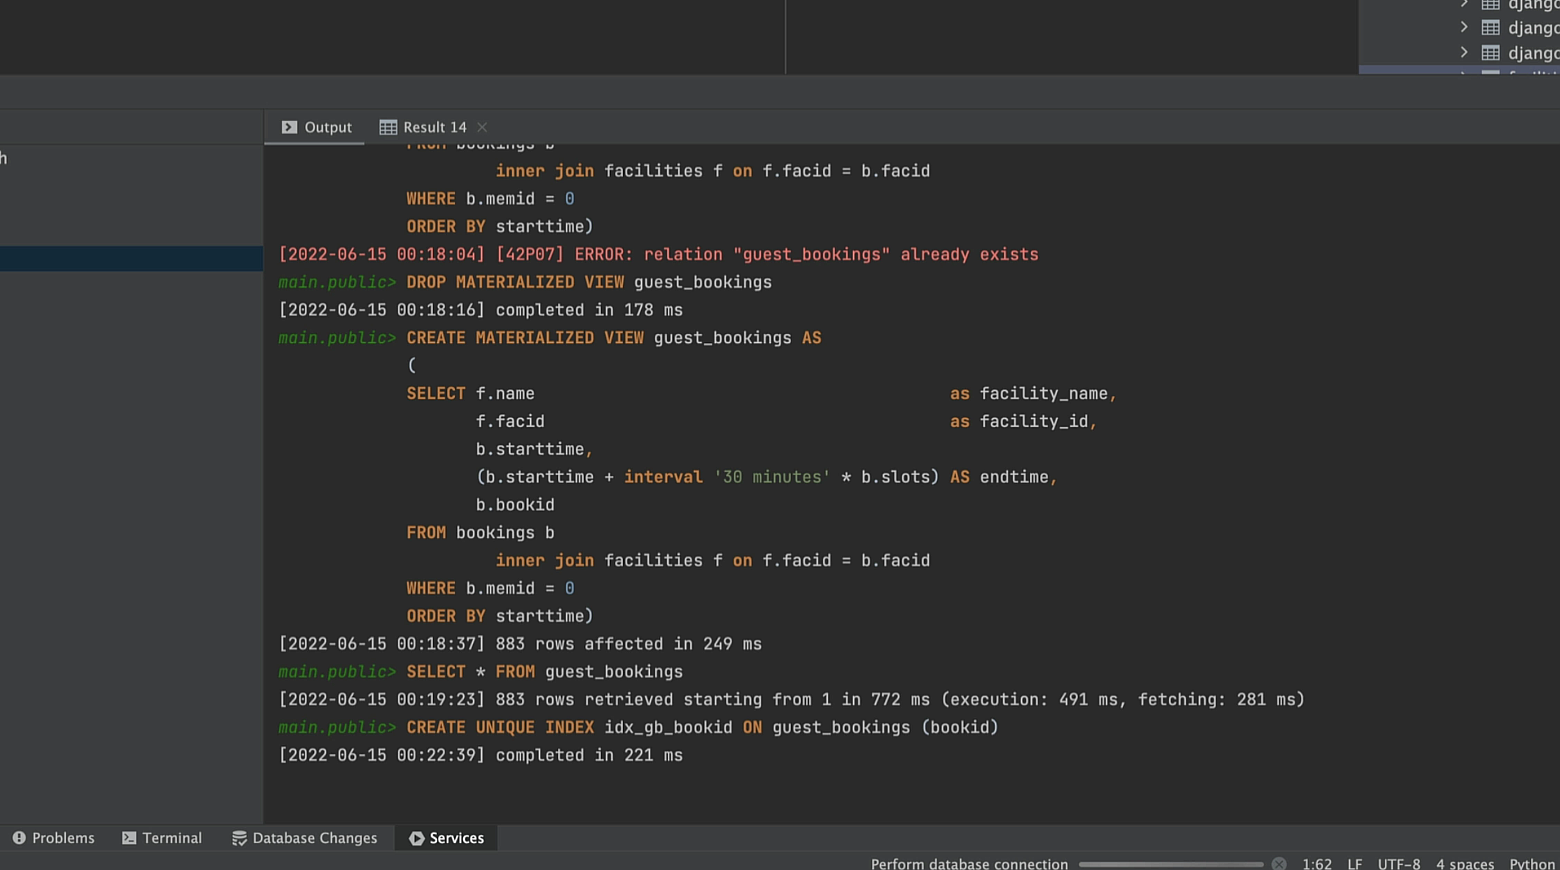
We need to add a primary key to our materialized view, since the Django ORM requires it. This will also make getting single items in a booking query faster. We will use the bookid column as a primary key, but you could also create a new “ID” column. To use bookid as a primary key, we need to add it to the materialized view, and then we need to re-create the materialized view. But we can’t just create it again – we’ll get an error in the Django console while trying to run it if we do.
What we need to do is to DROP this materialized view first.
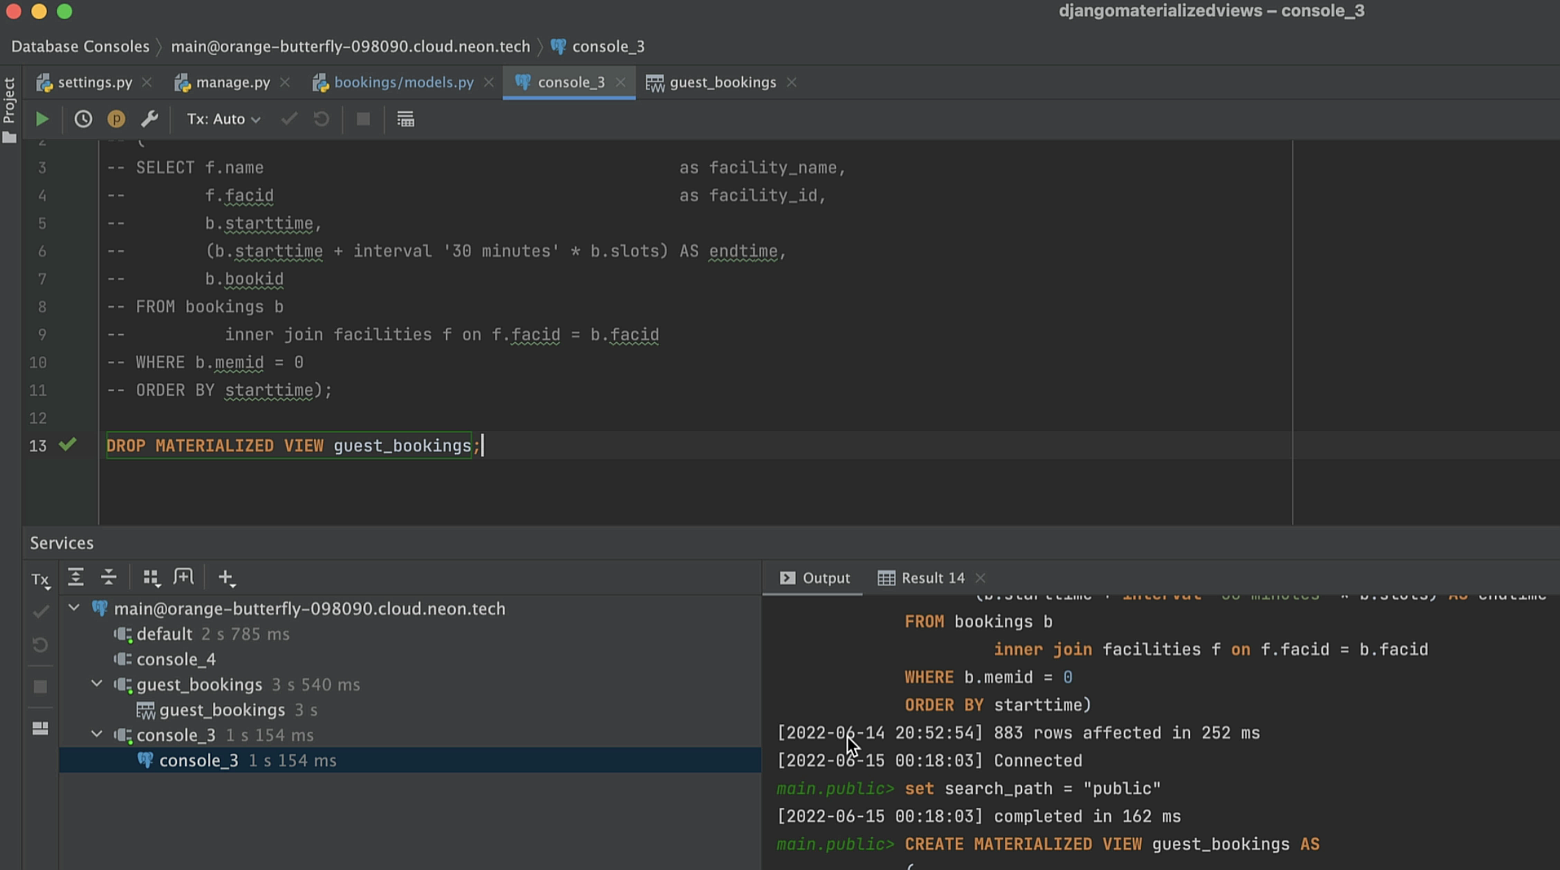
And then execute the updated materialized view.
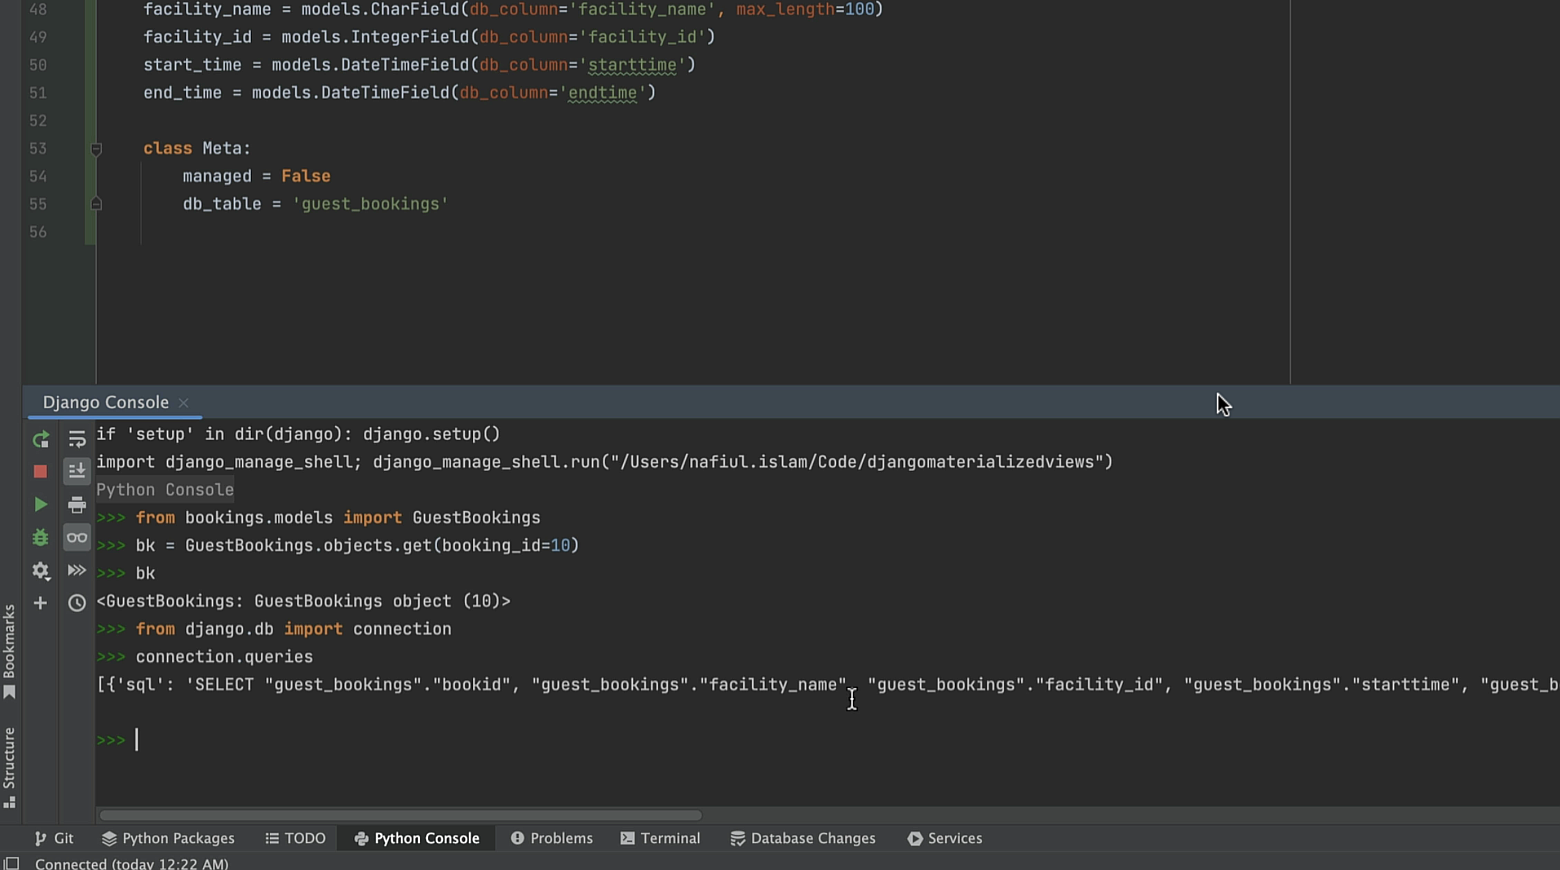
Turning back to the GuestBookings model, we need to incorporate the new field we added to the materialized view. So we add a new field booking_id, and set primary_key=True for it.
Let’s check the Django console to see whether the model is working correctly. We’ll import the GuestBookings model and look at both the first booking and the attributes of the first guest.
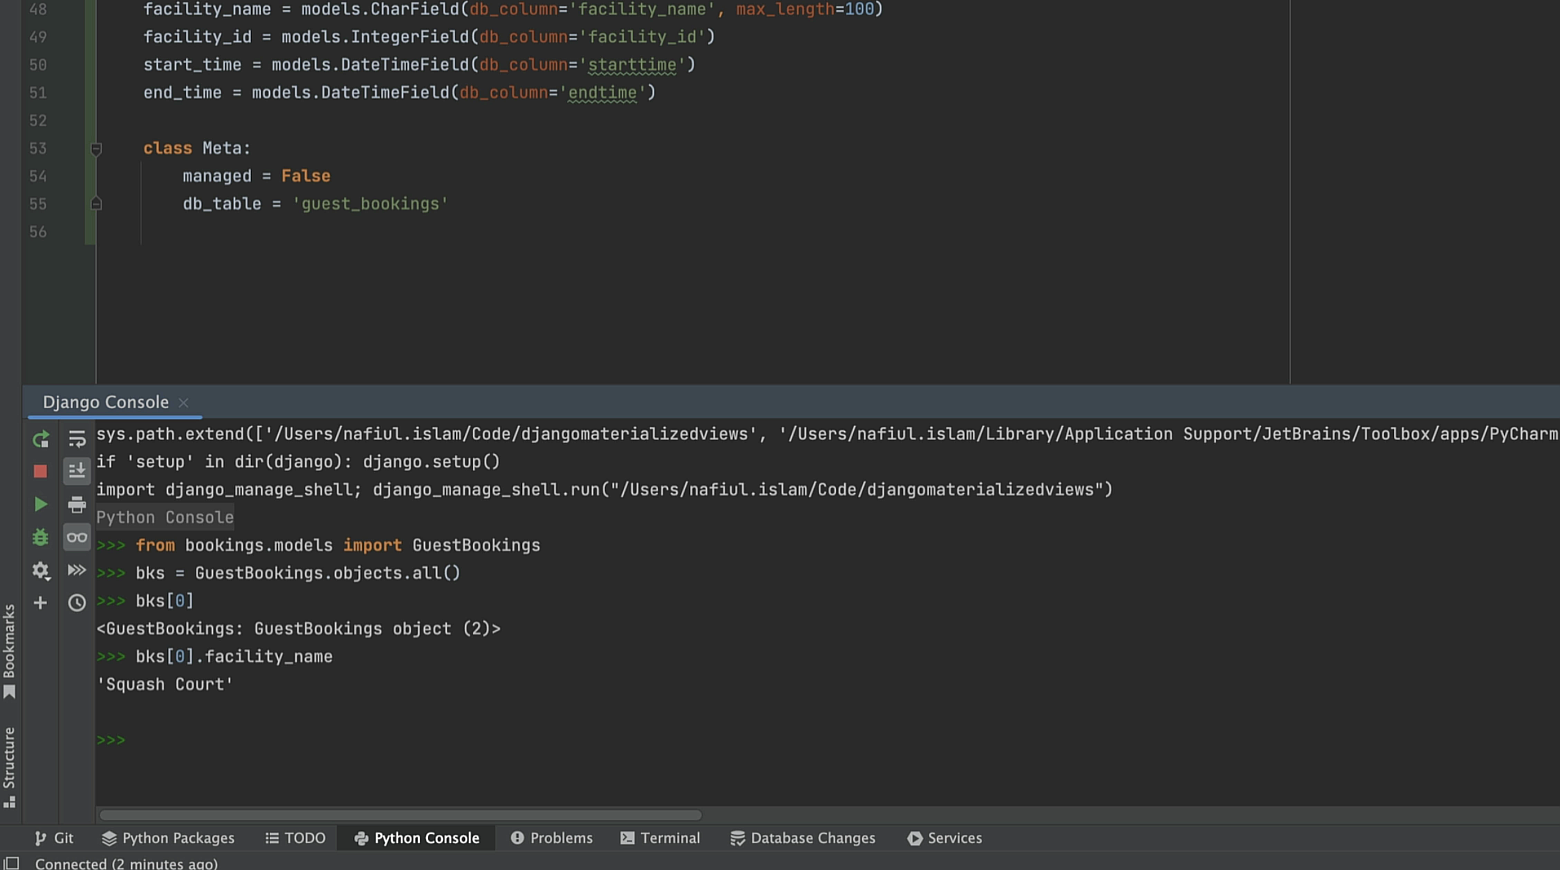
The materialized view is working!
To optimize retrieval when we need it in the future, let’s create a unique index for the materialized view based on the bookid. This will allow us to retrieve the object with the GET method very quickly.
To create a unique index, we should identify the column on which we want to create the index, along with a name for the index.
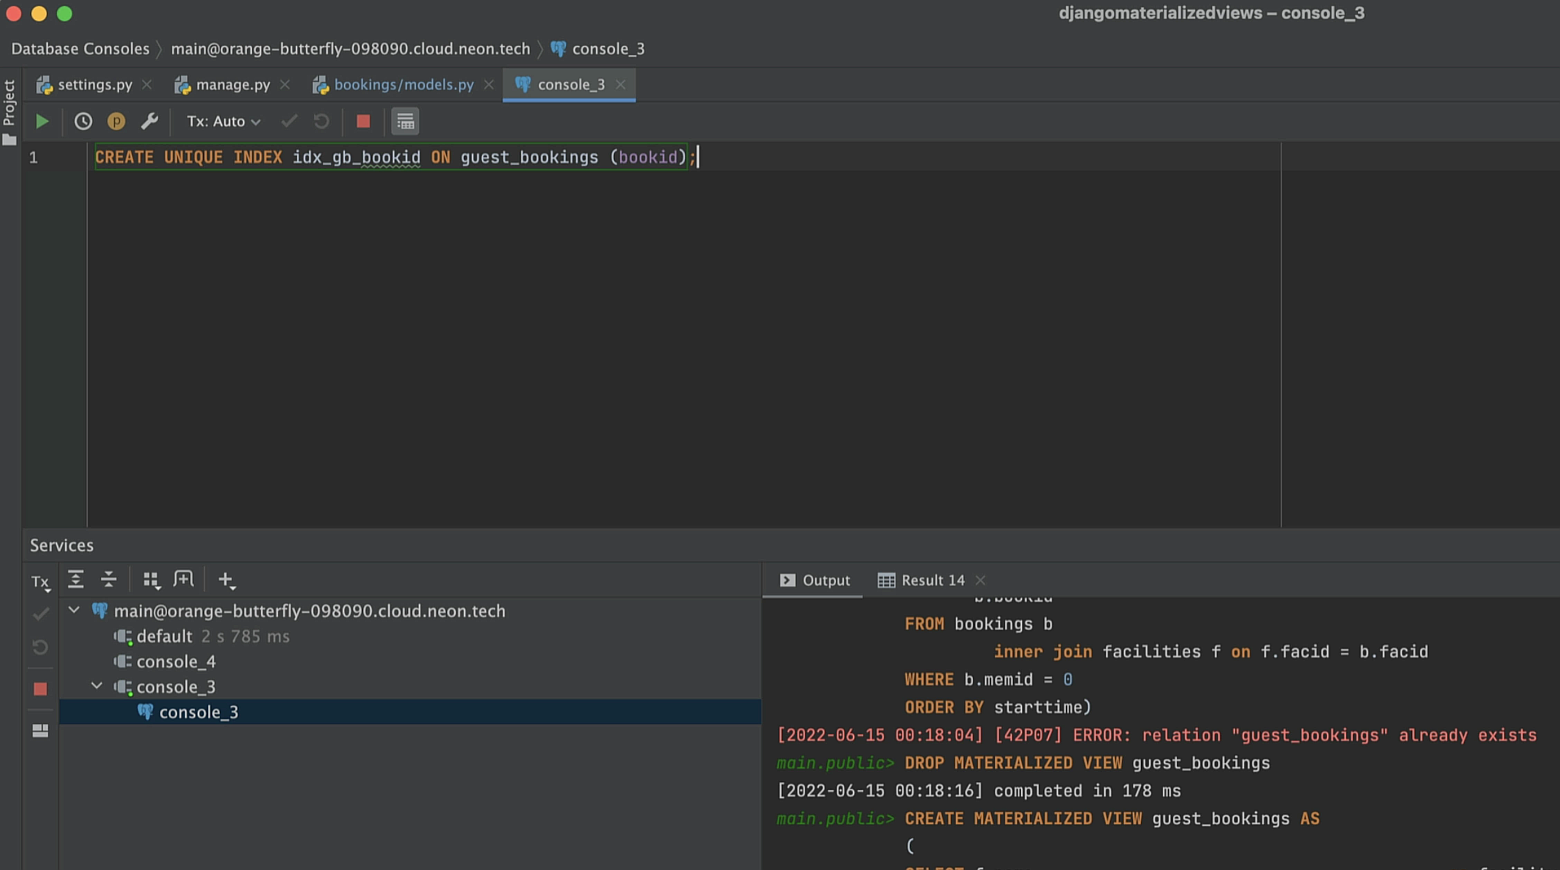
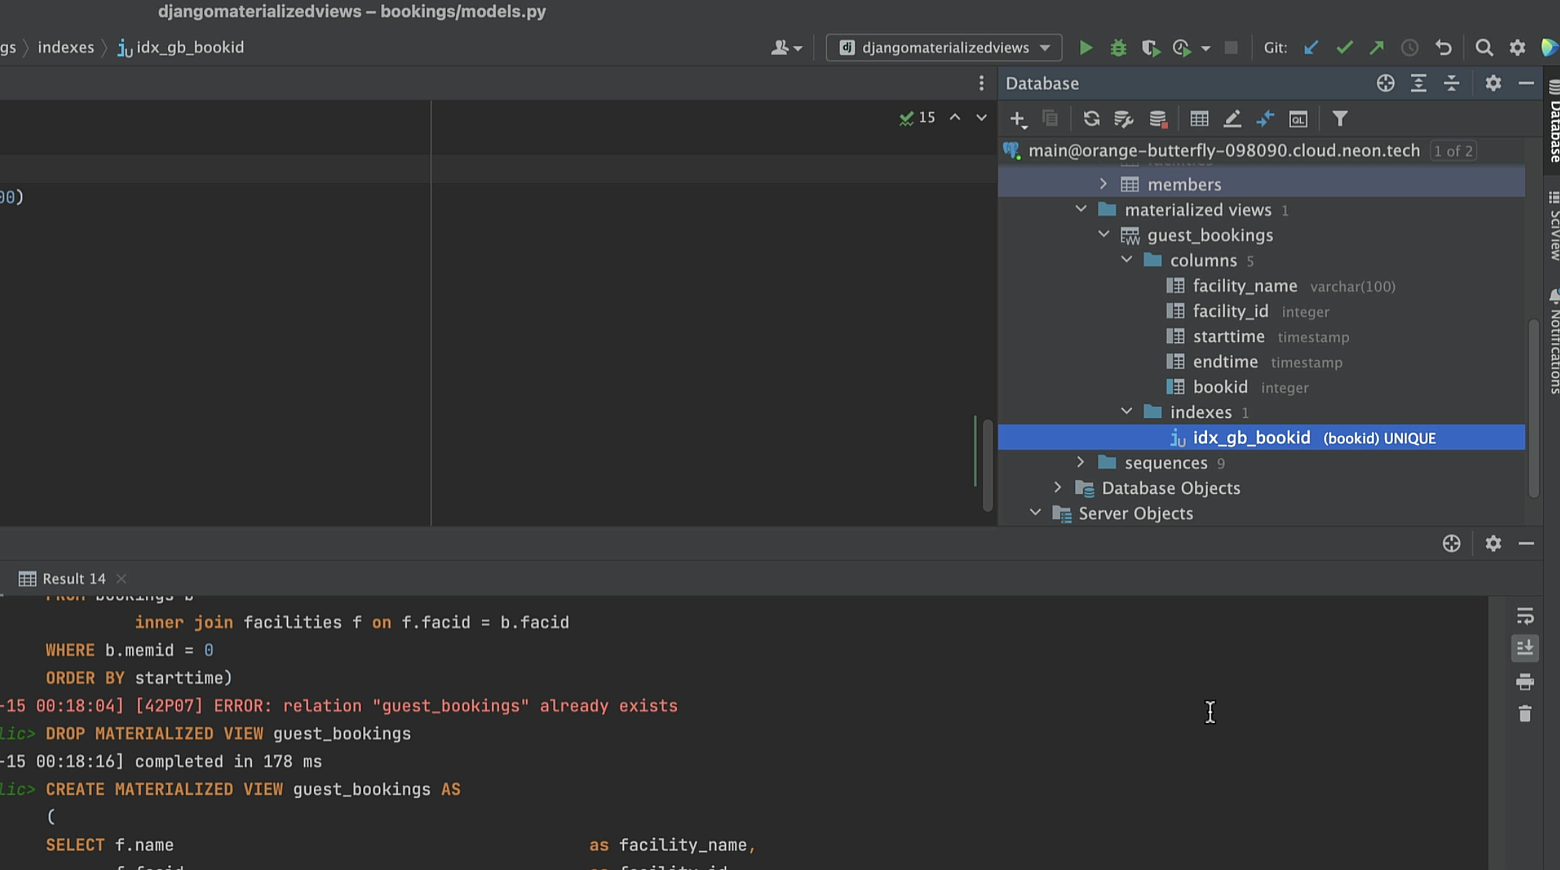
If you are using PyCharm for Django development, executing the newly created unique index will cause PyCharm to refresh the database schema and database properties. Most importantly for us, it will also refresh the materialized view, where we can now see the index.
Now let’s take a look at the generated queries to see how creating unique indexes helps optimize performance.
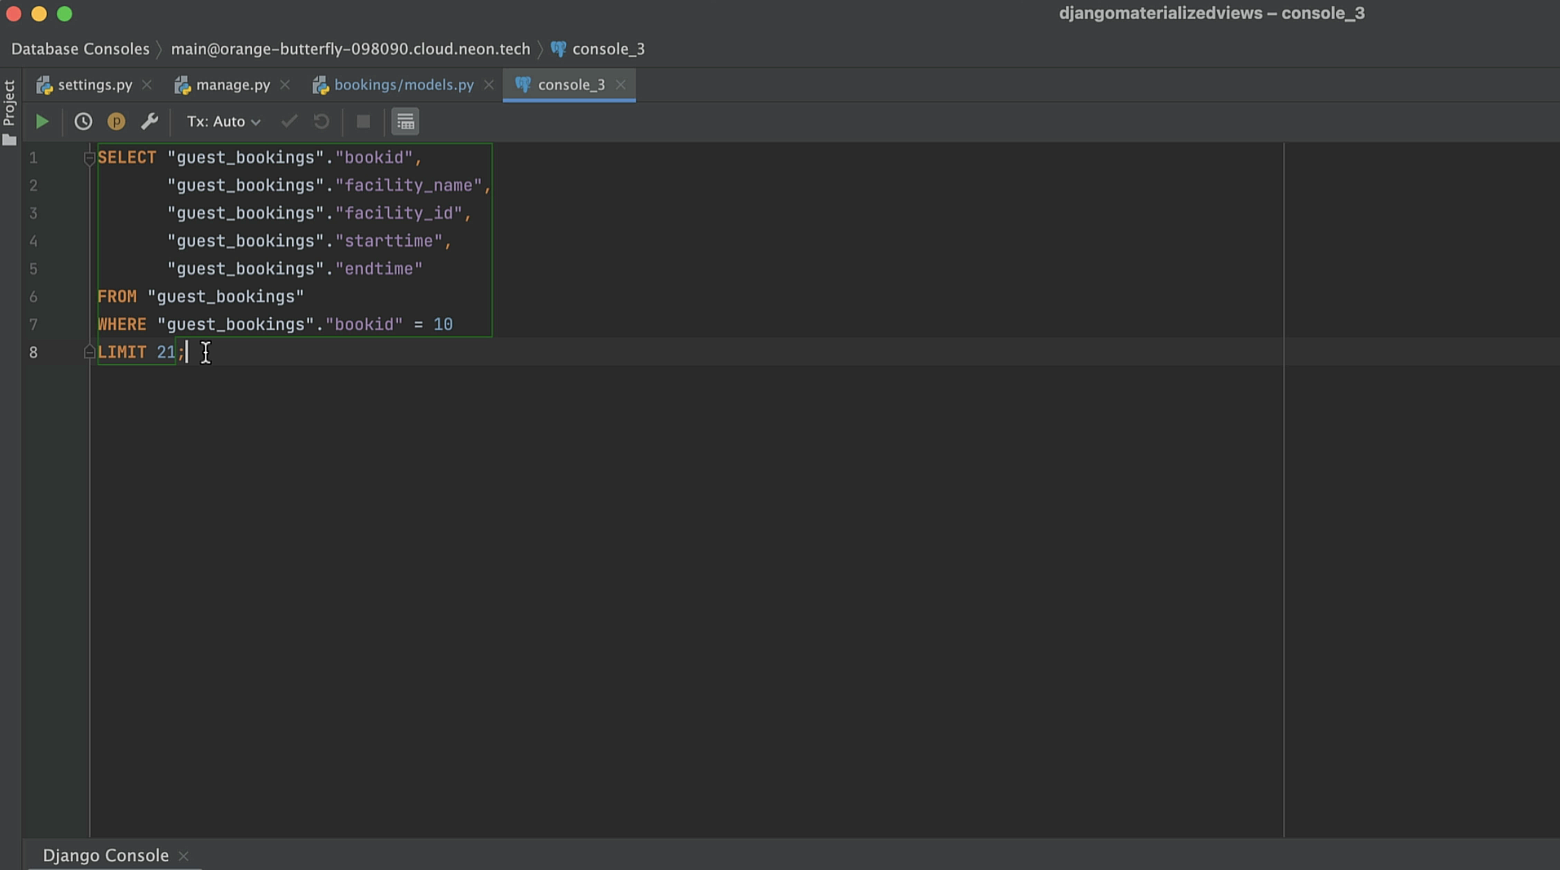
To see the queries that have been generated in Django, we only need to import connection from the django.db module and then use connection.queries to get a list of dictionaries with all of the queries that have been generated. Make sure your Django DEBUG setting is set to True, because connection.queries is only available if DEBUG is True.
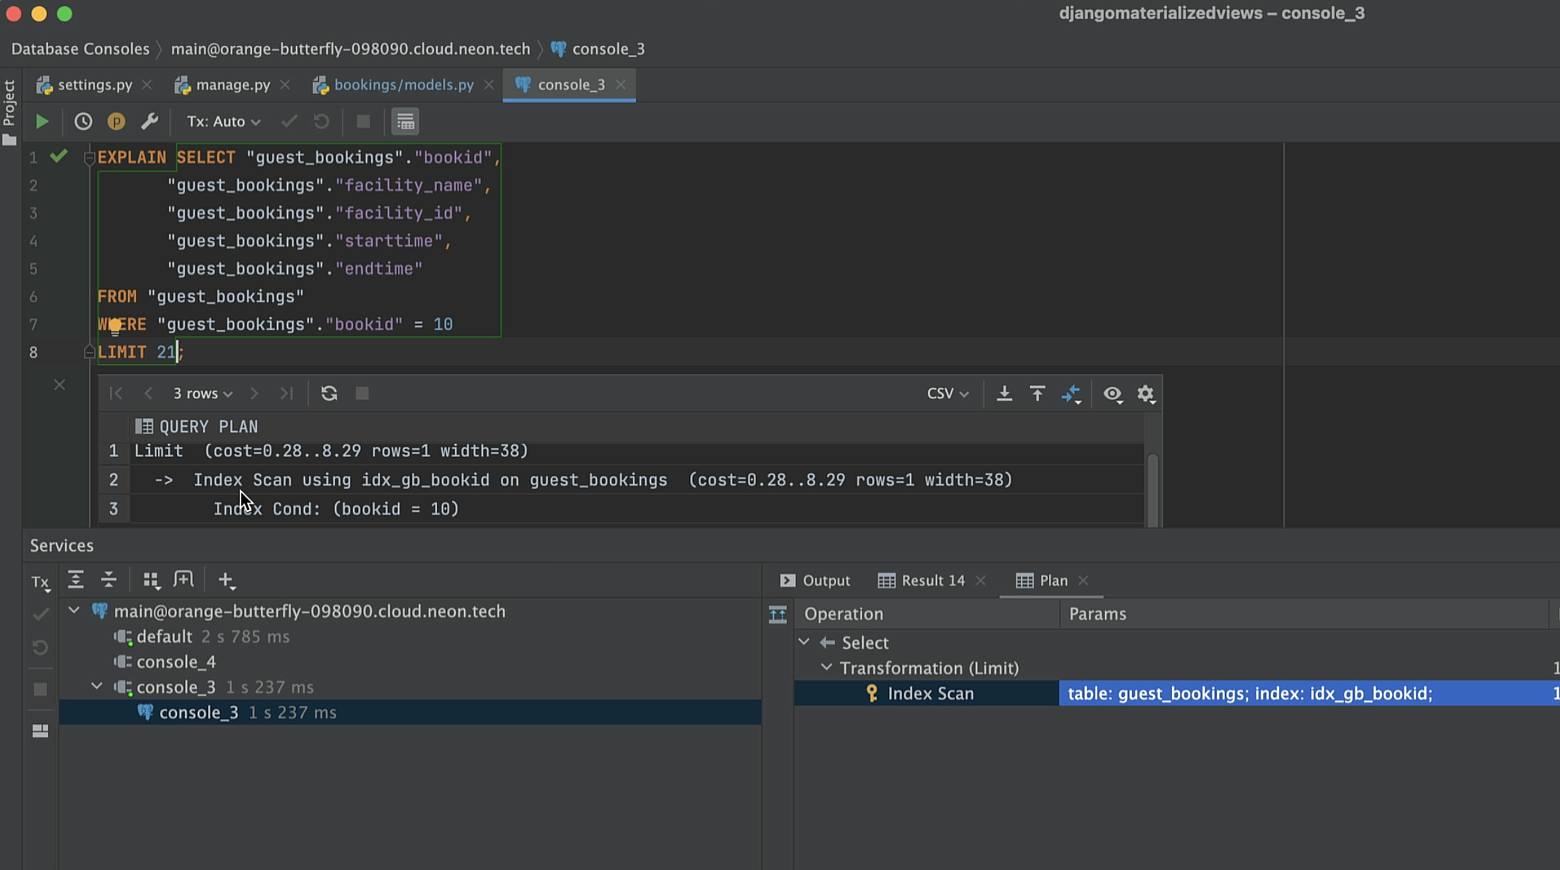
Now let’s import that string to the database console and see what plan the PostgreSQL planner created for our query.
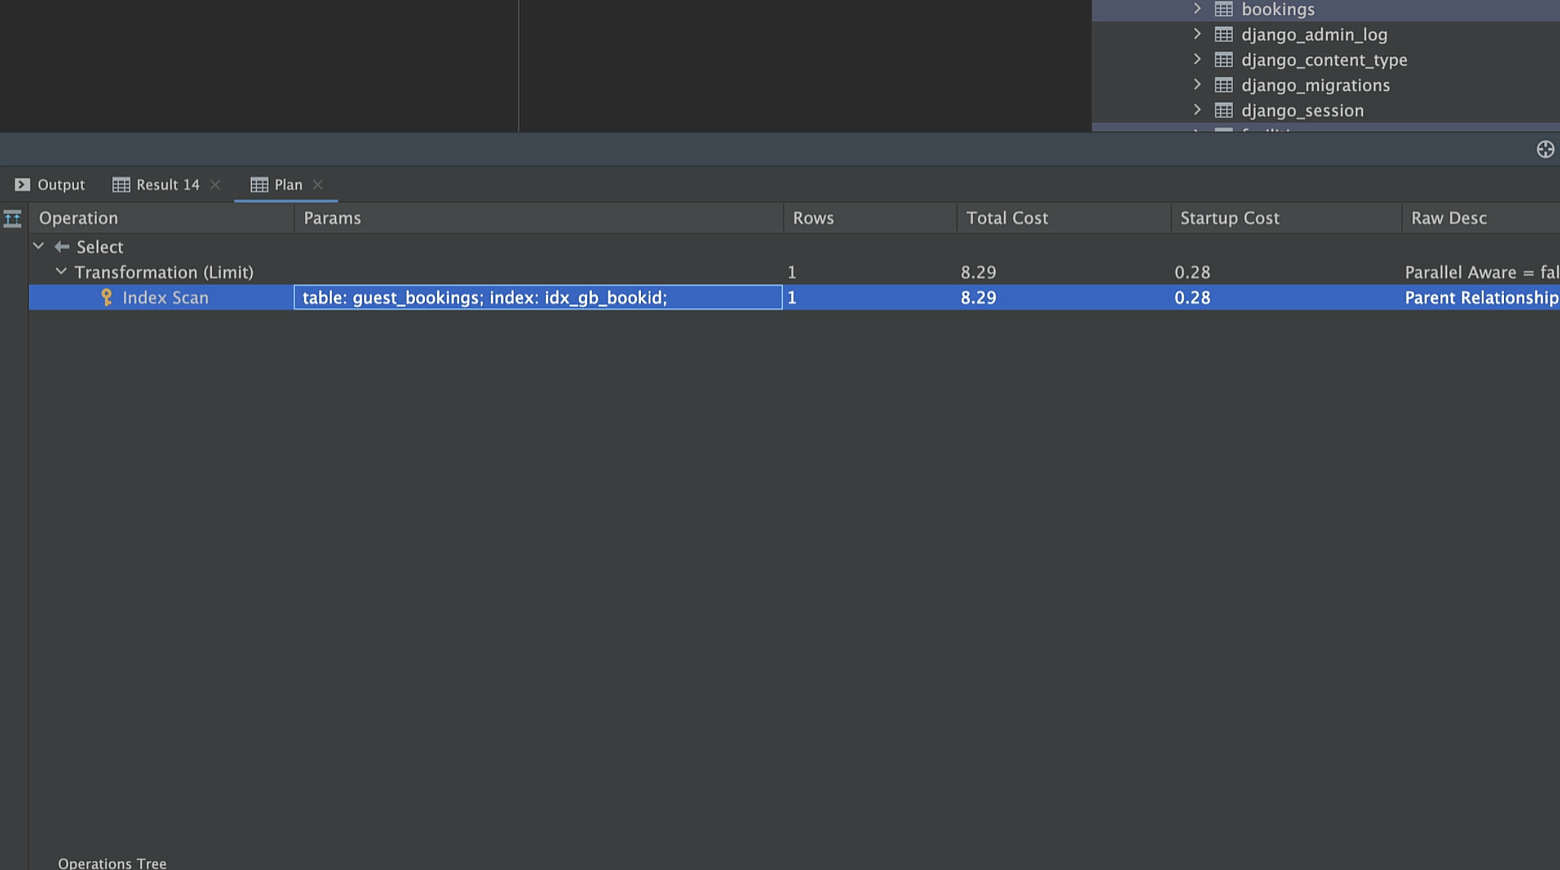
We’ll do this using the Explain Plan command in PyCharm.
But you can also use a regular EXPLAIN statement.
PostgreSQL devises a query plan for each query it receives. Choosing the right plan to match the query structure and the properties of the data is absolutely critical for good performance.
When we retrieve the results of this query, we see that Postgres is opting to use an Index Scan, instead of a regular sequential scan. This means that Postgres has to traverse a smaller data structure in order to retrieve the record that we want, which makes the query faster.
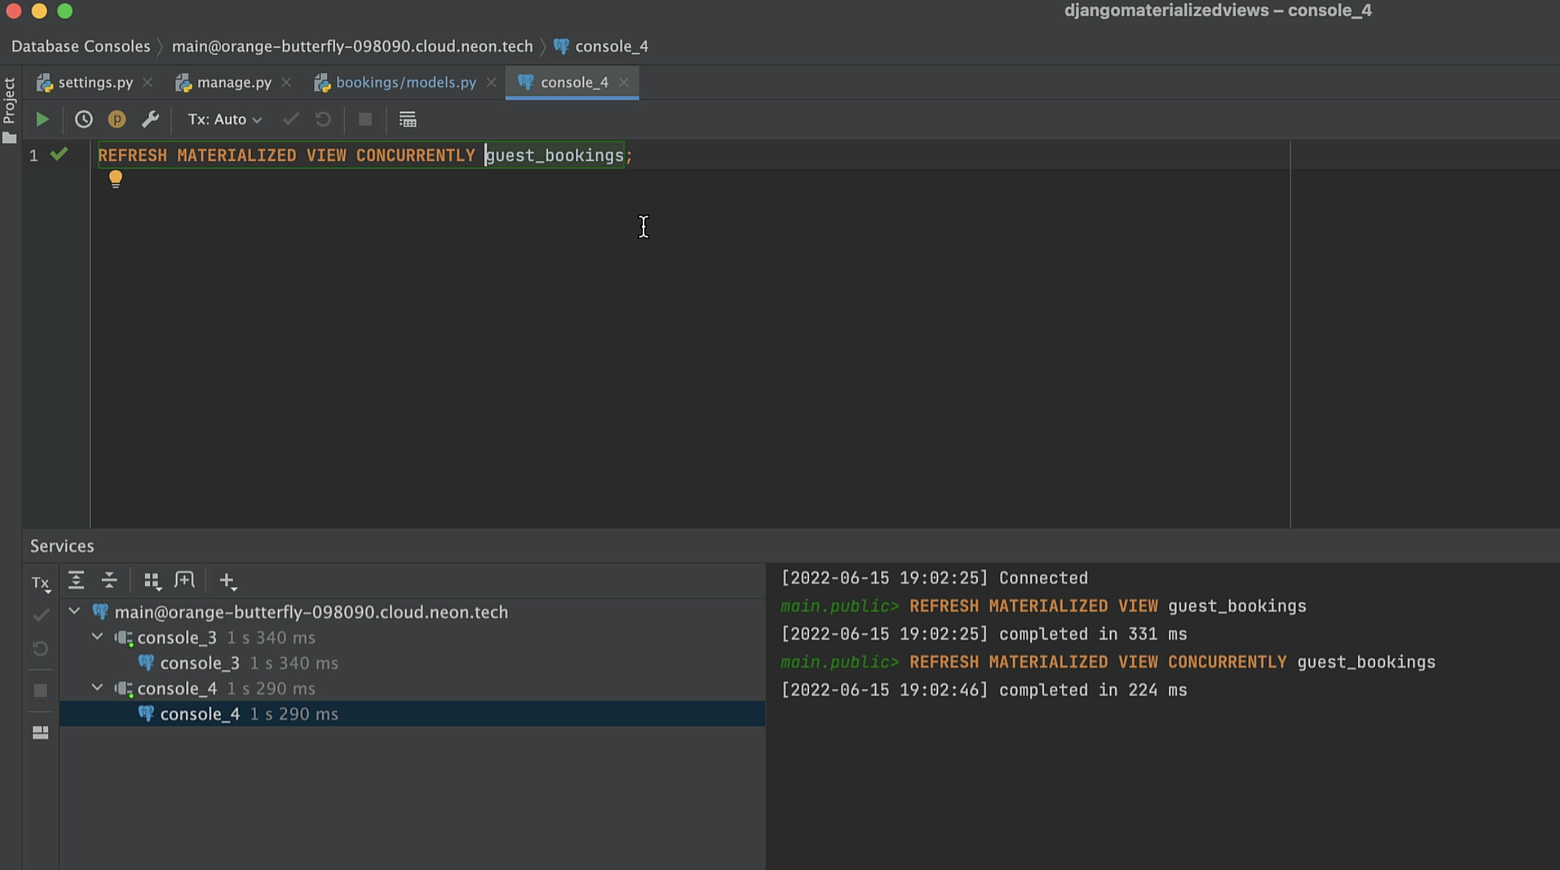
Because our system is constantly accepting new bookings and processing cancellations, we’ll need to refresh the materialized view regularly. To do this without causing the database to lock, we can use REFRESH MATERIALIZED VIEW CONCURRENTLY.
That’s everything we wanted to share with you today about materialized views in Django. After reading this post, you should be able to:
- Create materialized views and encapsulate them in Django models.
- Recreate materialized views when needed using the DROP statement.
- Use unique indexes to further cut down on execution time.
Let’s discuss the topic further in the comments or on Twitter (don’t forget to mention us with “@pycharm”). If you are interested in more material on Django and databases, take a look at the videos below.
Further resources:
Django Learning Resources
Get a compilation of the Django-related resources created by the experts at PyCharm to help you navigate through them all.
Django with PyCharm by Paul Everitt
Database Performance Tips with Django
How to Build Real Time Interactions in Your Django 3 App