

JetBrains TeamCity — Continuous Integration For Ruby

There’s been lots of talks about Ruby and Rails being Agile. One of the core agile practices is Continuous Integration. And JetBrains offers its continuous integration and build management system named TeamCity.
One of the many RubyMine 2.0 additions is IDE integration with TeamCity. So, here we want to review how a Ruby/Rails project can be set up in TeamCity and what additional benefits the IDE integration brings.
We’ll not be giving a full tutorial on TeamCity setup and configuration here, we’ll link to TeamCity docs instead, which are very good, by the way. We recommend using TeamCity 5.0 as it has the ‘Rake runner’ bundled and RubyMine only supports this version.
So, after you install TeamCity, launch it, direct your browser to it, (e.g. http://localhost:8111), log in and begin adding your project to start building it.
First, create a new project, and then create a build configuration that actually configures the build process. Follow the configuration steps.
 For running Ruby builds you need to select the right build runner. Most probably you want to choose Rake Runner.
Do not forget to configure test reporters for the build, so you get nice stats for all types of tests (RSpec, Cucumber, Shoulda, etc.).
Once the build configuration is ready you can ‘Run’ it to get first results.
Here are some cool things about TeamCity:
- Instant build results — you do not need the build to finish to know some test have failed
- Build time estimation — TeamCity tells you how long the build will run
- Misc. build triggers — launch build on VCS commit, by schedule, or dependency from other build configuration
- Pre-tested commit — TeamCity will perform VCS check-in of your changes only after a successful build with them (e.g. no tests fail).
- Assign/take responsibility — responsibility can be set for a build configuration problems or failed tests.
- Multiple notification ways such as e-mail, Jabber, RSS, IDE plugin, tray notifier.
- Multiple supported VCS — SVN, Git, Perforce, CVS, Mercurial, etc.
- Open source code in IDE from TeamCity web UI (works for RubyMine, IntelliJ IDEA, Eclipse, etc.)
- View VCS check-in diffs in TeamCity web UI
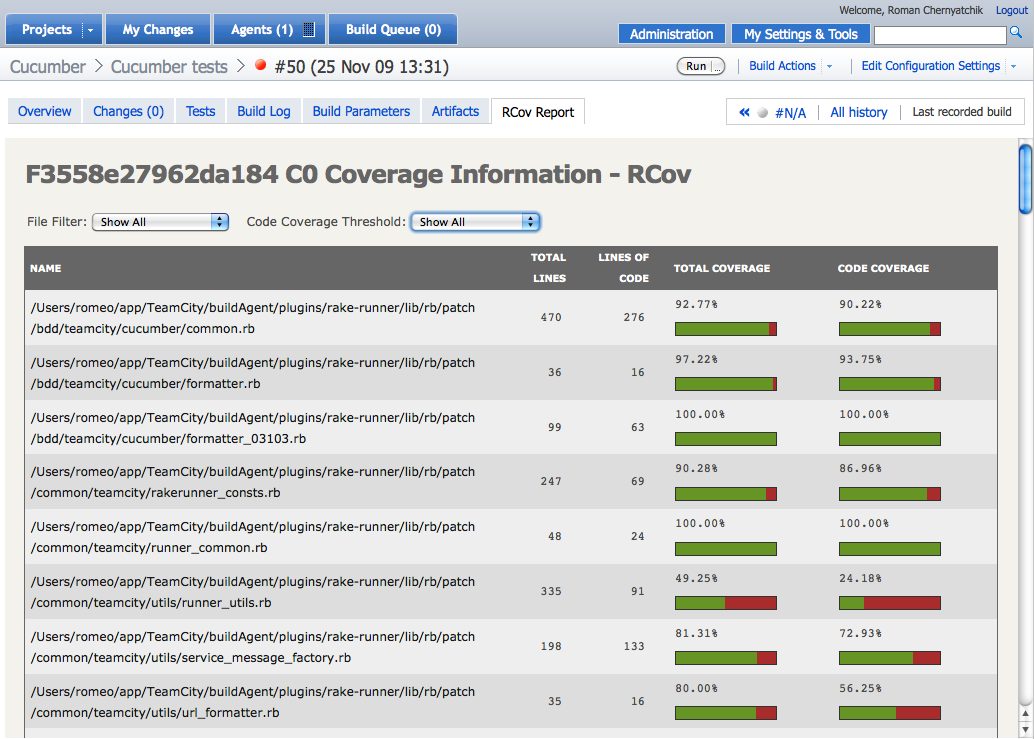
Additionally, you can add custom reports to TeamCity UI. For example, if you have RCov set-up analyzing your code, you can embed its HTML report as another tab (see screenshot below, click to enlarge).
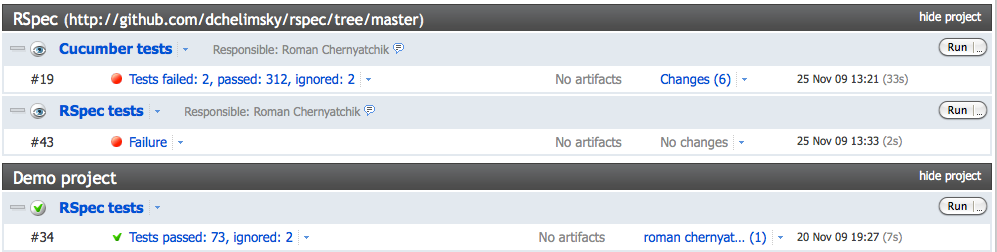
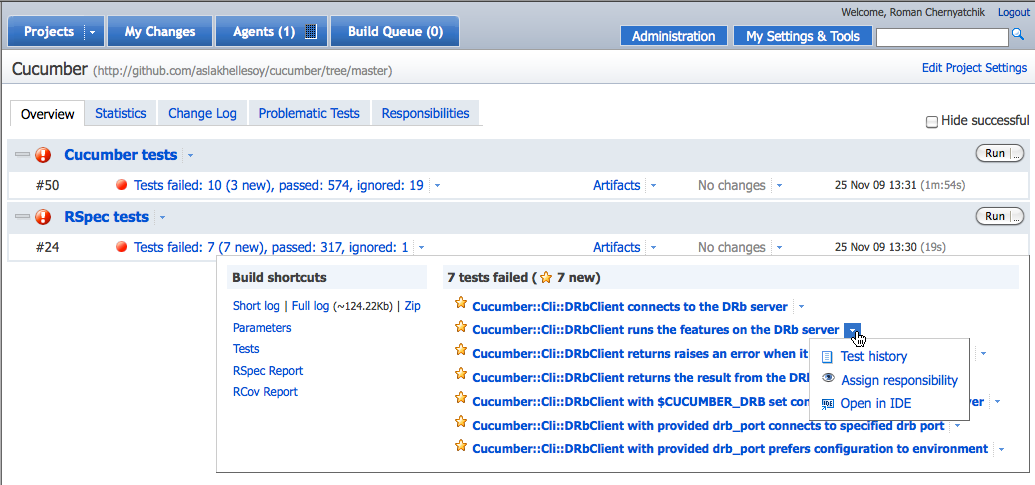
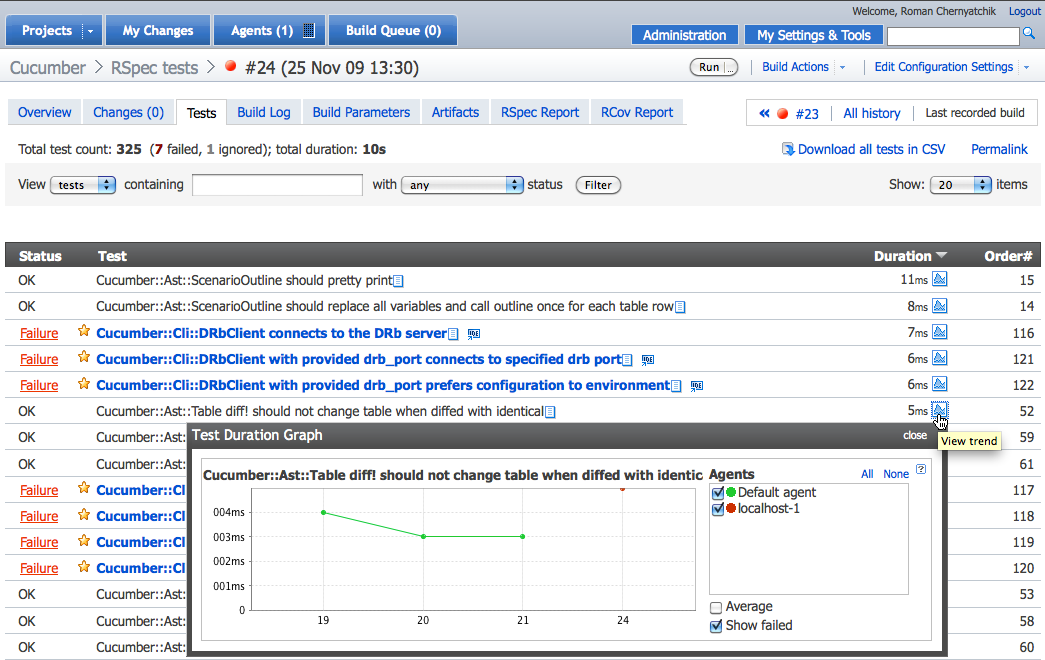
Review some TeamCity screenshots made from Cucumber and other projects builds:

So, your builds should up and running already. Time to see how we can work with TeamCity from RubyMine. Let’s install the IDE plugin.
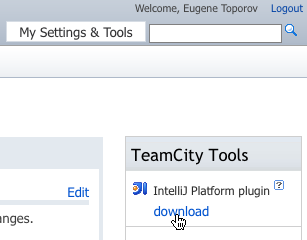
For this, in TeamCity UI go to My Settings & Tools and from TeamCity Tools section, download the IntelliJ Platform plugin. For plugin installation instructions refer to Installing Plugin Manually.
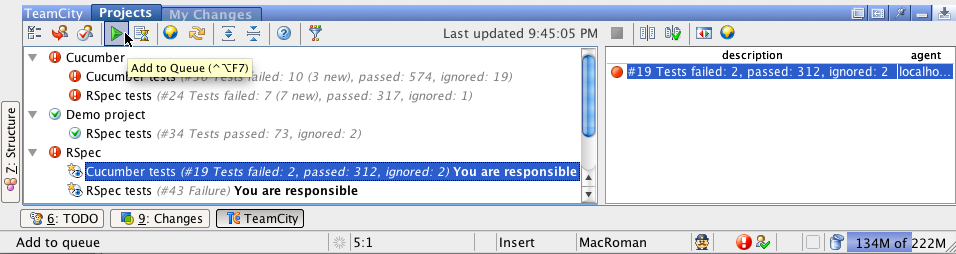
When you relaunch RubyMine you will notice a new icon in the status bar and a new TeamCity menu item. You need to configure the server and log in to it to see your builds. Make sure you configure watched projects/builds under IDE Notifier in Watched Builds and Notifications section.
Now, with the IDE plugin, you can:
- Start/stop builds from RubyMine
- View build stats from RubyMine
- Receive build results notifications in the IDE
As always, we look forward to hear your thoughts on this. Welcome to our issue tracker and discussion forum. There’s also TeamCIty forum where you can ask questions about the system
To be continued..


