Space
The intelligent code collaboration platform
Space and SpaceCode will be discontinued on June 1, 2025. Learn more → →
Introducing Custom Issue Fields in Space

To help you to manage and simplify your organization’s workflows, we are working hard to make Space the optimal, customizable solution for software development teams.
When you’re dealing with issues, customization is crucial for submitting and tracking extremely specific tasks. Today we’re happy to share that in addition to predefined fields, we’ve added custom issue fields to Space!
With this update, you can now adjust Space issue tracking to your exact needs. Categorize, prioritize, and make your tasks more transparent for your organization. Add what’s important to your workflow, regardless of whether it’s geared toward bug tracking or software development, and filter your tasks further whenever you please.
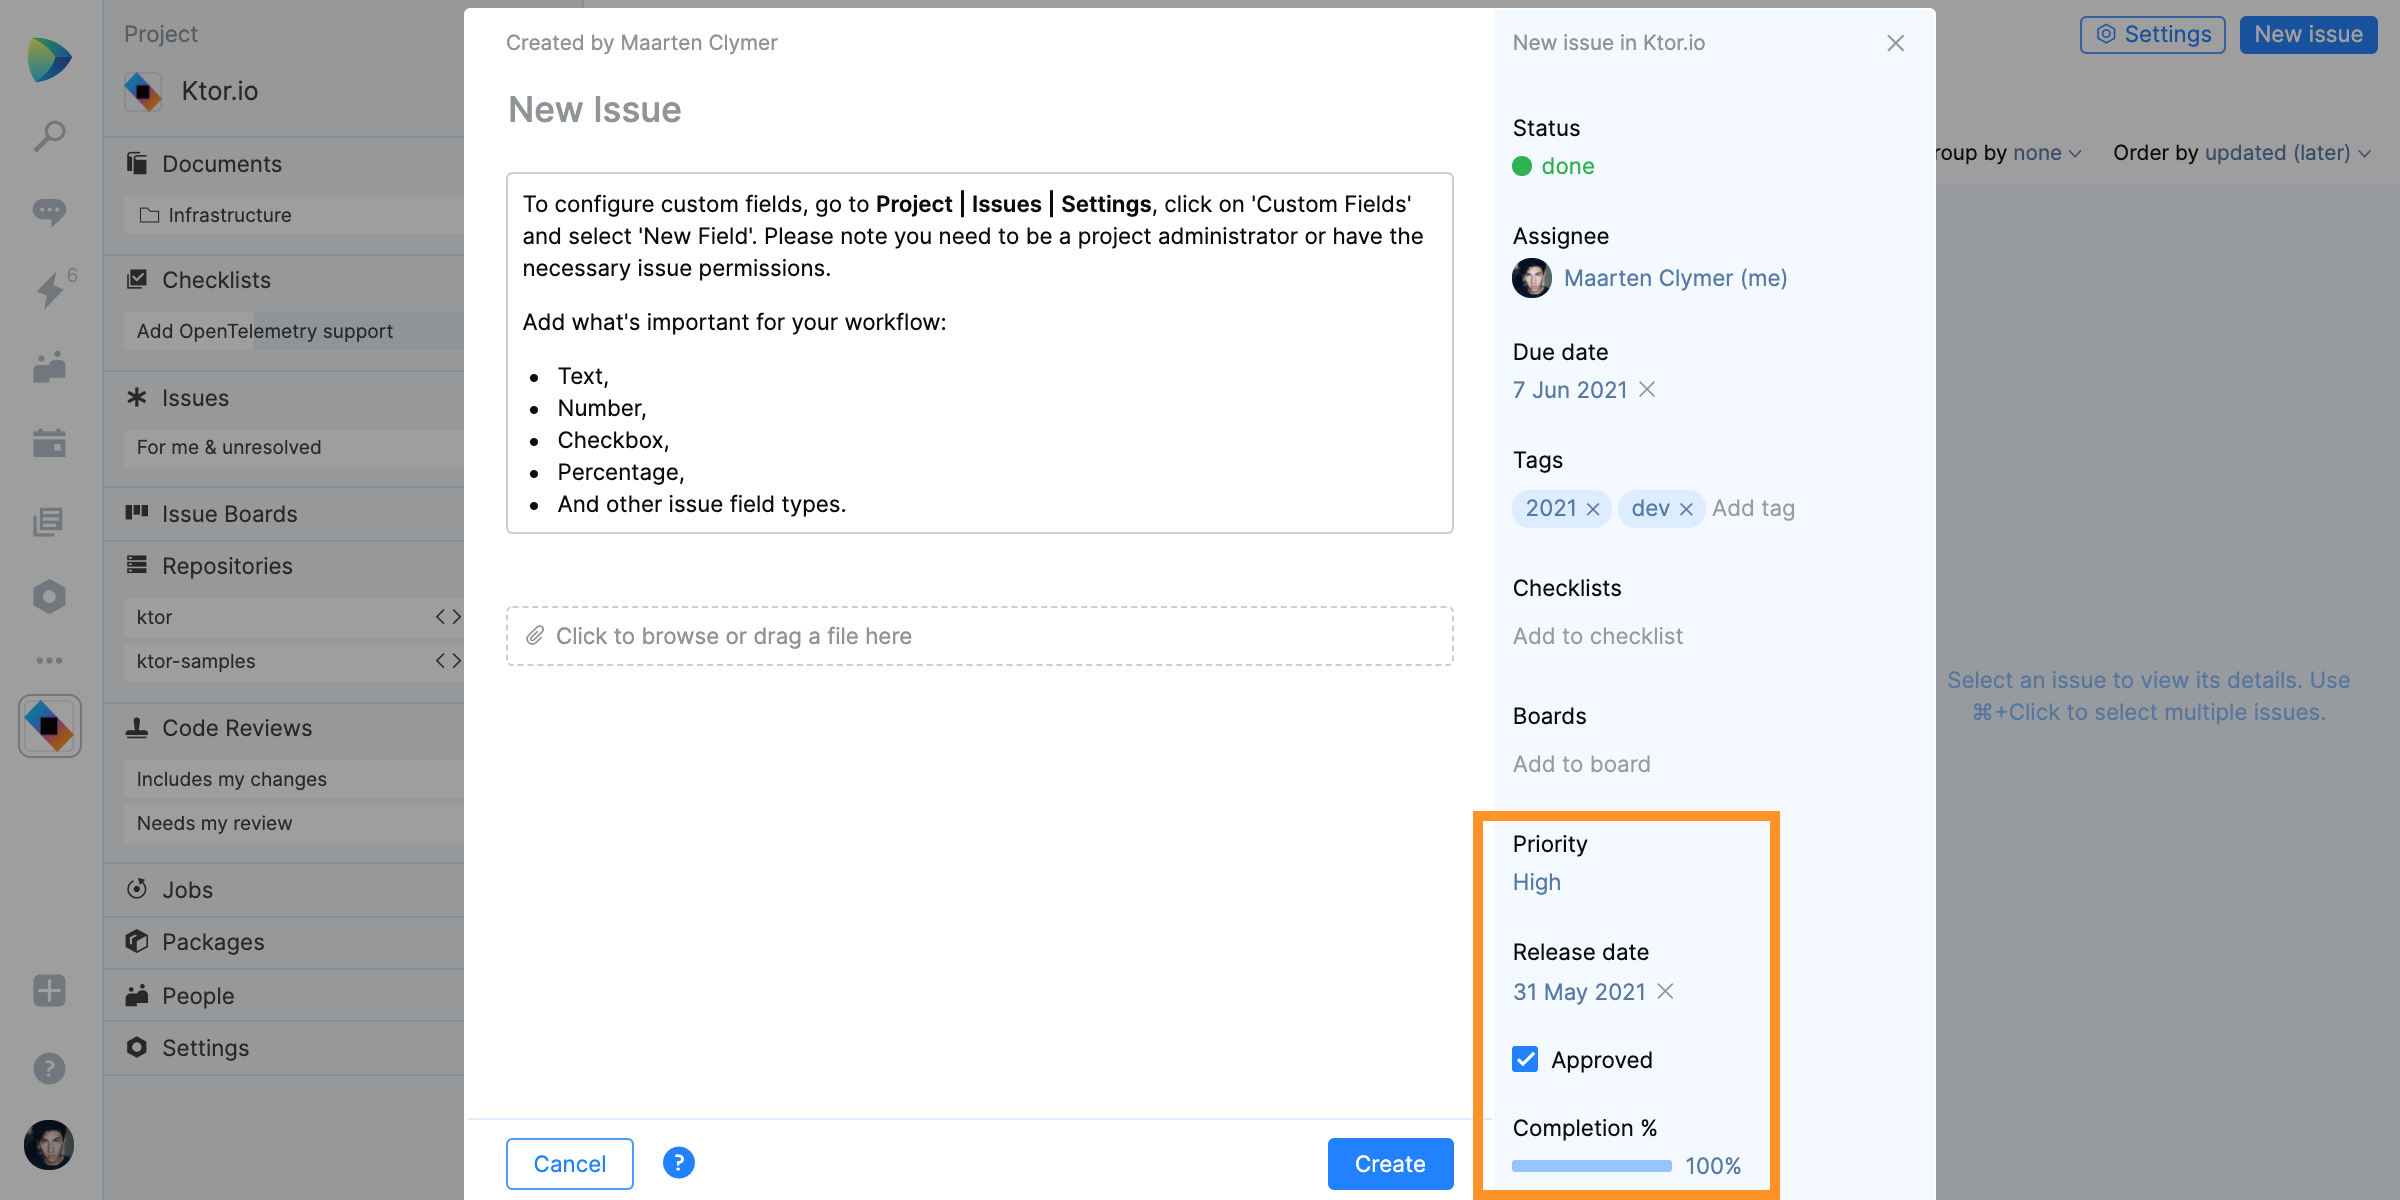
Dive in to discover what custom field types are supported by Space and to learn how to configure them.
Custom issue fields overview
All custom issue fields are available starting from the Organization plan, while the Free plan supports one custom issue field per project, and the Team plan supports two custom issue fields per project.
Custom issues will help you to organize your issues based on custom types you add.
When designing a custom field, you can give it whatever name you please, select the field type, and set values that should be entered into it. Store values for organization-specific references, set priorities, indicate stages, or add whatever you need to track issues efficiently.
Here’s what you can do with custom fields in Space issues:
- Add various types of custom fields to your issues.
- View and update custom fields within an issue.
- Filter the Issues list using custom fields.
The custom fields in Issues are specific to the Space project in which they are created, which means you can apply them throughout your project.
Custom issue field types
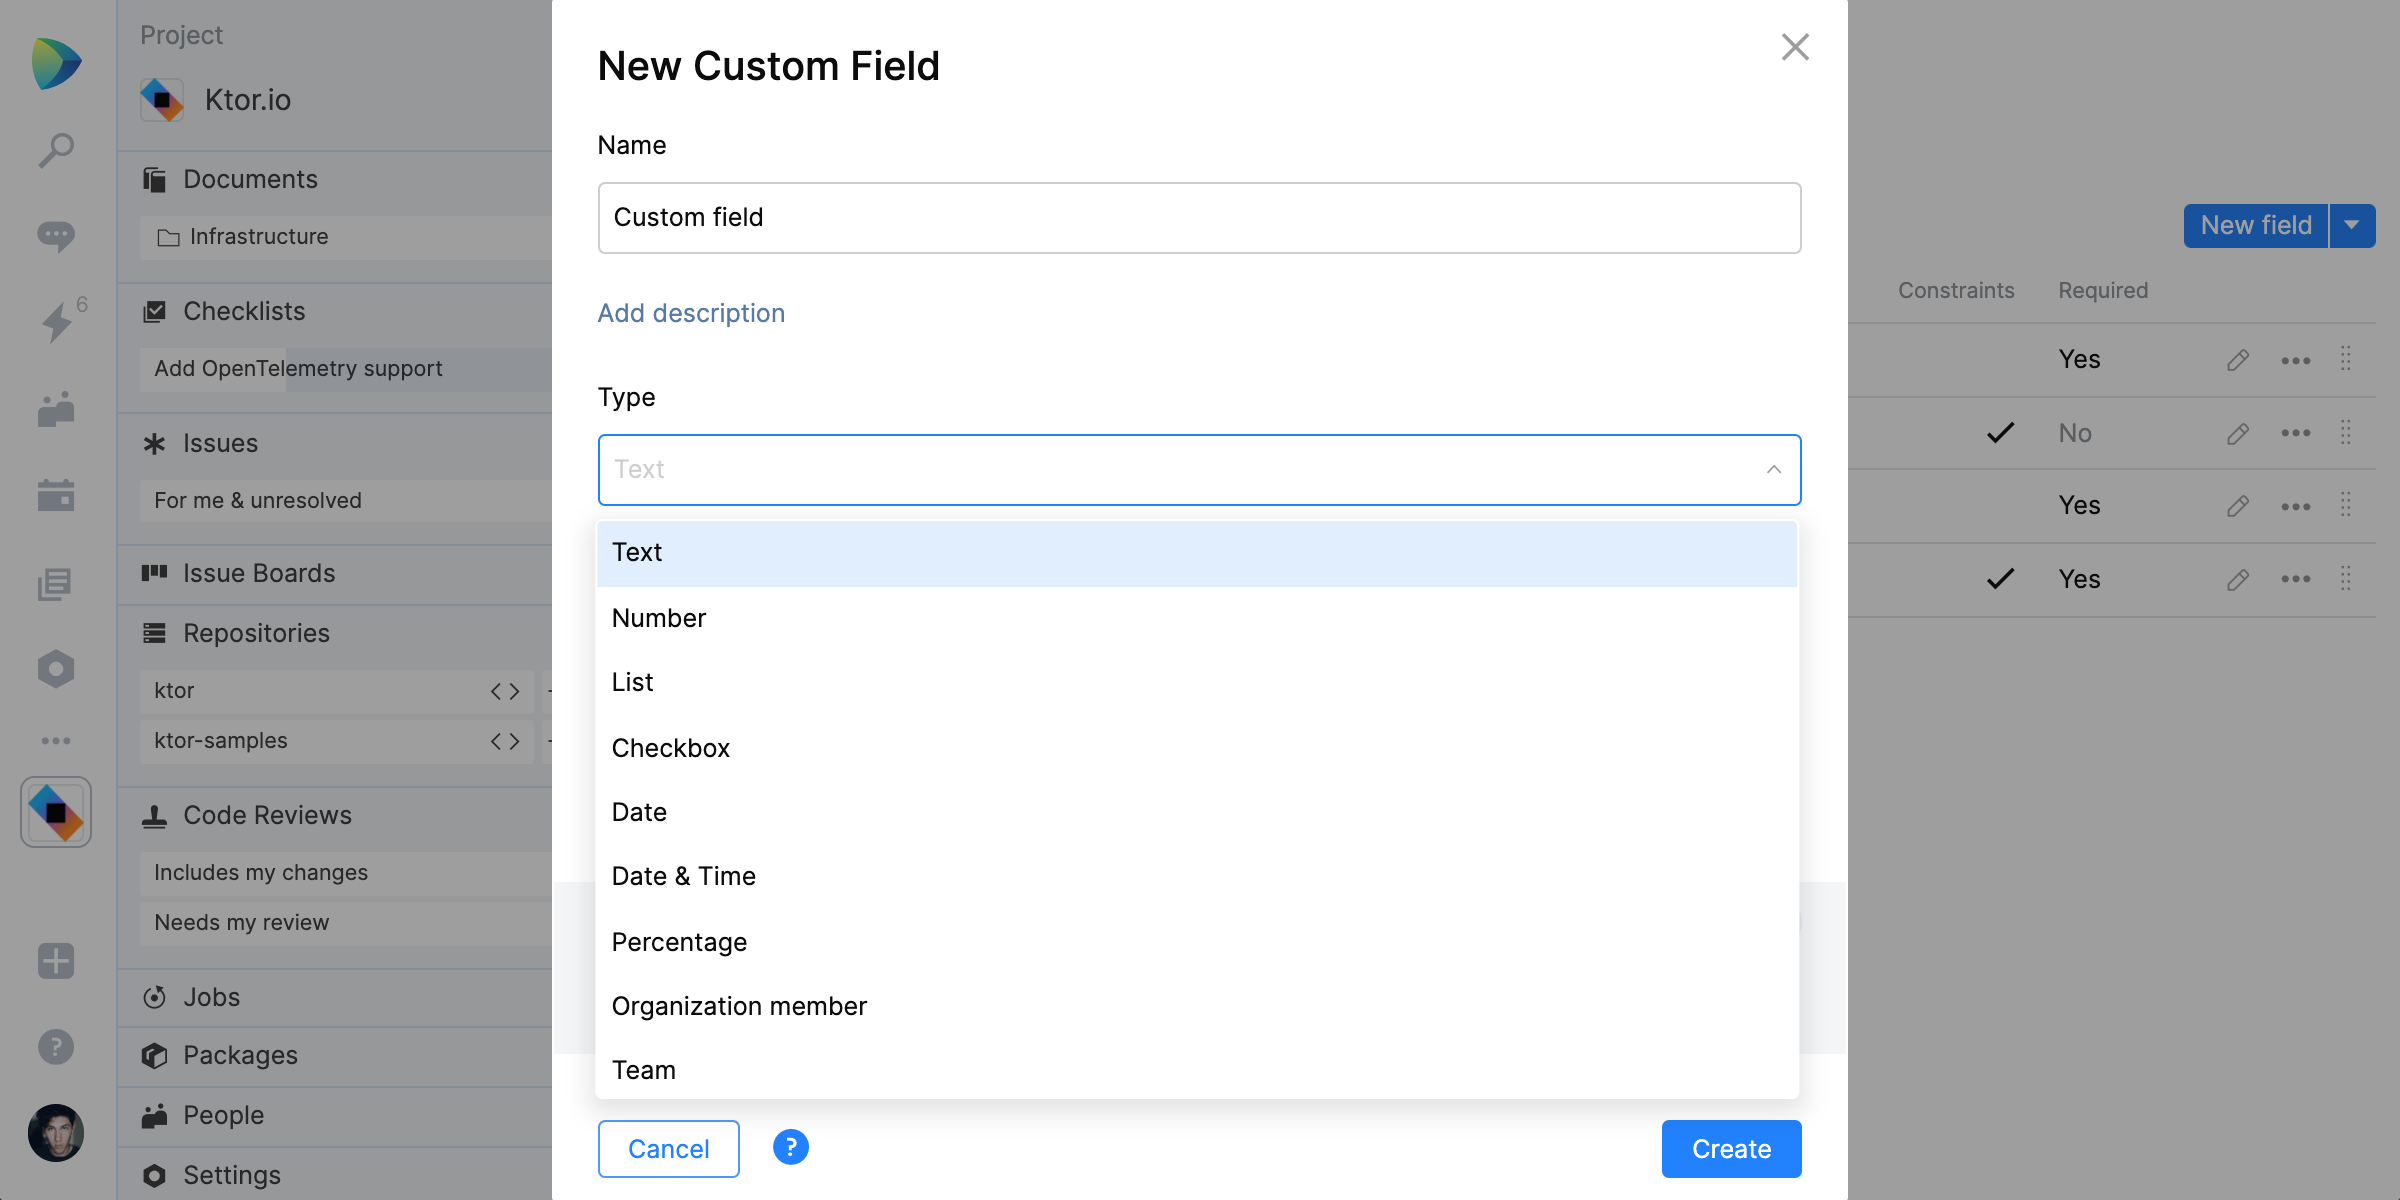
By default, Space includes a number of commonly used issue fields, like Assignee, Due date, and Status. In addition to these predefined fields, you can now define your own custom fields of the following types:
- Text – Allows you to enter free form text. You can use this field for storing unique data, such as customer company names or event names.
- Number – Defines a number, which could be used for specifying time estimates or costs for a task.
- List – Creates a dropdown list with preset options, which could be used to indicate the priority level for a task. New options can be added on the fly if needed.
- Checkbox – Creates a checkbox with yes/no values. You can use this field to indicate approval, or specify whether something is required.
- Date – Allows you to specify a date, such as a feature release date.
- Date & Time – Sets both a date and a specific time, if more precise time frames are needed.
- Percentage – Makes it possible to specify a percentage, for example to indicate a task’s progress.
- Link – Allows you to add a link to an issue, for example to YouTrack or a Google doc.
You can now also attach Space entities, such as Team, Organization member, Location, Issue, and Project, to your issues. Using this binding, you will be able to store all the data within an issue, access entities in a click, and quickly filter issues by a specific Space entity.
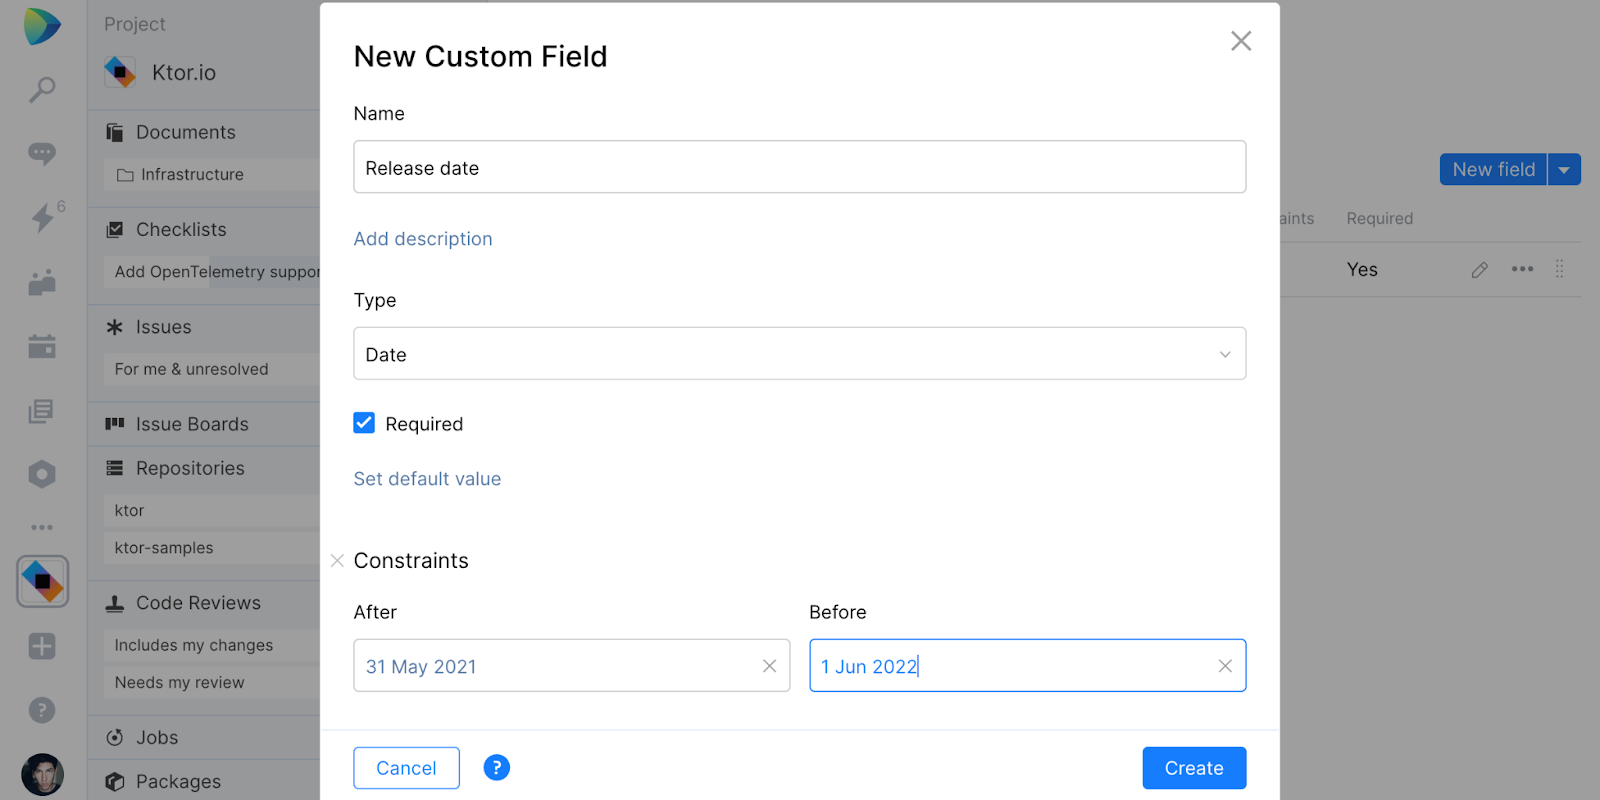
You can make any or all of the above fields required, and add constraints for the minimum and maximum values where applicable.
How to configure custom fields
You need to be a project administrator or have the permission to manage issue settings in your project.
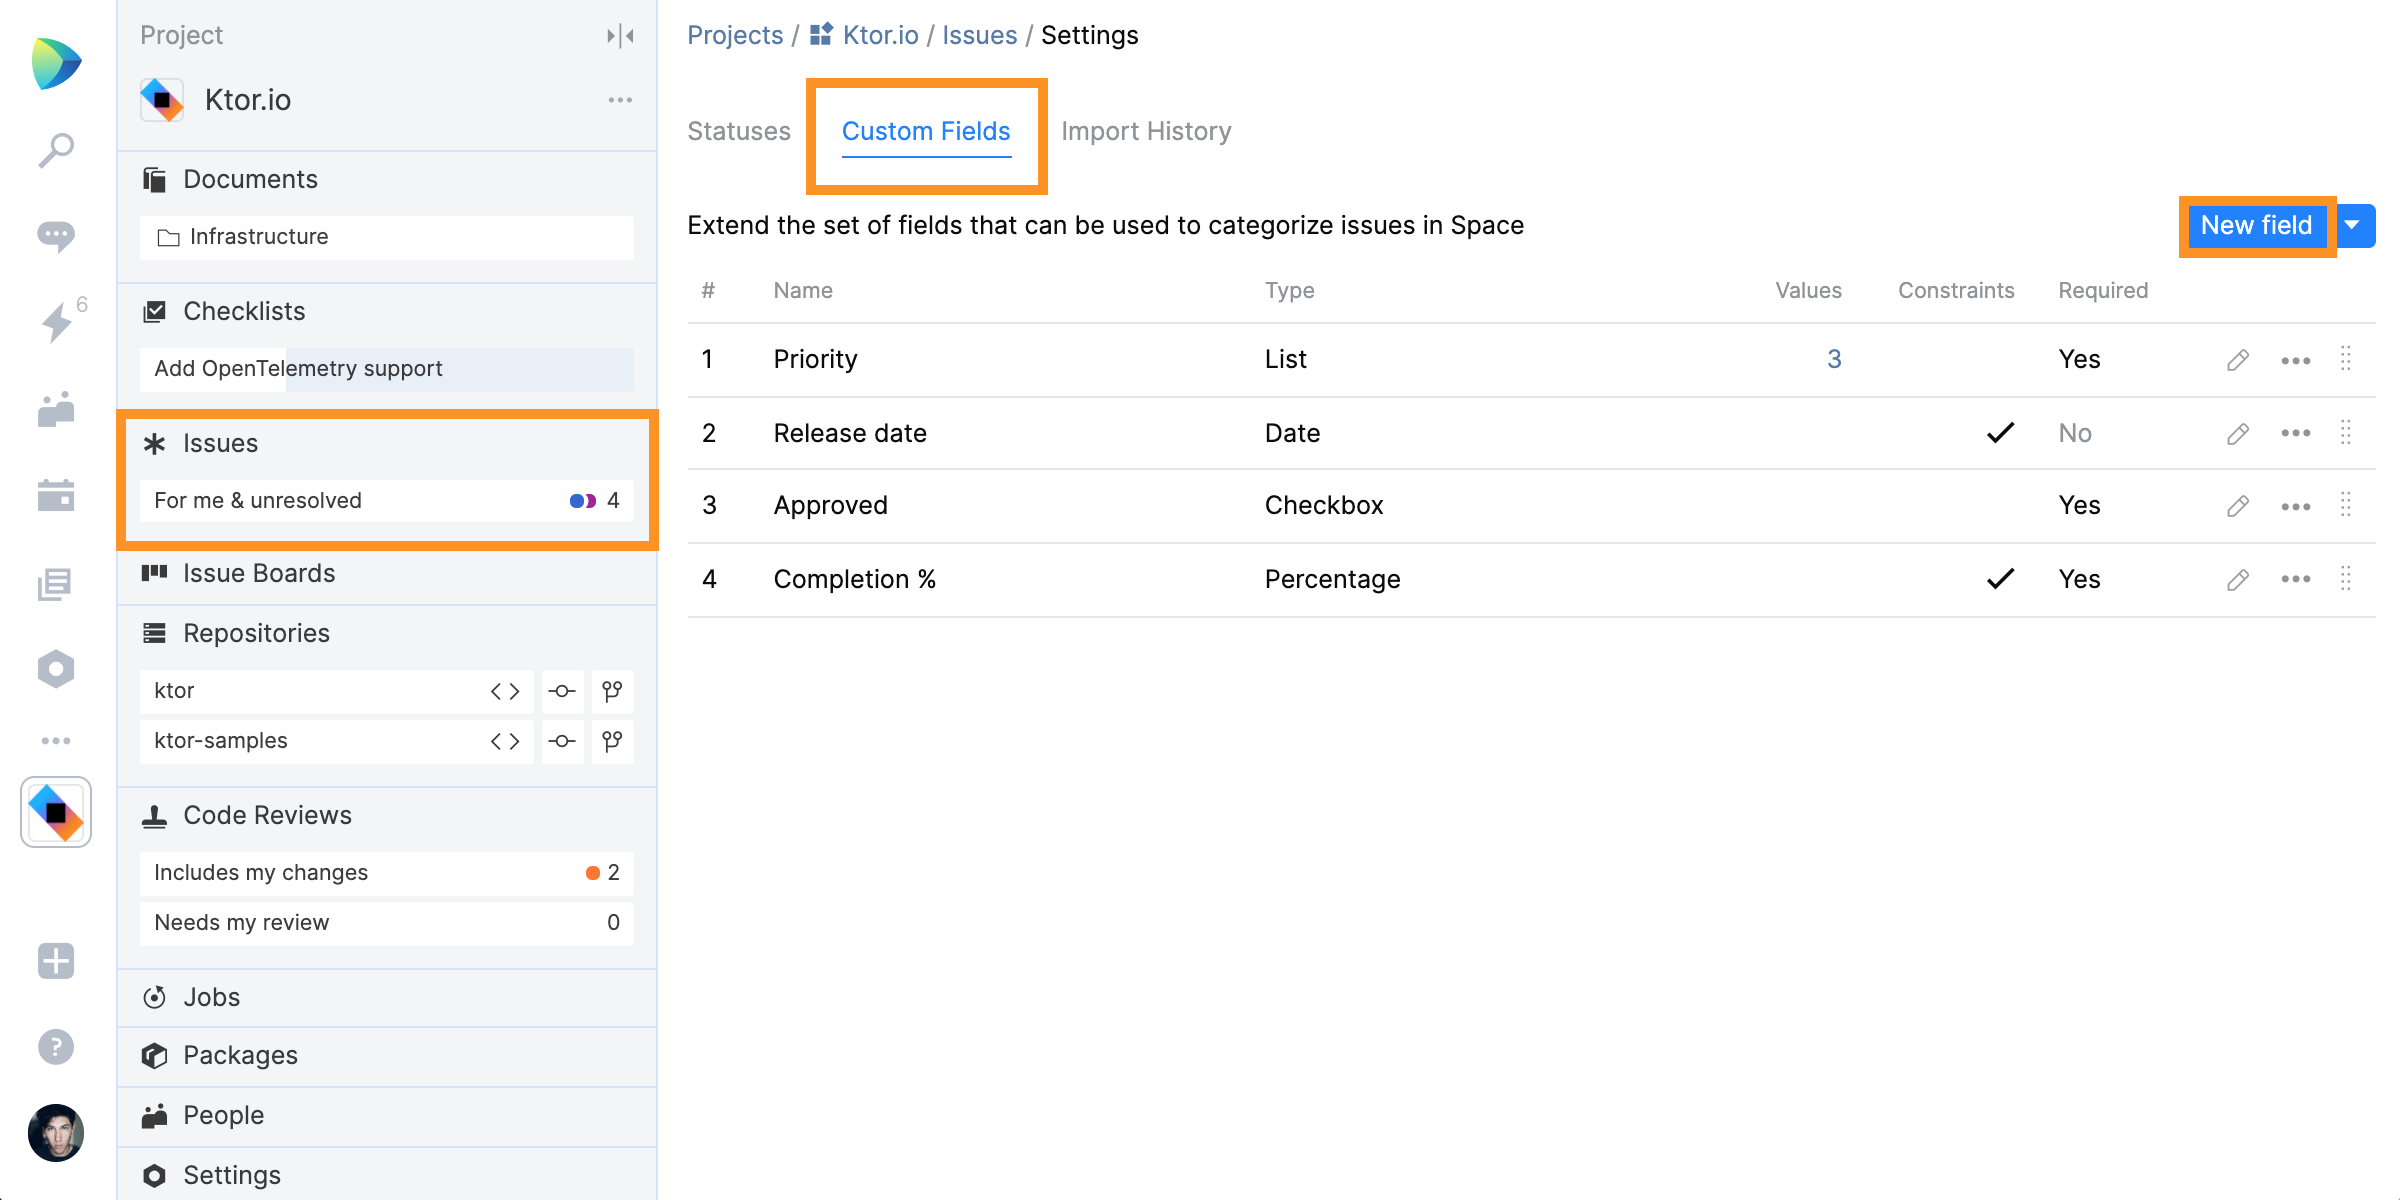
To configure custom fields, go to Project | Issues | Settings, click on ‘Custom Fields’ and press the blue ‘New Field’ button.
Creating a custom field takes three steps:
- Create a field name.
- Select a custom field type.
- Select other options if necessary and click ‘Save’.
That’s it! After you’ve added a custom field, you can specify its value when creating a new issue or modifying existing issues.
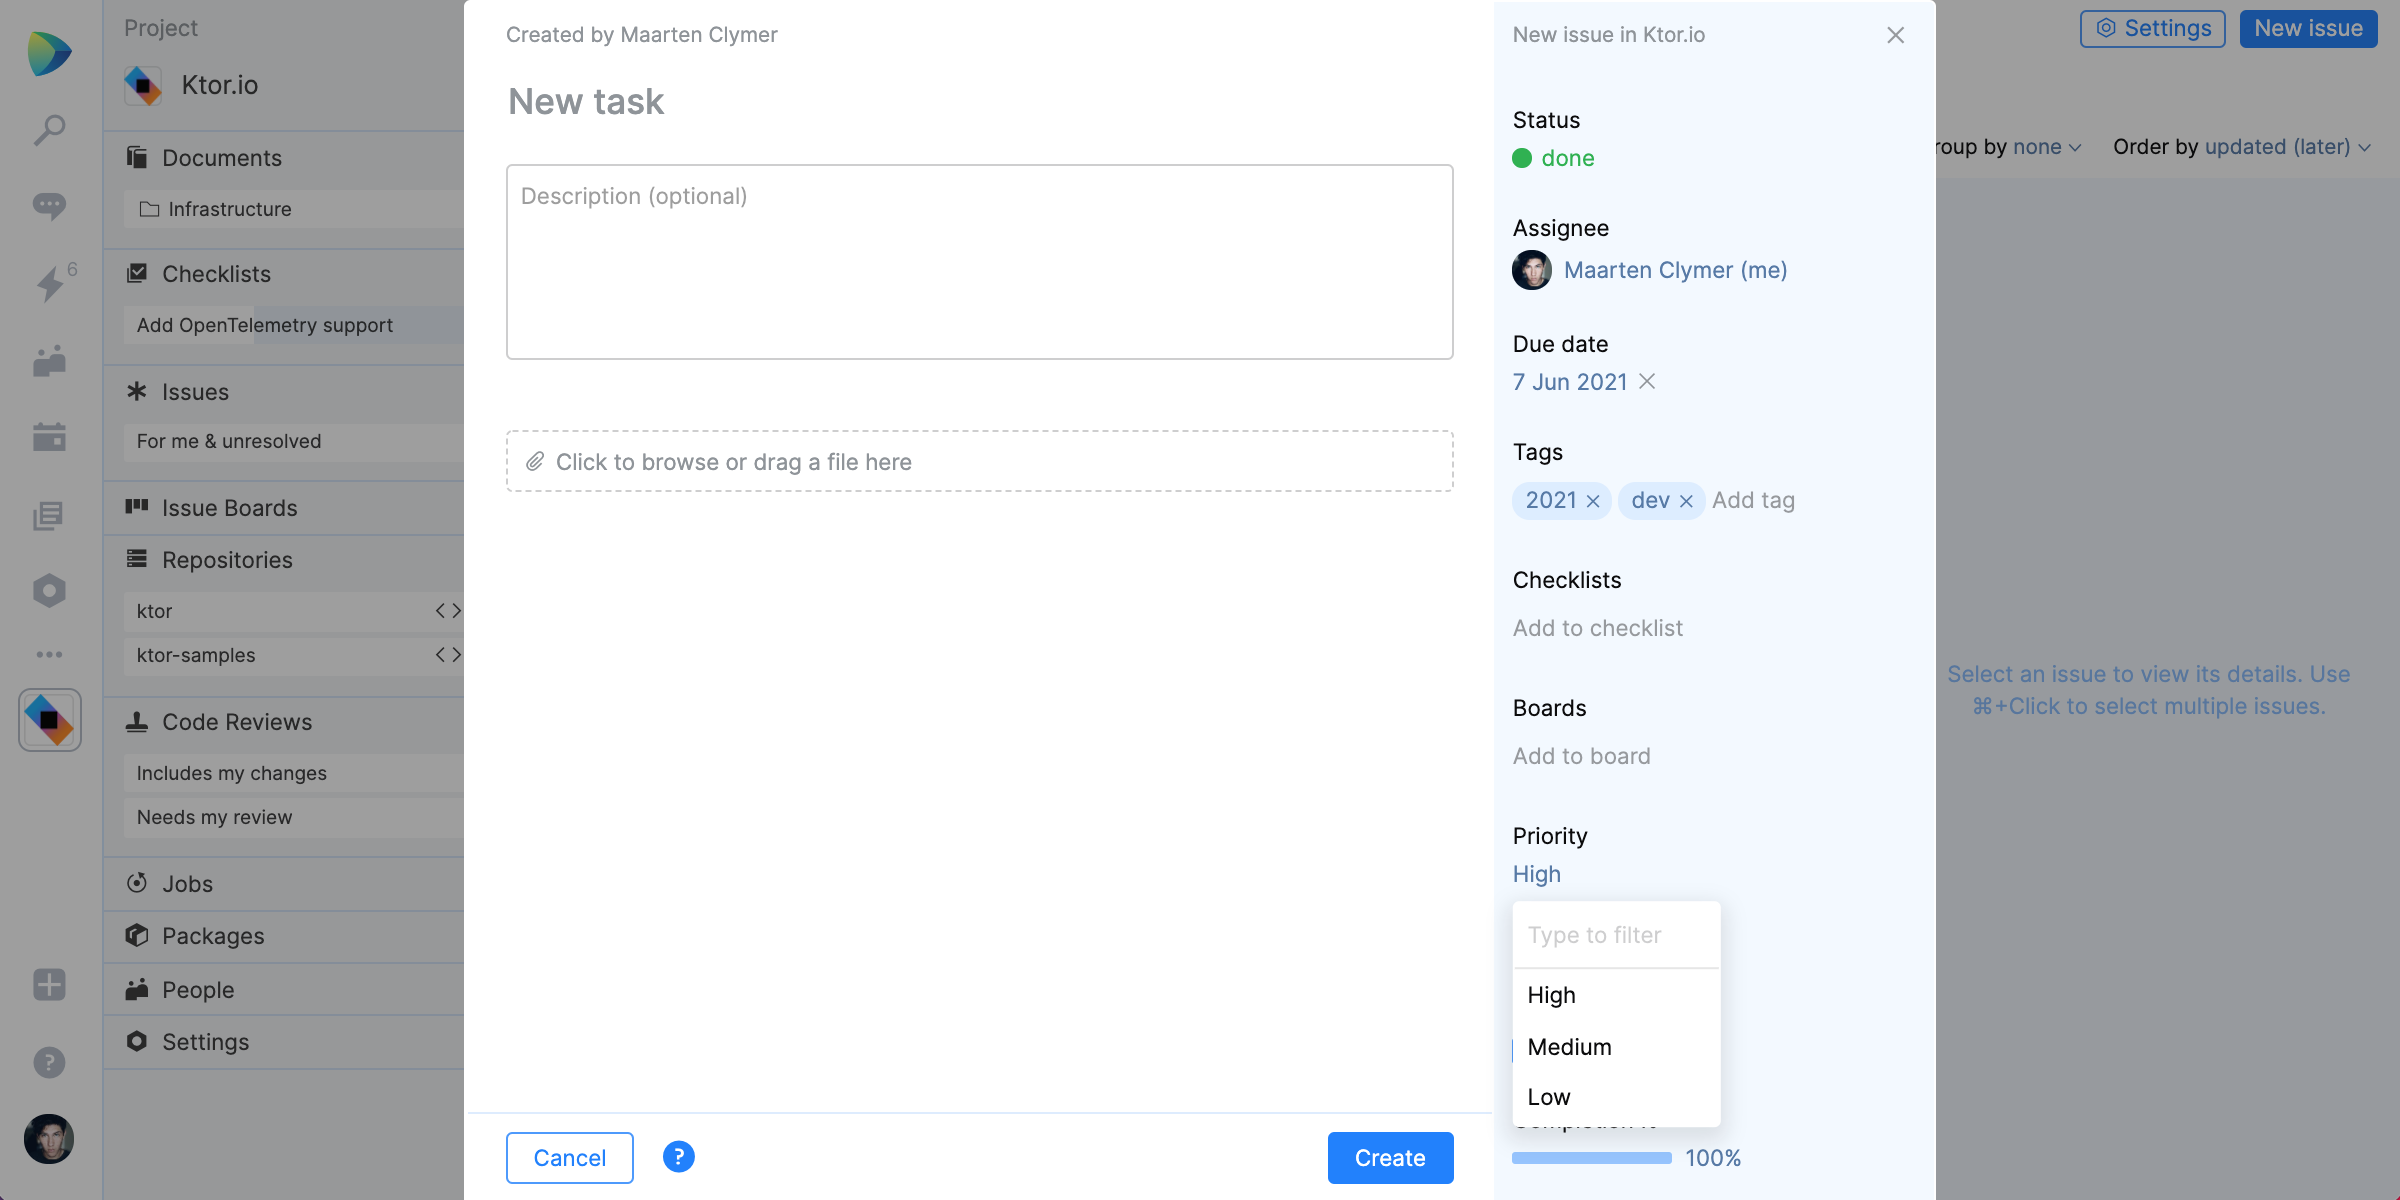
On top of that, you can update your existing issues with custom fields in bulk. This will be useful if you’re planning to update the existing issues quickly (for example, if you want to remove old tags and introduce custom fields instead).
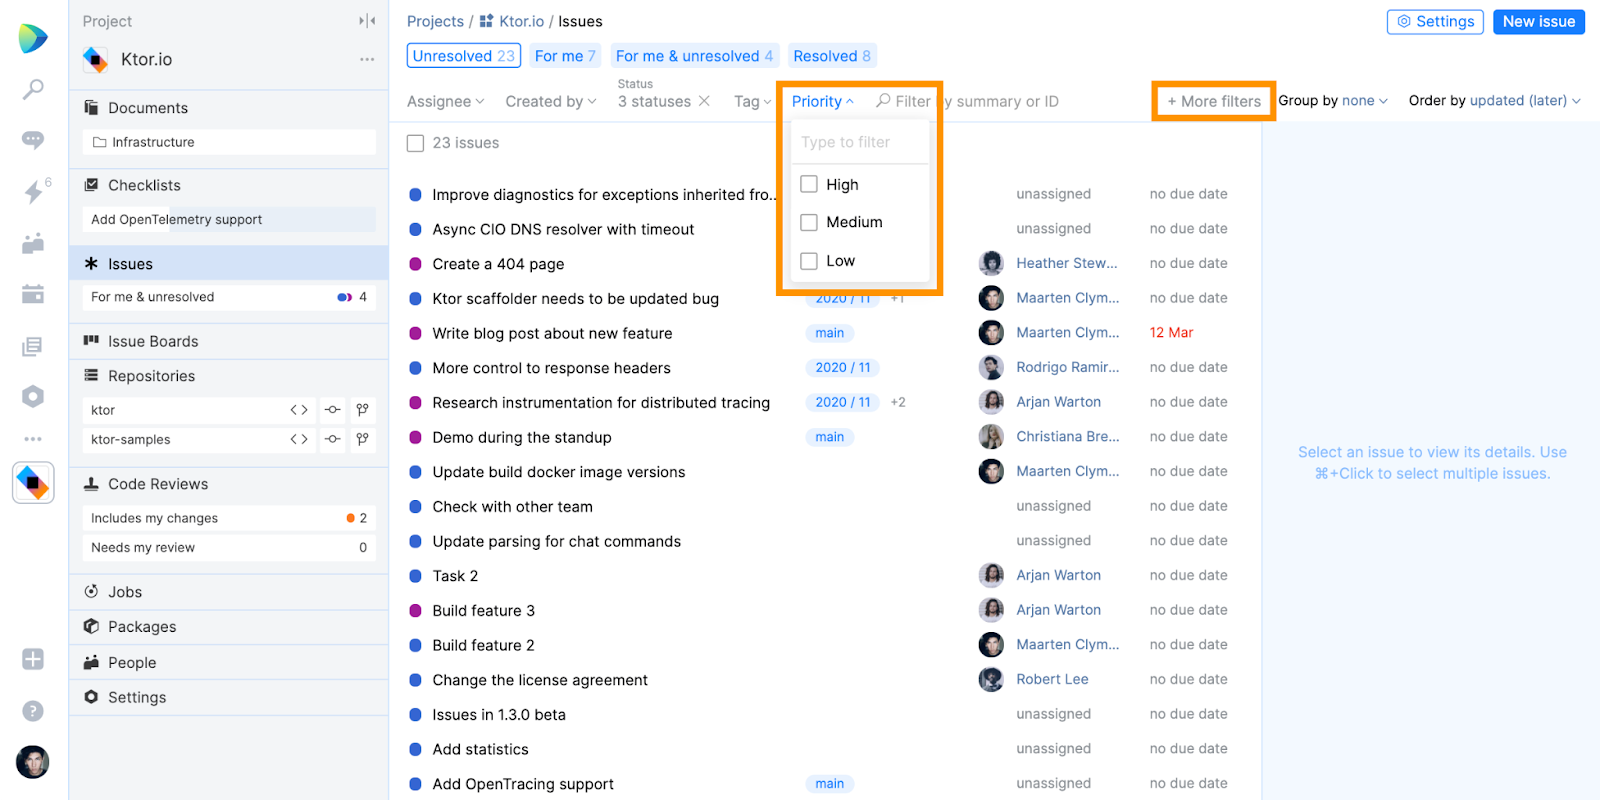
When custom fields are created, you will be able to filter all your project’s Issues, Issue Boards, and Backlog by custom fields. To do so, click on ‘More filters’ and select one of your custom fields. Once you do this, a filter will be added to your upper menu, and will remain there with the selected values, even if you refresh the page.
What kinds of custom fields will you be using? Share your feedback and thoughts in the comments below!
Subscribe to Space Blog updates


