Developing the basics: programming myself, post nine
I am too old for this Git
<<Read the previous post in this series Read the next post in this series>>
Git. No, not the guy who pushed in front of you at the checkout, and then paid in pennies which he counted out one-by-one losing count halfway through, but the Version Control System (VCS) which has become pretty much used by everyone in the open source development world https://github.com/.
It is getting to the point now where knowing how to use this is probably going to be pretty helpful, especially down the line. My current version control system of commenting out the code when it works and copying and pasting the code with the newly added changes is maybe not the most efficient nor effective way to code.
So it is time to learn a bit about Git. Considering there are full-on books about the tool, what I am going to cover in this is the very basic necessities to try and explain how I understand it, which might hopefully help you get more out of the system. Or at least inspire you to mess around with it.
I will also share some of the resources people have recommended to me, so you can go on and do some further reading on it if it is something you want to learn about too.
What is this Git
Git has been around since 2005. It is a Version Control System like I mentioned above, which basically means it is a place to keep all the different versions of your files – so the original files, the additions, the bits you decided were rubbish and deleted, all of it; but with an added twist. If you go mental and change something which then goes on and breaks the whole program, then you can revert back to the old working file. It also allows you to branch the project, which means basically you can take the original and make edits (commits) to the file, play with it and test it before suggesting (pull request) to add these changes to the original main file (merge and deploy).
Simple enough. But if you go onto the git website https://github.com/ and make an account, sign in and all that annoying stuff, then you get to look at a page like this:
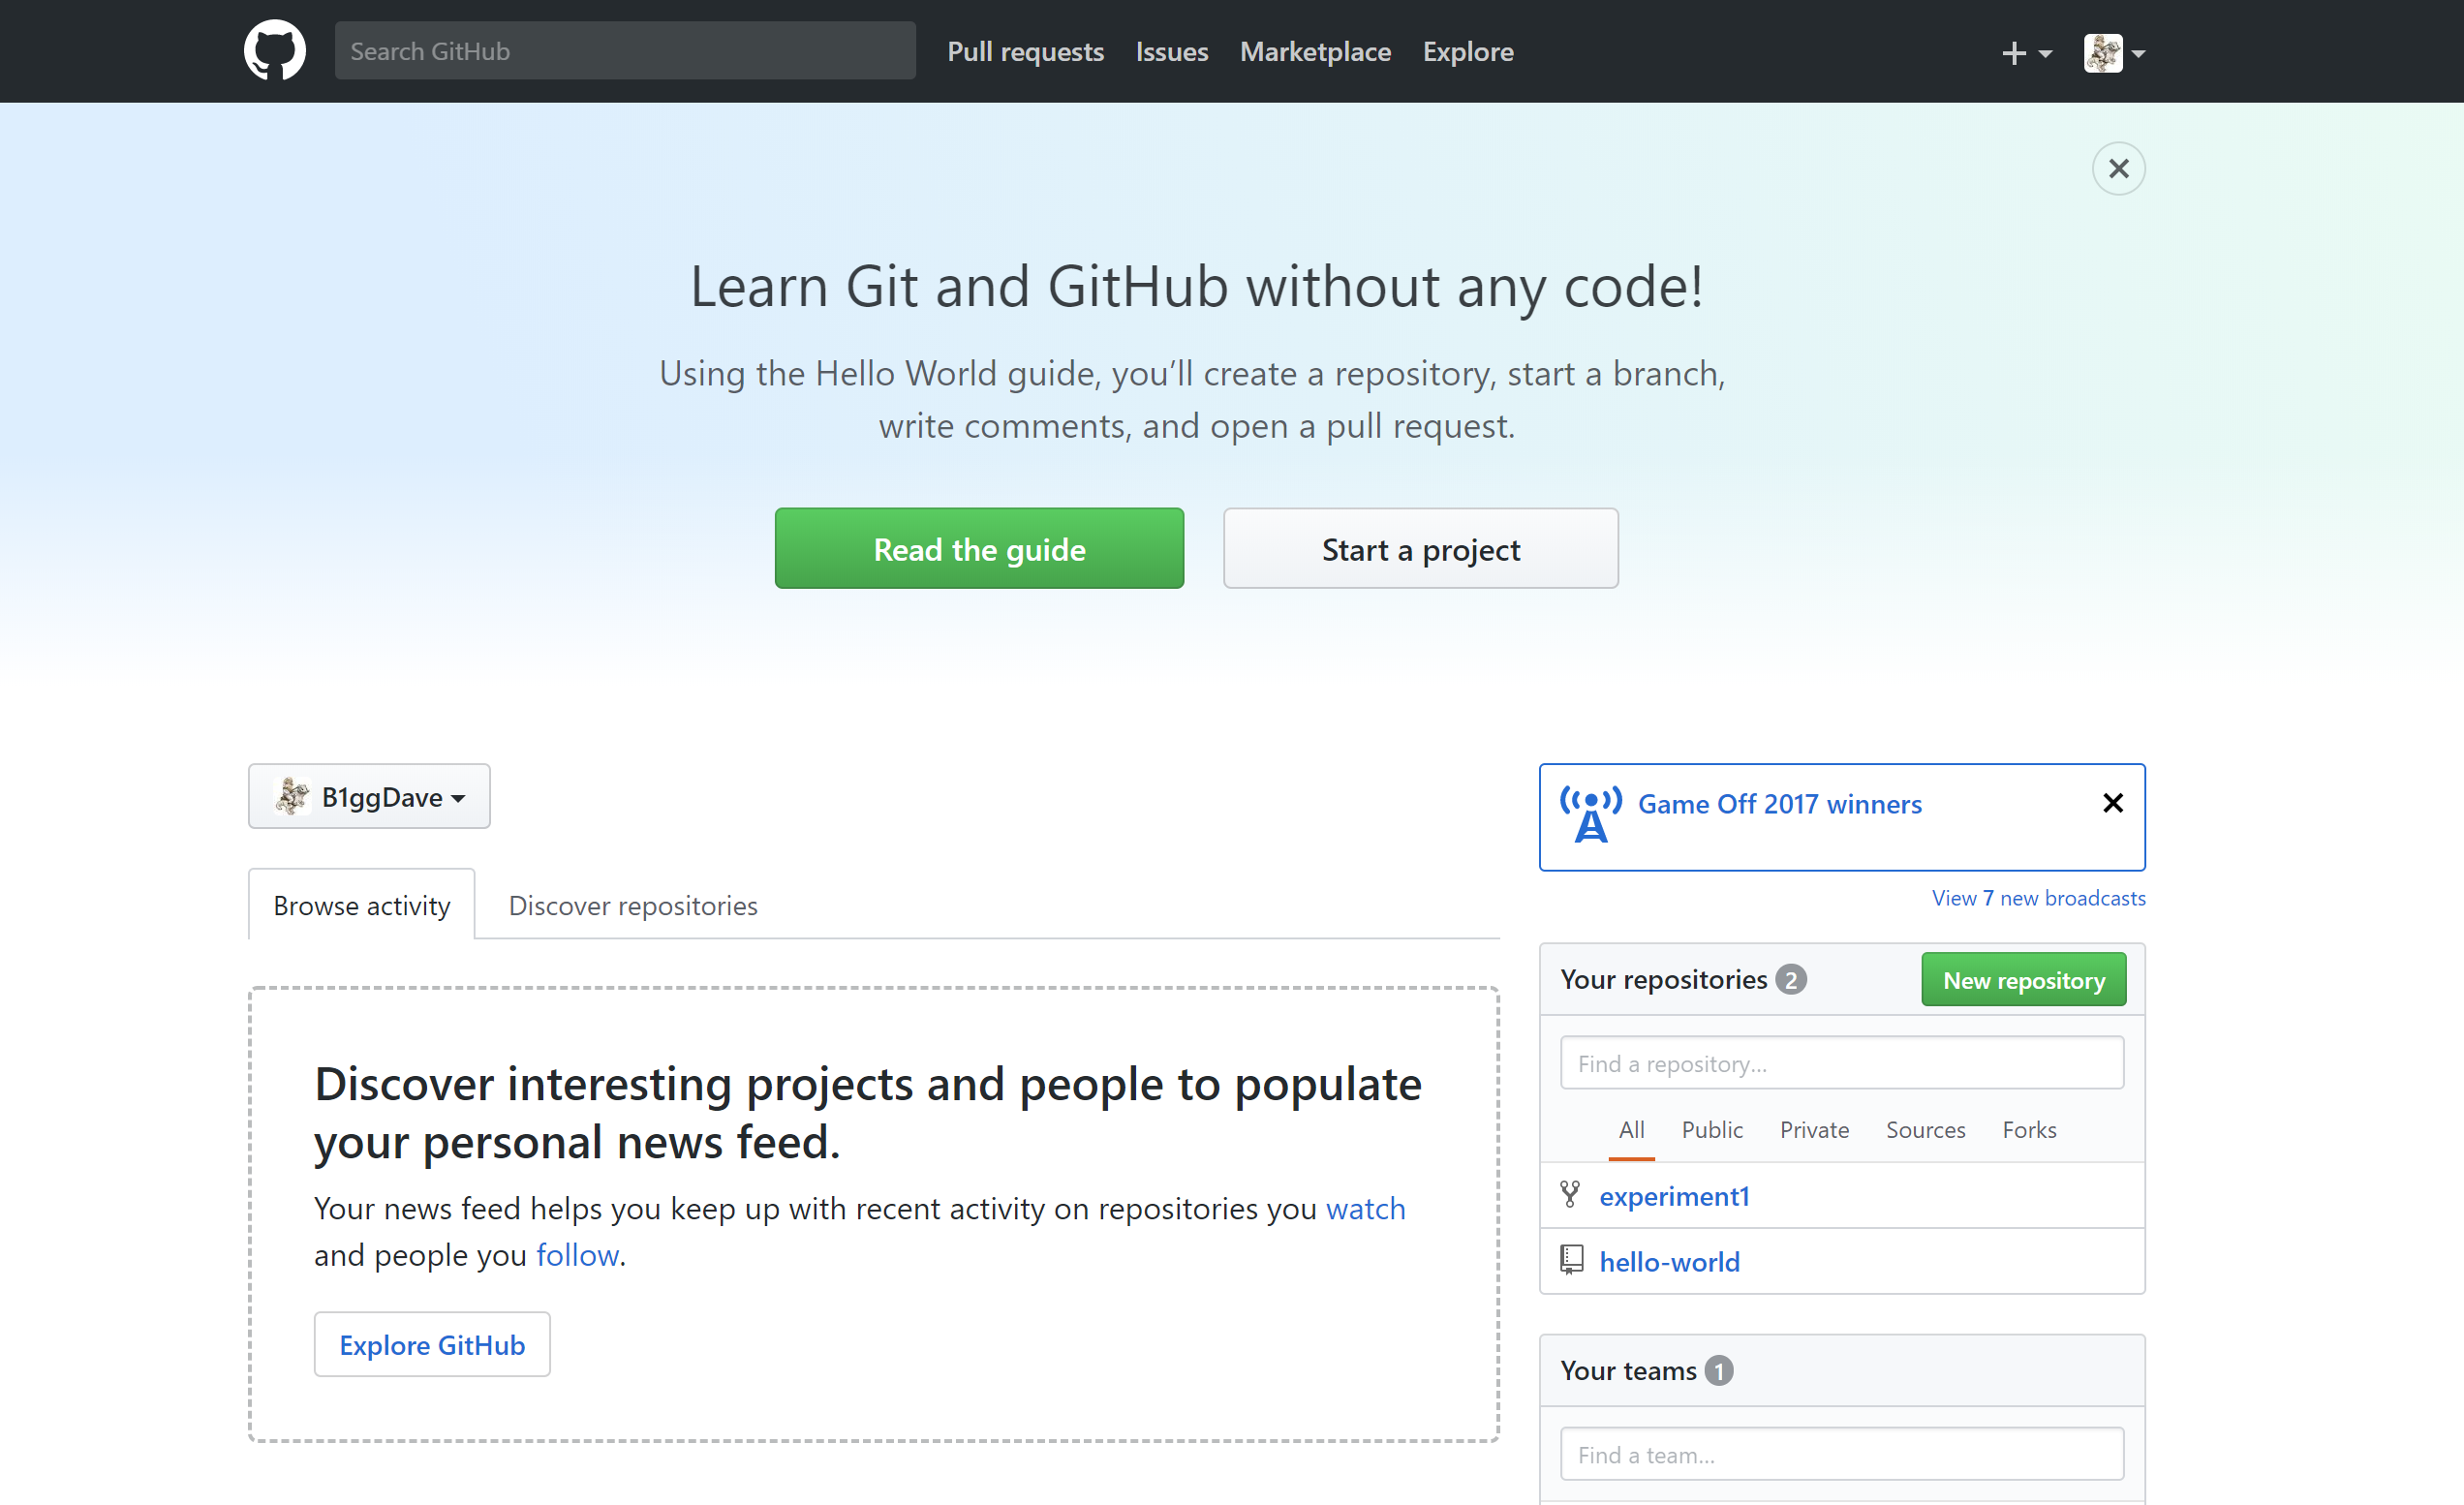
If you are like me… basically, I had no idea what to make of this… Then probably a good start is to RTFM which stands for “Read the, umm, fascinating manual” as I am constantly learning in the computer world.
https://guides.github.com/activities/hello-world/
Repository
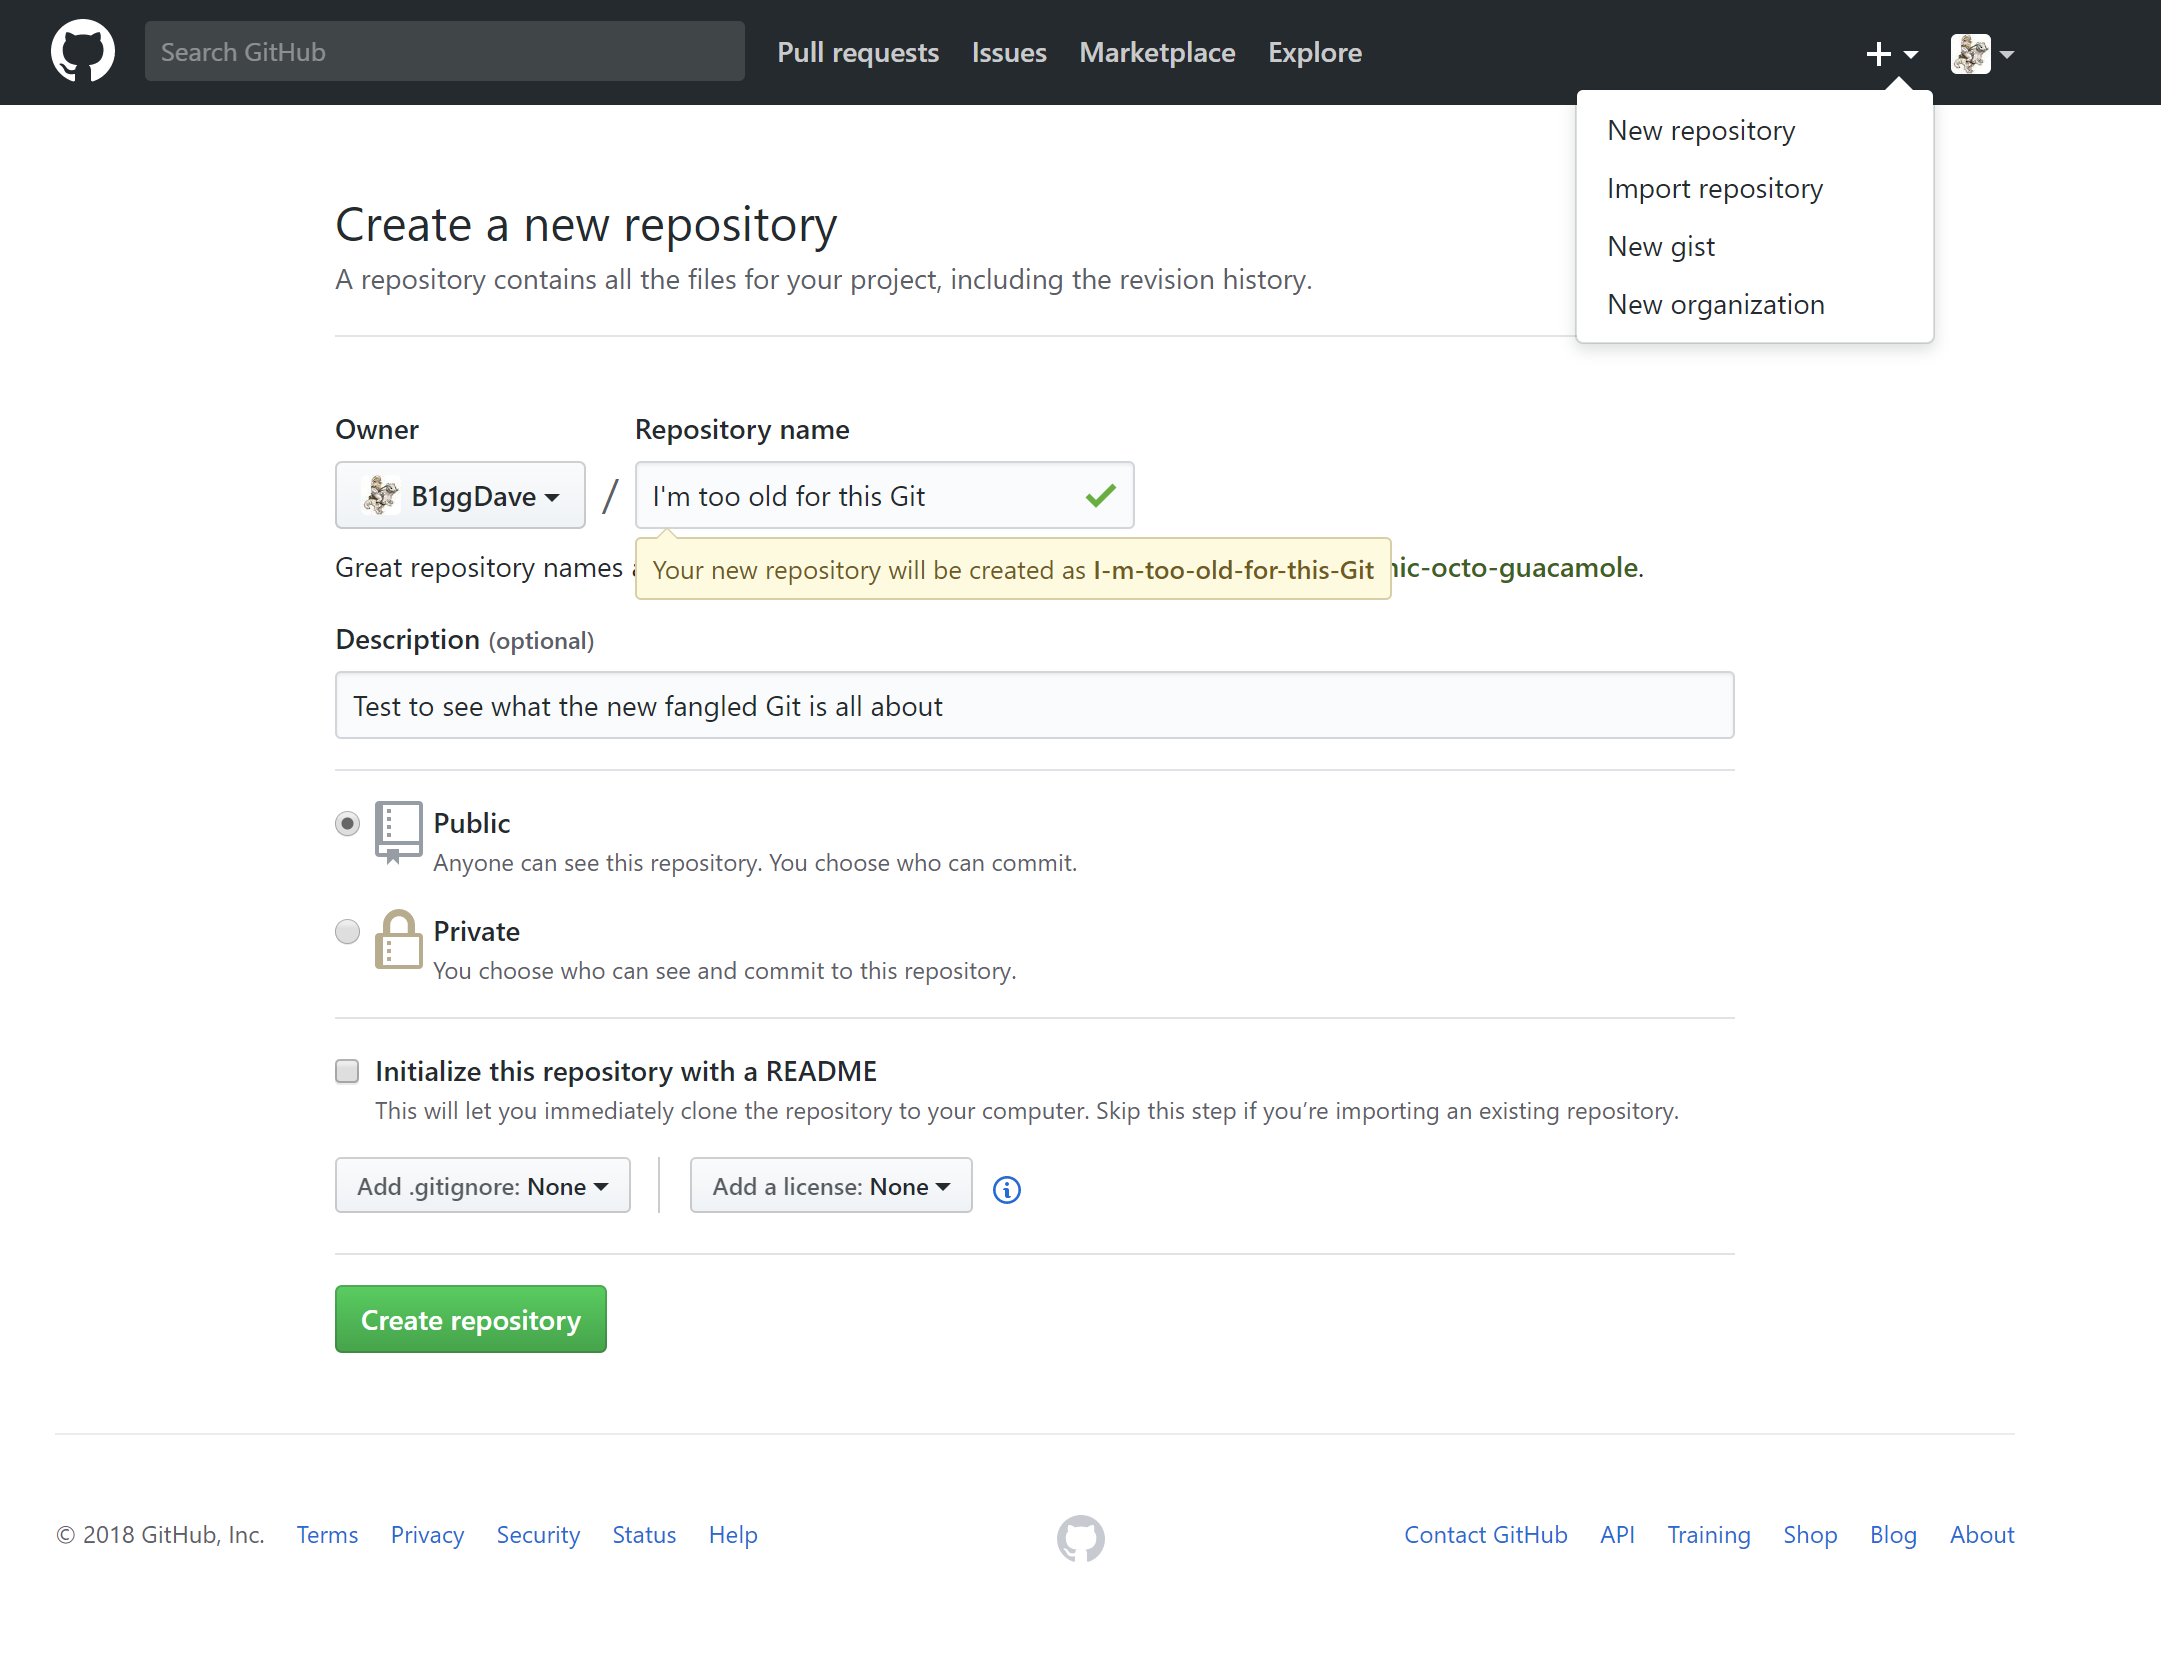
To start off, we need to create a new repository. Why? I have no idea. Click the + in the top right-hand corner of the screen, just next to your login detail. Name it something cool, give it a description, click on the Private option, quickly click back on the Public option as you realize the private option wants you to pay something, and then Create repository.
In theory (from what I am reading):
A repository can be thought of as the whole project. What you have here is all the different project files in all their different stages. A container for all the things you are doing on the project.
There are three essential parts in Git to understand:
Working Directory: This is where you do all the work: create, edit, and delete files
Staging Area: This is where you list all the changes you want to make
Repository: Where Git permanently stores the changes as different versions of the project
The workflow should then go something like this:
– You modify files in the working directory part
– You put the changes you want to make to the staging area.
– The changes are then reviewed in the staging area.
– You commit, which takes the files in the staging area and adds them to your Git directory.
– You merge the branches with their commits to the master project file.
But let’s actually take a look at this in action and see if we can’t break something.
The first step is to make a file for the Git repository, the default first file is README.md. Ok, with me so far?
So create a new file with the “Create new file” button. Put some relevant text in there, then “commit directly to the master branch”.
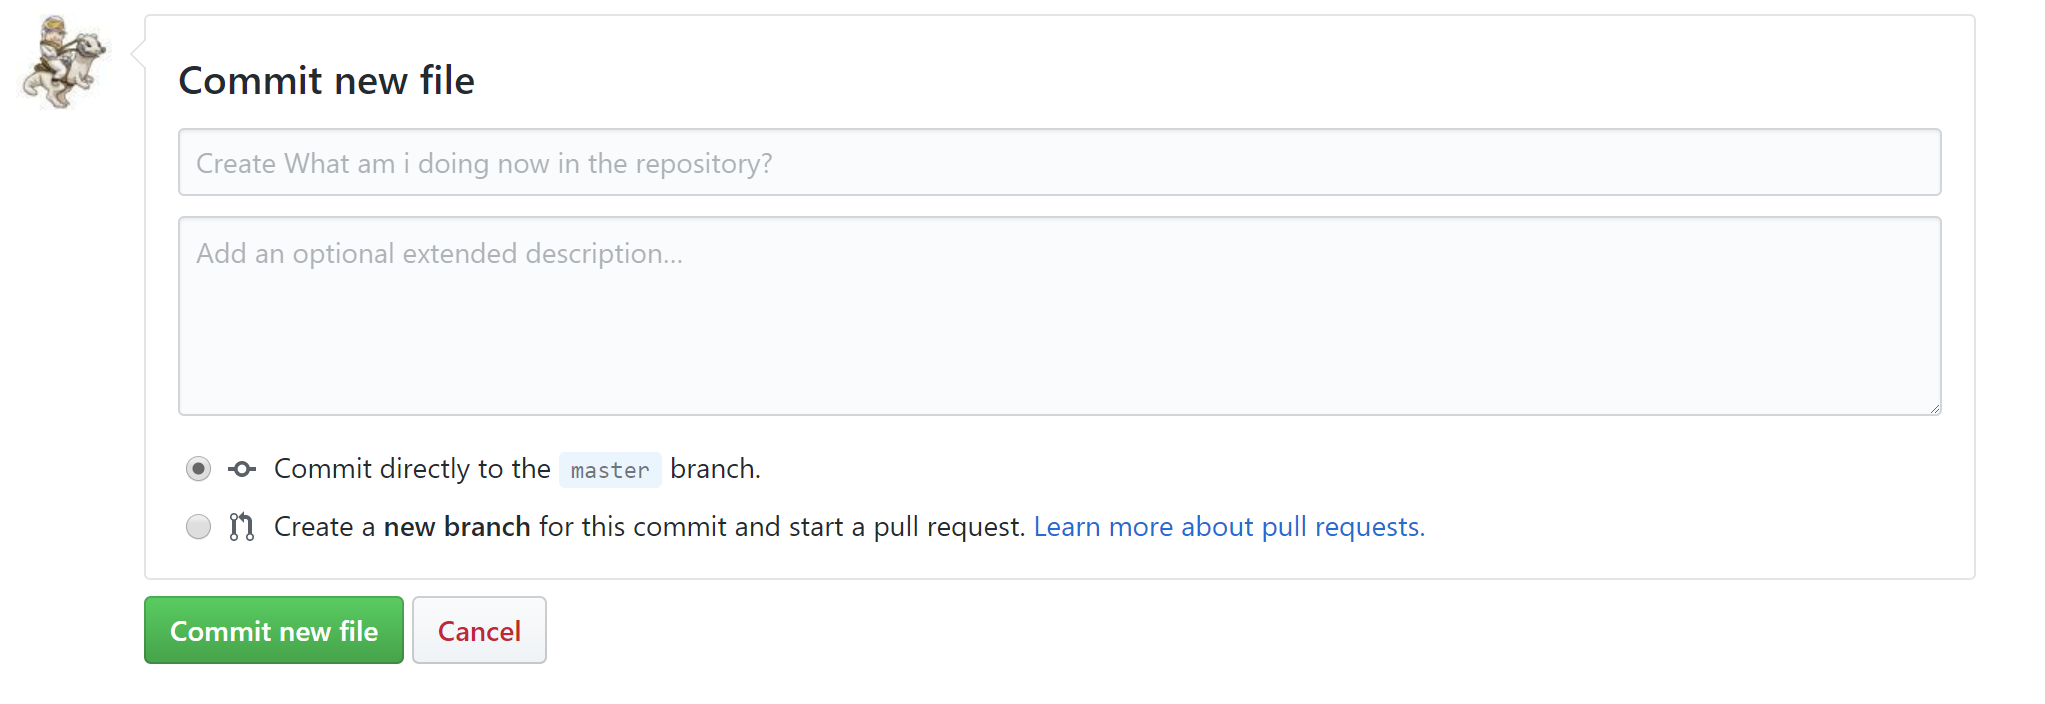
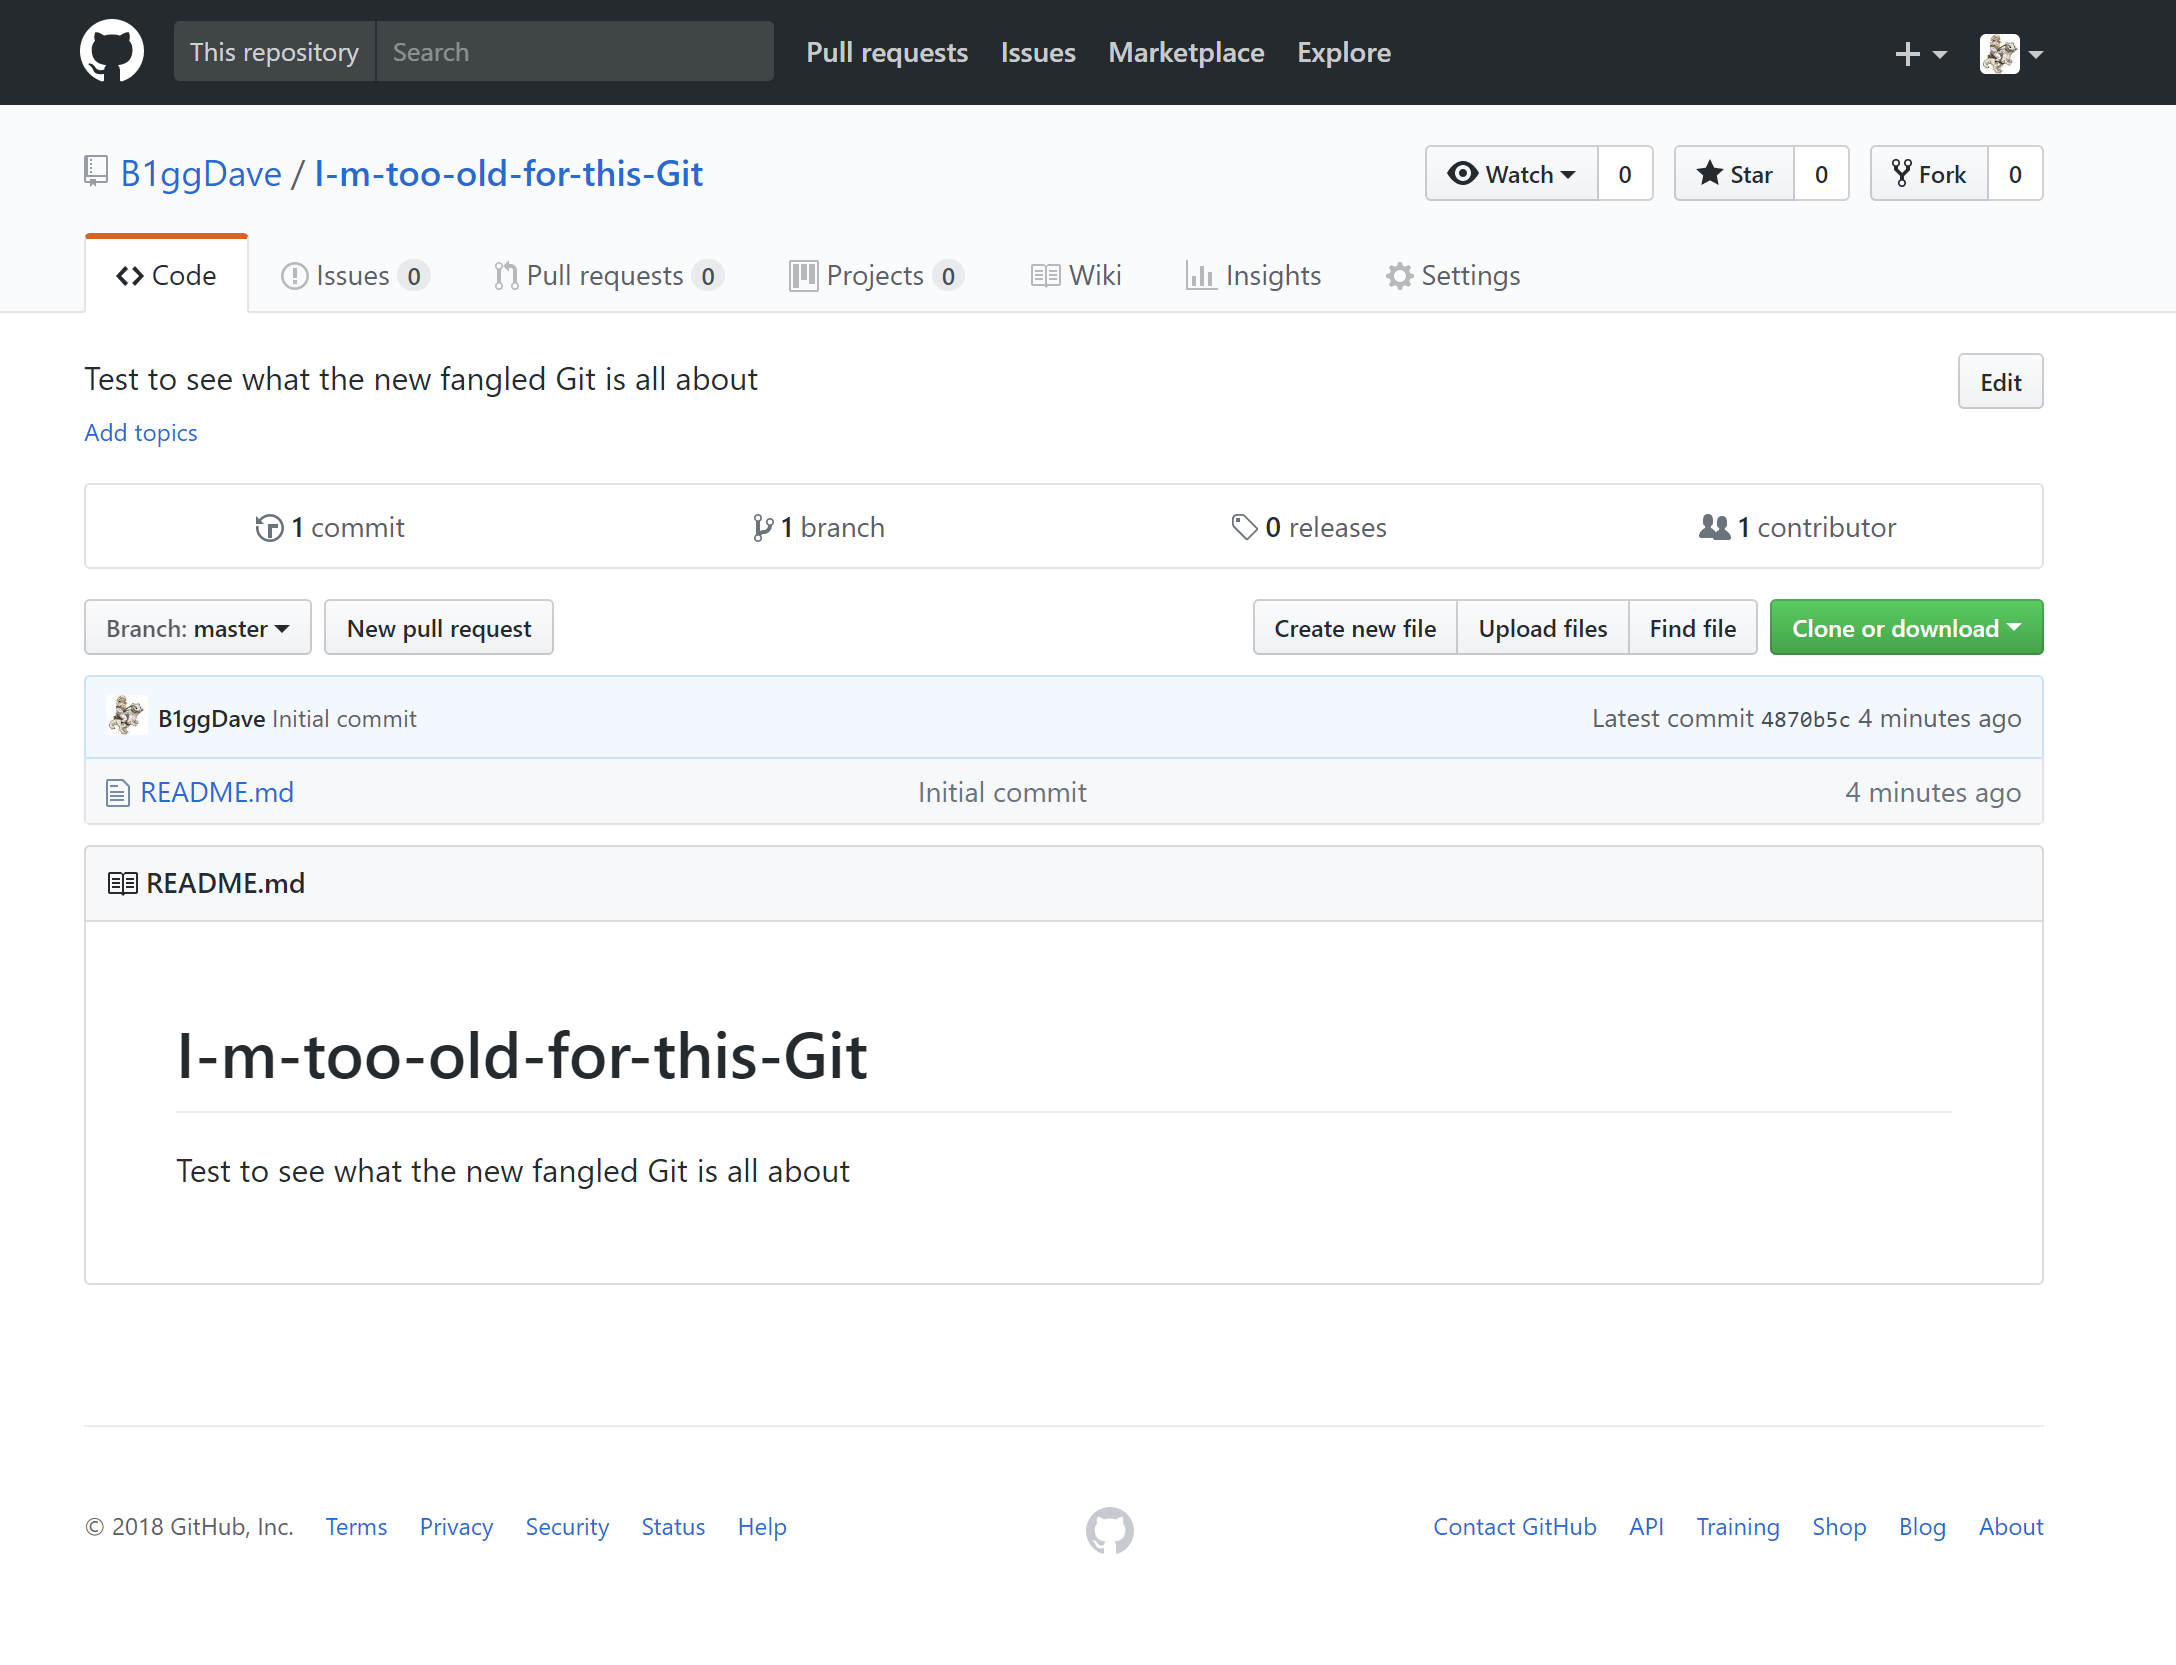
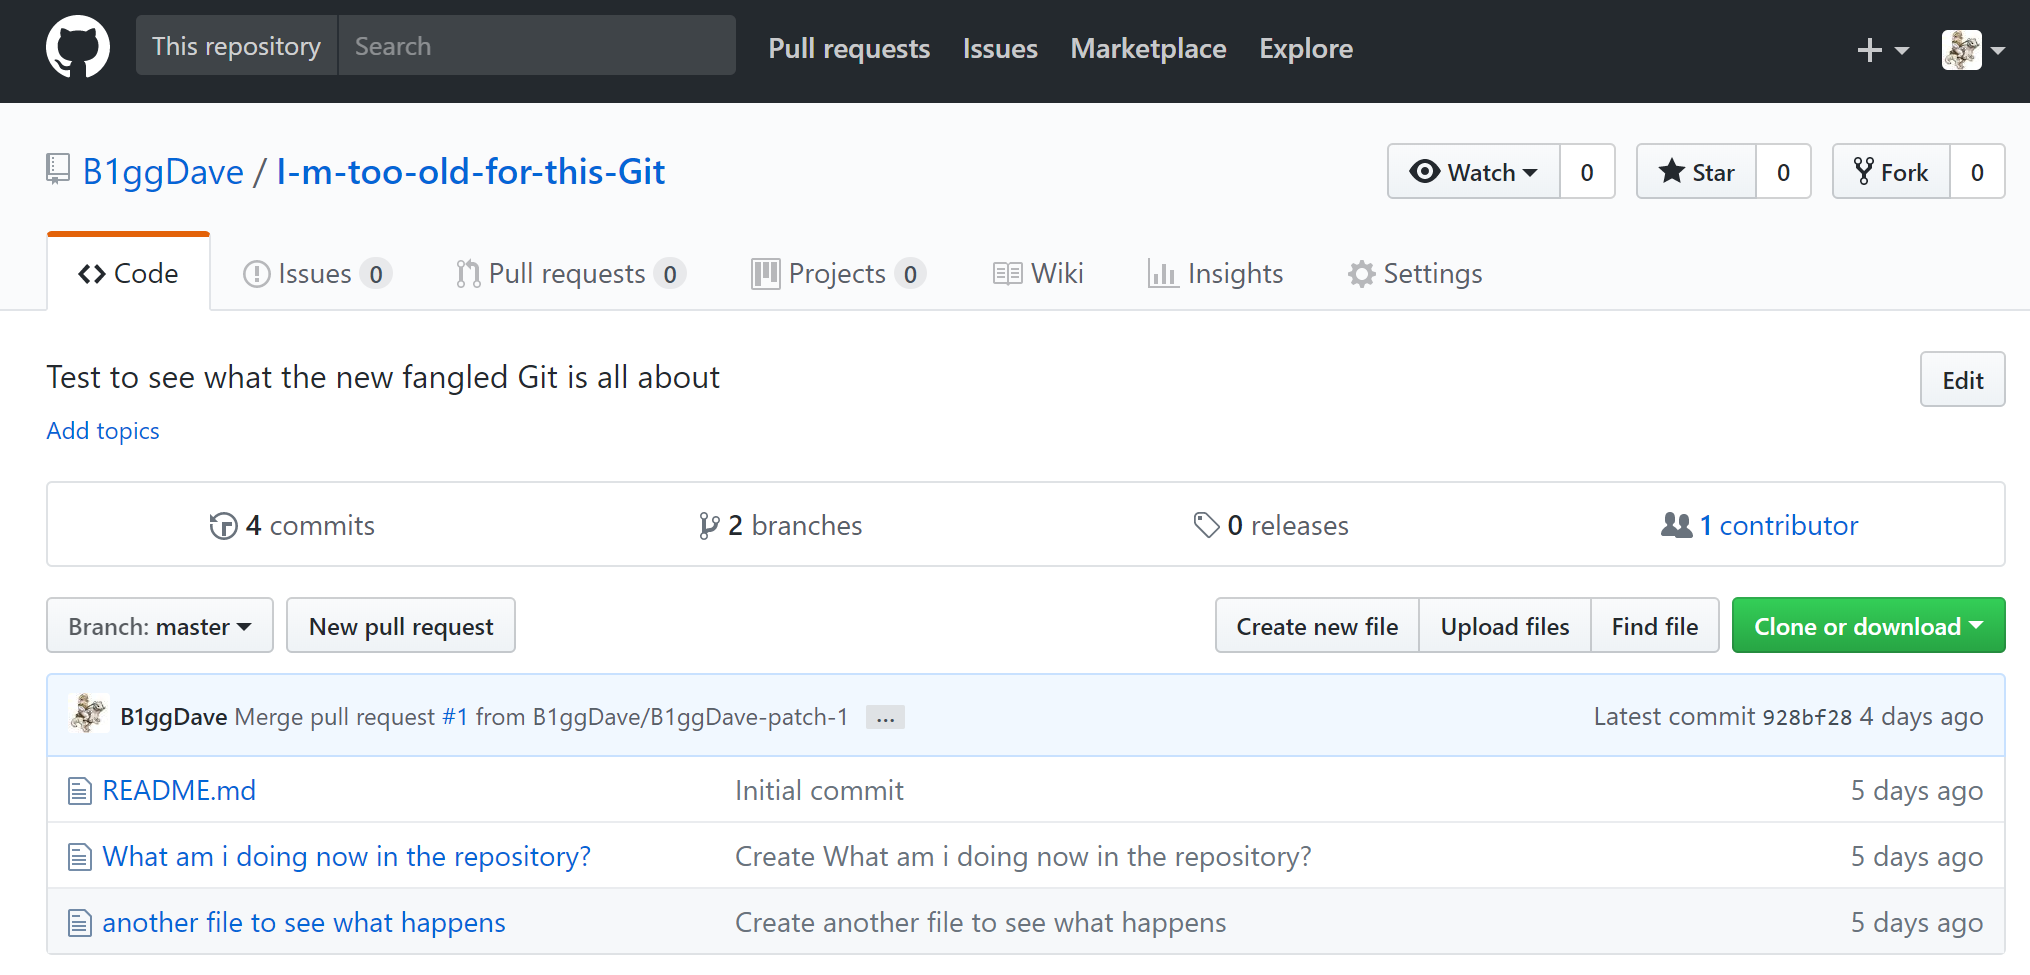
The result is a fantastic repository with a README file in it. Job done.
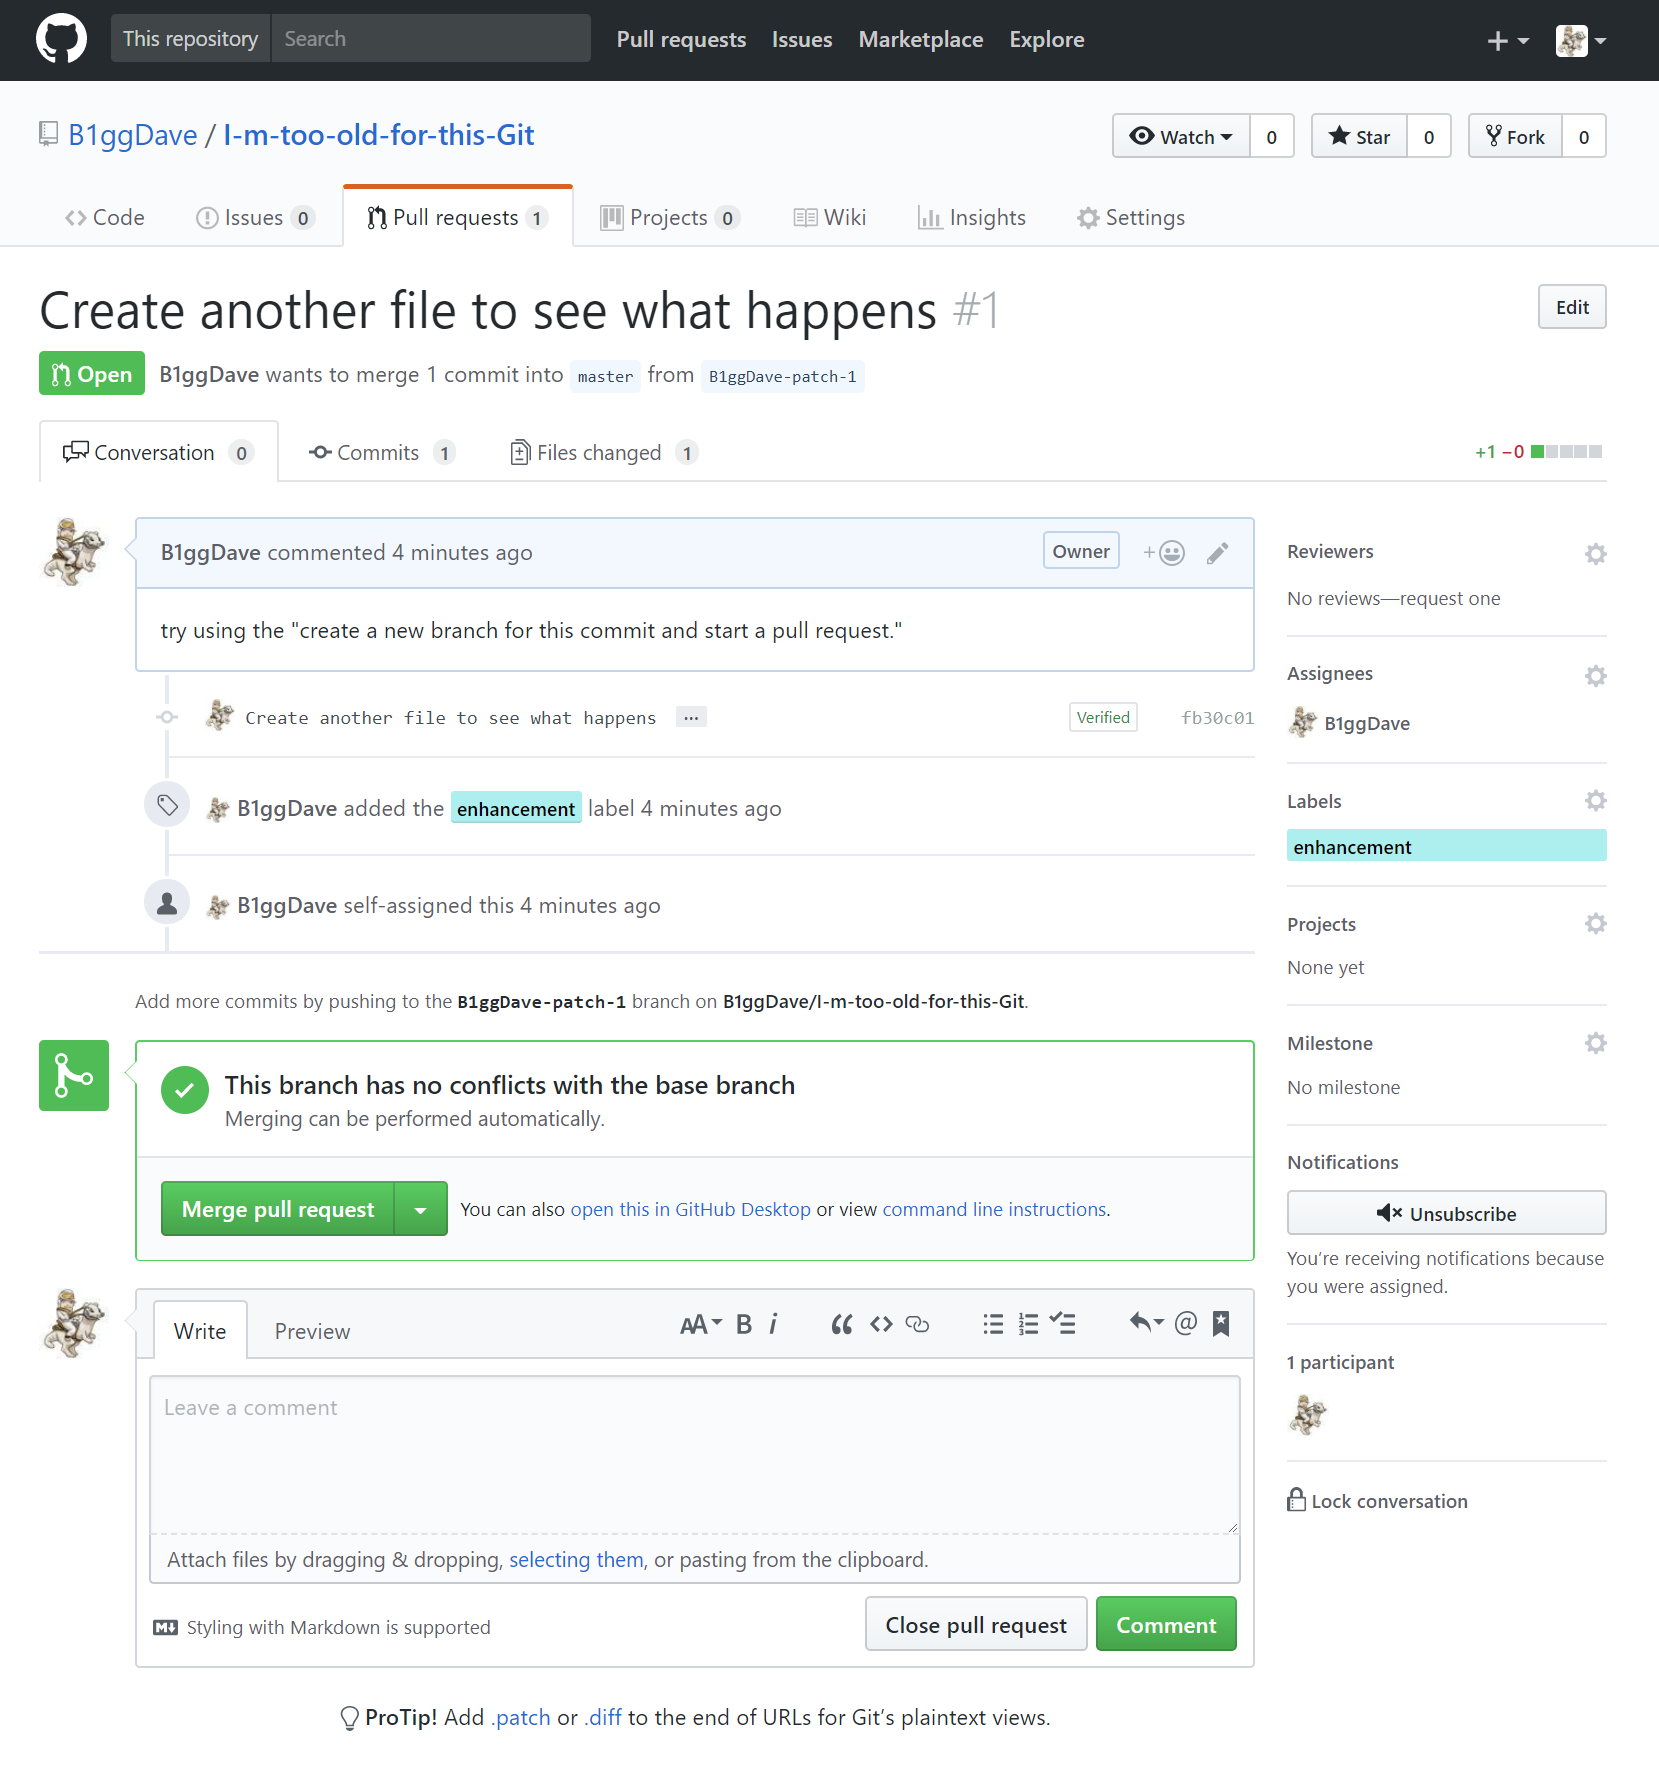
Ok not bad, not bad at all. Now it’s time to “Create a new file”, but this time we will try to “create a new branch for this commit and start a pull request”.
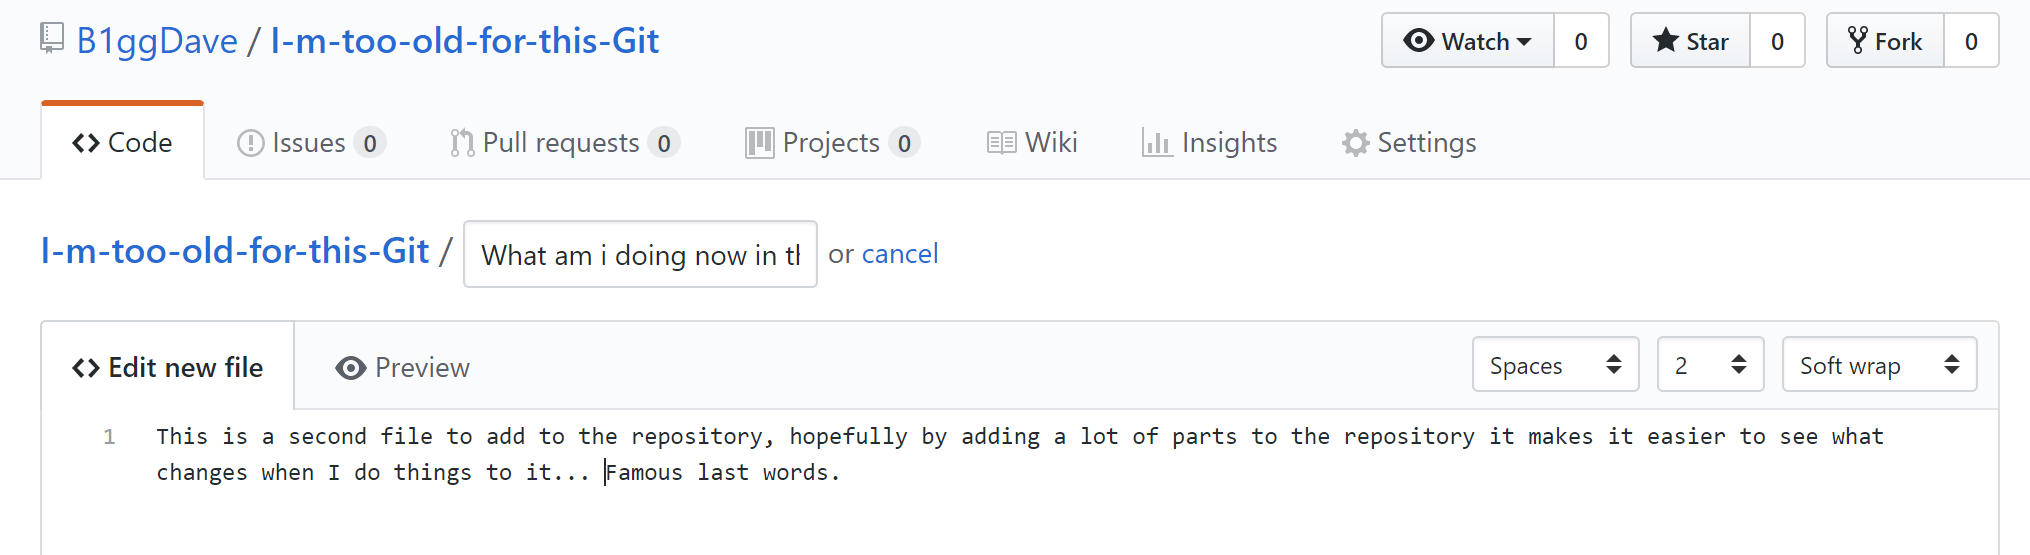
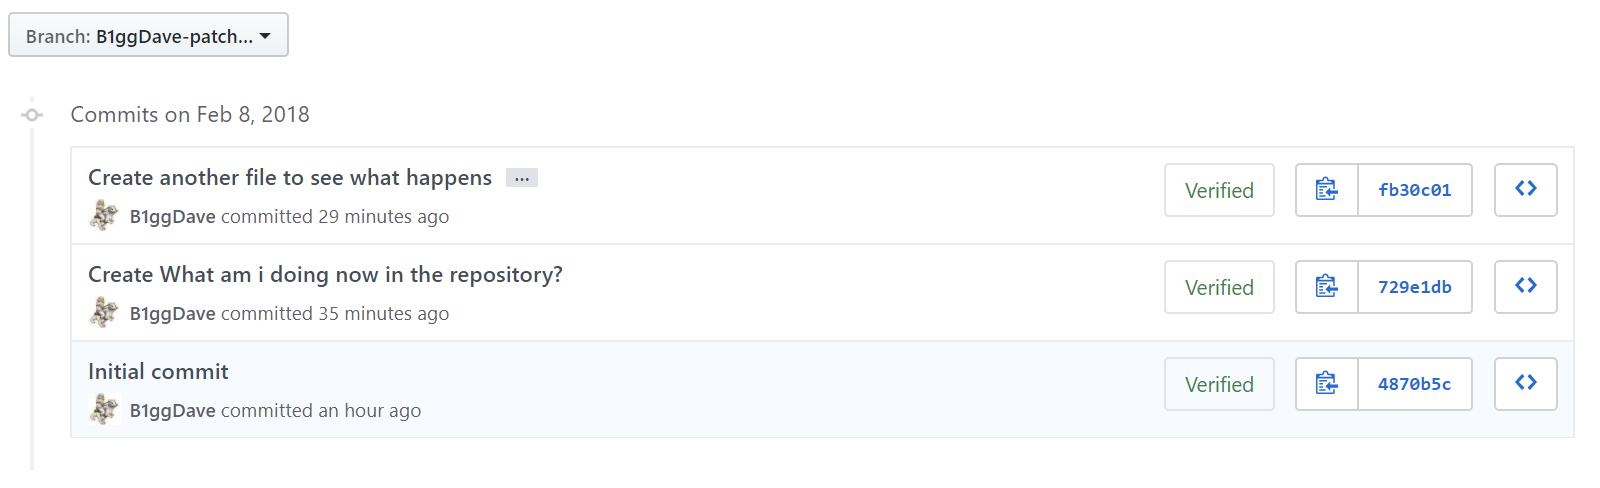
The result of this is that now I have two versions of the project in the repository: a master branch, which only contains the “I’m too old for this Git” file, and a “BiggDave-patch-1” branch, which has both the “Im too old for this Git” and the “create another file to see what happens” files.
So this is what the BiggDave-patch-1 branch now looks like inside: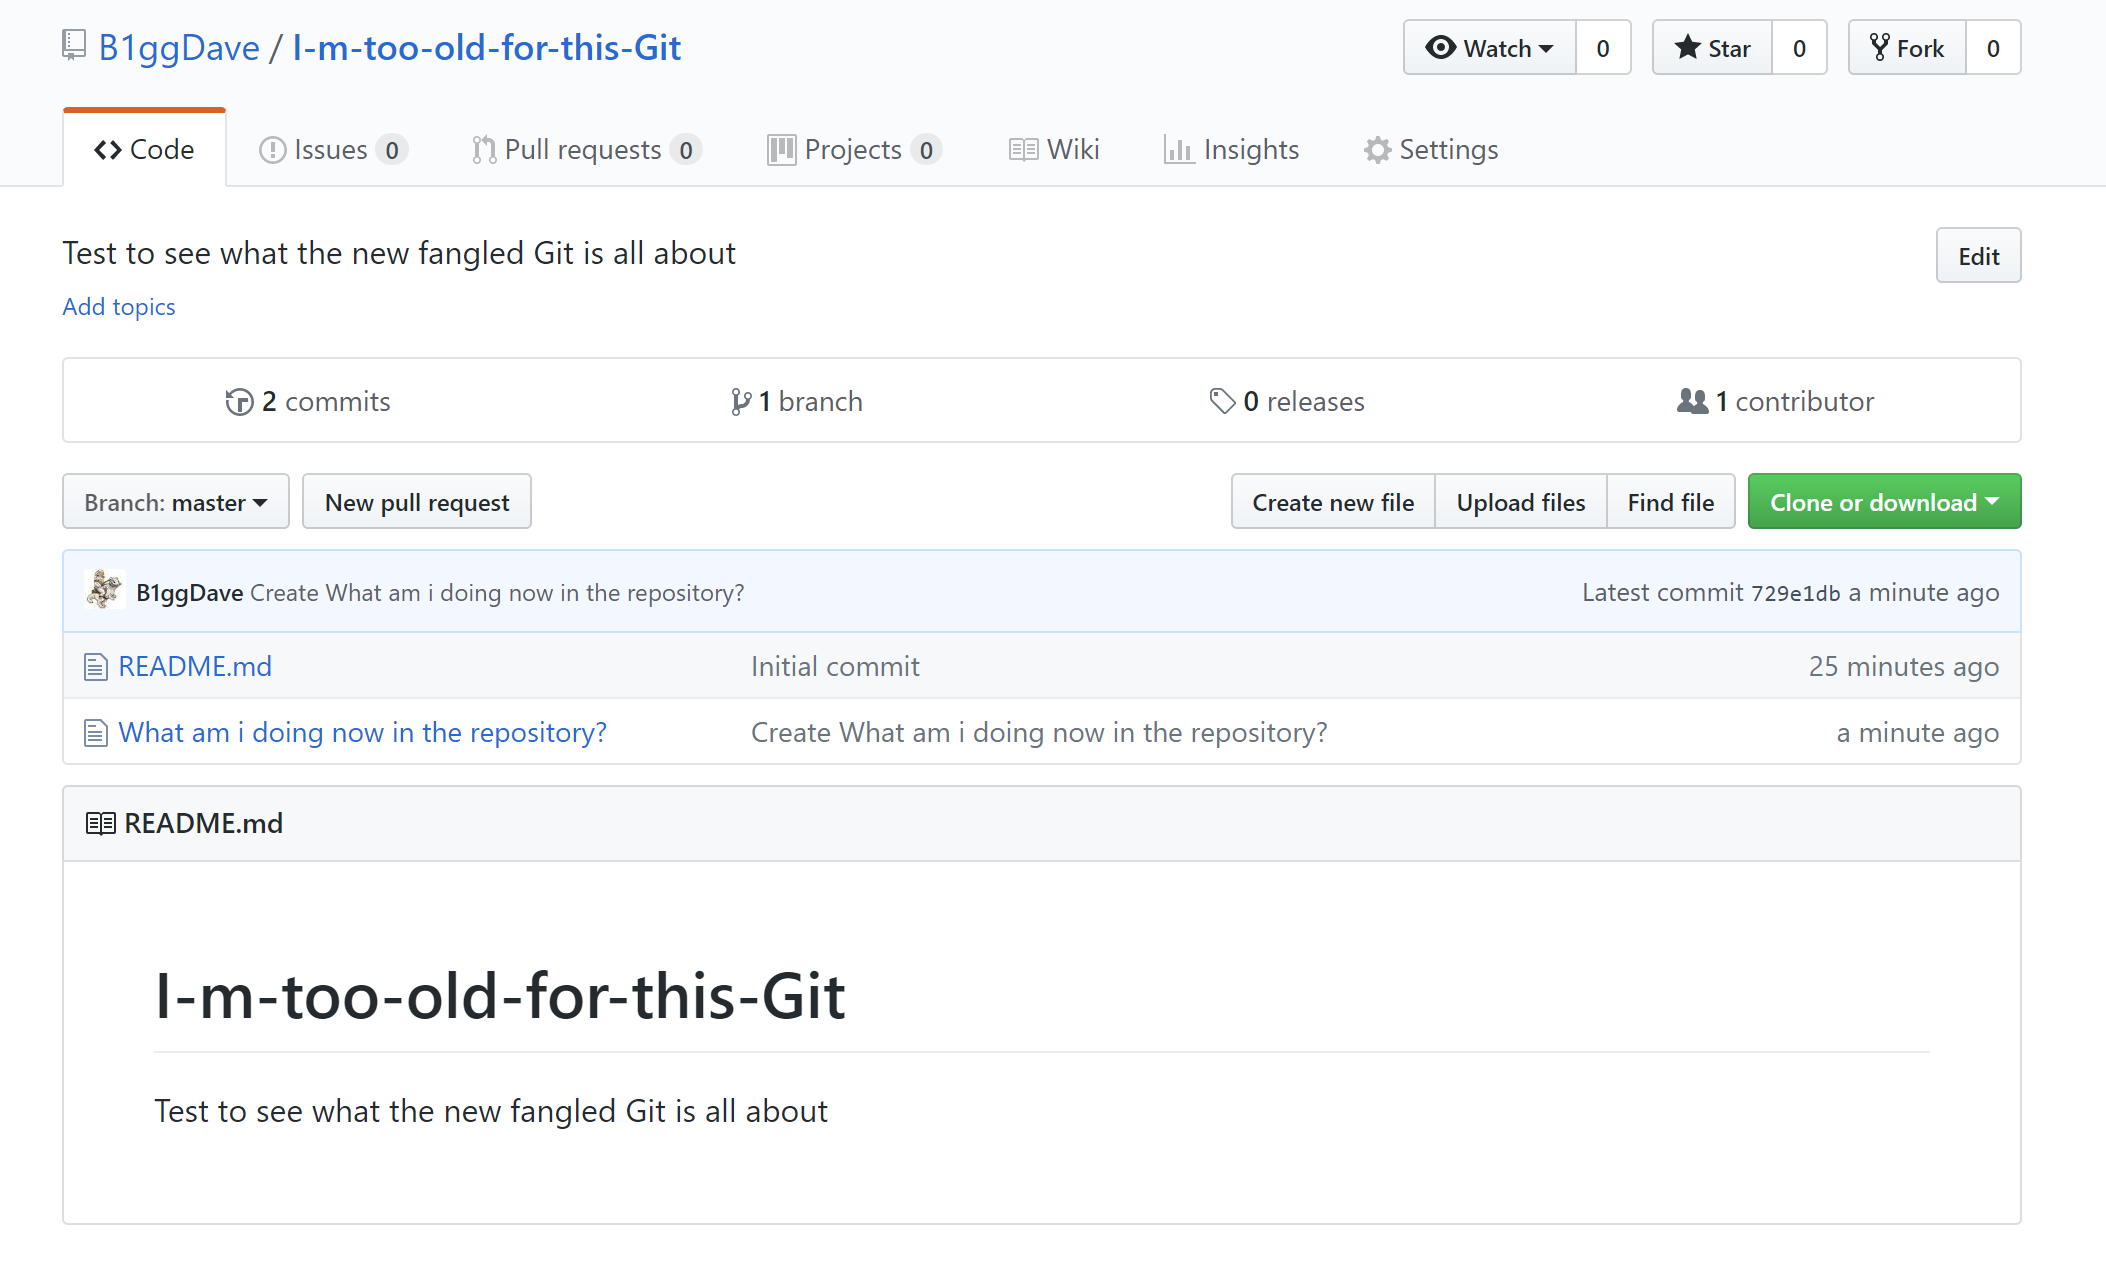
Then you can merge this with the main branch.
What I have learnt is that you create a branch from the main repository, this contains all the files in there. You commit all the changes that you think are needed to this. You then open a pull request on this branch, basically, you are asking if you can add these changes to the project. If accepted then you merge them. We won’t merge just yet though.
So what if you then go mental and try to add further branches manually? (Before we saved the commit as an independent branch.)
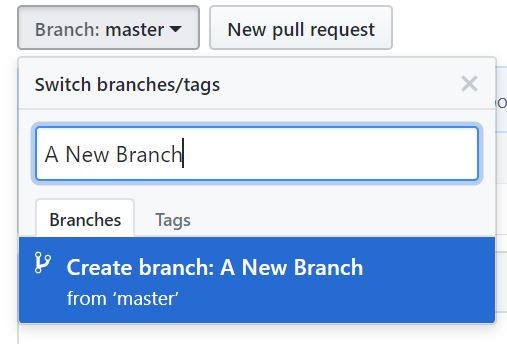
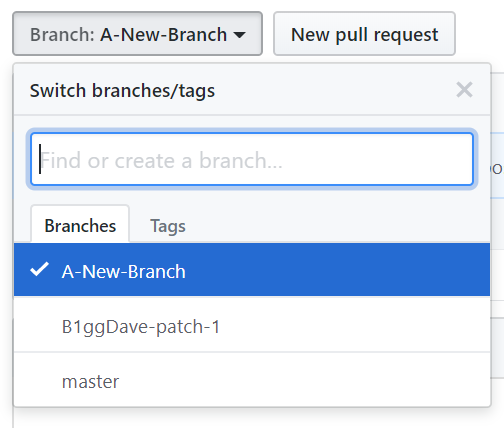
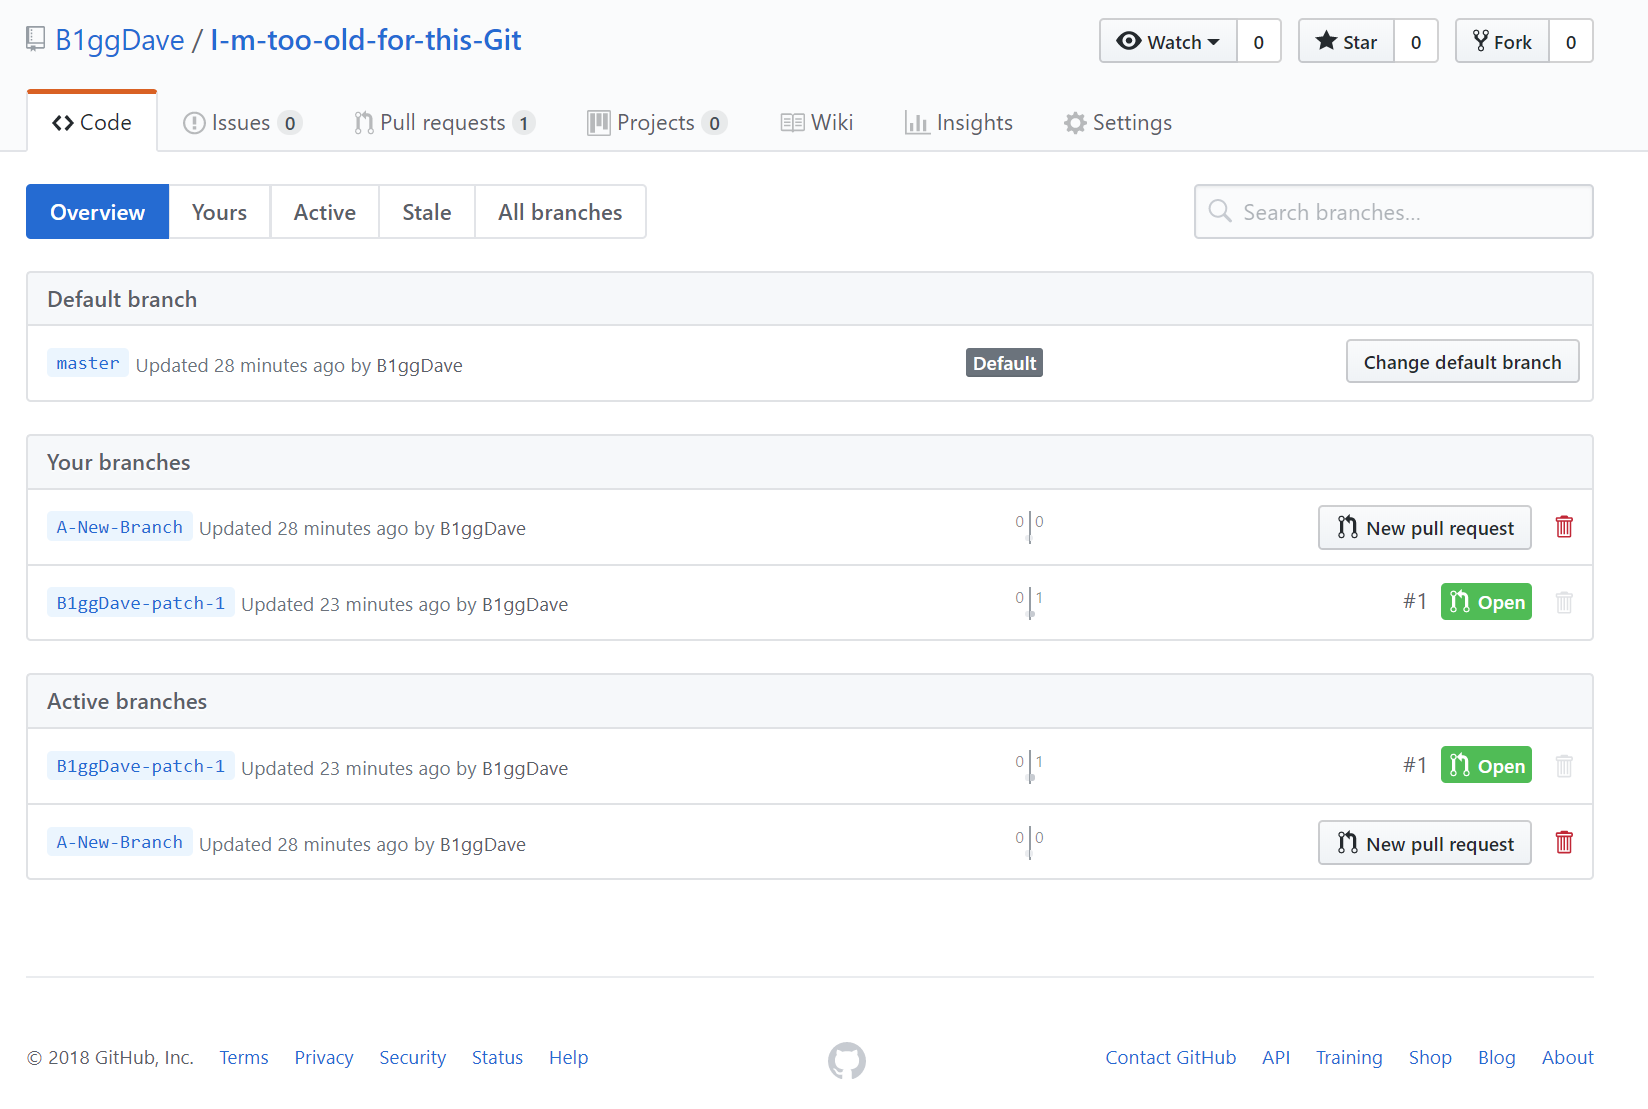
So after we have done this, we have the following in our Git overview. The default master branch, this contains the finalized files. We have two branches off of this main master branch, “A New Branch” and “BiggDave patch 1”
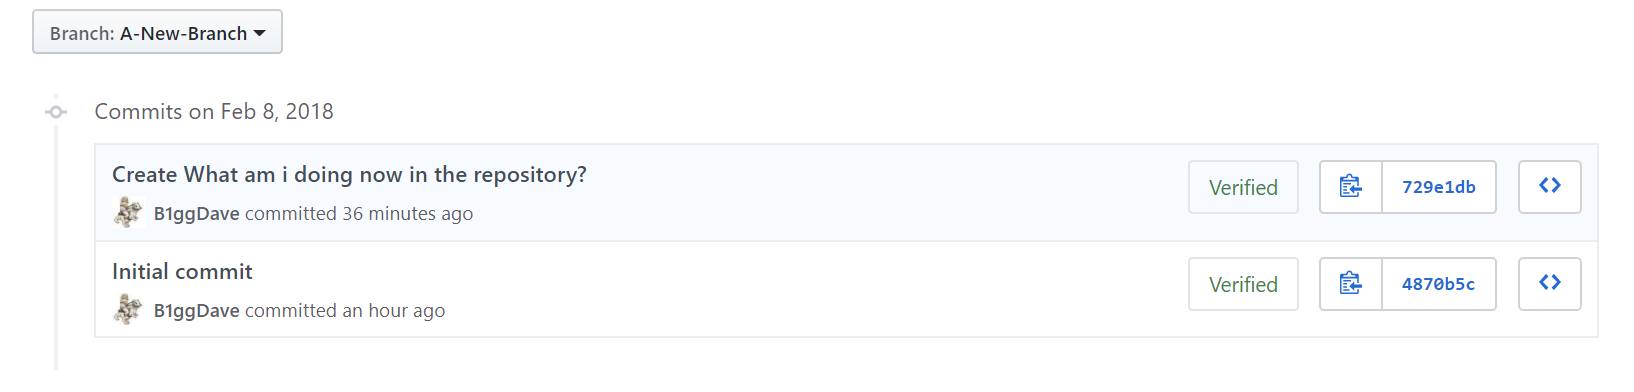
In the “A New branch” branch, we can create another file. We will call this file “Now let’s create another file to see what happens”. Cryptic, I know.
So the overview of Git repository looks like this now:
In each of the branches, there are the commits made to them:
Now all you need to do is go to the master branch and check out the “Pull requests” pending. These are the suggested changes in each of the branches, you will see there what additions it wants to make, then you simply merge the Pull requests.
After you merge each of these branches, the master branch has all the additions added and the two other branches can be deleted.
This is the first play around with Git, just to see how it works a little bit. I am in the 3 hours of playing about with the system, no expert, but I hope if you are getting started with it that it shows this isn’t too complicated. At least not to begin with. Also, you can’t break it, so get playing with it yourself as there are a lot of interesting projects to get involved in. My next experiments into this will be uploading some real projects and seeing how I can work with them in the system.
This perfectly sums up the process…
https://guides.github.com/pdfs/githubflow-online.pdf
So as not to leave you hanging. Here are the recommendations I have been given to get started with Git (outside of the pretty good getting started guide included on the Git site).
Further resources for learning Git
https://www.codecademy.com/learn/learn-git
This course is pretty well put together and takes you through usage scenarios that as a coder you are likely to run into.
https://git-scm.com/book/en/v2
This is a link to the online version of Pro Git by Scott Chacon and Ben Straub. This is an awesome book if you have the time as it covers pretty much every aspect of Git, the first 3 chapters should give you a good head-start on the system.
A thousand words won’t bring you back, I know because I’ve tried. And neither will a million tears, I know because I’ve cried. – Anon. (probably a developer after losing his project files).