TeamCity
Powerful CI/CD for DevOps-centric teams
TeamCity integration with .NET, Part 1: New approach and demo
This post was created in collaboration with a TeamCity .NET developer Nikolay Pianikov.
Microsoft has recently released .NET 5, a new SDK that unifies all the modern .NET tools. In anticipation of this, we have revised our integration with .NET in a new build runner that has been available since TeamCity 2019.2.3.
In this blog series, we’ll tell you about this new integration and take you through a demo project you can run on your server.
Old approach vs. new approach
If you’ve worked with .NET in TeamCity before, you’ll already know that the variety of integration tools it provides can be pretty overwhelming. As Microsoft strives to combine all .NET functionality together into one SDK, we have also decided to streamline our approach to building .NET projects.
Previously, TeamCity offered the following .NET components:
- MSBuild – support for MSBuild and Mono XBuild
- Visual Studio (sln) – an imitation of Visual Studio IDE (devenv) with MSBuild
- Visual Studio 2003 – a similar runner but focused on Visual Studio 2003
- Visual Studio Tests – for launching Visual Studio and MSTest
- .NET Process Runner – for launching .NET applications
- .NET CLI – for integrating TeamCity with .NET Core CLI
- NUnit – for launching NUnit tests
- Support of
nuget.exeCLI for Windows:- NuGet Pack
- NuGet Publish
- NuGet Installer
- Built-in NuGet package repository
- TeamCity symbol server – for collecting and storing debugging info
- Integration with Azure DevOps (formerly Team Foundation Server)
- Duplicates Finder (ReSharper) – for finding code duplicates
- Inspections (ReSharper) – for inspecting code using JetBrains Resharper
- FxCop – for code static analysis based on FxCop
- JetBrains dotTrace – for performance testing with dotTrace Command-Line Profiler
- JetBrains dotMemory Unit – for memory problems’ testing with JetBrains dotMemory Unit
- Support for Unity 3D
Most of the listed runners are now represented by a single .NET runner. This makes it much easier to compose your build projects and test them on multiple OSs using one transparent solution. The new runner supports:
- .NET CLI commands
- Windows and cross-platform MSBuild
- “True” Visual Studio IDE (devenv)
- Windows and cross-platform tests, including NUnit and XUnit
- Launching Windows, .NET processes, and command scripts on different operating systems
- Cross-platform code coverage statistics
- and, of course, Docker
We are still supporting the obsolete runners to give our users enough time to migrate. But, this support is limited and we are not going to be adding any new features to these runners. If you have not migrated yet, check out the .NET runner documentation for instructions. If you have any trouble migrating, please leave a comment or let us know about it via one of our feedback channels.
Demo project
To illustrate the new approach, we’ve created a demo project. In Part 1, we will describe its structure. For more details and helpful tips, keep an eye out for the next parts of this blog series. If you’d like to follow along, you can clone the demo repository and run this project yourself.
Source repo: https://github.com/JetBrains/teamcity-dotnet-samples
This project has already been built on the demo TeamCity server. You can sign in as a guest and explore the build results.
The demo project runs, tests, and deploys a simple cross-platform app for displaying a clock. Its code comprises several subprojects:
| Code subproject | Project type | Description | TeamCity build configurations | Deployment |
|---|---|---|---|---|
| Clock | NET 1.2 | Common business logic library | – Creating a package – NuGet publication |
via NuGet |
| Clock.IoC | NET 1.2 | IoC setup library | – Creating a package – NuGet publication |
via NuGet |
| Clock.Tests | .NET 5.0 | Common logic tests | – Windows tests – Linux tests |
|
| Clock.Console | .NET 5.0 | Console application | – Windows x64 – Linux x64 – Docker Nanoserver – Docker Ubuntu – Docker multi-arch |
via Docker |
| Clock.Web | .NET 5.0 | Web API application | – Windows x64 – Linux x64 – Docker Nanoserver – Docker Ubuntu – Docker multi-arch |
via Docker |
| Clock.Desktop | .NET 4.8 WPF | Desktop application | – Creating a distributive | via Windows distributive |
| Clock.Desktop.Uwp | UAP | UWP application | – Creating a UWP package | via UWP package |
| Clock.Xamarin | NET 1.2 | Common Xamarin library | – Creating an Android package | via Android package |
| Clock.Xamarin.Android | Xamarin Android | Android application | – Creating an Android package | via Android package |
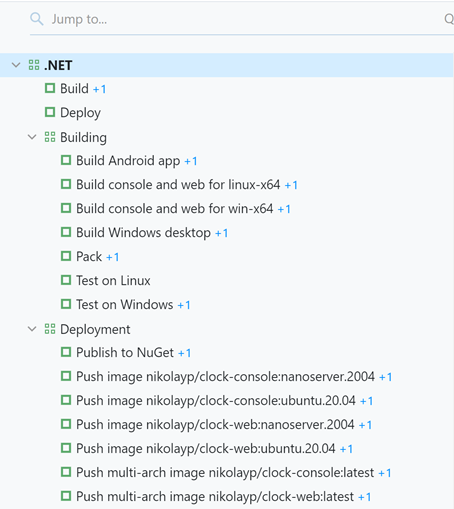
To configure CI/CD for this source project, we’ve designed a hierarchy of projects and build configurations in TeamCity.
Though TeamCity has a friendly UI, we prefer to keep all configurations in Kotlin DSL. This way, it is easy to version project settings and reuse them. For example, you can just fork our demo source code and Create a project from its URL on your TeamCity server. There is no need to set up anything manually.
If you are curious about how to create configurations as a code, we recommend reading this blog series.
The root demo project in TeamCity comprises two build configurations and two subprojects.
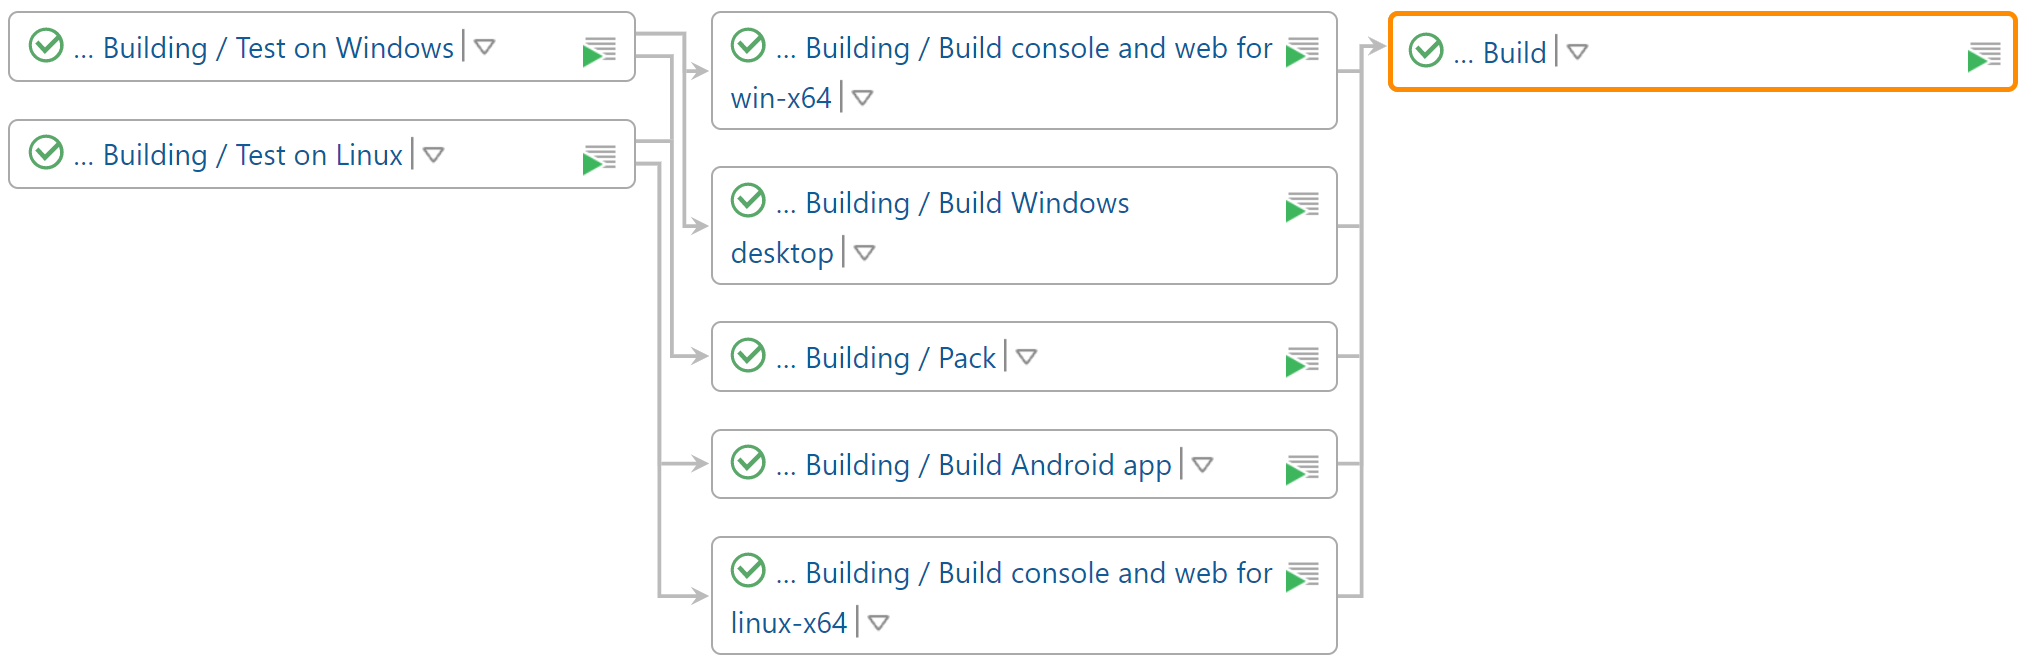
The “Build” configuration aggregates apps and packages from configurations of the “Building” subproject:
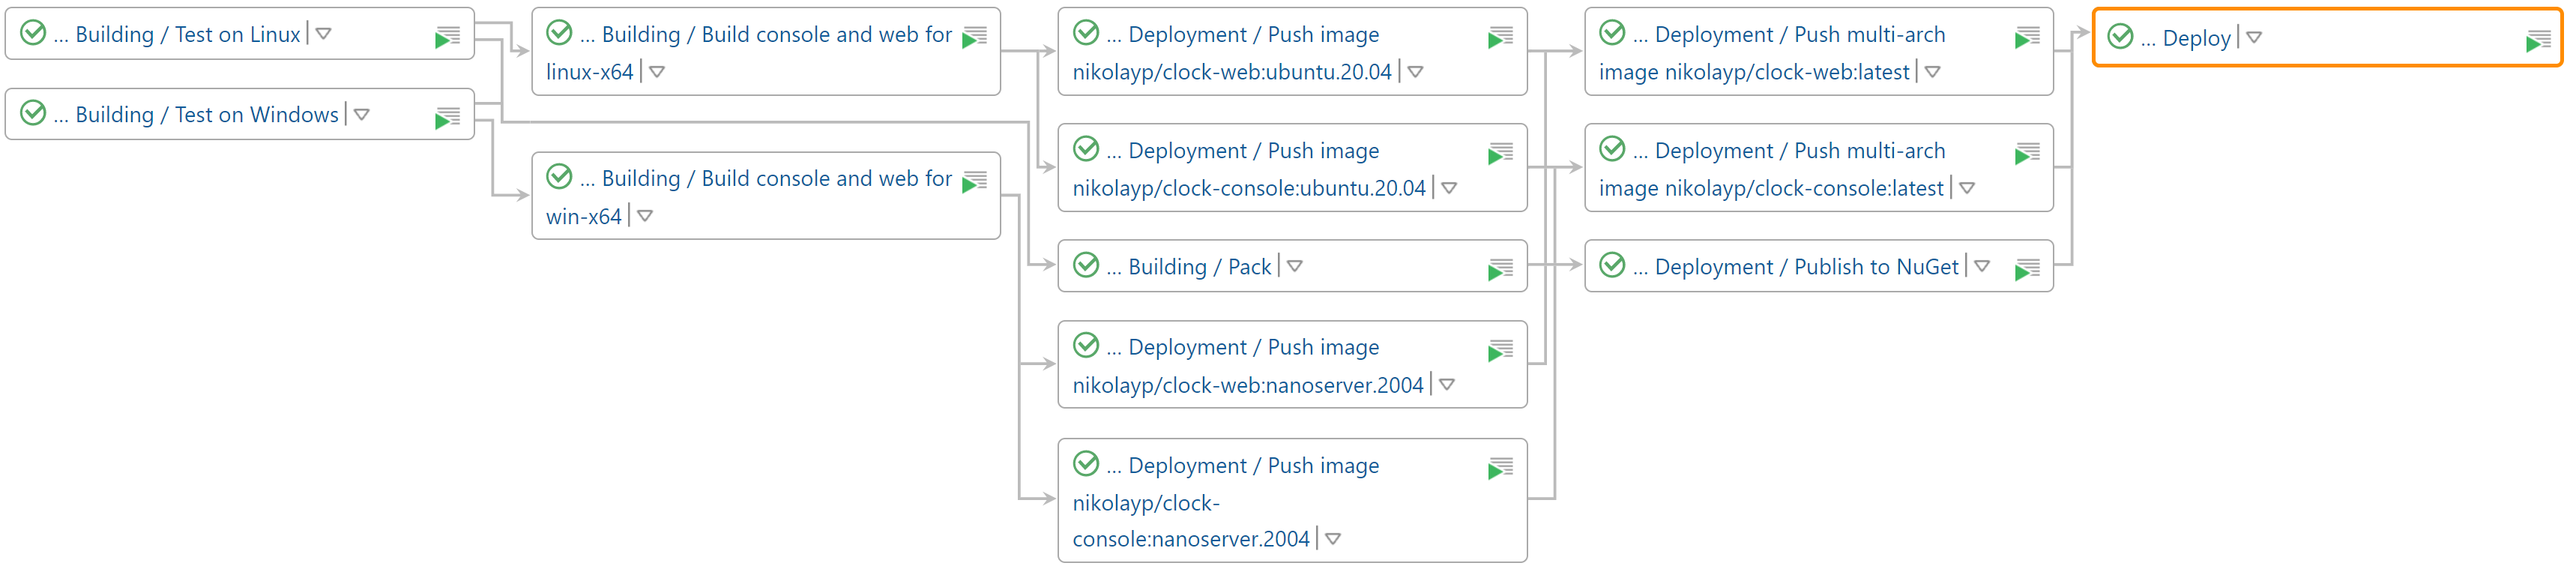
The “Deploy” configuration, predictably, deploys them into Docker and NuGet repositories:
This way, we build a hierarchy of configurations, each of which serves its granular purpose: one for testing on Linux, one for building an Android app, and so on.
All these configurations use system parameters that are passed to .NET commands as key-value pairs: /p:key=value. For example, if a build configuration has the system.configuration=Release system parameter, each launched .NET command will be run with the /p:configuration=Release parameter. The prefix system. will be omitted as it is only needed to indicate the parameter type in TeamCity.
Here’s the list of all parameters used in the build configurations:
| Parameter | Value in TeamCity configuration | Description | |
|---|---|---|---|
| All build configs | configuration |
Release |
MSBuild config |
VersionPrefix |
1.0.0 |
Base version for apps and packages | |
VersionSuffix |
beta%build.number% |
Pre-release mark in app/package versions | |
| Build console and web | InvariantGlobalization |
true |
Launch an app without access to cultural data resources |
| Build Windows desktop | PublishDir |
../bin/Clock.Desktop/win/ |
Path to the app publishing directory |
|
../bin/Clock.Desktop.Uwp/win/ |
Path to the UWP package publishing directory | |
| Pack | Copyright |
Copyright 2020 JetBrains |
Metadata of NuGet packages |
Title |
TeamCity .NET sample |
||
RepositoryType |
git |
||
RepositoryUrl |
https://github.com/JetBrains/teamcity-dotnet-samples.git |
||
RepositoryBranch |
refs/heads/master |
You can include these parameters directly in project files or pass them via command-line parameters. By using system parameters, you don’t have to worry about the nuances of passing special characters as TeamCity will take care of all of it.
To run these configurations, we used the following build agents:
- Windows 10 x64 Pro 10.0.19041
- Visual Studio 2019 Pro 16.7.5
- Docker (Windows container) 19.03.13
- .NET SDK 5.0
- Ubuntu 16.04
- Docker 18.06.3
This was just the general structure of our demo project. In the next part of this series, we will talk about its build and test configurations in more detail. Meanwhile, you can explore this project yourself or read the .NET runner documentation.
Once again, your feedback is very important to us. Please let us know if you like the new .NET runner and what you expect from it in the future.
Happy building!