TeamCity
Powerful CI/CD for DevOps-centric teams
Automate Your React App Deployment With TeamCity

This tutorial was brought to you by Kumar Harsh, a software developer and technical author.
If you regularly work with React projects, you probably already know how tricky it can be to deploy them smoothly. Issues like manual errors, inconsistent deployment practices, and slow iteration cycles often turn React app deployment into a challenging process and a source of frequent headaches. Effective use of automation can help reduce those headaches and significantly improve the transition from code to users.
TeamCity, a continuous integration and continuous deployment (CI/CD) platform from JetBrains, is designed to simplify deployment pipelines. It offers features like build automation and optimization, detailed test reporting, and secure credential management.
By securely automating your deployment workflow, TeamCity helps reduce errors, improve consistency, and accelerate delivery, allowing your team to focus on building great applications.
In this tutorial, you’ll learn how to set up an automated deployment pipeline with TeamCity Pipelines. You’ll learn how to configure TeamCity to deploy a React app from a GitHub repository to an Amazon S3 bucket, making it ready to serve as a static website.
Prerequisites
Before you get started, here’s what you’ll need to follow along:
- A GitHub account.
- An AWS account. The pipeline you’ll create in this tutorial will deploy the final app to an Amazon S3 bucket. Since you only need to use S3, a free AWS account will work.
- A TeamCity Pipelines account. If you don’t have one, you can sign up for a 14-day free trial.
Once you have these ready, start by forking this GitHub repo to your own GitHub account:
https://github.com/krharsh17/teamcity-react-test-app
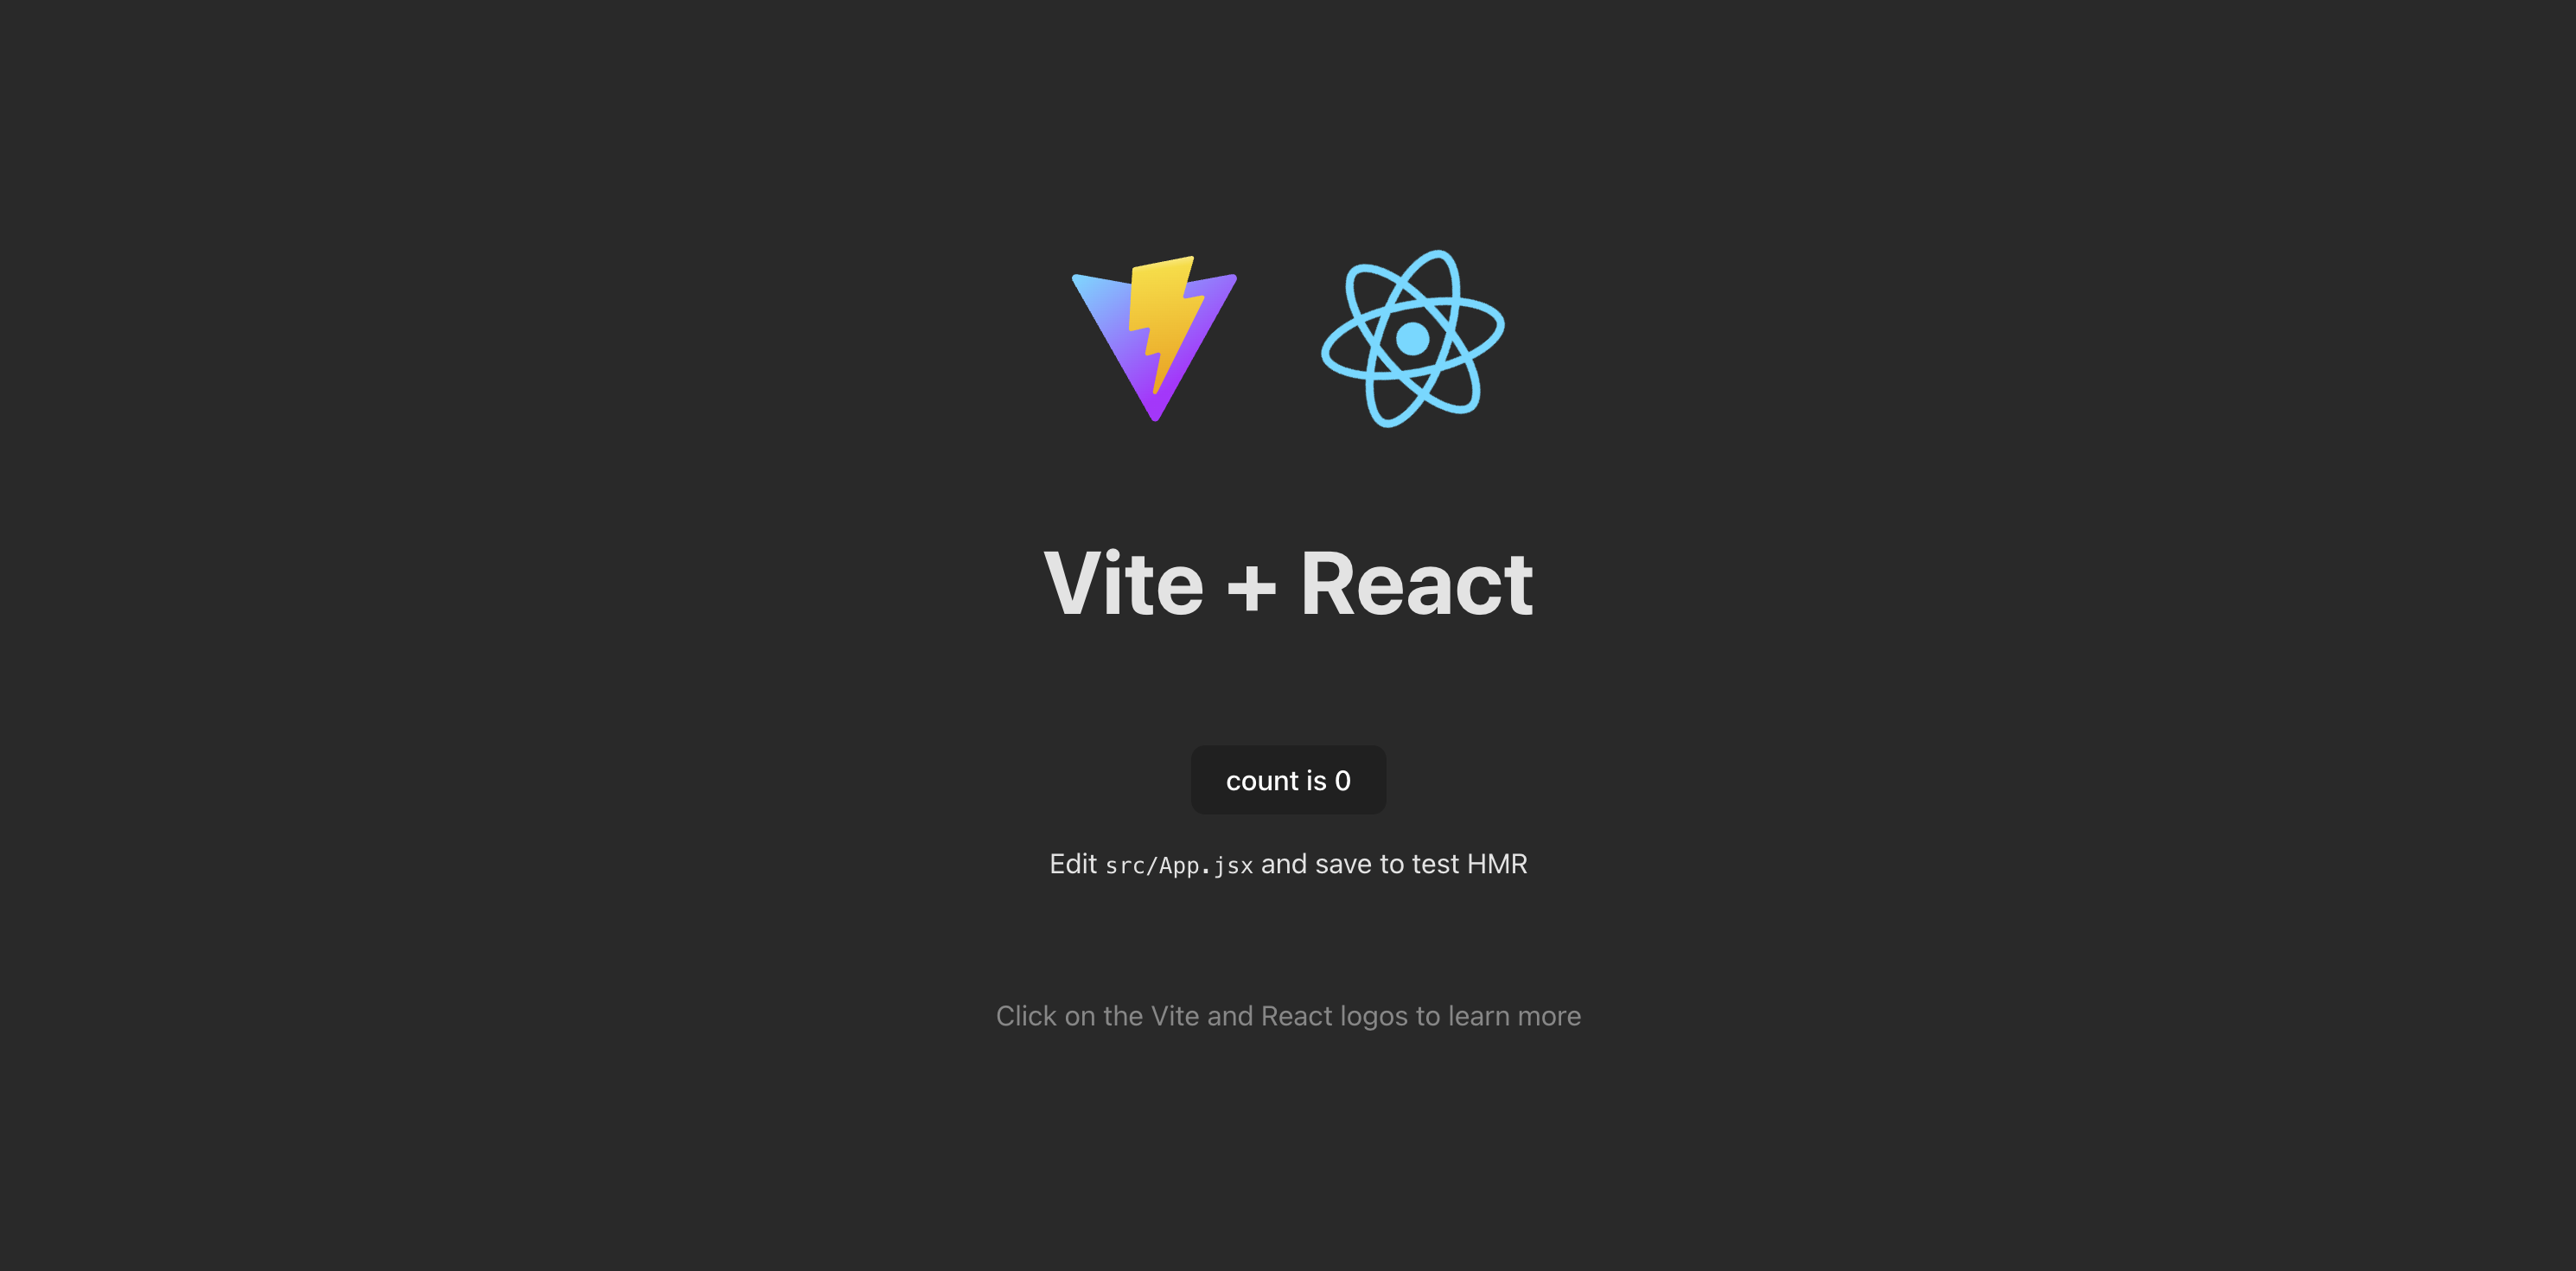
The above repo contains a React 18 app created using Vite. The app’s home page displays framework logos and includes a button that tracks how many times it’s clicked:
Output of the React app
The repo also contains two integration tests in the src/App.test.jsx file that check whether the App component is rendered and if the button and the counter are working.
You can enter the following commands in a terminal window at the root of the repo to run the tests for yourself:
yarn && yarn test
Here’s what the output should look like:
RUN  v0.34.6 /Users/kumarharsh/Work/Draft/teamcity-react/teamcity-react-test-app

 ✓ src/App.test.jsx (2)

   ✓ App (2)

     ✓ renders

     ✓ should increase count by 1

 Test Files  1 passed (1)

      Tests  2 passed (2)

   Start at  23:05:51

   Duration  642ms (transform 31ms, setup 0ms, collect 146ms, tests 26ms, environment 284ms, prepare 51ms)

✨  Done in 1.61s.
This indicates that the tests ran successfully on your local system. At this point, you’re ready to start building the CI/CD pipeline.
Setting up TeamCity
Let’s start by creating a new pipeline in TeamCity. Once you’ve signed up for TeamCity Cloud, you should see a loading screen:

TeamCity Cloud server starting
Once the server is up, here’s what the dashboard should look like:

TeamCity Pipelines dashboard
Click the blue Create new pipeline button in the middle of the page, then authenticate with your Git platform:

Logging in to a VCS provider
Authenticate with GitHub once again. TeamCity will then ask you to choose the repo you’d like to deploy in your first pipeline. Type “teamcity-react-test-app” in the search bar:

Choosing your forked repo
Select the forked repo and click Create:

Creating the pipeline
This will set up your new pipeline. Here’s what its Edit page should look like:

Newly created pipeline
At this point, you’re ready to start developing the steps and jobs in the pipeline.
Creating a simple, sequential pipeline
You’ll first create a straightforward pipeline that installs dependencies, runs tests, creates a build, sets up AWS credentials, and finally pushes the built artifacts to the S3 bucket. Then, you’ll optimize it by splitting it into multiple jobs that can reuse steps and run in parallel as needed.
Hover over the name of the job (Job 1) in the right pane and click the pencil icon that pops up to edit the name:

Editing the job name
Rename the job “Deploy to S3.” Then, click the NODE.JS icon under the Steps section to add a Node.js-based pipeline step:

Adding a new step
This will open another sidebar that asks for the details of the steps, including the step name, the working directory (which is the repo root by default), and the shell script you’d like to run as part of this step:
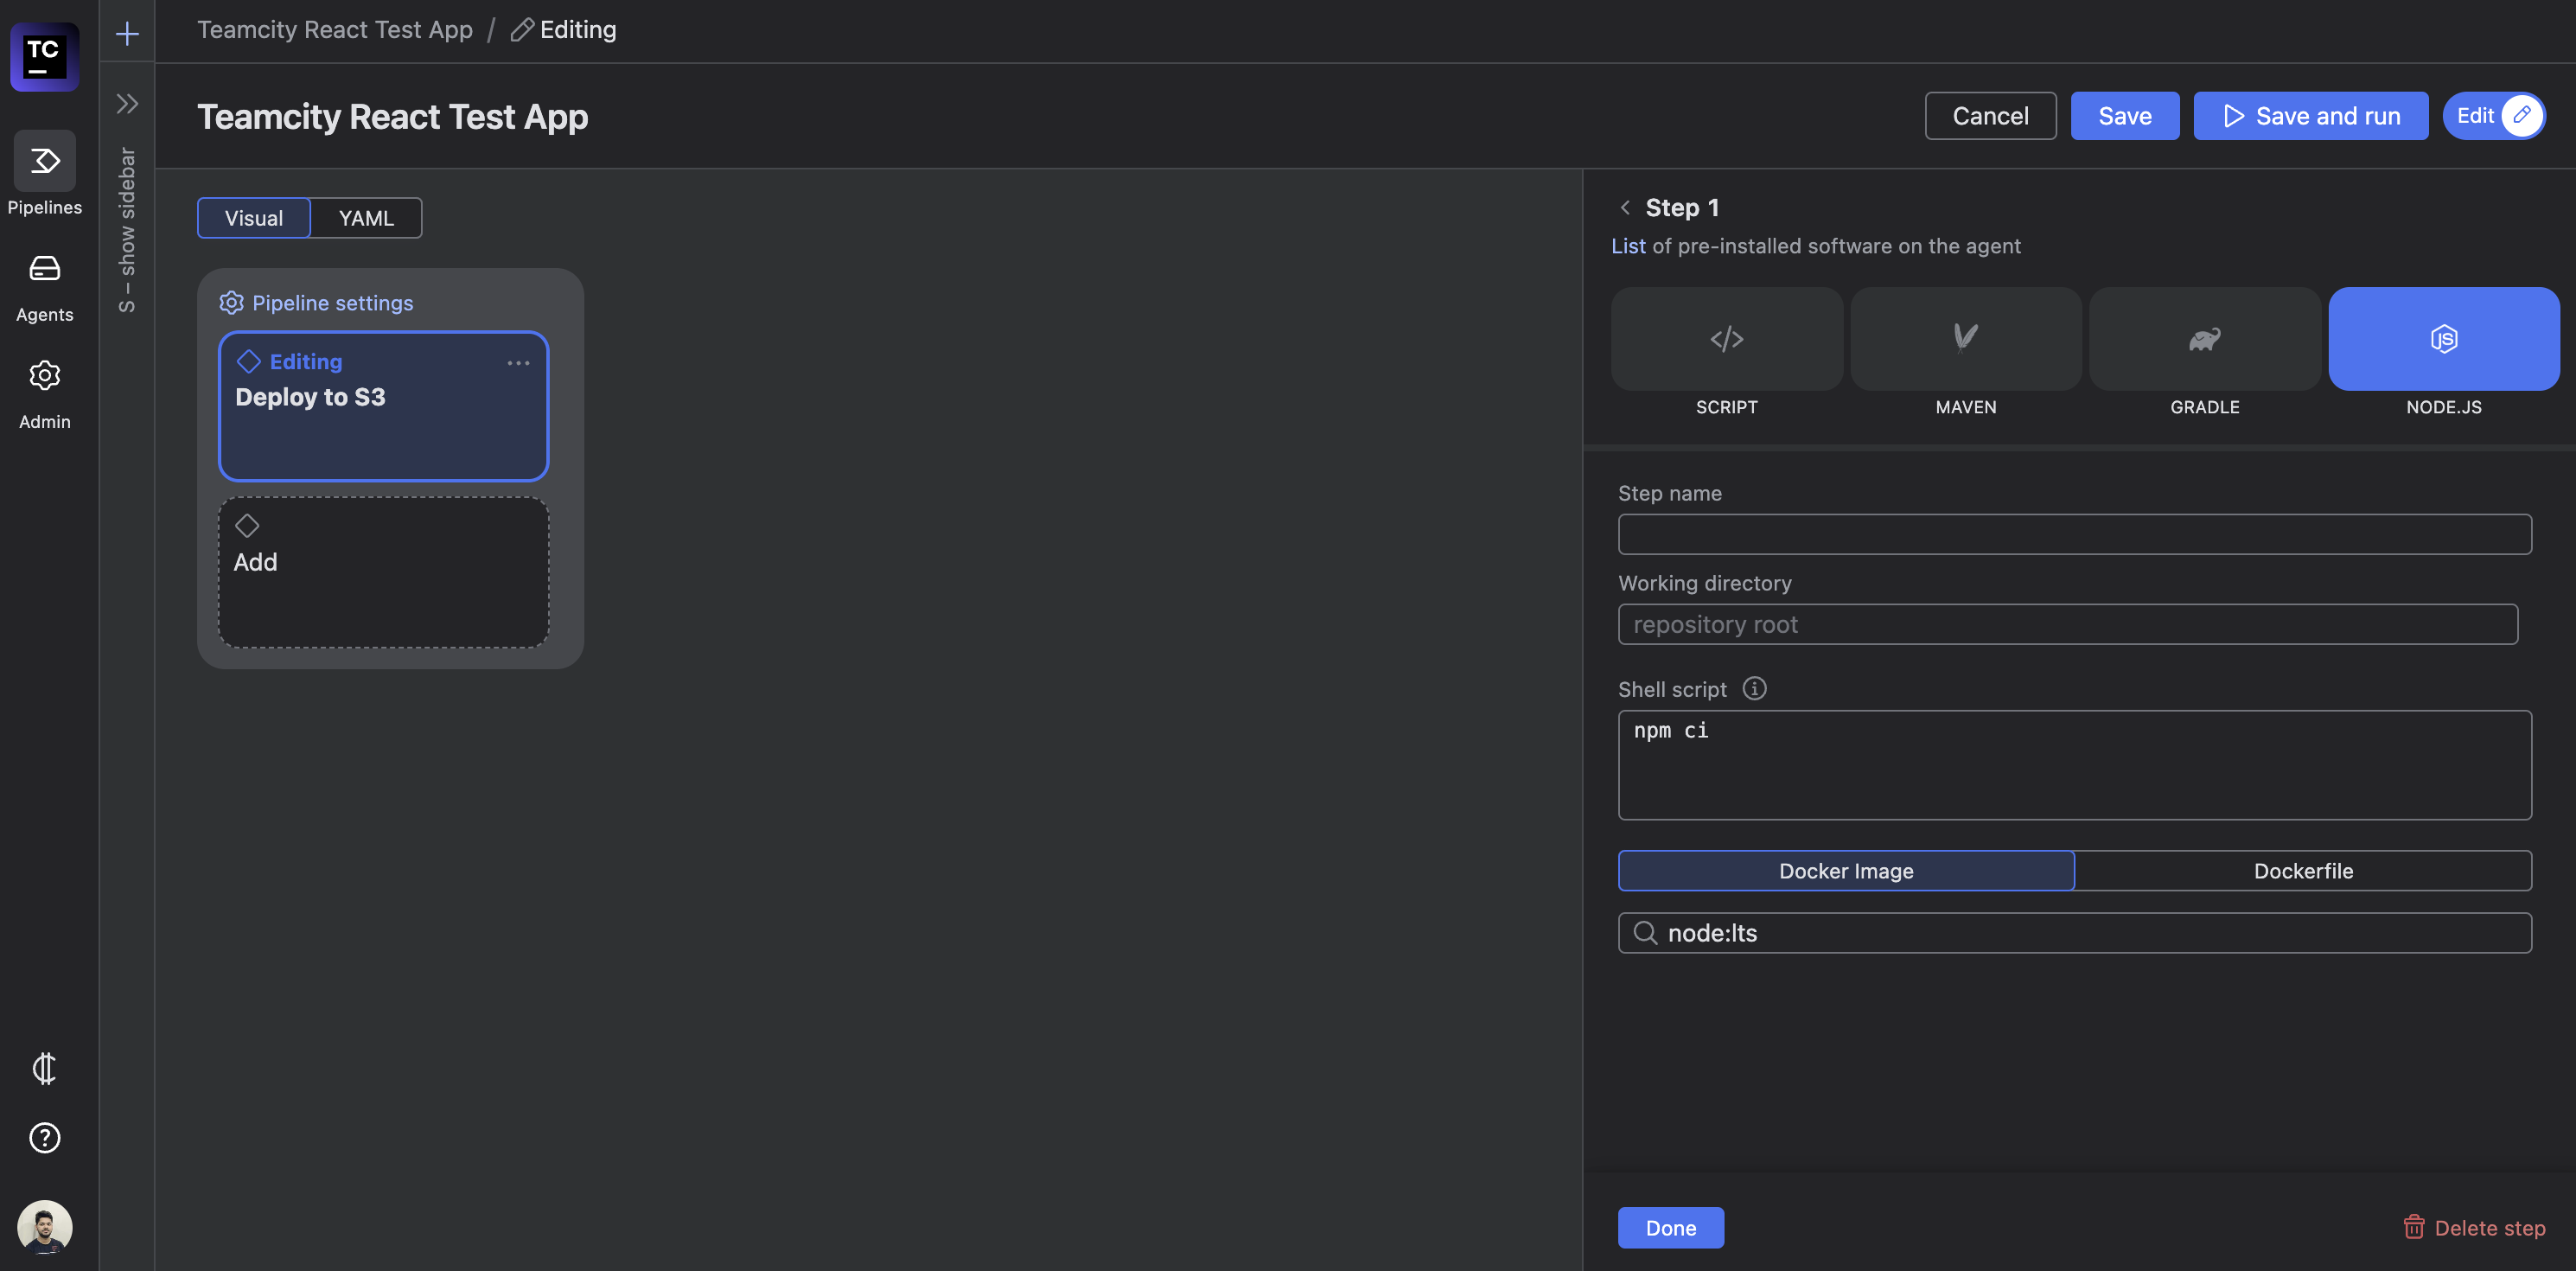
Editing the step details
Enter “Install dependencies” as the step name and yarn for the shell script. Click the blue Done button in the bottom left-hand corner of the sidebar to add the step to the job. Here’s what the job should look like now:

Updated job
Adding the test and build steps
Now, add two more steps to the job with the following details:
- “Run test”, with the shell script
yarn test. - “Build”, with the shell script
yarn build.
Here’s what the job should look like when you’re done adding the two steps:

Updated job with three steps
At this point, you can try out the pipeline to see if it runs the tests and builds the app correctly by clicking the blue Save and run button in the top right-hand corner of the page. Here’s what the output should look like:

Results of the first run
You can expand the sections for each of the steps 1 through 3 to learn more about how they ran. Try expanding step 2 to view the test results. You’ll notice results similar to what you received when you ran the tests locally:

Test execution logs
This indicates that the test and build steps are working correctly.
Preparing the S3 bucket for deployment
As mentioned earlier, you’ll be deploying the built React app to an Amazon S3 bucket. But before you do that, you’ll need to create a new S3 bucket and configure it to serve a static website. You can find detailed instructions on how to do that in this AWS tutorial.
Here’s an overview of the steps:
- Create a new S3 bucket with a name (for example,
myawsbucket-kh) and default settings. - On the bucket details page, go to the Properties tab. Scroll down to find the Static website hosting section and click the Edit button:
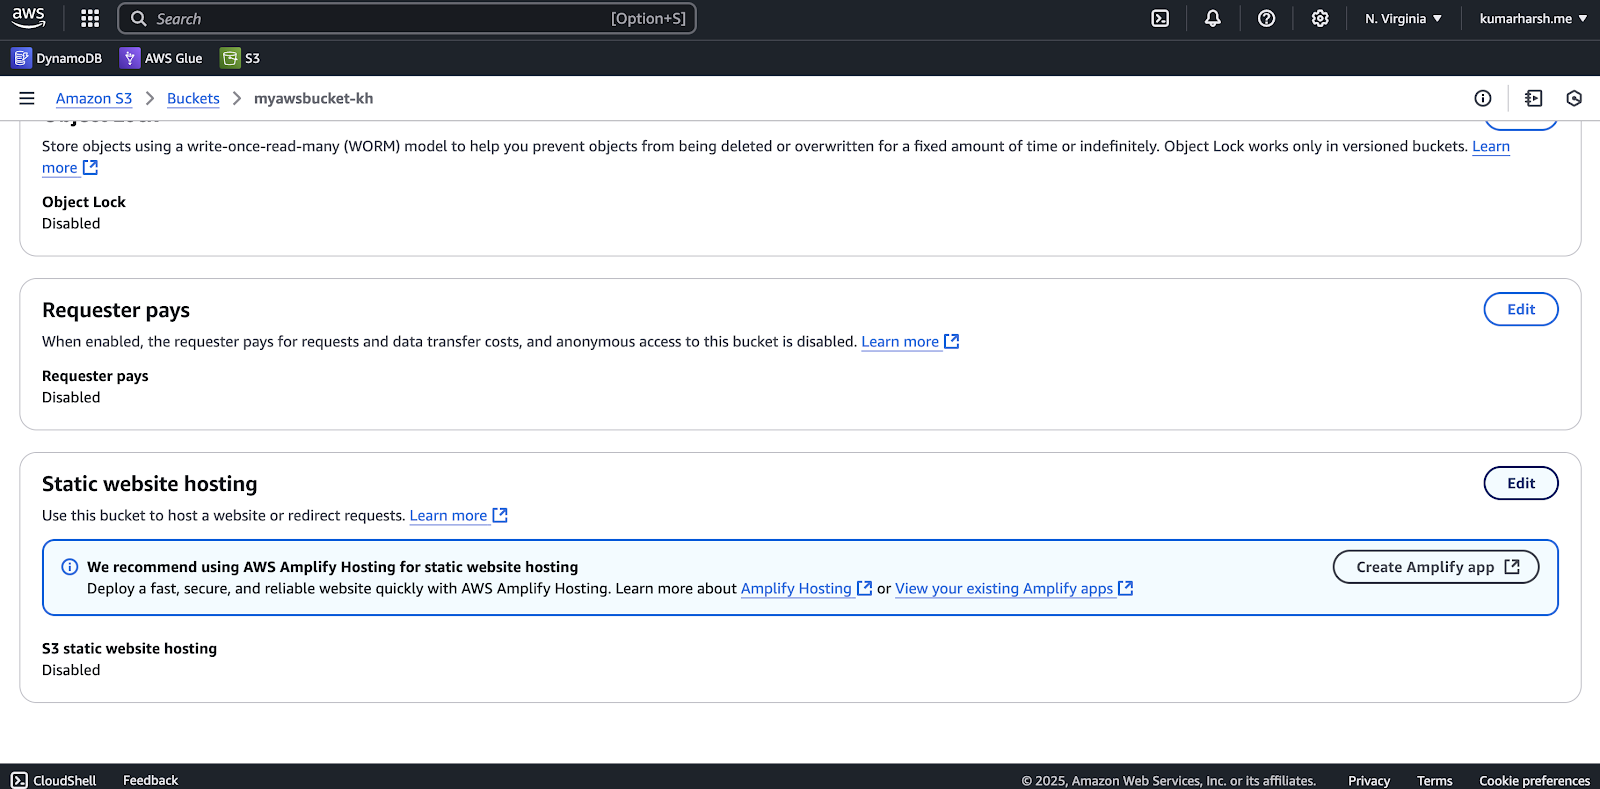
Enabling static website hosting - Choose Enable under Static website hosting and specify the Index document as index.html. Click the Save changes button at the bottom of the page when done. Here’s what the Static website hosting section should look like now:
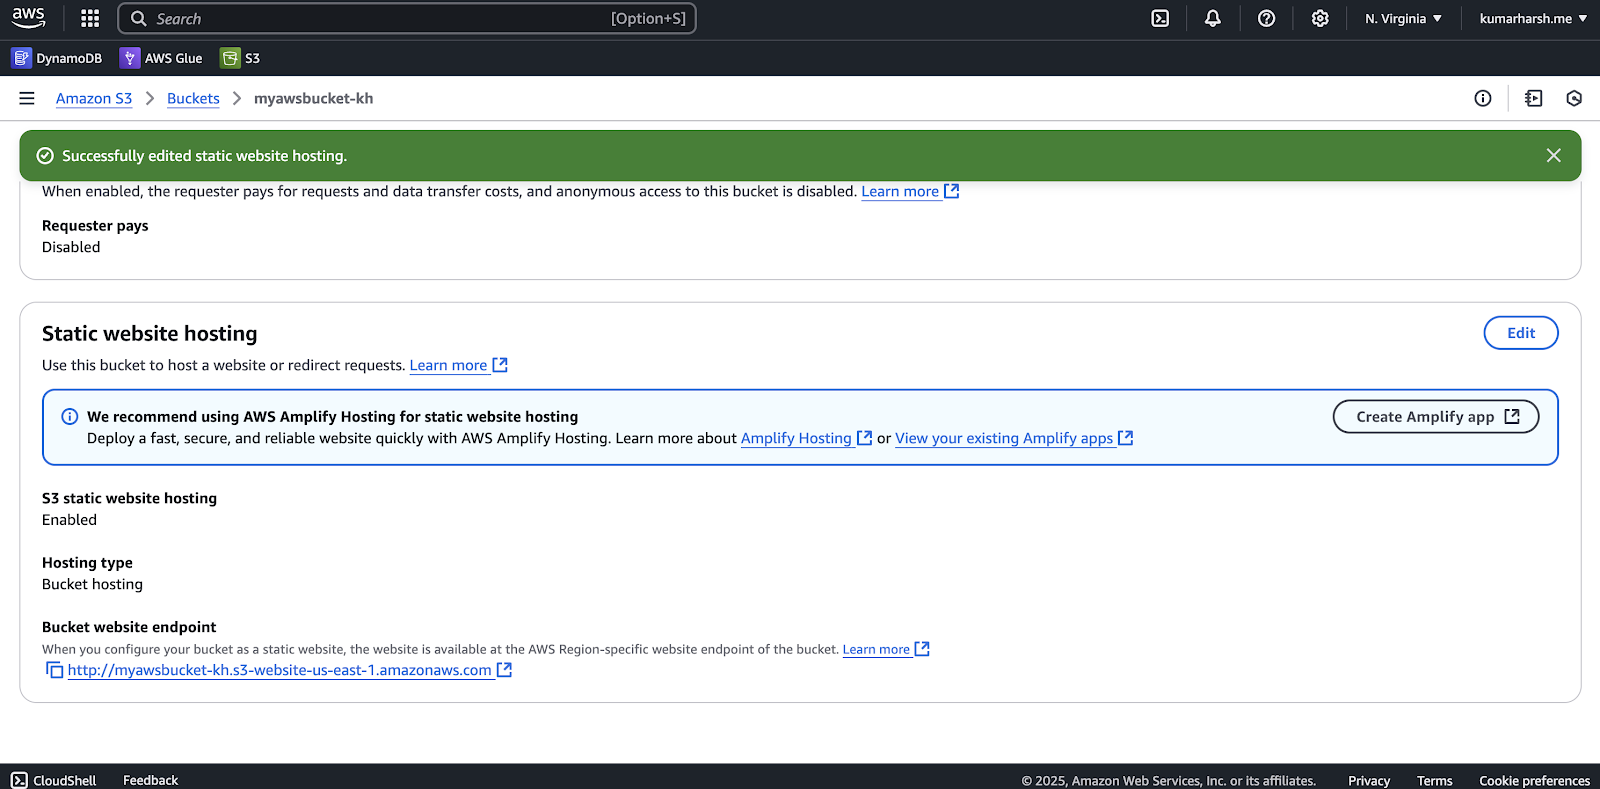
Static website hosting enabled
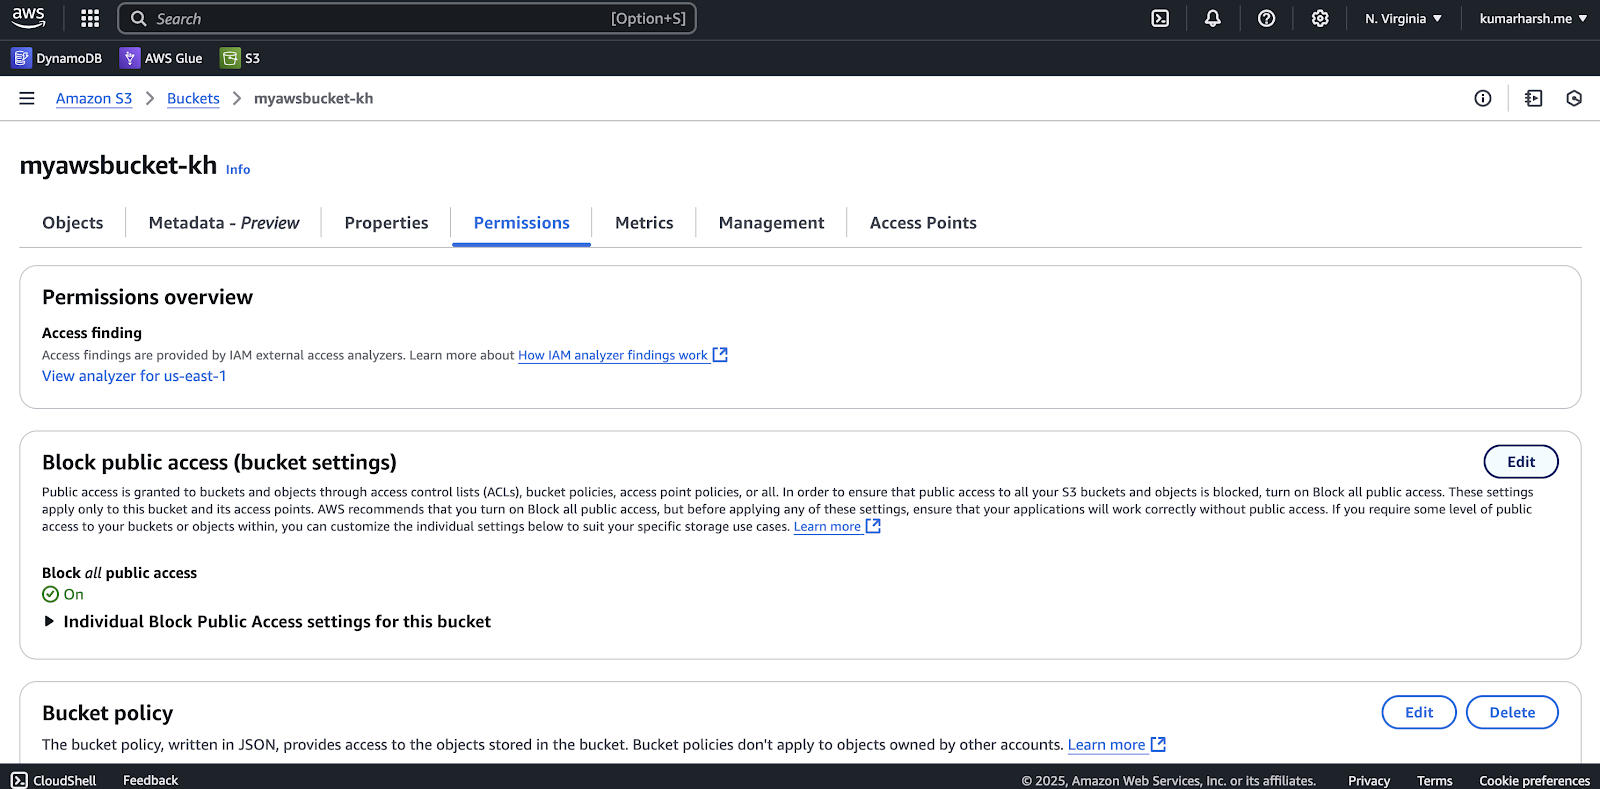
You’ll also find the website endpoint at the bottom of this page. This is where you’ll be able to access the website once it’s deployed. - You also need to enable public access to the bucket. To do that, head over to the Permissions tab from the same page and click the Edit button in the Block public access (bucket settings) section:
Editing public access settings
On the resulting page, you need to uncheck the Block all public access option and click the Save changes button in the bottom right-hand corner: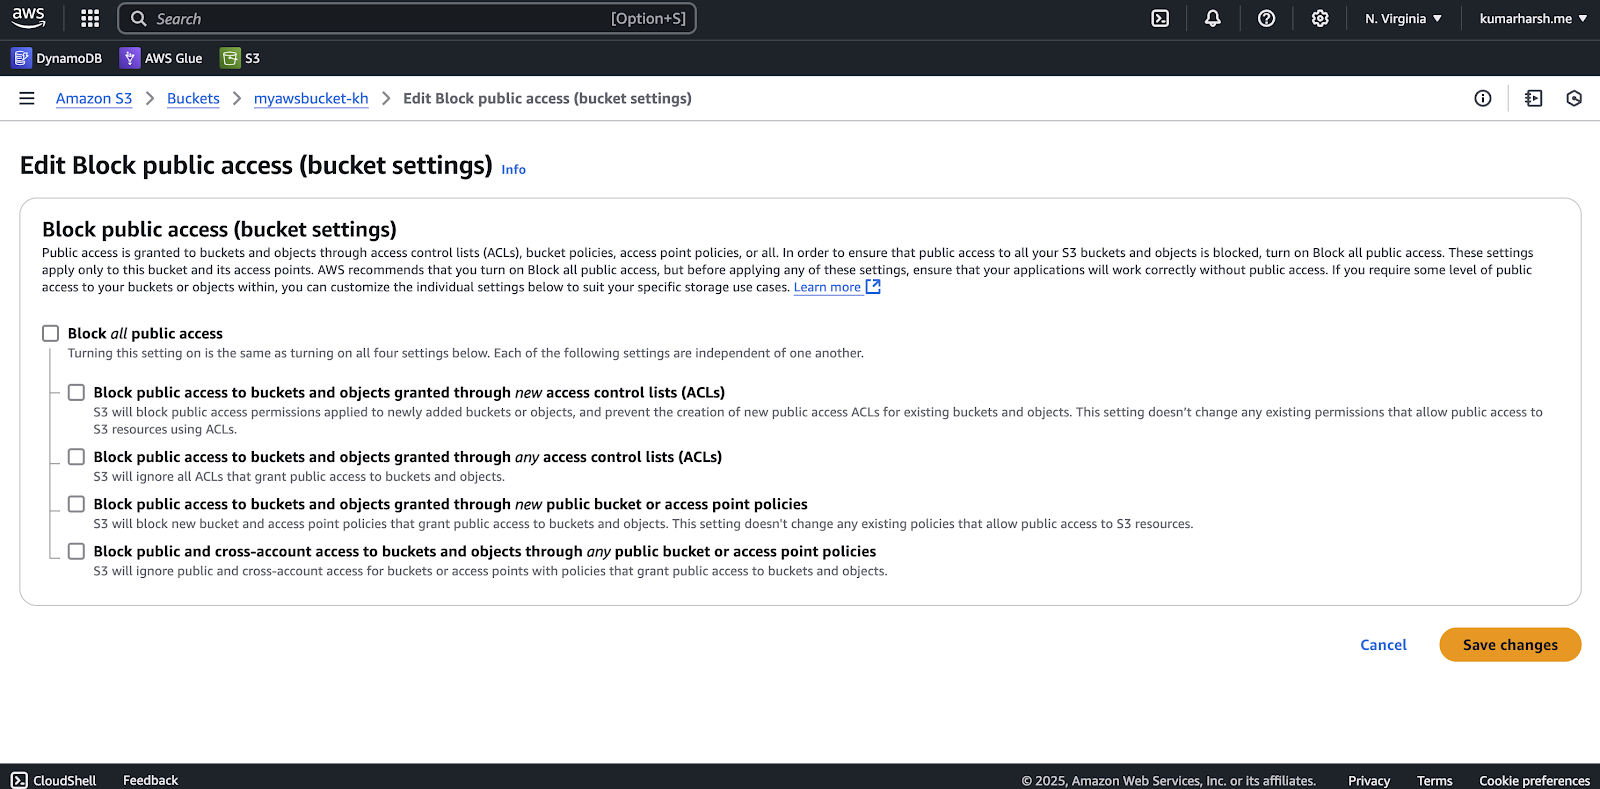
Enabling public access
Once you’ve enabled public access, you can start uploading files to this bucket and access the website at the URL you retrieved earlier.
Copy and store the S3 bucket name somewhere safe. You also need to generate an AWS access key ID and secret. Before you do that, it’s best to create a dedicated AWS IAM user for the CI/CD pipeline to avoid exposing your admin user’s privileges unnecessarily.
To do that, navigate to the AWS IAM Users page via your AWS console:

Users page via the AWS IAM console
On this page, click the orange Create user button to create a new user. Feel free to give it any name you like. For permissions, choose Attach policies directly under Permission options and search for and add the AmazonS3FullAccess policy to the user. Here’s what the user should look like on the review page:

Reviewing the newly proposed user
Click the Create user button in the bottom right-hand corner of the page. Once the user is created, click its name on the Users page to view its details:

Viewing the newly created user’s details
Here’s what the user details page will look like:

User details
Click the Security credentials tab and scroll down to find the Access keys section:

Finding the access keys section
Click the Create access key button. On the page that opens, choose Command line interface (CLI) under the Use case and check the confirmation checkbox at the bottom of the page before clicking the Next button:

Creating the access key
You can skip adding tags to the access key and click the Create access key button:

Skipping tags and creating the access key
The next page will display the access key and the secret access key values. Copy them and store them safely. You’ll use them in the next step of the pipeline to upload built artifacts to the S3 bucket through the AWS CLI.
You can safely provide your pipeline with the AWS secrets through TeamCity’s secrets. However, the recommended approach to handle infrastructure integration with CI/CD pipelines is to allow administrators to connect and manage cloud platforms while only providing pipelines (and related users) the ability to use those connections as part of the pipeline steps only, with no access to the secret keys or values at all. To learn more about implementing this approach, check out TeamCity’s AWS Connection.
Adding the deploy steps
You now have everything you need to add the deploy steps. To do that, you’ll need to add two more steps to your TeamCity pipeline as you did before.
First, add a step named “Configure AWS credentials.” Set the step type to Script and use the following custom script value:
aws configure set aws_access_key_id "%AWS_ACCESS_KEY_ID%"

aws configure set aws_secret_access_key "%AWS_SECRET_ACCESS_KEY%"
This step uses the AWS CLI to configure your AWS account credentials by accessing the AWS_ACCESS_KEY_ID and AWS_SECRET_ACCESS_KEY TeamCity secrets.
Next, add a step named “Push to S3.” Set its type as Script and add the following custom script value:
aws s3 cp dist s3://%AWS_S3_BUCKET_NAME%/ --recursive
With the AWS CLI properly configured, this step will upload the contents of the dist directory (generated by the build step) to the S3 bucket, using the bucket name stored in the TeamCity secret AWS_S3_BUCKET_NAME.
You can use the AWS CLI directly inside the pipeline because it’s preinstalled on default JetBrains-hosted agents. Here’s a list of all the software resources that you get out of the box when using JetBrains-hosted runners on TeamCity Cloud.
This is what the job should look like when you’re done adding the steps:

Deploy steps added to the pipeline
You’ll notice that the “Deploy to S3” job now shows up in yellow with a warning that says “No compatible agent”. This is because some of the steps in the job rely on pipeline secrets that aren’t defined yet. You can fix that by clicking the Pipeline settings link right above the job and clicking the plus (+) icon to the right of the No Secrets section in the right pane:

Adding secrets to the pipeline
This will show some text input fields in that section that will allow you to add secret names and values. You need to add the following secrets:
AWS_ACCESS_KEY_ID: Your AWS access key.AWS_SECRET_ACCESS_KEY: Your AWS access key secret.AWS_S3_BUCKET_NAME: The name of your S3 bucket.
Once you’ve defined and saved these values, you’ll notice the yellow highlight and warning text are gone:

Pipeline ready to run
You can now click the Save and run button in the top right-hand corner to save and run the updated pipeline. Here’s what the output should look like:

Test run of the updated pipeline
This means that your app was successfully built and deployed to your S3 bucket. You can check the bucket to see if the files were actually added there:

S3 bucket with build artifacts
You can also visit the public website URL you received earlier to view the deployed website:

Deployed website as a result of the pipeline
Since the pipeline was created with a GitHub VCS repository, it’s automatically configured to monitor the main branch for new commits and trigger whenever it detects changes.
Optimizing the pipeline
You can make some tweaks to optimize this pipeline further. Currently, there are only a small number of tests, which shouldn’t cause a performance bottleneck. However, if you end up having a large number of tests, especially integration tests that might require extensive setup and teardown in some cases, the test step could become quite time-consuming.
The pipeline is configured to only proceed to the build and the deploy steps once the tests have been completed successfully.
If you’re setting up a pipeline on a production branch that only receives commits after they’ve been approved as part of a PR or another review process earlier, you can consider running the tests and the build in parallel to save some time.
If either of the two fails, the deploy step can be skipped since you wouldn’t want to deploy a version that doesn’t satisfy internal tests or if you’re not able to generate a successful build for it.
You can use TeamCity’s parallel builds to achieve this. Since this will require you to split the pipeline into multiple jobs, TeamCity can reuse job results to avoid rerunning jobs if the last run was successful and no new changes have been made since then.
This approach saves CI/CD minutes when testing the pipeline with the same commit multiple times. Alternatively, you can configure the pipeline to reupload (without rebuilding) the website to the S3 bucket if needed.
To implement these optimizations, you’ll first need to split the steps from the “Deploy to S3” job into three jobs.
Create build
The Create Build job will just install project dependencies and create the build. For that, you need to add two steps to it: a Node.js step called “Install dependencies” with the command yarn and another Node.js step called “Create build” with the command yarn build. Here’s what the job will look like when you’ve added the steps:

New build job with two steps
You also need to scroll down and configure the artifacts for this job. Since the output of this job will be used by the “Deploy to S3” job to deploy the app to the S3 bucket, you need to click the plus sign icon to the right of the Artifacts section and enter ./dist/* in the input field that pops up:

Updated artifacts path in the build job
Run tests
Now, create another job named “Run Tests” and add two steps: “Install dependencies” (same as before) and another Node step called “Run tests” with the command yarn test. Here’s what the job will look like when you’ve added the steps:

You don’t need to configure any artifacts for this job since it doesn’t generate any output files after running the tests. You could, however, choose to export test results in a file and add another job to the pipeline to upload the results to a test results analysis platform.
Deploy to S3
Finally, you need to update the “Deploy to S3” job to run only after the other two jobs have finished running successfully. Since the other steps are now being run as part of the other two jobs, this job only needs to run the “Configure AWS credentials” and “Push to S3” steps.
Here’s what the steps list will look like when you’ve deleted the first three steps:

New deploy job
You need to check both Create Build and Run Tests under Dependencies since the deploy job depends on those two jobs running successfully. Here’s how the job’s details (and the pipeline) will look when you do that:

Job dependencies configured
Click the dropdown that says Ignore artifacts next to the Create Build checkbox under Dependencies and change its status to Use artifacts:

Artifact usage configured for the job
Scroll down to the Optimizations section, where you’ll see that the Reuse Job Results toggle is on by default:

Reuse job results toggle
Switch the toggle to off. Disabling this ensures that, regardless of whether the repository receives a new commit, each pipeline run updates the last successful build artifacts on the S3 bucket. This can help in situations where the contents of the S3 bucket have been manually modified and you need to restore them to the last successful build state.
Now, you can click the Save and run button and watch as the pipeline tests and builds your code before deploying it to S3.
You can watch as the various steps of the pipeline run in order to build, test, and deploy your React app:

Optimized pipeline run in progress
You can explore the execution logs of each of the jobs and their steps by clicking the job and then navigating through the logs in the right pane. Once the build completes running, here’s what the page will look like:

Successful test results of the optimized pipeline
You can now try pushing a new commit to your forked GitHub repo and watch the pipeline get triggered automatically. Within minutes, it will test, build, and deploy your updated React website to the S3 bucket!
Conclusion
This tutorial explained how to set up an automated deployment pipeline with TeamCity to deploy a React app from GitHub to an Amazon S3 bucket. This process eliminates manual intervention, ensuring your app is deployed faster, more reliably, and with consistent results.
Automating your React app deployment not only saves time but also minimizes errors and improves overall development workflows, allowing your team to focus on delivering value to users.
With tools like Build Approval, TeamCity allows you to add an extra layer of security by ensuring that only authorized builds are deployed to production. Meanwhile, as you saw in the tutorial, build chains (or pipelines) enable you to manage complex workflows by breaking them into smaller, interdependent tasks, making large projects easier to handle.
These features, combined with TeamCity’s comprehensive reporting and automation capabilities, make it a powerful choice for your deployment needs. Make sure to give TeamCity a try for your next React app project!