TeamCity
Powerful CI/CD for DevOps-centric teams
Building and Deploying Microservices With Spring Boot and TeamCity

This tutorial was brought to you by Rajkumar Venkatasamy, draft.dev.
Microservice architecture has become a cornerstone for building scalable and maintainable applications. Microservices allow individual services to be developed, deployed, and scaled independently, resulting in faster delivery cycles and improved fault isolation.
For example, an e-commerce platform can use independent services to handle product catalogs, user authentication, and order management. By breaking large applications into smaller, independent services, organizations can address challenges such as long development cycles, difficulty in scaling specific components, and the risk of a single failure affecting the entire application.
In enterprise applications, microservices make it easier to quickly update and scale specific parts of the system. This allows teams to improve features without affecting the entire application. Automated testing and deployment of service components increase reliability, catching potential issues early and maintaining system stability.
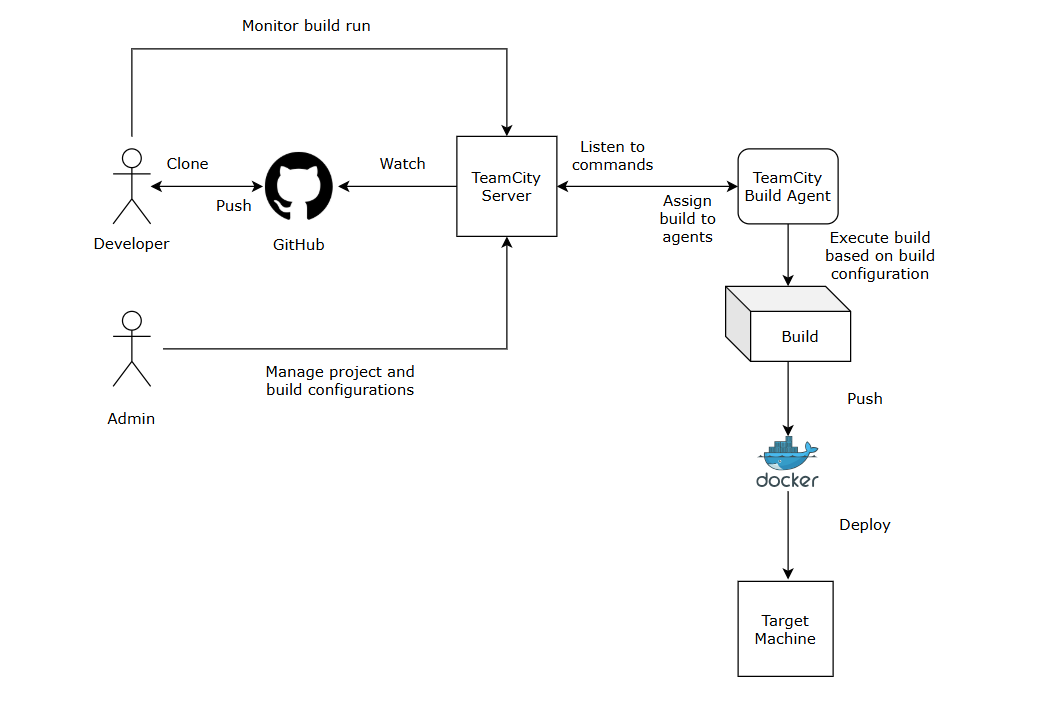
Microservices also streamline the DevOps workflow, allowing for faster time-to-market by reducing the complexity of deployments and leveraging continuous integration and continuous deployment (CI/CD) pipelines. These pipelines play a critical role in managing the lifecycle of microservices from development to deployment, ensuring consistent and efficient delivery processes.
In this tutorial, you’ll learn how to create a microservice using Spring Boot, set up a CI/CD pipeline with JetBrains TeamCity, and automate deployment using Docker.
Microservice overview and prerequisites
Imagine you’re developing an inventory management system where each microservice handles a specific function, such as managing products, orders, or customers. In this tutorial, you’ll build a “Product Service” microservice that provides RESTful APIs to create and list products.
You’ll need the following to complete this tutorial:
- Exposure to Java programming and JDK 21 or higher.
- Familiarity with Spring Boot, particularly using Spring Initializr for generating and working with Spring Boot projects.
- TeamCity. This tutorial uses the on-premises version of TeamCity running on a Windows machine as a Windows service. However, you can use whichever TeamCity version you prefer.
- Git.
- A GitHub account.
- Docker Desktop.
A Docker Hub account and a repository to pull or push the Docker image you’ll build as part of this tutorial.
Set up a new GitHub repo
Create an empty repository on GitHub and clone it to your local machine using this command:
git clone <your GitHub repository path>
You’ll use this GitHub repository later while setting up the build pipeline in TeamCity.
Generate a Java Spring Boot project
Open a browser and paste the following preconfigured URL to load the Spring Boot project in the browser:
https://start.spring.io/#!type=maven-project&language=java&platformVersion=3.4.1&packaging=jar&jvmVersion=21&groupId=com.example&artifactId=demo&name=demo&description=Demo%20project%20for%20Spring%20Boot&packageName=com.example.demo&dependencies=web,data-jpa,h2
You’ll be directed to the Spring Initializr dashboard:
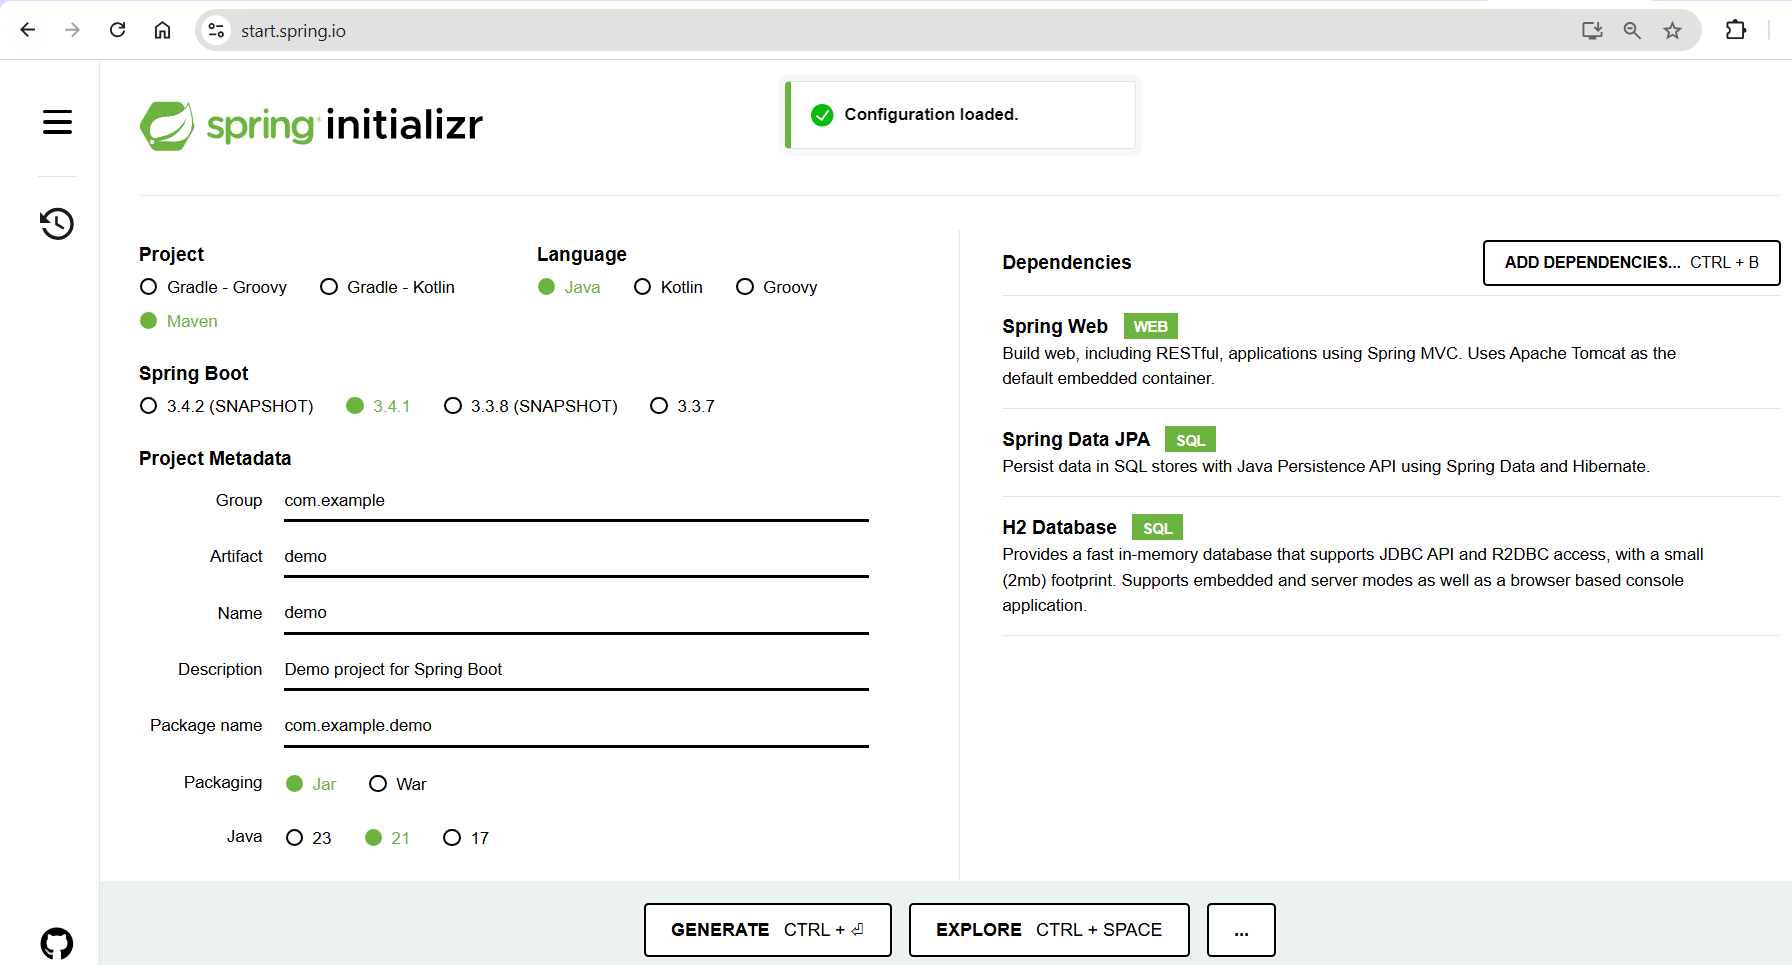
Click GENERATE to download the Spring Boot project. Extract the project in the directory where you cloned your GitHub repository. Then, open the project in your favorite IDE (such as IntelliJ IDEA) and edit the pom.xml file to include the following dependency:
<dependency>
   <groupId>org.mockito</groupId>
   <artifactId>mockito-core</artifactId>
   <scope>test</scope>
</dependency>
Add the following plugin in the same pom.xml file:
<plugin>
   <groupId>org.apache.maven.plugins</groupId>
   <artifactId>maven-surefire-plugin</artifactId>
   <configuration>
      <argLine>-javaagent:${settings.localRepository}/org/mockito/mockito-core/5.14.2/mockito-core-5.14.2.jar</argLine>
   </configuration>
</plugin>
The above changes need to be done in your pom.xml file to bring in the Mockito library, which enables you to use mocking in your unit tests. <scope>test</scope> ensures that Mockito is only used during testing and not included in the final application build, as it’s not required while the application is run.
If you want to explore the pom.xml file in its entirety or reference the source code of this tutorial, you can visit this GitHub repository.
Implement a RESTful API for the product service
When complete, the demo application will have two APIs: one that allows the user to create a product and one that will fetch the created products.
Create a product entity class
Begin by creating an entity class called product.java inside the com.example.demo package under the src directory. This entity class maps the product information to the underlying table definition:
package com.example.demo;

import jakarta.persistence.Entity;
import jakarta.persistence.GeneratedValue;
import jakarta.persistence.GenerationType;
import jakarta.persistence.Id;

@Entity
public class Product {
    @Id
    @GeneratedValue(strategy = GenerationType.IDENTITY)
    private Long id;
    private String name;
    private double price;

    public Product(Long id, String name, double price) {
        this.id = id;
        this.name = name;
        this.price = price;
    }

    public Product() {
    }

    // Getters and setters

    public Long getId() {
        return id;
    }

    public void setId(Long id) {
        this.id = id;
    }

    public String getName() {
        return name;
    }

    public void setName(String name) {
        this.name = name;
    }

    public double getPrice() {
        return price;
    }

    public void setPrice(double price) {
        this.price = price;
    }
}
The @Entity annotation indicates that this is an entity class and is referring to a database table. The @Id annotation indicates the primary key of the product entity and @GeneratedValue holds the technique by which the values of the primary keys will be generated.
Create a product repository class
Next, create a product repository class called ProductRepository.java in the same com.example.demo package. You’ll need the repository class to store, manipulate, and retrieve the persisted product information from the underlying table. The @Repository Spring annotation helps you achieve this:
package com.example.demo;

import org.springframework.data.jpa.repository.JpaRepository;
import org.springframework.stereotype.Repository;

@Repository
public interface ProductRepository extends JpaRepository<Product, Long> {}
Create a product controller class
Create a ProductController.java class inside the same com.example.demo package. Below is the source code for the controller class file, which includes the @Autowired product repository class and calls the methods that create or fetch product information in their respective APIs:
package com.example.demo;


import org.springframework.beans.factory.annotation.Autowired;
import org.springframework.web.bind.annotation.*;

import java.util.List;

@RestController
@RequestMapping("/products")
public class ProductController {
    @Autowired
    private ProductRepository repository;

    @GetMapping
    public List<Product> getAllProducts() {
        return repository.findAll();
    }

    @PostMapping
    public Product createProduct(@RequestBody Product product) {
        return repository.save(product);
    }
}
That’s all for the core application logic.
Create a test class
The next step is to create a test class to test the API methods defined in the controller class.
Create a test class named ProductControllerTest.java under the test directory and within the package com.example.demo. Paste in the following code, which contains the logic to test the product creation and retrieval methods:
package com.example.demo;

import com.fasterxml.jackson.databind.ObjectMapper;
import org.junit.jupiter.api.BeforeEach;
import org.junit.jupiter.api.Test;
import org.mockito.Mockito;
import org.springframework.beans.factory.annotation.Autowired;
import org.springframework.boot.test.autoconfigure.web.servlet.WebMvcTest;
import org.springframework.context.annotation.Bean;
import org.springframework.context.annotation.Configuration;
import org.springframework.http.MediaType;
import org.springframework.test.context.ContextConfiguration;
import org.springframework.test.web.servlet.MockMvc;

import java.util.Arrays;
import java.util.List;

import static org.mockito.ArgumentMatchers.any;
import static org.springframework.test.web.servlet.request.MockMvcRequestBuilders.*;
import static org.springframework.test.web.servlet.result.MockMvcResultMatchers.*;

@WebMvcTest(ProductController.class)
@ContextConfiguration(classes = {ProductController.class, ProductControllerTest.TestConfig.class})
class ProductControllerTest {

        @Autowired
        private MockMvc mockMvc;

        @Autowired
        private ProductRepository repository;

        @Autowired
        private ObjectMapper objectMapper;

        @BeforeEach
        void setUp() {
                Mockito.reset(repository);
        }

        @Test
        void getAllProducts_ShouldReturnProductList() throws Exception {
                // Arrange
                List<Product> products = Arrays.asList(
                        new Product(1L, "Product1", 100.0),
                        new Product(2L, "Product2", 200.0)
                );
                Mockito.when(repository.findAll()).thenReturn(products);

                // Act & Assert
                mockMvc.perform(get("/products"))
                        .andExpect(status().isOk())
                        .andExpect(jsonPath("$.length()").value(2))
                        .andExpect(jsonPath("$[0].name").value("Product1"))
                        .andExpect(jsonPath("$[1].name").value("Product2"));
        }

        @Test
        void createProduct_ShouldReturnSavedProduct() throws Exception {
                // Arrange
                Product product = new Product(1L, "NewProduct", 150.0);
                Mockito.when(repository.save(any(Product.class))).thenReturn(product);

                // Act & Assert
                mockMvc.perform(post("/products")
                                .contentType(MediaType.APPLICATION_JSON)
                                .content(objectMapper.writeValueAsString(product)))
                        .andExpect(status().isOk())
                        .andExpect(jsonPath("$.id").value(1))
                        .andExpect(jsonPath("$.name").value("NewProduct"))
                        .andExpect(jsonPath("$.price").value(150.0));
        }

        @Configuration
        static class TestConfig {
                @Bean
                public ProductRepository productRepository() {
                        return Mockito.mock(ProductRepository.class);
                }
        }
}
Build the application
Now that the application source code is ready, open a terminal and switch to the project directory containing the entire application code. Execute the following command to compile and build the application:
mvnw clean install
You should see an output similar to the following, indicating that the build has started and completed successfully:
[INFO] Scanning for projects...
[INFO]
[INFO] --------------------------< com.example:demo >--------------------------
[INFO] Building demo 0.0.1-SNAPSHOT
[INFO]   from pom.xml
[INFO] --------------------------------[ jar ]---------------------------------
[INFO]
[INFO] --- clean:3.4.0:clean (default-clean) @ demo —

…
…
…

[INFO] ------------------------------------------------------------------------
[INFO] BUILD SUCCESS
[INFO] ------------------------------------------------------------------------
[INFO] Total time:  9.064 s
[INFO] Finished at: 2025-01-05T10:57:04+05:30
[INFO] ------------------------------------------------------------------------
Test the APIs locally
You can test the APIs locally using any of your favorite API testing tools. To test the product creation, make a POST request to the products endpoint at http://localhost:8080/products with the following request body:
{
    "name": "product-1",
    "price": 14.20
}

You should get this JSON response:
{
    "id": 1,
    "name": "product-1",
    "price": 14.2
}

You can make another similar POST request with the request body below to create another product:
{
    "name": "product-2",
    "price": 20
}
Next, test the product information retrieval API by making a GET request to the products endpoint at http://localhost:8080/products. You should see a response body with the details of the product information created earlier:
[
    {
        "id": 1,
        "name": "product-1",
        "price": 14.2
    },
    {
        "id": 2,
        "name": "product-2",
        "price": 20.0
    }
]
Push the project code to your GitHub repository
To set up a CI/CD pipeline for your product microservice with TeamCity, you need to push your project source code into a version control repository like GitHub. Commit and push your changes to your GitHub repo by executing the following command from a terminal opened in the project directory:
git add .
git commit -am "initial commit"
git push
You’ve now tested your application locally and pushed the source code to GitHub.
Create a project in TeamCity
Let’s move on to integrating your application with TeamCity.
First, ensure that both the TeamCity server and agent services are running. If you’re using Windows, you can execute the following command in a PowerShell terminal:
Get-Service -Name "TeamCity"
You should see this output:
Status   Name               DisplayName
------   ----               -----------
Running  TeamCity           TeamCity Server
Execute the following command:
Get-Service -Name "*BuildAgent*"
You should see this output:
Status   Name               DisplayName
------   ----               -----------
Running  TCBuildAgent       TeamCity Build Agent
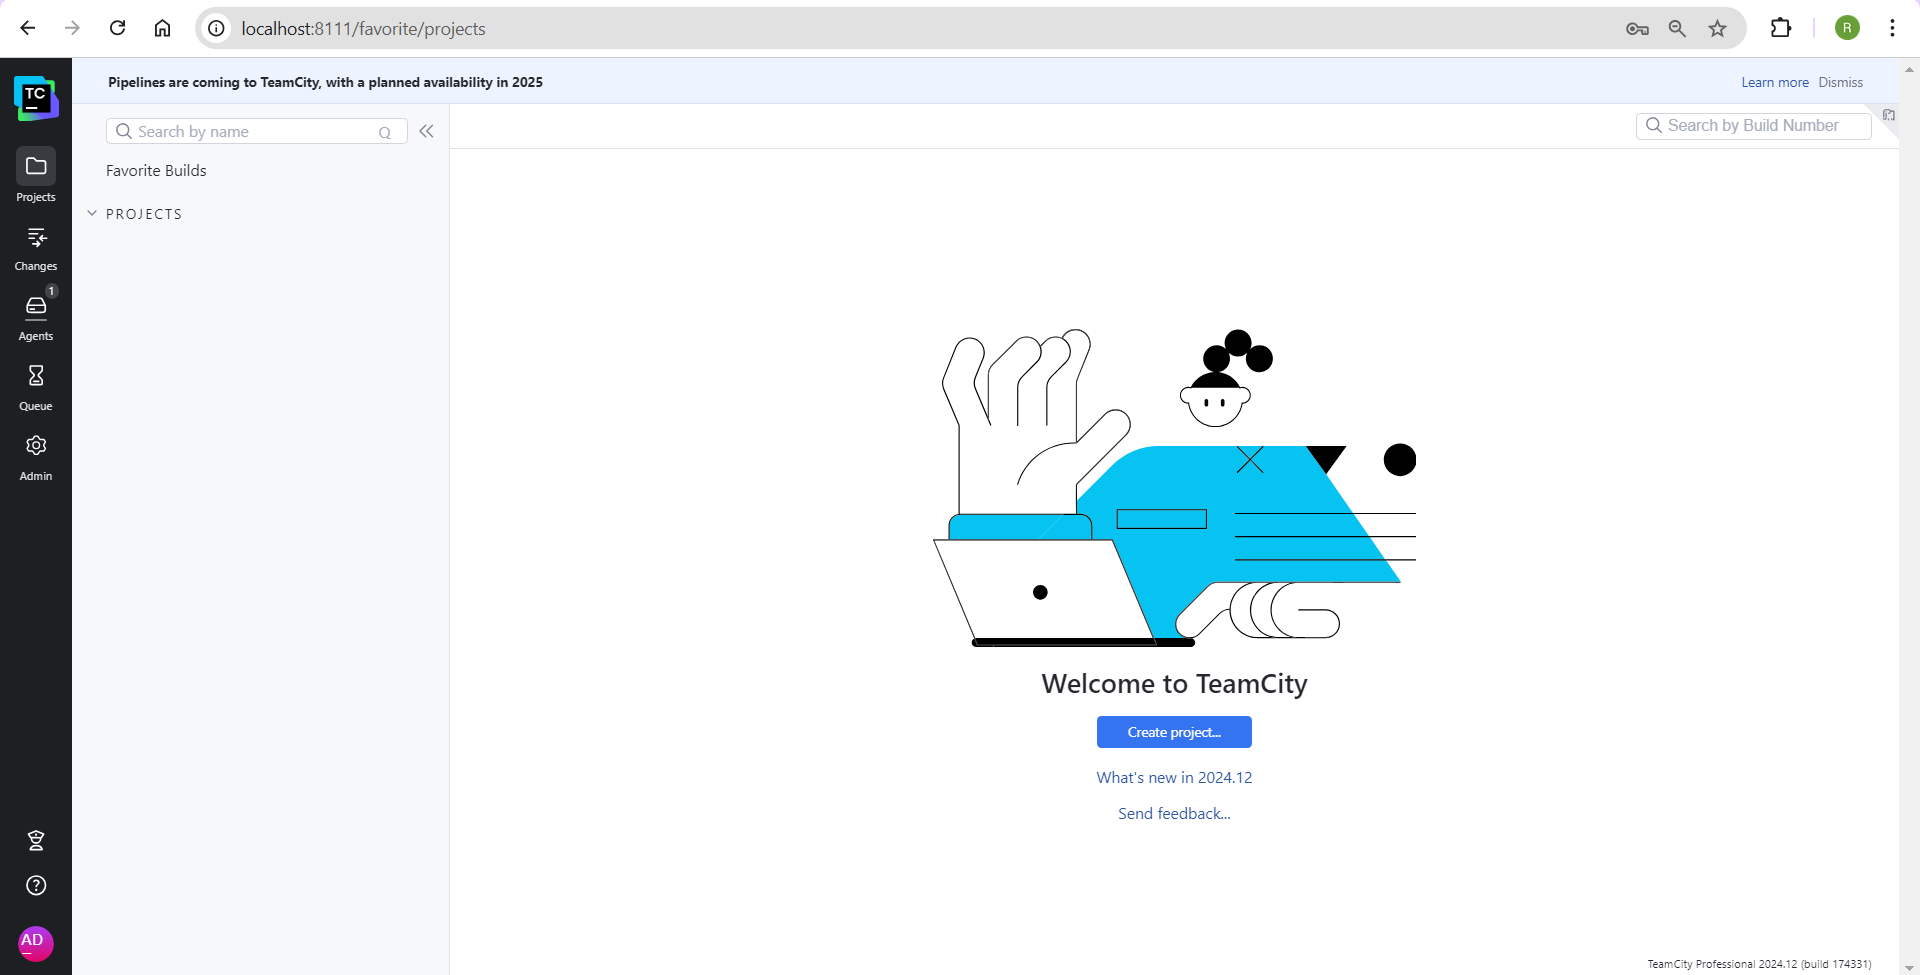
Then, open a browser and access http://localhost:8111/. Log in to the TeamCity portal with the username and password that you specified when installing TeamCity:

Once you’re logged in, click Create project… to create a new project in TeamCity:
Once the TeamCity server is able to connect with your GitHub repository, you should see a screen indicating the connection to the repository has been verified:
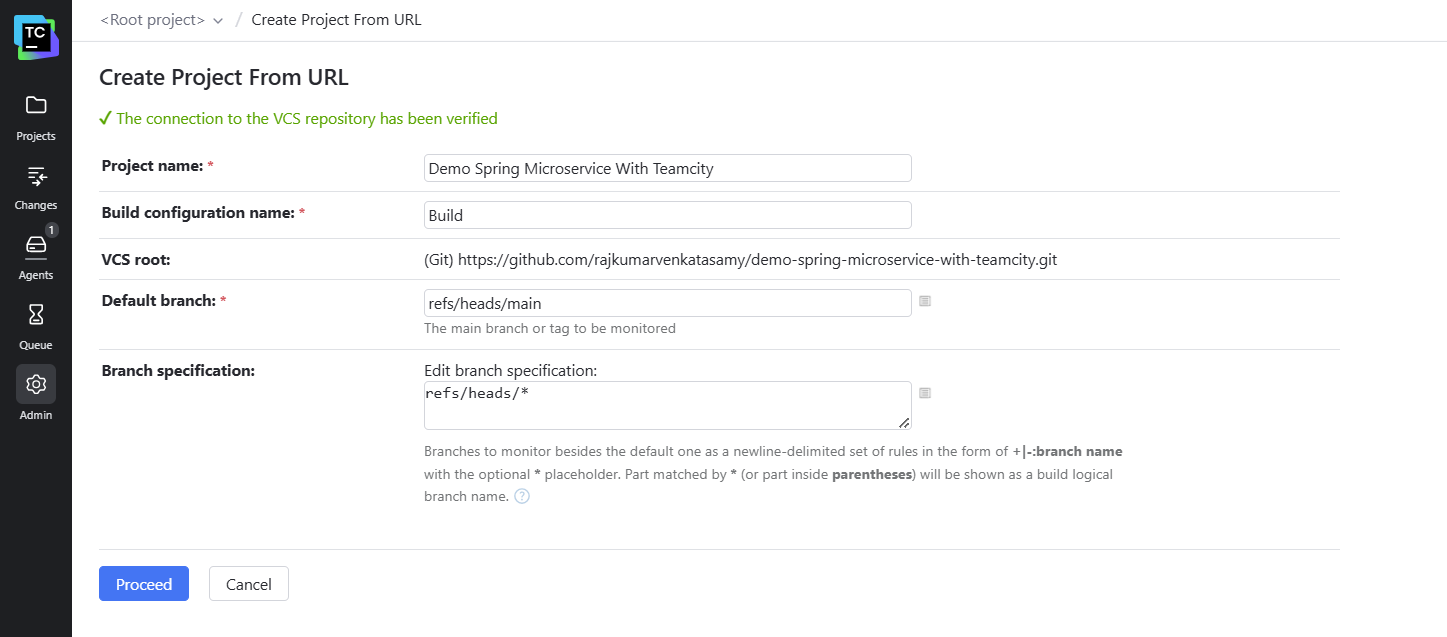
Leave the details as is and click Proceed.
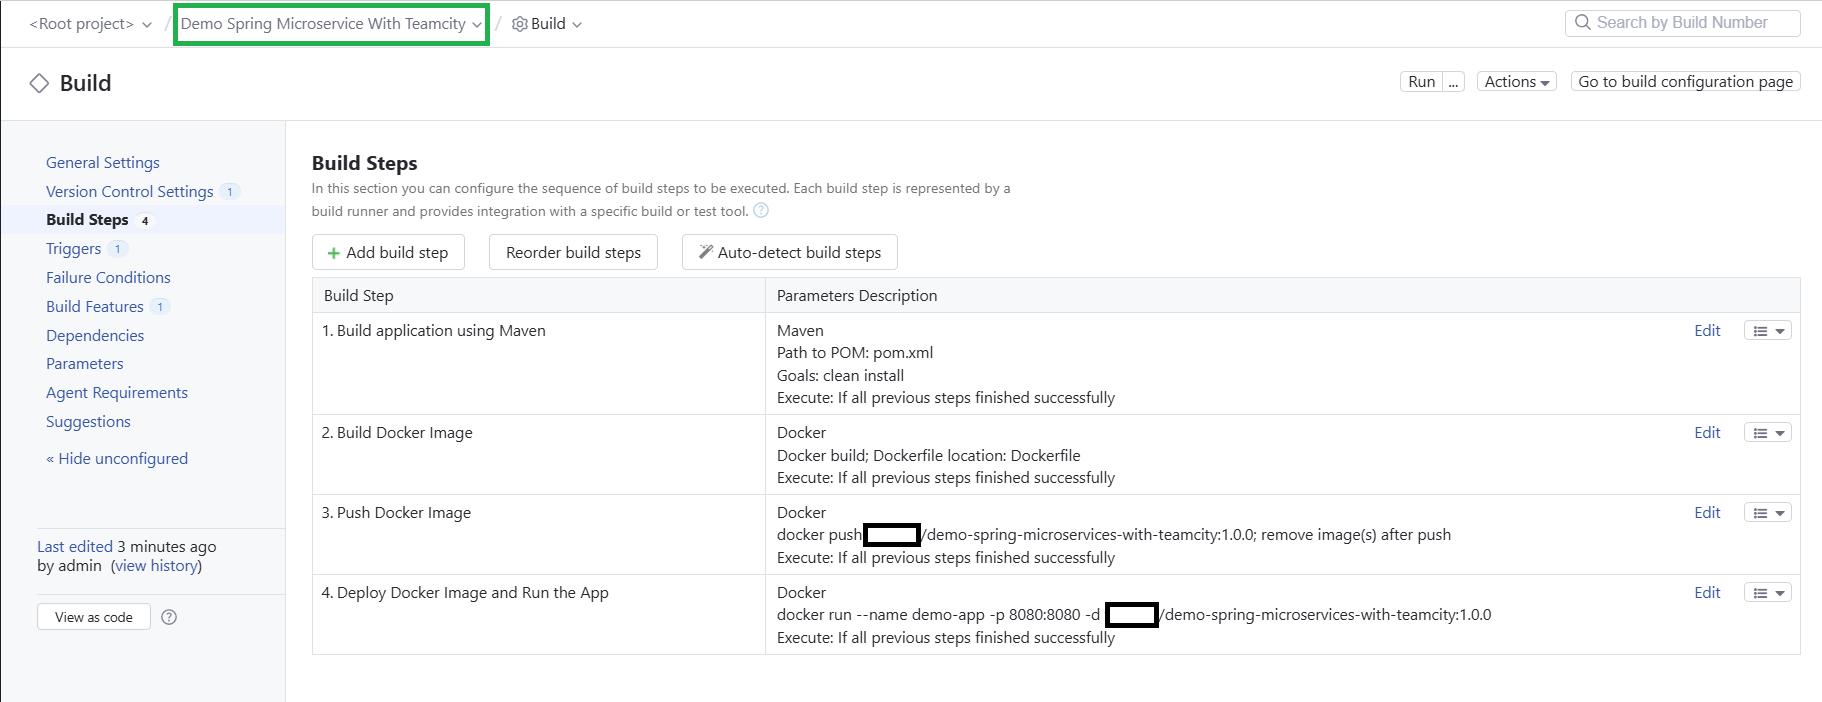
Configure build steps
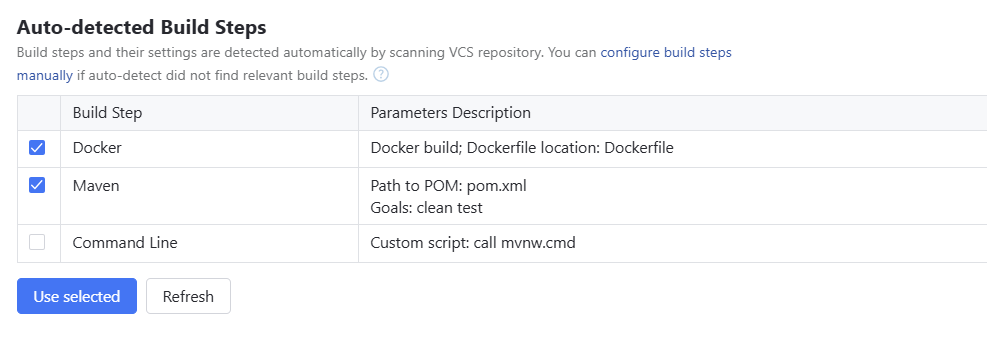
After clicking Proceed, you’ll be redirected to a screen where TeamCity will automatically detect certain build steps based on your project files:
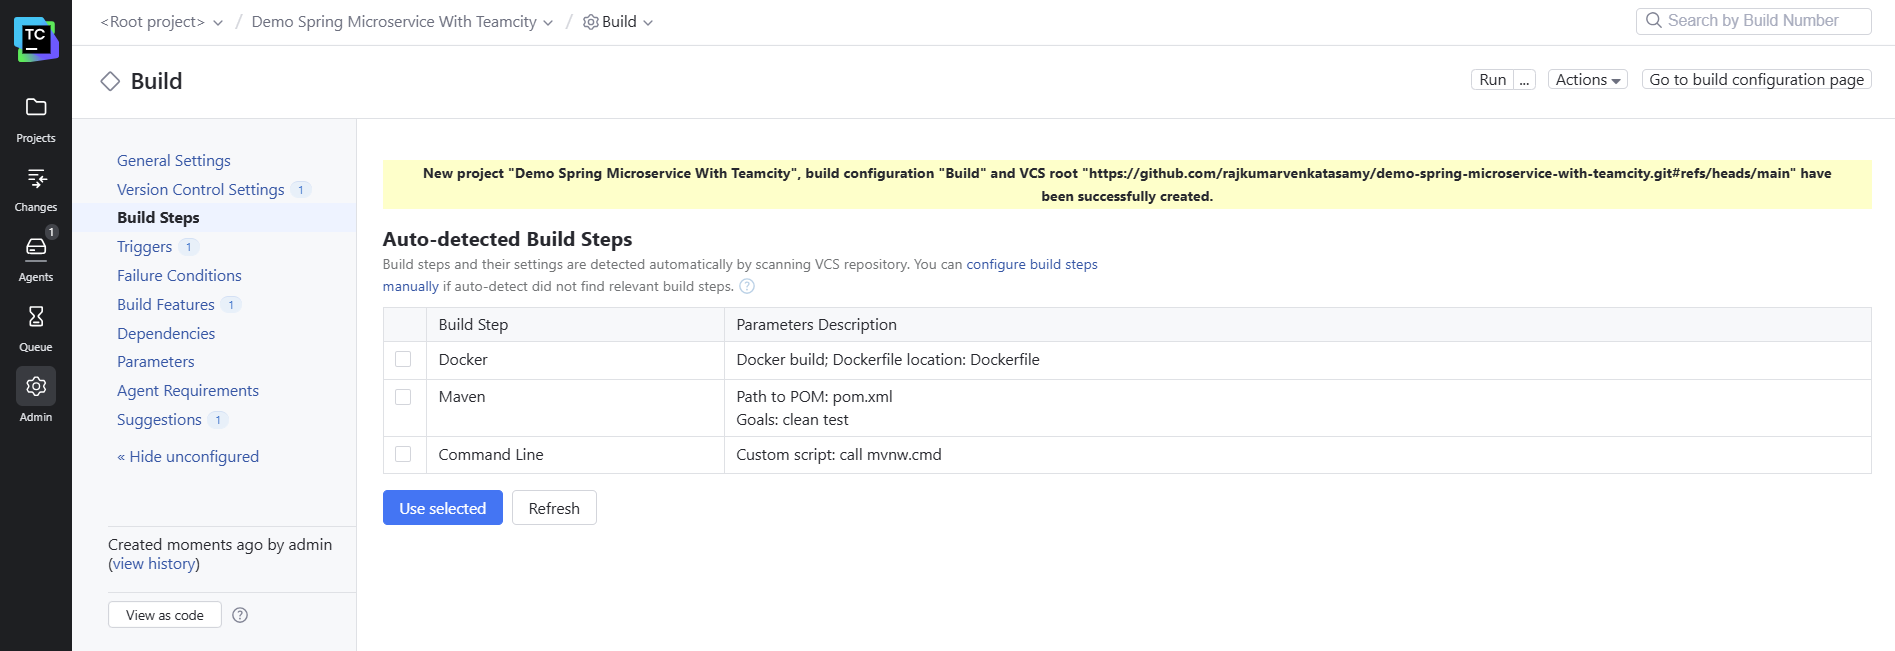
Select the Docker and Maven build steps as shown below and click Use selected:
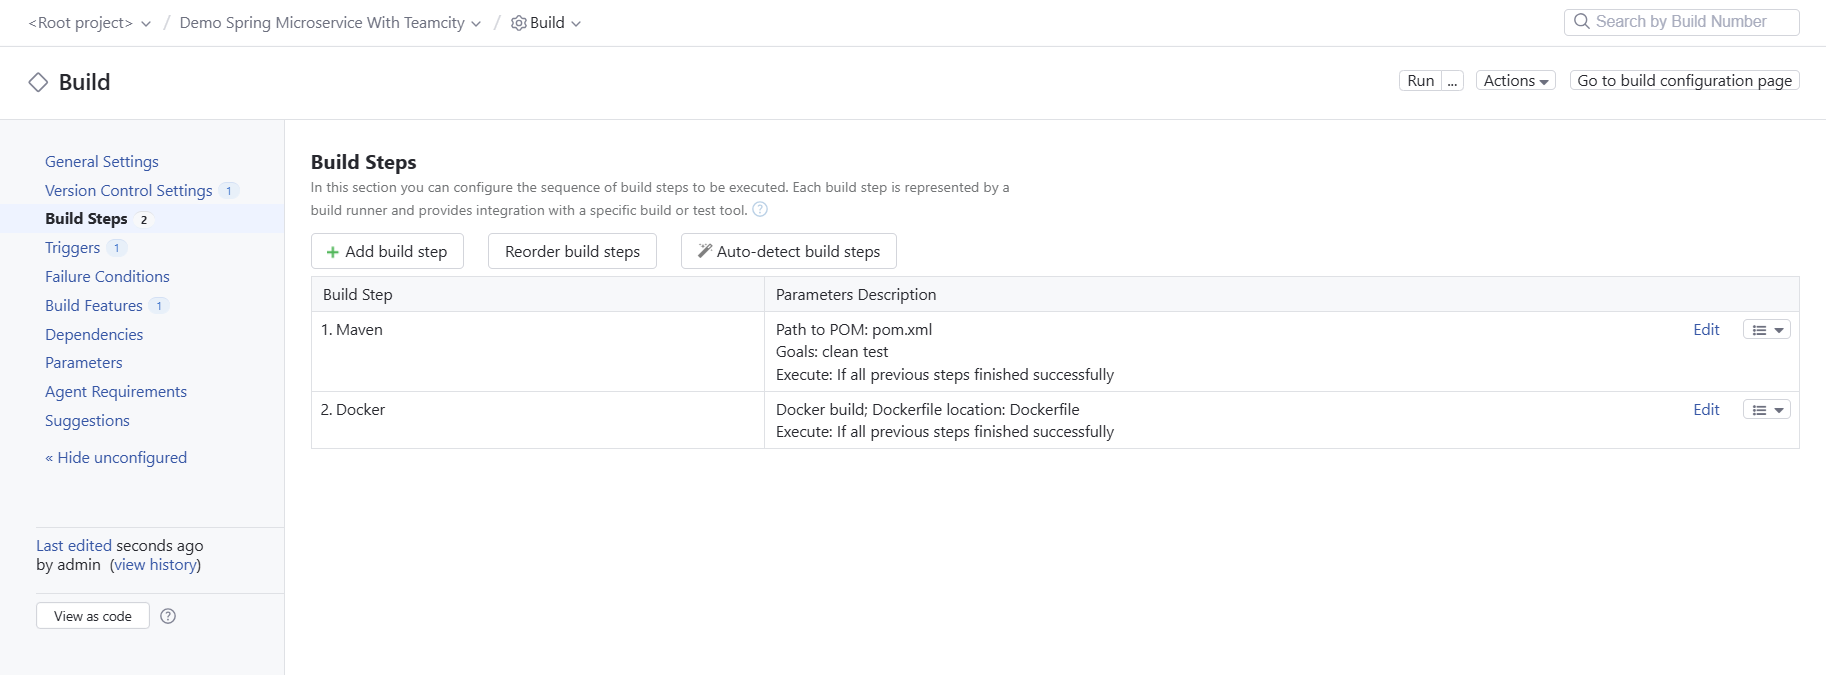
The selected build steps will be added and displayed on the next screen:
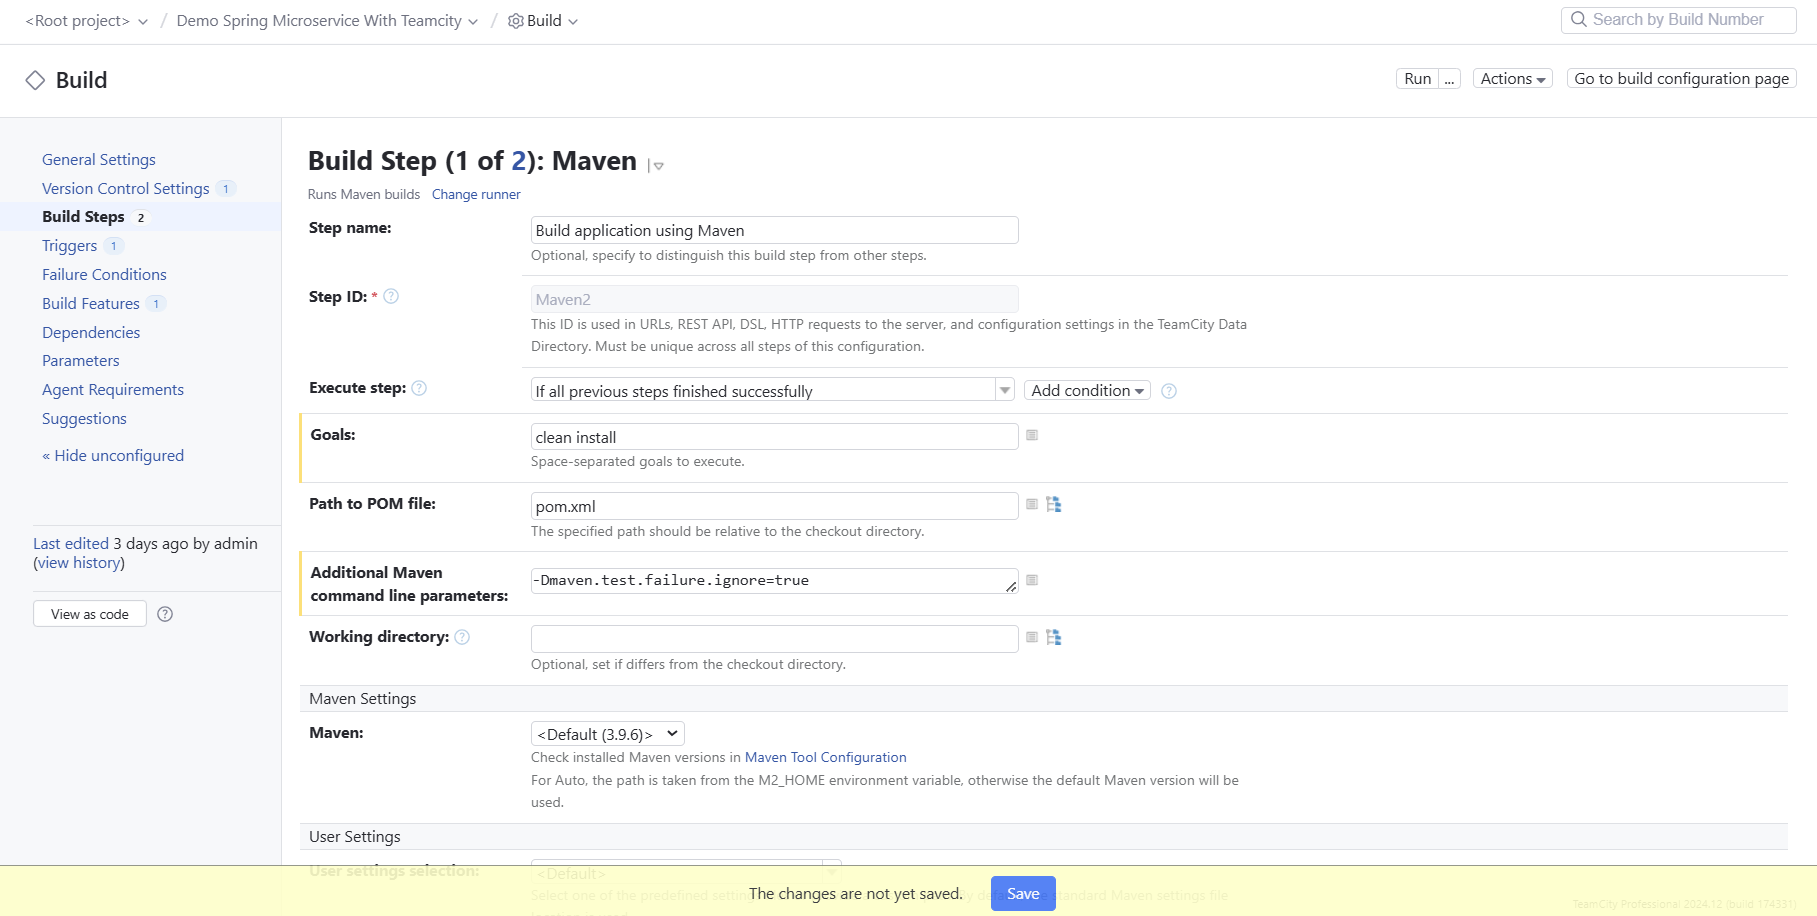
Click Edit on the “Maven” build step to view its details. Here, you can enter “Build application using Maven” (or anything else you like) as the step name. Leave all other settings as their default values and click Save:
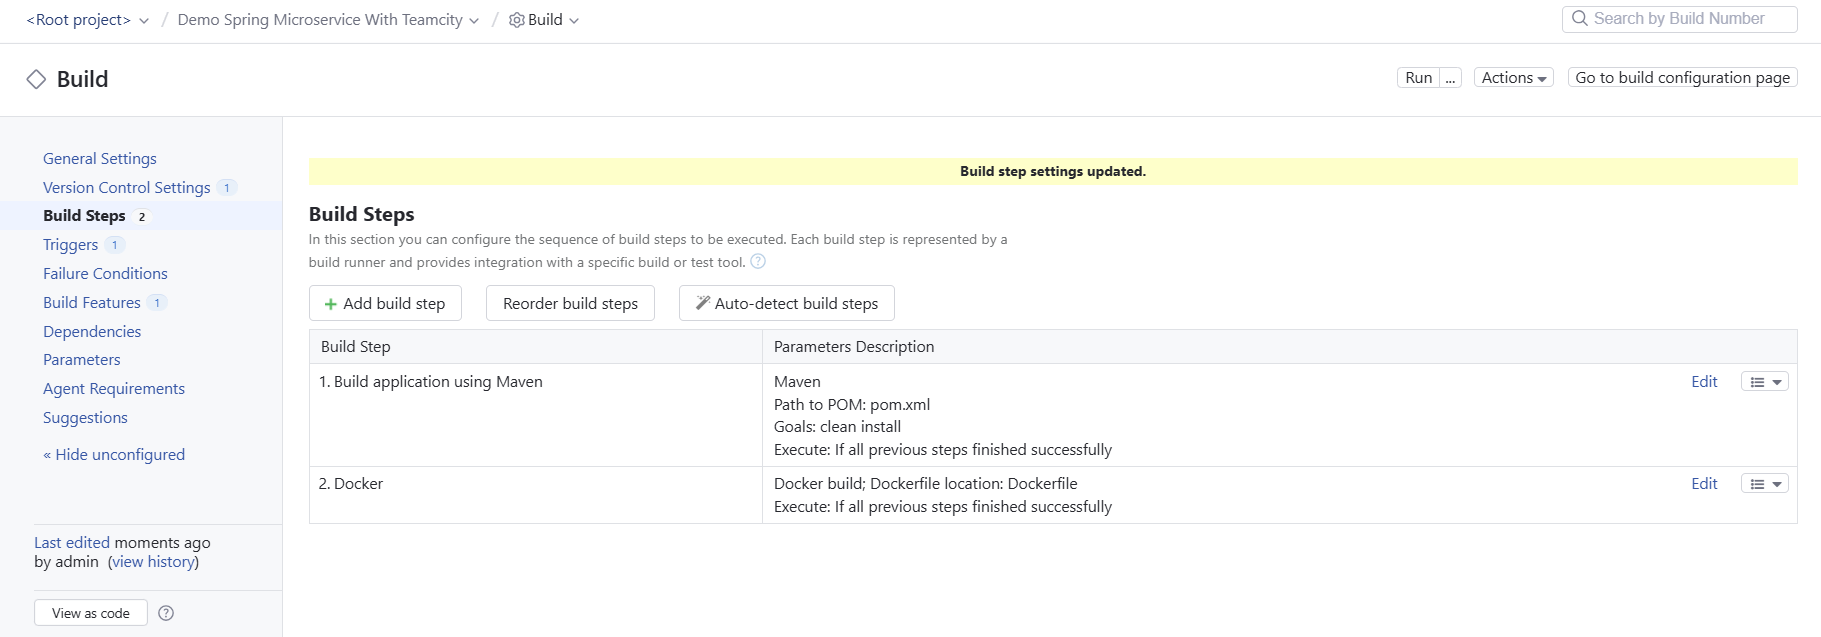
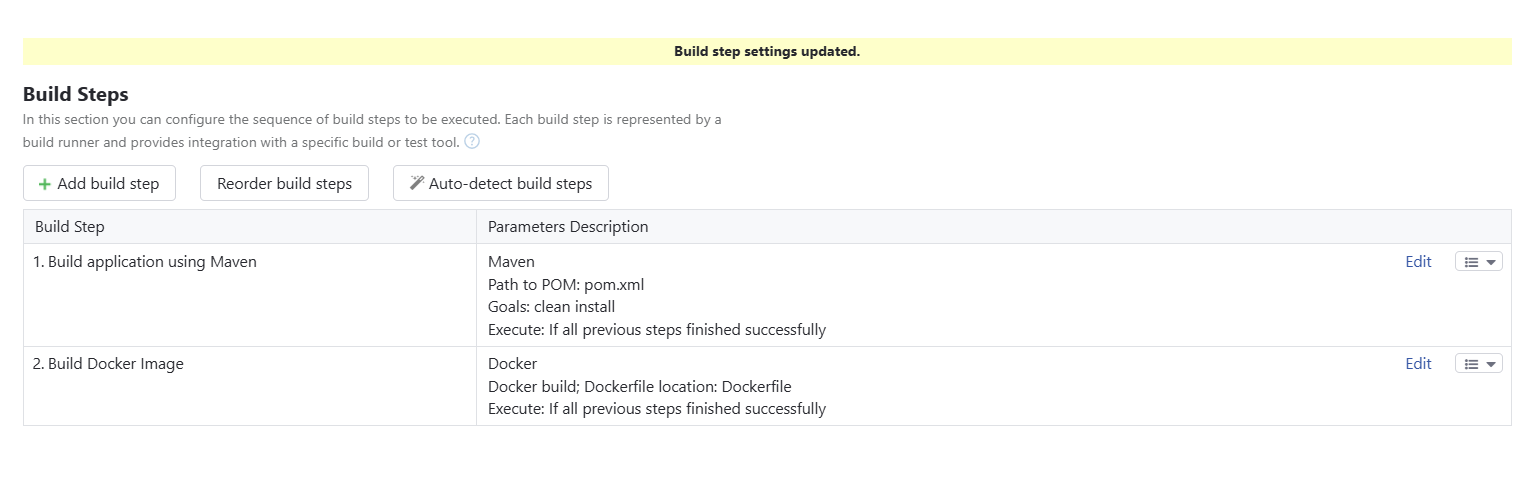
You should see a message indicating that your build step was successfully updated:
Next, click Edit for the “Docker” build step. Enter a custom step name (something like “Build Docker Image”) and fill in the Image name:tag field to build the Docker image with the given name and tag. Leave the other default values as they are and click Save:
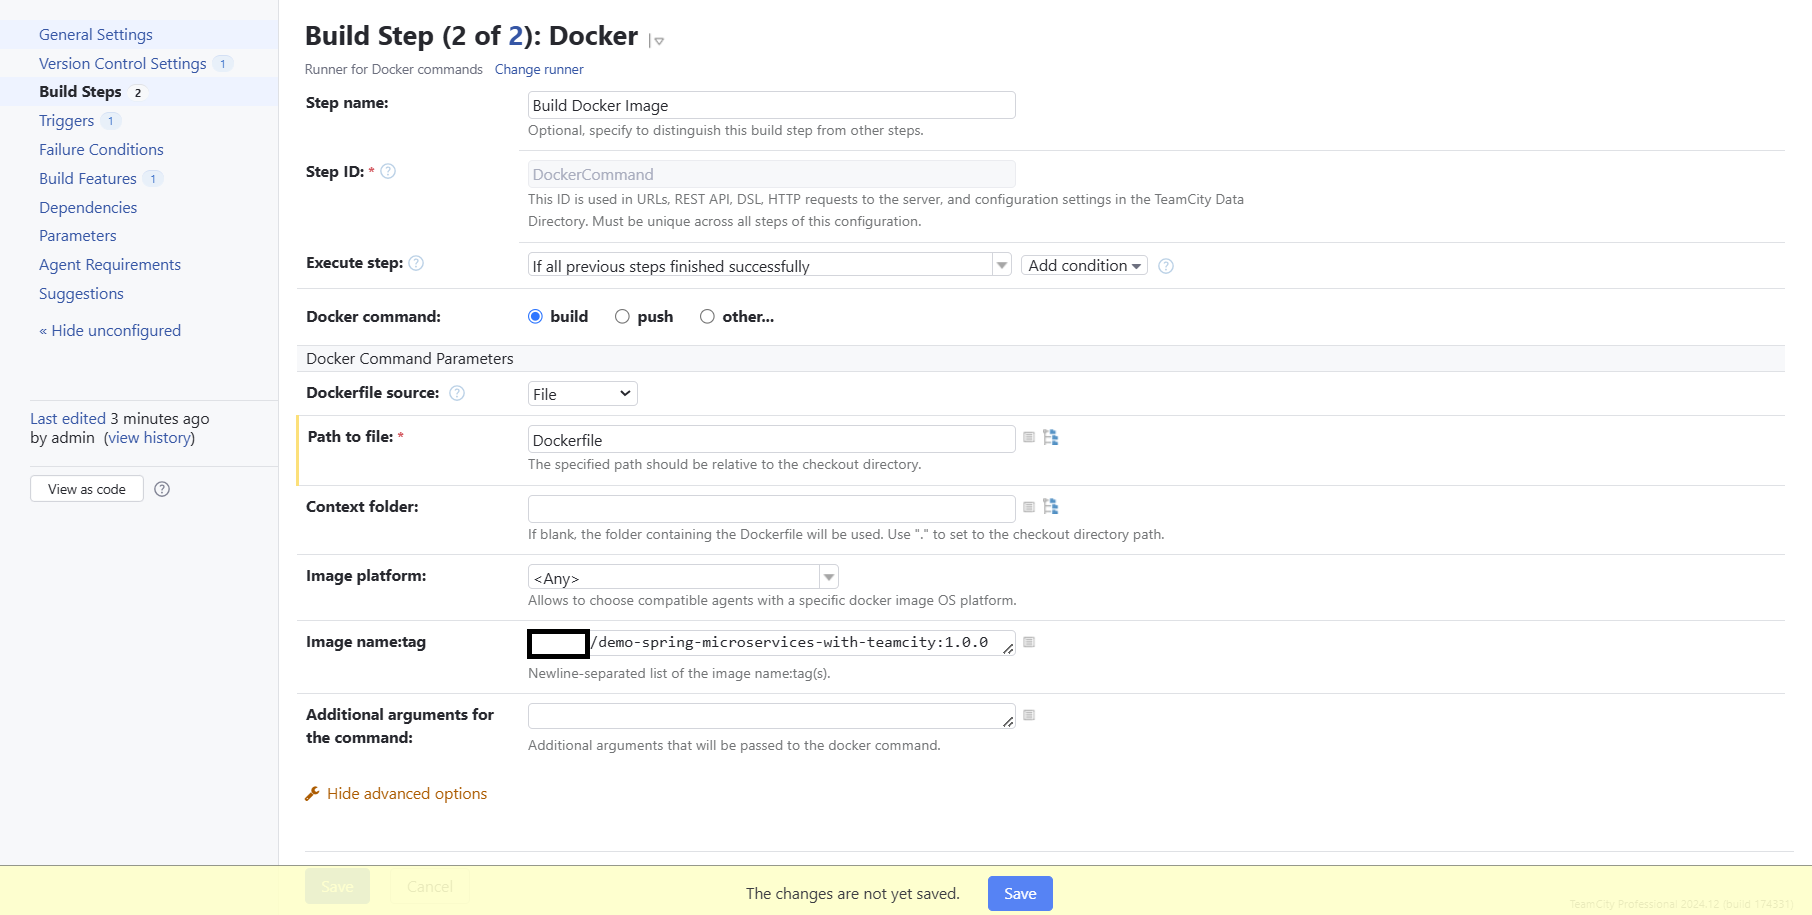
You should see a message indicating that your build step was successfully updated:
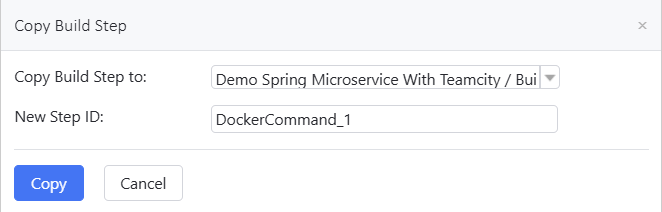
Click the drop-down menu to the right of the second build step and select Copy build step… to duplicate the step:

On the form that appears, accept the default values shown by clicking Copy:
You should see a message confirming your action was successful:
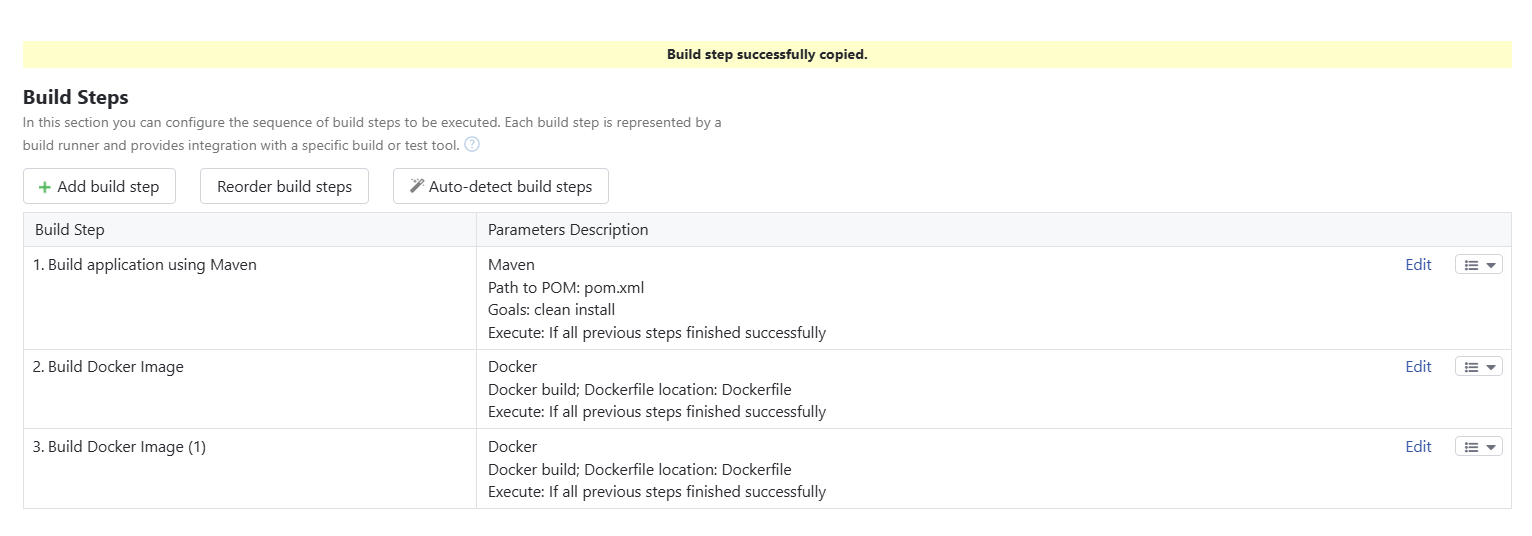
Next, edit the newly copied step. Enter a new step name (something like “Push Docker Image”), then select push as the Docker command option to indicate that the image has to be pushed using the docker push command:
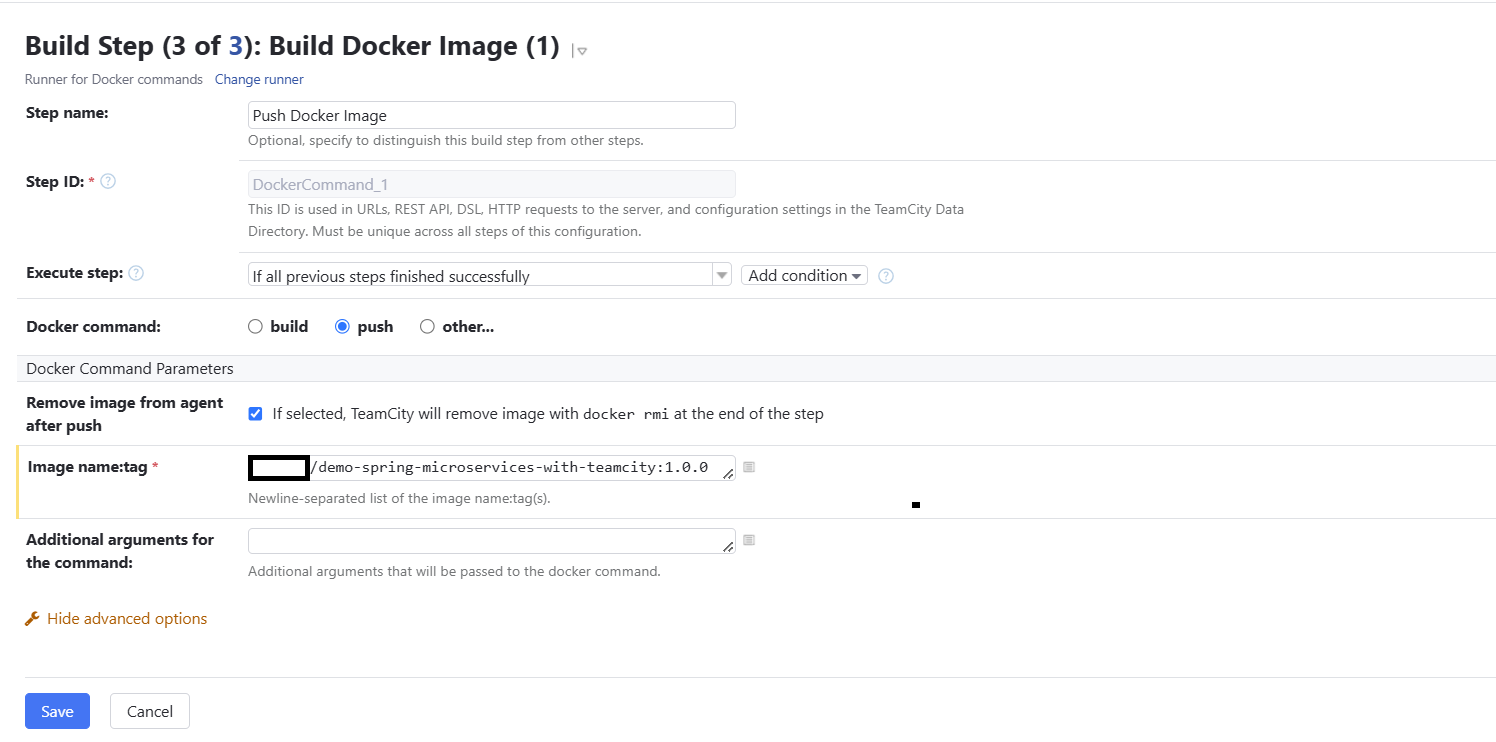
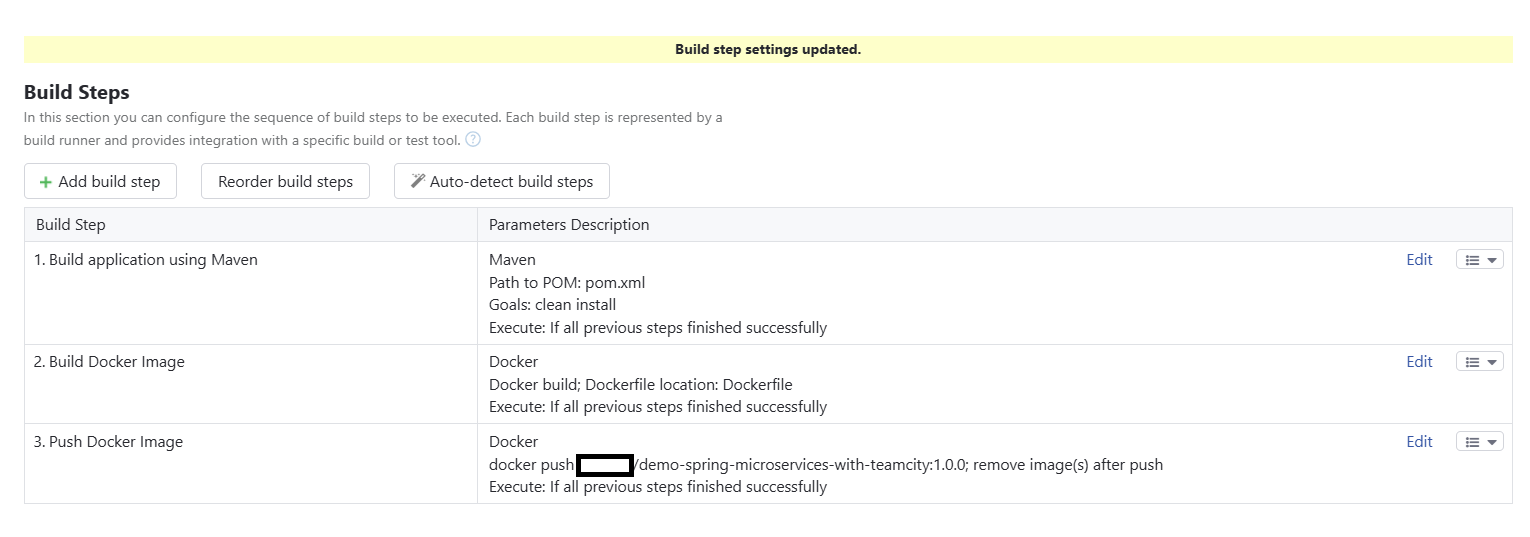
After clicking Save, you should see a message indicating that your edit was successful:
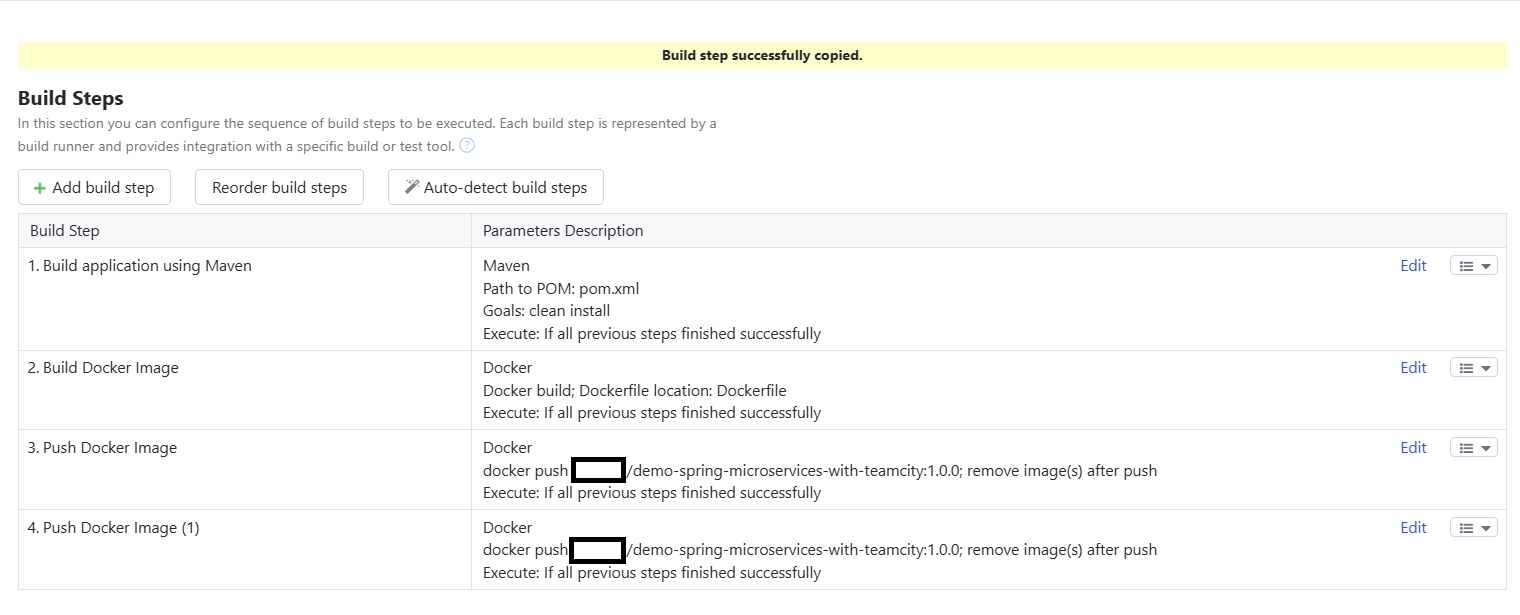
Next, copy the “Push Docker Image” step by repeating the instructions from earlier:
Click Edit next to the newly created step. Enter something like “Deploy Docker Image and Run the App” as the step name, then select other as the Docker command option and enter run in the Command name field. For additional arguments for the command, enter --name demo-app -p 8080:8080 -d <your_docker_repository_name>/<your_image_name>:<your_tag_name>.
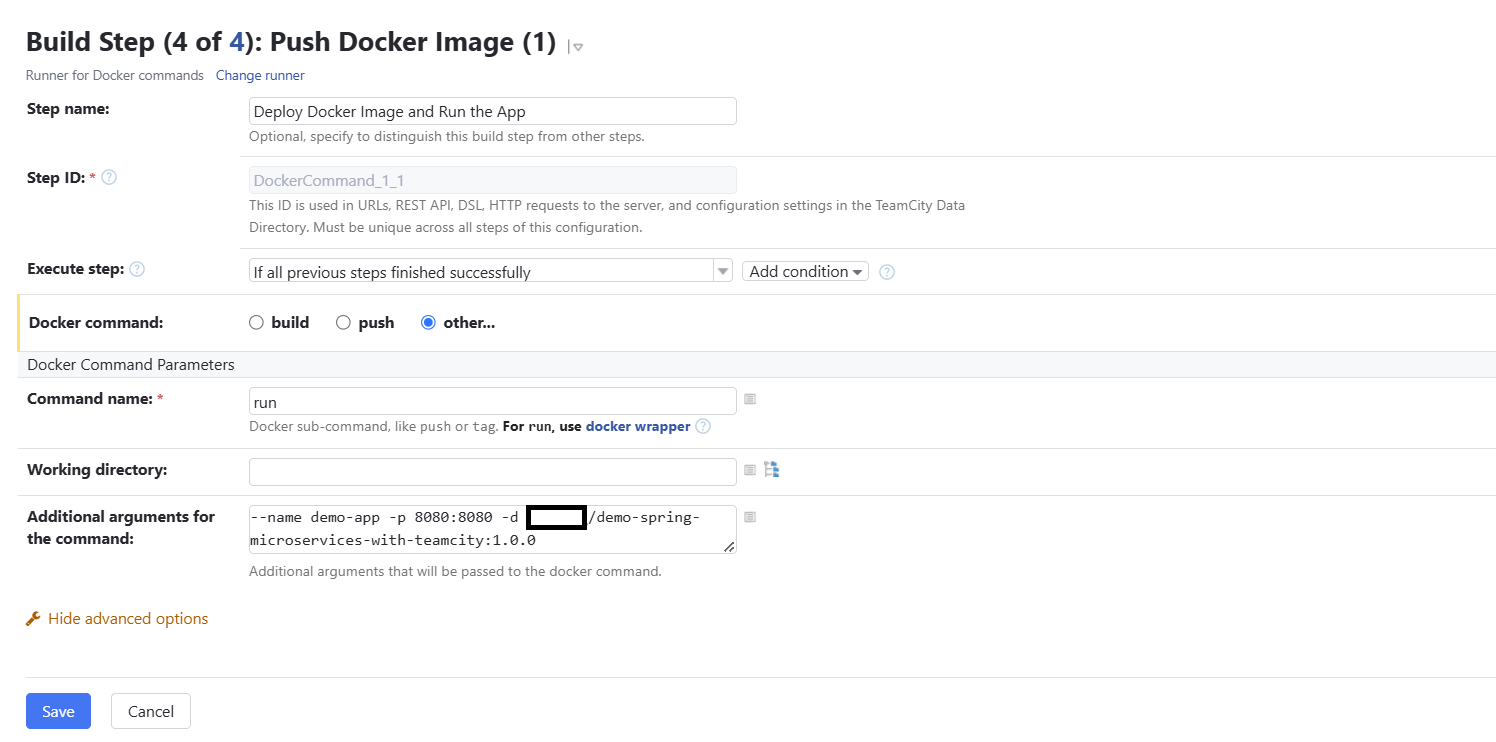
The deployment step defined above will pull the Docker image from the Docker Hub registry to the target machine (your local machine, in this case) and start the application container.
After you click Save, you should get confirmation that your last edit action was successful.
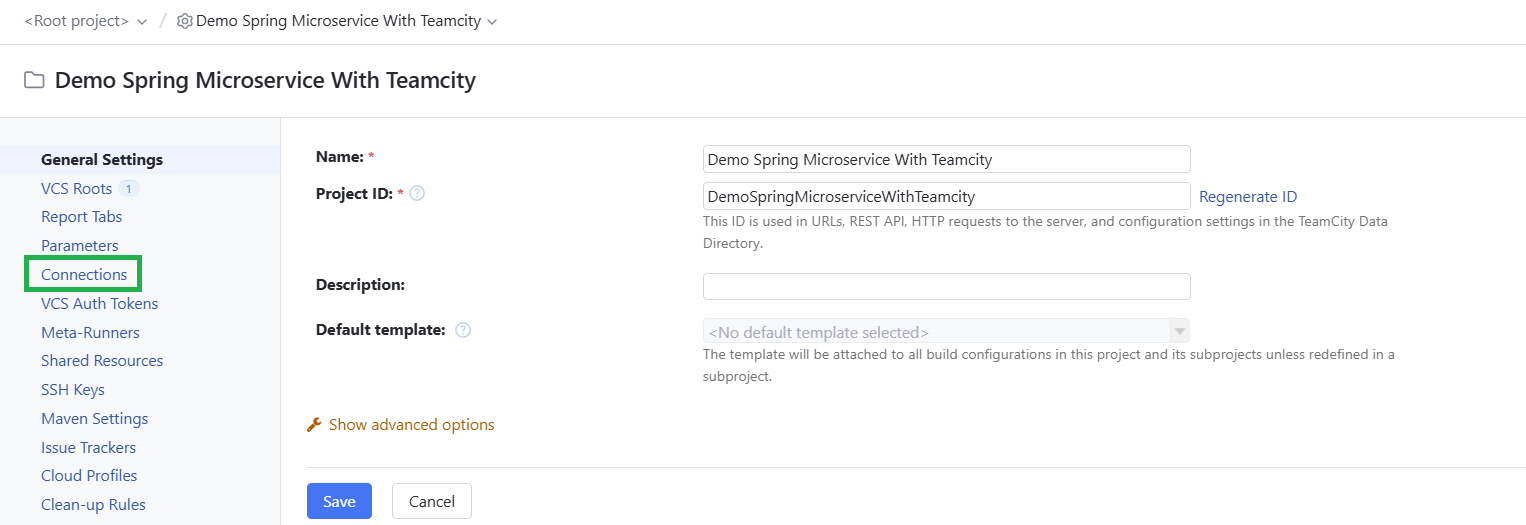
Now, click the project name displayed at the top to go to the project details screen:
Click Connections on the left:
Click Add Connection to define a new connection with the details pertaining to your Docker Hub account:
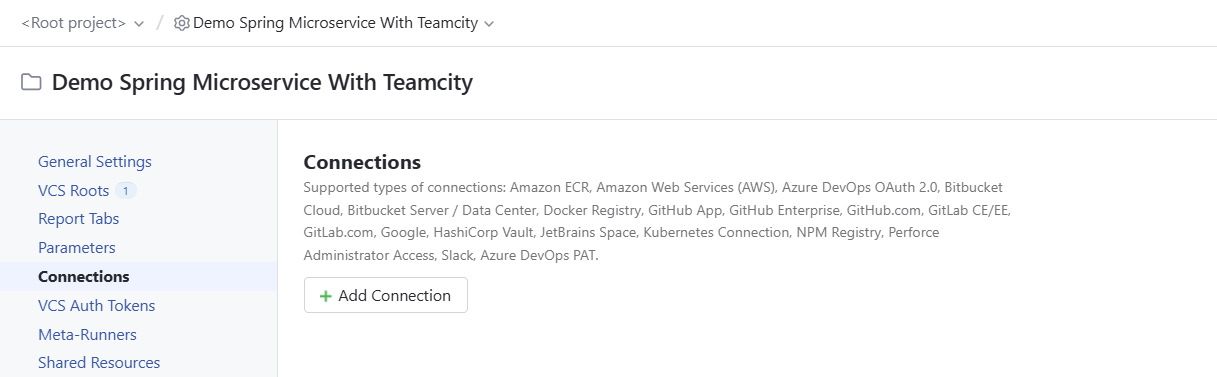
This is a required step to enable the build pipeline to perform Docker-oriented actions that you configured as part of earlier build steps.
On the form that appears, select Docker Registry as the connection type, then enter your Docker Hub account credentials:
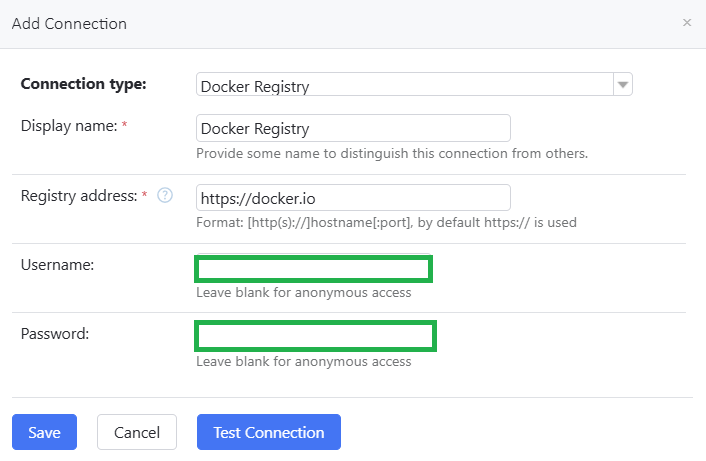
Click Save. You should get confirmation that the connection was successfully created.
Next, click Go to project page in the top-right hand side of the screen to navigate back to the project page:

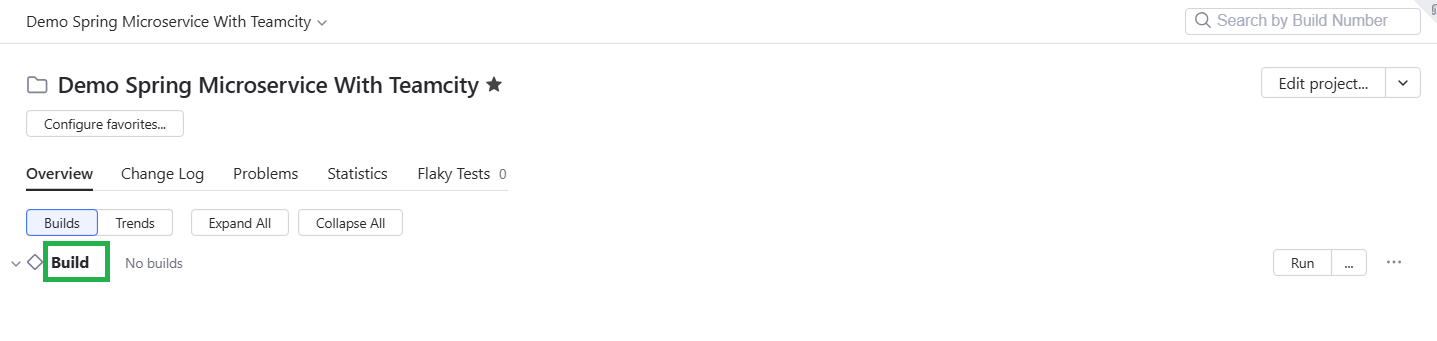
Click Build:
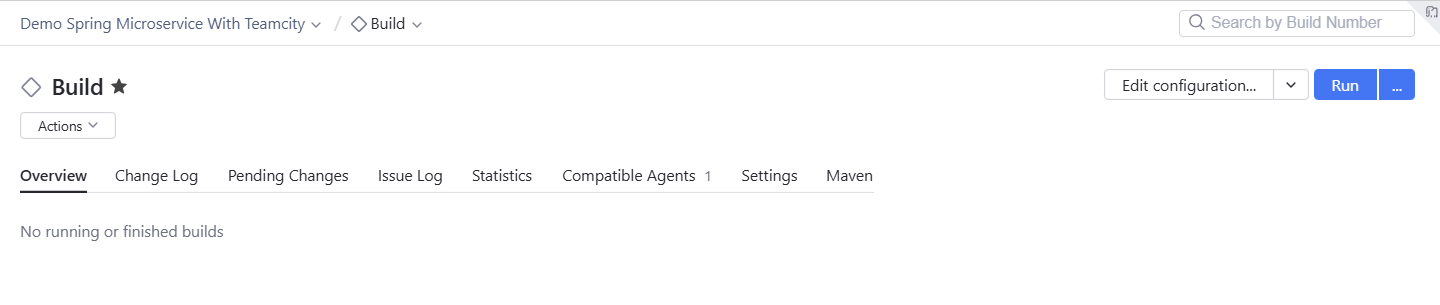
Click Edit configuration… at the top:
Click Build Features in the left menu:

Click Add build feature:

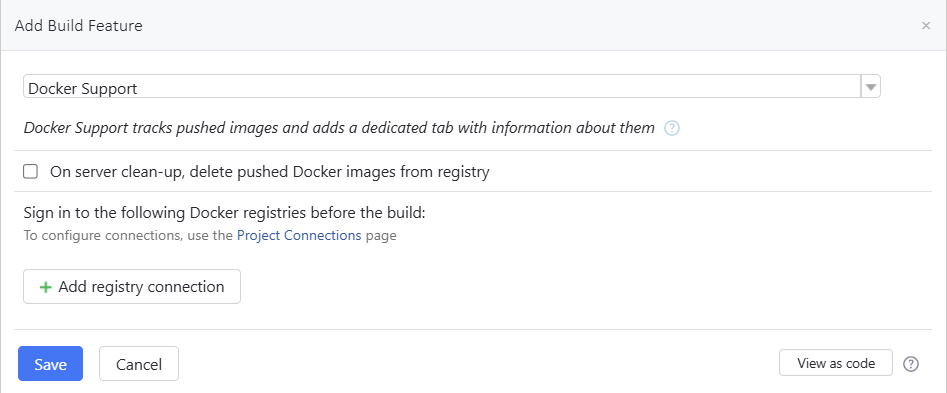
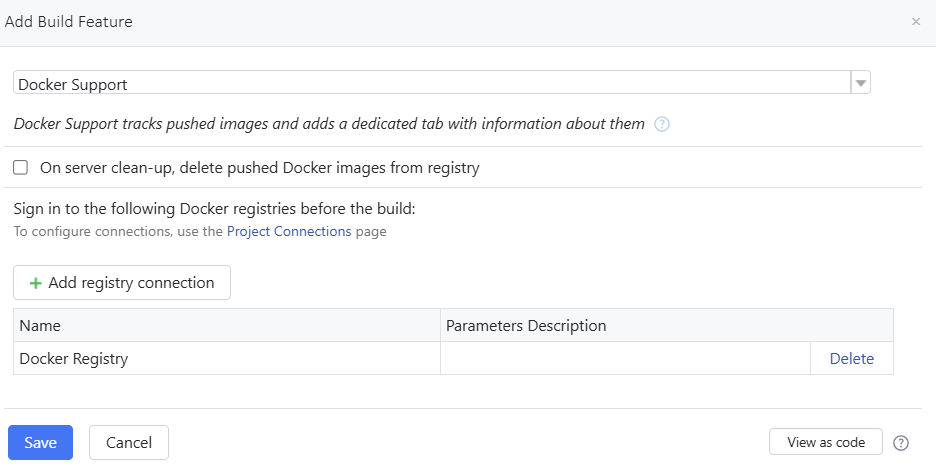
Select Docker Support as the build feature, then click Add registry connection:
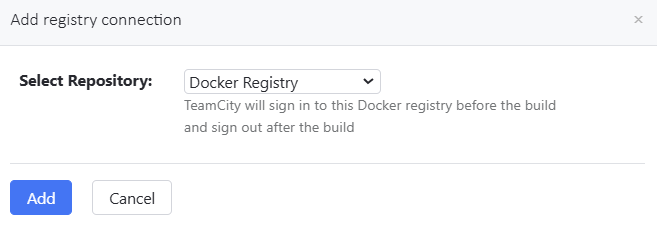
Choose the configured Docker Registry connection from the drop-down menu, then click Add to link the registry connection. This informs the pipeline that it has to use the Docker Support feature and the linked registry connection as part of the relevant Docker steps.
Finally, click Save to save the added Docker Support build feature:
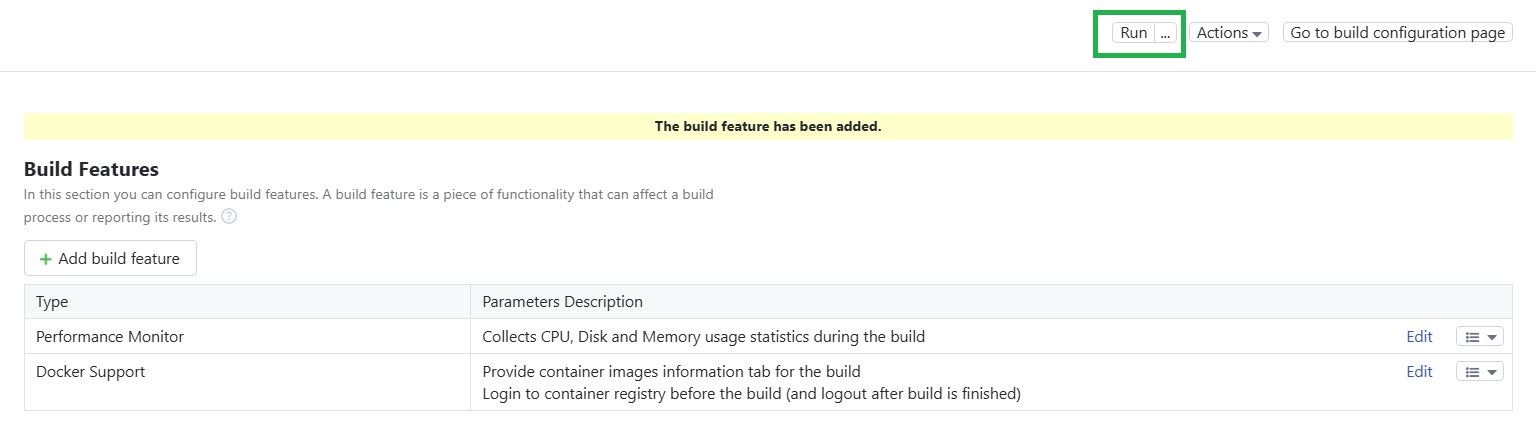
You’ll get a message confirming that the build feature has been added successfully. By default, TeamCity adds another build feature to carry out performance monitoring when the build is executed. As part of this feature, performance statistics (such as CPU, disk, and memory utilization) will be tracked and registered during the build runs.
Run the build
Everything is now set up, and you can click Run to run the build:
Once the build is completed, you’ll see a screen indicating that the build run was successful.
Click Show full log to view the build run log information:
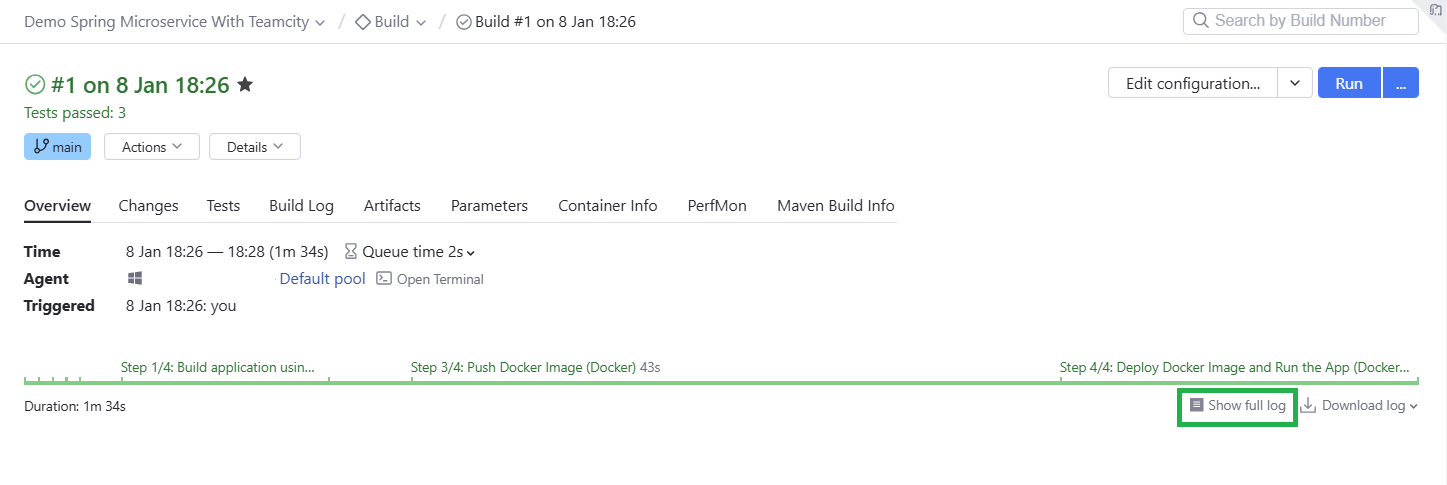
This is handy for troubleshooting any build failures. You can also click the PerfMon tab to view the performance statistics collected during the build run:
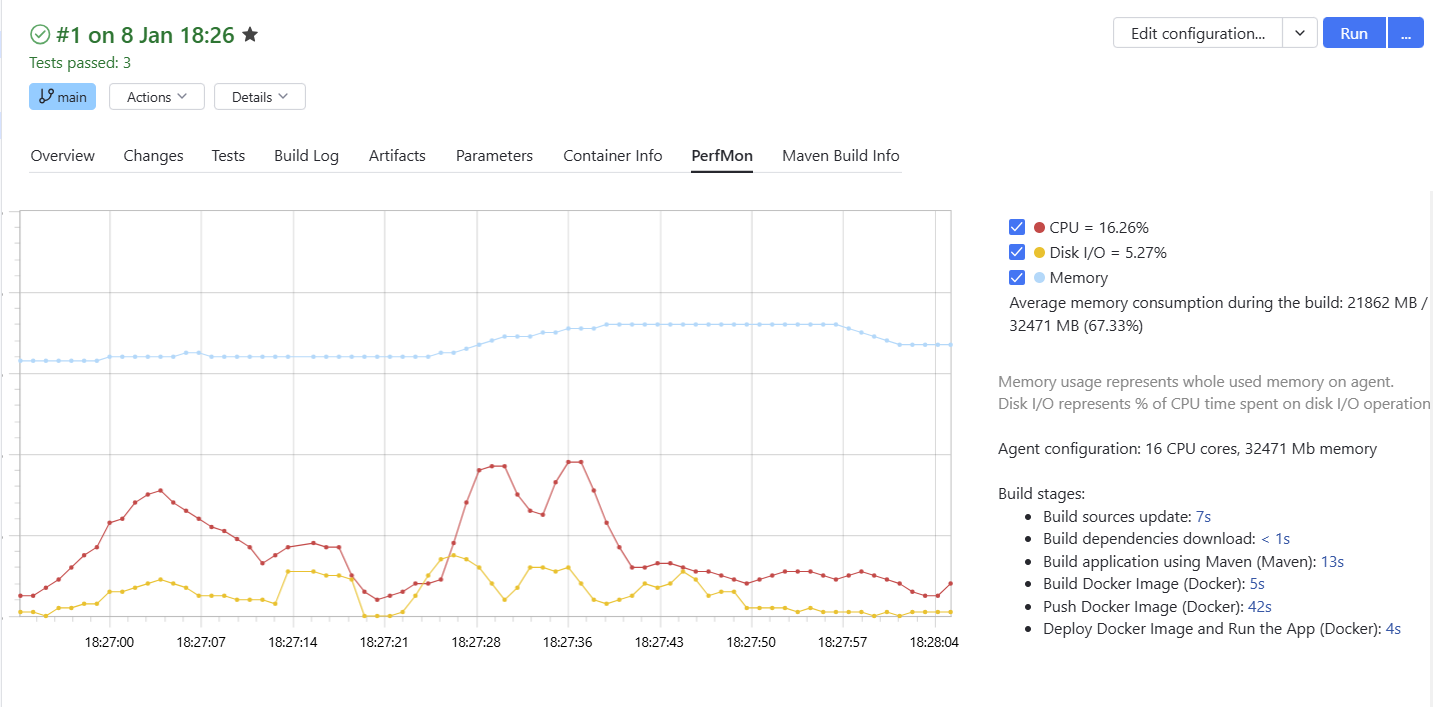
In addition to resource utilization statistics, the screen will also show you the elapsed time for each build stage. You can see which of the build stages took the most time to execute and make the necessary adjustments to address the performance issue.
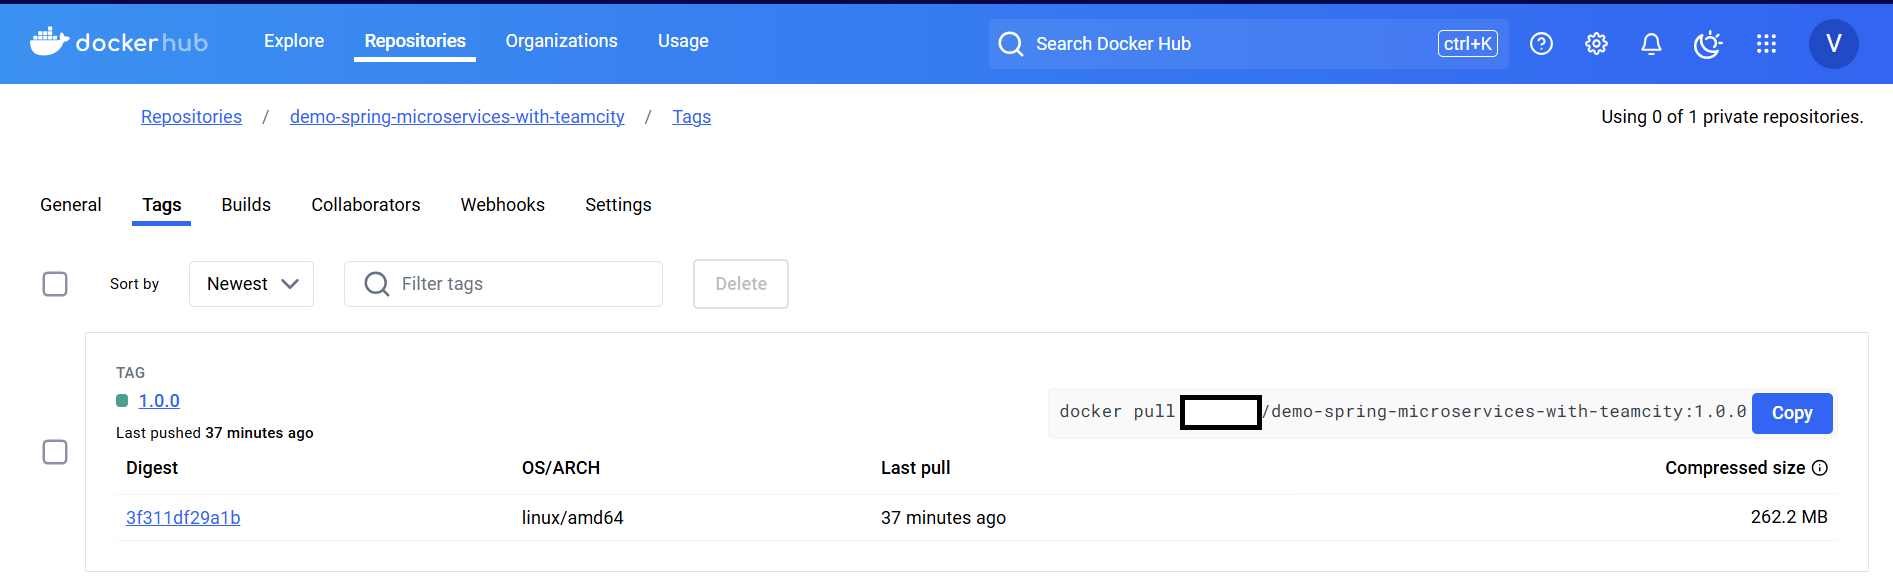
You should also see that the published Docker image is now available in the Docker Hub registry:
You can now test the application to ensure the Docker container started via the automated build and deployment pipeline process works as expected. For testing, follow the same steps as before when you tested the APIs locally.
Final thoughts
In this tutorial, you explored how to build and deploy microservices using Spring Boot and TeamCity. You learned how to create a simple Spring Boot application, implement microservices, and integrate them with a CI/CD pipeline to streamline the deployment process.
By adopting a microservices architecture and leveraging robust tools for automation, you can accelerate development cycles, enhance reliability, and achieve seamless scalability for your applications. These principles and practices are essential for modern software development in enterprise and cloud-native environments.
TeamCity helps simplify and enhance CI/CD workflows for microservices. With features like build automation, support for distributed builds, and seamless integration capabilities, TeamCity enables teams to manage complex pipelines with ease. Its scalability ensures it can handle growing workloads, while its robust ecosystem of plugins supports diverse use cases.
If you’re ready to elevate your CI/CD processes, try TeamCity for free and experience its capabilities firsthand. Get started today and unlock the potential of faster, more reliable software delivery.