TeamCity
Powerful CI/CD for DevOps-centric teams
How to Tame Your Flaky Tests in TeamCity

This article was brought to you by Satish Subrahmanya, draft.dev.
It’s 4:47 pm on a Friday. Your feature branch just passed all tests locally, and the code review went smoothly, so you hit the merge button. But then it happens: The CI build fails. The same test suite that passed five minutes ago is now showing red. You rerun it. Green. You run it again. Red.
You’ve run into a flaky test. If you’ve spent any time in software development, you’ve likely lost hours (or days) to flaky tests. They make you question your sanity, distrust your CI pipeline, and, worst of all, train your team to click Rerun build instead of investigating actual failures.
But that doesn’t have to be your reality. This article shows how TeamCity automatically detects and marks flaky tests, reduces false positives, and helps teams get clarity on test failures through built-in history, investigations, and mutes.
What makes tests flaky
Flaky tests fail randomly due to timing issues, dependencies, external services, or resource contention rather than code changes.
Let’s look at a few examples of how this plays out:
1. The race-condition trap:
@Test

public void testAsyncEmailNotification() {

    User user = createUser("test@example.com");

    orderService.placeOrder(user, items);

    // This might work locally but fail in CI

    Thread.sleep(100); // The "hope and pray" approach

    assertEquals(1, emailService.getSentEmails().size());

}
2. The test-order-dependency dance:
public class UserServiceTest {

    private static UserRepository userRepo = new UserRepository();

    @Test

    public void testCreateUser() {

        User user = new User("alice@example.com");

        userRepo.save(user);

        assertEquals(1, userRepo.count()); // Passes when run alone

    }

    @Test

    public void testDeleteUser() {

        // Assumes testCreateUser ran first - classic mistake

        User user = userRepo.findByEmail("alice@example.com");

        assertNotNull(user); // Fails when run in isolation

    }

}
3. The external-service roulette:
def test_api_integration():

    # This test's success depends on an external service

    response = requests.get("https://api.example.com/current")

    assert response.status_code == 200  # Until the API is down

    assert "data" in response.json()  # Or returns different data
4. The resource-contention chaos:
describe('Database Connection Pool', () => {

    it('should handle concurrent connections', async () => {

        const promises = [];

        // Works fine locally with 4 cores, fails on CI with 2 cores

        for (let i = 0; i < 100; i++) {

            promises.push(db.query('SELECT * FROM users'));

        }

        const results = await Promise.all(promises);

        expect(results).toHaveLength(100); // Sometimes 98, sometimes 100

    });

});
Every flaky test erodes trust in your CI/CD pipeline and costs real development time.
The default: Handling flaky tests in Jenkins
If you’re working with a legacy system like Jenkins, handling flaky tests requires various plugins and custom scripts.
Here are a few examples you might be familiar with:
The “fingers crossed” retry pattern:
// Jenkinsfile - Hope dies last

pipeline {

    agent any

    stages {

        stage('Test') {

            steps {

                retry(3) {

                    sh 'npm test'

                }

            }

        }

    }

}
The plugin-roulette game:
<hudson.plugins.flaky__test__handler.FlakyTestResultAction>

    <testData>

        <test>

            <className>PaymentServiceTest</className>

            <testName>testConcurrentPaymentProcessing</testName>

            <flakyRuns>17</flakyRuns>

            <totalRuns>234</totalRuns>

        </test>

    </testData>

</hudson.plugins.flaky__test__handler.FlakyTestResultAction>
The “someone will fix this eventually” workaround:
// The workaround we all know

stage('Run Tests') {

    steps {

        script {

            def testPassed = false

            def attempts = 0

            while (!testPassed && attempts < 3) {

                try {

                    sh 'mvn test'

                    testPassed = true

                } catch (Exception e) {

                    attempts++

                    echo "Test failed, attempt ${attempts}/3"

                    if (attempts >= 3) {

                        currentBuild.result = 'UNSTABLE'

                        testPassed = true

                    }

                }

            }

        }

    }

}
In addition to the effort required for manual setup, the maintenance tax and fragility of all these plugins and scripts increase with scale.
Jenkins remains popular for good reasons: It’s open source and highly customizable. Many teams have built stable CI/CD workflows on top of it. But when flaky tests are affecting developer confidence and productivity, you might have reached the limitations of this plugin-first approach.
How to handle flaky tests in TeamCity
Instead of relying on workarounds, TeamCity’s built-in test intelligence gives you direct visibility into test history, automatic flaky test detection, and tools for managing investigations and mutes.
Detecting flaky tests automatically
TeamCity automatically detects and surfaces problematic tests, removing the need for manual tracking and allowing you to focus on fixing them rather than finding them.
When a test fails and then passes (or vice versa) on the same code revision, TeamCity recognizes this pattern as flakiness:
// CONCEPTUAL REPRESENTATION - How TeamCity detects flaky tests

// Not literal DSL - illustrates the detection logic

class FlakyTestDetector {

    fun analyzeTestHistory(test: TestResult): TestStatus {

        val recentRuns = getTestHistory(test.id, limit = 10)

        val flipRate = calculateFlipRate(recentRuns)

        val sameRevisionFlips = detectSameRevisionFlips(recentRuns)

        return when {

            sameRevisionFlips > threshold -> TestStatus.FLAKY

            flipRate > 0.2 -> TestStatus.POTENTIALLY_FLAKY

            else -> TestStatus.STABLE

        }

    }

}
The platform marks tests as flaky using flip-rate heuristics and same-revision flip rules (when a test’s status flips on the same code revision), and it displays badges with links to the first failure and full history in the UI.
These signals are visible in TeamCity’s Tests and Problems views, with links to the first failure and test history:
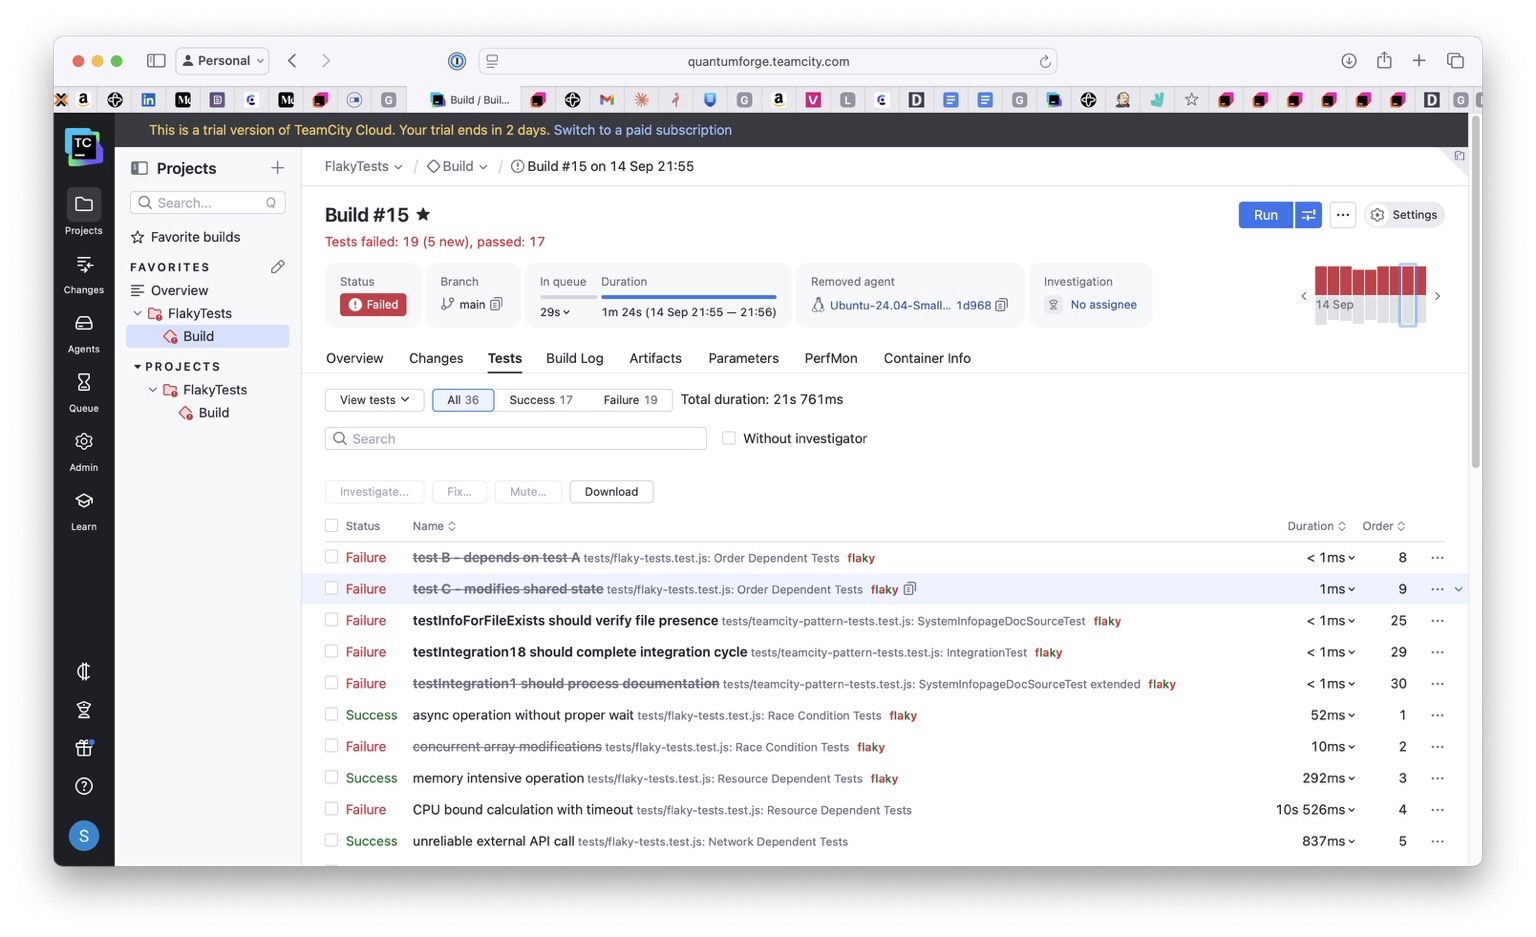
Here’s what you see in the Tests tab:
Build Results → Tests tab
├── ✅ UserServiceTest (15 passed)
├── ⚠️ PaymentServiceTest (14 passed, 1 flaky)
│ ├── ✅ testSinglePayment
│ ├── ✅ testPaymentValidation
│ └── 🔄 testConcurrentPaymentProcessing [FLAKY – flip rate: 23%]
└── ✅ OrderServiceTest (22 passed)
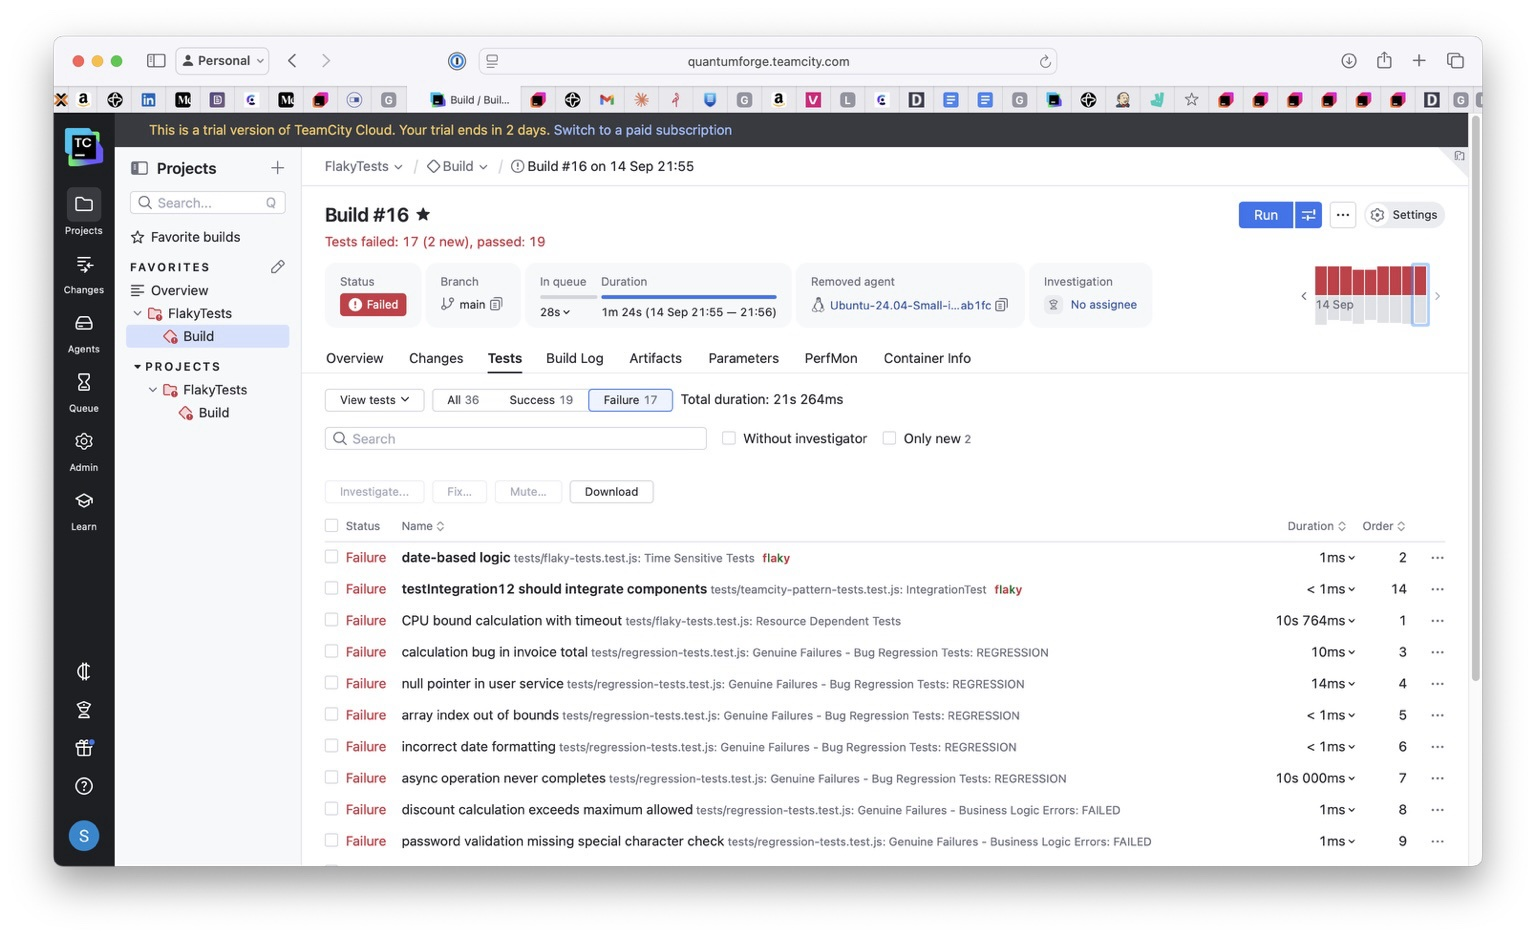
Separating flaky tests
TeamCity’s reporting UI separates test failures from build configuration issues, which simplifies investigation.
The navigation path is as follows:
- Build Results > Tests tab: See flaky badges and failure reasons
- Problems tab: Filter test failures vs. build problems
- My Investigations page: Assign ownership of flaky tests
- Mutes dialog: Set scope and unmute policy
Configuring smart test retries
A smart retry strategy helps separate genuine defects from one-off glitches such as network hiccups, database contention, or timeouts.
Instead of rerunning an entire build, TeamCity lets you configure targeted retries at the test framework level:
For .NET projects: Starting with TeamCity 2024.03, the .NET (VSTest) runner includes built-in retry support. This means you can set a retry count and delay directly in the runner configuration.
For JVM projects (Gradle): Use the Gradle Test Retry plugin to automatically rerun only the failed test cases, not the whole suite.
// build.gradle - JUnit 5 filtering + Gradle Test Retry

plugins {

    id("java")

    id("org.gradle.test-retry") version "1.5.9" // or latest

}

test {

    useJUnitPlatform()

    // Include tags passed via -DincludeTags=flaky

    def include = System.getProperty("includeTags")

    if (include) {

        useJUnitPlatform {

            includeTags include.split(",").collect { it.trim() }.findAll { it }

        }

    }

    // Retry logic (preserves signal, doesn't hide failures)

    retry {

        maxRetries = System.getProperty("retryCount")?.toInteger() ?: 0

        failOnPassedAfterRetry = false

    }

}
For Maven projects: Configure the Surefire plugin with rerunFailingTestsCount so that transient issues get a second chance without hiding persistent failures.
Here’s an example for Maven:
<!-- pom.xml -->

<plugin>

    <groupId>org.apache.maven.plugins</groupId>

    <artifactId>maven-surefire-plugin</artifactId>

    <version>3.2.5</version>

    <configuration>

        <rerunFailingTestsCount>2</rerunFailingTestsCount>

    </configuration>

</plugin>
Implementing the mute-and-monitor pattern
Even with retries, some flaky tests remain too noisy to leave in the mainline build. You want to keep your pipeline green without losing visibility into these tests.
TeamCity’s Mute feature allows you to silence failures in the main build while still running and tracking the tests in the background. While TeamCity doesn’t have a literal “quarantine” feature, you can achieve the same effect using this pattern:
Mute → Monitor → Stabilize → Unmute
- Mute the flaky test with a clear reason and manual unmute policy.
- Keep the mainline build green – muted tests don’t cause test failures.
- Run a scheduled “flaky only” build that retries these tests under controlled conditions.
- Require a number of consecutive passes before unmuting.
- Unmute once the test is stable and trustworthy again.
You can also pair muting with investigations: Assign someone to monitor the flaky test, track its history, and decide when it’s safe to restore it to the main suite.
Here’s a Kotlin DSL snippet showing how you might keep flaky tests running separately while preserving a stable main build:
// TeamCity Kotlin DSL - Production configuration

import jetbrains.buildServer.configs.kotlin.v2019_2.*

object MainBuild : BuildType({

    name = "Main Test Suite"

    steps {

        gradle {

            tasks = "test"

        }

    }

    failureConditions {

        testFailure = true  // Build fails on real test failures

    }

    // Note: muted tests run but do not affect build status by design

})

object FlakyTestMonitoring : BuildType({

    name = "Flaky Test Stabilization"

    triggers {

        schedule {

            schedulingPolicy = daily {

                hour = 2

            }

        }

    }

    steps {

        gradle {

            tasks = "test"

            // Run tests tagged as flaky with retries

            gradleParams = "-DincludeTags=flaky -DretryCount=3"

        }

    }

})
FAQ
How does TeamCity detect flaky tests?
TeamCity detects flaky tests through flip-rate analysis and same-revision flip detection – when tests pass/fail on identical code.
What’s the difference between muting and skipping?
Muted tests still run (preserving signal), but they don’t fail the build. Skipped tests don’t execute at all.
Can I automate the unmute process?
TeamCity supports auto-unmute policies, but for flaky tests, manually unmuting after n consecutive passes is recommended to avoid false confidence.
Conclusion
TeamCity helps you manage flaky tests through flip-rate detection, test-history tracking, and the mute-and-monitor pattern:
- Automatic detection and clear UI signals reduce time wasted on false positives.
- Direct navigation paths and the ability to assign ownership help you manage flaky tests efficiently.
- Smart retries filter out transient failures without hiding real issues.
- Muting keeps flaky tests visible without blocking the mainline build.
You might even feel brave enough to deploy on a Friday!