Upsource
Code Review and Project Analytics
Orderly code reviews in Upsource

Code review like no other development practice relies on humans being efficient. And for most of us to achieve that, it’s important to have our tasks well organized and our time well planned.
Upsource takes care of a lot of things for you without any need to configure anything. For example, if you have a branch review, it’ll automatically add new revisions to it. It’ll promptly notify you about things that require your attention. It keeps track of which changes you have seen, and which you haven’t so that you only need to review those you haven’t seen.
With some configuration required you can automate away a lot more. You can set up a custom workflow that can create reviews, assign reviewers from a certain pool of users, close reviews and/or resolve discussions upon everyone accepting the changes.
If that’s not enough, Upsource gives you some tools to add that extra orderliness. Let’s look at some of them.
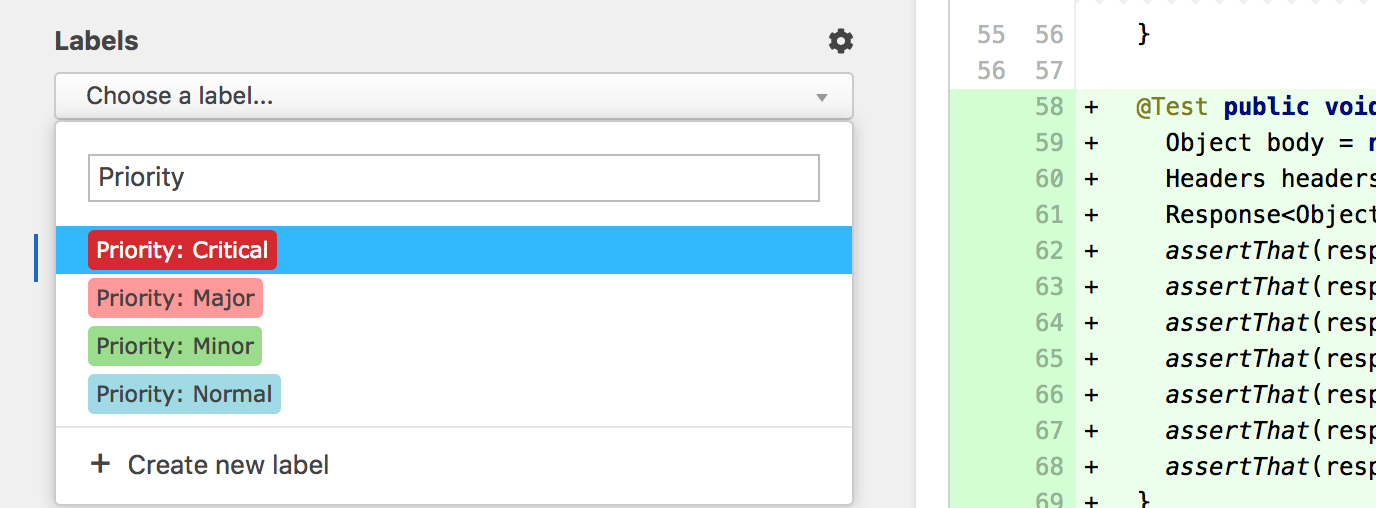
By and large, it is preferable for reviewers to do their part as soon as possible so that code reviews do not pile up, block the process, become less relevant, and harder to merge. However, it may happen that a certain reviewer or a group of reviewers accumulates a number of code reviews to go through. In such scenario, it would be helpful to them to be aware of the priorities of those code reviews. One way to go about it would be to have a habit of manually setting a Due Date for code reviews when you know it.

Alternatively, as a team, you can have code review-level labels to signify priorities. You can have a single label to mark certain code reviews as “urgent” or create a more granular system of priority labels.
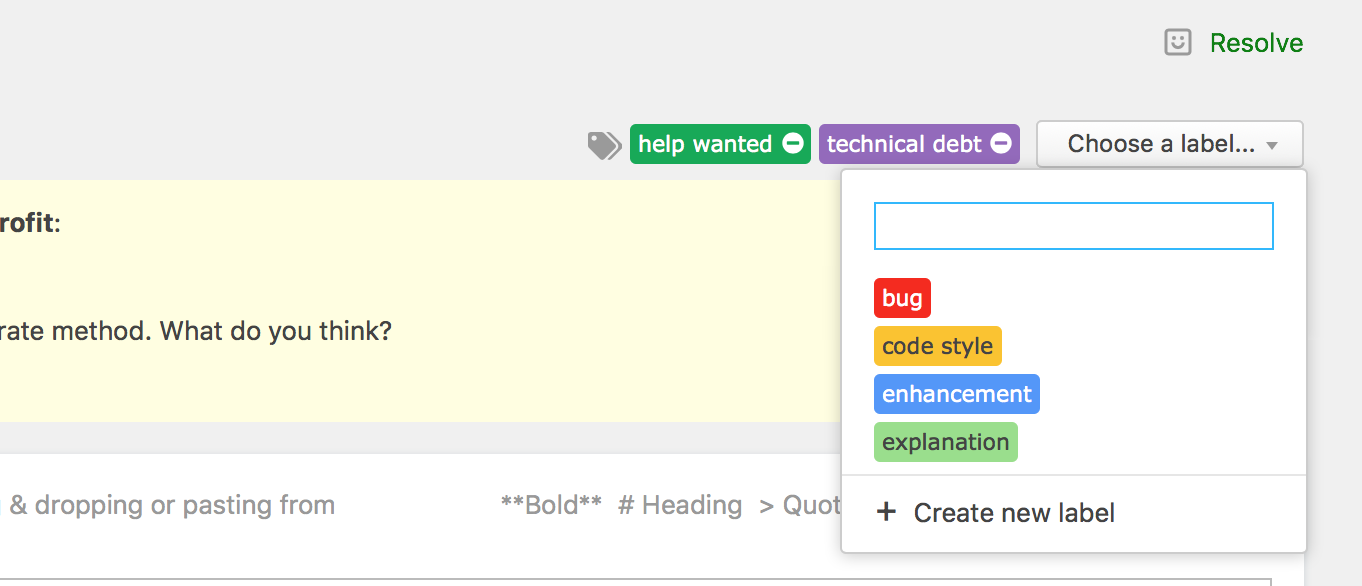
Labels, of course, can be used for other things too. For example, if you create a code review for a branch or a pull request, and want to consult with your colleagues on some design decisions early on, when it’s not too late to discuss these things, you can label that review as “help wanted”. If, on the other hand, you’re not ready to show your changes to reviewers, you can put “work in progress” there and switch to “ready for review” when needed.
You can, if you want to, use code review labels to identify the type of a change in a code review (bug, feature, etc.), although, one can argue that it’s more appropriate to have this information in either commit message or linked through an issue tracker ticket. On the contrary, labeling discussions within a code review can be helpful. Upsource has pre-defined discussion labels like “bug”, “enhancement”, etc., but you can, of course, add more. For instance, “technical debt”.
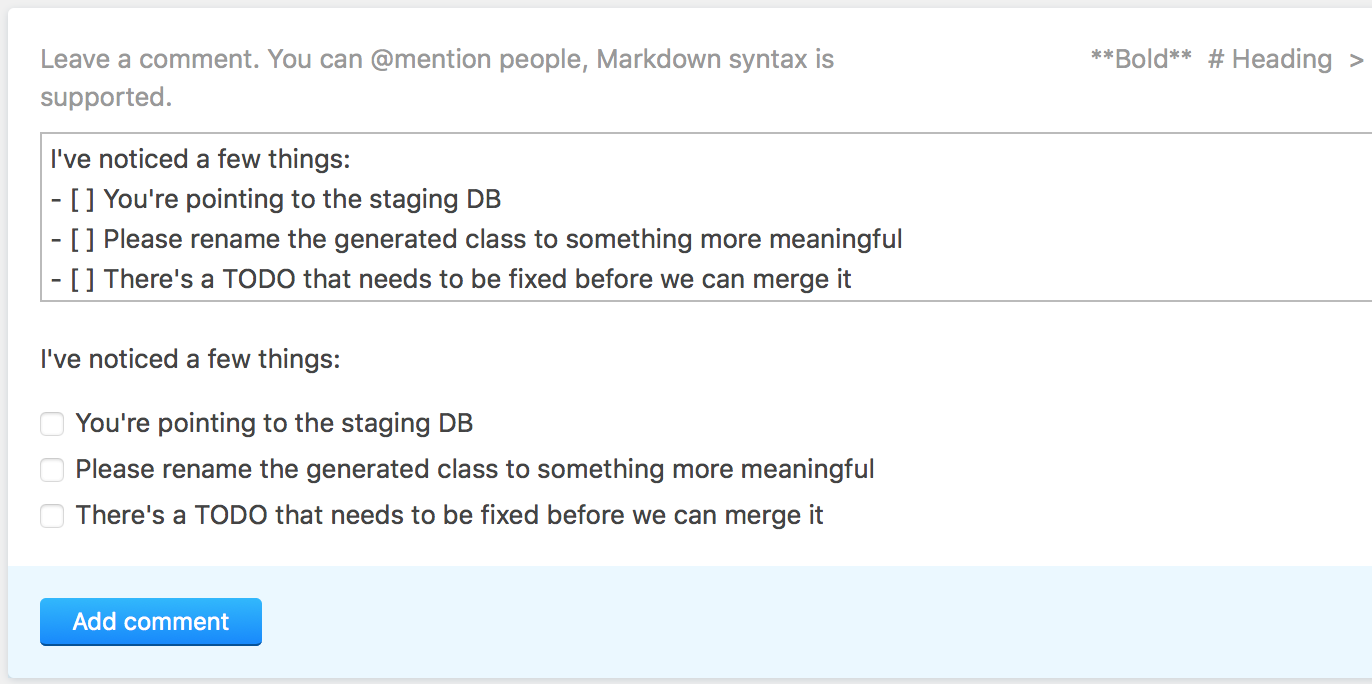
When starting a discussion in a code review, you can also structure your own feedback in an actionable manner. If you have a number of suggestions on how to improve the code you are reviewing, use markdown to generate a checklist in your comment. Indicate incomplete items with - [ ], and completed ones with - [x]. This will render a list of checkboxes in the comment. As you or the code author go through the checklist, you can simply check or clear boxes to automatically update your checklist.
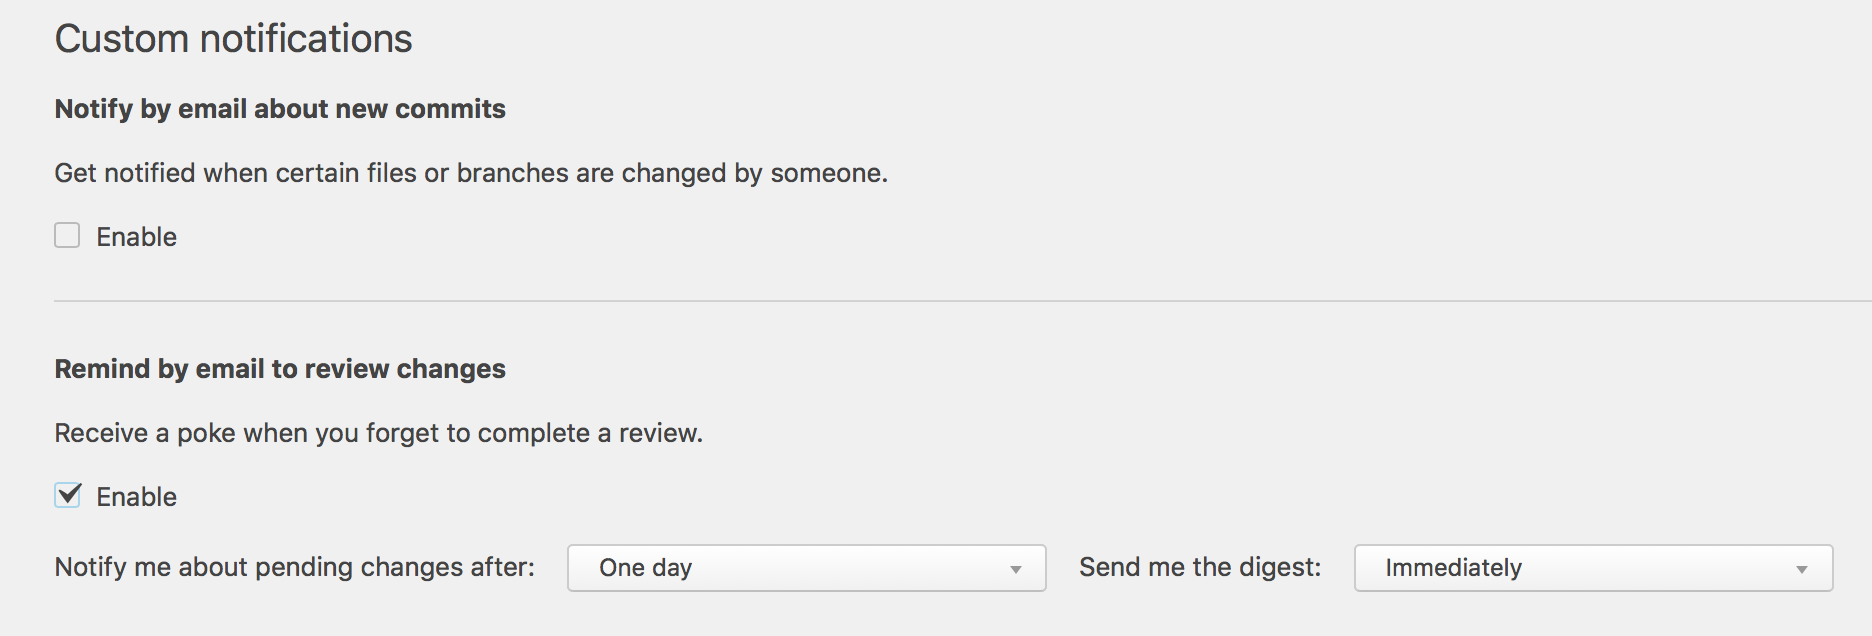
Last but not least, check your notification settings – click on your profile picture at the top right corner, and go to “Notifications”. While the most important notifications are turned on by default, there are some that are considered optional but you may find useful. Like, a reminder that you have forgotten to complete a review, or notification about activities sync with GitHub.
You can also customize your notifications to receive updates on very specific things like certain files being changed.
While there’s no “one suits all” guide on how to better organize your code reviews, I hope you’ve found some ideas in this post that’ll work for your team.
Happy code reviews!