WebStorm Your Node App!

This is a simple tutorial on how to get started with Node.JS development in WebStorm 3.0 EAP. The same steps apply for PhpStorm 3.0 EAP or IntelliJ IDEA 11 EAP with Node.JS plugin installed.
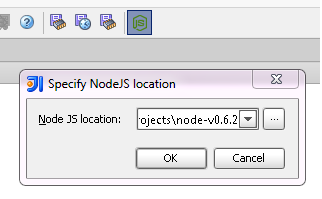
Initially, you’ll need to configure the location of Node.JS JavaScript files in the IDE. To do that, click the  icon on the toolbar. If you have Node.JS installed from sources, specify its location there. Otherwise you can always download Node.JS JavaScript source files from http://nodejs.org/dist (e.g. http://nodejs.org/dist/v0.6.2/node-v0.6.2.tar.gz).
This setting is needed for completion, validation and debugging of standard NodeJS symbols.
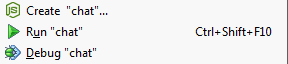
There are several ways to run or debug Node.JS app script. The easiest way to start is right from the editor popup menu:
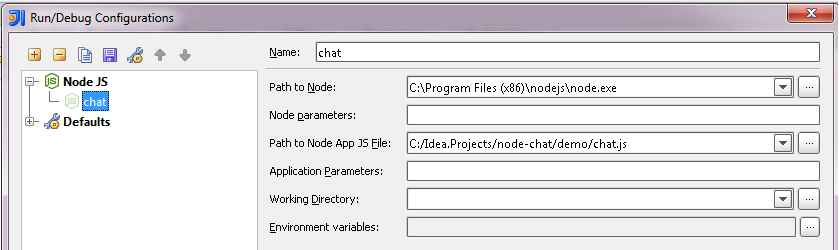
Run / debug parameters can be tweaked for the created run configuration. Although NodeJS path is auto-detected, it’s possible to change it by editing the “Default” configuration.
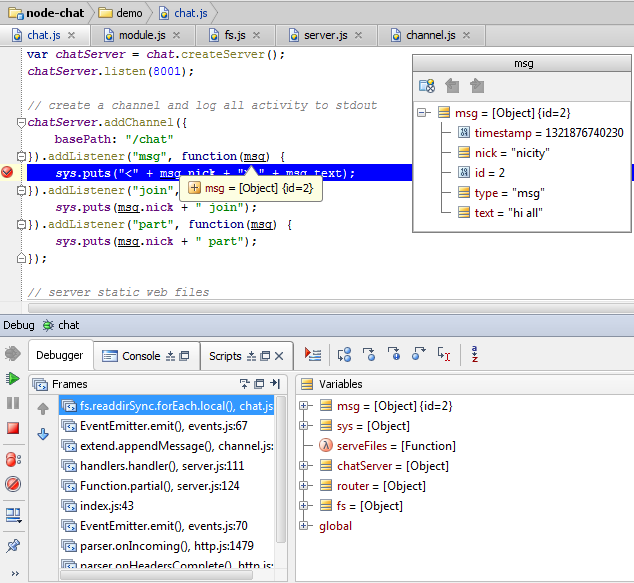
After you’ve run the correctly created configuration, it is possible to debug Node app using breakpoints, stepping, expressions evaluation, etc.
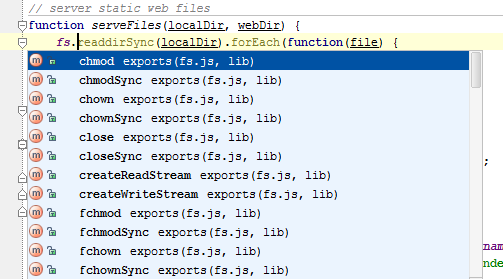
WebStorm is aware of CommonJS module structure and suggests proper auto completion options:
Develop your Node.JS applications with pleasure!
Download WebStorm for your platform from this project EAP page.