WebStorm and Windows Azure Mobile Services

With Microsoft’s Windows Azure Mobile Services, we can build a back-end for iOS, Android, HTML, Windows Phone and Windows 8 apps that supports storing data, authentication, push notifications across all platforms, and more. There are client libraries available for all these platforms which can be used when developing in your IDE of choice, for example AppCode, Google Android Studio, or Visual Studio. On the server-side, we can write Node.js code.
In this post, we won’t go into the innards of Windows Azure Mobile Services. Instead, let’s focus on how we can use WebStorm to build the server-side code which has to be written in Node.js. Note that the workflow described applies to development of any Node.js app: VCS integration, the REST Client plugin and NodeUnit test integration can be used in other projects as well.
If you want a full tutorial on setting things up, Maarten has one available on his blog.
Working on server-side logic with WebStorm
The in-browser editor for server-side scripts provided through the Windows Azure Management Portal is a bit limited. It features no code completion, and all code has to go in one file. How would we create shared logic which can be re-used across different scripts? How would we unit test our code? This is where WebStorm comes in. We can access the complete server-side code through a Git repository and work on it in a full IDE.
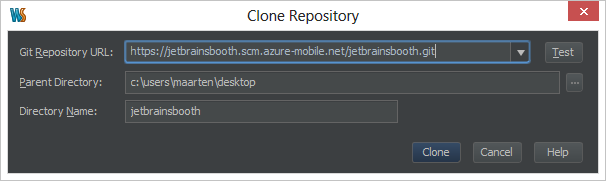
We can use WebStorm’s VCS | Checkout From Version Control | Git menu to bring down the server-side code for our Windows Azure Mobile Service. Note Git access should be enabled explicitly in the Windows Azure Management portal for this to work.
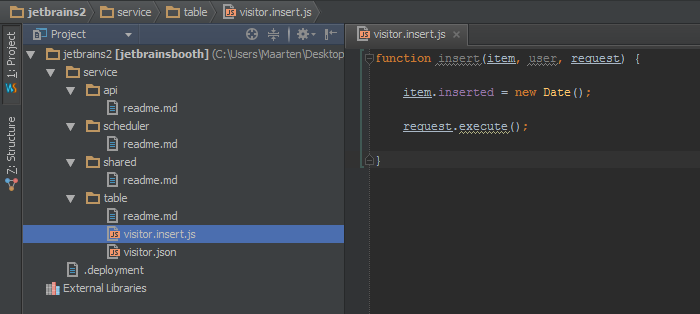
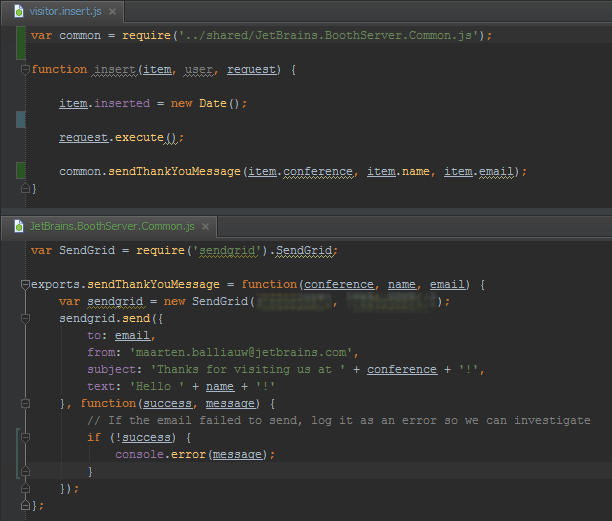
In our project, we can see several folders and files. The service/api folder can hold custom APIs (check the readme.md file for more info). service/scheduler can hold scripts that execute at a given time or interval, much like CRON jobs. service/shared can hold shared scripts that can be used inside table logic, custom APIs and scheduler scripts. In the service/table folder we can create scripts that map to a given table in Windows Azure Mobile Services. I’ve added visitor.insert.js which runs for POST requests to a visitor table. The visitor.json file contains access rules for this table.
As these files are just JavaScript, we can develop our API using WebStorm and make use of code completion, code analysis and so on.
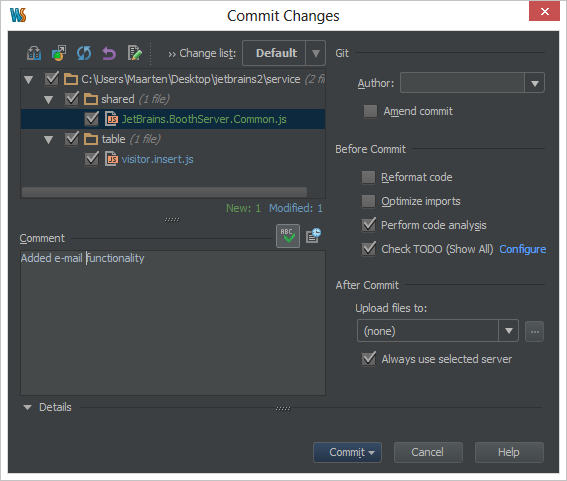
We can deploy our server-side code to Windows Azure Mobile Services by pushing to the remote Git repository by simply hitting Ctrl+K (or Cmd+K on Mac OS X).
Sending email using a Node.js module
In our API, we want to send out an email whenever a new record is added to the database. We can do this by making use of a Node.js module, for example SendGrid.
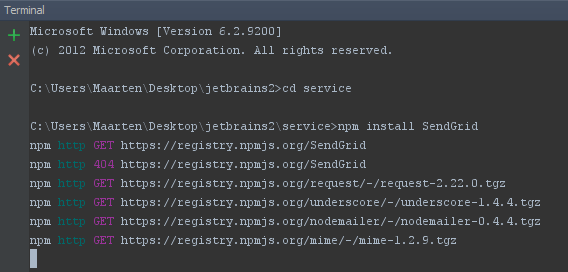
Windows Azure Mobile Services comes with some Node.js modules preinstalled, like SendGrid and Twilio. However, we want to make sure we are always using the same version of the Node.js package, so let’s install it into our project. WebStorm has a built-in package manager to do this, but Windows Azure Mobile Services requires us to install the module in a non-standard location (the service folder). Hence we will use the Terminal tool window in WebStorm to install it.
Once finished, we can start working on our e-mail logic. In the example below, I’ve created this logic in the shared folder so it can be reused in different scripts. In this case, I’m using it in the visitor.insert.js script.
Calling our API using the REST client
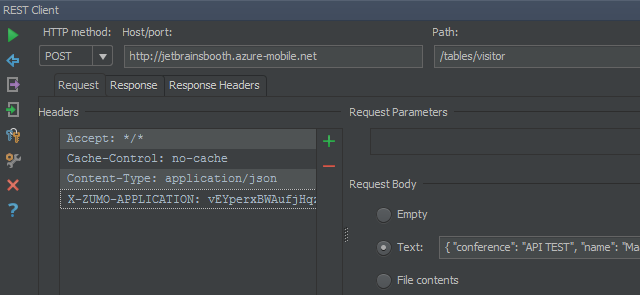
We can test our remote API using WebStorm’s built-in REST client. From the Tools | Test RESTful Web Service menu we can craft API calls manually.
We can specify the HTTP method to use (POST since we want to insert) and the URL to our Windows Azure Mobile Services endpoint. In the headers section, we can add a Content-Type header and set it to application/json. We also have to specify an API key which can be found in the Windows Azure Management Portal through the X-ZUMO-APPLICATION header. On the right-hand side we can provide the text to post, in this case a JSON-serialized object with some properties.
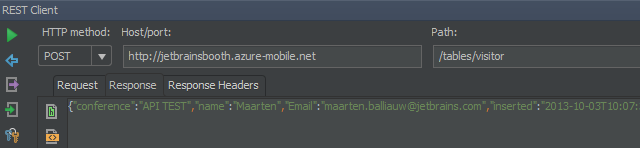
After running the request, we get back response headers and a response body:
Through the toolbar, we can export/import requests, making it easy to create a number of predefined requests that can easily be run over and over for testing the REST API.
Unit testing our logic
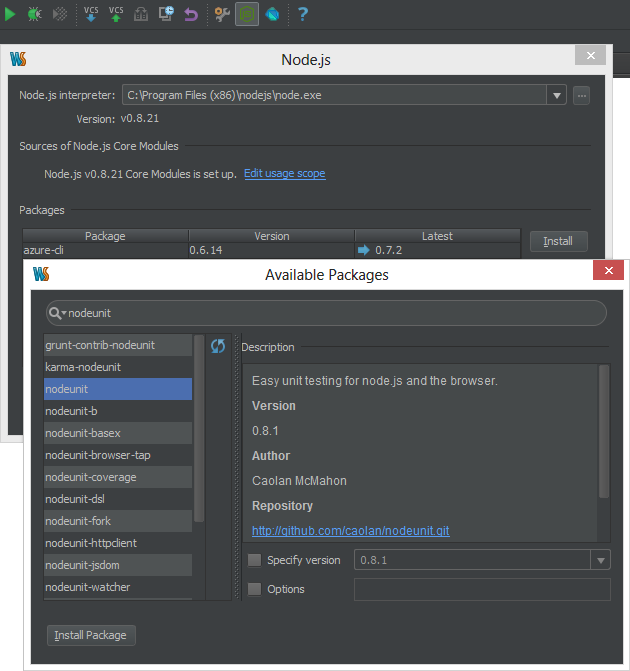
With WebStorm we can easily test our JavaScript code and custom Node.js modules. Let’s first set up our IDE. Unit testing can be done using the nodeunit testing framework which we can install using the Node.js package manager.
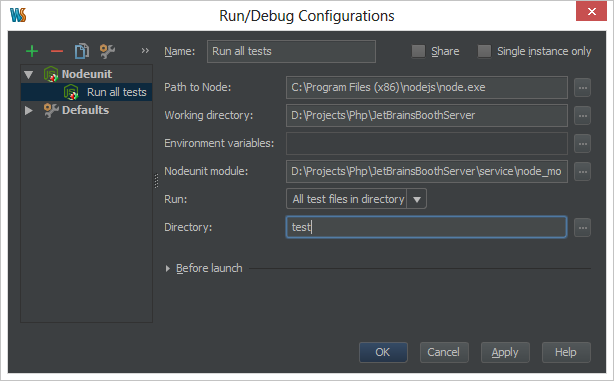
Next, we create a new Run Configuration from the toolbar selecting Nodeunit as the configuration type and entering all required configuration details. In our case, let’s run all tests from the test directory.
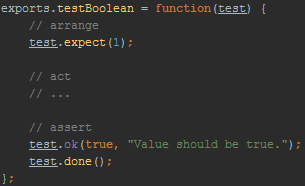
Next, we create a folder that will hold our tests and mark it as a Test Source Root (open the context menu and use Mark Directory As | Test Source Root). Tests for Nodeunit are always considered modules and should export their test functions. Here’s a very basic example which tells Nodeunit to wait for one assertion, assert that a Boolean is true and marks the test case completed.
The full source code for both the server-side and client-side application can be found on https://github.com/maartenba/JetBrainsBoothMobileService. In this repository, you can also find some more unit tests as well as a few mocks that allow testing table-specific scripts.
If you would like to learn more about Windows Azure Mobile Services and work with authentication, push notifications or custom APIs, check out the getting started documentation. And if you haven’t already, give WebStorm a try. A fully functional 30-day trial is available from www.jetbrains.com/webstorm.
Develop with pleasure!
WebStorm Team