The WebStorm team
Tips & Tricks


Angular Workflow in WebStorm
WebStorm is well-known for its AngularJS support. WebStorm 2016.1 introduces lots of new exciting features in Angular (previously known as Angular 2) support. Combining that with support for the latest TypeScript and ECMAScript 6 (2015) features, WebStorm can be a great playground for your new Angular applications.
If you’re using Angular 2 RC, please make sure you’re using WebStorm 2016.1.3 or WebStorm 2016.2 for proper support.
In this blog post we’d like to share with you some tips and tricks that we hope you’ll find useful when working on Angular apps in TypeScript in WebStorm. We’ll have a look at:
- Auto imports in TypeScript
- Using Angular CLI
- Code completion in Angular components and templates
- Documentation lookup
- Navigation
- Refactoring Angular components and methods
- Compiling TypeScript
- Debugging Angular apps
Disclaimer: This blog post is not intended as a tutorial for getting started with Angular . If you’re new to Angular, we suggest you to go through the Angular Quickstart first. While Angular is still in Beta, there might be some changes in the framework that can affect the way Angular-specific coding assistance works in WebStorm.
Angular and TypeScript support are also available in IntelliJ IDEA Ultimate, PhpStorm, PyCharm Professional, and RubyMine, all version 2016.1 or above. Make sure that you’ve installed AngularJS plugin: go to Preferences | Plugins – Install JetBrains plugins and search for AngularJS.
Let’s see what you can do with WebStorm!
Installing Angular
To make WebStorm understand Angular syntax, we need to have Angular library files in our project.
The easiest way to add Angular to the project is using npm. If you don’t have package.json file in the project yet, run in the terminal opened in the application’s root folder: npm init -y
Then run: npm install --save @angular/core
That will install the core Angular package with the critical runtime parts of the framework. Most probably you would also need to install other packages Angular consists of – here’s a full list.
Tip: If you have already added a package.json file in your project, you can just right-click it in the IDE Project view and use Run npm install action.
Using Angular CLI
WebStorm 2016.2 adds integration with Angular CLI for bootstrapping new Angular projects. Install Angular CLI globally via npm:
npm install -g @angular/cli
Now you can create new projects with it from the IDE Welcome screen: click Create New Project, select Angular CLI from the list on the left, enter project name, click Ok, wait till all dependencies are installed and you’re ready to go.
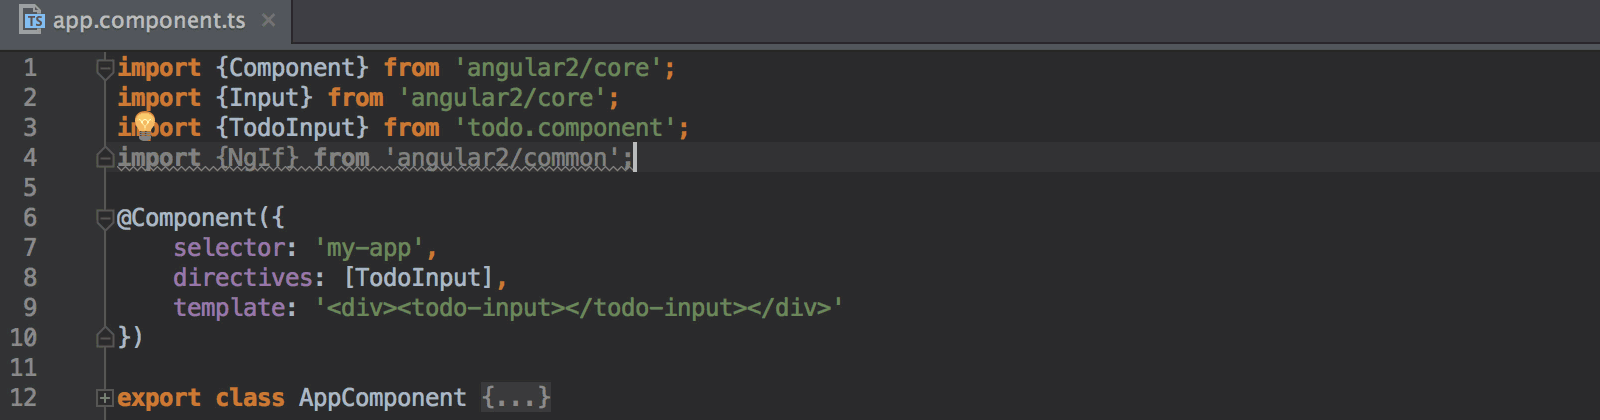
Auto imports in TypeScript
One of the great advantages of using typed languages like TypeScript is that you get far more precise and intelligent coding assistance, which helps you write better code more efficiently.
To define a component in our Angular application, we use @Component decorator. It needs to be imported from the Angular 2 library.
WebStorm can import symbols from other files and modules automatically. So you can just start typing @Component or, for example, a class defined in the project and WebStorm will just take care of the import statement. By the way, imported symbols from the same module are nicely put in one import statement.
You can disable auto imports in Preferences | Editor | General | Auto Import. You can still add the import by hitting Alt-Enter on the unresolved symbol and selecting Add import statement.
If you want to import everything you need first, start typing the import statement and WebStorm will suggest the files and modules to import as well as the symbols available in them.

For all unused imports, WebStorm will show a warning. With the Optimize imports action (Ctrl-Alt-O), you can easily clean up all the unused imports and merge related import statements from the same file into one line.
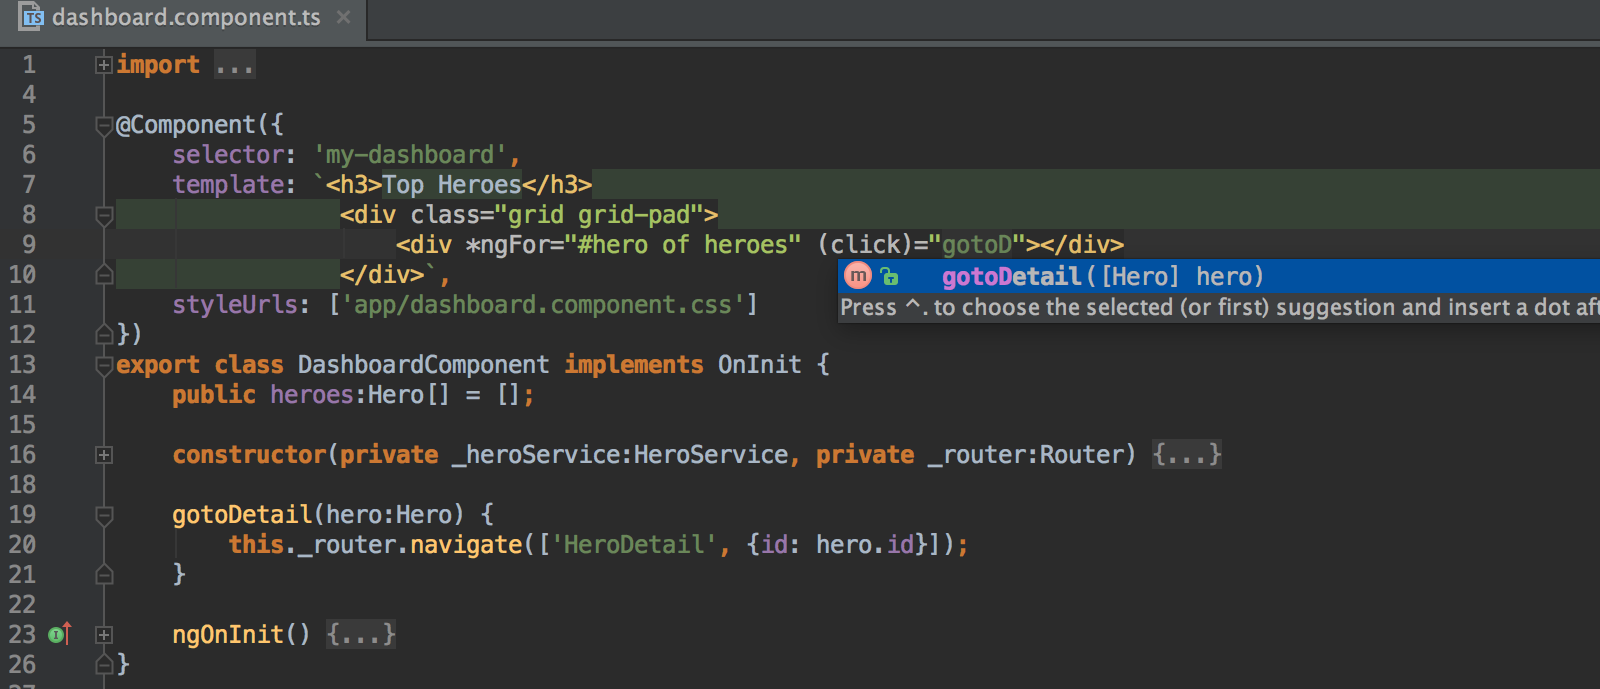
Code completion in Angular components and templates
WebStorm will provide you with code completion results for any functions, methods, and properties, as well as for Angular-specific event and property bindings and inside them.
Here are a few examples:


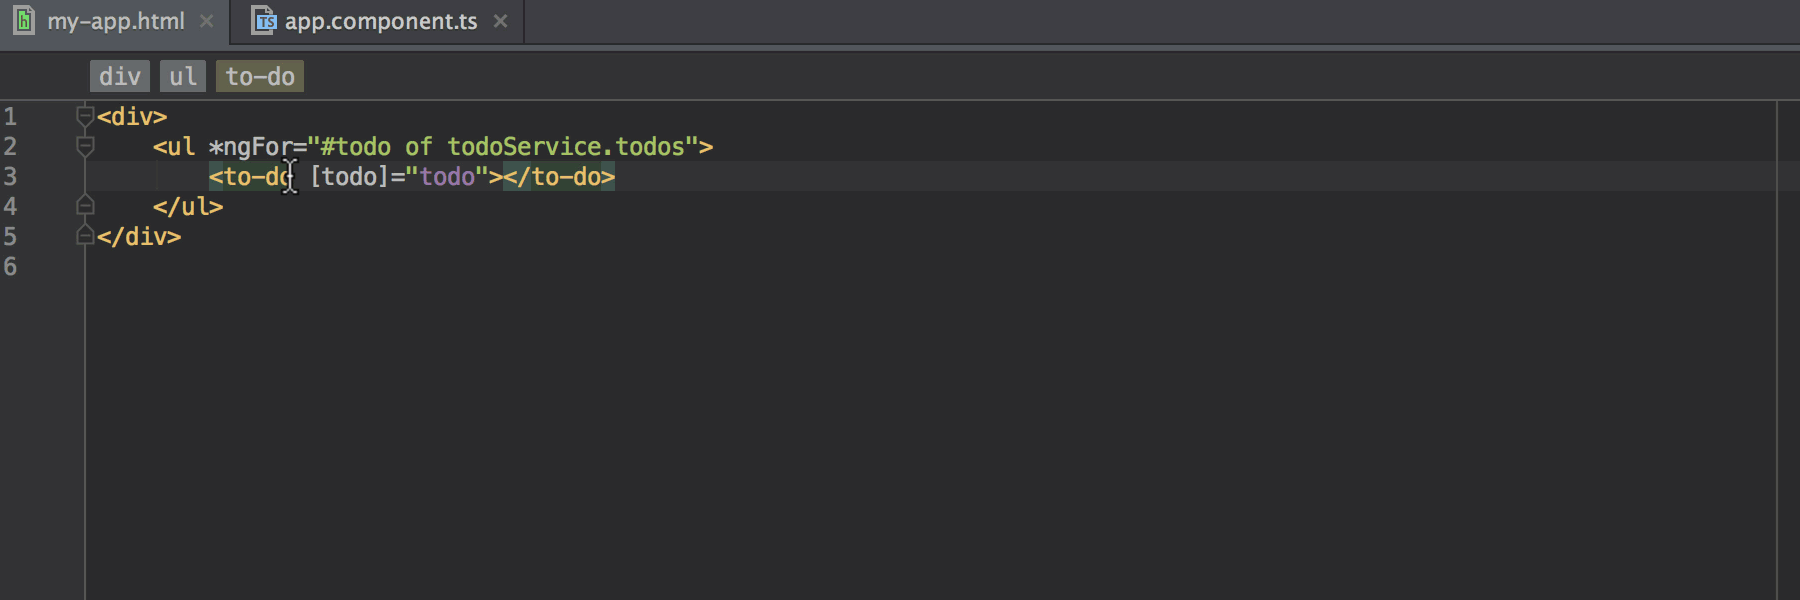
Inside any template you’ll get code completion for methods defined in the component:
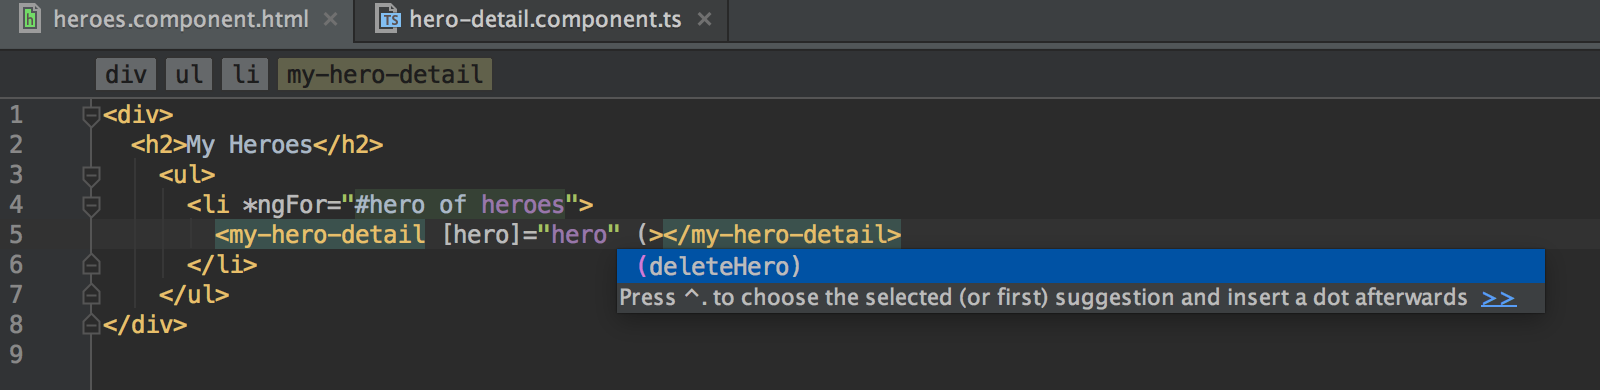
Code completion suggestions and resolve work for custom event handlers defined in the component with the @Output decorator, for example:
If you’ve defined a variable inside the template, you’ll get coding assistance and type inference for it later in the same template.

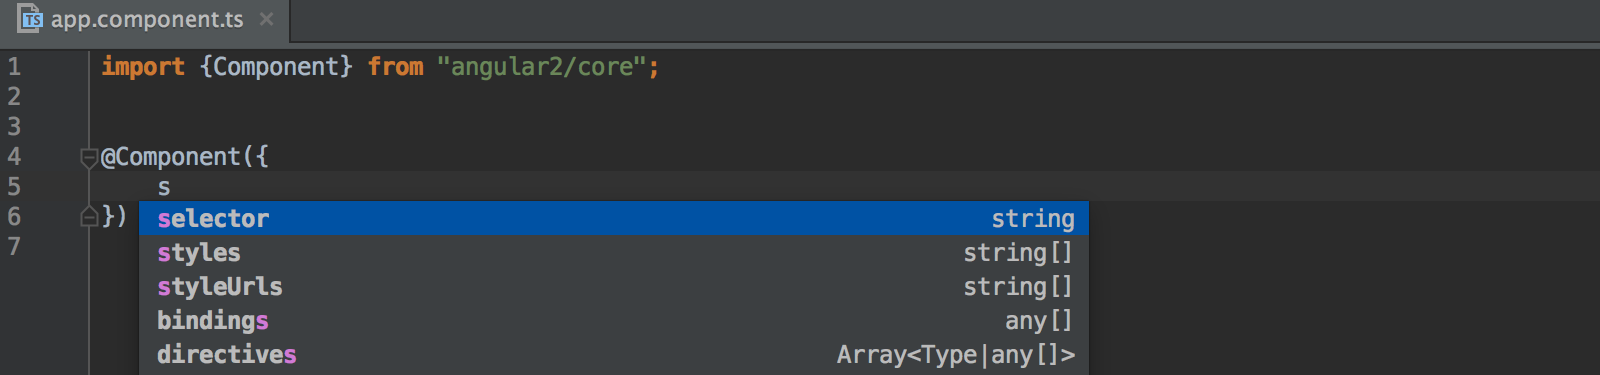
In @Component decorator we can see suggestions for available properties, such as selector or template.
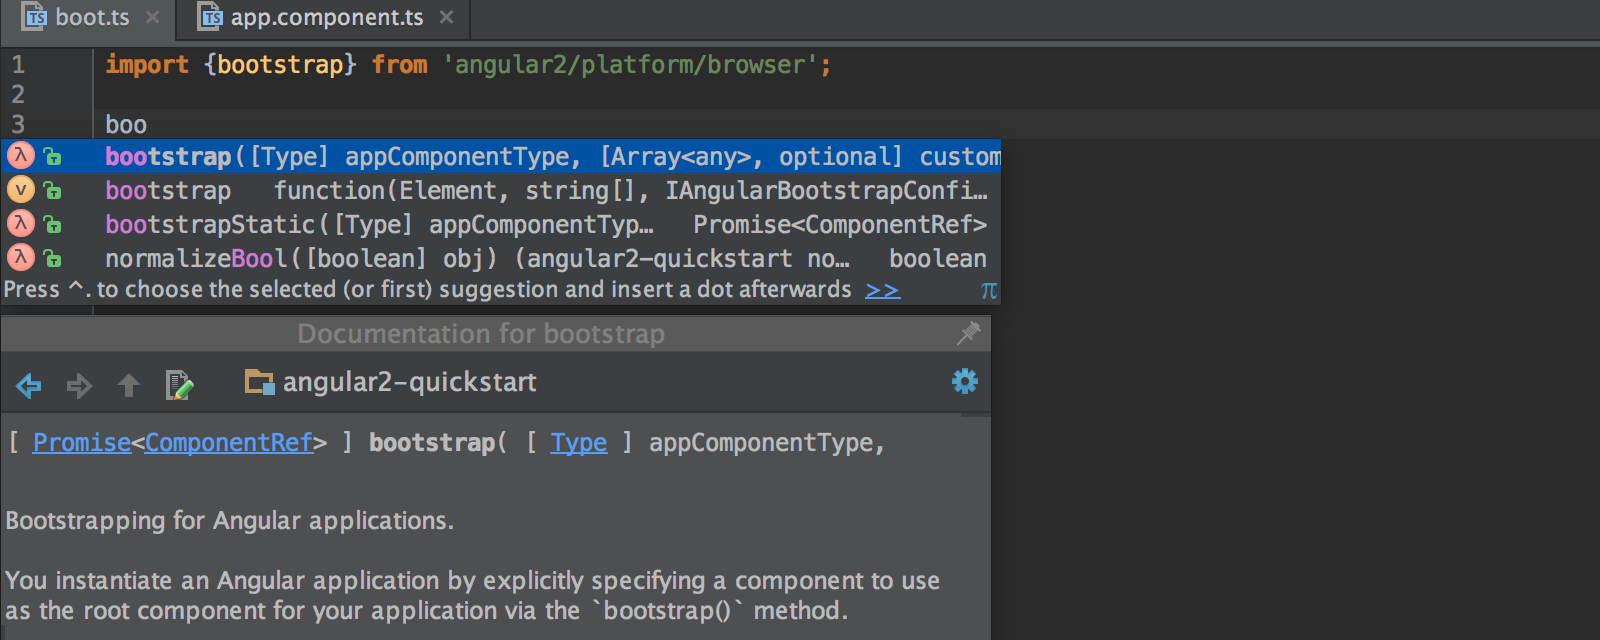
Documentation lookup
With the caret on Angular methods or functions, you can press F1 to quickly view documentation. You can also invoke Documentation right from code completions results.
Navigation
One of the most useful shortcuts for navigating around the code is Ctrl-click (or Ctrl-B) on Windows and Linux and Cmd-click or Cmd-B on OS X – it takes you to the definition of any class, function, method, variable or component. It also allows you to jump to a different module from the import statement.
Some Angular-specific navigation includes:
- Navigation to the file from the path in styleURLs and templateURL.
- Jumping to the component definition (to the @Component where you have specified its name it the selector parameter) from its usage in the HTML file.
- Navigation from a one-way binding in the component to the property defined using @Input in the component definition.

Press Ctrl/Cmd-Alt-Left arrow to navigate right back to where you were.
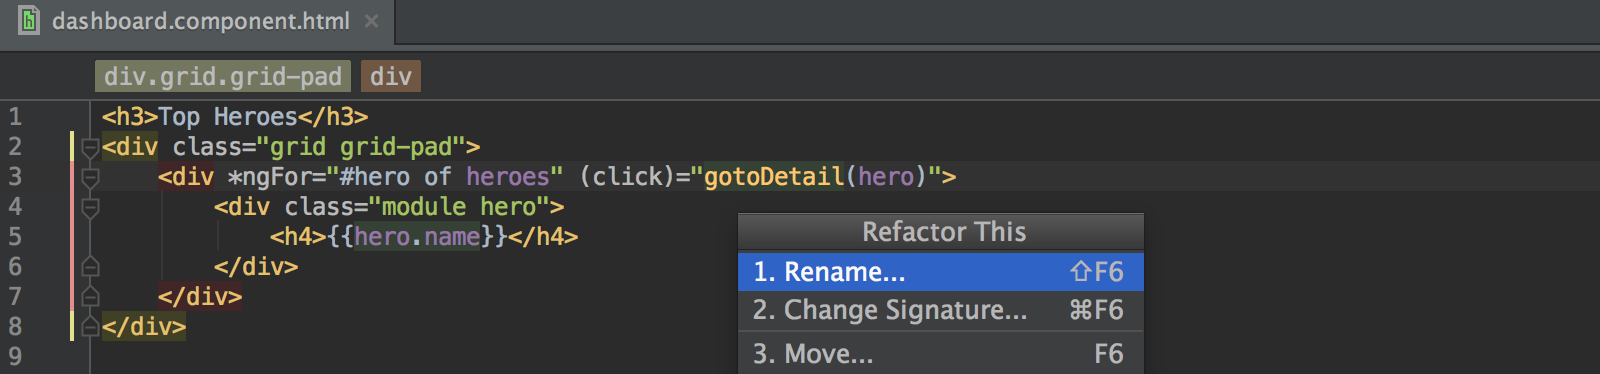
Refactoring Angular components and methods
Refactoring options available in WebStorm can be a real time saver.
For component names you can use Refactor – Rename. Press Ctrl-T on the tag or selector property in the component definition and then select Rename.
Rename also works for custom event handlers, class names and methods defined in the component.
Compiling TypeScript
If you don’t have a fully set-up built process for your app, you may want to try a built-in TypeScript compiler. You can read about it in our How to compile TypeScript blog post.
Debugging Angular app
If you’d like to debug your Angular app created with Angular CLI in WebStorm, check out this step-by-step tutorial.
Also watch a recording of our webinars WebStorm: Angular 2 Tips and Tricks featuring John Lindquist and Using WebStorm for Building Angular Apps with Victor Savkin.
Subscribe to WebStorm Blog updates