

WebStorm 2018.2 EAP, 182.3341: extract React component, global file watchers, rerun failed tests

Please welcome WebStorm 2018.2 EAP #6!
Toolbox App is the easiest way to get EAP builds. You can also get notifications right in the IDE when a new EAP build is available: simply go to Preferences | Appearance & Behavior | System Settings | Updates and select “Automatically check updates for Early Access Program”.
If you’re not yet familiar with our Early Access Programs, or if you want to find out what features were added in WebStorm 2018.2 EAP, check out this page.
Here are some highlights from WebStorm 2018.2 EAP #6 (182.3341.1):
- New Extract React component refactoring
- Improved support for React namespaced components and PropTypes
- Option to configure a global File Watcher available in all projects
- New Rerun failed tests action for Karma, Jest, and Mocha
- Improved support for the Angular CLI’s schematics
- Manage logs on the new Logs tab in the Node.js run/debug configuration
Extract React component
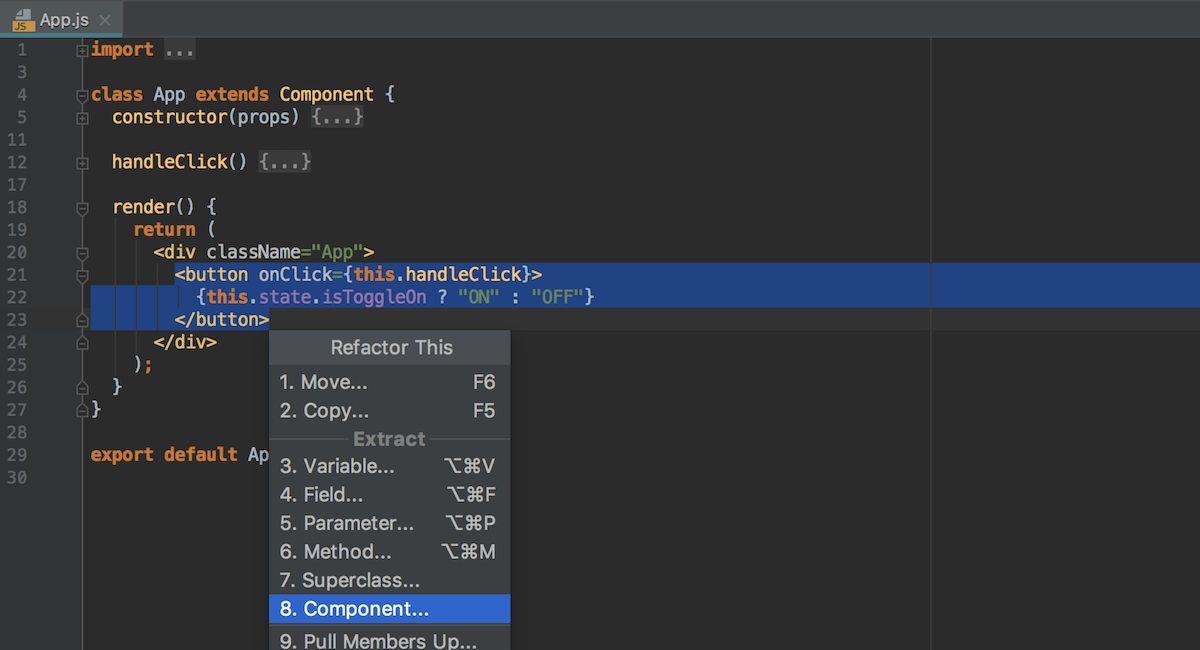
We’re very excited about this feature! WebStorm can now help you create a new React component, by extracting the JSX code from the render method of an existing one.
Select the code you want to extract, and then select Component… from the Refactor this… popup (Ctrl-T on macOS or Ctrl-Alt-Shift-T on Windows and Linux). Name the component and select whether it should be a class component or a functional component.
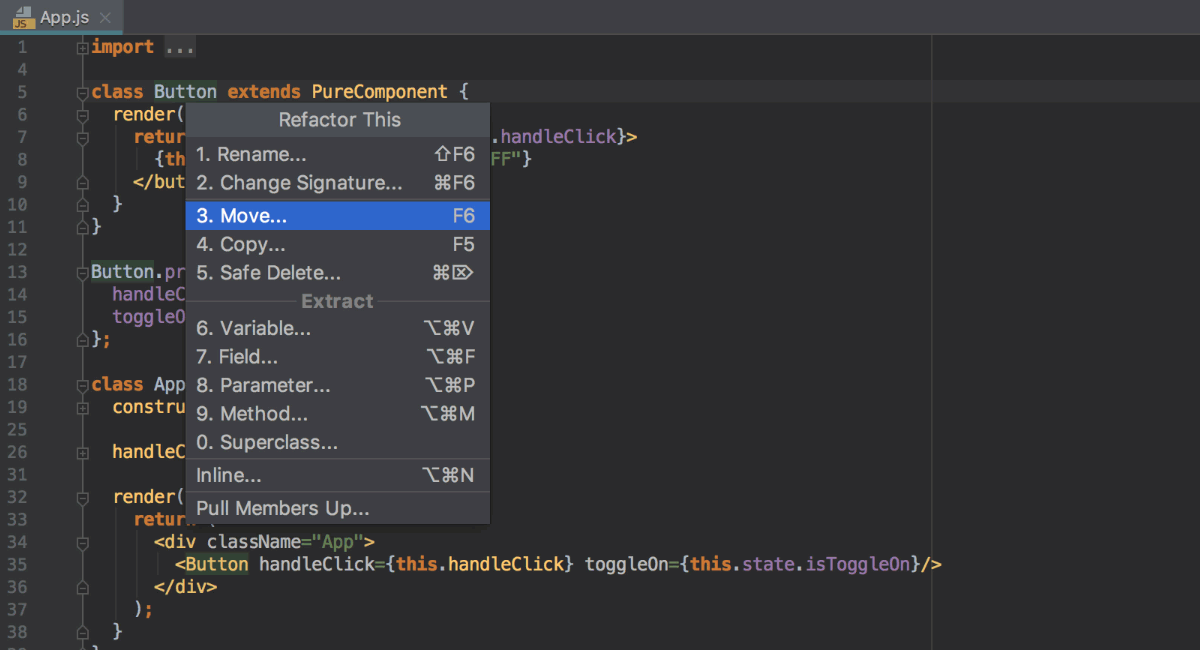
That’s it! Now your new component is defined next to the existing one and used in it.
You can then use the Move refactoring to move the new component and all the required imports to a separate file. (Do let us know if you’d like this option to be available right on the Extract Component refactoring dialog.)
In this Gist you can see the code before and after the refactoring.
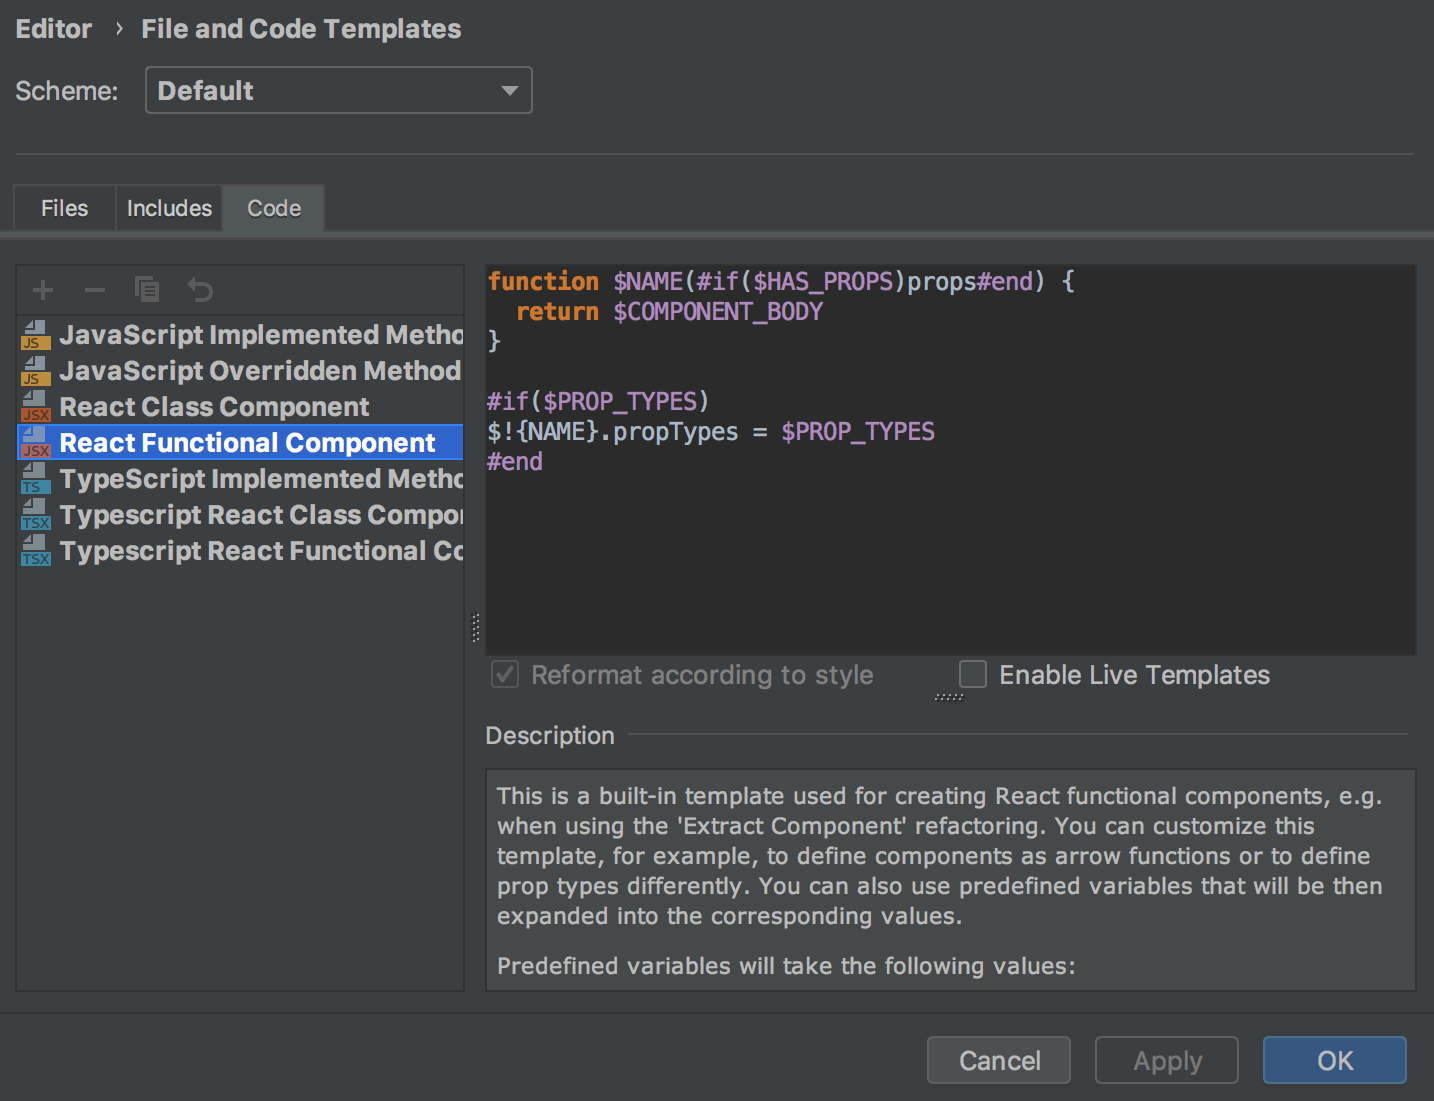
You can modify the code templates WebStorm uses for the new components, by going to Preferences | Editor | File and Code Templates and selecting the Code tab. For example, you can switch from using PureComponent to using Component or React.Component when creating a class component. Or, change the template for functional components to using arrow function. You can also change the style of using PropTypes or remove them altogether.
We hope you like this new feature and get a lot of use out of it! Please share your feedback with us in the comments below or on our issue tracker.
Support for React namespaced components
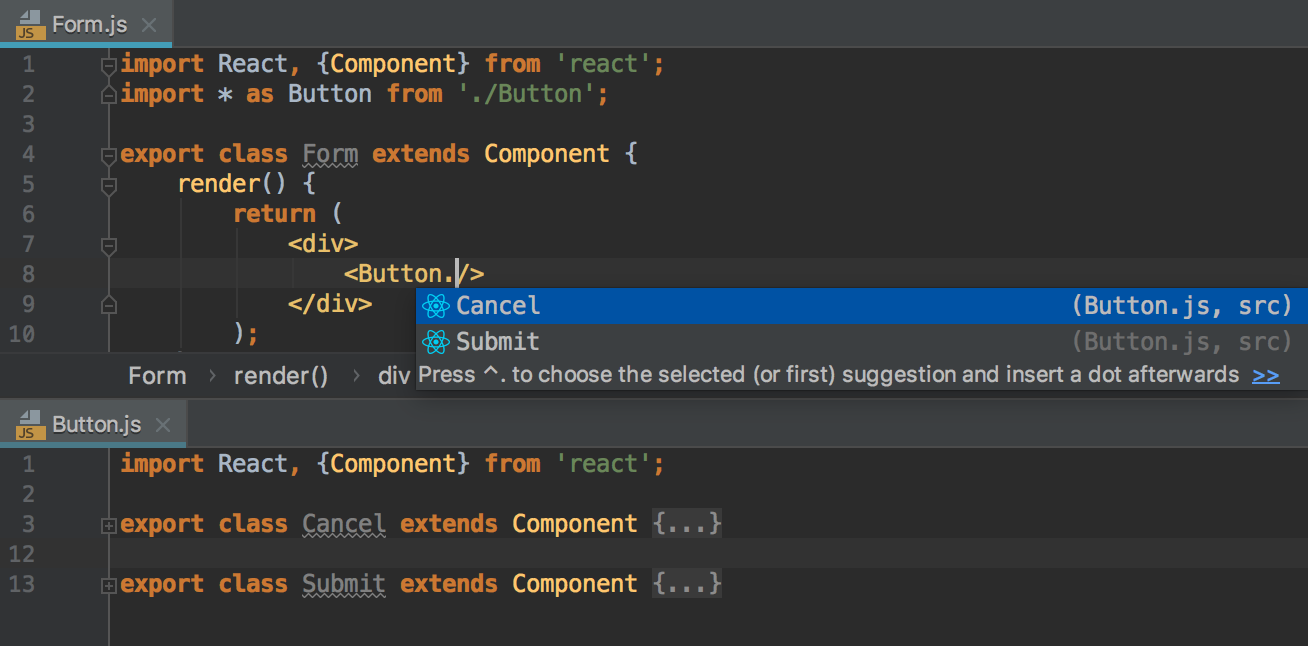
WebStorm now has better support for React components that have a namespace in their name. You can now get appropriate code completion and navigation to the definition for these components in JavaScript and TypeScript files.
Better support for PropTypes
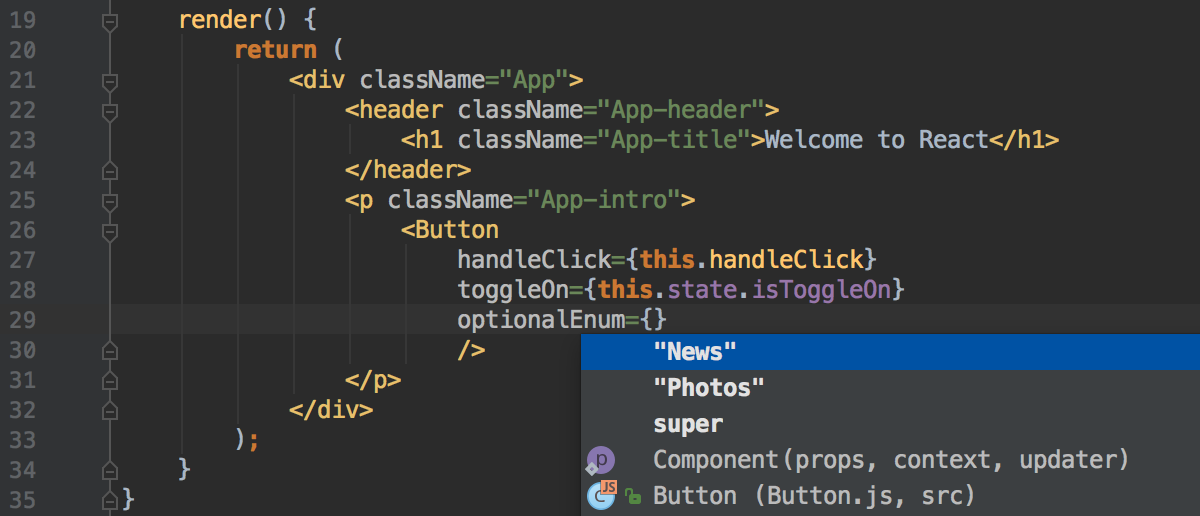
Code completion is now more precise when you use PropTypes like shape, oneOf, instanceOf, or arrayOf. Here are a couple of examples:
Here in the completion we have the values listed using PropTypes.oneOf:
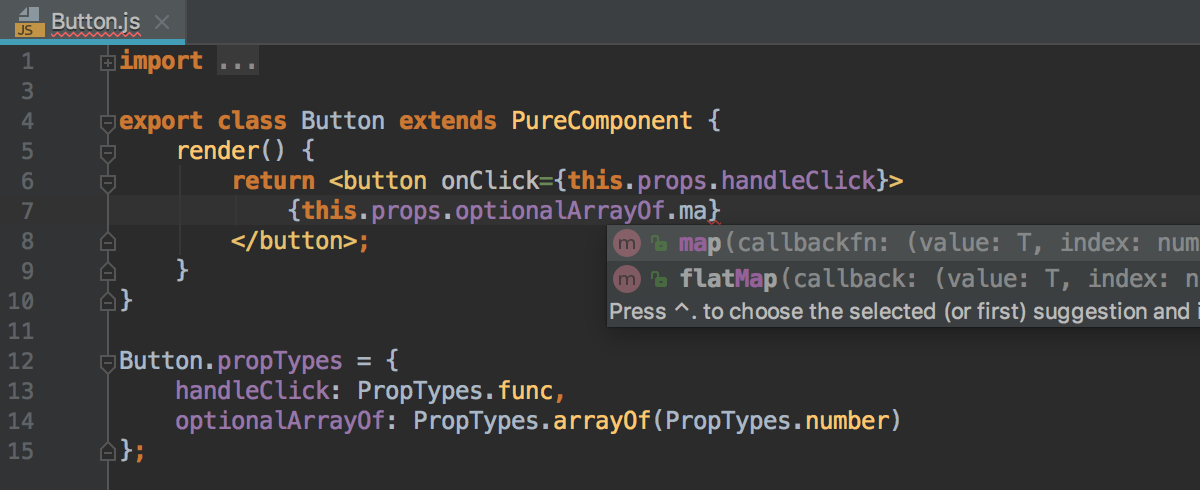
And here we have completion for array methods because PropTypes.arrayOf is used:
Global File Watchers
With File Watchers, you can run command-line tools like Prettier automatically when you change or save a file. Before, it was only possible to configure and use a file watcher in a specific project. If you wanted to use the same watcher in a different project, you had to repeat the whole configuration. But now you can create and store File Watchers on the IDE level, and easily enable them in different projects.
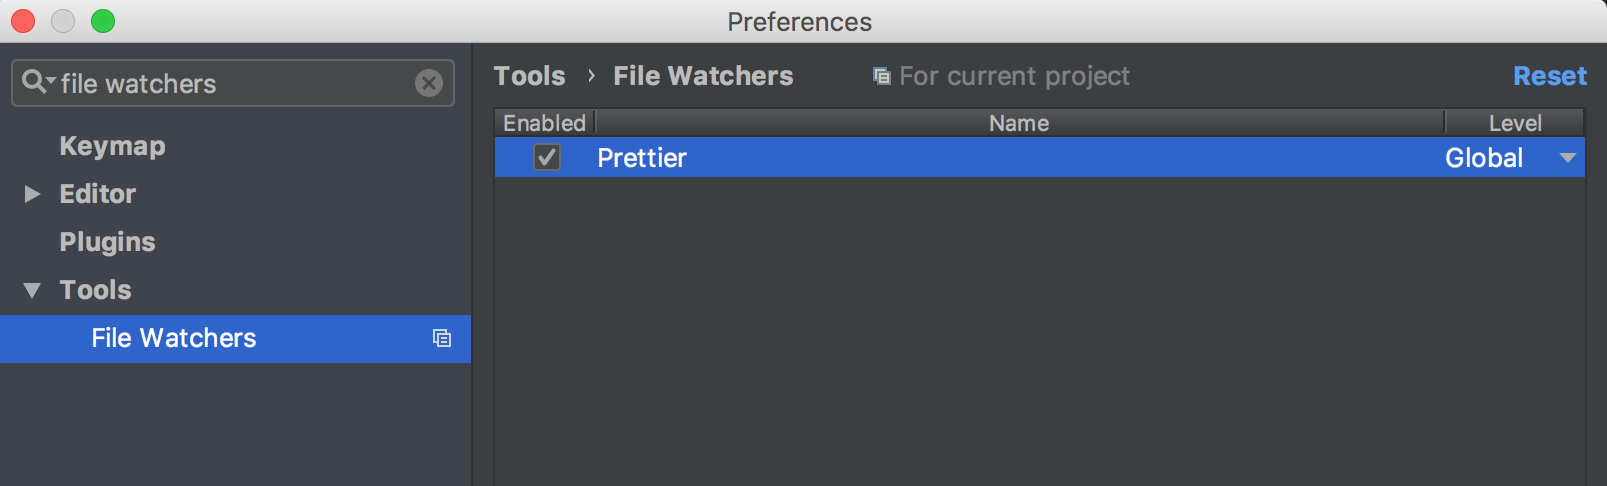
To create a global File Watcher, open the IDE Preferences (from the project or from the Welcome screen) and go to Tools | File Watchers, click the + button, and select Custom from the list. Now configure the File Watcher for the tool you want to use (for more information on how to do that, see our documentation).
Once you’ve saved the new File Watcher, you can decide if it’s going to be available only in the current project – select Project in the right column or for all projects – then select Global.
Note that the global File Watchers will be available in all projects, but disabled by default. If you want to use it, go to the project’s Preferences | Tools | File Watchers and select the check-box next to it.
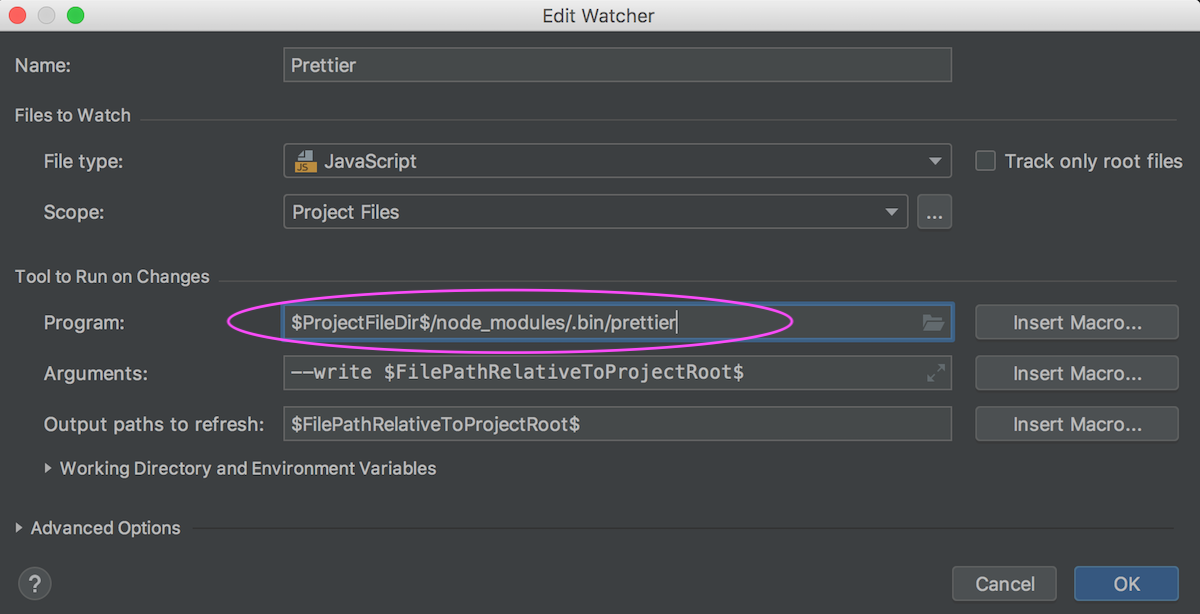
Let’s create a new global File Watcher for Prettier following the steps described in the Prettier docs. What we want to change is the path to Prettier – for every project where we want to enable this File Watcher, we want to use Prettier installed in the project’s node_modules folder. To do that, we use a macro in the path: $ProjectFileDir$/node_modules/.bin/prettier.
Rerun failed tests
There’s a new Rerun Failed Tests action available when you run tests with Karma, Jest, or Mocha in WebStorm. As the name suggests, it allows you to rerun only those tests that have failed, instead of running all tests after the fix.

Run more Angular schematics using the Angular CLI integration
With the New… – Angular CLI… action in the Project view, you can now generate code using schematics that are defined in libraries like @angular/material (note that you need to use Angular 6 for this). Previously, you could only generate components, services, and other blueprints defined in the Angular CLI itself.
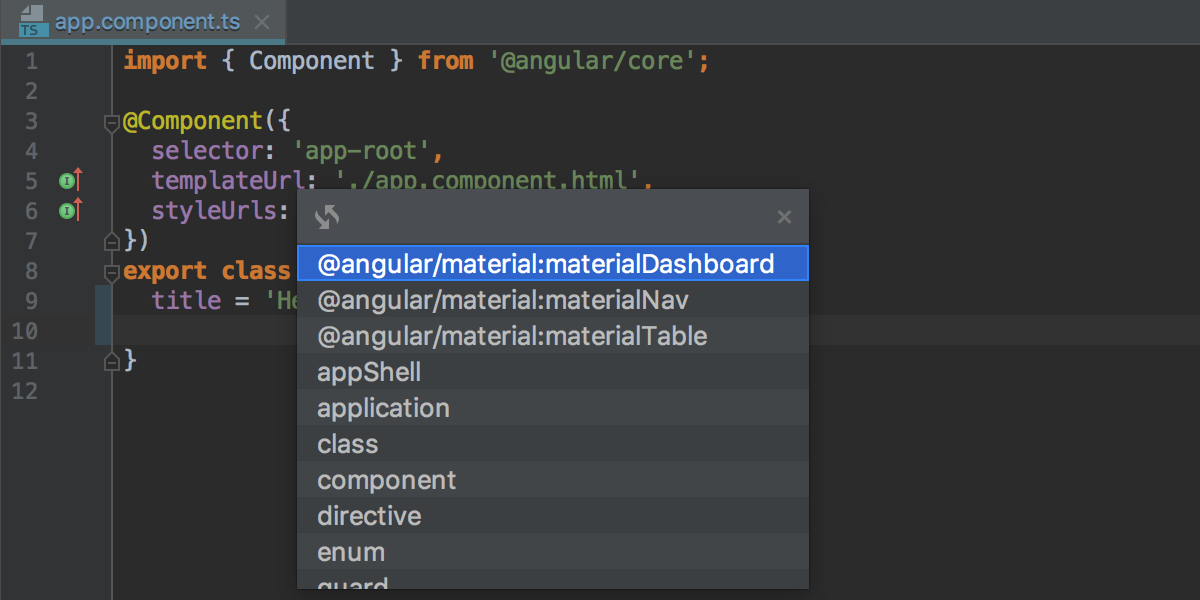
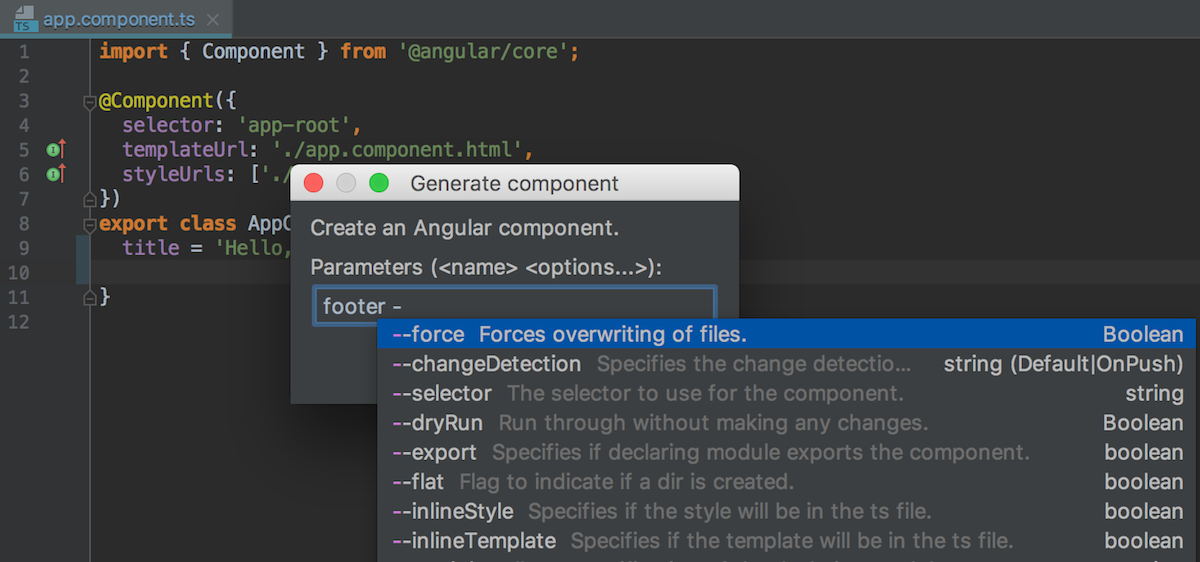
In addition, WebStorm now shows the schematic’s description and provides code completion and description for available options.
Manage logs when running a Node.js app
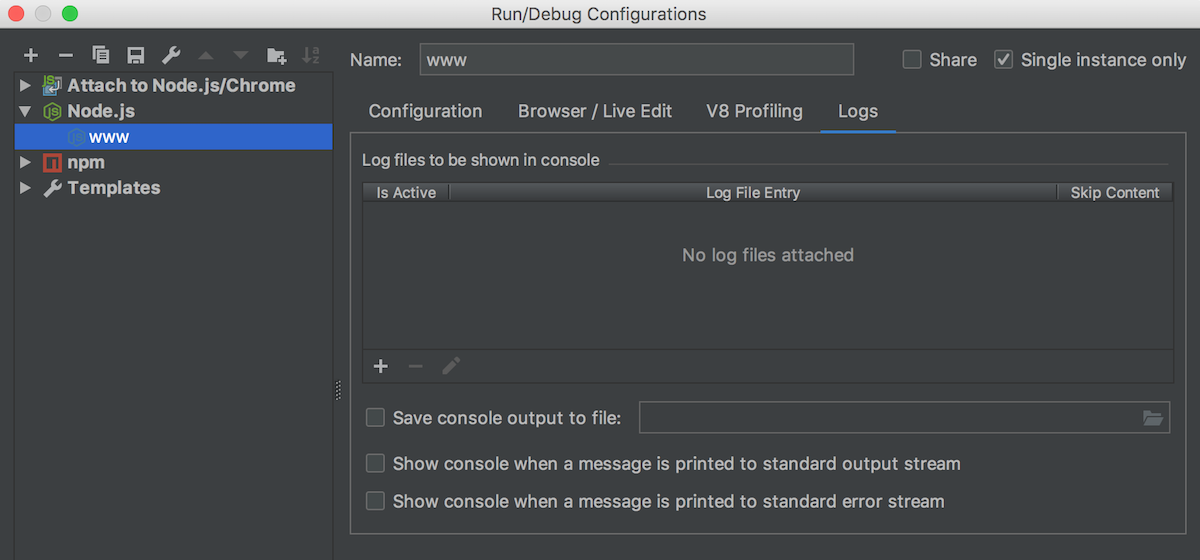
If you’re using a logging tool like morgan in your Node.js app, and the tool writes logs to a file, you can now see these logs on the Console tab in the Node.js Run tool window. To enable this, go to the new Logs tab in the Node.js run/debug configuration. While there, you can also enable saving the console output to a log file.
Please see the Release Notes for a full list of issues.
WebStorm Team


