Using Angular 9 in WebStorm
Note: In WebStorm 2020.1 onwards, support for the Ivy metadata is enabled by default. See this blog post for more information.
A long-awaited update of the Angular framework, Angular 9, was finally released last week! If you’ve closely followed the news about this update, you might already know that it comes with a number of great enhancements, with the most exciting of them being the new default compiler and runtime, Ivy. To help you work with Ivy and other Angular 9 features, we’ve added support for them to WebStorm. Let’s see how you can make use of it.
Creating a new project and updating to version 9
The fastest way to create a new Angular 9 project is to click Create New Project on the welcome screen and select Angular CLI from the list of available projects. When creating a new Angular project, WebStorm will use the Angular CLI installed globally on your machine or get its latest version via npx:
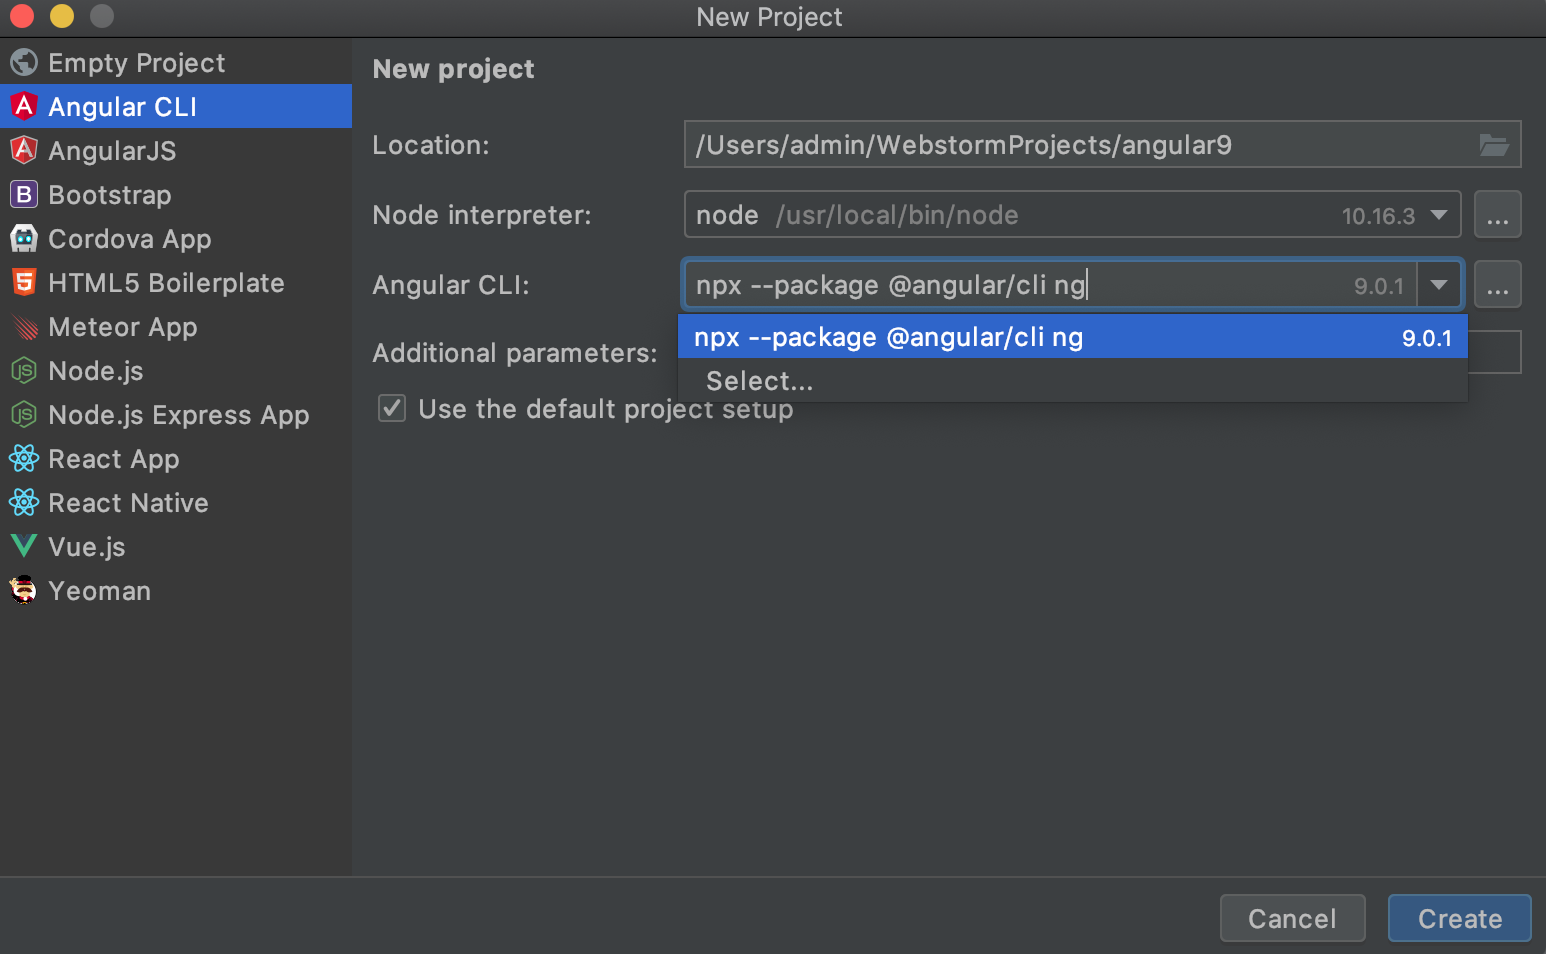
With npx selected, WebStorm will generate a new Angular 9 project with all the required configuration files and dependencies as soon as you click Create:
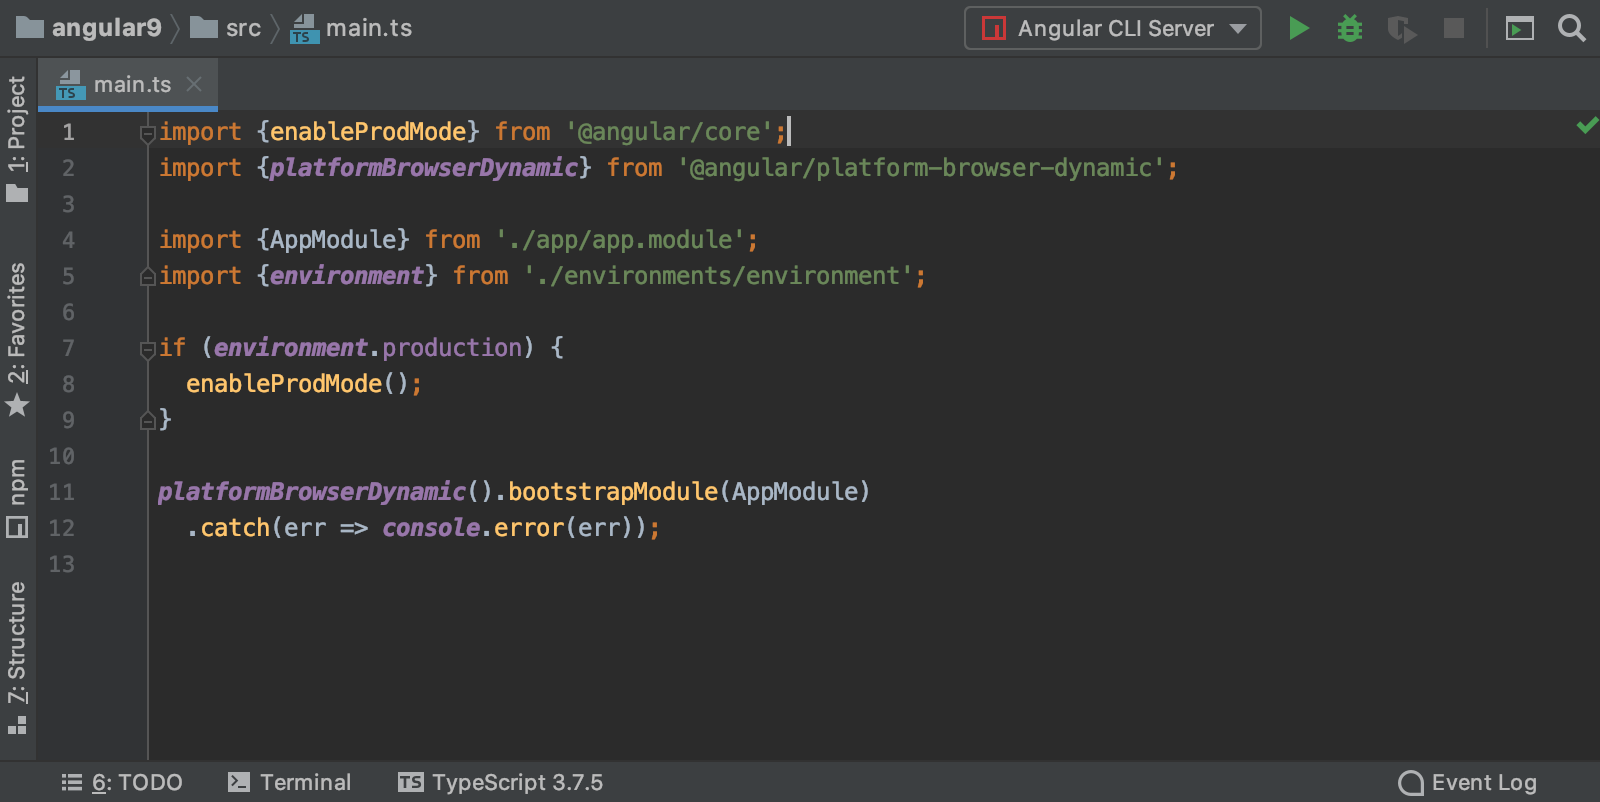
In an Angular 9 project, you can use the features you’d typically expect when working with Angular in WebStorm, such as code completion and auto imports in TypeScript and template files, all available and requiring no configuration. However, there’s one exception, local libraries, which we’ll cover in a second. And, of course, you can get all the benefits provided by the Ivy compiler, such as faster compilation, smaller bundle size, and improved type checking, to name but a few.
If you’d like to update an existing project to version 9, the best option is to do so by following the detailed instructions from the official Angular website.
Enabling Ivy metadata support in WebStorm
Angular 9 brings a new approach of defining additional metadata in .d.ts files, instead of the infamous .metadata.json. Thanks to this new approach, WebStorm can provide you with even faster code completion and inspection results. However, as some of the parts of the new standard are still being polished, we don’t have it enabled by default for now. This is likely to change later depending on user feedback, our own testing results, and changes on the Angular side.
Let’s see how you can turn Ivy metadata support on in WebStorm for even faster code insight. First, press Cmd/Ctrl-Shift-A, type Registry in the Find Action popup and select it from the search results:

Next, you’ll see the Registry dialog. Start typing angular.enableIvyMetadataSupport, and you’ll see the corresponding registry key. Tick an empty box next to this key and restart the IDE in order for the change to take effect:
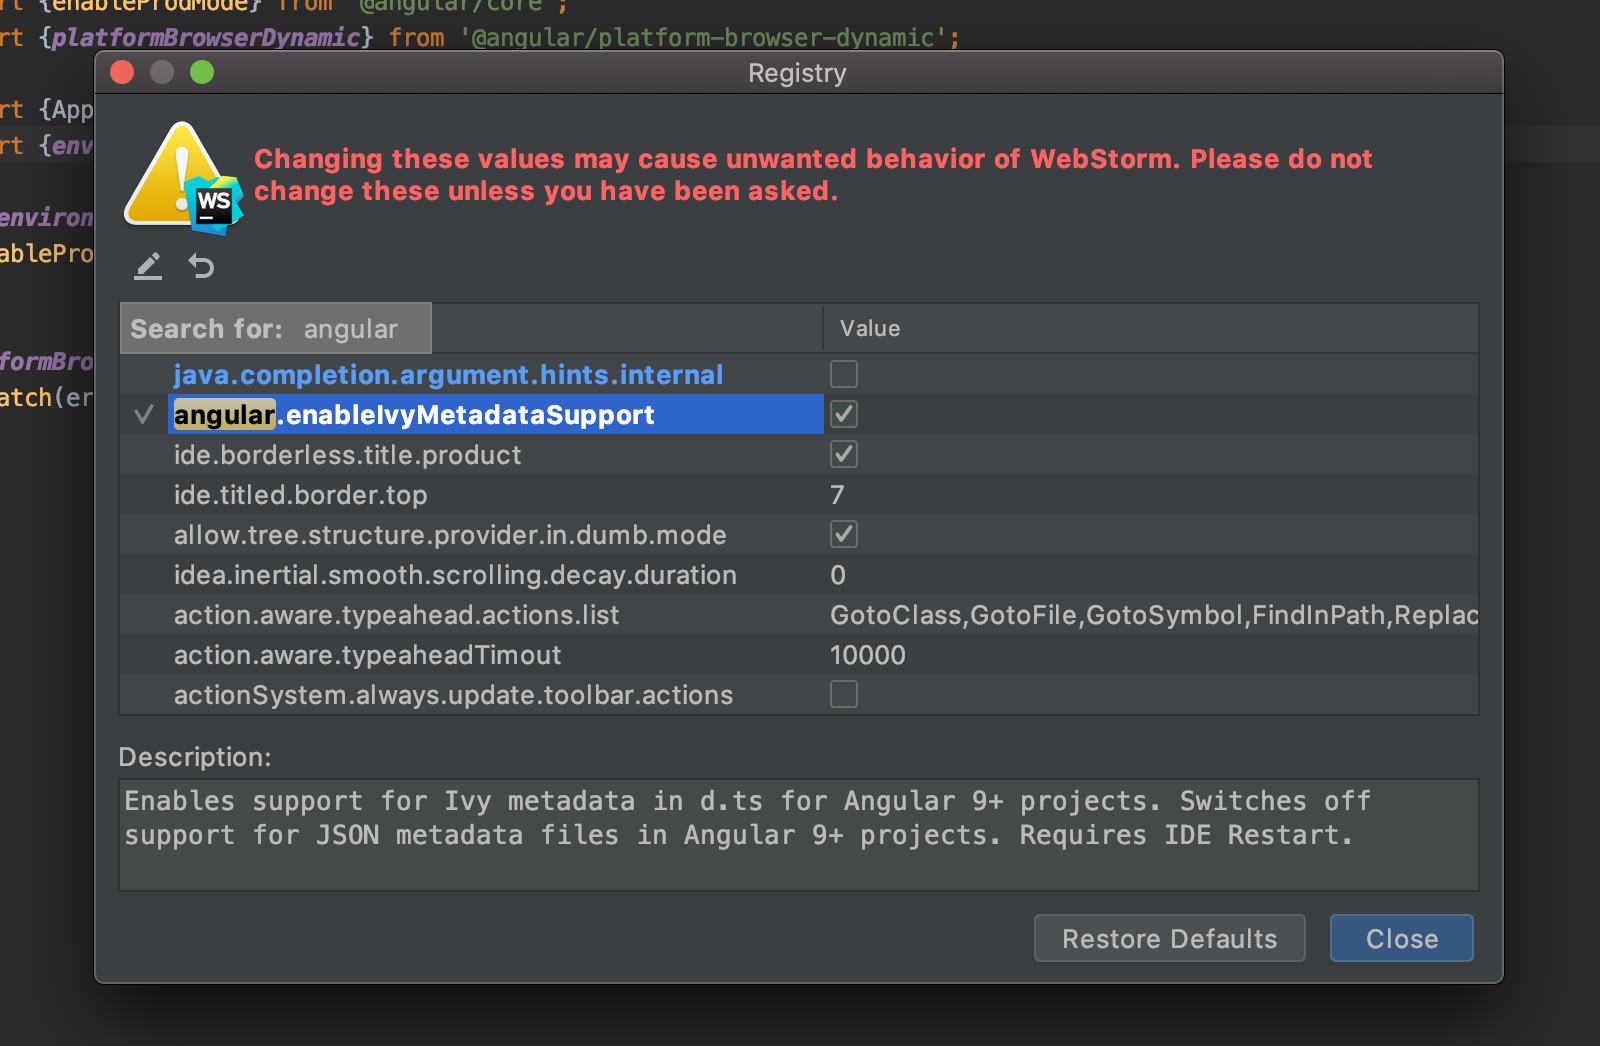
Voila! Support for Ivy metadata has now been enabled.
Working with local Angular libraries
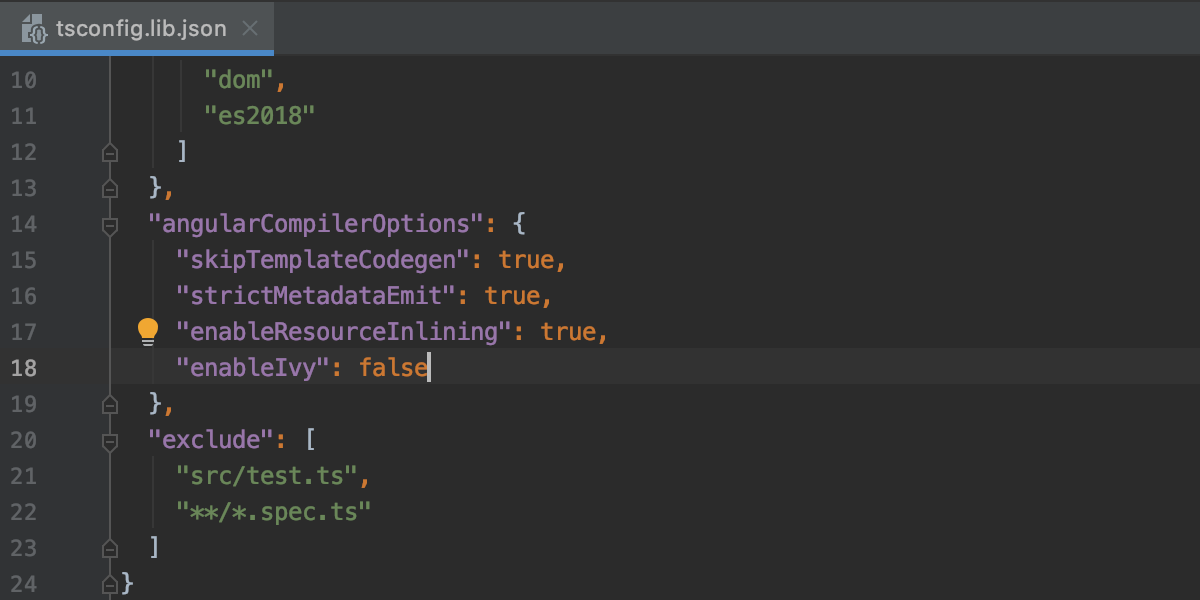
If your project uses local libraries created with <a href="https://angular.io/guide/creating-libraries" target="_blank" rel="noopener noreferrer">ng generate library</a>, in Angular 9 they are set to compile with Ivy by default. To get code completion for them, you need to enable Ivy metadata support. However, this metadata lacks information about some code constructs, such as @Attribute annotations or ng-content selectors. While this information is not required by the Ivy compiler, it is needed for the IDE to provide you with completion suggestions and code inspections. So, if you use any of the mentioned constructs in your local library, we recommend switching Ivy off for it. You can do this in the tsconfig.lib.json file of a specific library by adding enableIvy: false under angularCompilerOptions as shown below:
Using Angular schematics
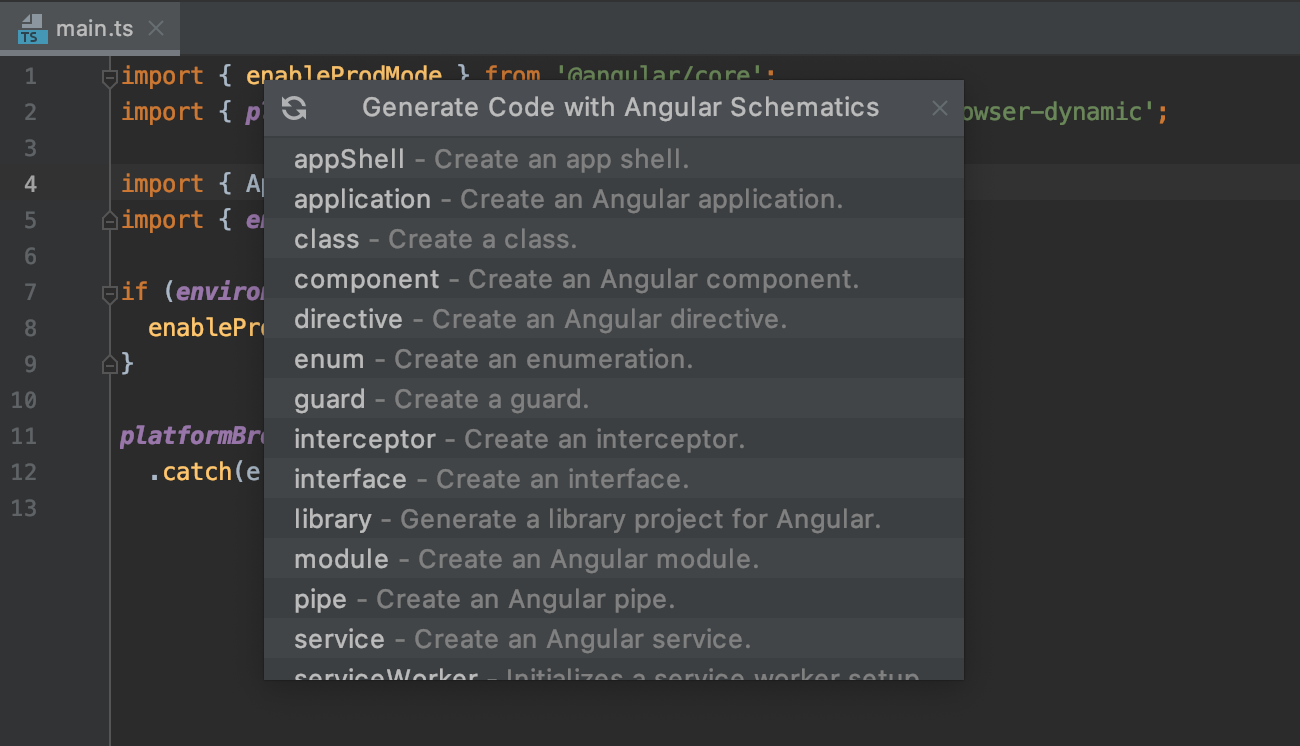
Finally, you can use schematics with Angular 9 just like you could in the previous framework versions. To do so, look for Schematics using the Find Action popup (Cmd/Ctrl-Shift-A) or select Angular Schematic… from File | New in the main menu:
That’s about it. If you have any questions or feedback, please don’t hesitate to post them in the comments below.
The WebStorm team
Subscribe to WebStorm Blog updates


