The Angular Renaissance: Navigating the New Features With WebStorm

Angular 17 has arrived, marking another big leap for the framework. This release introduces a bunch of new features and enhancements that promise to streamline the development experience. For those seeking an exhaustive list of updates, the official Angular blog provides a comprehensive overview. In this post, we’ll focus on the syntax and API changes that are reshaping the way Angular apps are being developed: standalone components, signals, and the new control flow.
The WebStorm team has made a considerable effort to deliver essential support for Angular 17 in WebStorm 2023.3. This version also comes with a range of useful inspections and quick-fixes to improve your experience working with modern Angular APIs, which this post will also touch on.
Standalone components
The main idea behind standalone components is their self-contained nature, meaning they should not be declared in some NgModule. The standalone approach reduces boilerplate and makes components more reusable. Starting with Angular v17, this approach is recommended as the default.
Following this recommendation, the new Angular project wizard in WebStorm 2023.3 includes a default option for bootstrapping an application using the standalone approach:
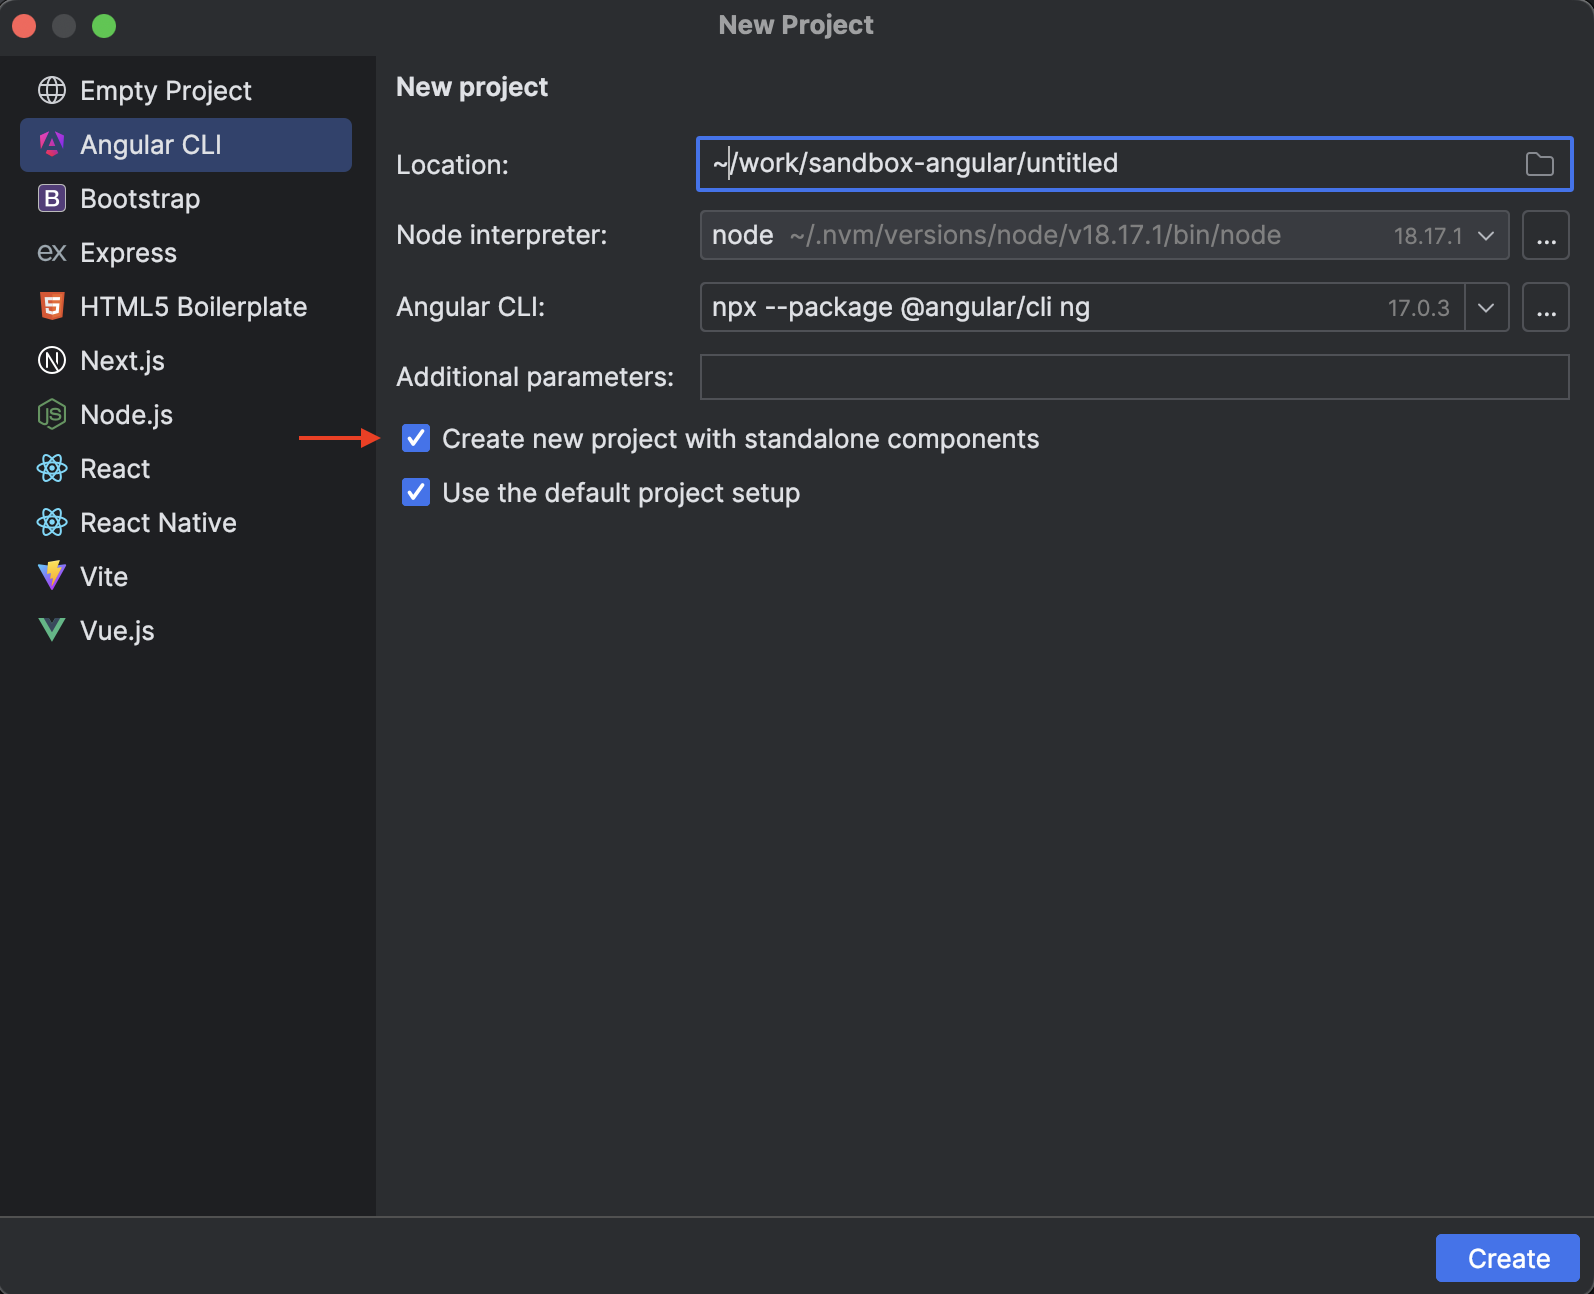
In this case, the generated application will not contain any NgModules, and the ng generate command will produce standalone components by default, effectively setting standalone: true in the component’s metadata:
import { Component } from '@angular/core';
import { CommonModule } from '@angular/common';

@Component({
  selector: 'app-button',
  standalone: true, // <---- that's how standalone components are declared
  imports: [CommonModule],
  templateUrl: './button.component.html',
  styleUrl: './button.component.css'
})
export class ButtonComponent {
}
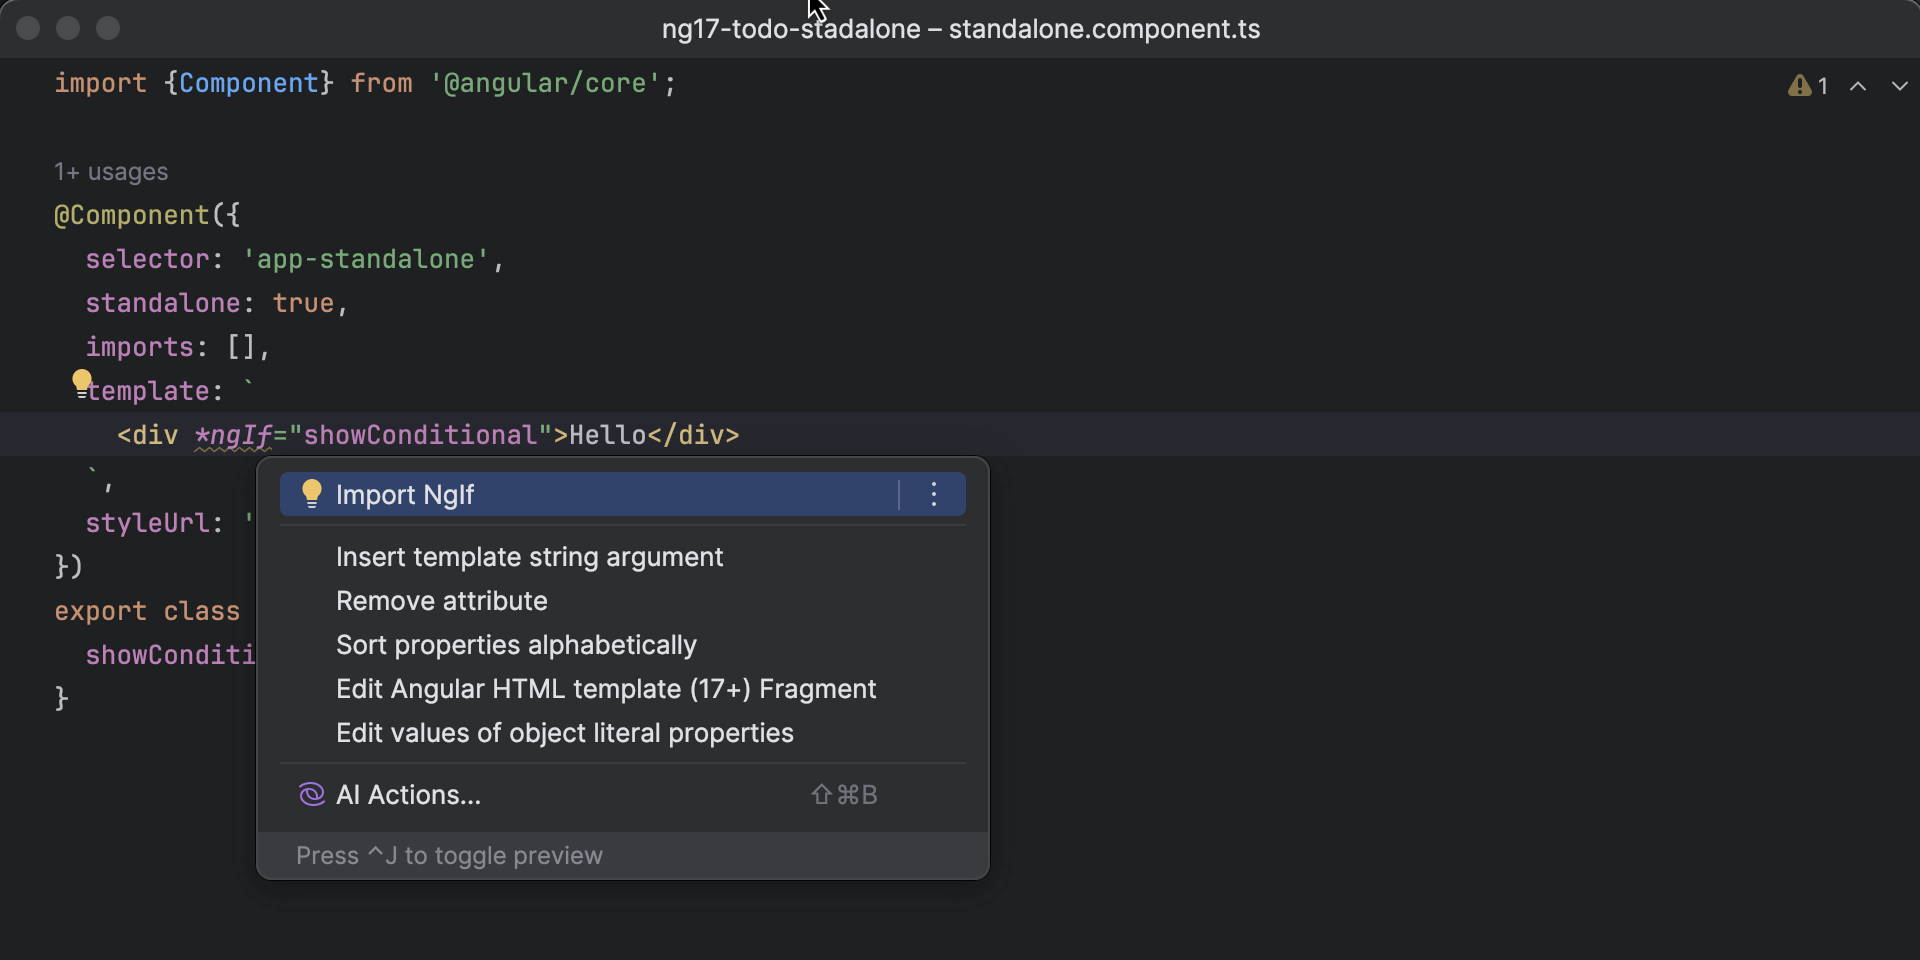
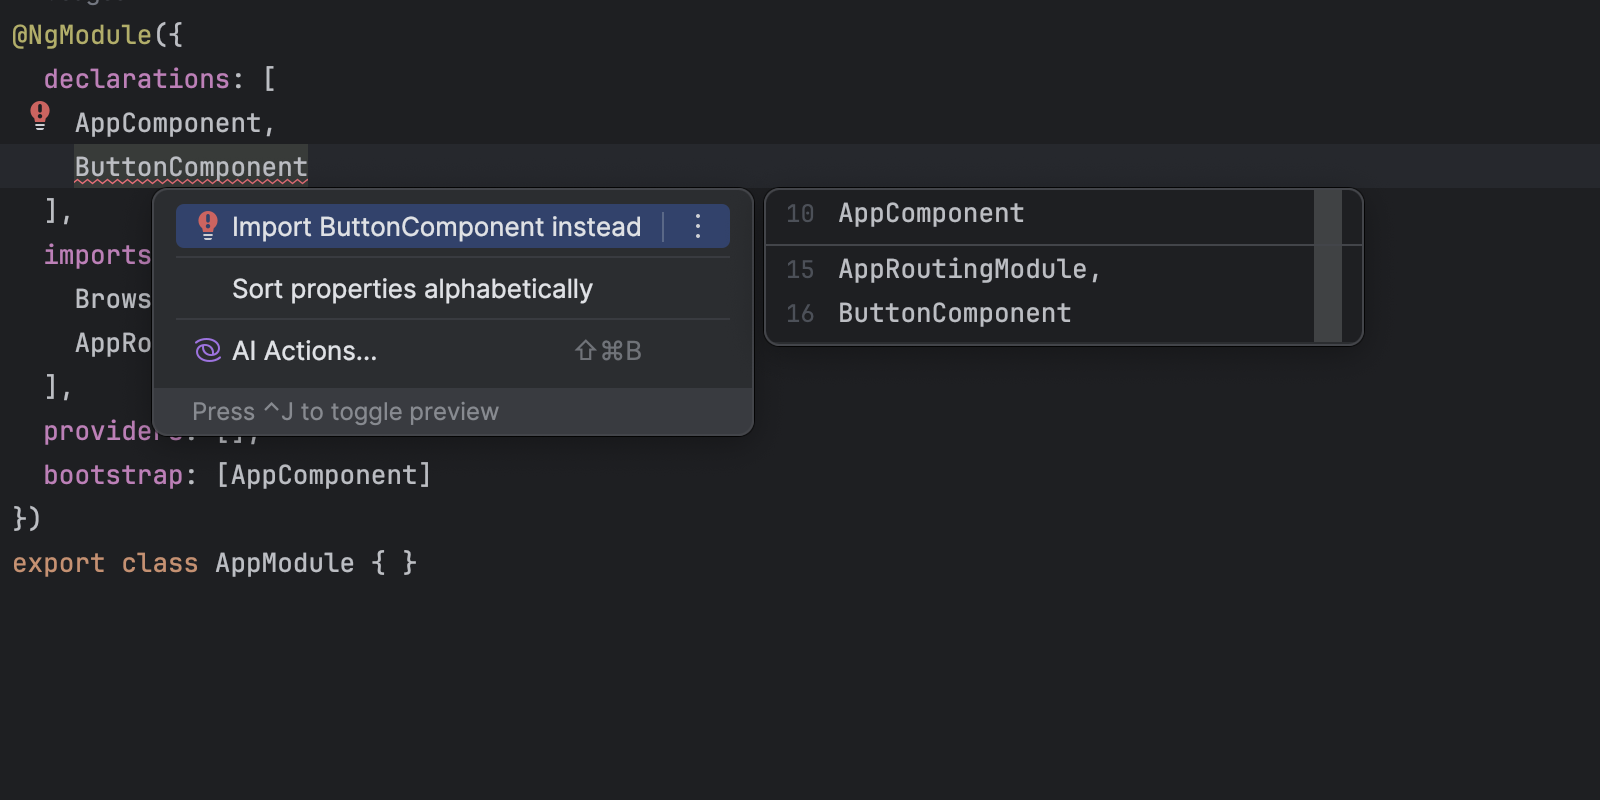
The imports property of standalone components is used to list its dependencies. It’s generally recommended to avoid importing entire modules since this cancels out the benefits of tree-shaking. Instead, it’s better to granularly import components, directives, and pipes used in the current component. WebStorm helps facilitate this, thanks to its auto-import mechanism:
Even if your app was created without using the --standalone flag and contains modules, you can still generate standalone components via the Angular CLI (starting from v15) by using the --standalone flag. This essentially means that standalone components can be incrementally adopted into your codebase.
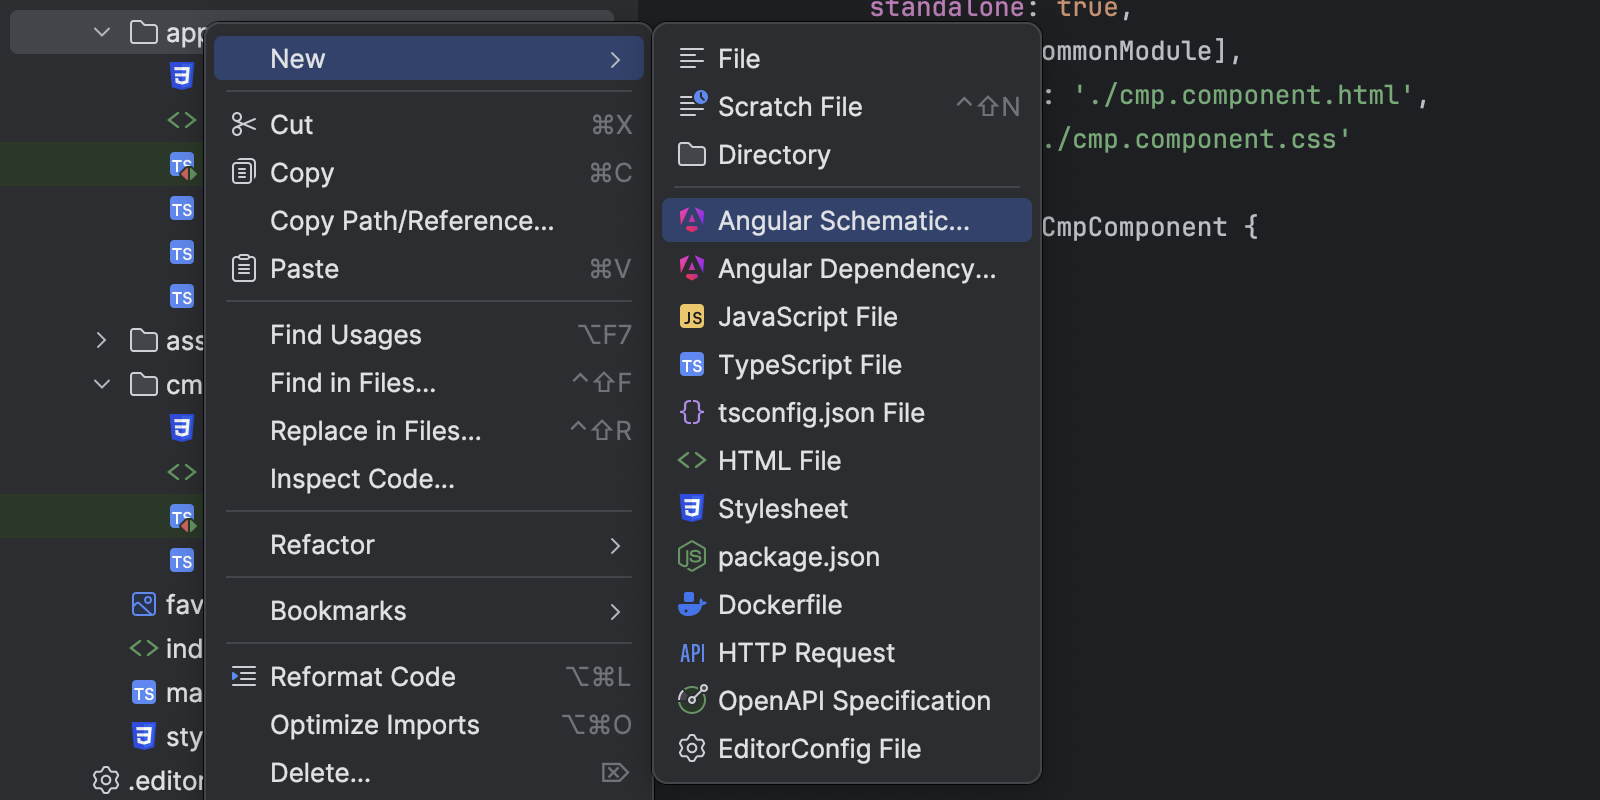
WebStorm provides a convenient way to invoke the Angular CLI commands via the GUI. Right-click on a destination folder in the project tree, click New, and then select Angular Schematic:
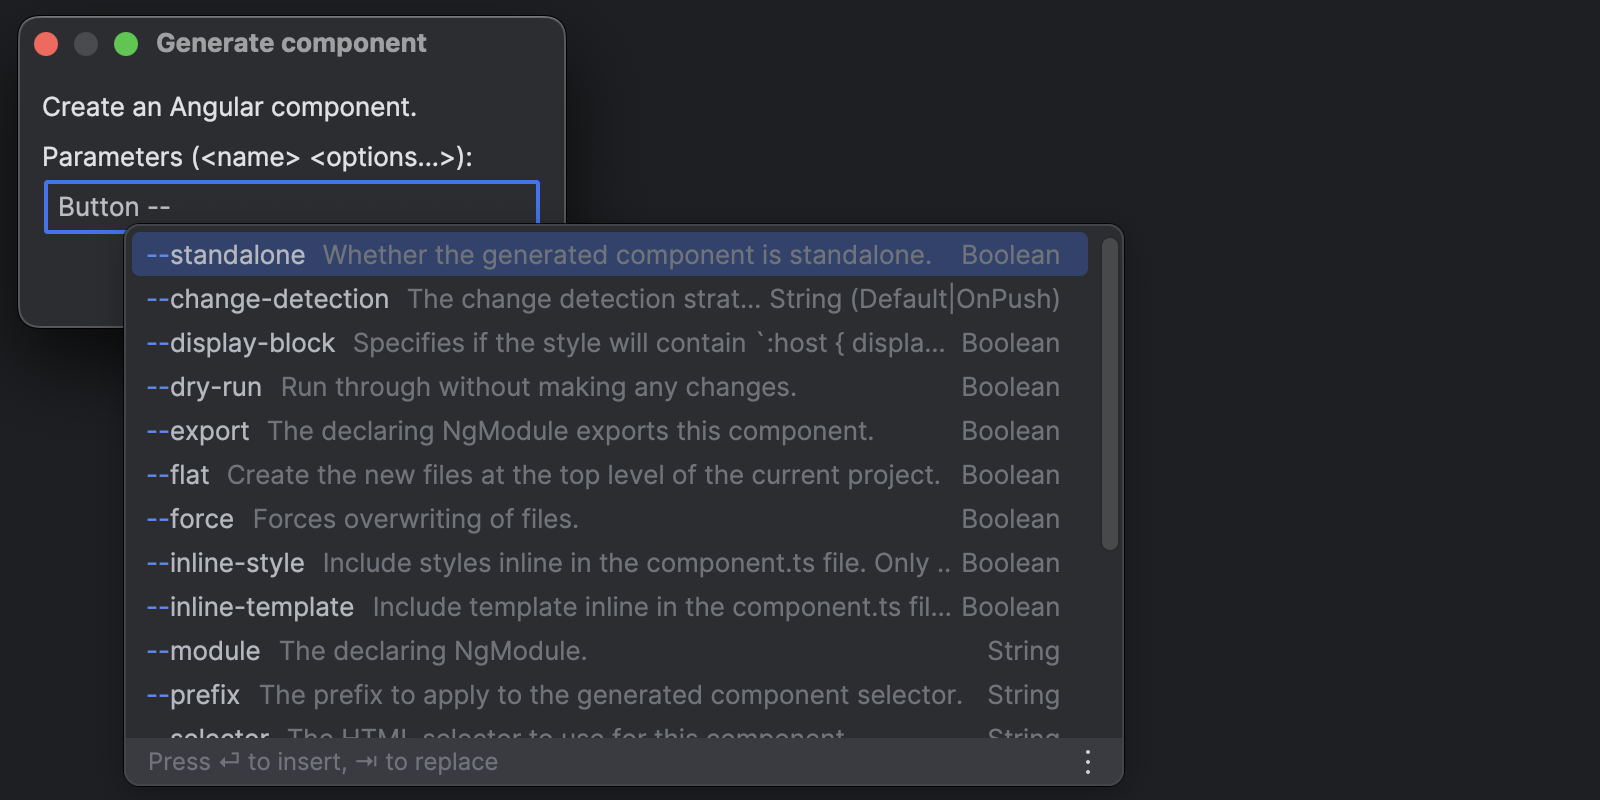
Next, select Component from the list of options. The Generate Component dialog provides auto-completion for arguments based on the selected CLI command:
If you migrate some of your components to be standalone, you should remove them from the module’s declarations. Instead you may want to put them into the module’s imports to use across the non-standalone components. WebStorm provides a quick-fix for that:
Previously, the IDE would run an inspection that identified components that are neither standalone nor belong to any module:
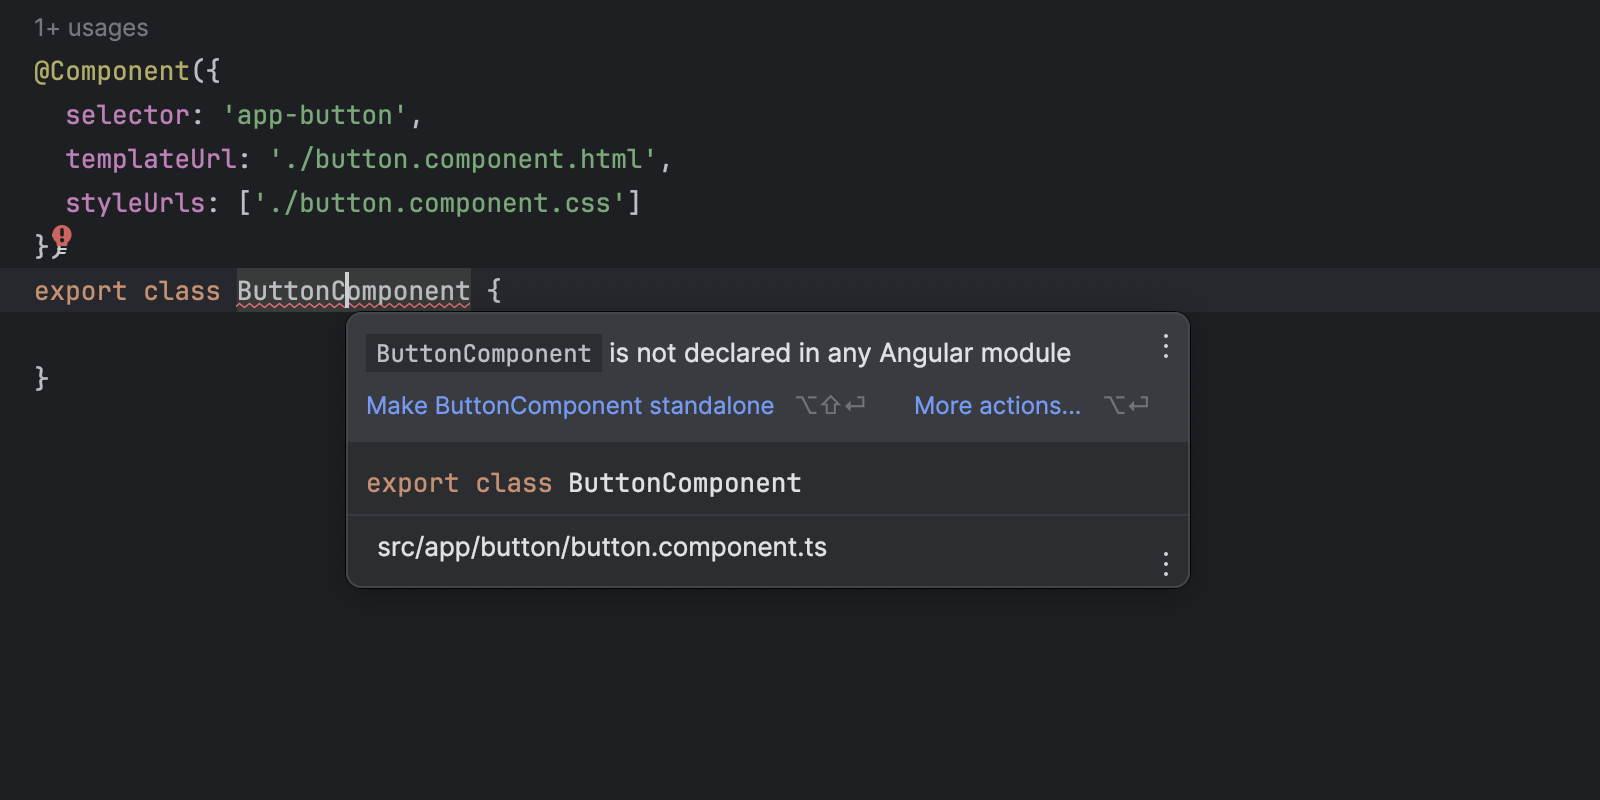
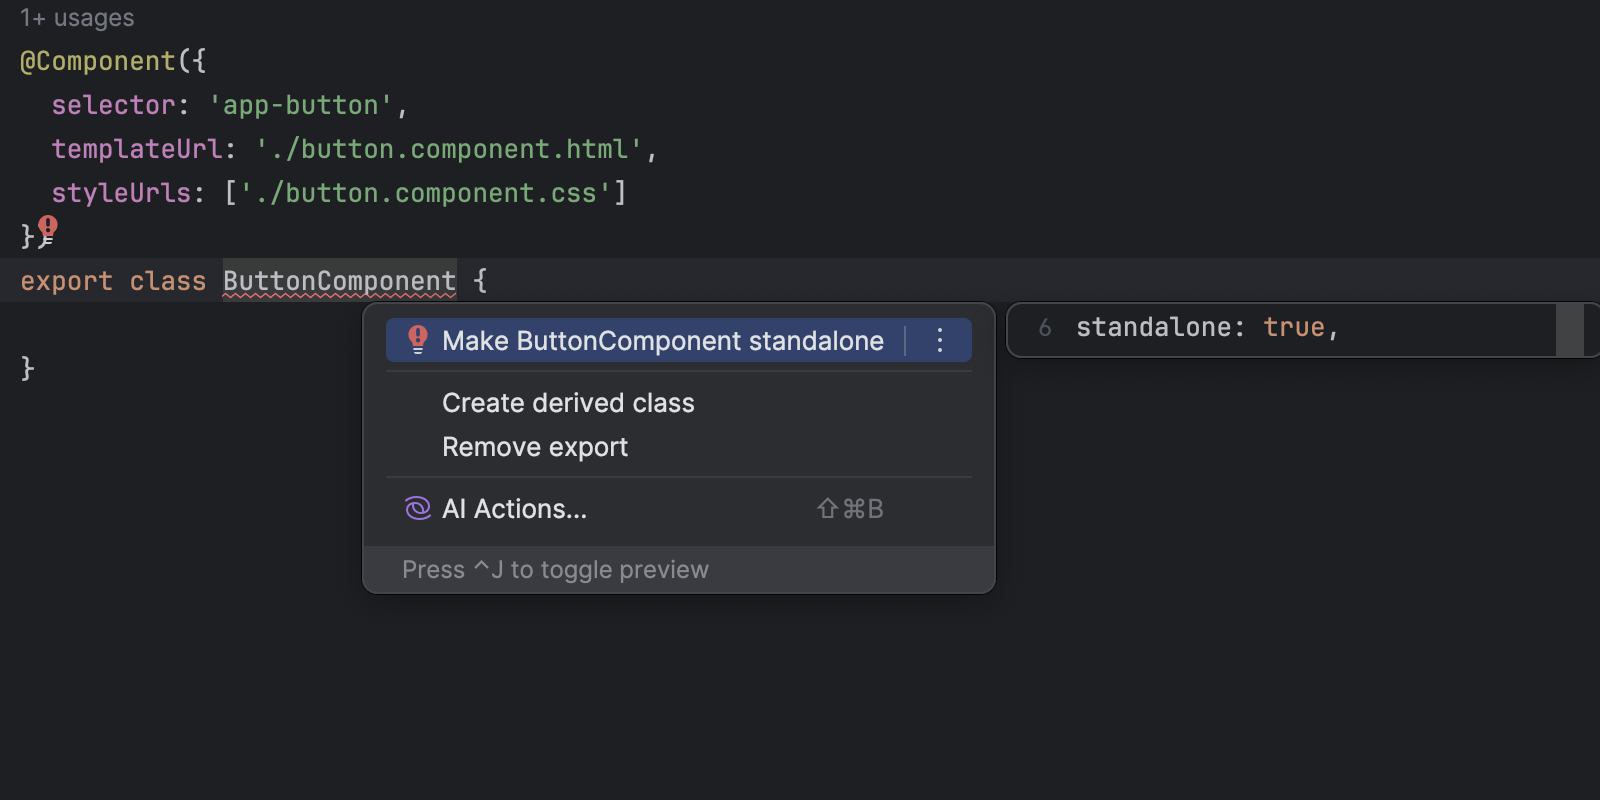
Now the default suggestion from the IDE is to make the component standalone:
For migration, Angular CLI offers a convenient method to migrate an entire project or some of its parts to the standalone API by using the @angular/core:standalone command. This command can also be launched via the Angular Schematics action in WebStorm.
Before initiating this process, it’s crucial to ensure that all your current work is committed. This will allow you to revert to a previous state if something goes wrong during the migration process. Additionally, bear in mind that for complex applications, even if the migration finishes successfully, a careful review of the changes is still required.
Signals
According to Angular’s docs:
Signals is a reactivity system that granularly tracks how and where the state is used throughout an application. This allows the Angular framework to optimize rendering updates, enhancing the efficiency of the application.
To describe how reactivity previously worked in Angular, we can look at its use of the zone.js library. In particular, zone.js patches the browser APIs to listen to events that may affect data. Angular then reacts to these events by running a global, top-down change detection mechanism. This mechanism keeps your UI in sync with the app state without the need to explicitly trigger changes, but this approach sometimes leads to performance problems and issues that are difficult to track.
Additionally, there was a demand for the built-in reactive API for the app state, in particular when it comes to the derived state. You may want to read the signals RFC and the preceding discussion for more details regarding the motivation and design decisions behind it.
So, what is a signal?
A signal is a wrapper around a value that notifies interested consumers when that value changes. Signals can contain any value, from primitives to complex data structures.
For your convenience, WebStorm provides a set of live templates to facilitate the creation of signals and the computed state:
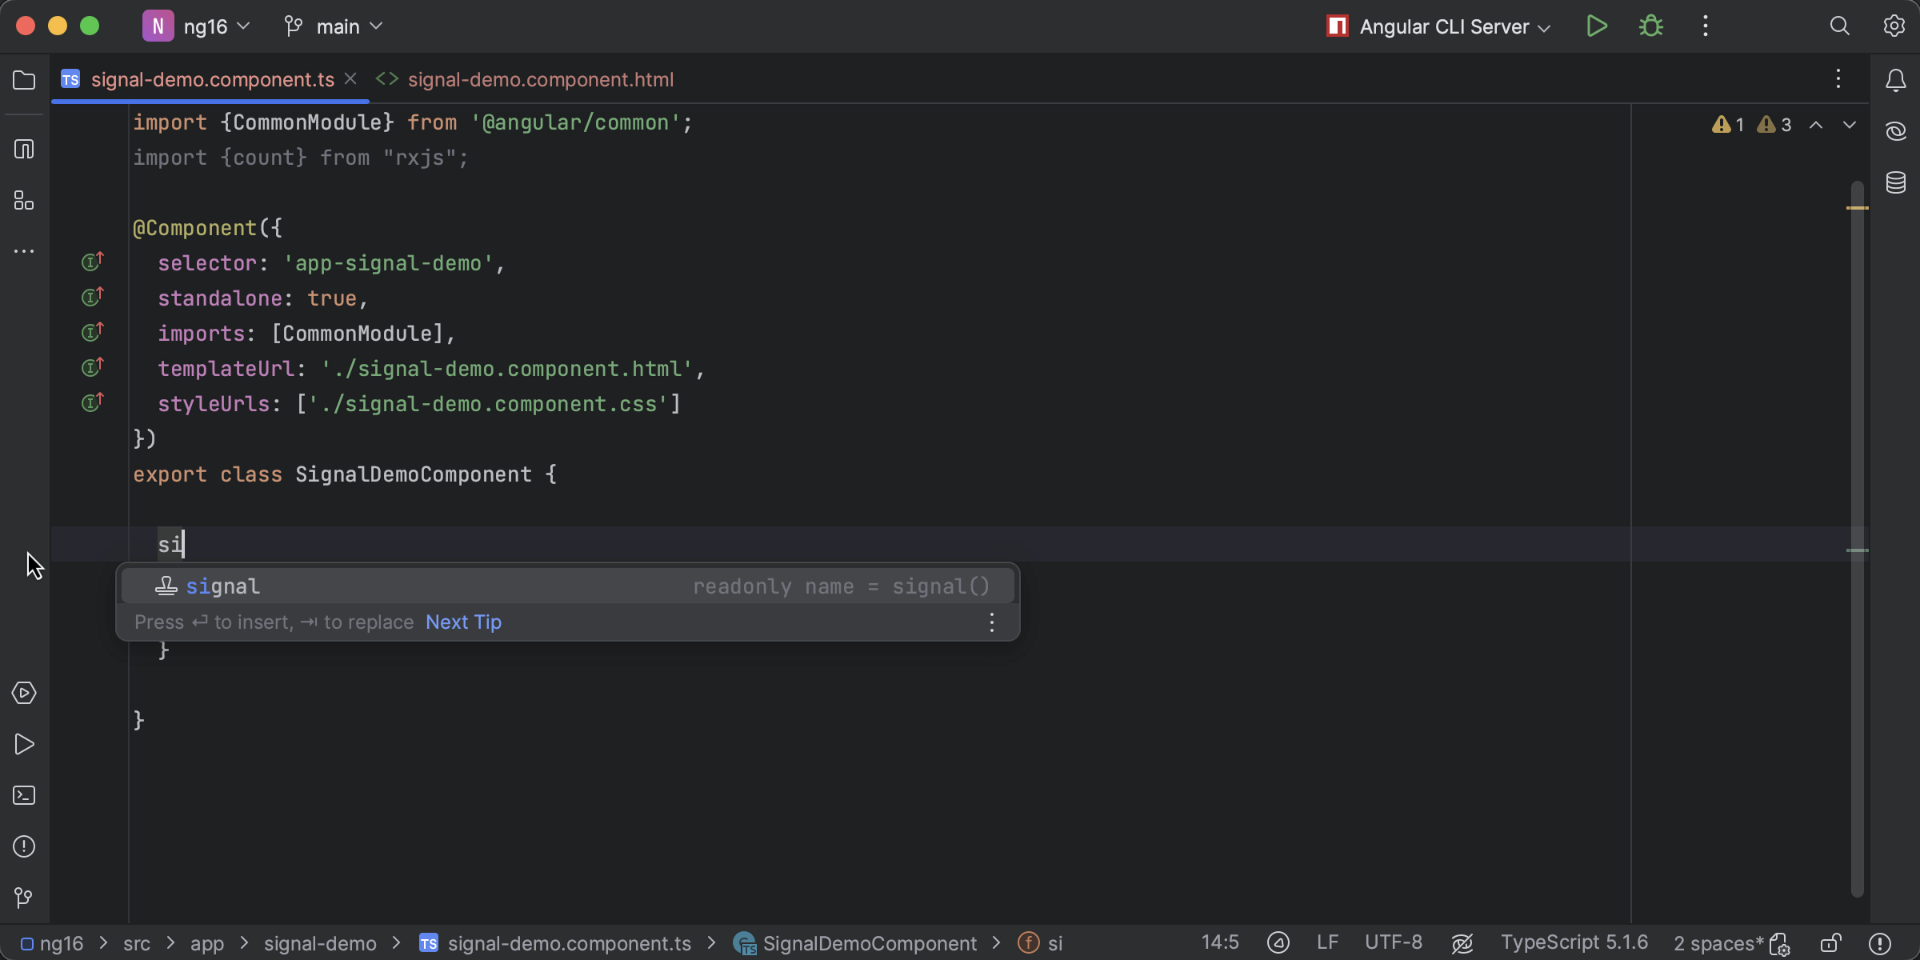
Moreover, you have the ability to create a signal on the fly directly from a template:
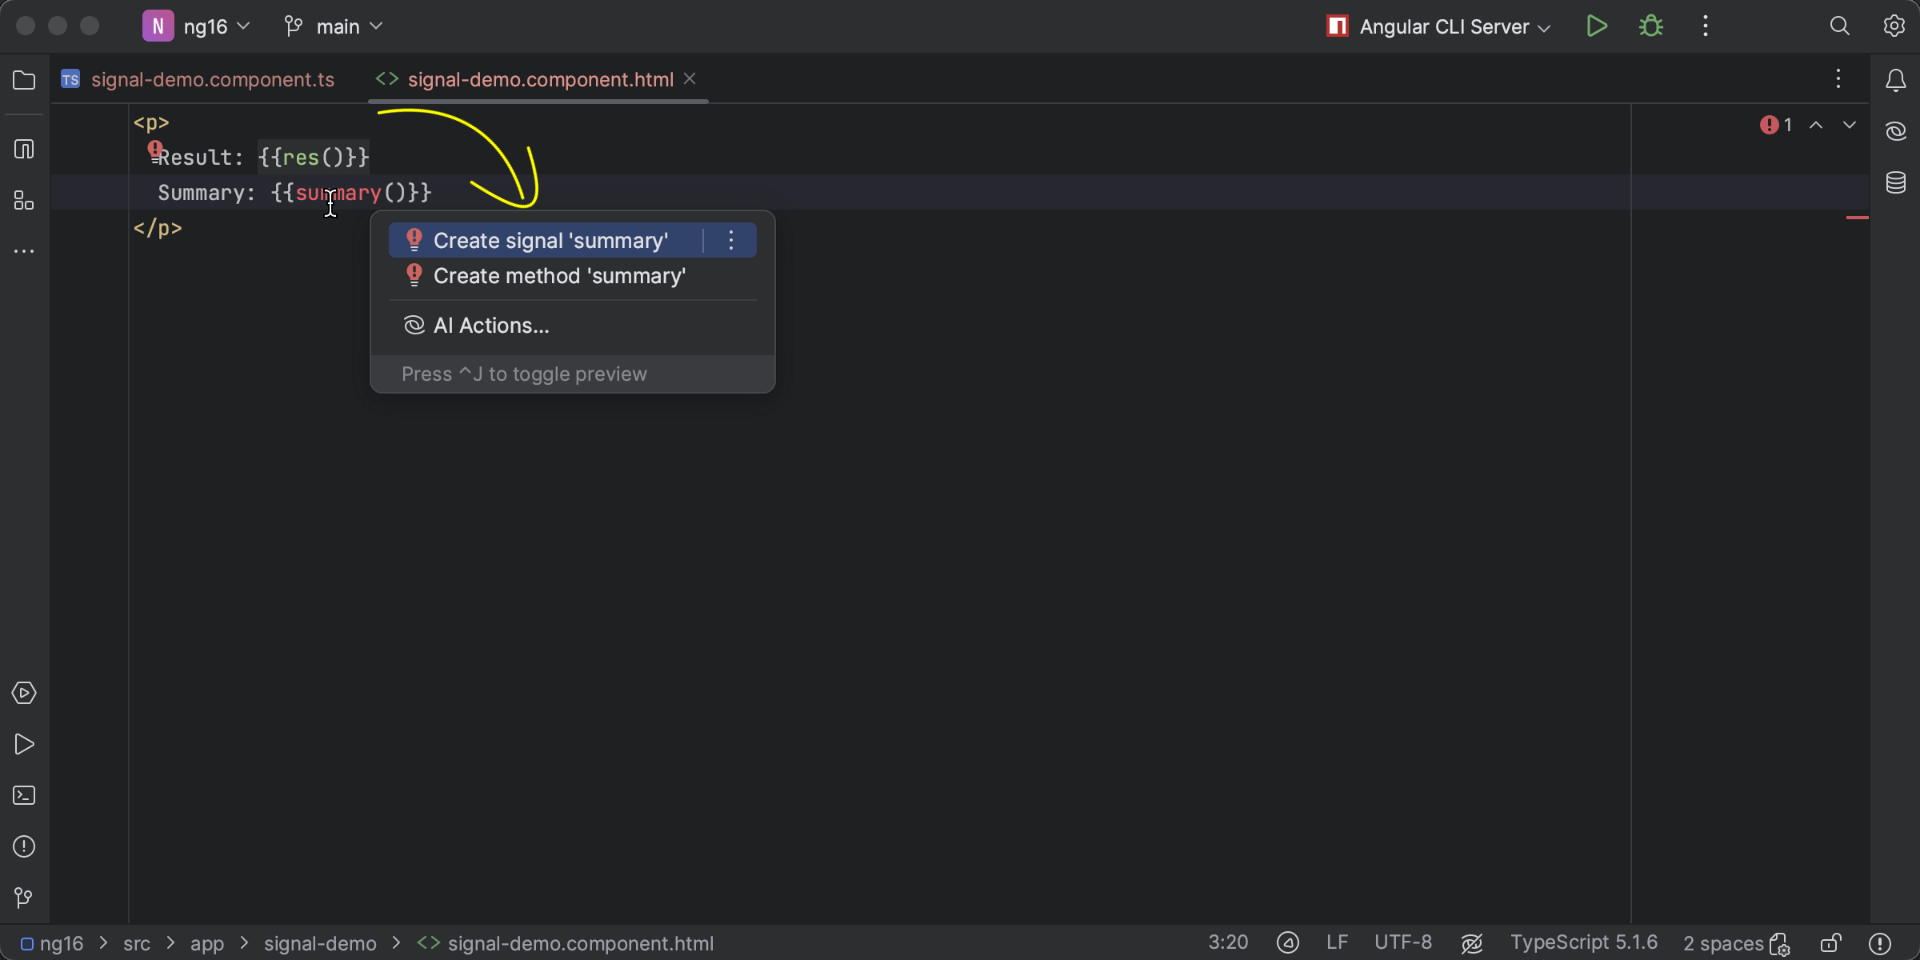
WebStorm comes with color highlighting for signals, which you can also customize if you like. To do so, go to Settings | Editor | Color Scheme | Angular Template | Signal:
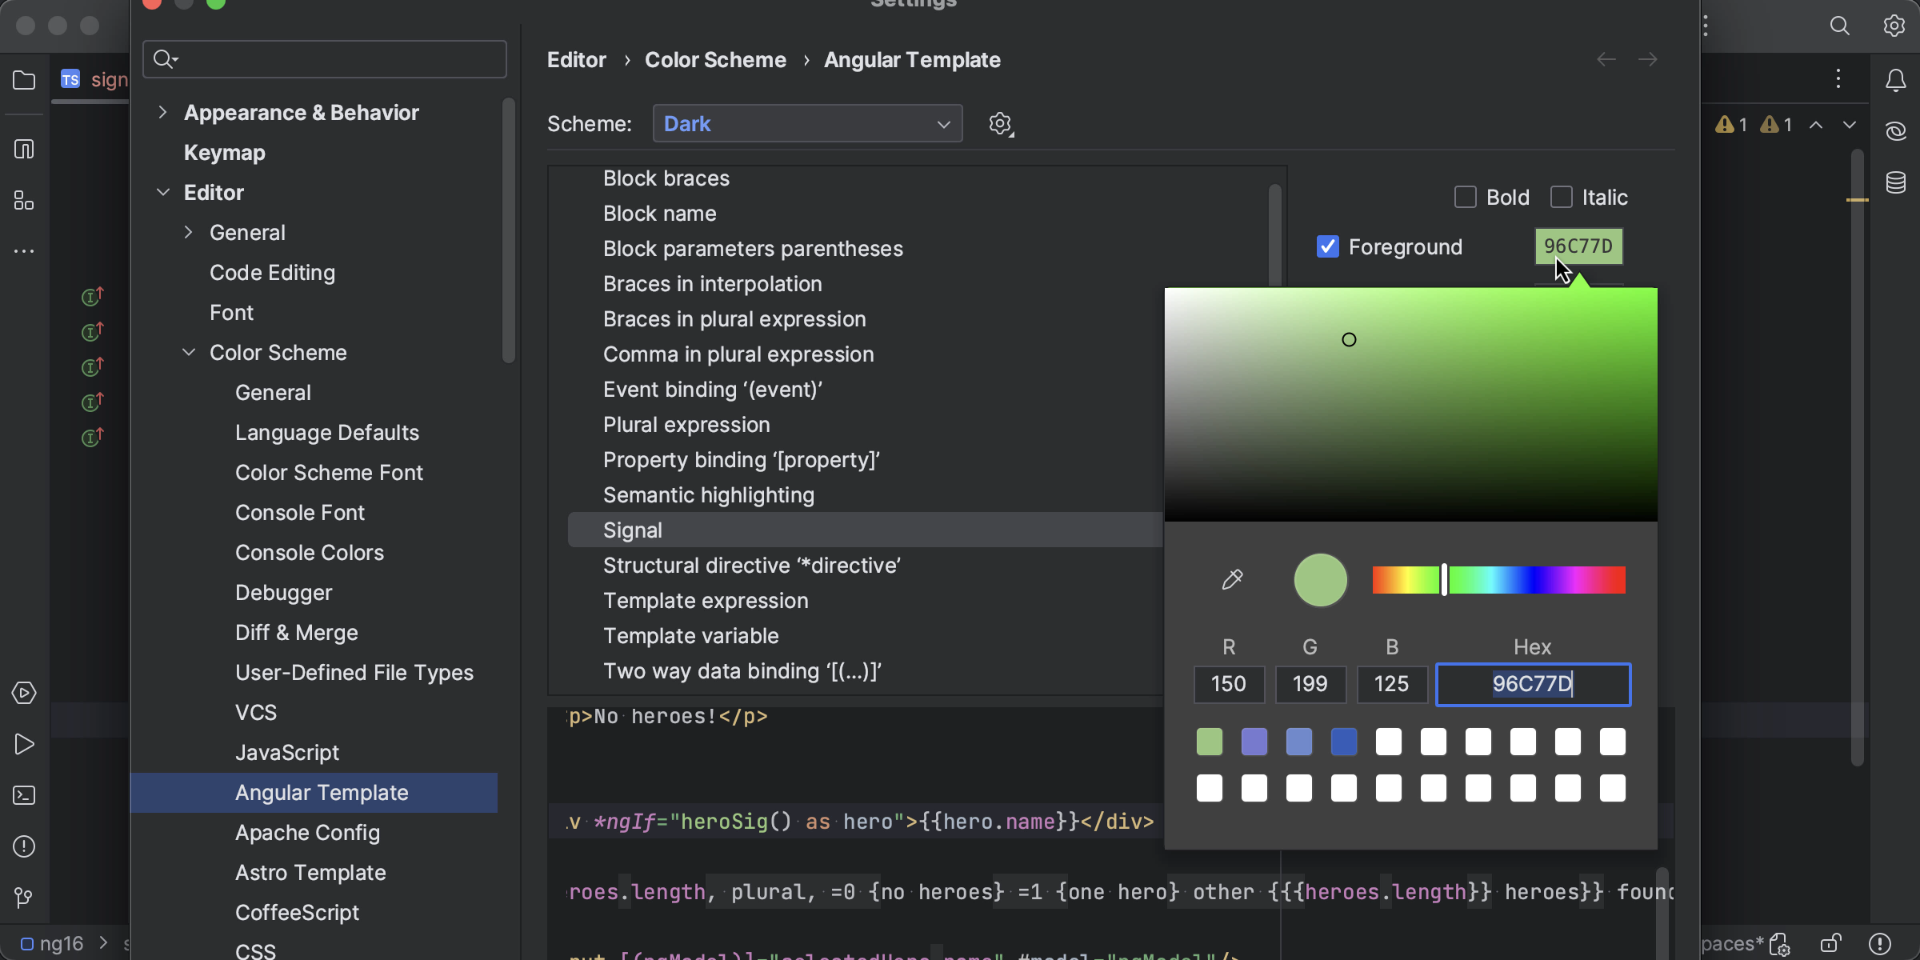
Using different colors for signals can help reduce the cognitive load and also help mitigate the common error of not calling the function expression in the template (aka missing `()`).
Control flow
Previously, in Angular templates, you could only use directives to render parts of your application conditionally or to render lists. This was the way to manage the dynamic aspects of your templates. Consider the following example, which uses the *ngIf and *ngSwitch directives to conditionally display the authentication status and the user’s role:
<div *ngIf="isAuthenticated; else anonymous">
  Role:
  <div [ngSwitch]="accessLevel">
    <div *ngSwitchCase="'admin'">Admin</div>
    <div *ngSwitchCase="'moderator'">Moderator</div>
    <div *ngSwitchDefault>Guest</div>
  </div>
</div>
<ng-template #anonymous>
  The user is not authenticated
</ng-template>
Angular 17 introduces a new control flow syntax aiming to replace directives. It’s more ergonomic and syntactically similar to JavaScript:
@if (isAuthenticated) {
  <div>
    Role:
    <div>
      @switch (accessLevel) {
        @case ('admin') {
          <div>Admin</div>
        }
        @case ('moderator') {
          <div>Moderator</div>
        }
        @default {
          <div>Guest</div>
        }
      }
    </div>
  </div>
} @else {
  The user is not authenticated
}
The new control flow also provides better type checking, as type narrowing within conditional branches is now possible.
When it comes to loops, the new control flow changes this code:
<ng-container *ngFor="let article of articleList()">
  <app-article [article]="article"></app-article>
</ng-container>
… into this:
@for (article of articleList(); track article.id) {
  <app-article [article]="article"></app-article>
} @empty {
  no articles
}
Notice that specifying the track is mandatory in @for blocks to avoid common performance problems. Unlike trackBy in *ngFor, it allows the use of expressions along with tracking functions. There is also a convenient @empty block to render the elements if the collection has no items.
One of the major features of Angular 17 is deferrable views. While not strictly related to control flow, deferrable views leverage the same @block syntax, and there is no corresponding directive:
@defer (on viewport) {
  <article/>
} @loading {
  Loading Article…
} @error {
  Error occured
} @placeholder {
  <img src="placeholder.png">
}
Deferrable views provide you with the benefits of lazy loading – a feature that used to be tightly coupled to the Angular router – on a more fine-grained level, as it allows you to lazy-load just single parts of the view. It also comes with customization features that lazy-loading via routes can’t provide. In this way, deferrable views allow you to specify on and when conditions. That, coupled with the fact that the Angular framework ships some predefined conditions, like on viewport, on idle, on interaction, on hover, on immediate, and on timer, lets you define very specific loading behavior.
As with standalone components, there is a CLI command that allows you to migrate your templates to the new control flow: @angular/core:control-flow.
Initial support for the new control flow and block syntax is available in WebStorm 2023.3. We plan to add further enhancements in subsequent releases.
Conclusion
Angular 17 is packed with new exciting features, rightly earning it the name “Angular Renaissance”. WebStorm 2023.3 introduces support for these new APIs, and the release includes numerous useful quick-fixes along with enhanced strict template checking. We’re committed to further improving control flow support in the upcoming releases. Stay tuned for updates!
The WebStorm team