Space
The intelligent code collaboration platform
Space and SpaceCode will be discontinued on June 1, 2025. Learn more → →
Space Packages. Get Started with Container Registry
Let’s continue our series of blog posts dedicated to Space Packages. The previous post was about working with Maven repositories. In this one, let’s play with container registries! What are they for? The most obvious example is a Docker registry, but in addition to Docker images, container registries support OCI images and Helm charts.
The structure of the post will be quite the same: we’ll show you how to create a container registry in Space, get authenticated in it, and push Docker images.
Create a repository
As usual, your journey starts on the Packages page in Space:
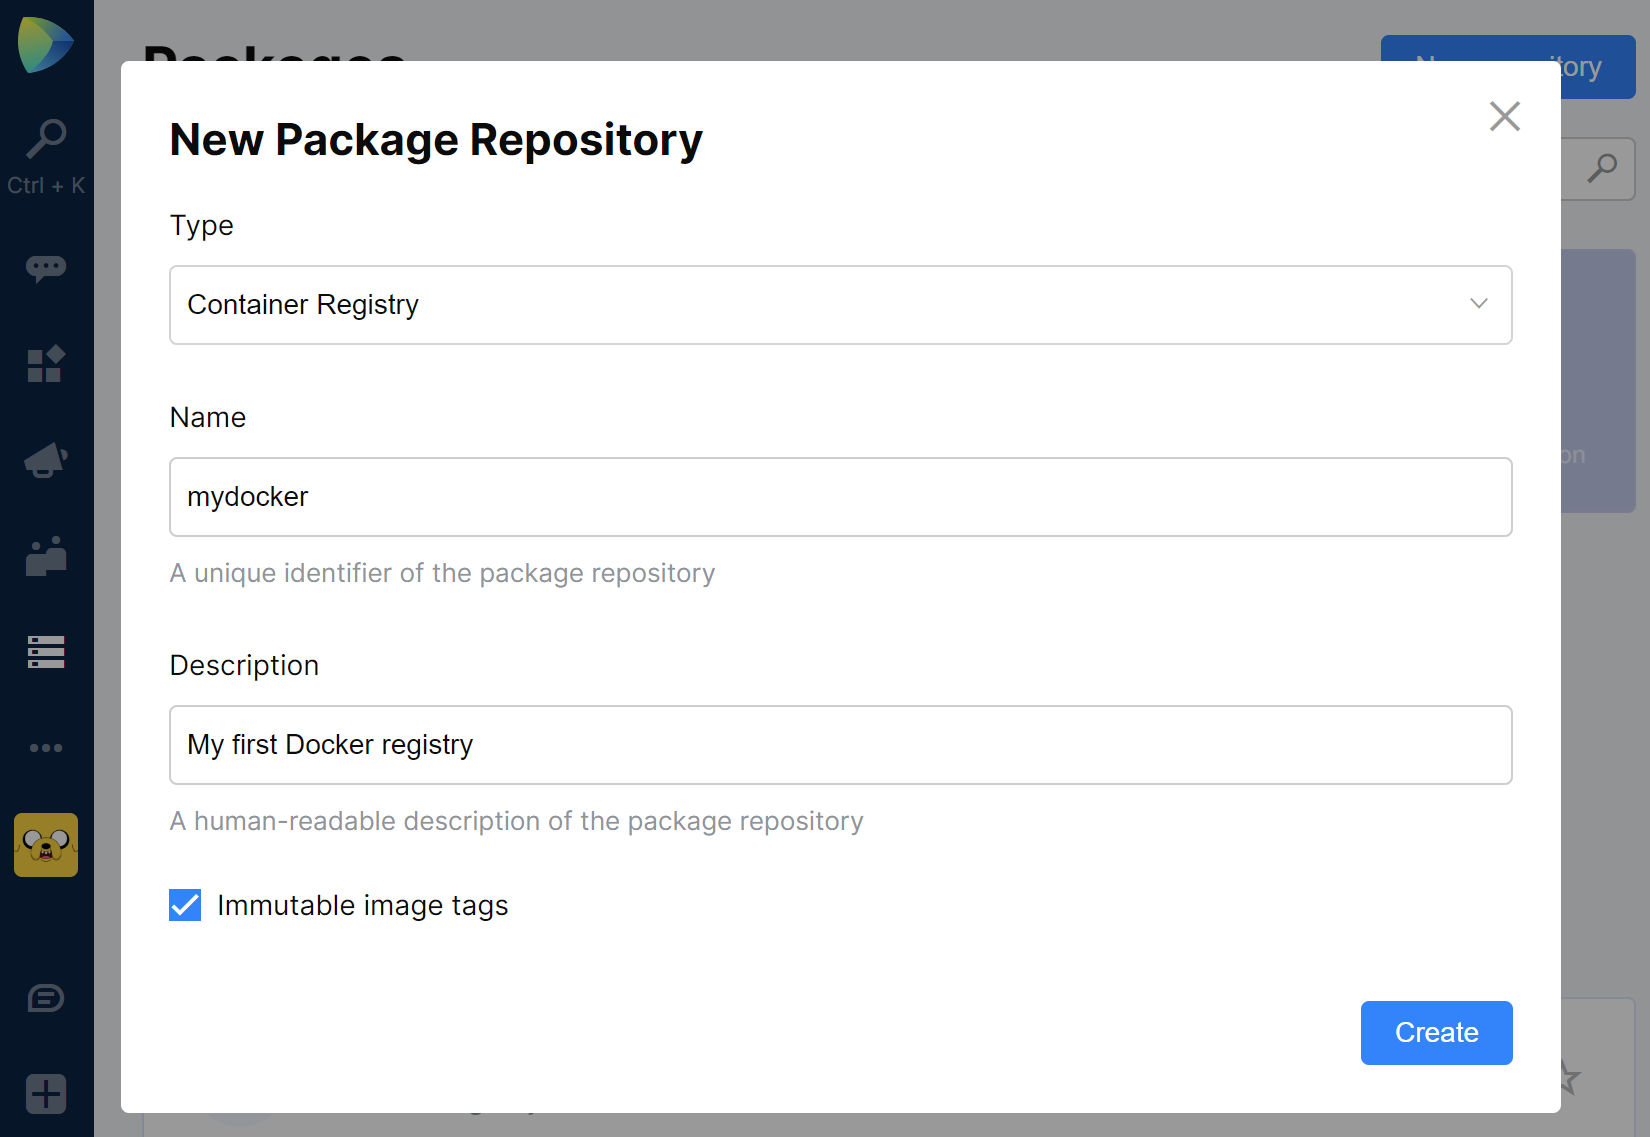
- To create a repo, click New repository and then specify its type (Container registry in our case), name, and description. Note that for the sake of consistency, we use the term repository regardless of what each vendor calls it, such as registry, repository, feed, and so on.
Note the Immutable image tags: If enabled, users are not allowed to push images with the same tag. So, a tag becomes a unique image identifier which is great for image versioning. For example,myimage:2019.2.3,myimage:2019.3.0, ormyimage:release.

- After you create the repository, its URL (namespace) will be shown on the title bar of the repo page. A URL of a particular image is a namespace with the image name in the end. For example:
mycompany.registry.jetbrains.space/mydocker/myimage
Log in to the repository
So, you have a Docker registry and now it’s time to log in to it. Nothing special here; simply log in using account credentials:
- If you want to log in on your own behalf, use your Space credentials:
docker login mycompany.registry.jetbrains.space -u
When asked for the password, use your Space password. The authentication needs to be done only once.
Important update since the previous blog post: We’ve added the ‘Personal tokens’ feature to Space. It lets you create a permanent token to authenticate in Space modules. So, you can create such a token in My Profile | Personal Tokens | New personal token and use it instead of your password when authenticating in Packages. - If you want to provide access rights to an application, it is better to use a service account. You can found the details in the previous blog post.
Push images to the repository
After logging in to the repository, you can start our work with it. For example, you have some myimage locally and want to push it to your Docker registry in Space:
- Build the image locally.
- Tag the local image:
docker tag myimage mycompany.registry.jetbrains.space/mydocker/myimage - And then push it:
docker push mycompany.registry.jetbrains.space/mydocker/myimage
Explore the repository in Space
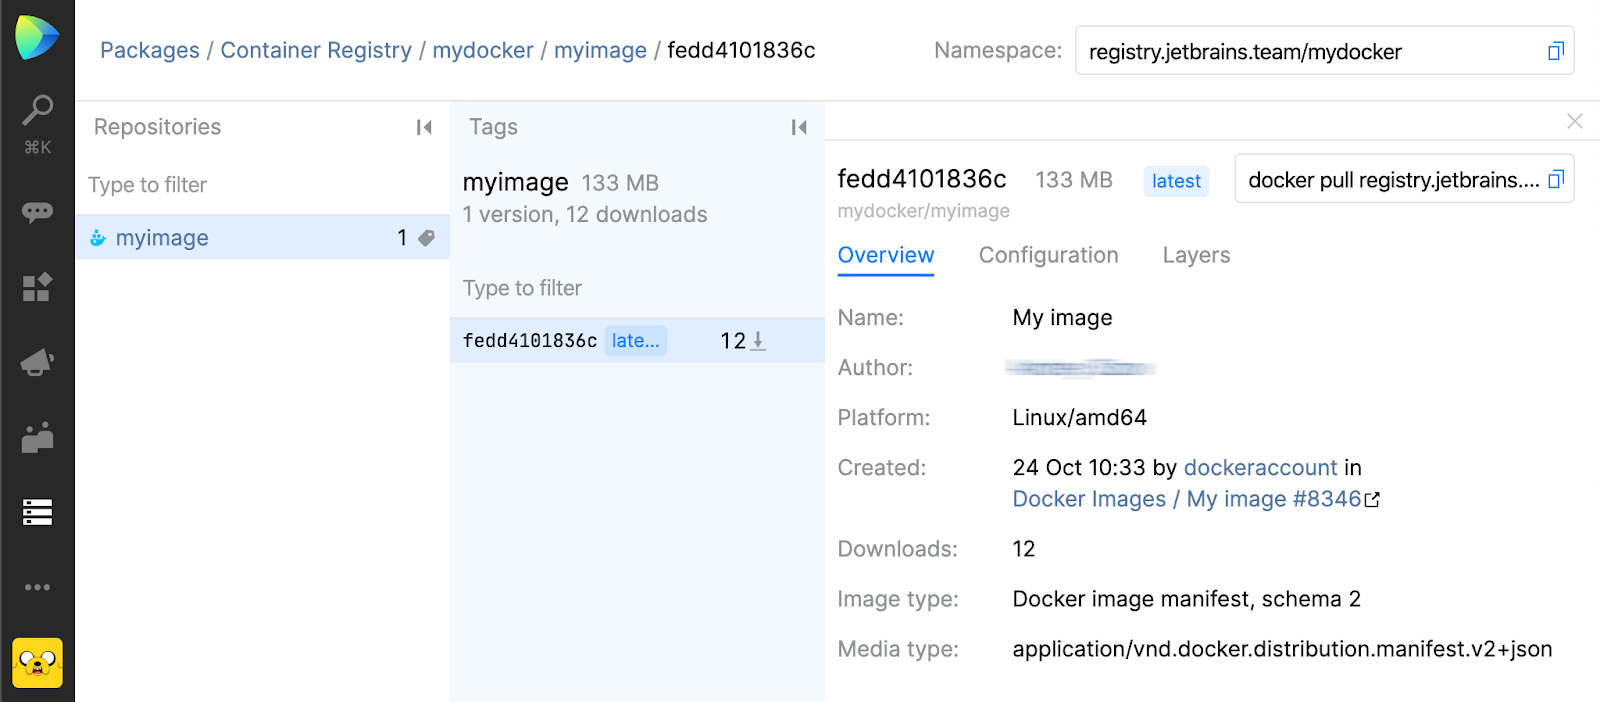
The published image is shown on the Packages tab inside the corresponding repo:
Select an image to see its detailed info.
The cool thing about this page: if you mark images with OCI annotations, they will be shown among other image properties. The reason for using such annotations is adding some metadata to the image (see the Created field).
That’s all for now! Feel free to ask questions and leave comments below.
Subscribe to Space Blog updates


